How to Make Asparagus: Simple Asparagus Recipe

Asparagus is a tasty and flexible vegetable. It can be cooked in many ways. With lots of asparagus recipes out there, starting to cook asparagus is easy. Whether you’re new to cooking or have experience, learning to cook asparagus can make your meals better and healthier.

Asparagus

Cooking asparagus is fun and rewarding. You can try different recipes and techniques. From simple steaming to complex roasting, there’s a method for everyone. By following a simple recipe and using the right tools and ingredients, you can make delicious, healthy meals that highlight asparagus’s unique flavor and texture.

Key Takeaways

  • Asparagus is a versatile vegetable that can be prepared using various asparagus cooking methods
  • There are numerous asparagus recipes available to suit different tastes and dietary preferences
  • Mastering the art of asparagus preparation can elevate your meals and provide essential nutrients
  • Simple asparagus recipes can be a great starting point for beginners
  • Exploring different asparagus cooking methods and techniques can help you create delicious and healthy meals
  • Using the right tools and ingredients is crucial for preparing perfect asparagus dishes

Understanding Asparagus: A Versatile Spring Vegetable

Asparagus is a favorite spring veggie packed with asparagus nutrition benefits. It’s great for a healthy diet. Its unique taste and texture make it perfect for many dishes.

There are green, white, and purple types of asparagus. Each has its own taste and look. Asparagus is in season from February to June, peaking in March to May.

Asparagus is full of vitamins A, C, and K, and is low in calories. Knowing about the types of asparagus helps you pick and prepare it wisely.

Different Types of Asparagus

  • Green asparagus: This is the most common type. It tastes slightly sweet and tender.
  • White asparagus: Grown underground, it’s milder than green asparagus.
  • Purple asparagus: It has a richer flavor than green asparagus. It’s often used in special dishes.

Seasonal Availability

Asparagus is available from February to June. The best time is March to May. This is when it’s freshest and tastiest.

Nutritional Benefits

Asparagus is full of nutrients. It’s low in calories but rich in vitamins A, C, and K. It’s a great choice for a healthy diet.

Selecting the Perfect Asparagus Spears

Choosing the right asparagus is key to a great dish. Look for spears that are firm, straight, and bright green. Stay away from wilted, bent, or brown-tipped spears, as they might be old or damaged.

Think about the thickness of the spears too. Thicker spears are great for grilling or roasting. They can handle high heat well. Thinner spears are better for sautéing or steaming because they cook fast and evenly.

  • Choose spears with tightly closed buds, as these will be more tender and flavorful.
  • Avoid spears with open or flowering buds, as these can be bitter and tough.
  • Consider the season and choose spears that are in season, as these will be fresher and more flavorful.

By following these tips, you can pick the best asparagus spears for your dish. Whether you’re grilling, roasting, or sautéing, the right spears will make a big difference.

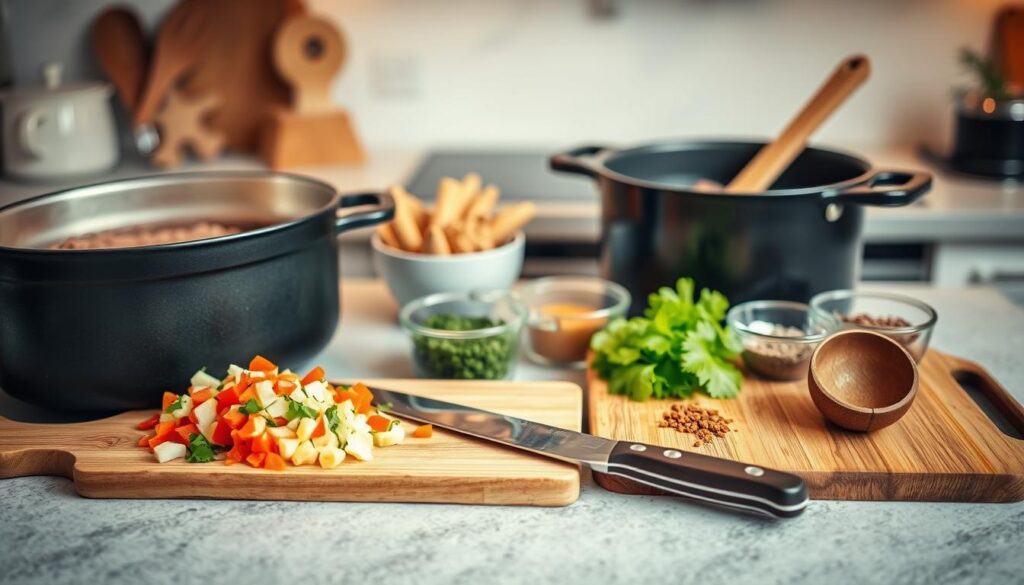
Essential Tools and Ingredients for How to Make Asparagus Recipe

To make a tasty asparagus dish, you need the right tools and ingredients. A well-stocked kitchen is key to a great final product.

Start by getting the basic kitchen equipment. You’ll need a pot, steamer basket, and cutting board. These help clean, trim, and cook the asparagus. Sharp knives and a colander are also useful for prep.

Kitchen Equipment Needed

  • Pot
  • Steamer basket
  • Cutting board
  • Sharp knives
  • Colander

For asparagus ingredients, start with olive oil, salt, and pepper. These basics enhance the asparagus’s natural taste. You can also add garlic, lemon juice, and parmesan for extra flavor.

Basic Ingredients List

  • Olive oil
  • Salt
  • Pepper

With the right tools and ingredients, you’re ready to make a delicious asparagus dish.

Properly Cleaning and Trimming Asparagus

Cleaning asparagus is key before cooking. Start by rinsing it under cold water to get rid of dirt. Then, dry it with a paper towel to remove extra moisture.

Next, trim the asparagus to get rid of tough parts. Cut off the bottom inch of each spear. You can also peel it to remove tough skin. Here’s how to clean and trim asparagus right:

  • Rinse the asparagus under cold running water
  • Pat the asparagus dry with a paper towel
  • Trim the ends of the asparagus, removing any tough or woody parts
  • Peel the asparagus, if desired, to remove any tough skin

Cleaning and trimming asparagus well can really improve its taste and texture. By following these steps, your asparagus will be clean, tender, and ready to cook.

Be gentle when handling asparagus to avoid breaking it. With the right cleaning and trimming, you can enjoy healthy asparagus dishes all year.

StepDescription
1Rinse the asparagus under cold running water
2Pat the asparagus dry with a paper towel
3Trim the ends of the asparagus, removing any tough or woody parts
4Peel the asparagus, if desired, to remove any tough skin

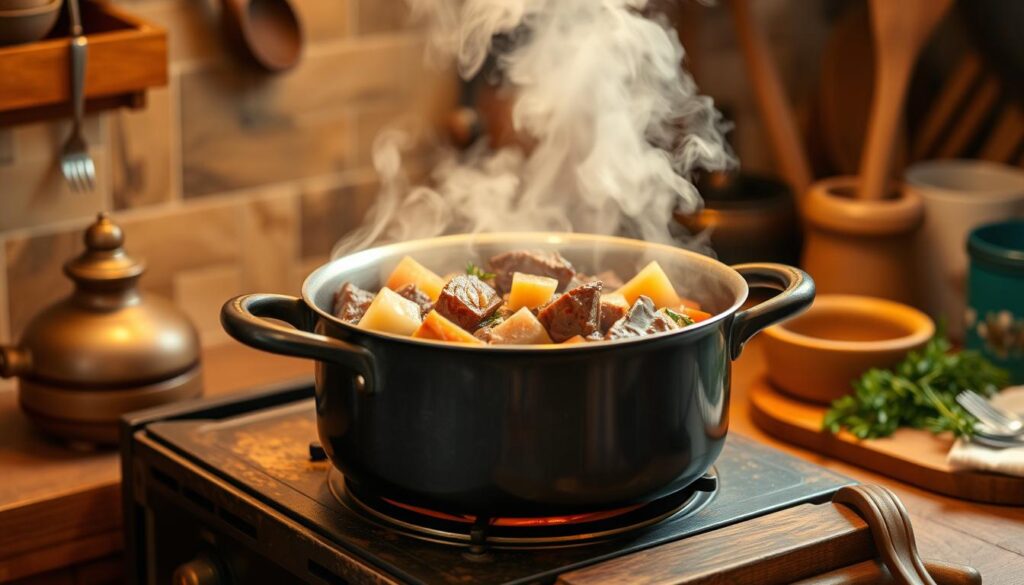
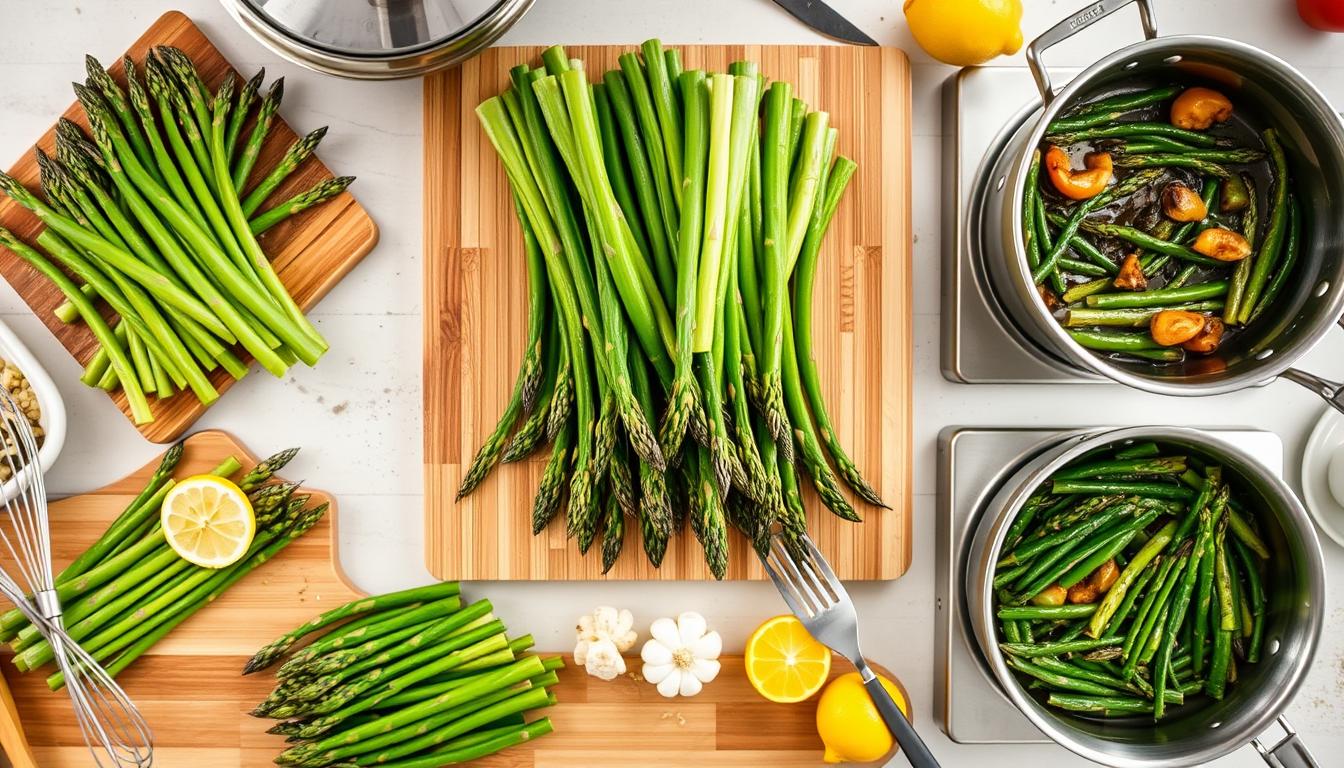
Basic Preparation Methods

Cooking asparagus can be easy and tasty. There are many ways to do it, like blanching. This method involves boiling the spears briefly. It keeps them green and crunchy.

Other methods include steaming, roasting, and grilling. Each one needs just a few tools and ingredients. For instance, steaming needs a steamer basket and boiling water. Roasting requires a hot oven and a baking sheet.

Blanching Technique

Blanching asparagus is quick and simple. Just boil the spears for 3-5 minutes. Then, cool them in an ice bath to stop cooking.

Steaming Process

Steaming asparagus is good for keeping nutrients and flavor. Place the spears in a steamer basket over boiling water. Cover and cook for 4-6 minutes.

Roasting Instructions

Roasting asparagus brings out its sweetness. Preheat the oven to 425°F (220°C). Toss the spears with olive oil, salt, and pepper. Cook for 12-15 minutes.

Grilling Guidelines

Grilling asparagus adds a smoky taste. Brush the spears with olive oil. Grill over medium-high heat for 3-5 minutes on each side.

MethodEquipmentCooking Time
BlanchingPot, boiling water, ice bath3-5 minutes
SteamingSteamer basket, pot, boiling water4-6 minutes
RoastingOven, baking sheet, olive oil12-15 minutes
GrillingGrill, olive oil3-5 minutes per side

Seasoning Your Asparagus

Seasoning asparagus opens up a world of flavors. You can use salt, pepper, garlic powder, and paprika to enhance its taste. For a zesty twist, squeeze some lemon juice or sprinkle parmesan cheese on top.

Here are some popular seasoning options for asparagus:

  • Salt and pepper: a classic combination that enhances the natural flavor
  • Garlic powder: adds a savory and aromatic flavor
  • Paprika: provides a smoky and slightly sweet flavor
  • Lemon juice: adds a bright and tangy flavor
  • Parmesan cheese: adds a nutty and savory flavor

Trying different asparagus recipes and seasonings can lead to your favorite way to enjoy asparagus. Whether it’s a simple or complex mix, the goal is to highlight the asparagus’s natural taste.

Exploring various seasoning options and asparagus recipes can introduce new flavors. So, don’t hesitate to be creative and find your ideal seasoning mix.

Common Cooking Mistakes to Avoid

When cooking asparagus, it’s key to know common mistakes. These can ruin your dish. Overcooking asparagus is a big mistake. It makes the asparagus mushy and not tasty.

Some common mistakes to watch out for include:

  • Overcooking, which can be avoided by checking the asparagus frequently during the cooking process
  • Seasoning errors, such as adding too much salt or not enough seasoning
  • Storage mistakes, like storing asparagus at room temperature, which can cause it to spoil quickly

To avoid these mistakes, it’s crucial to understand the basics of asparagus cooking. Following a tried-and-true recipe is key. By being mindful of these common errors, you can ensure that your asparagus dish turns out delicious and enjoyable.

MistakeEffectPrevention
OvercookingMushy asparagusCheck asparagus frequently during cooking
Seasoning errorsUnappetizing flavorUse the right amount of seasoning
Storage mistakesSpoilageStore asparagus in the refrigerator

Pairing and Serving Suggestions

Asparagus is a versatile vegetable that pairs well with many main dishes. Try it with grilled chicken, pan-seared salmon, or roasted beef. These options complement asparagus’s earthy flavor, making for a balanced meal.

Consider serving asparagus as a side dish or adding it to salads, pasta, and risottos. It also goes great with creamy sauces like hollandaise or beurre blanc. Here are some favorite ways to enjoy asparagus:

  • Grilled chicken with roasted asparagus and quinoa
  • Pan-seared salmon with steamed asparagus and brown rice
  • Roasted beef with sautéed asparagus and roasted vegetables

Main Dish Combinations

Asparagus pairs well with a variety of main dishes. It’s great with grilled chicken, pan-seared salmon, and roasted beef. These combinations make for a satisfying meal.

Wine Pairing Recommendations

For wine, asparagus goes well with crisp white wines like Sauvignon Blanc and Pinot Grigio. These wines enhance asparagus’s delicate flavor. For something richer, try asparagus with hollandaise or beurre blanc and a glass of Chardonnay or Champagne.

WinePairing Suggestions
Sauvignon BlancGrilled chicken, steamed asparagus, and quinoa
Pinot GrigioPan-seared salmon, roasted asparagus, and brown rice
ChardonnayRoasted beef, sautéed asparagus, and roasted vegetables

Storage and Leftover Management

Keeping asparagus fresh is key. To store it, wrap it in a paper towel or plastic bag and put it in the fridge. This keeps it moist and fresh for 3-5 days. You can also freeze it, blanched or unblanched, for soups, stews, and casseroles.

Reheating asparagus leftovers safely is important. Heat it to 165°F (74°C) to avoid foodborne illness. Here are some tips for handling asparagus leftovers:

  • Store leftovers in a covered container in the fridge for up to 3 days.
  • Freeze leftovers for later use in soups, stews, or casseroles.
  • Reheat leftovers to 165°F (74°C) for food safety.

By following these tips, you can enjoy asparagus while reducing waste. Proper storage and handling are key to keeping it fresh and safe.

Asparagus is a versatile vegetable that can be stored and reheated safely with proper techniques.

Always check the freshness and safety of your asparagus before eating it. Enjoy this nutritious veggie in many dishes.

Storage MethodShelf Life
Refrigeration3-5 days
FreezingUp to 8 months

Conclusion: Mastering the Art of Asparagus Preparation

Through this guide, you’ve learned how to master asparagus cooking. Choosing fresh asparagus spears and using the right techniques are key. Seasoning with care brings out the true flavor and texture of this spring veggie.

With practice, you’ll become skilled at making delicious asparagus dishes. These dishes will impress everyone you share them with. You’ll be able to create beautiful and tasty asparagus dishes with ease.

Success in cooking asparagus comes from paying attention to the details. From trimming the ends to choosing the best cooking method, these tips will help you. Follow them to make asparagus dishes that will wow your guests.

Now that you know how to cook asparagus, start exploring its many uses. This nutritious veggie offers endless possibilities for delicious meals. So, use your new skills to create amazing asparagus dishes and enjoy the process.

FAQ

What are the different types of asparagus?

Asparagus comes in three main types: green, white, and purple. Each type has its own unique taste and look.

When is asparagus in season?

Asparagus is in season from February to June. The best time is from March to May.

What are the nutritional benefits of asparagus?

Asparagus is packed with vitamins A, C, and K. It’s also low in calories.

How do I select the perfect asparagus spears?

Choose spears that are firm, straight, and bright green. Avoid wilted, bent, or brown spears.

What kitchen equipment do I need to make asparagus?

You’ll need a pot, steamer basket, and cutting board. Optional tools include a vegetable peeler and sharp knife.

How do I properly clean and trim asparagus?

Rinse under cold water, pat dry, and trim the ends. You can also peel it if you like.

What are the basic preparation methods for asparagus?

Common methods include blanching, steaming, roasting, and grilling.

How can I season my asparagus to enhance the flavor?

Season with spices and herbs like salt, pepper, garlic powder, paprika, lemon juice, or parmesan cheese.

What are some common cooking mistakes to avoid when making asparagus?

Avoid overcooking, bad seasoning, and wrong storage.

What are some good pairing and serving suggestions for asparagus?

Asparagus goes well with grilled chicken or pan-seared salmon. It’s great as a side or in salads, pasta, and risottos. It also pairs well with crisp white wines, like Sauvignon Blanc.

How should I store and manage leftover asparagus?

Store in the fridge, wrapped in a paper towel or plastic bag. Use within 3-5 days. You can also freeze it for longer.

Mouthwatering Cube Steak Crock Pot Meal – Family Favorite

A delicious cube steak crock pot recipe is perfect for a family dinner. It’s easy to make with little effort. This meal is both flavorful and tender, making it a great choice for family gatherings.

A cube steak crock pot meal is an excellent choice for a family dinner. It’s easy to prepare and cooks perfectly in a crock pot. This recipe is perfect for those who want a quick and delicious meal for their family.

Key Takeaways

  • A cube steak crock pot recipe is perfect for a family dinner
  • The recipe is easy to prepare and requires minimal effort
  • A cube steak crock pot meal is a delicious and flavorful option
  • The recipe can be cooked to perfection in a crock pot
  • A cube steak crock pot meal is a great option for those looking for a quick and easy recipe
  • The recipe is perfect for a family dinner or a special occasion

Understanding Cube Steak: Your Guide to This Budget-Friendly Cut

Cube steak is a favorite among home cooks because it’s budget-friendly and versatile. It’s made from tougher cuts like top round or sirloin, tenderized by machines. This makes it tender and easy to chew, perfect for many recipes.

Choosing quality meat is key. Look for fresh cube steak with a good texture. You can find it in most supermarkets, labeled as “cube steak” or “minute steak.” Brands like Tyson and Swift are known for their quality.

What Makes Cube Steak Special

Cube steak stands out because it’s affordable and full of flavor. It’s great for cube steak sandwiches and stews. It’s also a budget-friendly choice compared to pricier meats.

Best Grades and Cuts to Choose

Choosing the right cube steak is crucial. Here are some top options:

  • USDA Choice: Known for tenderness and flavor.
  • USDA Select: Offers quality at a slightly lower price.
  • Top Round: Leaner and sweeter than other cuts.

How to Select Quality Cube Steak

To pick quality meat, look for fresh cube steak. It should smell good and feel firm. Avoid damaged packages and check the expiration date. These tips help you get the best cube steak for a tasty meal.

Essential Ingredients for Your Crock Pot Cube Steak

To make a tasty crock pot cube steak recipe, you need the right crock pot ingredients. These will make your dish flavorful and tender, loved by all. Quality ingredients are key for slow cooking.

A classic cube steak recipe mixes meats, veggies, and spices. You’ll need:

  • 1-2 pounds of cube steak
  • 1 onion, sliced
  • 3 cloves of garlic, minced
  • 1 cup of beef broth
  • 1 tablespoon of tomato paste
  • 1 teaspoon of dried thyme
  • Salt and pepper, to taste

These crock pot ingredients are a great start. Feel free to add mushrooms, bell peppers, or potatoes to your liking. The goal is to balance flavors with your cube steak.

Choose top-notch ingredients for the best taste. Your cube steak is the main attraction. With the right mix and slow cooking, you’ll get a delicious crock pot cube steak recipe.

Preparing Your Cube Steak for Slow Cooking

To make your cube steak tender and flavorful, you need to prepare it right for slow cooking. This involves seasoning, pre-searing, and using marinades. These steps will improve the taste and texture of your steak.

Slow cooking is all about cooking the steak at a low temperature for a long time. This breaks down the meat’s connective tissues, making it tender and juicy. Begin by seasoning the steak to enhance its natural flavor.

Proper Seasoning Techniques

Seasoning is key when preparing cube steak for slow cooking. Use herbs and spices like garlic, onion, and paprika to add flavor. Choose seasonings that work well for slow cooking.

Pre-Searing Tips

Pre-searing is another crucial step. It involves searing the steak in a hot pan before slow cooking. This step locks in juices and adds a rich flavor.

Marinade Options

Marinades can also enhance your cube steak’s flavor. Mix ingredients like soy sauce, Worcestershire sauce, and brown sugar for a tasty marinade. By combining seasoning, pre-searing, and marinades, you’ll get a delicious, tender steak through slow cooking.

The Perfect Cube Steak Crock Pot Recipe

A cube steak recipe is a tasty and simple choice for dinner. This crock pot meal is ideal for family dinners and is easy to make. You’ll need a pound of cube steak, olive oil, and your favorite seasonings to start.

Some key ingredients to keep in mind when making this recipe include:

  • 1 pound of cube steak
  • 1/4 cup of olive oil
  • 1 teaspoon of salt
  • 1/2 teaspoon of black pepper
  • 1/2 teaspoon of garlic powder

This recipe is great for busy days because it cooks in a crock pot. Just add all the ingredients and cook on low for 6-8 hours. You’ll get a tender, flavorful steak that everyone will love.

This recipe is also very flexible. You can serve it with mashed potatoes, steamed veggies, or a salad. You can even use leftovers for sandwiches or wraps.

In summary, this cube steak crock pot meal is perfect for anyone looking for a tasty and easy recipe. It’s great for weeknight dinners or special occasions. So, why not try it and see how delicious it is?

Time and Temperature Guidelines

Cooking cube steak in a crock pot needs the right time and temperature. The goal is to make it tender and flavorful. The cooking time depends on the steak’s size and thickness, and how you like it cooked.

Temperature is key to a great dish. Low heat is best for cube steak. It makes the meat tender. Always follow the crock pot’s instructions for temperature.

Low vs High Heat Settings

Cooking on low heat takes longer, from 8 to 10 hours. It’s perfect for a ready-to-eat meal when you get home. High heat cooks it faster, in 4 to 6 hours, but might make it a bit tougher.

Optimal Cooking Duration

The best cooking time for cube steak is 6 to 8 hours on low heat. This ensures even cooking and prevents overcooking. Check the steak often to get it just right.

By following these guidelines, you’ll get a delicious, tender cube steak. Always prioritize food safety and handle the steak carefully to avoid health risks.

Cooking TimeTemperature SettingResult
8-10 hoursLow heatTender and flavorful
4-6 hoursHigh heatSlightly tougher texture

Companion Side Dishes and Serving Suggestions

Side dishes are key to a great family dinner. For a cube steak crock pot meal, try different flavors and textures. Mashed potatoes, roasted vegetables, and garlic bread are all good choices.

Make your family dinner special with thoughtful serving ideas. Here are a few to start with:

  • Pair your cube steak with steamed broccoli or green beans for a healthy meal
  • Offer a variety of salads or side dishes to please everyone
  • Try corn on the cob or grilled vegetables for a summer vibe

Think about presentation and ambiance too. Use tablecloths, candles, and flowers to warm up the atmosphere. With these ideas, your family dinner will be unforgettable.

Other side dishes to consider are baked beans, coleslaw, and fried okra. Choose sides that match your cube steak’s flavors and textures. Don’t be afraid to try new things. With a bit of planning, you can make a dinner that’s both tasty and memorable.

Troubleshooting Common Cooking Issues

When cooking cube steak in a crock pot, several issues can arise. These include tough meat and inconsistent sauce consistency. To prevent these problems, it’s important to understand their causes and take corrective measures.

One common problem is tough meat. This can happen if you overcook the steak or use low-quality cube steak. To avoid this, pay close attention to cooking time and temperature. Also, choose the right grade and cut of cube steak, as some types are more prone to becoming tough.

Another issue is sauce consistency. Achieving the right sauce consistency is key for a delicious meal. It can be challenging, but it’s essential for a satisfying dish.

Preventing Tough Meat

  • Choose the right grade and cut of cube steak
  • Avoid overcooking, as this can lead to tough meat
  • Use a meat thermometer to ensure the correct internal temperature

Sauce Consistency Solutions

To achieve the right sauce consistency, balance the liquid and thickening agents. Use a mix of broth and flour or cornstarch to thicken. Adjusting the seasoning can also enhance the flavor and texture of the sauce.

Seasoning Adjustments

Making seasoning adjustments is crucial to bring out the flavors. This involves adding herbs and spices and adjusting salt and pepper. By doing this, you can create a delicious and well-balanced meal.

Cooking IssueSolution
Tough MeatChoose the right grade and cut of cube steak, avoid overcooking
Sauce ConsistencyBalance the amount of liquid and thickening agents, adjust seasoning
SeasoningAdjust the amount of herbs and spices, salt and pepper

Storage and Reheating Tips

Storing and reheating leftovers safely is key. Cool your cube steak to room temperature in two hours. Then, refrigerate or freeze it in airtight containers. For reheating, use the microwave, oven, or stovetop. Make sure the internal temperature hits 165°F (74°C) to avoid foodborne illness.

Here are some helpful tips for storing and reheating leftovers:

  • Use shallow containers to cool leftovers quickly and prevent bacterial growth.
  • Label and date containers so you can easily keep track of how long they’ve been stored.
  • Avoid overcrowding the refrigerator or freezer, as this can lead to uneven cooling and reheating.

By following these storage tips and reheating guidelines, you can enjoy your cube steak leftovers safely and conveniently. Always check leftovers for spoilage before eating. If unsure, throw them away.

Conclusion: Mastering Your Cube Steak Crock Pot Creation

The cube steak crock pot meal is a hit with families. It’s affordable and tastes great. By using the tips from this guide, you’ll learn to make a delicious cube steak in your slow cooker.

For a great crock pot meal, season well, pre-sear, and be patient. Try out different flavors and sides to make your cube steak just right. Soon, you’ll be making this tasty dish all the time.

FAQ

What is cube steak, and why is it a budget-friendly cut?

Cube steak is a thin, tender cut from the cow’s round area. It’s tenderized, making it perfect for quick cooking. This makes it a great, affordable choice for meals.

What are the best grades and cuts of cube steak to choose?

Look for USDA Choice or Select grades for the best flavor and tenderness. The top or bottom round cuts are the most affordable and easy to find.

What are the essential ingredients needed for a crock pot cube steak recipe?

You’ll need cube steak, broth, onions, garlic, and seasonings like salt and pepper. Add potatoes, carrots, and mushrooms for a full meal.

How should I prepare the cube steak for slow cooking in a crock pot?

Season the steak with salt, pepper, and spices. Pre-searing can lock in flavors. Marinating also tenderizes the meat and boosts taste.

What are the optimal time and temperature settings for cooking cube steak in a crock pot?

Cook on low for 6-8 hours or high for 3-4 hours. This ensures the meat is tender and flavors are rich.

What are some good companion side dishes to serve with crock pot cube steak?

Try mashed potatoes, roasted veggies, or buttered noodles. A green salad is also great. These sides complement the steak well.

How can I troubleshoot common cooking issues with crock pot cube steak?

Choose quality steak and avoid overcooking to prevent toughness. For a thicker sauce, use a cornstarch slurry. Adjust seasoning as needed.

How should I store and reheat leftover crock pot cube steak?

Store in an airtight container in the fridge for 3-4 days. Reheat in a saucepan or microwave, keeping it warm but not overcooked.

Easy Crockpot Steak and Potatoes Recipe – Delicious Slow Cooker Meal

Imagine coming home to a warm, comforting meal that’s been cooking all day. Our easy crockpot steak and potatoes recipe is perfect for a delicious dinner. It’s simple to make and will impress your family and friends.

This recipe is great for any night or special occasion. It’s easy to make a tasty meal with little effort. Just add your ingredients to the slow cooker and let it cook for you.

Key Takeaways

  • Our easy crockpot steak and potatoes recipe is a simple and delicious meal solution
  • The slow cooker steak and potatoes recipe is perfect for a weeknight dinner or a special occasion
  • This recipe requires minimal effort and can be prepared in just a few minutes
  • The easy crockpot steak and potatoes recipe is a great way to enjoy a home-cooked meal without spending hours in the kitchen
  • The slow cooker steak and potatoes recipe is a great option for a stress-free dinner
  • This recipe is perfect for families and individuals who want to enjoy a delicious and easy meal

Why Choose This Easy Crockpot Steak and Potatoes Recipe

This recipe is perfect for a busy day. You can just throw everything into the crockpot and forget about it. When you’re done, you’ll have a delicious meal that everyone will love.

This recipe has many benefits. It’s cheap to make and can feed a lot of people. It’s also great for family dinners because it’s easy to prepare and can be served with many sides. Some of the benefits include:

  • Time-saving: simply add all the ingredients to the crockpot and let it cook
  • Cost-effective: uses affordable ingredients and can feed a large family
  • Perfect for family dinners: easy to make and can be served with a variety of sides

This recipe is a great choice for anyone looking for a tasty and easy meal. The combination of a delicious steak and potatoes with the ease of preparation makes it perfect for a family dinner.

This recipe is sure to become a favorite in your home. It’s easy to make and stress-free. So why not try it and enjoy a delicious meal with your family?

BenefitsDescription
Time-savingSimply add all the ingredients to the crockpot and let it cook
Cost-effectiveUses affordable ingredients and can feed a large family
Perfect for family dinnersEasy to make and can be served with a variety of sides

Essential Equipment and Ingredients

To make this tasty easy crockpot steak and potatoes recipe, you’ll need some basic stuff. You’ll need a crockpot, a big bowl, and some common kitchen tools. For the ingredients, you’ll need steak, potatoes, onions, garlic, and spices for extra flavor.

Here’s what you’ll need for this slow cooker steak and potatoes recipe:

  • 1-2 pounds of steak
  • 2-3 large potatoes
  • 1 large onion
  • 3 cloves of garlic
  • Salt and pepper to taste
  • Other spices and seasonings of your choice

Having the right stuff is key to making this easy crockpot steak and potatoes recipe a hit. With these basics, you’ll make a tasty meal perfect for any time.

You might also want to add some extra things to make your dish even better. Consider adding:

  • Fresh herbs, such as thyme or rosemary
  • A sprinkle of paprika or other spices
  • A squeeze of fresh lemon juice

By using this slow cooker steak and potatoes recipe and the right tools and ingredients, you’ll make a meal that everyone will love.

IngredientQuantity
Steak1-2 pounds
Potatoes2-3 large
Onion1 large
Garlic3 cloves

Selecting the Perfect Cut of Steak for Slow Cooking

Choosing the right steak is key for a tasty best crockpot steak and potatoes recipe. Even tough cuts become tender and flavorful with slow cooking. For a slow cooker steak and potatoes dish, pick a cut that’s good for long cooking and soaks up flavors well.

Chuck roast, round steak, and flank steak are top picks for crockpot cooking. They’re tough and full of connective tissue. This tissue breaks down, making the meat tender and juicy.

Best Steak Cuts for Crockpot Cooking

  • Chuck roast: a classic choice for slow cooking, it’s tender and flavorful
  • Round steak: a leaner cut, it’s perfect for those looking for a healthier option
  • Flank steak: a flavorful cut, it’s great for those who want a lot of flavor in their dish

Budget-Friendly Options

Looking for affordable options? Skirt steak or tri-tip are great choices. They’re cheaper but just as tasty as pricier cuts.

What to Avoid

When picking a steak for slow cooking, avoid lean cuts like sirloin or tenderloin. They can get dry and tough. Also, skip very thick cuts as they might not cook evenly.

Cut of SteakPrice RangeSuitability for Slow Cooking
Chuck Roast$5-$10Excellent
Round Steak$4-$8Good
Flank Steak$6-$12Excellent

Potato Selection and Preparation Guidelines

Choosing the right potatoes is key for a great steak and potato slow cooker dish. Opt for high-starch potatoes like Russet or Yukon Gold. These keep their shape well and offer a nice contrast to the steak.

To prep your potatoes, peel and chop them into small pieces. You can keep the skin on for extra fiber and texture. Make sure to remove any eyes or blemishes for even cooking. Then, soak the chopped potatoes in cold water to remove excess starch. After that, drain and pat them dry with a paper towel.

Here are some tips for selecting and preparing the perfect potatoes:

  • Choose high-starch potatoes like Russet or Yukon Gold
  • Peel and chop potatoes into bite-sized pieces
  • Remove eyes and blemishes for even cooking
  • Soak chopped potatoes in cold water to remove excess starch

By following these simple guidelines, you’ll be well on your way to creating a delicious steak and potato slow cooker dish. With the right potatoes and a little preparation, you can enjoy a tasty slow cooker steak and potato dinner any night of the week.

Potato VarietyCharacteristicsSuitability
RussetHigh starch, dry textureExcellent for slow cooking
Yukon GoldButtery, yellow fleshGreat for slow cooking and roasting

Step-by-Step Preparation Method

To make the easy crockpot steak and potatoes recipe, start with morning prep. Chop the onions and garlic, and get the steak and potatoes ready. This makes layering in the crockpot easier.

Morning Prep Work

In the morning, prepare the ingredients for the slow cooker steak and potatoes. Chop the onions and garlic, and season the steak with your favorite spices. Choose a cut of steak like a chuck roast or a round steak for slow cooking.

Layering Ingredients

After preparing the ingredients, layer them in the crockpot. Start with onions and garlic, then add potatoes. Next, put in the steak and any other ingredients like carrots or peas. Make sure to leave space for even cooking.

Setting Your Crockpot

Set your crockpot to the right temperature and cooking time. Cook on low for 8-10 hours or on high for 4-6 hours. This ensures the steak is tender and the potatoes are cooked. Follow these steps for a delicious slow cooker steak and potatoes meal.

Seasoning and Marinade Options

Seasoning and marinade are key to a great crockpot steak and potatoes recipe. The right mix of herbs and spices can make a big difference. Start with basics like salt, pepper, and garlic powder for a solid base.

For more flavor, try making your own marinade. Mix soy sauce, Worcestershire sauce, and brown sugar for a tangy taste. Or, use store-bought marinades for a variety of flavors.

Look for marinades from Kraft and McCormick for different tastes. Always check the label to match your dish’s flavors. Experimenting with marinades can make your dish unforgettable.

Here are some tips for using marinades:

  • Always read the label and follow the instructions for use
  • Choose a marinade that complements the other ingredients in your dish
  • Don’t be afraid to experiment and try new flavors

By trying different seasonings and marinades, you can make a delicious crockpot steak and potatoes recipe. Whether using a slow cooker or oven, the right flavors can transform your dish.

Cooking Times and Temperature Settings

When cooking an easy crockpot steak and potatoes recipe, knowing the cooking times and temperature is key. To get tender and flavorful results, keep an eye on the temperature and time. Cook on low for 8-10 hours or on high for 4-6 hours for a slow cooker steak and potatoes dish.

Cooking the steak and potatoes at a low temperature for a long time is crucial. This makes the steak tender and juicy. The potatoes become creamy and soft, soaking up all the flavors.

To get the best results, use a meat thermometer to check the steak’s internal temperature. For medium-rare, it should be at least 130°F (54°C). For medium, it should be at least 140°F (60°C). Also, check the potatoes by inserting a fork or knife. If they slide in easily, they’re done.

Some tips for cooking an easy crockpot steak and potatoes recipe include:

  • Always brown the steak before adding it to the slow cooker to enhance the flavor
  • Use a variety of spices and herbs to add depth and complexity to the dish
  • Don’t overcook the steak or potatoes, as this can result in a tough and unappetizing texture

By following these guidelines and using a slow cooker, you can make a delicious and satisfying easy crockpot steak and potatoes recipe. It’s perfect for any occasion.

Troubleshooting Common Issues

When making a delicious steak and potato slow cooker dish, it’s key to know about common problems. By tackling these issues, your tasty slow cooker steak and potato dinner will be perfect. Tough meat is a common problem. You can fix it by cooking it longer or choosing a tender steak.

Mushy potatoes are another issue. To avoid this, don’t overcook them. It’s important to watch the cooking time and adjust the liquid. Here are some tips to solve common problems:

  • Check the steak’s tenderness by inserting a fork; if it’s still tough, cook for an additional 30 minutes.
  • Prevent mushy potatoes by cooking them for 6-8 hours on low heat.
  • Adjust the liquid levels by adding more broth or water if the dish seems too dry.

By using these tips, you can make a delicious steak and potato slow cooker dish. It will impress your family and friends. Always check the cooking time and adjust the seasoning. Then, you’ll enjoy a tasty slow cooker steak and potato dinner soon.

With these tips, you’re ready to make a delicious and flavorful dish. It’s perfect for any occasion. Whether it’s a special event or a weeknight dinner, a tasty slow cooker steak and potato dinner will be a hit.

IssueSolution
Tough MeatAdjust cooking time or use a more tender cut
Mushy PotatoesMonitor cooking time and adjust liquid levels
Dry DishAdd more broth or water

Serving Suggestions and Side Dishes

When serving your best crockpot steak and potatoes recipe, you have many options. Try it with steamed veggies, a fresh salad, or crusty bread for a complete meal.

Here are some great side dish ideas for slow cooker steak and potatoes:

  • Roasted veggies like asparagus or Brussels sprouts
  • Mashed potatoes for a cozy side
  • Garlic bread to soak up juices

To enhance your meal, add slow cooker gravy or sour cream. You can also play with seasonings and herbs for a special touch.

With these ideas, you can make a tasty and satisfying meal. It’s perfect for pleasing even the most finicky eaters. So, get creative and enjoy your best crockpot steak and potatoes recipe!

Conclusion: Mastering Your Crockpot Steak and Potatoes

Learning to make a tasty easy crockpot steak and potatoes recipe is easy. Just follow the steps and try out different flavors. You’ll soon be making slow cooker steak and potatoes that everyone will love.

Success comes from using the best ingredients and following cooking times. Don’t be afraid to try new flavors. With practice, you’ll become great at this dish. It’s perfect for any day of the week.

So, get creative in the kitchen. Use your crockpot to make amazing meals. Enjoy your cooking!

FAQ

What makes this crockpot steak and potatoes recipe so easy?

This recipe is simple because it needs little prep work. The slow cooker does most of the cooking. Just add the ingredients and let it simmer while you do other things.

What are the benefits of making this slow cooker steak and potato dish?

This recipe saves time, is affordable, and great for family dinners. The slow cooker makes it easy to cook without much effort. Plus, the ingredients are cheap, making it budget-friendly.

What type of steak is best for this crockpot recipe?

Chuck roast, round steak, and flank steak work well in the crockpot. These cuts get tender and flavorful when cooked slowly.

How should I prepare the potatoes for this dish?

Use Russet or Yukon Gold potatoes for the best taste. Peel and cut them into small pieces before adding to the crockpot.

Can I customize the seasoning and marinade for this recipe?

Yes, you can! Try classic flavors like salt, pepper, and garlic powder. Or, make your own marinade with soy sauce, Worcestershire sauce, and brown sugar. You can also buy a marinade for ease.

How long does this crockpot steak and potatoes recipe take to cook?

Cooking time varies with your crockpot settings. But, it usually takes 6-8 hours on low or 3-4 hours on high to get the meat tender.

What are some common issues I should watch out for when making this recipe?

Watch for tough meat, mushy potatoes, and wrong liquid levels. Follow the recipe closely and adjust as needed to avoid these issues.

What are some good side dish options to serve with this crockpot steak and potatoes?

Try steamed veggies, a fresh salad, mashed potatoes, or crusty bread. These sides enhance the meal and match the steak and potatoes’ flavors.

Creamy Chicken Pot Pie: Quick Homemade Recipe

Does comfort food really have to take hours to prepare? Or can a delicious creamy chicken pot pie be made fast? This question is at the heart of why many families love this dish. It’s perfect for busy weeknights when you want a hearty meal without spending hours in the kitchen.

Using cream of chicken soup as a key ingredient saves time. It also makes the dish creamy, which is a big part of its charm. Read on to find out how to make an easy chicken pot pie with cream of chicken soup that will be a hit at home.

Key Takeaways

  • This recipe offers a quick homemade version of a classic comfort food.
  • Using cream of chicken soup simplifies and enhances creaminess.
  • A quick chicken pot pie is ideal for busy families.
  • Rich flavors can be achieved with minimal preparation time.
  • This dish can become a staple in any household!

Introduction to Creamy Chicken Pot Pie

Creamy chicken pot pie is a beloved dish in American cuisine. It has its roots in traditional chicken pot pie, a comfort food loved by families for years. This dish combines tender chicken, savory vegetables, and a flaky crust, bringing nostalgia to family gatherings.

The beauty of creamy chicken pot pie is its versatility. Home cooks can adjust the ingredients to their liking or based on what they have at home. Some prefer the classic version, while others like to add their own twist with different seasonings and vegetables.

Using cream of chicken soup makes the dish easy to prepare, perfect for busy families. This ingredient boosts the flavor and adds to the dish’s creamy texture. Whether enjoyed on a cold evening or at a family event, creamy chicken pot pie remains a favorite, bringing warmth and comfort to all who enjoy it.

Why Choose a Quick Chicken Pot Pie?

A quick chicken pot pie is perfect for busy weeknights. It’s an easy dinner recipe that doesn’t take long to make. You can enjoy a comforting meal without spending hours in the kitchen.

Using frozen vegetables and pre-made pie crusts makes it even quicker. These ingredients save you time on chopping and baking. You get to enjoy a delicious dinner without the hassle.

You can also make it your own with whatever ingredients you have. Whether it’s leftover chicken or different veggies, you can get creative. A quick chicken pot pie is all about great taste and saving time, ideal for a busy schedule.

Key Ingredients for Your Creamy Chicken Pot Pie

Making a delicious chicken pot pie starts with knowing the right ingredients. The mix of flavors and textures turns a simple meal into a family favorite. Here, we look at the must-have ingredients for your creamy chicken pot pie. We also suggest some optional add-ins to make it even better.

Essential Ingredients

  • Cooked chicken: Shredded or cubed chicken breast offers a tender and savory base.
  • Cream of chicken soup: This serves as a creamy, rich sauce that ties everything together.
  • Frozen mixed vegetables: Peas, carrots, and corn provide color and nutrition, making the dish wholesome.
  • Pre-made pie crust: A flaky crust creates the perfect vessel for all the delicious pot pie flavors.

Optional Add-Ins for Extra Flavor

To make your chicken pot pie your own, try these extras:

  • Fresh herbs: Thyme or parsley can introduce fragrant notes.
  • Garlic: A few cloves can boost the dish’s overall flavor profile.
  • A splash of white wine: This can deepen the savory taste of the filling.

Choosing the right ingredients for your chicken pot pie makes for a tasty and fulfilling meal. Adding your own touches with optional ingredients lets you create a unique dish. This way, your pot pie will be a hit at any dinner.

Easy Chicken Pot Pie Recipe with Cream of Chicken Soup

Making an easy chicken pot pie recipe with cream of chicken soup is fun and simple. Start by preparing your ingredients well. Then, follow the cooking steps to make a meal that everyone will love. Here’s how to begin.

Prepping Ingredients for Success

First, collect all the ingredients you need. Cooking chicken efficiently saves time. Use a rotisserie chicken for its tenderness and flavor. If you have frozen veggies, thaw them quickly under water or in the microwave.

This prep work makes cooking easier and improves the taste of your dish.

Step-by-Step Cooking Instructions

Here’s how to make your chicken pot pie:

  1. Preheat the oven to 425°F (220°C).
  2. In a large bowl, mix cooked chicken, thawed veggies, and cream of chicken soup. Make sure everything is well combined.
  3. Roll out your pie crust and put it in a pie dish. Fill it with the chicken and veggie mix.
  4. Put another pie crust on top, sealing the edges by pressing. Cut slits for steam to get out.
  5. Bake for 30 to 35 minutes until the crust is golden.
  6. Let the pie cool a bit before you serve it.

Tips for Making the Perfect Pot Pie

Making a delicious chicken pot pie requires a few key techniques. The right pie crust and a creamy filling are essential. Here are some tips for the best pie crust and how to get a creamy texture.

Creating the Best Pie Crust

The crust is as important as the filling for a perfect pot pie. Here are some pie crust tips:

  • Butter vs. Shortening: Butter makes the crust flaky and flavorful. Mixing both for a richer taste is a good idea.
  • Chill Your Ingredients: Keep your butter and water cold. This helps the crust stay flaky.
  • Don’t Overwork the Dough: Mix just until combined. Overworking makes the crust tough.

How to Achieve Creaminess

A creamy filling is key for a great pot pie. To get the right consistency:

  • Thickening Agents: Use flour or cornstarch to thicken. Mix them in before baking.
  • Proper Cooking Time: Cook the filling until it’s just thick. This avoids a soggy pie.
  • Incorporate Dairy Gradually: Add cream or milk slowly. This helps control the creaminess.

Serving Suggestions for Chicken Pot Pie

Turning your chicken pot pie into a full meal is easy with the right serving ideas. Choose side dishes and drinks that make the meal richer and more fun.

Pairing Side Dishes

Think about side dishes that balance out the creamy chicken pot pie. Here are some ideas:

  • Side Salads: A crisp salad with a light vinaigrette dressing is a great contrast.
  • Roasted Vegetables: Seasonal veggies like carrots or asparagus add color and nutrients.
  • Crusty Bread: Artisan bread or baguette is perfect for dipping into the pot pie’s filling.

Perfect Beverage Choices

Choosing the right drinks can make your meal even better. Drinks should enhance the pot pie’s flavors without overpowering them.

  • White Wine: Sauvignon Blanc or Chardonnay complements the pot pie’s richness.
  • Sparkling Water: Sparkling water with lemon is a refreshing choice for those who don’t drink alcohol.
  • Homemade Iced Tea: Mint or lemon iced tea adds a refreshing touch to the savory flavors.

Storing and Reheating Your Pot Pie

Managing your chicken pot pie after cooking is key to keeping it tasty. Knowing how to store and reheat it is important. This ensures the pie stays flavorful and moist. Follow these tips for storing and reheating your pie.

Proper Storage Techniques

Start by letting the pie cool down before storing it. Here are some tips for storing chicken pot pie:

  • Use an airtight container or cover it tightly with foil or plastic wrap. This keeps the pie moist and prevents freezer burn.
  • Store leftover pie in the fridge for 3 to 4 days. Make sure it’s cooled first.
  • Freeze the pie for longer storage. Wrap it in plastic wrap and then foil to prevent freezer burn. A well-wrapped pie can last up to 3 months.
  • Freeze uncooked pie for a fresh-baked option. This way, you can bake it whenever you want.

Best Reheating Methods

Reheating chicken pot pie needs care to keep the crust crispy and filling creamy. Here are two methods:

MethodStepsBenefits
OvenPreheat the oven to 350°F (175°C). Cover the pie with foil to prevent over-browning. Bake for 25 to 30 minutes or until hot.Keeps the crust crispy and filling warm.
MicrowavePlace a slice on a microwave-safe plate. Cover with a damp paper towel. Heat on medium for 2 to 3 minutes, checking often.Fast and easy for single servings.

By using these storage and reheating tips, you can enjoy your chicken pot pie any time.

Variations on the Classic Recipe

Exploring new twists on the classic chicken pot pie is exciting. It can meet different dietary needs while keeping the taste great. Adding unique ingredients can make delicious alternatives for everyone.

Vegetarian Options

Looking for a vegetarian chicken pot pie? Try using mushrooms, lentils, or chickpeas instead of chicken. These add a meaty texture and a rich taste. Add lots of veggies like carrots, peas, and corn for extra nutrition.

Top it with a flaky crust or mashed potatoes for that cozy feel.

Variations for Different Diets

Chicken pot pie can be made for various diets. For a gluten-free option, use almond flour or a gluten-free mix for the crust. If you’re watching carbs, try a cauliflower mash instead of crust.

Each change keeps the dish comforting, making it fit into many meal plans.

Health Benefits of Homemade Chicken Pot Pie

Making chicken pot pie at home has many health perks. Unlike store-bought pies, homemade ones let you pick the ingredients. This means you get a meal full of nutrition, which is key for staying healthy.

Chicken is a lean protein that helps muscles grow and repair. Adding veggies like carrots, peas, and potatoes makes the pie tasty and nutritious. These veggies add vitamins and minerals, and they’re good for your digestive health.

Using healthy fats like olive oil or butter in moderation is good for your heart. This is a big plus compared to frozen pies, which often have bad fats. Making your own pie is a healthier choice.

The table below shows how homemade chicken pot pie compares to a store-bought one.

NutrientHomemade Chicken Pot PieStore-Bought Chicken Pot Pie
Calories350480
Total Fat18g25g
Saturated Fat7g12g
Protein25g15g
Fiber4g2g

Homemade chicken pot pie is a balanced meal. It’s tasty and packed with health benefits chicken pot pie offers. Cooking meals from scratch means your family gets better nutrition and stays healthy.

Why This Recipe is a Family Favorite

The creamy chicken pot pie is a favorite in many homes. Its rich flavors and comforting texture make it perfect for family dinners. It brings warmth and togetherness, becoming a staple in American homes.

Family traditions often include recipes passed down through generations. Chicken pot pie is no exception. Families share memories of making it together, creating a sense of closeness.

Baking a chicken pot pie is more than cooking; it’s a symbol of love and care. The aroma fills the house, building excitement. Enjoying it reminds families of good times, creating lasting memories.

The creamy chicken pot pie is more than food; it’s about heart and heritage. It evolves with family tastes but keeps its comfort food core. Every bite tells a story, strengthening family bonds.

Conclusion

The quick chicken pot pie recipe is a true gem of easy comfort food. It brings warmth and joy to any family gathering. Its simplicity and delicious taste make it perfect for busy weeknights.

Using cream of chicken soup boosts the flavor and saves time. This makes it a favorite in many family recipes.

Every bite of this creamy dish reminds us of the memories we make over meals. It’s great for cozy evenings or big family gatherings. It strengthens bonds and whets appetites.

Getting everyone involved in making it adds to the fun. The process is as enjoyable as the final dish.

Homemade meals are more than just food; they’re filled with love and care. They are the heart of lasting family traditions. So, get your ingredients ready, put on your apron, and make this classic dish in your kitchen.

Enjoy every moment and let the comforting aroma of this pot pie fill your home.

FAQ

What is a creamy chicken pot pie?

A creamy chicken pot pie is a cozy dish. It’s filled with cooked chicken, veggies, and a creamy sauce. Cream of chicken soup is a key part. It’s baked in a flaky pie crust.

How long does it take to make a quick chicken pot pie?

A quick chicken pot pie takes about 45 minutes to an hour. This time includes getting ready, putting the pie together, and baking it until it’s golden.

Can I use homemade chicken soup instead of cream of chicken soup?

Yes, you can use homemade chicken soup instead. Make sure it’s creamy enough. Or add cornstarch or flour to thicken it.

What are some easy add-ins for the chicken pot pie?

Adding herbs like thyme or rosemary, diced potatoes, mushrooms, or cheese can make your pie better. They add flavor and texture.

Is chicken pot pie a good choice for meal prep?

Yes! Chicken pot pie is perfect for meal prep. It reheats well and can be made ahead. Freeze it for later.

Can I make a vegetarian chicken pot pie?

Yes, you can make a vegetarian version. Use plant-based proteins like lentils, chickpeas, or mushrooms. Use vegetable broth instead of chicken soup.

How can I make the perfect pie crust for my chicken pot pie?

To make a great pie crust, use cold butter for flakiness. Mix ingredients just until they come together. Chill the dough before rolling it out. Adding butter and shortening can add flavor.

What are the best ways to store and reheat chicken pot pie?

Store your pie in an airtight container in the fridge for up to three days. Reheat it in the oven at 350°F until warm. Or microwave slices, but the oven is better for texture.

How to Make Delicious Marry Me Chicken Recipe

What makes a dish special enough to win over your loved ones? Is it the flavors, the chicken’s tenderness, or the sauce’s richness? The marry me chicken recipe has it all. It’s a mix of creamy sauce, tender chicken, and sun-dried tomatoes that will impress anyone.

The marry me chicken has become very popular, and for good reasons. Its unique blend of flavors and ingredients stands out. It’s perfect for impressing your partner or trying something new. The marry me chicken recipe is a great choice.

Key Takeaways

  • The marry me chicken recipe is a perfect blend of flavors and ingredients
  • The dish features tender chicken, creamy sauce, and sun-dried tomatoes
  • The recipe is a must-try for any occasion
  • The marry me chicken is a sensational dish that has gained popularity in recent years
  • The recipe is easy to make and requires minimal ingredients
  • The dish is perfect for impressing your loved ones

The Romance Behind Marry Me Chicken

The marry me chicken recipe has a captivating history. It started with a social media post. The person claimed it was so good, it could make anyone want to marry them. The post quickly went viral, spreading the recipe everywhere online.

This easy marry me chicken recipe became a hit on social media. It’s loved for its special mix of flavors and ingredients. Chicken, sun-dried tomatoes, and a creamy sauce make it rich and indulgent. Plus, it’s simple to make and needs just a few ingredients, making it popular.

  • Its unique flavor mix of savory, sweet, and tangy
  • How easy it is to prepare, welcoming cooks of all levels
  • Its flexibility, perfect as a main dish or side

The marry me chicken recipe has won the hearts of many food lovers. Its fame keeps growing. It’s perfect for a romantic dinner or a tasty meal with family and friends. Give it a try!

Essential Ingredients for the Perfect Marry Me Chicken Recipe

To make the best marry me chicken, you need the right ingredients. The dish includes chicken breasts, sun-dried tomatoes, garlic, cream, and parmesan cheese. Each ingredient is key to the dish’s flavor and texture.

Choosing high-quality ingredients is important. Good sun-dried tomatoes and fresh garlic make a big difference. Fresh garlic adds a flavor that jarred or powdered garlic can’t match.

Here are the main ingredients for your marry me chicken recipe:

  • 1 1/2 pounds boneless, skinless chicken breasts
  • 1/2 cup sun-dried tomatoes, chopped
  • 3 cloves garlic, minced
  • 1 cup heavy cream
  • 1/2 cup grated parmesan cheese
IngredientQuantity
Chicken breasts1 1/2 pounds
Sun-dried tomatoes1/2 cup
Garlic3 cloves
Heavy cream1 cup
Parmesan cheese1/2 cup

Kitchen Tools and Equipment Needed

To make a tasty marry me chicken dish, you need the right tools and equipment. This makes cooking smooth and efficient. A big skillet is key for sautéing the chicken and veggies. A saucepan is needed for the creamy sauce.

For utensils, silicone spatulas, tongs, and a whisk are handy. They help cook the chicken and sauce perfectly. This makes your delicious marry me chicken meal even better.

Essential Cookware

  • Large skillet
  • Saucepan
  • Utensils (silicone spatulas, tongs, whisk)

Optional Kitchen Gadgets

Some optional gadgets can make cooking easier and more fun. A stand mixer is great for whipping cream. A food processor helps chop veggies quickly.

Preparation Tools

Tools like a cutting board, knife, and measuring cups are also needed. They help you prepare ingredients and cook the dish well. With these, you’ll make a delicious marry me chicken meal that will impress everyone.

Step-by-Step Marry Me Chicken Recipe

To make the perfect Marry Me Chicken, follow these simple steps. Learning how to make marry me chicken is easier than you think. With these marry me chicken instructions, you’ll impress everyone.

Here are the basic steps to get you started:

  • Preheat your oven to 375°F (190°C).
  • Season the chicken with your favorite herbs and spices.
  • Heat a skillet over medium-high heat and sear the chicken until browned on both sides.
  • Transfer the chicken to a baking dish and bake for 25-30 minutes, or until cooked through.

For a complete and delicious meal, serve the Marry Me Chicken with your favorite sides. Try roasted vegetables or mashed potatoes. These marry me chicken instructions help you make a dish that’s tasty and looks great.

By following these simple steps and using the right ingredients, you’ll make a delicious Marry Me Chicken. Remember, practice makes perfect. Don’t be afraid to try new things. Happy cooking!

IngredientQuantity
Chicken breasts4
Olive oil2 tablespoons
Salt and pepperTo taste

Creating the Perfect Creamy Sauce

To make your marry me chicken with sun-dried tomatoes even better, a creamy sauce is key. The sauce’s base is important, with heavy cream, butter, and Parmesan cheese being the main ingredients. Using top-quality ingredients will help you get the best taste.

A great sauce can make your dish unforgettable. Seasoning is essential for flavor. Add a bit of salt, black pepper, and dried herbs like thyme or basil. For more flavor, garlic or onion powder can be added.

Sauce Base Ingredients

  • Heavy cream
  • Butter
  • Parmesan cheese
  • Garlic powder
  • Onion powder

Seasoning Tips

When seasoning your sauce, start with a little. Add salt, pepper, and herbs a bit at a time. Taste as you go and adjust until it’s just right. This way, your sauce will perfectly match your marry me chicken.

Achieving the Right Consistency

The sauce’s consistency is important. Too thick, and it’s overwhelming; too thin, and it’s not good. To get it just right, whisk in more heavy cream or simmer it until it’s perfect. With practice, your sauce will be creamy and delicious, making your dish even better.

Sauce IngredientQuantity
Heavy cream1 cup
Butter2 tablespoons
Parmesan cheese1/2 cup

The Secret to Perfectly Tender Chicken

To get tender chicken in the marry me chicken recipe, cooking it right is key. You need to use the best cooking methods and not overcook it. Also, picking the right chicken breasts is important for the dish’s texture and taste.

When picking chicken breasts, choose fresh and high-quality ones. It’s also vital to store them well to keep them fresh. Tips for storing chicken include using a sealed container, labeling it, and keeping it in the fridge at 40°F (4°C) or below.

Here are some tips for cooking tender chicken:

  • Cook the chicken at the right temperature, which is 165°F (74°C) for breast meat and 180°F (82°C) for thigh meat.
  • Use a meat thermometer to ensure the chicken is cooked to a safe internal temperature.
  • Avoid overcooking the chicken, as it can become dry and tough.

By following these tips, you can make tender and tasty chicken for your marry me chicken recipe. Always handle and store chicken safely to avoid foodborne illness.

The secret to a fantastic marry me chicken recipe is tender chicken. With these tips, you’ll impress your loved ones with a delicious dish.

Chicken Breast Storage TipsTemperatureStorage Method
Fresh Chicken Breasts40°F (4°C) or belowSealed container, labeled with date
Cooked Chicken Breasts40°F (4°C) or belowSealed container, labeled with date

Sun-Dried Tomatoes: The Game-Changing Ingredient

Sun-dried tomatoes are key in marry me chicken ingredients. They add a burst of intense tomato flavor and a touch of sweetness. This makes them a great match for the creamy sauce.

Choosing high-quality sun-dried tomatoes is important. Look for ones that are perfectly dried, without mold or too much moisture. You can find them at specialty food stores or online.

Selecting Quality Sun-Dried Tomatoes

  • Choose tomatoes with a deep red color and a slightly chewy texture
  • Avoid tomatoes with visible signs of mold or moisture
  • Opt for tomatoes that are packaged in airtight containers to preserve freshness

After picking your sun-dried tomatoes, prepare them for the marry me chicken recipe. Soak them in hot water or olive oil, then chop and add to the sauce.

Preparation Methods

Rehydrating sun-dried tomatoes is quick and easy. You can soak them in hot water, olive oil, or chicken broth for extra flavor. Once soaked, chop them up and mix into the sauce. They’ll add a rich, tangy taste to the marry me chicken ingredients.

Preparation MethodDescription
Soaking in hot waterRehydrates the tomatoes quickly and easily
Soaking in olive oilAdds a rich, fruity flavor to the tomatoes
Soaking in chicken brothInfuses the tomatoes with a savory, meaty flavor

Common Mistakes to Avoid

When making the marry me chicken recipe, it’s key to know common mistakes. Issues like temperature control, sauce problems, and timing errors can ruin it. Understanding the importance of precise temperature, sauce prep, and timing is vital.

To avoid these mistakes, pay close attention to detail. Knowing the recipe well helps. Watch out for overcooking the chicken, underseasoning the sauce, and not letting it rest before serving.

  • Use a thermometer to ensure the chicken is cooked to the correct temperature.
  • Taste and adjust the sauce regularly to avoid underseasoning.
  • Let the dish rest for a few minutes before serving to allow the flavors to meld together.

By following these tips, you can make a delicious marry me chicken dish. It will surely impress your loved ones.

MistakeSolution
Overcooking the chickenUse a thermometer to ensure the chicken is cooked to the correct temperature.
Underseasoning the sauceTaste and adjust the sauce regularly to avoid underseasoning.
Not letting the dish restLet the dish rest for a few minutes before serving to allow the flavors to meld together.

Delicious Side Dish Pairings

When it comes to the Marry Me Chicken recipe, the right side dishes make a big difference. You can choose from many options to make a complete meal. Some favorites include roasted vegetables, mashed potatoes, and garlic bread.

It’s important to pick side dishes that match the chicken’s flavors and textures. For instance, the creamy sauce in the Marry Me Chicken goes great with crunchy roasted veggies or soft mashed potatoes. You can also try different seasonings and herbs to make your side dishes even better.

Here are some tips for choosing the right side dishes for your Marry Me Chicken recipe:

  • Consider the flavor profile: Choose side dishes that complement the rich and creamy sauce of the Marry Me Chicken recipe.
  • Vary the textures: Mix soft and crunchy textures to add depth to the meal.
  • Keep it simple: Don’t overcomplicate the side dishes – simple recipes can be just as delicious.

By picking the right side dishes, you can make a meal that everyone will remember. Whether it’s for a romantic dinner or a special occasion, the Marry Me Chicken with tasty side dishes will impress your guests.

Make-Ahead and Storage Tips

The marry me chicken recipe is great because you can make it ahead. It’s perfect for meal prep or impressing guests. To keep it fresh, follow the right storage and reheating steps.

Before refrigerating or freezing, let the dish cool to room temperature. This stops bacteria growth and keeps flavors strong. You can store it in airtight containers in the fridge for three days or freeze for two months.

Proper Storage Methods

  • Use airtight containers to prevent moisture and other flavors from affecting the dish.
  • Label and date the containers so you can easily keep track of how long they’ve been stored.
  • Store the containers in the refrigerator at a temperature of 40°F (4°C) or below.

Reheating Guidelines

To reheat, use the oven or microwave. For the oven, preheat to 350°F (180°C) and heat for 15-20 minutes. For the microwave, heat on high for 30-60 seconds. Always check the dish’s temperature before serving to ensure it’s at least 165°F (74°C).

By following these tips, you can enjoy your marry me chicken recipe anytime. It’s perfect for meal prep or special occasions. These tips will help you keep your dish delicious and fresh.

Recipe Variations and Dietary Modifications

The marry me chicken recipe can be changed to fit different diets and tastes. With a few tweaks, you can make a dish that’s both tasty and meets your needs. Whether you want dairy-free, gluten-free, or different spice levels, there are many ways to customize this recipe.

Exploring recipe variations is key. You can swap heavy cream for a non-dairy option, use gluten-free flour, or add more spices. These dietary modifications let you enjoy the marry me chicken while sticking to your diet.

Here are some tips for marry me chicken recipe variations:

  • Use dairy-free milk and cheese alternatives to create a creamy sauce
  • Substitute gluten-containing ingredients with gluten-free options
  • Adjust the spice level to suit your taste preferences

By trying these tips and experimenting with recipe variations and dietary modifications, you can make a delicious marry me chicken dish. So, don’t hesitate to get creative and make this recipe your own!

ModificationDescription
Dairy-FreeUse non-dairy milk and cheese alternatives
Gluten-FreeSubstitute gluten-containing ingredients with gluten-free options
Spice Level AdjustmentsAdjust the amount of spices to suit your taste preferences

Conclusion

As we wrap up our exploration of “Marry Me Chicken,” we hope you’ve seen its charm. This dish has gone from simple to social media sensation. It has won over many with its delicious taste.

This recipe is perfect for any occasion. It’s great for a romantic dinner, a family meal, or just a cozy night in. The chicken, creamy sauce, and sun-dried tomatoes make it a standout dish.

Keep trying new things with “Marry Me Chicken.” Try different flavors and make it fit your diet. Share your versions with friends and family for a memorable meal.

Cooking is more than just making food. It’s about the journey, the smells, and the taste. Enjoy every step as you make “Marry Me Chicken” for your family. Happy cooking, and enjoy your meal!

FAQ

What is the origin of the “Marry Me Chicken” recipe?

The “Marry Me Chicken” recipe has a romantic story. It started with a social media post. The poster said this dish was so good, it could make anyone want to marry you. The post quickly went viral, spreading the recipe everywhere online.

What are the essential ingredients for the “Marry Me Chicken” recipe?

To make the “Marry Me Chicken” recipe, you need chicken breasts, sun-dried tomatoes, garlic, cream, and parmesan cheese. These ingredients make a rich, creamy sauce that goes well with the chicken.

What kitchen tools and equipment are needed to make the “Marry Me Chicken” recipe?

You’ll need a large skillet, a saucepan, and utensils to cook the “Marry Me Chicken” recipe. Optional gadgets like a food processor or blender can help with the sauce.

How do you create the perfect creamy sauce for the “Marry Me Chicken” recipe?

The creamy sauce is key to the “Marry Me Chicken” recipe. Focus on the sauce base, seasonings, and getting the right consistency.

What is the secret to achieving perfectly tender chicken in the “Marry Me Chicken” recipe?

To cook the chicken right, use the right techniques. Avoid overcooking to keep the chicken tender.

Why are sun-dried tomatoes an important ingredient in the “Marry Me Chicken” recipe?

Sun-dried tomatoes add flavor and texture to the “Marry Me Chicken” recipe. They complement the creamy sauce and tender chicken.

What are some common mistakes to avoid when making the “Marry Me Chicken” recipe?

Avoid temperature control issues, sauce problems, and timing errors when making the “Marry Me Chicken” recipe. Paying attention to these details ensures a perfect dish.

What are some delicious side dish pairings for the “Marry Me Chicken” recipe?

You can pair the “Marry Me Chicken” recipe with roasted vegetables, mashed potatoes, and garlic bread. These sides are delicious with the dish.

Can the “Marry Me Chicken” recipe be made ahead and stored for later use?

Yes, you can make the “Marry Me Chicken” recipe ahead and store it. Just follow proper storage and reheating guidelines to keep it fresh and flavorful.

Can the “Marry Me Chicken” recipe be adapted to suit different dietary needs and preferences?

The “Marry Me Chicken” recipe can be adapted for different diets. You can make dairy-free or gluten-free versions, and adjust the spice level to your liking.

The Ultimate Beef Stroganoff Recipe

What makes a beef stroganoff recipe unforgettable? Is it the tender beef, the creamy sauce, or the blend of herbs? The classic beef stroganoff has been a staple in American cuisine for decades. Its rich history is as fascinating as the dish itself.

From its origins in Russian cuisine to becoming a modern American favorite, the beef stroganoff recipe has changed. Yet, its essence remains the same. A great beef stroganoff recipe is all about balance and harmony of flavors. This is why using high-quality ingredients is crucial.

As we explore beef stroganoff, we’ll look at the right cut of beef, the perfect creamy mushroom sauce, and serving suggestions. Whether you’re a seasoned chef or a beginner, this classic beef stroganoff recipe will become a favorite. So, what are the key elements that make a beef stroganoff recipe truly exceptional?

Key Takeaways

  • High-quality ingredients are essential for a great beef stroganoff recipe
  • The right cut of beef can make a significant difference in the dish
  • A creamy mushroom sauce is a crucial component of the classic beef stroganoff
  • Traditional and modern serving suggestions can elevate the dish
  • Balance and harmony of flavors are key to a memorable beef stroganoff recipe
  • Using a beef stroganoff recipe as a base, you can create many variations
  • A classic beef stroganoff is a versatile dish that can be served on many occasions

The Rich History of Beef Stroganoff

Beef Stroganoff has been a favorite in restaurants and homes for centuries. The beef stroganoff recipe has changed over time. It comes from Russian cuisine and was named after Count Pavel Stroganov, a Russian aristocrat.

The easy beef stroganoff we know today has roots in many cultures. It’s now a favorite in America. It’s made with sautéed beef, mushrooms, and a creamy sauce, served over egg noodles.

Origins in Russian Cuisine

In Russia, Beef Stroganoff was a fancy dish. It was made with beef, mushrooms, and sour cream. It was served at fancy dinner parties and was seen as a delicacy.

Evolution to Modern American Favorite

Over time, Beef Stroganoff became a staple in America. The easy beef stroganoff recipe was adapted to use common ingredients. It became a hit for family dinners and special occasions.

Cultural Significance

Beef Stroganoff has become a cultural icon. It has been featured in cookbooks, restaurants, and blogs. It’s known for its rich flavor and creamy texture.

IngredientQuantity
Beef strips1 pound
Mushrooms1 cup
Sour cream1 cup

Essential Ingredients for Perfect Beef Stroganoff

To make the best beef stroganoff, use top-notch ingredients. You’ll need fresh mushrooms, tender beef, and a mix of herbs and spices. Each ingredient’s quality and freshness are key for great taste and texture.

Some key ingredients to focus on include:

  • High-quality beef, such as sirloin or ribeye, sliced into thin strips
  • Fresh mushrooms, preferably button or cremini, sliced and sautéed to bring out their natural flavor
  • A blend of herbs and spices, including paprika, garlic powder, and onion powder, to add depth and complexity to the dish

With these ingredients, you can make a tasty homemade beef stroganoff. It will be as good as any restaurant dish. Just follow a simple recipe and use the freshest ingredients for a meal you’ll love.

When prepping, slice the beef and mushrooms thinly. Sauté them in a hot pan to enhance their flavors. Add herbs and spices to taste. Serve over egg noodles or rice for a filling meal. With these ingredients and a bit of cooking know-how, your homemade beef stroganoff will impress everyone.

Choosing and Preparing the Right Cut of Beef

Choosing the right beef is key to a tasty beef stroganoff. The dish needs tender and flavorful beef to match the rich sauce. It’s important to pick the right cut and prepare it well.

The best cuts for stroganoff are leaner ones like sirloin or ribeye. These cuts are tender and have a fine texture, perfect for thin strips. Proper slicing techniques are also crucial for even and quick cooking.

Best Cuts for Stroganoff

  • Sirloin: A popular choice for beef stroganoff, sirloin is lean and tender, with a mild flavor.
  • Ribeye: A slightly fattier cut, ribeye adds a richer flavor to the dish and a tender texture.

Proper Slicing Techniques

To slice the beef right, slice against the grain. This makes the beef less chewy and more tender. Cut the beef into thin strips, about 1/4 inch thick, for quick and even cooking.

Meat Tenderizing Tips

To make the beef even more tender, try marinating or pounding. Marinating in oil, acid, and spices breaks down fibers and adds flavor. Pounding the beef also tenderizes it and makes it more even.

Classic Beef Stroganoff Recipe

To make an easy beef stroganoff, you’ll need a few key ingredients. These include beef strips, mushrooms, and beef broth from a can. The best beef stroganoff recipe is about finding the right balance of flavors. So, use top-notch ingredients and follow the steps closely.

Here’s what you’ll need:

  • 1 pound beef strips
  • 1 cup mushrooms, sliced
  • 1 onion, chopped
  • 2 cloves garlic, minced
  • 1 cup beef broth
  • 1 tablespoon tomato paste
  • 1 teaspoon Dijon mustard
  • Salt and pepper, to taste

First, cook the beef and mushrooms in a pan until they’re browned. Then, add the onion, garlic, beef broth, tomato paste, and mustard. Stir well and let it simmer until the sauce thickens. Serve the easy beef stroganoff over egg noodles or rice for a delicious meal.

The secret to a great best beef stroganoff recipe is to cook the beef and mushrooms right. Brown them well before adding the sauce. You can also add other ingredients like bell peppers or sour cream to make it your own.

A good beef stroganoff recipe should be flavorful and satisfying. It should have a nice balance of textures and tastes. By following this recipe and using quality ingredients, you’ll make a delicious easy beef stroganoff dish that everyone will love.

IngredientQuantity
Beef strips1 pound
Mushrooms1 cup
Onion1
Garlic2 cloves

Mastering the Creamy Mushroom Sauce

To make a tasty creamy beef stroganoff, you need to get the mushroom sauce right. This sauce is key and needs careful making. It’s made with butter, flour, and beef broth for a smooth texture.

First, you melt butter in a pan and mix in flour to make a roux. Cook the roux a bit to get rid of any flour taste. Then, add beef broth slowly to get the right thickness. For a homemade beef stroganoff, use fresh mushrooms and quality beef broth.

Sauce Base Preparation

Preparing the sauce base is crucial for the creamy mushroom sauce. Here’s how to do it:

  • Melt 2 tablespoons of butter in a pan over medium heat.
  • Add 1 tablespoon of flour and cook for 1-2 minutes, stirring constantly.
  • Gradually add 1 cup of beef broth, whisking continuously to avoid lumps.

Achieving the Perfect Consistency

Getting the sauce just right is important. It should be smooth and creamy but not too thick or thin. Here are some tips to get it just right:

ConsistencyDescription
Too thickAdd a little more beef broth to thin out the sauce.
Too thinAdd a little more flour to thicken the sauce.
PerfectThe sauce is smooth and creamy, coating the back of a spoon.

By following these tips and using top-notch ingredients, you can make a delicious creamy mushroom sauce for your homemade beef stroganoff.

Traditional and Modern Serving Suggestions

There are many ways to serve a tasty beef stroganoff recipe. The classic choice is with egg noodles. But, you can also try it with rice or other sides.

Here are some serving suggestions:

  • Egg noodles: a classic combination that pairs well with the creamy sauce
  • Rice: a lighter option that allows the flavors of the dish to shine
  • Roasted vegetables: adding some roasted vegetables such as broccoli or carrots can add texture and flavor to the dish

To make your beef stroganoff recipe more elegant, garnish it with fresh herbs or a dollop of sour cream. Serving it with crusty bread or crackers is also a great idea.

For a modern twist on the classic beef stroganoff, use different proteins like chicken or pork. You can also add unique ingredients like mushrooms or bell peppers. The key is to experiment and find what you like best.

Serving SuggestionsDescription
Egg NoodlesA classic combination that pairs well with the creamy sauce
RiceA lighter option that allows the flavors of the dish to shine
Roasted VegetablesAdding some roasted vegetables such as broccoli or carrots can add texture and flavor to the dish

Common Cooking Mistakes to Avoid

When making easy beef stroganoff, knowing common mistakes is key. These mistakes can ruin the dish. They include issues with temperature, sauce consistency, and timing.

Temperature control is crucial. Overcooking the beef or sauce makes it tough and dry. To avoid this, cook the beef to the right temperature and stir the sauce constantly.

Temperature Control Issues

Some common temperature control issues include:

  • Overcooking the beef, making it tough and dry
  • Scorching the sauce, leading to a bitter taste
  • Not cooking the dish to the recommended internal temperature, potentially leading to foodborne illness

By avoiding these mistakes, you can make a delicious and safe beef stroganoff. With practice, you’ll get better at cooking it and enjoy every meal.

Sauce Problems and Solutions

Sauce consistency is also important in beef stroganoff. A sauce that’s too thick or too thin can ruin the dish. To fix this, adjust the liquid in the sauce and stir constantly to avoid lumps.

Variations and Dietary Adaptations

There are many ways to make homemade beef stroganoff fit different tastes and diets. For those who can’t have gluten, using gluten-free flour or noodles is a good choice. This small change can make a big difference for those with gluten issues, letting them enjoy a tasty and creamy dish.

For those who can’t have dairy, non-dairy milk or cheese can be used to make a creamy sauce. This is great for those with lactose intolerance or dairy allergies. Almond milk, soy milk, and coconut milk are popular choices. They help keep the sauce rich and creamy.

Modern Twists

There are also many new ways to make beef stroganoff. You can use different proteins like chicken or pork, or add new veggies like bell peppers or mushrooms. Trying different seasonings and spices can also give the dish a unique taste. A little paprika or thyme can add a lot of flavor to the sauce.

Gluten-Free Options

  • Use gluten-free flour to make a gluten-free roux
  • Choose gluten-free noodles, such as rice noodles or quinoa noodles
  • Be mindful of cross-contamination with gluten-containing ingredients

Exploring these variations can help you make a homemade beef stroganoff that fits your needs. Whether you’re looking for a gluten-free, dairy-free, or a modern twist, there are many ways to make it your own. So, get creative and enjoy a delicious and creamy beef stroganoff!

Conclusion: Mastering Your Homemade Beef Stroganoff

Exploring the classic beef stroganoff recipe shows us its rich history and key elements. Mastering this dish means paying close attention to every detail. It also requires using high-quality ingredients.

Choosing the right beef and making a creamy mushroom sauce are crucial steps. Each step is important for a perfect dish.

By using the techniques and tips from this guide, you can make your beef stroganoff even better. Make sure to prepare and sear the beef well. Also, simmer the sauce gently for the right consistency.

Don’t be afraid to try new things to make it your own. With practice, you’ll soon be making beef stroganoff like a pro.

So, get your ingredients ready and start cooking. You’ll impress everyone with your delicious homemade beef stroganoff. Bon appétit!

FAQ

What is the origin of beef stroganoff?

Beef stroganoff comes from Russian cuisine. It was a dish with sautéed beef in a sour cream sauce. It became popular in the U.S. and is now a beloved comfort food.

What are the best cuts of beef to use for beef stroganoff?

For beef stroganoff, use tender cuts like sirloin, ribeye, or filet mignon. These cuts stay tender and flavorful in the sauce.

How do I prepare the beef for beef stroganoff?

Slice the beef thinly against the grain for tender bites. You can also tenderize it by pounding lightly or marinating in wine or soy sauce.

What are the key ingredients in a classic beef stroganoff?

A classic beef stroganoff includes tender beef, mushrooms, onions, garlic, and beef broth. It also has sour cream and spices like Dijon mustard and paprika.

How do I make the creamy mushroom sauce for beef stroganoff?

Start by sautéing mushrooms and onions in butter. Then, make a roux with flour, beef broth, and sour cream. Season with salt, pepper, and spices for a creamy sauce.

What are some common serving suggestions for beef stroganoff?

Serve beef stroganoff over egg noodles, rice, mashed potatoes, or crusty bread. Garnish with parsley, chives, or a dollop of sour cream.

Can I make beef stroganoff ahead of time?

Yes, you can make beef stroganoff ahead of time. The flavors get better as it sits. Just store the beef and sauce separately and reheat gently.

What are some variations or dietary adaptations of beef stroganoff?

You can make beef stroganoff with chicken or turkey for a change. There are also gluten-free and dairy-free versions. Adding veggies like peas or spinach makes it healthier.

Overnight Oats: Easy, Healthy Breakfast

What makes a perfect breakfast? Is it quick to make, or full of nutrients? Overnight oats offer both. They mix rolled oats, milk, and your favorite ingredients in a jar. This makes a tasty, healthy meal ready for morning.

Starting your day with overnight oats gives you energy and satisfaction. But what are overnight oats, and how can you make them a daily part? We’ll dive into the world of overnight oats and guide you to begin.

Key Takeaways

  • Overnight oats are a convenient and healthy breakfast option
  • They can be made with a variety of ingredients, including rolled oats, milk, and fruit
  • Overnight oats are easy to prepare and can be ready to go in the morning
  • This healthy recipe is packed with nutrients and can provide a boost of energy
  • Overnight oats are a great way to start your day and can be customized to suit your tastes

What Are Overnight Oats?

Overnight oats are a quick breakfast favorite for many. They are made by soaking oats in milk or another liquid overnight. This makes them soft and ready to eat in the morning. This no-cook oats method has gained popularity thanks to social media and the desire for healthy, easy meals.

The history of overnight oats is not well-known, but it’s thought to have started in Europe. Oats were a common food there. The idea of soaking oats in liquid overnight for a quick breakfast has been around for centuries. But the modern version, with its many flavors and toppings, is a more recent trend.

The Basic Concept

To make overnight oats, you mix rolled oats, milk, and flavorings or toppings in a jar. Then, you refrigerate it overnight. In the morning, the oats are soft and ready to eat. You can top them with fresh fruit, nuts, or other favorites.

History and Origins

The exact start of overnight oats is unclear, but it’s believed to come from traditional European porridge. Soaking oats in liquid overnight for a quick breakfast has been a long-standing tradition. Recently, social media and food bloggers have made it more popular.

Overnight oats are loved for their convenience, health benefits, and flexibility. They’re a quick breakfast that can be made ahead of time, perfect for busy mornings. They’re also nutritious, high in fiber, and can be customized with various toppings. This makes them a hit for people with different dietary needs.

These are just a few tasty ways to enjoy overnight oats. Their ease, health benefits, and adaptability have made them a favorite no-cook oats choice for many.

Essential Ingredients for Perfect Overnight Oats

To make delicious oats, you need a few key ingredients. These are rolled oats, milk or a milk substitute, and a sweetener or flavor. Overnight oats are great because you can add many ingredients to make them your own.

Some common ingredients in overnight oats include:

  • Fruits such as berries, bananas, or mangoes
  • Nuts like almonds, walnuts, or pecans
  • Seeds like chia, flax, or hemp
  • Spices such as cinnamon, vanilla, or nutmeg

Overnight oats are perfect for breakfast. They’re easy to make, healthy, and can fit your diet. By mixing your favorite ingredients with oats, you get a nutritious breakfast that lasts all morning.

To start, mix your ingredients in a jar or container and chill it overnight. In the morning, you’ll have a tasty breakfast ready. With a bit of creativity, you can make many different breakfasts using overnight oats.

IngredientQuantityOptional
Rolled Oats1/2 cupNo
Milk or Milk Alternative1/2 cupNo
Fruit1/2 cupYes
Nuts or Seeds1 tablespoonYes

The Health Benefits of Starting Your Day with Overnight Oats

Starting your day with overnight oats can greatly improve your health. These oats are a fantastic breakfast choice. They give you energy and help with digestion. The fiber in oats keeps your bowel movements regular and prevents constipation.

Overnight oats are also packed with nutrients. They have protein, healthy fats, and complex carbs. This makes them a great way to start your day with a healthy meal. Some key benefits include:

  • Improved digestive health due to the high fiber content
  • Support for healthy blood sugar levels
  • Aid in weight management by keeping you fuller for longer

Adding overnight oats to your breakfast can boost your energy. There are many tasty and easy recipes to try.

NutrientAmount per serving
Fiber4-6 grams
Protein10-15 grams
Healthy fats10-15 grams

Overall, overnight oats are a nutritious and tasty breakfast option. They offer many health benefits. By making them a daily part of your routine, you can improve your health and enjoy a delicious meal.

Step-by-Step Guide to Making Overnight Oats

Making overnight oats is easy and quick. It’s a great way to start your day with a healthy easy breakfast. Just mix your oats, milk, and any flavorings or sweeteners in a jar or container.

Here’s how to do it:

  • Combine oats, milk, and flavorings in a jar or container
  • Mix well to ensure all ingredients are fully incorporated
  • Cover the jar or container and refrigerate overnight or for at least 4 hours
  • In the morning, your quick breakfast will be ready to eat

By following these steps, you can have a tasty and healthy easy breakfast for busy mornings. Plus, you can add your favorite ingredients. This makes it a quick breakfast that you’ll love.

With this guide, you can make your own overnight oats. Enjoy a healthy and convenient easy breakfast option every day.

IngredientQuantity
Rolling Oats1/2 cup
Milk1 cup
Flavorings (optional)1 tablespoon

Best Container Options and Storage Tips

Choosing the right container is key when making no-cook oats. Mason jars are a favorite because they’re easy to use and look good. But, any container with a lid works well for storing oats.

Storing oats in the fridge is important to keep them fresh and safe. Here are some tips for storing overnight oats:

  • Use a container with a tight-fitting lid to prevent contamination and spoilage.
  • Keep the container in the refrigerator at a temperature of 40°F (4°C) or below.
  • Consume the oats within 5 days of preparation.

Container Options

Other good containers for overnight oats include glass or plastic containers with lids. Pyrex or Tupperware are great options.

Storage Methods

To keep your oats fresh, store them in the fridge at a steady temperature. Freezing them for up to 2 months is also an option.

Shelf Life

Overnight oats can last up to 5 days in the fridge if stored right. Always check for any signs of spoilage before eating, like a bad smell or slimy texture.

Container TypeShelf LifeStorage Method
Mason Jar5 daysRefrigerator
Glass Container5 daysRefrigerator
Plastic Container5 daysRefrigerator

Top Flavor Combinations and Mix-ins

Overnight oats are a great way to start your day. They let you try out many flavors and mix-ins. This makes it easy to find a healthy recipe that you’ll love.

Some favorite flavors are vanilla and cinnamon, peanut butter and banana, and pumpkin spice. You can also add fruits, nuts, or spices to make your oats even better. Try adding sliced bananas, almonds, or cinnamon for extra taste and health benefits.

Here are some more ideas for flavor combinations and mix-ins:

  • Berry bliss: mix in some fresh or frozen berries, such as blueberries or strawberries, for a sweet and antioxidant-rich breakfast
  • Tropical twist: add some diced mango or pineapple to give your oats a tropical flavor
  • Nutty delight: mix in some chopped nuts, such as walnuts or pecans, for a crunchy texture and a boost of healthy fats

Remember, the key to a tasty and healthy recipe is to keep trying new things. With overnight oats, you can explore endless breakfast ideas every day.

Common Mistakes to Avoid When Preparing Overnight Oats

Making overnight oats for a quick breakfast requires avoiding common mistakes. The wrong ratio of oats to liquid can make them too dry or soggy. It’s key to balance the ingredients for the perfect texture.

Temperature matters too. Cold ingredients can slow down soaking. Old oats or poor mixing can also cause texture problems.

Ingredient Ratios

Start with the right ingredient ratios to avoid mistakes. Use 1/2 cup of oats with 1/2 cup of liquid like milk or yogurt. Adjust this as you like, but it’s a good starting point.

Temperature Considerations

Temperature is crucial for overnight oats. Cold ingredients slow soaking, leading to uncreamy oats. Use room temperature ingredients for the best results.

Texture Issues

Texture problems are common in overnight oats. Old oats or poor mixing can make them too dense or watery. Use fresh oats and mix well to avoid this.

By following these tips, you can make a delicious, quick breakfast. It’s perfect for any day of the week.

Seasonal Variations for Year-Round Enjoyment

Delicious oats are perfect for any time of the year. You can make them exciting by adding seasonal ingredients. For example, in fall, pumpkin puree or cinnamon can add a cozy flavor.

In winter, cranberries or orange zest bring a burst of citrus. Spring and summer are great for adding fresh berries like strawberries or raspberries. These changes keep your breakfasts interesting and delicious all year.

  • Apples or pears in the fall
  • Cranberries or cherries in the winter
  • Bananas or mangoes in the spring
  • Peaches or pineapples in the summer

These add natural sweetness and essential vitamins and minerals. By using seasonal ingredients, you can enjoy healthy and tasty breakfasts all year.

With a bit of creativity, overnight oats can be a fun and healthy breakfast any time of the year. Try these seasonal variations and start your day with a delicious bowl of oats.

SeasonIngredientsFlavor Combinations
FallPumpkin puree, cinnamon, applesPumpkin spice, apple cinnamon
WinterCranberries, orange zest, cherriesCranberry orange, cherry vanilla
SpringFresh berries, bananas, mangoesStrawberry banana, mango peach
SummerPeaches, pineapples, coconut flakesPeach coconut, pineapple upside-down cake

Making Overnight Oats for Special Dietary Needs

Overnight oats can be made to fit many dietary needs. This makes them a great choice for those with special requirements. It’s easy to make changes to suit different needs, making them a flexible breakfast option.

For those with gluten intolerance, using gluten-free oats is a simple fix. This change lets them enjoy oats without worrying about gluten reactions. Vegans can also make their oats cruelty-free by using plant-based milks and avoiding honey.

To lower sugar, try using natural sweeteners like stevia or monk fruit. You can also use less sweetener. These tweaks make oats healthier and better for those watching their sugar intake. They ensure a tasty, easy breakfast that fits your dietary needs.

Gluten-Free Options

  • Use gluten-free oats as a direct substitute in any overnight oats recipe.
  • Explore different types of gluten-free milks to find the one that works best for you.

Vegan Adaptations

  • Choose plant-based milk alternatives like almond, soy, or coconut milk.
  • Avoid using honey; instead, opt for maple syrup or other vegan-friendly sweeteners.

Low-Sugar Alternatives

  • Use natural sweeteners like stevia or monk fruit to reduce sugar content.
  • Limit the amount of sweetener used in the recipe to minimize sugar intake.

By making these changes, you can make a healthy breakfast that fits your needs. Whether you need gluten-free, vegan, or low-sugar options, overnight oats can be adapted. This makes them a favorite for many, as they’re easy to customize for any diet.

Time-Saving Meal Prep Strategies with Overnight Oats

Overnight oats are a fantastic way to get a quick breakfast in the morning. You can make several jars at once. This means you have a healthy breakfast for every day of the week. It’s a great choice for meal prep, saving you time during the week.

To make meal prep even easier, scale up your recipe and prep ingredients ahead of time. Use containers that are easy to carry, like mason jars or ones with lids. This makes it simple to take your oats on the go.

Here are some tips for meal prepping with overnight oats:

  • Prepare a large batch of oats and divide it among multiple containers
  • Add different toppings or flavorings to each container to keep things interesting
  • Store the containers in the refrigerator and grab one on your way out the door in the morning

By using no-cook oats in your meal prep, you save time and have a healthy breakfast ready. A bit of planning and prep work means you can enjoy a tasty breakfast every day.

Conclusion

Overnight oats have become a great breakfast choice for many. They are easy to make and offer lots of health benefits. This breakfast is perfect for those looking for a quick and healthy start to their day.

With overnight oats, you can try new flavors and ingredients. You can add fresh fruits, nuts, or even spices. This makes your breakfast exciting and tailored to your taste.

As we’ve seen, overnight oats are not just tasty but also good for you. They can help you feel energized and ready for the day. Adding them to your morning routine can make a big difference in your health and happiness.

FAQ

What are overnight oats?

Overnight oats are a simple breakfast. They involve soaking rolled oats in milk or another liquid overnight. This makes them soft and ready to eat in the morning.

What are the essential ingredients for making overnight oats?

To make overnight oats, you need rolled oats, milk, and a sweetener or flavoring. You can also add fruits, nuts, seeds, and spices to make it your own.

What are the health benefits of eating overnight oats?

Overnight oats are very nutritious. They are high in fiber, which is good for your digestive health and blood sugar. They also help you feel full longer, which can aid in weight management.

What is the best way to store overnight oats?

Store overnight oats in an airtight container, like a mason jar, in the fridge. This way, they can last up to 5 days.

Popular flavors include vanilla and cinnamon, peanut butter and banana, and pumpkin spice. You can also mix fruits and nuts for different tastes.

How can I adapt overnight oats for special dietary needs?

For gluten-free oats, use gluten-free oats. For vegan options, use plant-based milks and avoid honey. For less sugar, try stevia or monk fruit.

What are some time-saving meal prep strategies with overnight oats?

Overnight oats are great for meal prep. You can make many jars at once. This way, you have a healthy breakfast ready for each day of the week.

Tasty Ground Beef Tacos: The Perfect Recipe

What makes a ground beef tacos recipe unforgettable? Is it the quality of ingredients, the cooking method, or something else? To make perfect ground beef tacos, you need to think about these things. A great recipe can turn this classic dish into a favorite at home.

With the right mix of flavors and textures, your ground beef tacos will be a hit. Everyone will want more of this delicious dish.

Introduction to Ground Beef Tacos

A top ground beef tacos recipe starts with quality ingredients and a simple cooking method. By following a few steps and using the right ingredients, you can make a flavorful and authentic dish. Whether you’re experienced or new to cooking, a good recipe can help you make restaurant-quality tacos at home.

Ground beef tacos are loved for their rich flavors and hearty texture. A well-made recipe will quickly become a favorite among your family and friends.

Key Takeaways

  • Quality ingredients are essential for a great ground beef tacos recipe
  • A simple cooking method can help bring out the best flavors in your dish
  • Using the right combination of spices and seasonings can elevate your ground beef tacos recipe
  • A good ground beef tacos recipe can be customized to suit your tastes and preferences
  • With the right ingredients and cooking method, you can create a dish that’s both delicious and satisfying
  • A well-crafted ground beef tacos recipe can become a staple in your household

The History and Evolution of Ground Beef Tacos

Ground beef tacos have a rich history that spans the border of Mexico and the United States. Their evolution is a fascinating story. It shows how traditional Mexican cuisine blended with American tastes.

In traditional Mexican cuisine, tacos are a staple. They consist of a corn tortilla filled with meats, cheeses, and vegetables. The idea of easy ground beef tacos came to the United States from Mexican immigrants. They brought their culinary traditions with them.

Over time, American-style ground beef tacos emerged. They are filled with ground beef, lettuce, tomatoes, and cheese. They are wrapped in a crispy taco shell.

Traditional Mexican Tacos vs. American-Style Ground Beef Tacos

Traditional Mexican tacos use fresh, handmade tortillas. They are filled with meats like carnitas, al pastor, or carne asada. American-style ground beef tacos, on the other hand, use store-bought tortillas. They are filled with seasoned ground beef.

The differences between these tacos show the cultural exchange and adaptation. This happened as Mexican cuisine was introduced to the United States.

How Ground Beef Tacos Became an American Favorite

The popularity of ground beef tacos in the United States is due to their convenience and affordability. As Americans became more interested in international cuisine, the demand for easy ground beef tacos grew. Today, they are a staple in many American restaurants and households.

Their evolution is a testament to the power of cultural exchange and culinary innovation.

Essential Ingredients for Perfect Ground Beef Tacos

To make the best ground beef tacos, you need the right ingredients. The type of ground beef, spices, and toppings are key. They all help make a delicious and authentic taco.

Choose high-quality ground beef that’s lean and fresh. Consider grass-fed or organic beef for a better taste and a sustainable choice.

Some must-have spices and seasonings for best ground beef tacos include:

  • Cumin
  • Chili powder
  • Paprika
  • Garlic powder
  • Salt and pepper

How you prepare and cook the ground beef matters too. Make sure to cook it until it’s brown and fully cooked. Then, season it with your favorite spices and toppings.

IngredientQuantity
Ground beef1 pound
Cumin1 teaspoon
Chili powder1 teaspoon

With the right ingredients and these tips, you can make the best ground beef tacos. They’re sure to impress anyone.

Kitchen Tools and Equipment You’ll Need

To make delicious simple ground beef tacos, you need the right tools. Having the right items makes cooking easier and faster. Start by getting a large skillet, cutting board, and utensils like spatulas and tongs.

Basic Equipment Requirements

For simple ground beef tacos, you’ll need a few key tools. These include:

  • A large skillet for browning the ground beef
  • A cutting board for chopping onions, lettuce, and other toppings
  • Utensils like spatulas and tongs for handling the food

Optional Tools for Enhanced Preparation

Some optional tools can make preparation better. You might want a food processor for chopping and a grill for smoky flavor. With the right tools, you can make tasty simple ground beef tacos everyone will enjoy.

Storage Containers and Serving Dishes

Don’t forget about storage and serving items. You’ll need these to keep ingredients fresh and serve your tacos. Choose airtight containers and attractive, functional serving dishes.

Selecting and Preparing the Right Ground Beef

Choosing the right ground beef is key for quick ground beef tacos. You need a flavor-packed and safe option. Ground beef comes in lean and regular types. Lean is better for health, with less fat.

To cook the ground beef safely, follow some steps. Store it in a sealed container at 40°F (4°C) or below. Cook it to 160°F (71°C) or higher. A food thermometer helps check the temperature.

  • Choose a ground beef with a fat content that suits your taste preferences
  • Handle the ground beef safely to avoid cross-contamination
  • Cook the ground beef to an internal temperature of at least 160°F (71°C)

By following these tips, you can enjoy delicious and safe quick ground beef tacos. Always keep food safety in mind when handling and cooking ground beef.

The Ultimate Ground Beef Tacos Recipe

To make tasty ground beef tacos, you need a good recipe. The secret is using the right seasonings and cooking methods. Start by seasoning the ground beef with cumin, chili powder, and paprika.

A great recipe should guide you on seasoning, cooking, and assembling the tacos. Here are the key steps:

Meat Seasoning Instructions

  • Use 1 lb of ground beef and add 1/2 teaspoon of cumin, 1/2 teaspoon of chili powder, and 1/4 teaspoon of paprika.
  • Mix well and let it sit for a few minutes to allow the flavors to blend.

Cooking Temperature and Time

Cook the ground beef in a large skillet over medium-high heat. Break it up into small pieces as it cooks. Aim for a temperature of 375°F and cook for 5-7 minutes, until it’s fully browned.

Assembly Steps

To assemble the tacos, place cooked ground beef in a taco shell. Add your favorite toppings like shredded lettuce, diced tomatoes, and cheese.

By following this recipe, you’ll make delicious and authentic tacos. They’re perfect for a quick meal or a flavorful dish for your next gathering.

Fresh Toppings and Garnishes

When making homemade ground beef tacos, the toppings and garnishes are key. Fresh, quality ingredients can boost the flavor and texture. This makes the tacos truly memorable. For the best tacos, mix traditional and modern toppings.

A classic choice is lettuce, tomatoes, and cheese. These add a crisp, refreshing contrast to the savory ground beef. But, for something new, try avocado, salsa, or sour cream.

Traditional Toppings

  • Lettuce
  • Tomatoes
  • Cheese
  • Cilantro

Creative Modern Additions

  • Avocado
  • Salsa
  • Sour cream
  • Diced onions

By mixing traditional and modern toppings, you can create a unique flavor. Whether you prefer classic or adventurous, the right toppings make a big difference.

ToppingDescription
LettuceA crisp, refreshing green that adds texture to the tacos
AvocadoA creamy, rich fruit that adds a unique flavor and healthy fats
SalsaA spicy, tangy sauce that adds a burst of flavor to the tacos

Homemade Taco Sauce and Condiments

For simple ground beef tacos, the right condiments are key. Making your own taco sauce and condiments is simple. It lets you tailor the flavors to your taste. For quick tacos, having various condiments adds that extra flavor.

To start, you’ll need basic ingredients like diced tomatoes, onions, garlic, and jalapenos. These can make salsa, guacamole, and sour cream. Experimenting with different combinations helps find the perfect flavor for your tacos.

Here are tips for making your own taco sauce and condiments:

  • Use fresh, high-quality ingredients for the best flavor.
  • Don’t be afraid to try new ingredient combinations.
  • Adding a squeeze of fresh lime juice can add a citrus burst.

By making your own taco sauce and condiments, you can add a personal touch. Whether you want a spicy kick or a tangy twist, the right condiments elevate your tacos.

Homemade condiments are a great way to add a personal touch to your tacos and make them truly special.

Tips for Achieving the Perfect Texture

To make a great ground beef tacos recipe, focus on the perfect texture. Cook the meat right and choose the right taco shells. A well-cooked dish can greatly improve the meal’s flavor and satisfaction.

Cooking techniques are key to the ground beef’s texture. Overcooking makes it dry and tough, while undercooking makes it soft and unappealing. To get it just right, cook the beef to the recommended internal temperature.

Meat Cooking Techniques

  • Cook the ground beef in a skillet over medium-high heat, breaking it up into small pieces as it cooks.
  • Use a thermometer to ensure the internal temperature reaches 160°F (71°C) for optimal food safety and texture.
  • Avoid overmixing the ground beef, as this can lead to a dense and tough texture.

The type of taco shells also affects the dish’s texture. For an easy ground beef tacos recipe, crunchy taco shells are best. They hold their shape and add a nice crunch.

Shell Preparation Methods

To prepare the taco shells, warm them up in the oven or microwave as the package says. This crisps up the shells and improves their texture. Pair the perfectly cooked ground beef with crunchy taco shells for a dish that will impress everyone.

Making Ground Beef Tacos Ahead of Time

Preparing homemade ground beef tacos in advance can save time and ensure a tasty meal. It’s key to follow storage and reheating tips to keep the flavor and texture right. This way, your tacos will always be delicious.

When you make tacos ahead, store the parts separately. This means the cooked beef, tortillas, and toppings. This makes it easy to put the tacos together when you’re ready to eat.

Storage Guidelines

  • Store cooked ground beef in an airtight container in the refrigerator for up to 3 days.
  • Keep tortillas fresh by storing them in a cool, dry place or freezing them for up to 2 months.
  • Prepare toppings such as diced tomatoes, shredded lettuce, and diced avocado just before serving for optimal freshness.

Reheating Instructions

To reheat cooked ground beef, simply microwave it for 30-60 seconds or heat it in a pan over medium heat until warmed through. Assemble the tacos by placing the reheated ground beef onto a tortilla and adding your desired toppings.

By following these storage and reheating guidelines, you can enjoy delicious homemade ground beef tacos anytime. Whether it’s for a weeknight dinner or a weekend gathering, making tacos ahead of time makes things easier and more efficient.

Taco ComponentStorage MethodShelf Life
Cooked Ground BeefAirtight container in refrigeratorUp to 3 days
TortillasCool, dry place or freezerUp to 2 months
ToppingsPrepare just before servingBest when fresh

Common Mistakes to Avoid

When making simple ground beef tacos, it’s easy to make mistakes. These can ruin the dish. To make perfect quick ground beef tacos, avoid overcooking the meat, using low-quality ingredients, and not preparing taco shells right.

Some common mistakes to avoid include:

  • Overcooking the ground beef, making it dry and tough
  • Using low-quality ingredients, such as old spices or stale tortillas
  • Not preparing the taco shells properly, leading to a soggy or brittle texture

To avoid these mistakes, follow some simple tips. First, cook the ground beef until it’s just browned. Then, season it with fresh spices. Second, use high-quality ingredients like fresh lettuce and diced tomatoes. Finally, prepare taco shells as the package says, or make your own for a crispy texture.

By following these tips and avoiding common mistakes, you can make delicious simple ground beef tacos. They will please even the pickiest eaters. Whether for a weeknight dinner or a weekend gathering, with practice and patience, you’ll get better fast.

MistakeTip to Avoid
Overcooking the meatCook until just browned, then season with fresh spices
Using low-quality ingredientsUse fresh lettuce, diced tomatoes, and other high-quality ingredients
Not preparing the taco shells properlyFollow package instructions or make your own homemade shells

Healthy Adaptations and Dietary Modifications

Enjoying ground beef tacos can be healthy with the right tweaks. You can make easy ground beef tacos for different tastes and needs. Whether you want low-fat, gluten-free, or keto-friendly options, there are many ways to adapt the recipe.

Using fresh, wholesome ingredients is key for healthy tacos. Choose leaner ground beef or try turkey or chicken for less fat. Use whole-wheat or gluten-free tortillas for those with dietary restrictions.

Low-Fat Options

For less fat, consider leaner ground beef and less cheese. Add more veggies like lettuce, tomatoes, and bell peppers. Use herbs and spices for flavor instead of high-fat sauces.

Gluten-Free Variations

Make gluten-free tacos with gluten-free tortillas or lettuce wraps. Try different gluten-free seasonings and sauces. Use corn tortillas, gluten-free taco shells, or portobello mushroom caps for a low-carb option.

Keto-Friendly Alternatives

Keto tacos can be made with low-carb tortillas or lettuce wraps. Add avocado and sour cream for high fat. Use ground beef and cheese for more protein. These tweaks make keto tacos delicious and diet-friendly.

Conclusion

As we wrap up this guide on making the perfect homemade ground beef tacos, we invite you to become a taco expert. Try different ingredients and methods. The best ground beef tacos are what you like best, so feel free to mix and match.

Ground beef tacos can be anything from traditional Mexican to something entirely new. Their flexibility lets you get creative in the kitchen. Most importantly, enjoy the process and the joy of sharing these tasty meals.

Now that you know more about making tacos, you can impress everyone. Get ready to cook and make delicious tacos. It’s time to start your taco adventure!

FAQ

What are the key ingredients for making the perfect ground beef tacos?

To make great ground beef tacos, you need quality ground beef and taco seasoning. Don’t forget diced onions, minced garlic, and taco shells or tortillas. Toppings like shredded lettuce, diced tomatoes, and cheese can make them even better.

How do I properly cook the ground beef for tacos?

Start by browning the ground beef in a skillet over medium-high heat. Break it into small pieces as it cooks. Drain any extra fat. Add taco seasoning and a bit of water, then simmer until the flavors mix well and the liquid is gone.

What are some creative topping and garnish options for ground beef tacos?

Try adding avocado, diced onions, and sliced jalapeños for a twist. Fresh cilantro, salsa, and crumbled cheese like queso fresco or cotija can also add flavor.

Can I make ground beef tacos ahead of time?

Yes, you can make them ahead. Store the cooked beef in an airtight container in the fridge for 3-4 days. Reheat it and add your favorite toppings for a quick meal.

What are some common mistakes to avoid when making ground beef tacos?

Avoid overcooking the beef and using low-quality meat. Don’t forget to drain the fat and prepare taco shells right. Too many toppings or unbalanced flavors can also ruin the tacos.

Can I make healthier versions of ground beef tacos?

Definitely! Use lean beef and whole-wheat wraps or lettuce instead of taco shells. Add more veggies and choose low-fat cheese or Greek yogurt. Homemade taco seasoning can also cut down on sodium.

The Best Beef Stew Recipe for Cozy Nights

What makes a perfect beef stew recipe for a cold winter night? Is it the tender chunks of beef, the rich flavors of the broth, or the ease of preparation? A delicious beef stew recipe can be the ultimate comfort food, providing warmth and satisfaction on a chilly evening. With an easy beef stew recipe, you can create a hearty meal that’s perfect for cozy nights in with family and friends.

A great beef stew recipe should be easy to make, using simple ingredients and straightforward cooking techniques. The best beef stew recipe will result in a dish that’s both flavorful and comforting, making it an ideal choice for a cold winter’s night. By following a simple and easy beef stew recipe, you can create a delicious meal that’s sure to become a favorite.

Key Takeaways

  • Beef stew is a comforting and satisfying meal for cold winter nights
  • An easy beef stew recipe can be made with simple ingredients and techniques
  • A great beef stew recipe should result in tender beef and rich flavors
  • Beef stew is a perfect dish for cozy nights in with family and friends
  • A simple beef stew recipe can be customized to suit your tastes and preferences
  • Beef stew is a hearty and comforting meal that’s easy to make and enjoy

Why Beef Stew Is the Ultimate Comfort Food

Beef stew has been a comfort food for centuries. Its rich flavors and hearty ingredients are perfect for cold winter nights. A warm, delicious bowl of homemade beef stew brings nostalgia and comfort, making it great for family gatherings and special occasions.

The history of beef stew goes back to ancient times. It was found in medieval European cuisine. Over time, different regions added their own twists, creating a variety of flavors and ingredients. For a real experience, try a best beef stew recipe with fresh, local ingredients.

The History of Beef Stew

Beef stew has a long history in European cuisine. It was made with tough meat, slow-cooked in broth to make it tender and flavorful.

Health Benefits of Homemade Stew

Making homemade beef stew is healthy. It uses fresh ingredients, has low sodium, and is high in protein. It’s a great choice for a nutritious and satisfying meal.

Why This Recipe Stands Out

This best beef stew recipe is special because of its unique spices and cooking methods. The mix of tender beef, fresh veggies, and rich broth gives a memorable flavor.

  • High-quality protein from the beef
  • Fresh, locally sourced ingredients
  • Low sodium content
  • Rich, flavorful broth

By using this best beef stew recipe, you can make a delicious, comforting meal. It’s perfect for any occasion, whether it’s a hearty homemade beef stew for a cold winter night or a special dish for a family gathering.

Essential Ingredients for the Perfect Beef Stew Recipe

To make a delicious beef stew recipe, you’ll need tender beef, fresh veggies, and spices. These ingredients are easy to find. You can also adjust the recipe to fit your taste.

Some key ingredients for an easy beef stew recipe are:

  • Beef: Choose a cut like chuck or round for slow cooking.
  • Vegetables: Onions, carrots, potatoes, and celery are great for a beef stew recipe.
  • Spices: Bay leaves, thyme, and rosemary add flavor to the stew.

A good beef stew recipe is about balance and harmony. With the right ingredients and patience, you can make a hearty dish. It’s perfect for cozy nights.

Following a simple easy beef stew recipe lets you enjoy a tasty meal. It’s sure to become a favorite.

IngredientQuantity
Beef1 pound
Onions2 medium
Carrots3 medium

Choosing and Preparing Your Beef

Choosing the right beef is key to a great homemade beef stew. Use cuts like chuck, brisket, or round for a tender stew. These cuts need longer cooking but make the stew rich and satisfying.

Start by trimming off any extra fat from the beef. This keeps the stew from getting too oily. Cut the beef into small cubes, so they cook evenly. Seasoning with salt, pepper, and herbs will make the beef taste even better.

Best Cuts for Stewing

  • Chuck: A classic choice for beef stew, chuck is tender and flavorful.
  • Brisket: A leaner cut, brisket becomes tender and juicy when cooked low and slow.
  • Round: A lean cut that is perfect for stewing, round is packed with flavor and texture.

How to Trim and Cube Beef

Trimming and cubing beef is easy. Just use a sharp knife to remove excess fat. Then, cut the beef into cubes of the same size for even cooking.

Proper Seasoning Techniques

Seasoning is crucial for great beef flavor. Mix salt, pepper, and herbs for depth and complexity. Adding garlic or onion powder can also enhance the flavor of your stew.

Cut of BeefCooking TimeFlavor Profile
Chuck2-3 hoursRich and tender
Brisket3-4 hoursLean and juicy
Round2-3 hoursLean and flavorful

Required Kitchen Equipment and Tools

To make a tasty beef stew recipe, you’ll need some basic kitchen tools. You probably already have most of them. For an easy beef stew recipe, you’ll need a large pot, a cutting board, and some utensils.

Here are the essential tools you’ll need:

  • A large pot with a heavy bottom (at least 3-quart capacity)
  • A cutting board for chopping vegetables and meat
  • A set of utensils, including a wooden spoon, slotted spoon, and tongs
  • A colander or strainer for draining excess liquid

When picking your tools, think about the material and how long they’ll last. A stainless steel pot is good because it’s easy to clean and can handle high heat. A wooden cutting board is also a smart choice because it’s kind to knives and simple to keep clean.

With the right kitchen tools, making your beef stew recipe will be a breeze. It will be a truly easy beef stew recipe to follow.

EquipmentDescription
Large Pot3-quart capacity, heavy bottom
Cutting BoardWooden or plastic, for chopping vegetables and meat
UtensilsWooden spoon, slotted spoon, tongs

Step-by-Step Best Beef Stew Recipe

To make a delicious homemade beef stew, follow a well-structured recipe. The best beef stew recipe includes several key steps. These steps include browning the meat, preparing the vegetables, and creating the perfect broth.

The process starts with browning the meat. This step enhances the flavor and texture of the beef. Then, prepare the vegetables by chopping them into bite-sized pieces. The broth is made with beef stock and red wine, adding depth and richness.

Browning the Meat

Browning the meat is a key step in making the best beef stew. This process cooks the beef in a hot pan, creating a crispy exterior. This adds texture and flavor to the stew. To brown the meat, heat a tablespoon of oil in a large pan over medium-high heat. Then, add the beef and cook until browned on all sides.

Preparing the Vegetables

Preparing the vegetables is another important step in making a delicious homemade beef stew. This involves chopping the vegetables into bite-sized pieces and sautéing them in a pan until they’re tender. Common vegetables used in beef stew include carrots, potatoes, and onions.

By following these steps and using the best beef stew recipe, you can create a hearty and flavorful stew. It’s perfect for any occasion, whether you’re looking for a comforting meal on a cold winter night or a delicious dish to serve at a dinner party.

Secret Tips for Extra Tender Meat

To get extra tender meat in your beef stew recipe, follow some secret tips. Marinades are key. They help break down meat’s connective tissues, making it tender and tasty.

Slow cooking is also vital. Cooking meat slowly breaks down tissues, making it tender and juicy. This is crucial for an easy beef stew recipe. It lets flavors mix well and meat become tender.

Here are more tips for tender meat:

  • Use a meat tenderizer to break down connective tissues
  • Cook meat at a low temperature to keep it tender
  • Use a slow cooker for long, slow cooking

By using these tips, you can make a delicious, tender beef stew recipe. Always choose high-quality ingredients. Cook meat slowly and patiently for the best results.

Adding Vegetables: Timing and Techniques

When making homemade beef stew, timing is key for the perfect texture and taste. The best recipes include carrots, potatoes, and onions.

To get these veggies ready, peeling and chopping are crucial. Cut root veggies like carrots and potatoes into small pieces for even cooking. Onions can be chopped or sliced, depending on your preference.

The cooking times for these veggies differ. Add them to the stew 30-40 minutes before serving. This lets them cook fully and soak up the stew’s flavors. Here are some cooking times to remember:

  • Carrots: 20-25 minutes
  • Potatoes: 25-30 minutes
  • Onions: 15-20 minutes

By following these tips and using the best beef stew recipe, you’ll make a delicious, hearty stew. It’s perfect for any occasion.

Troubleshooting Common Stew Problems

Making a delicious beef stew recipe can sometimes come with a few hitches. To get your easy beef stew just right, knowing how to fix common problems is key. One common issue is a sauce that’s either too thin or too thick.

Fixing a sauce that’s off can be simple. If it’s too thin, cut down on the broth or wine. For a thicker sauce, add a bit more liquid. This will get your sauce just right.

Fixing Thin or Thick Sauce

Another problem is tough meat. To avoid this, cook your stew at a low heat for a long time. This breaks down the meat’s connective tissues, making it tender and flavorful. Also, browning the meat well before adding other ingredients boosts flavor and texture.

Dealing with Tough Meat

Seasoning is also crucial for a great beef stew. Taste the stew often and add salt, pepper, or herbs as needed. Adding bay leaves or thyme can also enhance the flavor. With these tips, you’ll make a delicious beef stew that everyone will love.

Adjusting Seasoning

Other issues like overcooked veggies or underseasoning can also happen. To avoid these, add veggies at the right time and season the stew often. With practice and patience, you’ll make a beef stew that’s perfect for any time.

Storage and Reheating Guidelines

After making your tasty homemade beef stew, it’s key to store and reheat it right. This keeps its flavor and texture just right. Cool the stew to room temperature first. Then, put it in an airtight container and chill it in the fridge within two hours.

For keeping it longer, freeze your best beef stew recipe. Split the stew into parts, put them in airtight containers or freezer bags. Don’t forget to label them with the date. When you reheat, make sure it hits 165°F (74°C) to stay safe.

  • Reheat the stew in the fridge overnight, then warm it up on the stovetop or in the microwave.
  • Use a microwave-safe dish to reheat, covering it with a lid or plastic wrap.
  • Don’t reheat the stew too many times to avoid foodborne illness.

By sticking to these tips, you can enjoy your best beef stew recipe for a longer time. And it will stay safe and delicious.

Serving Suggestions and Pairings

When serving your tasty beef stew, you have many choices. For an easy beef stew recipe, crusty bread or mashed potatoes are great. They match the stew’s rich flavors well.

Best Side Dishes

Other excellent side dishes include:

  • Roasted vegetables, such as carrots and Brussels sprouts
  • Garlic knots or other savory breads
  • A simple green salad with a light vinaigrette

Wine Pairing Recommendations

Choosing the right wine can make your meal better. For beef stew, try a red wine like Cabernet Sauvignon or Merlot. If you like white, Pinot Grigio or Chardonnay works well too.

Here’s a table with some wine pairing ideas:

Wine TypeWine Pairing
RedCabernet Sauvignon, Merlot
WhitePinot Grigio, Chardonnay

Conclusion

As we wrap up our exploration of the best homemade beef stew recipe, it’s clear this dish is special. It’s not just a meal; it’s a labor of love that brings warmth and comfort. Every bite showcases the power of patience and detail in cooking.

Whether you’re an experienced cook or just starting out, this recipe is a must-try. By following the steps and tips in this article, you’ll make a stew that rivals any restaurant. Feel free to add your own twist and discover flavors that are uniquely yours.

Enjoying the last spoonfuls of this dish is a treat. We encourage you to share your experiences and tips with others. The joy of cooking grows when we learn from each other. So, go ahead, show off your cooking skills, and enjoy the cozy, comforting taste of this timeless recipe.

FAQ

What are the essential ingredients for the perfect beef stew recipe?

For the perfect beef stew, you need tender beef, fresh veggies like carrots, potatoes, and onions. Also, add aromatic spices like garlic, thyme, and bay leaves. These ingredients make a rich, flavorful broth perfect for winter nights.

How do I choose and prepare the beef for the stew?

Choose chuck, brisket, or round for stewing. These cuts are tender and flavorful when cooked slowly. Trim excess fat, cube the meat, and season with salt, pepper, and herbs to enhance flavor.

What kitchen equipment and tools do I need to make the best beef stew?

You’ll need a large pot or Dutch oven, a cutting board, a sharp knife, and basic utensils. These tools are simple to find and use, making the recipe accessible.

What are the steps for making the perfect beef stew?

Start by browning the meat and preparing the veggies. Then, create a rich broth with beef stock and red wine. Simmer the stew at the right temperature and for the right time for a flavorful dish.

What are some tips for achieving extra tender meat in the beef stew?

For tender meat, use a marinade, slow cook at low temperatures, and season well. Avoid overcooking to keep the meat juicy and tender.

How do I troubleshoot common stew problems?

Common issues include a thin or thick sauce, tough meat, and unbalanced seasoning. To fix a thin sauce, thicken with a roux or cornstarch slurry. For tough meat, choose the right cut and cook slowly. Adjust seasoning with salt, pepper, or herbs to balance flavors.

What are the best ways to store and reheat the beef stew?

Store the stew in airtight containers in the fridge or freezer. Reheat safely on the stovetop or in the microwave. This keeps the stew flavorful and textured.

What are the best side dishes and wine pairings for the beef stew?

Serve with crusty bread, mashed potatoes, and roasted veggies. For wine, a full-bodied Cabernet Sauvignon or Merlot pairs well. A lighter Chardonnay or Pinot Grigio also complements the stew’s rich flavors.

The Best Waffle Recipe: Fluffy, Homemade Waffles

What makes a great waffle recipe? How can you make the fluffiest, most delicious homemade waffles in your kitchen? A good waffle recipe is key for a perfect breakfast. With the right ingredients and equipment, you can impress your family and friends with easy waffles.

Making homemade waffles has many benefits. You can customize the recipe to your taste. With the best waffle recipe, you can try different flavors and textures.

Key Takeaways

  • Using the right ingredients is key for a great waffle recipe
  • A good waffle iron makes a big difference in your homemade waffles
  • An easy waffle recipe can be tailored to your taste
  • Making homemade waffles is a fun and rewarding experience
  • The best waffle recipe lets you try many delicious flavors and textures
  • Don’t worry if your first batch of homemade waffles isn’t perfect

The History of Waffles: From Medieval Times to Modern Breakfast

Waffles have a long history, starting in medieval times. The idea of breakfast waffles we enjoy today is newer. But cooking batter between two hot irons has been around for ages. The first waffle irons were simple, made of iron, but later got more complex with fancy designs.

The change in waffle irons helped shape the waffle recipe. As irons became common, people tried new ingredients and cooking ways. This led to different waffles, like the Belgian and American styles. Homemade waffles became a family tradition, with recipes passed down through generations.

Origin of the Belgian Waffle

The Belgian waffle comes from Belgium and is known for its light texture. It’s made with yeast and cooked in a deep grid iron. Today, it’s a favorite breakfast dish worldwide, often topped with whipped cream, fruit, and syrup.

Evolution of Waffle Irons

Waffle irons have greatly evolved. Now, they’re made with non-stick materials and have cool features. You can find irons with adjustable heat, timers, and even built-in thermometers. These help cook waffles evenly and prevent sticking.

Essential Equipment for Perfect Waffles

To make perfect crispy waffles, you need the right tools. A good waffle iron is key. It helps you get the perfect golden-brown color and texture. Think about the waffle recipe you want and how brown you like them.

Here are some key factors to consider when selecting a waffle iron:

  • Non-stick surface for easy waffle release
  • Adjustable heat control for perfect browning
  • Durable construction for long-lasting use

You’ll also need a mixing bowl and a whisk for your easy waffle recipe. A digital thermometer helps make sure your waffle iron is at the right temperature.

With the right equipment, you’re on your way to making delicious, crispy waffles. They’ll impress your family and friends. Always follow the waffle iron’s instructions and clean it often to keep making perfect waffles.

EquipmentDescription
Waffle IronNon-stick surface, adjustable heat control, durable construction
Mixing BowlStainless steel or glass, easy to clean and mix
WhiskStainless steel or silicone, easy to mix and blend

Understanding Waffle Batter Ingredients

To make delicious homemade waffles, knowing the ingredients is key. A good recipe balances dry and wet ingredients. You can also add optional items for a unique taste.

The type of flour used affects your waffles’ texture. A mix of all-purpose flour and cornstarch makes them light and airy. Sugar and salt add flavor.

Dry Ingredients Guide

  • 2 cups all-purpose flour
  • 2 tablespoons cornstarch
  • 1 tablespoon sugar
  • 1/2 teaspoon salt

Wet Ingredients Selection

Wet ingredients like milk, eggs, and butter add moisture and richness. For a classic recipe, use 1 cup of milk, 2 large eggs, and 2 tablespoons of melted butter.

Optional Add-ins and Flavoring

For a unique flavor, try adding vanilla extract, cinnamon, or nuts. You can also use almond or soy milk for a non-dairy option.

The Classic Waffle Recipe You Need to Try

To make a delicious classic waffle recipe, you’ll need a few key ingredients. You’ll need all-purpose flour, sugar, baking powder, salt, milk, eggs, and melted butter. The secret to a best waffle recipe is balancing wet and dry ingredients perfectly.

A simple easy waffle recipe should be easy to follow and need little equipment. You’ll need a waffle iron, a large bowl, and a whisk. First, mix the dry ingredients. Then, add the wet ingredients and stir until the batter is slightly lumpy.

Here’s a basic classic waffle recipe to start with:

  • 2 cups all-purpose flour
  • 4 teaspoons sugar
  • 2 teaspoons baking powder
  • 1/4 teaspoon salt
  • 2 large eggs
  • 1 cup milk
  • 4 tablespoons melted butter

Preheat your waffle iron and grease it with butter or cooking spray. Pour about 1/4 cup of batter onto the iron and spread it out. Cook for 3-5 minutes, until the waffles are golden and crispy.

With this easy waffle recipe, you’ll make delicious waffles quickly. Just remember to use the right ingredients and don’t overmix the batter. Happy cooking!

IngredientQuantity
All-purpose flour2 cups
Sugar4 teaspoons
Baking powder2 teaspoons
Salt1/4 teaspoon
Large eggs2
Milk1 cup
Melted butter4 tablespoons

Mastering Waffle Batter Consistency

To make the perfect fluffy waffles, mastering the batter consistency is key. A classic waffle recipe needs a balance of ingredients for a light texture. Knowing the signs of perfect batter and avoiding mixing mistakes are important.

A smooth, thick batter without lumps is ideal. It should spread evenly on the waffle iron and turn golden brown. Using the right flour and adjusting the recipe is critical. For example, coarser flour might need more liquid.

  • Use a digital thermometer to ensure the waffle iron is at the right temperature.
  • Don’t overmix the batter, as this can lead to tough and dense waffles.
  • Let the batter rest for a few minutes to allow the flour to absorb the liquid ingredients.

By following these tips and using a classic waffle recipe, you’ll make delicious, fluffy waffles. They’ll impress your family and friends.

IngredientQuantityImportance
Flour2 cupsHigh
Sugar1 cupMedium
Eggs2High

Remember, practice makes perfect. Don’t get discouraged if your first batch doesn’t turn out right. Keep trying different ingredients and techniques until you find your perfect waffle recipe.

Step-by-Step Waffle Making Technique

To make delicious homemade waffles, follow this easy waffle recipe and technique. First, preheat your waffle iron as the manufacturer suggests. While it heats up, mix your waffle batter using a simple recipe.

When the iron is hot, pour about 1/4 cup of batter onto its center. This amount works for most standard waffle irons. Close the iron and cook for 3-5 minutes, until the waffle is golden and crispy.

  • Use the right amount of batter to avoid overflowing the iron.
  • Adjust the cooking time based on the thickness of your waffles and the heat of your iron.
  • Don’t open the iron too often, as this can cause the waffles to cook unevenly.

By following this easy waffle recipe and technique, you can create delicious homemade waffles. They’re perfect for breakfast, brunch, or dinner. Try different waffle recipes and toppings to find your favorite.

Waffle RecipeCooking TimeTemperature
Classic Waffle Recipe3-5 minutes375°F
Belgian Waffle Recipe5-7 minutes400°F

Achieving the Perfect Golden-Brown Color

To get the perfect golden-brown color on your crispy waffles, you need to control the waffle iron’s temperature. Also, time the cooking right. A good waffle recipe will give you guidelines. But, you must adjust these for your waffle iron and waffle type.

For an easy waffle recipe, here are some tips:

  • Preheat the waffle iron to the recommended temperature.
  • Use a small amount of oil to brush the waffle iron, ensuring the waffles don’t stick.
  • Cook the waffles for the recommended time, or until they’re golden brown and crispy.

By following these tips and using the right waffle recipe, you’ll get the perfect golden-brown color on your crispy waffles. Always adjust the recipe and cooking time for your waffle iron and waffle type.

Waffle Iron TemperatureCooking TimeResult
Medium-high heat3-5 minutesGolden brown and crispy
Medium heat5-7 minutesLight brown and cooked through

Creative Waffle Variations and Toppings

Homemade waffles offer endless possibilities. With a basic recipe, you can make sweet and savory waffles. For breakfast, add fresh fruits like strawberries or blueberries to the batter.

Customize your waffle recipe for unique flavors. Sweet options include:

  • Whipped cream and chocolate chips
  • Caramelized bananas and honey
  • Powdered sugar and cinnamon

For savory waffles, add cheese, herbs, or spices. Try these combinations:

  • Bacon and cheddar cheese
  • Spinach and feta cheese
  • Jalapeno peppers and cheddar cheese

Be creative with your waffles. Whether you like sweet or savory, there’s a recipe for you. Experiment and find your favorite!

ToppingDescription
Fresh FruitsAdd fresh fruits like strawberries or blueberries to the batter for added flavor and nutrition.
Whipped Cream and Chocolate ChipsA classic sweet combination that’s perfect for breakfast waffles.
Bacon and Cheddar CheeseA savory combination that’s great for a breakfast or brunch dish.

Storage and Reheating Methods

To keep your crispy waffles fresh, store them in an airtight container. This keeps their texture and prevents sogginess. For reheating, use a toaster or oven to get that golden-brown look. For an easy waffle recipe, reheat in the toaster for a few minutes or in the oven at 350°F for 5-7 minutes.

Here are some tips for storing and reheating waffle recipe creations:

  • Store waffles in an airtight container to maintain freshness
  • Reheat waffles in a toaster or oven to achieve the perfect golden-brown color
  • Adjust reheating time based on the type of waffle and desired crispiness

Freezing is a great option for enjoying crispy waffles later. Place waffles in a freezer-safe bag or container. Store in the freezer for up to 2 months. When ready, toast or bake until crispy.

By following these tips, you can enjoy your favorite waffle recipe creations anytime. Whether it’s a classic easy waffle recipe or something new, these methods ensure perfect crispy waffles every time.

Storage MethodReheating MethodResult
Airtight containerToaster or ovenFresh and crispy waffles
Freezer-safe bag or containerToaster or ovenCrispy waffles after reheating

Troubleshooting Common Waffle Problems

Making breakfast waffles can sometimes go wrong. To get light and fluffy waffles, you need to solve these problems. A great waffle recipe is key, but even with the best ingredients, issues can arise.

Sticky waffles, texture problems, and uneven cooking are common issues. Knowing the causes and how to prevent them is important. For example, the right waffle iron and heat can prevent sticky waffles. Also, the batter’s consistency is key for texture.

Fixing Sticky Waffles

  • Check the waffle iron’s heat and adjust as needed
  • Use a non-stick waffle iron or spray with cooking spray
  • Don’t overmix the waffle batter

Addressing Texture Issues

For perfect waffle texture, use the right ingredients and a good recipe. Fresh eggs and milk are essential. Avoid overmixing the batter. These tips will help you make tasty homemade waffles.

Common IssueCauseSolution
Sticky wafflesIncorrect heat or batter consistencyAdjust heat and batter consistency
Texture issuesOvermixing or incorrect ingredientsUse fresh ingredients and avoid overmixing

By solving common waffle problems and using a good recipe, you can make delicious breakfast waffles. Always use fresh ingredients and follow the right techniques. This way, your homemade waffles will be light and fluffy.

Expert Tips for Restaurant-Quality Waffles

To make waffles like restaurants, you need the best recipe and tools. A classic recipe includes flour, sugar, and eggs. But, the secret to a great waffle is in how you make it. Temperature control is key for the right texture and crispiness.

Here are some tips for making restaurant-quality waffles:

  • Use a high-quality waffle iron that can achieve the right temperature.
  • Experiment with different types of flour, such as whole wheat or oat flour, to create a unique flavor.
  • Don’t overmix the batter, as this can result in a dense waffle.

A great waffle recipe is essential for a top-notch waffle. By following these tips and using the best ingredients, you can make a waffle that’s as good as those in restaurants. Whether you’re making a classic waffle or trying something new, the most important thing is to have fun and try different flavors and techniques.

With practice and patience, you can become a waffle expert. You’ll make delicious, restaurant-quality waffles that will wow your friends and family. So, go ahead and try it out. Don’t be afraid to experiment with new ingredients and techniques to create your own unique waffle recipe.

Waffle RecipeIngredientsInstructions
Classic WaffleFlour, sugar, eggs, milkMix ingredients, cook in waffle iron
Belgian WaffleFlour, sugar, eggs, yeastMix ingredients, let rise, cook in waffle iron

Conclusion: Making Waffle Magic at Home

Making delicious homemade waffles is an art form. It’s something anyone can learn, whether you’re a pro in the kitchen or just starting out. This guide has given you the tools to make waffle recipe perfection right in your kitchen.

Success with easy waffle recipe comes from knowing the science behind the batter. It also means trying out different ingredients and getting better at making waffles. With a bit of patience and practice, you’ll be making fluffy, golden waffles that everyone will love.

Let your creativity run wild and make waffle magic at home. Enjoy making your waffles your own with your favorite toppings and flavors. Share your creations online and inspire others to try making waffles too. The world of waffles is full of possibilities, and you’re ready to explore them.

FAQ

What makes the best waffle recipe?

The best waffle recipe makes waffles that are fluffy inside and crispy outside. It needs the right mix of dry and wet ingredients. Also, using the right technique and tools is key.

How do I choose the right waffle iron?

Look at the size, shape, and temperature control of the waffle iron. A nonstick surface makes cleaning up easier.

What are the key ingredients in a classic waffle recipe?

Classic waffles need flour, sugar, baking powder, salt, eggs, milk, and melted butter or oil. The right mix of these ingredients is important for the perfect waffle.

How do I achieve the perfect waffle batter consistency?

To get the right batter, don’t overmix. Use ingredients at the right temperature. Adjust the wet and dry ingredients as needed. The batter should be thick but pourable.

What’s the best way to store and reheat leftover waffles?

Cool leftover waffles completely. Then, store them in an airtight container or plastic bag. Reheat them in a toaster or oven to keep them crispy.

How can I customize my waffles with different toppings and flavors?

You can top waffles with fruit, whipped cream, chocolate chips, or even chicken and syrup. Try different spices and extracts for unique flavors.

What are some common waffle problems and how can I fix them?

Waffles can stick, be soggy, or not brown evenly. Fix these by adjusting the batter, cooking temperature, and technique.

Get The Best Recipes In 2025

Exit mobile version