Delicious Sourdough Bagel Recipe | Easy Homemade Bagels

What makes a homemade bagel perfect? Can you get that perfect crunch and chew with a sourdough bagel recipe? Making homemade bagels is fun and rewarding. With the right sourdough bagel recipe, you can make delicious treats that are just like those from your local bakery.

Sourdough Bagel Recipe

By following a simple sourdough bagel recipe, you can make homemade bagels full of flavor and texture. They’re perfect for topping with your favorite spreads or as a base for sandwiches. With a bit of practice and patience, you can make sourdough bagels at home. Enjoy the benefits of freshly baked bread without needing a commercial bakery.

Key Takeaways

  • Homemade bagels can be made with a simple sourdough bagel recipe
  • Sourdough bagels have a unique flavor and texture
  • Making homemade bagels can be a fun and rewarding experience
  • A sourdough bagel recipe requires patience and practice to master
  • Homemade bagels are perfect for topping with your favorite spreads or using as a base for sandwiches
  • Freshly baked sourdough bagels are a delicious alternative to commercial bakery products
  • With the right sourdough bagel recipe, you can achieve a perfect blend of crunch and chew

Understanding Sourdough Bagels: A Perfect Blend of Tradition and Taste

Sourdough bagels have a special history and taste. They use a sourdough starter, a mix of wild yeast and bacteria. This starter makes sourdough bagels unique.

The fermentation process is key. It lets the dough rest and rise. This breaks down sugars and creates lactic acid. It makes sourdough bagels tangy and chewy.

What Makes Sourdough Bagels Different

Sourdough bagels stand out because of their starter. This starter gives them a special flavor and texture. The longer fermentation makes their taste more complex.

  • A tangy, slightly sour flavor
  • A chewy, dense texture
  • A crispy crust

The Science Behind Sourdough Fermentation

The science of sourdough fermentation is complex. Wild yeast and bacteria in the starter feed on dough sugars. They produce lactic acid and carbon dioxide. This creates sourdough bagels’ unique taste and texture.

Benefits of Making Sourdough Bagels at Home

Making sourdough bagels at home has many benefits. You can control the ingredients and feel proud of your creation. It’s a rewarding process that can lead to delicious results. With practice and patience, anyone can make great sourdough bagels at home.

Essential Ingredients for Your Sourdough Bagel Recipe

To make a tasty sourdough bagel, you need top-notch ingredients. The sourdough starter is key, adding a special flavor and texture. You can pick a natural starter or make your own.

Other key ingredients for your bagel recipe are:

  • High-protein flour, like bread flour or high-protein all-purpose flour
  • Salt, which boosts flavor and controls yeast
  • Water, which should be filtered and at room temperature

Choosing the right ingredients is crucial for a perfect sourdough bagel. A great recipe balances ingredients, including the sourdough starter. This creates a delicious, chewy texture.

Look for fresh yeast and high-quality flour for the best results. Using a sourdough starter also adds a unique flavor and texture to your bagels.

IngredientQuantityImportance
Sourdough starter1 cupFoundation of the recipe
Flour3 cupsProvides structure and texture
Salt1 tablespoonEnhances flavor and controls yeast growth
Water1 cupHydrates the dough and creates texture

With the right ingredients and a good recipe, you can make delicious sourdough bagels. They’re perfect for any time.

Required Equipment and Tools

To bake sourdough bagels, you need the right tools. You’ll need basic kitchen stuff like a mixing bowl, measuring cups, and a wooden spoon. The right baking gear makes the process smoother and improves your results.

There are also special tools that can be handy for baking sourdough bagels. A stand mixer, dough scraper, and baking stone are some examples. These tools make mixing, kneading, and baking easier.

Basic Kitchen Equipment

  • Mixing bowl
  • Measuring cups
  • Wooden spoon
  • Oven

Optional Specialized Tools

  • Stand mixer
  • Dough scraper
  • Baking stone

Having the right tools is key for baking. Good kitchen tools make baking fun and help you get better results. Whether you’re new or experienced, the right tools help you reach your baking goals.

Setting Up Your Workspace

Setting up your workspace is crucial for baking. Make sure you have a clean, flat area for mixing and kneading. Also, have all your ingredients and tools ready. A well-set workspace lets you focus on baking and makes your sourdough bagels better.

EquipmentPurpose
Mixing bowlMixing and kneading the dough
Stand mixerMixing and kneading the dough
Baking stoneBaking the bagels to a crispy crust

Preparing Your Sourdough Starter

To make a tasty homemade sourdough bagel, you need a healthy sourdough starter. This starter is key for the fermentation process. It gives sourdough its special flavor and texture. Making your sourdough starter is easy but takes patience and care.

To start, mix equal parts of flour and water in a clean container. Let it sit in a warm, draft-free spot for 24-48 hours. This lets it ferment and grow its natural yeast. Once it’s active and bubbly, start feeding it to keep it healthy.

  • Use a glass or ceramic container, as metal can slow down fermentation.
  • Keep it at room temperature (70-75°F) for best fermentation.
  • Feed it once a day to keep it active and healthy.

By following these steps and tips, you can make a lively sourdough starter. This starter is crucial for your homemade sourdough bagels. Be patient and watch your starter’s activity. This will tell you when it’s ready for your recipe.

Step-by-Step Sourdough Bagel Recipe

To make delicious sourdough bagels, you need to follow a step-by-step guide. This recipe requires patience and attention to detail. The fermentation process is key to developing the bagels’ flavor and texture.

The journey starts with making the dough. You mix the ingredients together and let the dough rest. Then, the first fermentation begins, which can take hours. During this time, the dough rises and develops a sourdough flavor.

Making the Dough

Making the dough is the first step. You mix flour, water, salt, and sourdough starter together. The mix should be shaggy, then kneaded until smooth and elastic.

First Fermentation Process

The first fermentation is crucial. The dough rises and develops the sourdough flavor. Place the dough in a warm, draft-free area for several hours.

After the first fermentation, shape the dough into bagels. Divide the dough into smaller pieces and shape each into a ball. Roll out the ball into a rope and form a circle with overlapping ends.

Shaping Your Bagels

Shaping the bagels is key. They should have a hole in the center. Place the shaped bagels on a baking sheet lined with parchment paper, leaving space between each.

The final step is the final proofing. Let the shaped bagels rise again before boiling and baking. This step is vital for the bagels’ flavor and texture.

The Boiling Process: Creating That Perfect Chewy Crust

The boiling step is key to a chewy crust for your sourdough bagels. It involves briefly dipping the shaped bagels in boiling water before baking. This step is crucial for achieving the right crust texture.

It’s important not to overboil. A gentle boil is what you want for the perfect crust. The boiling process makes the bagel’s surface crunchy. You can use water with sugar or honey for a sweet, sticky solution.

Here are some tips for boiling your bagels:

  • Use a large pot to boil your bagels, as this will help to prevent them from sticking together.
  • Make sure the water is at a rolling boil before adding your bagels.
  • Boil your bagels for 1-2 minutes on each side, or until they are golden brown.

By following these tips and adding the boiling step to your recipe, you can make delicious, chewy crusts.

The type of bagel recipe also affects the crust’s texture and taste. A good recipe includes yeast, flour, and salt. It also needs a slow fermentation to develop flavors. With the right ingredients and techniques, you can make a sourdough bagel with a chewy crust.

Boiling TimeTemperatureResult
1-2 minutes200-210°FChewy crust
2-3 minutes210-220°FCrispy crust

Baking Methods and Temperature Guidelines

Baking sourdough bagels requires the right temperature and oven setup. The best temperature is between 425°F and 450°F. Baking time should be 15-20 minutes. A reliable oven thermometer is key to get it right.

The oven setup is also important. Using a baking stone or steel can make the crust crispy. A steamy oven helps achieve a real bagel texture. You can use a pan of water or a steam injection system for this.

Oven Setup and Preparation

Preheat the oven to the right temperature and put a baking stone or steel inside. If you have a steam injection system, follow the instructions. For a steamy oven, use a pan of water.

Timing and Temperature Control

Keep an eye on the temperature and time when baking. Bagels should be golden brown and crispy in 15-20 minutes. They should have an internal temperature of 200°F to 210°F for the best taste and texture.

Visual Cues for Perfect Doneness

To check if your bagels are done, look for these signs:

  • Golden brown color on the outside
  • Crispy crust with a slight sheen
  • Soft and chewy interior

By following these tips and watching the temperature and time, you can bake perfect sourdough bagels. They will have a delicious crust and texture.

Baking TemperatureBaking TimeInternal Temperature
425°F – 450°F15-20 minutes200°F – 210°F

Traditional and Creative Bagel Toppings

Bagel toppings are endless, from classic to creative. The right toppings can turn a simple snack into a tasty meal. Creative toppings like avocado, bacon, or eggs offer unique flavors. Traditional options like cream cheese, lox, or capers bring a classic taste.

Some favorite bagel toppings include:

  • Classic cream cheese and smoked salmon
  • Crispy bacon and scrambled eggs
  • Fresh vegetables like cucumber, tomato, and spinach
  • Melted cheese, such as cheddar or mozzarella

For a creative twist, try new combinations like:

  1. Fig jam and prosciutto
  2. Hummus and sliced cucumber
  3. Grilled chicken and pesto

Whether you like traditional or creative toppings, the goal is to find what you love. With so many choices, you can mix and match to discover your favorite bagel.

Bagel ToppingDescription
Cream CheeseA classic bagel topping, cream cheese provides a tangy and creamy flavor.
LoxSmoked salmon, or lox, adds a delicious and savory flavor to your bagel.
AvocadoMashed or sliced, avocado adds a creamy and healthy twist to your bagel.

Storage and Freshness Tips

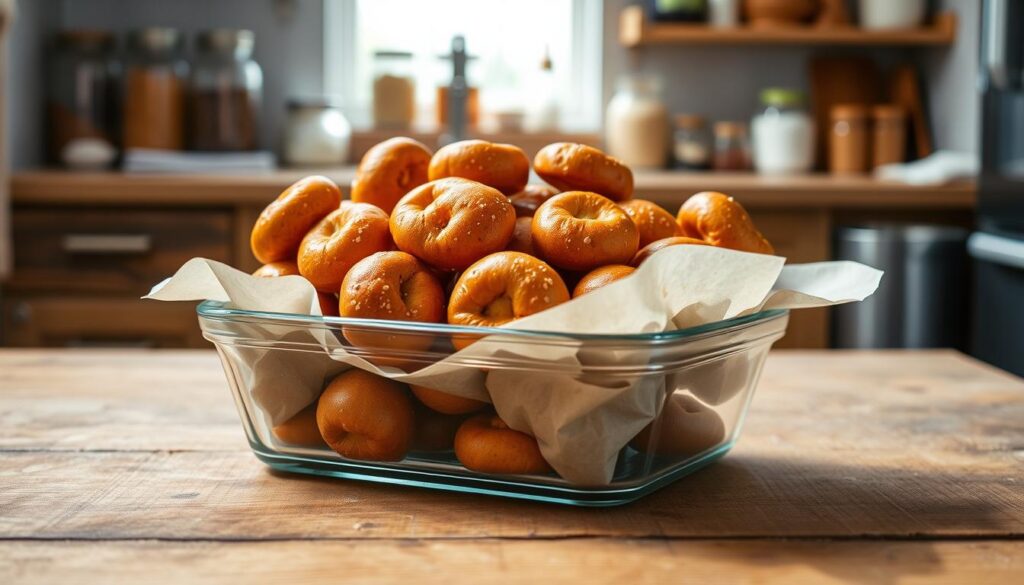
To keep your sourdough bagels fresh, proper storage is key. After baking, cool your bagels well to stop cooking and keep texture. This step is crucial to avoid sogginess and bad flavors.

For storage, airtight containers are best. They keep air out and moisture away. You can store bagels at room temperature for up to 3 days or freeze them for longer. Freezing is great for keeping bagels fresh, and thawing and reheating them is easy.

Proper Cooling Methods

Cooling bagels on a wire rack is a good idea. It allows air to circulate, cooling them evenly and quickly. This method helps keep your bagels fresh and textured.

Storage Containers and Techniques

Using a paper bag or a breathable container helps keep bagels fresh. For longer storage, use a freezer-safe bag or airtight container. This keeps your bagels fresh for months.

Freezing and Reheating Guidelines

Freeze bagels in a single layer in a freezer-safe bag or container. To reheat, thaw the bagel and bake at 375°F (190°C) for a few minutes. This toasts the bagel to your liking.

Follow these tips to enjoy your homemade sourdough bagels longer. Use proper cooling, storage containers, and freezing methods. This way, you’ll keep your bagels fresh and delicious.

Storage MethodStorage TimeFreshness Level
Airtight ContainerUp to 3 daysHigh
Freezer-Safe BagUp to 3 monthsHigh
Room TemperatureUp to 1 dayMedium

Troubleshooting Common Issues

When making sourdough bagels, several common issues can arise. These issues affect the final product’s quality and appearance. Troubleshooting these problems is essential to achieve the perfect sourdough bagel. Common issues include overproofing, underbaking, and uneven crust formation.

To address these common issues, it’s crucial to understand the causes and apply the right solutions. For instance, overproofing can be prevented by monitoring the dough’s fermentation time and temperature. Underbaking can be avoided by ensuring the bagels are baked at the correct temperature and for the right amount of time.

  • Check the dough’s fermentation time and temperature to prevent overproofing
  • Ensure the bagels are baked at the correct temperature and for the right amount of time to prevent underbaking
  • Use a steamy environment to promote even crust formation

By following these tips and being mindful of the potential common issues, you can troubleshoot problems. This will help you achieve a delicious, chewy crust and a soft interior. Remember, making sourdough bagels is an art that requires practice and experimentation.

With time and experience, you’ll become more comfortable identifying and addressing common issues. Your sourdough bagels will become a staple in your household. Happy baking!

IssueCauseSolution
OverproofingExcessive fermentation time or temperatureMonitor fermentation time and temperature
UnderbakingInsufficient baking time or temperatureEnsure correct baking time and temperature
Uneven crust formationLack of steam or improper baking environmentUse a steamy environment to promote even crust formation

Conclusion: Mastering Your Homemade Sourdough Bagel Journey

Making delicious homemade sourdough bagels is a rewarding journey. You’ve learned about fermentation and how to shape and bake them. Each step has helped you improve and enjoy the process.

The path to mastering homemade sourdough bagels never ends. With each batch, you get better and try new things. Keep facing challenges, celebrating wins, and always learning.

Enjoying your homemade sourdough bagels with others or alone is special. It’s about the creativity, patience, and passion in every bite. Let your bagels bring nourishment, connection, and joy to your life.

FAQ

What is the difference between sourdough bagels and traditional bagels?

Sourdough bagels use a sourdough starter for a unique taste and chewy texture. They have a more complex flavor and a tangy quality. This is different from traditional yeast-based bagels.

How long does it take to make sourdough bagels?

Making sourdough bagels takes 12 to 24 hours. This time lets the starter develop and the dough to get the right texture and flavor.

What are the benefits of making sourdough bagels at home?

Making sourdough bagels at home lets you control the ingredients and enjoy the process. It’s rewarding and educational. You can also try different flavors.

What is the role of the sourdough starter in the recipe?

The sourdough starter gives sourdough bagels their unique taste and texture. It has wild yeast and bacteria that ferment the dough. This makes the bagels chewy on the outside and soft inside.

What is the importance of the boiling process in making sourdough bagels?

Boiling is key for a chewy crust on sourdough bagels. It gelatinizes the starch on the dough’s surface. This step is crucial for the traditional bagel texture.

How can I ensure my sourdough bagels stay fresh for longer?

To keep sourdough bagels fresh, cool them completely before storing. Store them in an airtight container or freeze. This helps keep their texture and flavor for days.

What are some common issues that can arise when making sourdough bagels, and how can I troubleshoot them?

Issues like overproofing, underbaking, and uneven crusts can happen. Adjust fermentation time, baking temperature, and shaping. Pay attention to visual cues to solve these problems.

Delicious Cherry Cheesecake Recipe

What makes a classic cheesecake unforgettable? Can a simple cherry cheesecake recipe take this beloved dessert to new heights? The mix of creamy cheesecake and sweet cherry topping is perfect for any occasion. It’s a treat that’s sure to impress with its rich flavor and smooth texture.

A classic cheesecake is a staple in American desserts. Adding a cherry topping gives it a unique twist. Whether you’re an experienced baker or just starting, a cherry cheesecake recipe is a great choice. We’ll show you how to make a delicious homemade cheesecake that will become a favorite.

Key Takeaways

  • Learn the secrets to making a creamy and delicious cherry cheesecake recipe
  • Discover the essential ingredients and tools needed to create a classic cheesecake
  • Find out how to add a sweet and tangy cherry topping to your homemade cheesecake
  • Get tips on baking and cooling techniques to ensure a smooth and creamy texture
  • Explore the world of cheesecakes and learn how to make a cherry cheesecake recipe that’s sure to impress

The History of Cherry Cheesecake

Cheesecakes have a long history, starting in ancient Greece. The first cheesecakes were made with cheese, honey, and flour. They were enjoyed as desserts or snacks.

Over time, cheesecakes changed with different cultures. They added new cheesecake ingredients and toppings.

In the United States, cherries became a favorite topping for cheesecakes. To make a great cherry topping, use fresh cherries. Cook them with sugar and cornstarch for a thick, tasty sauce.

Origins of Cheesecake

Cheesecakes have been around for centuries. Each culture added their own twist, like the Greek and American cheesecakes. These variations have unique flavors and textures.

Evolution of Cherry Toppings

The cherry topping has changed a lot. People use different baking techniques to make the perfect topping. You can cook cherries with sugar and cornstarch or use fresh cherries and jam.

Some common cheesecake ingredients include graham cracker crust, cream cheese, and sour cream. Mixing these with the right baking techniques makes a delicious cherry cheesecake.

Essential Ingredients for Your Cherry Cheesecake Recipe

To make a delicious cherry cheesecake, you’ll need certain cheesecake ingredients. These include graham cracker crumbs, sugar, cream cheese, eggs, sour cream, and cherries. The quality of these ingredients is key. It affects the cheesecake’s texture and taste.

In dessert recipes, the ingredients matter a lot. For a cherry cheesecake, use fresh or frozen cherries. They’re a favorite for fruit desserts. You can also try other fruits like blueberries or raspberries for a different taste.

Here are the must-have ingredients for your cherry cheesecake recipe:

  • Graham cracker crumbs
  • Sugar
  • Cream cheese
  • Eggs
  • Sour cream
  • Cherries

Using top-notch ingredients and a reliable recipe will help you make a fantastic cherry cheesecake. It’s perfect for impressing your loved ones. This recipe is great for both experienced bakers and beginners. It’s a tasty and memorable dessert choice.

Kitchen Tools and Equipment Needed

To bake a cherry cheesecake, you need the right tools and equipment. Proper baking techniques require basic and specialized tools. A springform pan is key for easy cake removal. A mixer, whisk, and thermometer are also essential for the right consistency and temperature.

Having the right tools is crucial for cheesecake baking tips. A well-stocked kitchen with tools like a pastry brush and silicone spatula helps achieve professional results. Optional equipment like a food processor or stand mixer can also be beneficial.

Essential Baking Tools

  • Springform pan
  • Mixer
  • Whisk
  • Thermometer
  • Pastry brush
  • Silicone spatula
  • Measuring cups

Optional Equipment for Professional Results

Optional equipment like a food processor or stand mixer can help achieve professional results. These tools make mixing and blending easier, making the baking process more efficient.

Measuring and Temperature Tools

Accurate measurements and temperature control are key in baking. A digital thermometer and measuring cups ensure ingredients are at the right temperature and proportion. By using these kitchen tools with expert baking techniques and cheesecake baking tips, you’ll make a delicious and memorable dessert.

ToolDescription
Springform panEssential for removing the cheesecake from the pan
MixerUsed for mixing and blending ingredients
ThermometerCrucial for ensuring the right temperature

Preparing the Perfect Cheesecake Crust

To make a tasty cheesecake, you need a great crust. A graham cracker crust is a favorite. With the right baking, you get a crunchy, flavorful base. The secret is to mix the ingredients right and bake for the right time.

When making the crust, mixing the ingredients is key. Mix graham cracker crumbs, sugar, and melted butter for a smooth texture. Press it into the pan to cover the whole surface. Bake until it’s lightly browned and firm.

  • Use high-quality ingredients, such as fresh graham cracker crumbs and real butter.
  • Don’t overmix the crust mixture, as this can lead to a tough and dense texture.
  • Bake the crust at the right temperature, usually around 350°F, to achieve a golden brown color and a crispy texture.

By following these tips and using the right baking techniques, you can create a delicious and well-made cheesecake crust. It will make your dessert even better.

Creating the Creamy Cheesecake Filling

To make a creamy cheesecake filling, focus on the right mixing techniques. The filling is the dessert’s heart, making it special. It should be smooth and even, without lumps or air pockets.

When making the filling, temperature control is key. Make sure all ingredients are at room temperature. This prevents texture changes. The mixing techniques used can also affect the filling’s texture. Overmixing makes it dense, while undermixing makes it too soft.

Mixing Techniques for a Smooth Filling

  • Use a stand mixer or hand mixer to cream the cheese and sugar until smooth.
  • Gradually add the eggs, one at a time, mixing well after each addition.
  • Scrape down the sides of the bowl to ensure all ingredients are well incorporated.

By following these tips and using the right mixing techniques, you can create a creamy cheesecake filling. Keep an eye on the temperature and texture. Don’t overmix. With practice and patience, you’ll make a delicious and creamy filling perfect for any occasion.

Cherry Topping Preparation Methods

Creating a delicious cherry cheesecake starts with the cherry topping. You need to pick the right cherries, cook them well, and mix them with sugar and other ingredients. Here are some tips to help you make a perfect cherry topping for your fruit desserts.

Some popular methods for preparing cherry toppings include:

  • Cooking fresh or frozen cherries with sugar and water to create a sweet and tangy sauce
  • Using cherry jam or preserves as a topping, which can be a convenient and delicious option
  • Mixing cherries with other fruits, such as blueberries or raspberries, to create a unique and flavorful topping

These methods can be used to create a variety of dessert recipes, from classic cherry cheesecakes to innovative fruit desserts. By following these tips and experimenting with different ingredients and techniques, you can create a cherry topping that elevates your desserts to the next level.

You can also try using different types of cherries, such as sweet or sour cherries, to create a unique flavor profile. With a little practice and patience, you can create a delicious cherry topping that complements your favorite dessert recipes and adds a touch of elegance to your fruit desserts.

Baking and Cooling Guidelines

To get a perfectly baked cheesecake, you need to follow some key steps. Keeping the temperature right is very important. It makes the cheesecake smooth and tasty. Using a water bath helps keep the temperature steady, which prevents cracks and uneven cooking.

It’s important to watch the temperature closely when baking. The best temperature for a cheesecake is between 325°F and 350°F. This range helps the cheesecake cook gently, avoiding cracks and a dense texture. By sticking to these guidelines, you’ll get a cheesecake that’s creamy and smooth.

Water Bath Techniques

A water bath is a great way to keep the temperature steady while baking. To do this, put the cheesecake pan in a bigger pan filled with hot water. This method lowers the chance of cracks and makes the texture even. Using a water bath helps you get a cheesecake that’s perfectly baked and shiny.

Cooling Process

After baking, it’s crucial to cool the cheesecake slowly. This step helps avoid cracks and keeps the texture even. To cool it, turn off the oven and let it sit in the oven for 1 hour. Then, take it out and let it cool down to room temperature. Following these cooling steps ensures your cheesecake is perfectly cooled and ready to eat.

Baking TemperatureCooling Time
325°F1 hour
350°F30 minutes

Troubleshooting Common Issues

When making a cheesecake, several issues can arise. These problems can affect the final product’s quality and appearance. To address these cheesecake problems, it’s essential to understand the causes and apply effective troubleshooting techniques.

One common issue is the formation of cracks on the surface. This can be prevented by ensuring the cheesecake cools slowly and evenly.

Another issue that can arise is texture problems, such as a dense or soggy consistency. This can be resolved by adjusting the baking time and temperature. Also, using the right storage solutions is crucial in preventing texture problems and maintaining the overall quality of the cheesecake.

Preventing Cracks

To prevent cracks, it’s essential to avoid sudden temperature changes. Ensure the cheesecake is properly cooled. This can be achieved by turning off the oven and letting the cheesecake cool inside with the door slightly ajar.

By following these tips and using the right storage solutions, you can minimize the risk of cheesecake problems. This way, you can achieve a perfectly baked cheesecake.

Texture Problems

Texture problems can be caused by overmixing or underbaking the cheesecake. To resolve this issue, it’s essential to follow the recipe carefully. Adjust the baking time as needed.

By applying these troubleshooting techniques and using the right storage solutions, you can achieve a smooth and creamy texture. This texture is free from cheesecake problems.

Conclusion: Mastering Your Cherry Cheesecake

Creating the perfect homemade cheesecake with a cherry topping is an art. We’ve explored the history, ingredients, and techniques needed. This guide will help you impress your loved ones with a delicious dessert.

Follow our step-by-step guide and try new flavors. Improve your baking skills to become a cheesecake expert. Remember, baking is all about the journey of discovery.

So, get ready to bake! Preheat your oven and gather your ingredients. Enjoy every bite of your homemade cherry cheesecake. Happy baking!

FAQ

What is the history of cherry cheesecake?

Cheesecakes have a long history, starting in ancient Greece. They were made with cheese, honey, and flour. Over time, they evolved with new ingredients and toppings.

In the United States, cherries became a favorite topping. They are sweet and tart, making them perfect for cheesecakes.

What are the essential ingredients needed to make a cherry cheesecake?

To make a great cherry cheesecake, you need several ingredients. These include graham cracker crumbs, sugar, cream cheese, eggs, sour cream, and cherries. The quality of these ingredients is key to a delicious cheesecake.

What kitchen tools and equipment are needed to prepare a cherry cheesecake?

You’ll need various tools to make a cherry cheesecake. These include a springform pan, a mixer, a whisk, and a thermometer. Optional tools like a food processor or stand mixer can also help.

How do I prepare the perfect cheesecake crust?

The crust is essential for a cheesecake. It provides a base for the filling and adds texture and flavor. To make a perfect crust, mix the ingredients, press it into the pan, and bake it well.

What techniques are used to create a creamy cheesecake filling?

The filling is what makes a cheesecake creamy. To achieve this, focus on mixing techniques and temperature guidelines. Also, avoid mistakes that can ruin the texture.

How do I prepare the cherry topping for my cheesecake?

Preparing the cherry topping is important. You need to choose the right cherries, cook them, and mix them with sugar and other ingredients. This will make your topping delicious.

What guidelines should I follow when baking and cooling a cheesecake?

Baking and cooling a cheesecake needs care. Wrong temperatures or cooling methods can harm the texture. Follow guidelines on temperature, water baths, and cooling to ensure a perfect cheesecake.

How can I troubleshoot common issues that may arise when making a cheesecake?

Even with the best recipe, problems can occur. To fix issues like cracks, texture problems, and storage, follow tips and advice. This will help you solve these common problems.

Easy Carrot Juice Recipe for Healthy Sipping

Carrot Juice Recipe ,What makes a perfect healthy juice recipe? Is it the mix of ingredients, how easy it is to make, or the health perks it offers? Carrot juice is a standout because of its vitamins and antioxidants. It’s a tasty drink that can give you energy and help your health.

Carrot juice tastes sweet and refreshing. It’s a great way to add healthy habits to your day. But what’s so special about carrot juice, and how can you get the most health benefits from it? Let’s explore the world of healthy juices and see why carrot juice is so good for you.

Key Takeaways

  • Carrot juice is a nutritious beverage rich in vitamins and antioxidants
  • It provides numerous health benefits, including boosting energy and supporting overall well-being
  • Carrot juice is a great addition to healthy juice recipes due to its sweet and refreshing taste
  • It can be easily incorporated into your daily routine for a healthy habit
  • Carrot juice benefits include supporting healthy digestion and immune function
  • It can be made at home with a simple and easy recipe

Benefits of Fresh Carrot Juice

Fresh carrot juice is a nutritious drink that offers many health benefits. Juicing for health is getting more popular, and carrot juice is a top choice. It’s full of vitamins A, C, and K, and minerals like potassium and iron.

Carrot juice helps reduce inflammation, boosts the immune system, and aids digestion. To get these benefits, drink it in moderation. Aim for 1-2 cups a day.

Nutritional Profile

A single cup of fresh carrot juice has:

  • Vitamins A, C, and K
  • Minerals like potassium and iron
  • Antioxidants and phytochemicals

Health-Boosting Properties

Carrot juice has many health benefits, including:

  1. Reducing inflammation
  2. Supporting immune function
  3. Promoting healthy digestion

To enjoy carrot juice’s benefits, drink it in moderation. The right amount varies by person. But, a good rule is to have 1-2 cups a day as part of your juicing for health routine.

Selecting the Perfect Carrots for Juicing

Creating easy juice recipes starts with the right ingredients. Choosing fresh, organic, and ripe carrots is key. Look for carrots that are firm, straight, and bright orange.

Steer clear of wilted, bruised, or green-topped carrots. They might taste bitter and be less healthy. Choose carrots with a sweet and earthy smell. They will make your juice taste richer.

For the best results, follow these tips:

  • Choose carrots that are heavy for their size
  • Opt for carrots with a smooth, glossy skin
  • Avoid carrots with visible signs of mold or rot

By picking the right carrots, your juices will be tasty and full of nutrients.

Remember, the key to making great juice is to use high-quality ingredients and to experiment with different combinations to find your favorite flavors.

Adding careful carrot selection to your recipes can make your juices better in taste and health. With a bit of practice, you’ll be making delicious, healthy drinks in no time.

Essential Equipment for Making Carrot Juice

To make tasty and healthy carrot juice, you need the right tools. There are many juicer types, like centrifugal, masticating, and cold-press. Each has its own benefits, so picking the right one is key.

Centrifugal juicers are fast and efficient. Masticating juicers are slower but make better juice. Cold-press juicers crush and press to keep more nutrients and flavor. The equipment you choose greatly affects the juice’s quality and taste.

You’ll also need a cutting board, knife, and strainer. These help prepare carrots and make juicing smooth. Blenders or food processors can also work, but they might not make juice as good as a juicer.

Key Considerations for Choosing a Juicer

  • Speed and efficiency
  • Quality of juice
  • Ease of use and cleaning
  • Price and value

Think about these points and pick the best juicer and equipment. This way, you can make delicious and healthy carrot juice at home.

Juicer TypeSpeedQuality of JuicePrice
CentrifugalFastGoodAffordable
MasticatingSlowHighMedium
Cold-PressSlowHighHigh

Basic Carrot Juice Recipe

To make a tasty and healthy homemade carrot juice, you need a few simple things. You’ll need carrots, apples, and ginger. This recipe is one of the easy juice recipes you can make at home with a juicer.

Here’s how to make this basic carrot juice recipe:

  • Wash and peel the carrots, then chop them into chunks.
  • Feed the carrot chunks into your juicer, along with an apple and a slice of ginger.
  • Strain the juice and serve immediately.

This recipe is perfect for beginners who want to try homemade carrot juice. You can also play with different easy juice recipes by adding or swapping ingredients.

With this basic recipe, you can enjoy fresh carrot juice easily with a juicer. It’s great for both new and experienced juicers. This recipe is a fantastic way to start making homemade carrot juice and exploring easy juice recipes.

Preparation and Cleaning Tips

When making juice, cleaning carrots right is key. Start by washing them in cold water to get rid of dirt. This makes sure your juice is safe and good to drink.

To clean carrots, first rinse them under cold water. Then, use a vegetable brush to scrub off dirt. Next, peel the carrots with a vegetable peeler to remove the skin.

Washing and Peeling Guidelines

Peeling carrots keeps dirt and bacteria out of your juice. Some juicers need carrots chopped before juicing. Use a light touch when cutting to avoid pulpy carrots.

Cutting Techniques

Here are tips for cutting carrots for juice:

  • Chop the carrots into chunks or slices, depending on the juicer’s requirements
  • Use a sharp knife to prevent crushing or tearing the carrots
  • Cut the carrots in a way that minimizes waste and maximizes juice extraction

By following these tips, your carrot juice will be fresh and tasty. Always focus on cleaning and handling carrots well for the best juice.

StepDescription
1. WashingRinse carrots under cold running water
2. PeelingUse a vegetable peeler to remove the skin
3. CuttingChop carrots into chunks or slices for juicing

Flavor-Boosting Ingredients

To make your carrot juice taste better, try adding a squeeze of fresh lemon, lime, or orange juice. These citrus flavors mix well with carrots’ natural sweetness. They make your drink refreshing and lively.

There are other carrot juice ingredients you can try too. Here are a few:

  • A pinch of salt to enhance the taste
  • A handful of fresh herbs like parsley or cilantro for extra depth
  • A few dates or a drizzle of honey for sweetness

Creating a great juice flavor is all about trying different things. With a bit of creativity, you can make your carrot juice a tasty and healthy choice every day.

Adding these carrot juice ingredients to your routine can make your juice even better. It lets you enjoy all the good things about this healthy drink.

Creative Carrot Juice Combinations

Carrot juice is great for mixing with fruits and veggies. This creates unique and tasty flavors. It’s key to pick ingredients that taste good and are good for you.

Fruit Additions

Fruits like pineapple, mango, or berries make carrot juice sweet and tangy. They’re full of vitamins, minerals, and antioxidants. Try carrot juice with pineapple and coconut water for a refreshing drink.

Vegetable Mix-ins

Adding veggies like cucumbers, celery, or bell peppers adds a fresh and savory taste. These are low in calories but packed with nutrients. You can also try different spices and herbs to make your juice even better.

Spice Enhancements

Spices like ginger, turmeric, or cayenne pepper add a kick to carrot juice. They’re good for fighting inflammation and boosting your immune system. Start with a little spice and adjust to taste, as they can be strong.

Storage and Shelf Life

Keeping carrot juice fresh is key to its nutritional value and taste. It can stay good in the fridge for up to 24 hours. Make sure to store it in a sealed container and keep it out of sunlight.

To keep carrot juice fresh longer, freeze it in ice cube trays or glass bottles. This way, you save its nutrients and taste. Here are some tips for storing carrot juice:

  • Use airtight containers to prevent oxidation and contamination.
  • Keep the juice away from direct sunlight and heat sources.
  • Label and date the containers for easy identification.
  • Store the juice in the refrigerator at a temperature below 40°F (4°C).

By following these tips, you can enjoy your carrot juice while keeping its nutritional value and taste. Always check the juice for any signs of spoilage before drinking it.

Freezing is a good option for longer storage. Frozen carrot juice can last up to 3 months. Just thaw it in the fridge or at room temperature when you’re ready to drink it.

Proper storage and handling are crucial for the quality and safety of your carrot juice. By following these guidelines, you can enjoy the benefits of carrot juice while keeping its nutritional value and flavor.

Troubleshooting Common Issues

When making carrot juice, you might face issues like texture problems or taste adjustments. Understanding the causes and solutions is key. Texture issues, like a pulpy or foamy juice, are common.

To fix texture problems, strain the juice through a fine-mesh sieve or cheesecloth. This removes excess pulp, making the juice smoother. Adding a pinch of salt can also reduce foam and improve texture. For taste issues, like bitterness or sweetness, a squeeze of lemon or honey can balance the flavor.

  • Use fresh, high-quality carrots for the best taste and texture.
  • Try different ingredient combinations to find the perfect flavor balance.
  • Keep the juice in the fridge to prevent spoilage and keep its nutrients.

By following these tips and being aware of common issues, you can enjoy a tasty and healthy carrot juice. Always prioritize food safety and proper handling when making and storing your juice.

IssueSolution
Texture problemsStrain the juice or add a pinch of salt
Taste adjustmentsAdd a squeeze of lemon or a drizzle of honey

Best Times to Drink Carrot Juice

Drinking carrot juice is good at any time, but knowing the best juice timing boosts its benefits. Studies show that having it in the morning can increase energy and support your immune system. It’s packed with vitamins and minerals, making it a great morning pick-me-up.

Drinking carrot juice before a workout is also beneficial. It’s full of carbs and electrolytes, which can improve your performance and prevent dehydration. It’s good for anyone, whether you’re a pro athlete or just starting out.

Morning Benefits

  • Boosts energy levels
  • Supports immune function
  • Rich in vitamins and minerals

Pre-workout Options

  • Natural source of carbohydrates
  • Provides essential electrolytes
  • Enhances workout performance

Choosing the right juice timing and understanding the carrot juice benefits can make a big difference. Always pick fresh, quality carrots. Enjoy your juice in moderation as part of a healthy diet.

Potential Side Effects and Precautions

Carrot juice is usually safe, but there are some juice side effects to watch out for. These can include allergic reactions, digestive problems, and issues with certain medicines. Always talk to a doctor before drinking carrot juice, if you have health issues.

Some people might get stomach upset or diarrhea because of carrots’ high fiber. To avoid this, start with a little and slowly add more. Also, if you have diabetes, keep an eye on your blood sugar, as carrot juice can change it.

  • Consult with a healthcare professional before consuming carrot juice, if you have health issues.
  • Start with small amounts and gradually increase to avoid digestive problems.
  • Monitor blood sugar levels, as carrot juice can affect blood sugar control.

Knowing the juice side effects and taking the right carrot juice precautions lets you enjoy its health benefits. This way, you can minimize risks.

Conclusion

Adding carrot juice recipes to your daily routine can change your life for the better. This drink is packed with nutrients and offers many health benefits. It can boost your immunity and help your eyes stay healthy.

Carrot juice is made from fresh, organic carrots. It’s a treasure trove of natural goodness. You can enjoy it on its own or mix it with other fruits and veggies for a tasty treat.

Drinking carrot juice regularly is important. It helps you get the most health benefits. So, make it a part of your diet and enjoy the journey to wellness.

Carrot juice is not just good for you; it’s also delicious. Its vibrant color and rich nutrients can improve your health. Enjoy it and make it a key part of your healthy lifestyle.

FAQ

What are the key benefits of drinking carrot juice?

Carrot juice is packed with vitamins, minerals, and antioxidants. It boosts your immune system, supports healthy vision, and aids in digestion.

How should I select the perfect carrots for juicing?

Choose fresh, organic carrots that are vibrant and firm. Avoid wilted or bruised carrots with green tops, as they’re less nutritious.

What type of juicer is best for making carrot juice?

You can use centrifugal, masticating, or cold-press juicers for carrots. Centrifugal juicers are common and affordable. Masticating and cold-press juicers make higher-quality juice.

Can I use a blender or food processor to make carrot juice?

Yes, blenders or food processors can make carrot juice. But, the juice might not be as smooth and could have more pulp.

How long can I store freshly made carrot juice?

Store carrot juice in the fridge for up to 24 hours. For longer storage, freeze it in ice cube trays or glass bottles.

What are some common issues I might encounter when making carrot juice?

You might face texture or taste problems. For texture issues, strain the juice. For taste, add a pinch of salt or a squeeze of lemon.

When is the best time to drink carrot juice?

Drink carrot juice anytime, but it’s great in the morning or before a workout. It gives a natural energy boost and improves physical performance.

Are there any potential side effects or precautions to be aware of when drinking carrot juice?

Carrot juice is usually safe, but be aware of potential side effects. These include allergic reactions, digestive issues, and interactions with medications. Always consult a healthcare professional, even if you have no health issues.

Easy Peach Crumble Recipe for the Perfect Summer Treat

What makes a peach crumble recipe the ultimate summer dessert? It’s the mix of sweet, juicy fresh peaches and a crunchy topping. Or is there something more to this classic treat? As summer gets warmer, we all look for tasty, easy desserts to share with loved ones. A peach crumble is perfect, with its fresh peaches and delicious topping.

Making a peach crumble at home is a great way to cool down and satisfy your sweet cravings. With a simple recipe, you can whip up a dessert that’s perfect for hot days. The sweet peaches and crunchy topping will make it a favorite among your guests. It’s a great pick for any summer gathering.

Key Takeaways

  • A peach crumble recipe is a perfect summer dessert featuring fresh peaches and a crunchy crumb topping
  • This dessert is easy to make and requires minimal ingredients
  • A homemade peach crumble is a great way to beat the heat and satisfy your sweet tooth
  • The combination of sweet peaches and crunchy crumb topping makes this dessert a hit with family and friends
  • This peach crumble recipe is an excellent choice for a summer dessert

Why Peach Crumble Is the Ultimate Summer Dessert

Peach crumble is a refreshing summer treat. It’s easy to make and perfect for gatherings. You can serve it warm or cold, making it versatile.

The mix of fresh peaches and a crumbly topping is amazing. It’s great for any summer event. Peach crumble offers several benefits:

  • Easy to make and prepare in advance
  • Can be served warm or cold
  • Perfect balance of textures and flavors

Peach crumble is a tasty and easy dessert for summer. Its refreshing taste and simple preparation make it a hit at parties.

Summer DessertPreparation TimeServing Options
Peach Crumble30 minutesWarm or Cold

Essential Ingredients for Your Peach Crumble Recipe

To make a delicious peach crumble, you need a few key ingredients. Fresh peaches are the base, and they should be ripe and sweet. Slice the peaches and mix them with sugar, flour, and spices for a tasty filling.

The crumb topping is also vital. It’s made from flour, sugar, and butter. You can add nuts or oats for extra texture and flavor. This topping makes the peach crumble special.

Choosing the Perfect Peaches

When picking peaches, look for ones that are slightly soft and smell sweet. You can use any peach variety, but some are better for baking. Slice and mix the peaches with sugar, flour, and spices for a delicious filling.

Crumble Topping Components

The crumb topping is a mix of flour, sugar, and butter. It should be crumbly. You can also add nuts or oats for more texture and flavor. This topping is what makes the peach crumble unique.

Optional Add-ins and Variations

You can customize your peach crumble in many ways. Try adding different spices or flavorings like cinnamon or vanilla. Use different sugars or add a splash of liqueur to the filling. The options are endless, so feel free to experiment and find your favorite peach crumble.

IngredientQuantity
Peaches3-4 cups
Sugar1/2 cup
Flour1 1/2 cups
Butter1/2 cup

Kitchen Tools and Equipment Needed

To make a tasty peach crumble, you need the right tools. A big mixing bowl is key for mixing the peach filling. You’ll also need a pastry blender or food processor for the crumb topping. Plus, a 9×9 inch baking dish is essential for baking the crumble.

You’ll also need a measuring cup, spoon, and spatula. These tools help you measure ingredients and prepare the dessert. Having the right tools makes making a peach crumble easier and faster.

  • Large mixing bowl
  • Pastry blender or food processor
  • 9×9 inch baking dish
  • Measuring cup
  • Spoon
  • Spatala

With these tools, you’re ready to make a delicious peach crumble dessert.

Step-by-Step Peach Crumble Recipe

To make a delicious peach crumble, follow a simple recipe. The secret is a sweet peach filling and a crunchy topping. We’ll show you how to prepare the filling, make the topping, and assemble the crumble.

Preparing the Peach Filling

Begin by slicing the peaches. Mix them with sugar, flour, and spices. This mix will be your peach filling. Use fresh, ripe peaches for the best taste.

Making the Crumb Topping

To create the topping, mix flour, sugar, and butter. Use a pastry blender or food processor until it’s coarse crumbs. This topping adds a crunchy texture to the soft peaches.

Here’s a simple list for the crumb topping:

  • Combine 1 cup of flour, 1/2 cup of sugar, and 1/2 cup of cold butter in a bowl
  • Use a pastry blender or food processor to work the butter into the dry ingredients
  • Continue blending until the mixture resembles coarse crumbs

Assembly and Baking Instructions

Place the peach filling in a 9×9 inch baking dish. Top it with the crumb topping. Bake at 375°F for 40-50 minutes. The topping should be golden, and the filling bubbly. This recipe is perfect for summer, impressing everyone with its peach filling and topping.

Tips for Achieving the Perfect Crumble Texture

Getting the perfect crumble texture is key to a tasty peach crumble. The right mix of flour and butter in the topping is crucial. Cold butter and mixing until it’s coarse crumbs are important steps. This makes the topping crunchy yet tender.

Remember, don’t overmix the topping. This can make it tough and dense, ruining the texture. By following these tips, you’ll make a peach crumble that wows everyone.

  • Use all-purpose flour for the topping. It gives the right texture and structure.
  • Bake the crumble just right. Overbaking can make the topping too brown and the filling dry.
  • The right sugar balance is key. Too much sugar makes the topping too sweet, too little makes it bland.
Baking TipsDescription
Use cold butterCold butter makes the topping crunchy and tender.
Don’t overmixOvermixing makes the topping tough and dense.
Use the right ratio of flour to butterThe right flour to butter ratio is essential for the perfect texture.

Follow these tips and use the right ingredients. You’ll make a peach crumble with a perfect texture. It will become a favorite dessert.

Serving Suggestions and Pairings

Peach crumble is a versatile dessert perfect for any occasion. Serving it with vanilla ice cream is a popular choice. This combo enhances the dessert’s warm and crunchy texture.

There are endless ways to serve peach crumble. You can enjoy it warm or cold, whichever you prefer. Adding a dollop of whipped cream or a sprinkle of cinnamon can make it even more special.

Best Ice Cream Combinations

Choosing the right ice cream can make a big difference. Here are some top picks for peach crumble:

  • Vanilla ice cream: a timeless favorite
  • Caramel ice cream: adds a sweet and salty twist
  • Peach ice cream: pairs perfectly with the peach crumble

Garnish Ideas

Adding a garnish can elevate your dessert. Here are some ideas:

  • Fresh peaches: arrange sliced peaches on top
  • Whipped cream: add a dollop with cinnamon
  • Caramel sauce: drizzle for a sweet and salty touch
TemperatureDescription
WarmServe the peach crumble warm, straight from the oven
ColdServe the peach crumble cold, chilled in the refrigerator for a few hours

Storage and Make-Ahead Options

Peach crumble is a versatile dessert that’s great for busy times or special events. It can be stored and made ahead in different ways. To keep it fresh, follow some key refrigeration tips.

Refrigerate the peach crumble in an airtight container. For longer storage, freeze it in a freezer-safe container or bag. This way, you can prepare it ahead and serve it whenever you want.

Here are some storage options to consider:

  • Refrigerate for up to 3 days
  • Freeze for up to 2 months
  • Store in an airtight container
  • Use a freezer-safe container or bag

By following these tips, your peach crumble will stay delicious, whether served fresh or made ahead.

Refrigeration Guidelines

Refrigeration is a good way to keep peach crumble fresh. Place it in an airtight container and store it in the fridge at 40°F (4°C) or below.

Freezing Instructions

Freezing is also a great option for peach crumble. Place it in a freezer-safe container or bag and store it at 0°F (-18°C) or below.

Storage MethodStorage TimeStorage Temperature
RefrigerateUp to 3 days40°F (4°C) or below
FreezeUp to 2 months0°F (-18°C) or below

Seasonal Variations and Fruit Substitutions

Peach crumble is a versatile dessert that can use different fruits. This makes it perfect for seasonal changes. By swapping fruits, you can enjoy new flavors with each season.

Nectarines, plums, and apricots are great substitutes for peaches. Each fruit adds its own taste and texture. For instance, nectarines are sweet and tangy, while plums are richer.

To try a new peach crumble, just swap the peaches with your favorite fruit. Adjust the spices and flavors to match. You can mix fruits for a unique dessert. Here are some ideas:

  • Summer: Peaches, nectarines, or plums, with a hint of cinnamon and nutmeg
  • Autumn: Apples or pears, with a blend of warm spices like cinnamon, nutmeg, and allspice
  • Winter: Quince or persimmons, with a touch of citrus and a crunchy oat topping

Exploring seasonal fruits and substitutions keeps your dessert fresh. It also highlights the unique tastes of each season. So, don’t hesitate to try new combinations. You might find a new favorite!

FruitSeasonal VariationSpices and Flavorings
PeachesSummerCinnamon, nutmeg
NectarinesSummerCinnamon, nutmeg, almond extract
PlumsAutumnCinnamon, nutmeg, allspice

Common Troubleshooting Tips

When making a peach crumble, you might face some common problems. These can be fixed with a few simple tips. To get your dessert just right, follow some basic baking advice. A soggy bottom is often due to too much liquid or not enough baking time.

To solve this, try baking it a bit longer or use a water bath. This helps keep the bottom from getting too wet. Another problem is a burnt topping. This usually happens if the oven is too hot or if it’s baked for too long.

To avoid this, lower the oven temperature or bake it for a shorter time. This way, you’ll get the perfect texture without burning.

Fixing a Soggy Bottom

  • Check the peach filling for excess liquid
  • Adjust the baking time to prevent a soggy bottom
  • Use a water bath to prevent the bottom from becoming too wet

Preventing Burnt Topping

  • Reduce the oven temperature to prevent burning
  • Adjust the baking time to achieve the perfect texture
  • Keep an eye on the peach crumble while it’s baking

By using these tips, your peach crumble will turn out perfectly. It will be a delicious dessert to enjoy. Always adjust the sweetness to your liking and try different ingredients for unique flavors.

Conclusion: Mastering Your Homemade Peach Crumble

Learning to make homemade peach crumble is easy. Just follow the steps and tips in this recipe. You’ll make a delicious dessert that everyone will love. Use fresh, quality ingredients and adjust the flavors to your liking.

With a bit of practice, you’ll be a pro at baking peach crumble. Serve it with vanilla ice cream for a summer treat. Or, try different fruits to keep things exciting.

So, why wait? Start making this tasty homemade dessert recipe. Enjoy the sweet peaches and the crunchy topping. It’s a great way to enjoy the season’s flavors.

FAQ

What are the key ingredients for a perfect peach crumble?

For a tasty peach crumble, you need fresh, ripe peaches. Also, add flour, sugar, butter, and spices like cinnamon or nutmeg.

How do I choose the best peaches for my crumble?

Choose peaches that are ripe and smell good. They should be slightly soft. Avoid hard or blemished peaches for the best taste and juiciness.

What tools and equipment do I need to make a peach crumble?

You’ll need a big mixing bowl and a pastry blender or food processor. Also, a 9×9 inch baking dish, a measuring cup, spoon, and spatula.

How do I prevent the crumb topping from burning?

To avoid a burnt topping, bake at 375°F. Keep an eye on it. If it browns too fast, lower the oven temperature or shorten the baking time.

Can I make peach crumble ahead of time?

Yes, you can make it ahead. Refrigerate for up to 3 days or freeze for 2 months. Thaw in the fridge or reheat in the oven when you’re ready.

What are some tasty variations or add-ins for peach crumble?

Try adding spices like cinnamon, nutmeg, or ginger. You can also add nuts, oats, or other fruits like nectarines, plums, or apricots for extra flavor and texture.

How do I achieve the perfect crumb texture for my peach crumble?

For the perfect crumb, use cold butter. Mix it into the dry ingredients until it’s coarse. Don’t overmix to avoid a tough topping.

What are some good serving suggestions for peach crumble?

Serve peach crumble with vanilla ice cream or whipped cream. You can also garnish with fresh peach slices or powdered sugar.

Mouthwatering Branzino Recipe: Baked to Perfection

What makes a perfect branzino recipe? It’s all about the mix of a tasty seafood recipe and the right cooking methods. Branzino, a prized Mediterranean fish, is loved for its delicate taste and firm texture. It’s a favorite among seafood fans. In this article, we’ll dive into the world of branzino and show you how to cook it to perfection.

Key Takeaways

  • Learn about the origins and characteristics of branzino, a Mediterranean fish
  • Discover the nutritional benefits of incorporating branzino into your seafood recipe
  • Get tips on how to cook the perfect branzino recipe with a delicious flavor
  • Explore different seasoning and marinade options for your branzino dish
  • Find out how to pair your baked branzino with complementary side dishes
  • Understand the importance of proper storing and reheating techniques for your branzino recipe

What is Branzino? Understanding This Prized Mediterranean Fish

Branzino is a type of sea bass known for its delicate flavor and firm texture. It comes from the Mediterranean Sea and is a key ingredient in many healthy fish recipe dishes. Its mild taste and versatility make it perfect for baking, grilling, or sautéing.

Chefs often choose simple yet flavorful seafood recipe methods to highlight Branzino’s natural taste. This lets the fish shine, with ingredients that boost its flavor. Whether you’re a pro chef or a home cook, Branzino is great for making a tasty and healthy fish recipe that will wow everyone.

Origins and Characteristics

Branzino has silver-gray scales and a unique flavor that’s sweet and savory. Its firm texture and flaky flesh are perfect for baking or grilling.

Nutritional Benefits

This Mediterranean fish is not just tasty but also healthy. It’s packed with protein, omega-3 fatty acids, and essential nutrients. Adding Branzino to your healthy fish recipe collection is a smart choice.

Why Chefs Love Branzino

Chefs love Branzino for its versatility and easy preparation. Its mild flavor and firm texture open up endless creative possibilities. It’s great for both traditional Mediterranean dishes and modern fusion cuisine.

Essential Ingredients for the Perfect Branzino Recipe

To make a tasty branzino recipe, you need a few key items. These include fresh branzino, olive oil, garlic, lemon, and herbs. The quality of these ingredients is key in Italian cuisine. They help make a dish that’s full of flavor and true to its roots.

For easy dinner ideas, having a good pantry is important. For branzino, you’ll need:

  • Fresh branzino fillets
  • Extra virgin olive oil
  • Garlic cloves
  • Fresh lemons
  • Chopped herbs, such as parsley or rosemary

A branzino recipe needs the right seasonings too. Add salt, pepper, and a bit of red pepper flakes for extra taste. With these, you’re ready to make a delicious Italian cuisine dish.

For a simple easy dinner idea, serve your branzino with roasted veggies or a fresh salad. This adds to the dish’s flavors and makes for a complete meal.

By using fresh ingredients and following these tips, you’ll make a branzino recipe that will wow everyone. It’s perfect for both experienced cooks and beginners.

IngredientQuantity
Fresh branzino fillets4-6
Extra virgin olive oil1/4 cup
Garlic cloves3-4
Fresh lemons2
Chopped herbs1/4 cup

Kitchen Tools and Equipment You’ll Need

To make a tasty seafood dish like branzino, you need the right tools and equipment. A well-stocked kitchen makes cooking easier and more fun. For baking the branzino, a baking sheet and oven are key.

For this seafood recipe, you’ll also need some special tools. A sharp knife for filleting, a cutting board for chopping, and a spatula for flipping the branzino are must-haves. Quality kitchen tools really make a difference.

  • A meat thermometer to check the branzino’s temperature
  • A pastry brush for marinades and sauces
  • Tongs for handling the fish carefully

With these tools and equipment, you’ll create a delicious seafood dish. It’s sure to impress everyone at your table.

Preparing Your Branzino for Cooking

To make a tasty branzino recipe, you need to prepare the fish right. Start by scaling, gutting, and rinsing the branzino. This removes any dirt and makes the fish clean for cooking.

Preparing the branzino is just the start. A great branzino recipe needs focus on every detail. Here are some important steps:

  • Scale the fish to remove any impurities
  • Gut the fish to remove the internal organs
  • Rinse the fish under cold water to remove any remaining impurities

By following these steps, you’ll get your branzino ready for cooking. Always handle the fish gently to keep its delicate flesh intact. With the right preparation and cooking tips, you’ll make a branzino recipe that will wow everyone.

Remember, the secret to a great dish is in the details. From the freshness of the ingredients to how you present the dish, every step matters. By paying attention to these details and preparing your branzino well, you’ll create a dish that’s not only delicious but also looks amazing.

Classic Mediterranean Branzino Recipe

To make a tasty Mediterranean dish, use fresh ingredients and keep it simple. Branzino is a key fish in the Mediterranean, loved for its flavor and health benefits. It’s enjoyed worldwide for these reasons.

Here are the main ingredients and steps for a true Mediterranean branzino recipe.

  • Fresh branzino fish, preferably wild-caught
  • Extra virgin olive oil for cooking and dressing
  • Lemon juice and zest for added flavor
  • Garlic and herbs like thyme and rosemary for seasoning

Start by preheating your oven to 400°F (200°C). Season the fish with salt, pepper, and herbs. Then, drizzle with olive oil and lemon juice. Bake for 12-15 minutes, or until it’s flaky and tender.

Cooking times and temperatures can change based on the fish’s size and thickness. Cooking at high heat for a short time makes the outside crispy and the inside tender. This method is key to Mediterranean seafood cooking, boosting the dish’s flavor.

IngredientMeasurement
Branzino fish4 fillets (6 oz each)
Olive oil1/4 cup
Lemon juice2 tablespoons
Garlic2 cloves, minced

Seasoning and Marinade Options

To add flavor to your branzino, you can use various seasoning and marinade options. A good seafood recipe can be enhanced with herbs and spices. These complement the delicate taste of the fish.

Some popular seasoning options for branzino include:

  • Lemon pepper
  • Garlic and herbs
  • Mediterranean spice blend

These seasoning options can be used alone or with a marinade for a more complex flavor.

A marinade adds moisture and flavor to the fish. A simple marinade is olive oil, lemon juice, and herbs. For a more elaborate seafood recipe, try a marinade with yogurt, garlic, and spices.

When using a marinade or seasoning, adjust salt and pepper to taste. You can also mix herbs and spices to create a unique flavor for your seafood recipe.

Seasoning OptionMarinade OptionFlavor Profile
Lemon pepperOlive oil and lemon juiceBright and citrusy
Garlic and herbsYogurt and garlicRich and savory
Mediterranean spice blendHerbs and spicesComplex and aromatic

Side Dishes That Complement Baked Branzino

Baked branzino is a versatile dish that pairs well with many side dishes. Mediterranean cuisine offers several traditional options that go great with branzino. These include roasted vegetables, quinoa salad, and grilled asparagus.

For seafood lovers, branzino pairs well with garlic shrimp, steamed mussels, and sautéed scallops. These dishes add variety and enhance the branzino’s flavor. For a modern twist, try pairing it with roasted sweet potatoes, braised kale, or lemon-herb rice.

Traditional Mediterranean Accompaniments

  • Roasted vegetables: Roasted vegetables like zucchini, bell peppers, and eggplant are a classic choice for branzino.
  • Quinoa salad: A quinoa salad with mixed veggies, feta, and lemon-tahini dressing is refreshing and pairs well with branzino.
  • Grilled asparagus: Grilled asparagus with lemon and parmesan is simple yet elegant, making it a great side dish for branzino.

Modern Pairing Suggestions

For a modern twist, consider pairing branzino with roasted sweet potatoes, braised kale, or lemon-herb rice. These options add a creative touch to the traditional Mediterranean pairings. They can also enhance your dining experience.

Side DishDescription
Roasted Sweet PotatoesRosemary and garlic infused roasted sweet potatoes
Braised KaleKale braised in white wine and garlic, finished with lemon butter
Lemon-Herb RiceFluffy rice infused with lemon zest, parsley, and dill

Common Mistakes to Avoid When Cooking Branzino

Seafood cooking, like with branzino, needs careful attention to avoid mistakes. Overcooking is a big error, making the fish dry and tough. Always stick to the recommended cooking times and temperatures for your branzino recipe.

Another mistake is underseasoning. Branzino’s mild flavor needs proper seasoning. Use quality ingredients and a balanced seasoning blend to enhance its taste.

Here are some common mistakes to avoid when cooking branzino:

  • Overcooking the fish
  • Underseasoning
  • Not using fresh and high-quality ingredients

To ensure a delicious branzino dish, be mindful of these mistakes. Always follow a trusted branzino recipe. Take your time to prepare your ingredients carefully for the best results.

Wine Pairing Suggestions for Your Branzino Dish

Choosing the right wine for baked branzino can make a big difference. A good wine pairing can enhance the dish’s flavors, making it unforgettable. For branzino, a Mediterranean wine is often the best choice. It complements the fish’s delicate taste and texture.

Popular white wine options for branzino include Pinot Grigio, Sauvignon Blanc, and Vermentino. These wines are crisp and refreshing. They balance the richness of the fish with their flavors. For a taste of the Mediterranean, try a Greek Assyrtiko or a Spanish Albariño. They match the bright, citrusy flavors of the region.

White Wine Options

  • Pinot Grigio: A crisp and refreshing wine with flavors of green apple and citrus
  • Sauvignon Blanc: A zesty and herbaceous wine with notes of grapefruit and grass
  • Vermentino: A dry and savory wine with flavors of lemon, lime, and herbs

Regional Mediterranean Pairings

For a truly authentic wine pairing, match your branzino with a wine from the same region. A Greek white wine, like Assyrtiko, pairs well with the Mediterranean’s bright flavors. A Spanish Albariño complements the fish’s rich, savory taste.

In conclusion, finding the right balance between the fish’s flavors and the wine is key. With these wine pairing suggestions, you’ll create a memorable culinary experience.

WineRegionFlavor Profile
Pinot GrigioItalyCrisp, refreshing, green apple, citrus
Sauvignon BlancFranceZesty, herbaceous, grapefruit, grass
VermentinoItalyDry, savory, lemon, lime, herbs

Storing and Reheating Tips

Storing and reheating your seafood recipe right is key. It keeps the dish safe and tasty. After cooking your branzino, let it cool down to room temperature. Then, store it in an airtight container in the fridge.

When reheating, use the oven or microwave safely. Here are some tips to remember:

  • Reheat the branzino to at least 165°F (74°C) for safety.
  • Check the internal temperature with a food thermometer, important for seafood.
  • Avoid overcrowding to prevent uneven heating and bacteria growth.

By following these tips, you can enjoy your seafood recipe safely and well. Proper food handling and storage are vital to avoid foodborne illness. So, handle and store your branzino carefully.

Conclusion: Mastering the Art of Baked Branzino

As we wrap up our journey into branzino, a key part of Mediterranean cuisine, it’s clear that mastering baked branzino is rewarding. With the right ingredients, tools, and techniques, you can make a dish that will wow your guests. It’s a true seafood cooking experience.

By following our guide, you can make a branzino dish that’s both delicious and authentic. Try different seasonings and marinades to find your favorite. Pair it with the right side dishes and wine pairings for a complete meal.

Now, you have the knowledge to make amazing baked branzino at home. Bring the Mediterranean to your kitchen and enjoy the joy of cooking. Impress your loved ones with this tasty and impressive dish.

FAQ

What is Branzino?

Branzino is a Mediterranean sea bass known for its delicate taste and firm texture. It’s a favorite among chefs and seafood lovers for its versatility and health benefits.

What are the origins and characteristics of Branzino?

Branzino comes from the Mediterranean Sea. It’s loved for its mild, sweet flavor and flaky texture. It’s great for many cooking methods, like baking, grilling, and pan-searing.

What are the nutritional benefits of Branzino?

Branzino is packed with protein, omega-3s, and vitamins. It’s low in mercury and high in lean protein, making it great for health.

Why do chefs love Branzino?

Chefs adore Branzino for its flexibility and ability to highlight different flavors. Its mild taste and firm texture make it perfect for creative dishes. It’s also a hit with diners, so it’s a menu staple.

What are the essential ingredients for a perfect Branzino recipe?

For a top Branzino dish, you need fresh Branzino, quality olive oil, garlic, lemon, and herbs like rosemary, thyme, and parsley.

What kitchen tools and equipment are needed to prepare Branzino?

You’ll need a baking sheet, oven, and basic cooking tools like a spatula and tongs. For more advanced prep, consider a fish spatula or deboning pliers.

How do you prepare Branzino for cooking?

First, scale, gut, and rinse the Branzino. This step cleans it for cooking.

What are some seasoning and marinade options for Branzino?

To flavor Branzino, try lemon, garlic, herbs, and Mediterranean spices like oregano, basil, and paprika.

What side dishes complement baked Branzino?

Baked Branzino goes well with roasted veggies, rice pilaf, and fresh salads. For something new, try quinoa, couscous, or grilled asparagus.

What common mistakes should be avoided when cooking Branzino?

Avoid overcooking, underseasoning, and using low-quality ingredients. Focus on proper prep and cooking times for a delicious Branzino.

What wine pairing suggestions are there for Branzino?

Pair Branzino with white wines like Sauvignon Blanc, Pinot Grigio, and Vermentino. Mediterranean wines like Greco di Tufo or Falanghina are also great choices.

How should Branzino be stored and reheated?

Store Branzino in the fridge and eat it within a few days. When reheating, use gentle heat to keep its texture and flavor intact.

Delicious Chocolate Gravy Recipe

What makes a chocolate gravy recipe unforgettable? Is it the rich, velvety texture or the deep flavor that goes well with breakfast treats? For many, the perfect chocolate gravy recipe is a key part of Southern cuisine. It makes biscuits, pancakes, and more even better. In this article, we’ll explore what makes homemade chocolate gravy special.

We’ll cover everything from essential ingredients to kitchen tools. Whether you’re a pro in the kitchen or just starting out, our guide is here to help. Our easy chocolate gravy recipe is all about simplicity and flavor. It’s sure to become a hit in your home. So, what makes a delicious chocolate gravy recipe stand out?

Key Takeaways

  • Understanding the basics of a chocolate gravy recipe is crucial for achieving the perfect flavor and texture
  • Homemade chocolate gravy can be made with just a few simple ingredients
  • An easy chocolate gravy recipe is perfect for breakfast or brunch
  • The right kitchen tools and equipment can make all the difference in creating a smooth and creamy gravy
  • Experimenting with different flavors and ingredients can help you create a unique chocolate gravy recipe
  • A delicious chocolate gravy recipe is a great way to add some excitement to your morning routine

What is Chocolate Gravy?

Chocolate gravy is a sweet, rich condiment loved in the United States, especially in the south. It’s made with chocolate, milk, and flour, giving it a smooth, creamy feel. It’s great over biscuits, pancakes, or waffles, making breakfast or brunch even better.

The idea of southern chocolate gravy started in the early 1900s. It was a way to use leftover chocolate, which was rare and expensive back then. Now, chocolate milk gravy is a key part of southern cooking, with families sharing their secret recipes for years.

In recent years, best chocolate gravy has become popular all over the United States. Restaurants and cafes now offer their own versions. Whether you want a classic chocolate milk gravy or something new, it’s a hit with foodies and chocolate fans.

Here are some ways to enjoy chocolate gravy:

  • Serving it over biscuits or pancakes
  • Using it as a topping for waffles or ice cream
  • Mixing it with other ingredients to create a unique dessert sauce

In summary, chocolate gravy is a tasty, versatile condiment that’s perfect for satisfying sweet cravings. Whether you’re a fan of southern chocolate gravy or just want to try something new, it’s definitely worth trying.

Essential Ingredients for the Perfect Chocolate Gravy

To make a tasty cocoa gravy recipe, you need a few key ingredients. High-quality cocoa powder is crucial for its rich, chocolatey taste. You’ll also need milk, flour, and sugar to get the right flavor and consistency.

For the best traditional chocolate gravy recipe, use top-notch chocolate. Dark or semi-sweet chocolate adds a deep, creamy flavor. A pinch of salt and a dash of vanilla extract can also boost the taste, adding depth to your cocoa gravy recipe.

Here are the essential ingredients you’ll need:

  • 1 cup high-quality cocoa powder
  • 2 cups milk
  • 2 tablespoons flour
  • 1 tablespoon sugar
  • 1/4 teaspoon salt
  • 1/2 teaspoon vanilla extract
  • 2 ounces high-quality chocolate (dark or semi-sweet)

By using these ingredients and following a simple classic chocolate gravy recipe, you can make a delicious, rich chocolate gravy. It’s perfect for biscuits, pancakes, or waffles. Choose the best ingredients for your traditional chocolate gravy recipe to get the best flavor and texture.

IngredientQuantity
Cocoa powder1 cup
Milk2 cups
Flour2 tablespoons
Sugar1 tablespoon
Salt1/4 teaspoon
Vanilla extract1/2 teaspoon
High-quality chocolate2 ounces

Kitchen Tools and Equipment Needed

To make delicious homemade chocolate gravy, you’ll need some basic kitchen tools. The right tools can greatly improve the quality of your easy chocolate gravy.

A medium saucepan is key for heating the mixture. A whisk is needed for smooth blending. And, a measuring cup is essential for accurate ingredient amounts.

Basic Requirements

  • Medium saucepan
  • Whisk
  • Measuring cup

Optional Tools for Better Results

Optional tools can help you get even better results. A thermometer is great for precise temperature control. And, a blender can make your gravy extra smooth.

Investing in these tools will help you make a rich and delicious easy chocolate gravy. It will take your breakfast or dessert dishes to the next level.

ToolPurpose
Medium saucepanHeating the mixture
WhiskSmooth blending
Measuring cupAccurate ingredient proportions

Classic Chocolate Gravy Recipe Step by Step

To make a tasty southern chocolate gravy, start by melting 1 cup of chocolate in a saucepan over low heat. Then, whisk in 2 tablespoons of flour to make a smooth paste. Next, add 1 cup of milk slowly, whisking all the time to avoid lumps.

Don’t forget to add 1 tablespoon of sugar. Keep whisking until the mix thickens up nicely.

Here’s a step-by-step guide to making the perfect chocolate gravy recipe:

  • Melt the chocolate in a saucepan over low heat
  • Whisk in the flour to create a smooth paste
  • Gradually add the milk, whisking continuously
  • Add the sugar and continue whisking until the mixture thickens

While cooking the chocolate gravy recipe, stir constantly to avoid burning. If you want it thicker, add a bit more flour or cook it longer. For a thinner gravy, add a bit more milk.

Once the southern chocolate gravy is just right, take it off the heat. Let it cool a bit. Serve it over biscuits, pancakes, or waffles for a sweet treat. This classic chocolate gravy recipe makes a rich, creamy sauce perfect for any time.

IngredientQuantity
Chocolate1 cup
Flour2 tablespoons
Milk1 cup
Sugar1 tablespoon

Tips for Achieving the Perfect Consistency

To make the best chocolate gravy, getting the right consistency is key. It might take some effort, but with the right tips, you can achieve a smooth, creamy gravy. This is great for biscuits or pancakes.

One common issue is the gravy being too thick or too thin. To fix this, whisk constantly while it cooks. This ensures the chocolate and milk mix well. Adjusting the heat helps prevent the gravy from boiling over or sticking to the pan.

Common Texture Problems

Texture issues like lumps, separation, or being too thick can happen. To solve these, whisk the gravy harder or add a bit more milk to thin it.

Troubleshooting Solutions

Don’t worry about texture problems in your chocolate gravy. For a thick gravy, add more milk or cream. If it’s too thin, cook it a bit longer to thicken it.

Expert Techniques

For an even better chocolate gravy, try tempering the chocolate or using top-notch cocoa powder. You can also add a pinch of salt or a teaspoon of vanilla extract for extra flavor.

By using these tips, you can make a delicious, creamy chocolate gravy. It’s perfect for biscuits, pancakes, or even ice cream. With practice, you’ll soon be a pro at making chocolate milk gravy.

Best Pairings and Serving Suggestions

There are many ways to serve classic chocolate gravy. It’s great over breakfast treats or desserts. Try it over biscuits, pancakes, or waffles for a traditional breakfast.

Here are some ideas for using classic chocolate gravy:

  • Serve over biscuits, pancakes, or waffles for a delicious breakfast treat
  • Use as a topping for ice cream or yogurt for a sweet dessert
  • Pair with fresh fruit, such as strawberries or bananas, for a lighter option
  • Try using traditional chocolate gravy recipe as a dip for nuts or pretzels

Classic chocolate gravy is always a winner. Its rich, chocolatey taste makes any meal better. So, get creative and find your favorite way to enjoy traditional chocolate gravy recipe!

Variations of Traditional Chocolate Gravy

Want to try something new? There are many ways to change up traditional chocolate gravy. These tweaks can make the classic recipe your own, fitting your taste and dietary needs. Making homemade chocolate gravy is simple, and a few tweaks can lead to exciting flavors.

For a deeper taste, try a dark chocolate version. Use dark cocoa powder or dark chocolate chips. It’s great for those who love a bold chocolate flavor in their easy chocolate gravy. If you’re looking for something dairy-free, use almond or soy milk. This makes the gravy perfect for those with dietary restrictions.

  • Dark Chocolate Version: uses dark cocoa powder or dark chocolate chips
  • Dairy-Free Alternatives: uses non-dairy milk such as almond or soy milk
  • Spiced Chocolate Gravy: adds a pinch of cinnamon or cayenne pepper to give the gravy a spicy kick

These changes can turn chocolate gravy into a variety of desserts. Enjoy it over pancakes or waffles, or as a topping for ice cream or fruit.

VariationIngredientsTaste
Dark Chocolate VersionDark cocoa powder or dark chocolate chipsDeeper, richer flavor
Dairy-Free AlternativesNon-dairy milk such as almond or soy milkSuitable for those with dietary restrictions
Spiced Chocolate GravyPinch of cinnamon or cayenne pepperSpicy kick

Storage and Reheating Guidelines

After making your tasty chocolate gravy, it’s key to store it right. This keeps it fresh and flavorful. Use airtight containers in the fridge or freezer to store your southern chocolate gravy.

Proper Storage Methods

For up to 3 days, keep your chocolate gravy in the fridge. Use a clean, airtight container to avoid contamination. For longer storage, freeze it for up to 2 months. Use a freezer-safe container to prevent ice and separation.

Reheating Instructions

To reheat, use the stovetop or microwave. On the stovetop, heat it over low, whisking constantly. In the microwave, heat in 10-second bursts, stirring between each. Always reheat to 165°F (74°C) for safety.

By following these tips, your homemade chocolate gravy will last longer. Enjoy it with breakfast, brunch, or as a dessert topping. It will stay fresh and delicious.

Storage MethodStorage TimeReheating Method
RefrigeratorUp to 3 daysStovetop or Microwave
FreezerUp to 2 monthsStovetop or Microwave

Common Mistakes to Avoid

When making the best chocolate gravy, it’s key to know common mistakes. Overcooking the gravy can make it thick and unappetizing. To avoid this, constant stirring is crucial, especially with chocolate milk gravy. Also, using low-quality ingredients can ruin the flavor and quality of the gravy.

To avoid these mistakes, pay close attention and practice. Here are some tips for perfect chocolate gravy:

  • Use high-quality cocoa powder or chocolate for the best flavor
  • Whisk the gravy constantly to prevent lumps and overcooking
  • Don’t overheat the gravy, as this can cause it to break or become too thick

By following these tips and being careful, you can make a delicious, creamy chocolate gravy. It’s great over biscuits or pancakes. Whether you stick to a traditional recipe or try a chocolate milk gravy, success comes from paying attention and practicing.

“The secret to making the best chocolate gravy is to use high-quality ingredients and to whisk constantly. With a little practice, you’ll be making delicious, creamy gravy like a pro!”

MistakeSolution
Overcooking the gravyConstant stirring and monitoring the heat
Using low-quality ingredientsChoosing high-quality cocoa powder or chocolate
Not whisking the gravy enoughWhisking constantly to prevent lumps and overcooking

Health Considerations and Dietary Adaptations

Enjoying classic chocolate gravy needs careful thought about nutrition and diet. Traditional recipes can be high in calories and fat. This is a problem for those with certain dietary needs. To make a healthier version, knowing the nutritional content and making changes is key.

The nutritional facts of chocolate gravy depend on the recipe. A typical serving has 100 to 200 calories, with lots of fat and sugar. For a healthier option, try using dark chocolate or dairy-free milk. These can lower calories and fat.

Nutritional Information

A typical serving of classic chocolate gravy contains:

  • Calories: 150-200 per serving
  • Fat: 10-15g per serving
  • Sugar: 20-25g per serving

Dietary Modifications

To make a healthier version of chocolate gravy, consider these changes:

  • Use dark chocolate with at least 70% cocoa content
  • Replace traditional milk with dairy-free alternatives, such as almond or soy milk
  • Reduce the amount of sugar used in the recipe

Understanding nutrition and making dietary changes can help enjoy healthier chocolate gravy. Whether sticking to a traditional recipe or making adjustments, knowing the nutritional facts is crucial. This way, you can make informed choices about your diet.

IngredientTraditional AmountHealthier Alternative
Chocolate1 cup milk chocolate1/2 cup dark chocolate
Milk1 cup whole milk1 cup dairy-free milk
Sugar2 tablespoons1 tablespoon

The History Behind Southern Chocolate Gravy

Southern chocolate gravy has a rich history that spans over a century. It started in the early 20th century and is now a staple in southern cuisine. To make homemade chocolate gravy, you need to know its cultural significance and how it evolved.

The history of southern chocolate gravy is tied to the traditional cuisine of the southern United States. It’s often served with breakfast foods like biscuits, pancakes, and waffles. Making easy chocolate gravy is simple, needing just a few ingredients: cocoa powder, sugar, and milk.

Here are some key facts about southern chocolate gravy:

  • It originated in the southern United States in the early 20th century.
  • It is often served with breakfast foods such as biscuits and pancakes.
  • The traditional recipe includes cocoa powder, sugar, and milk.

To truly appreciate southern chocolate gravy, you must understand its history and evolution. By making homemade chocolate gravy and serving it with traditional southern breakfast foods, you can enjoy its rich flavors and traditions. Whether for a special occasion or a weekday breakfast, this treat is sure to delight.

IngredientQuantity
Cocoa powder2 tablespoons
Sugar1 tablespoon
Milk1 cup

Conclusion: Mastering Your Chocolate Gravy Recipe

Making the perfect chocolate gravy recipe is an art. It needs quality ingredients, the right technique, and patience. This article has given you the knowledge to make a delicious southern chocolate gravy that will wow your guests.

Whether you’re experienced or new to cooking, you can make the best chocolate gravy. Dive into the world of this beloved southern treat. Try new things and let your creativity shine. With each try, you’ll get better and better at making chocolate gravy.

Keep enjoying the cooking journey, celebrate your wins, and learn from mistakes. The fun of cooking is in the making, not just the end result. Enjoy the process, and you’ll become a true chocolate gravy expert.

FAQ

What is chocolate gravy?

Chocolate gravy is a tasty gravy from the southern United States. It’s made with chocolate, milk, and flour. It’s great over biscuits, pancakes, or waffles.

What are the origins and history of chocolate gravy?

The exact start of chocolate gravy is a mystery. But, it’s thought to have started as a way to use leftover chocolate. Now, it’s a key part of southern meals, enjoyed at breakfast or brunch.

What are the essential ingredients for making chocolate gravy?

To make chocolate gravy, you need good cocoa powder, milk, flour, and sugar. A bit of salt and vanilla can also enhance the taste.

What kitchen tools and equipment are needed to make chocolate gravy?

You’ll need a medium saucepan, a whisk, and a measuring cup for chocolate gravy. Optional tools like a double boiler or blender can help too.

How do you make the classic chocolate gravy recipe step-by-step?

Start by melting the chocolate. Then, whisk in flour and add milk and sugar slowly. Cooking it right is key for the perfect texture.

How do you achieve the perfect consistency for chocolate gravy?

Getting the right consistency is important. You can fix common issues by whisking well and cooking it to the right temperature.

What are the best pairings and serving suggestions for chocolate gravy?

Chocolate gravy goes well with biscuits, pancakes, waffles, and even ice cream or yogurt. It also pairs nicely with fruit and nuts.

What are some variations of traditional chocolate gravy?

You can try dark chocolate, dairy-free, or spiced chocolate gravy. These options let you tailor the flavor to your liking.

How do you properly store and reheat chocolate gravy?

Keep chocolate gravy refrigerated or frozen to store it. Reheat it on the stovetop or in the microwave carefully to keep it smooth and flavorful.

What are some common mistakes to avoid when making chocolate gravy?

Avoid overcooking, using bad ingredients, and not whisking enough. These mistakes can ruin your gravy. Follow these tips for success.

What are the health considerations and dietary adaptations for chocolate gravy?

Chocolate gravy is tasty but not always healthy. Knowing the nutritional facts and making healthy swaps can help you enjoy it guilt-free.

What is the history behind southern chocolate gravy?

Southern chocolate gravy has a rich history from the early 20th century. It’s a beloved part of southern cuisine, passed down through generations.

The Ultimate Guide to Cooking with Canned Pink Salmon

In today’s fast-paced world, finding ingredients that combine convenience, nutrition, and versatility can feel like striking gold. Enter canned pink salmon—a pantry staple that deserves a prime spot in your kitchen. Whether you’re a busy professional, a parent juggling multiple responsibilities, or someone who simply appreciates efficient cooking, canned pink salmon offers an impressive array of possibilities for creating delicious, nutritious meals in minutes.

Why Choose Canned Pink Salmon?

Time is precious in the kitchen, and canned pink salmon delivers significant time savings compared to its fresh counterpart. While preparing fresh salmon typically requires 30-45 minutes from start to finish, meals using canned salmon can be ready in as little as 25 minutes. This 10-20 minute difference might seem small, but it can make all the difference on busy weeknights when every minute counts.

Beyond convenience, canned pink salmon packs a powerful nutritional punch. It’s rich in omega-3 fatty acids, which help reduce inflammation and promote heart health. A single serving provides approximately 15 grams of high-quality protein, making it an excellent choice for maintaining muscle health and feeling satisfied. The canning process even preserves the salmon’s calcium content, as the soft, edible bones remain intact.

A World of Culinary Possibilities

The versatility of canned pink salmon might surprise you. Far from being limited to basic salmon salad, this ingredient can transform into an impressive variety of dishes. Here are some creative ways to use canned pink salmon:

Classic Salmon Patties

A beloved family favorite, salmon patties combine simplicity with satisfying flavor. Here’s what you’ll need:

  • One 14.75-ounce can of pink salmon
  • 1/2 cup of crushed saltine crackers
  • 1 tablespoon Worcestershire sauce
  • 1 beaten egg
  • 2 tablespoons of melted unsalted butter
  • Salt and pepper to taste
  • Canola oil for frying

Mix ingredients together, form into patties, and fry until golden brown. Pro tip: Make extra patties and freeze them for future meals.

Refreshing Salmon Salads

When it comes to quick, light meals, salmon salads shine. Try these variations:

  1. Salmon Taco Salad: Combine flaked salmon with crisp lettuce, fresh vegetables, and a zesty Greek yogurt coleslaw for a Mexican-inspired feast.
  2. Classic Salmon Salad: Mix canned salmon with mayonnaise, Dijon mustard, capers, and scallions for a sophisticated take on the classic.

Innovative Sandwich Creations

Transform your lunch routine with these creative sandwich options:

  1. Crispy Salmon Sandwich: Elevate canned salmon by soaking it in milk and coating it in a seasoned flour-pecan mixture before frying. Total time: 28 minutes (10 prep, 18 cook).
  2. Salmon Patty Sandwich: Combine salmon with shallots, cilantro, and soy sauce to create a flavorful patty, then top with tangy slaw. Ready in 30 minutes (5 prep, 25 cook).

Quick and Easy Recipe Ideas

When time is of the essence, try these speedy solutions:

  1. 15-Minute Classic Salmon Salad
    Mix canned salmon with avocado oil mayonnaise, diced hard-boiled egg, Worcestershire sauce, Dijon mustard, and Old Bay seasoning for a protein-rich meal ready in minutes.
  2. Simple Salmon Tacos
    Flake canned salmon and combine with diced onion, fresh cilantro, and a squeeze of lime juice. Serve in warm tortillas for an easy Mexican-inspired dinner.
  3. Quick Salmon Burgers
    Mix canned salmon with an egg and your choice of breadcrumbs or crushed crackers, shape into patties, and bake for a healthier alternative to traditional burgers.

Tips for Success

  • When making patties or burgers, drain the salmon well but consider keeping the calcium-rich bones for added nutrition.
  • Customize your dishes with fresh herbs, spices, and seasonal vegetables.
  • Keep several cans in your pantry for last-minute meal solutions.
  • Don’t overlook the possibility of using canned salmon in dips, soups, and pasta dishes.

Conclusion

Canned pink salmon proves that convenience doesn’t have to mean compromising on nutrition or taste. With its impressive versatility, significant time-saving benefits, and stellar nutritional profile, it’s an ingredient that deserves a regular spot in your meal planning rotation. Whether you’re crafting quick weeknight dinners or preparing for impromptu gatherings, canned pink salmon stands ready to help you create delicious, nutritious meals with minimal effort.

Remember, the key to making the most of this versatile ingredient is to think beyond traditional recipes and let your culinary creativity shine. From classic comfort food to innovative modern dishes, canned pink salmon can help you put a delicious, healthy meal on the table in minutes.

Make Perfectly Crispy Potato Chips at Home

What makes the perfect crispy potato chips recipe? Can you really get that satisfying crunch at home? Making homemade potato chips is fun and rewarding. It lets you control the ingredients and seasonings.

With the right techniques and tools, you can make deliciously crispy potato chips. They can even rival your favorite store-bought brands.

Imagine enjoying freshly made, crispy potato chips at home. You won’t have to worry about preservatives or additives. The secret to great homemade potato chips is in the preparation and cooking.

By following a simple recipe and using the right equipment, you can get that perfect crunch and flavor.

Key Takeaways

  • Learn how to make homemade potato chips with a simple recipe.
  • Discover the essential ingredients and equipment needed for crispy potato chips.
  • Understand the importance of proper slicing and soaking techniques.
  • Find out how to achieve the perfect oil temperature for frying.
  • Get tips on how to season your homemade potato chips for added flavor.
  • Learn how to store and serve your crispy potato chips for maximum freshness.

Essential Ingredients and Equipment for Homemade Potato Chips

To make tasty homemade potato chips, you need the right ingredients and tools. Russet or Yukon Gold potatoes are best because they’re high in starch. This makes the chips crispy outside and fluffy inside.

For uniform slices, a mandoline slicer is key. You’ll also need a deep fryer or a heavy pot with a thermometer. Choose oils like peanut or avocado for frying, as they have high smoke points.

Choosing the right oil is crucial for perfect chips. Different oils have unique flavors and smoke points. Here are some good options:

  • Peanut oil: mild flavor and high smoke point
  • Avocado oil: mild flavor and high smoke point
  • Vegetable oil: neutral flavor and medium smoke point

With the right ingredients, tools, and oil, you can make delicious homemade potato chips. They’ll be crispy, flavorful, and irresistible.

How to Make Potato Chips: Preparation Steps

Getting the perfect potato chips starts with the first steps. You need to wash and peel the potatoes, if you want to. This removes dirt, debris, and pesticides from the skin.

After washing, drying the potatoes is key. This step stops excess moisture from ruining the frying process. Some like to keep the skin on for extra texture and nutrition. Others prefer peeling for a smoother chip. Just be gentle with the potatoes to avoid damage.

To stop the potatoes from turning dark, keep them in cold water after peeling. This helps remove starch, which can make the chips less crispy. Soaking them in cold water for at least 30 minutes is best.

  • Use high-quality potatoes that are high in starch, like Russet or Idaho potatoes.
  • Handle the potatoes gently to avoid bruising or damaging the flesh.
  • Keep the potatoes in cold water after peeling to prevent discoloration.

By following these steps and tips, you’re on your way to making tasty homemade potato chips. Remember, proper preparation is key to getting the best chips.

Perfect Slicing and Soaking Techniques

To get the perfect crispy potato chips, focus on slicing and soaking. Slicing needs attention to detail for even cooking. Use a mandoline or sharp knife for slices about 1/16 inch thick.

Soaking slices removes excess starch for crispier chips. Soak in cold water for at least 30 minutes. This makes the chips crunchier. After soaking, dry the slices with a towel or salad spinner.

Achieving Uniform Thickness

Uniform thickness is key for even cooking and texture. Use a mandoline or sharp knife for slices. Remove any eyes or blemishes before slicing.

Removing Excess Starch

Removing starch is crucial for crispier chips. Soaking in cold water removes surface starch. Soak for at least 30 minutes for a crunchier texture.

Drying Methods

Drying slices removes excess moisture. Use a towel or salad spinner for this. This prevents greasy or soggy chips. Follow these steps for perfect crispy chips at home.

Frying and Seasoning Your Homemade Chips

To get the perfect crunch and flavor, you need to master frying potato chips. Heat the oil to 325°F to 375°F. This ensures the chips cook evenly and don’t get greasy.

When frying, keeping the oil at the right temperature is key. It prevents the chips from soaking up too much oil. This makes them taste soggy.

After heating the oil, add the potato slices. Fry them in batches to avoid overcrowding. Each batch should cook for 3-5 minutes until golden brown. This step is crucial for the right texture and taste.

After frying, season the chips with your favorite flavors. You can choose classic salt and vinegar or try something new like barbecue or sour cream and onion.

Seasoning Suggestions

Season the chips right after frying when they’re still warm. This helps the flavors stick better and taste stronger. Here are some great seasoning options:

  • Salt and vinegar: a classic mix that brings out the potato’s natural taste
  • Barbecue: adds a smoky, savory flavor
  • Sour cream and onion: offers a rich, creamy taste with a hint of onion

By mastering frying and seasoning, you can make a variety of delicious chip flavors. Whether you like simple or bold, the secret to perfect homemade chips is in the frying and seasoning.

Conclusion: Storing and Serving Your Crispy Potato Chips

Now that you’ve made your homemade potato chips, it’s time to think about storage and serving. Store them in an airtight container at room temperature. Don’t put them in the fridge, as the moisture can make them soggy. Enjoy your homemade chips within 3-5 days for the best crispiness.

When serving your potato chips, get creative. They’re great on burgers or sandwiches for a crunchy topping. Serve them with dips like ranch or salsa for a tasty snack. You can also use them as a colorful garnish for soups or salads.

Making your own potato chips at home is rewarding. With these tips, you can enjoy your delicious, crispy snack. Impress your friends and family with your homemade culinary skills. So, grab a handful of your freshly made chips and enjoy the salty, crunchy goodness.

FAQ

What are the best potato varieties for making crispy homemade chips?

Russet and Yukon Gold potatoes are the top choices for crispy chips. They have lots of starch and not much moisture. This makes them perfect for getting extra crispy when fried.

What kitchen tools are required for making potato chips at home?

You’ll need a mandoline slicer or sharp knife for even slices. A deep fryer or heavy pot is needed for frying. Don’t forget a cooking thermometer to check the oil’s temperature.

What type of oil should I use for frying potato chips?

Use oils with a high smoke point like peanut, vegetable, or canola oil. These oils handle high temperatures well. They won’t burn or add bad flavors to your chips.

How do I ensure my potato slices are dried properly before frying?

Start by soaking the slices in cold water to remove starch. Then, dry them with paper towels or a clean towel. Letting them air dry for a few minutes helps too.

How do I control the oil temperature when frying potato chips?

Keeping the oil between 325°F and 350°F is key for crispy chips. Use a thermometer to check the temperature. Adjust the heat to stay in this range.

What are some creative seasoning ideas for homemade potato chips?

Try these seasonings for a twist on classic chips: barbecue, ranch, chili powder and lime, garlic and parmesan, Cajun spice, and sweet and spicy with brown sugar and cayenne.

Delicious Salmon Sushi Bake Recipe – Easy & Flavorful

What makes a sushi bake recipe with salmon so appealing? Can you really mix traditional sushi flavors with the ease of a baked dish? Salmon sushi bake has become popular for its unique taste and simple preparation. It’s perfect for those wanting a new sushi twist.

A well-made sushi bake recipe with salmon can change your meal game. It’s a delicious, easy salmon recipe that blends Japanese cuisine with a homemade casserole. With the right ingredients, you can make a sushi bake that will wow your family and friends. It’s considered an easy salmon recipe.

Key Takeaways

  • Salmon sushi bake is a Japanese fusion dish that combines traditional sushi flavors with the convenience of a baked casserole.
  • This easy salmon recipe is perfect for those looking for a new twist on traditional sushi.
  • A sushi bake recipe with salmon can be prepared with minimal ingredients and effort.
  • The dish offers a unique and delicious taste experience.
  • It is an ideal choice for a quick and easy meal.
  • A sushi bake recipe with salmon is a great way to enjoy Japanese cuisine at home.
  • This Japanese fusion dish is perfect for anyone looking to try something new and exciting.

What is a salmon sushi bake?

A salmon sushi bake is a tasty mix of traditional sushi and a warm casserole. It’s a deconstructed sushi that makes sushi easy to enjoy with family.

Origins of Sushi Bake

The sushi bake idea came up because people wanted to make sushi at home, especially during the COVID-19 pandemic. It’s inspired by layered casseroles, making sushi simpler and easier to make.

Why This Recipe Works

This sushi casserole is loved for its easy recipe and flexibility. It mixes fresh salmon, seasoned rice, and a creamy topping, all baked to perfection. You can change it up to fit your taste and what you have on hand.

Salmon is a top pick, but you can also try other ingredients. Add crab meat and avocado or try different sauces. Here are some favorite ways to mix it up:

VariationMain Ingredients
Crab DelightCrab meat, avocado, cream cheese
Spicy TunaTuna, sriracha, green onions
VegetarianTofu, cucumber, sesame seeds

Essential Ingredients for the Perfect Sushi Bake Recipe, Salmon Style

Making a tasty salmon sushi bake begins with picking the right ingredients. Each part is key to getting the real flavors and textures right.

  • Sushi rice: This is the base of the dish, giving it the right stickiness and sweetness. High-quality sushi rice is essential for the perfect texture.
  • Sushi-grade salmon: Choose fresh, sushi-grade salmon for its safety and rich taste. This top-notch fish adds a special flavor to the bake.
  • Nori sheets: These seaweed sheets add a traditional sushi touch. They bring a unique umami taste and a bit of crunch when baked.
  • Japanese mayo: This creamy and tangy mayo holds everything together. Its special flavor goes well with the salmon, making the dish even better.

If you prefer different options, you can use cauliflower rice or avocado. These changes let you customize the dish while keeping its true sushi taste.

Preparation and Assembly Steps

Making the perfect salmon sushi bake takes a few important steps. From making the sushi rice to putting it all together, each step is crucial. It makes the dish both tasty and beautiful.

Rice Preparation

First, learn how to make sushi rice. Rinse 2 cups of short-grain rice until the water is clear. Then, cook it as the package says, and mix it with rice vinegar, sugar, and salt. Spread this seasoned rice in your baking dish to start your sushi bake.

Salmon Mixture

Next, mix the salmon filling. Use cooked and flaked salmon, mayonnaise, soy sauce, and a bit of sriracha for spice. Mix well so the flavors blend, making a creamy and tasty topping for your rice.

Layering Technique

To assemble the sushi bake, layer the rice in the dish. Then, put the salmon mixture on top, spreading it evenly. This layering not only improves the texture but also makes the bake look great.

Baking Instructions

Heat your oven to 375°F (190°C). Put the sushi bake in the oven and bake for 15-20 minutes. It should be golden brown and bubbly on top. Let it cool a bit before serving for the best taste and texture.

Pro Tips for the Best Results

Choosing the freshest salmon is key for a tasty sushi bake. Go for sushi-grade salmon for both safety and taste. Use high-quality short-grain rice for a sticky texture that’s great for layering.

Seasoning the rice right is important for flavor. Mix rice vinegar, sugar, and salt for a balanced taste. Make the salmon mixture creamy so it blends well with the rice.

Add creative sushi bake toppings to make it better. Try crunchy furikake, smooth avocado, or spicy mayo. These toppings boost flavor and look good too.

For a stunning sushi bake presentation, use a shallow dish. Top it with sesame seeds and green onions. This makes your dish look great and inviting.

  • Prepare parts early to make assembly easier.
  • Keep leftovers in airtight containers in the fridge.
  • Reheat gently to keep the bake’s texture and taste.

When serving, think about sushi bake serving suggestions. Pair it with a light salad or miso soup. These add to the meal’s balance and satisfaction.

Conclusion: Mastering Your Homemade Sushi Bake

Making a salmon sushi bake at home is a fun way to enjoy tasty flavors. You don’t need to be a pro at rolling sushi. This dish is easy to make and lets you try out different flavors.

You can add your favorite seafood, fresh veggies, or unique sauces. This makes it a great dish to play with in the kitchen.

Choosing a sushi bake is also a healthy choice. It lets you control the portions and add nutritious ingredients. This way, you can make it fit your dietary needs and enjoy it with others.

We suggest trying new things in the kitchen and making the recipe your own. Share your sushi bake creations with friends and family. It’s a great way to share the joy of cooking and connect with others who love to cook too.

FAQ

What is a salmon sushi bake?

A salmon sushi bake is a mix of sushi flavors in a casserole. It has sushi rice, salmon, and other tasty ingredients. It’s easy to make and perfect for home cooks.

How do I make authentic sushi rice for the bake?

To make sushi rice, rinse short-grain rice until the water is clear. Cook it as the package says, then mix it with rice vinegar, sugar, and salt. Let it cool before using it in your sushi bake.

Can I customize the ingredients in my sushi bake?

Yes, you can! Sushi bakes are very flexible. You can add nori sheets, Japanese mayo, avocado, or even shrimp or tuna. This lets you make your own unique sushi bake.

What are some pro tips for enhancing the flavor of my sushi bake?

For the best taste, use fresh sushi-grade salmon. Make sure your sushi rice is seasoned right. Add Japanese mayo and toppings like green onions and sesame seeds. Follow the layering and baking instructions carefully for great flavor and look.

How should I store and reheat leftovers of the sushi bake?

Keep leftovers in an airtight container in the fridge for up to three days. Reheat in the oven at 350°F for 10 minutes. This keeps the texture and flavor good, making it delicious the next day too.

Irresistible Sourdough Pretzel Bites: The Perfect Bite-Sized Treat

What makes sourdough pretzel bites so irresistible? How can you make these tasty homemade pretzels in your kitchen? These bites have a unique texture and flavor, making them stand out from regular pretzels. They’re perfect for any time, with their mix of crunch and chew.

Sourdough pretzel bites are great for snacking or as party appetizers. Making them at home is incredibly rewarding. With the right ingredients and techniques, you can impress everyone with your sourdough pretzel bites. They’re perfect for a quick snack or a fun baking project.

Key Takeaways

  • Sourdough pretzel bites offer a unique texture and flavor that sets them apart from traditional pretzels
  • They are a great snack idea for any occasion, from casual snacking to party appetizers
  • Creating homemade pretzels can be a fun and rewarding baking project
  • Sourdough pretzel bites have a perfect balance of crunch and chew
  • They can be made with simple ingredients and techniques
  • Sourdough pretzel bites are a delicious and versatile treat that can be enjoyed by people of all ages

The Magic of Sourdough Pretzel Bites

Sourdough pretzel bites turn bread baking into a true art. The sourdough starter’s natural fermentation adds a tangy taste and chewiness. This makes these pretzels truly special.

Using a sourdough recipe in your baking adds depth to flavors. The longer fermentation time makes the pretzels more complex and easier to digest. This makes them a healthier option.

The magic of sourdough is in its crust and soft inside. The fermentation acids create a crispy outside and a soft, airy inside. This gives a perfect mix of textures.

Here’s how sourdough pretzel bites compare to commercial ones:

AspectSourdough Pretzel BitesCommercial Pretzels
FlavorRich and tangySweet and mild
TextureChewy with crisp crustUniformly chewy
HealthImproved digestibilityContains preservatives

A Brief History of Sourdough Pretzels

Pretzels have a long history, starting in European monasteries. Monks first made them, and they were loved for their shapes and tastes. They became a big part of religious and festive events.

Origins of Pretzel Making

The first pretzels were simple twists of dough, looking like arms crossed in prayer. This early form set the stage for the tasty bread baking methods that followed.

The Sourdough Revolution

Lately, there’s been a big comeback to old-school bread baking ways. Bakers are using sourdough starters again. This adds a rich flavor and texture to sourdough pretzel bites, just like the monks made them.

Modern Pretzel Evolution

Now, pretzels are a gourmet treat. The love for sourdough pretzel bites shows a trend towards making small, handmade snacks. This change shows how pretzels are still loved today, in new ways.

EraMilestone
Early Middle AgesCreation of the first pretzels in European monasteries
19th CenturyIntroduction of mass-produced pretzels in the United States
21st CenturyRise of artisanal and sourdough pretzel bites

Essential Ingredients for Perfect Pretzel Bites

To make the perfect pretzel bites, start with the right ingredients. A good sourdough recipe gives your dough a tangy flavor.

Flour is key for your pretzel dough. Use high-quality bread flour for a chewy texture. Brands like King Arthur or Bob’s Red Mill work well.

Water makes the flour come alive and activates the sourdough starter. Use filtered water for better taste and fermentation. Salt adds flavor and strengthens the dough, making pretzels more resilient.

The sourdough starter is vital for depth in your easy baking recipes. It makes your pretzels unique. Make sure your starter is active and bubbly for the best results.

  • Optional Ingredients:
    • Honey or malt syrup for sweetness and color.
    • Butter or oil for richer flavor and texture.
    • Seeds like sesame or poppy for a crunchy topping.

Choosing the right ingredients is key to mastering your pretzel dough. Focus on quality and understanding each ingredient’s role. This way, you can make delicious sourdough pretzel bites every time.

IngredientRoleTips
FlourProvides structure and chewinessUse high-protein bread flour for best results
WaterHydrates the dough and activates the starterPrefer filtered water to avoid impurities
SaltAdds flavor and strengthens doughSea salt is a great choice for even distribution
Sourdough StarterLeavening agent and flavor enhancerEnsure your starter is active and bubbly
HoneySweetens and browns the pretzelsUse sparingly to balance flavors
ButterEnriches the dough’s flavorMelt before adding for better incorporation

Required Equipment and Tools

Making homemade pretzels is a fun and rewarding task. You need the right tools to succeed. Whether you’re new to bread baking or want to get better, the right equipment is key.

Basic Kitchen Equipment

Most kitchens already have what you need for pretzels. You’ll find:

  • Mixing bowls
  • Baking sheets
  • Measuring cups and spoons
  • Whisk or wooden spoon

Specialist Tools for Better Results

To take your bread baking to the next level, consider these tools:

  • Dough scraper – great for sticky dough
  • Lame knife – perfect for scoring pretzels
  • Measuring scale – for exact ingredient amounts

Optional Gadgets

For extra precision and ease, these gadgets are helpful:

  • Digital scale – for exact ingredient weighing
  • Proofer – keeps dough at the best rising temperature
  • Stand mixer – makes kneading easier
CategoryExamplesPurpose
Basic Kitchen EquipmentMixing bowls, baking sheetsPreparing and baking dough
Specialist ToolsDough scraper, lame knifeHandling dough, scoring pretzels
Optional GadgetsDigital scale, prooferPrecision measurements, optimal dough rising

Making Your Sourdough Starter

Creating a strong sourdough starter is key for great bread and tasty sourdough pretzel bites. Follow these steps to make and keep your starter.

Starting from Scratch

Start by mixing equal parts of flour and water in a glass container. Use 100 grams of whole wheat flour and 100 grams of water. Stir well and cover loosely to let air in. Let it sit at room temperature for 24 hours.

Maintaining Your Starter

Feed your starter every day by throwing away half and adding fresh flour and water. This keeps it healthy and active. Keep it in a warm spot to help it grow.

Troubleshooting Common Issues

If your starter is not active or smells bad, try changing the flour or feeding schedule. The right temperature and water are key to avoiding problems.

DayActionAmount
1Mix flour and water100g each
2-7Feed dailyDiscard 50%, add 50g each of flour and water
8+MaintainContinue daily feeding or refrigerate

Step-by-Step Baking Process

Start by making the perfect pretzel dough. Mix flour, water, salt, and sourdough starter until it comes together. This step is key for a chewy pretzel texture.

  1. Kneading the Dough: Put the dough on a floured surface and knead for 8-10 minutes. This develops the gluten, making the pretzels strong.
  2. Shaping into Bites: Cut the dough into small pieces. Roll each into a rope and twist into pretzel shapes or bite-sized pieces.
  3. Proofing: Put the shaped pretzels on a baking sheet and let them rise in a warm place for 30 minutes. This makes them lighter.
  4. Baking Soda Bath: Mix baking soda with water for a special bath. Dip each pretzel bite in it for 30 seconds. This adds flavor and a shiny finish.
  5. Baking: Heat your oven to 450°F (230°C). Bake the pretzel bites for 12-15 minutes until they’re golden brown. Watch them closely to avoid overcooking.

For the best results, make sure your oven is hot and don’t overcrowd the baking sheet. These recipes are easy, even for beginners. Follow each step carefully to get pretzel dough that’s chewy and full of flavor. Your homemade pretzels will be a hit with everyone.

Creative Variations and Toppings

Sourdough pretzel bites are perfect for making your own unique snacks. They can be sweet or savory, depending on what you like. This makes them a great choice for any occasion.

Sweet Options

Make your sourdough pretzel bites into sweet treats with these toppings:

  • Cinnamon Sugar: A classic favorite that adds a warm, sweet crunch.
  • Chocolate-Coated: Dip bites in melted dark or milk chocolate for a rich treat.
  • Glazed with Honey: A natural sweetener that gives a glossy finish.

Savory Combinations

For those who love savory flavors, try these:

  • Cheese-Topped: Sprinkle shredded cheddar or parmesan for a melty delight.
  • Herb-Infused Dough: Incorporate rosemary or garlic into the dough for added aroma.
  • Spicy Mustard Dip: Pair with a tangy mustard sauce for an extra kick.

Dietary Modifications

It’s easy to make these bites fit different diets:

  • Gluten-Free: Use gluten-free flour blends to make pretzel bites suitable for gluten intolerance.
  • Vegan: Replace dairy ingredients with plant-based alternatives without sacrificing taste.
  • Low-Sodium: Reduce salt in the dough and toppings for a heart-friendly option.
Variation TypeExamples
Sweet OptionsCinnamon Sugar, Chocolate-Coated, Honey Glaze
Savory CombinationsCheese-Topped, Herb-Infused, Spicy Mustard Dip
Dietary ModificationsGluten-Free, Vegan, Low-Sodium

Storing and Reheating Tips

Keeping your sourdough pretzel bites fresh is all about proper storage. For a few days, store them in an airtight container at room temperature. This keeps their taste and texture perfect for up to three days.

Freezing is the best choice for longer storage. Put the pretzel bites in a freezer-safe bag, squeezing out air. They can stay fresh in the freezer for up to three months. Just reheat them to get their crispy outside and soft inside back.

Reheating your homemade pretzels is simple. Preheat your oven to 350°F (175°C). Place the pretzel bites on a baking sheet. Bake for 5-10 minutes until they’re crispy again. Or, use the microwave for a quicker option, though they might not be as crispy.

Leftover pretzel bites can be turned into new snack ideas. Crush them for a crunchy coating on chicken tenders or mix them into savory trail mix. These ideas help reduce waste and add variety to your snacks.

Storage MethodDurationTips
Airtight ContainerUp to 3 daysStore at room temperature away from direct sunlight.
FreezingUp to 3 monthsUse freezer-safe bags, remove excess air.
Reheating in OvenN/APreheat to 350°F and bake for 5-10 minutes.
MicrowaveN/AHeat for 20-30 seconds, may reduce crispiness.

Conclusion: Mastering Your Sourdough Pretzel Bite Journey

Making homemade pretzels with sourdough is easy and fun. Each batch lets you get better and try new tastes. It’s a rewarding and tasty experience.

You can make your pretzels just the way you like them. Whether you like sweet or savory, you can make them special. They’re perfect for impressing guests.

These pretzels are great for any time. They have a rich flavor and a chewy texture. Keep trying new recipes to grow your baking skills.

Learning to make sourdough pretzel bites is just the start. It opens up a world of tasty pretzel recipes. Keep exploring and making delicious treats at home.

FAQ

What makes sourdough pretzel bites different from regular pretzels?

A: Sourdough pretzel bites have a tangy flavor and chewy texture. This is thanks to the sourdough starter’s natural fermentation. It makes them taste better than regular pretzels.

Can I use a store-bought sourdough starter for homemade pretzels?

Yes, you can use a store-bought sourdough starter for homemade pretzels. Make sure the starter is active and well-fed. This will help your pretzel dough turn out great.

What are some easy baking recipes for beginners interested in bread baking?

Beginners should start with sourdough pretzel bites. They are easy to make and introduce you to bread baking. Plus, you get to enjoy making homemade pretzels.

How do I store homemade pretzel dough for later use?

Store homemade pretzel dough in an airtight container in the fridge for up to 3 days. For longer storage, freeze it for up to three months. Thaw it in the fridge before baking.

What are some creative snack ideas using sourdough pretzel bites?

A: Sourdough pretzel bites go well with cheese, mustard, or hummus. You can also add herbs, spices, or sweet toppings like cinnamon sugar. This makes for a tasty snack idea.

Are there any gluten-free variations for sourdough pretzel bites?

Yes, you can make gluten-free sourdough pretzel bites. Use a gluten-free sourdough starter and substitute regular flour with gluten-free alternatives. Make sure all ingredients are gluten-free.

How long does it take to make delicious pretzels from scratch?

Making delicious pretzels from scratch takes about 4 to 5 hours. This includes time for the dough to rise and the pretzels to bake. Using a sourdough starter may add extra time for fermentation.

What equipment do I need for making sourdough pretzel bites at home?

You’ll need basic kitchen tools like mixing bowls, a baking sheet, and a dough scraper. For better results, consider a digital scale, proofing basket, and a baking stone.

Can I make appetizer recipes using sourdough pretzel bites?

Absolutely! Sourdough pretzel bites are perfect for appetizers. Serve them with dips, make mini pretzel sliders, or top them with cheese and herbs. They’re a hit with any crowd.

What are the best toppings or dips for sourdough pretzel bites?

Great toppings and dips for sourdough pretzel bites include melted cheese, mustard, and beer cheese dip. Honey mustard, or even sweet toppings like chocolate sauce and caramel, are also great. They enhance the pretzels’ savory taste.

Get The Best Recipes In 2025

Exit mobile version