Tasty Ground Beef Tacos: The Perfect Recipe

What makes a ground beef tacos recipe unforgettable? Is it the quality of ingredients, the cooking method, or something else? To make perfect ground beef tacos, you need to think about these things. A great recipe can turn this classic dish into a favorite at home.

With the right mix of flavors and textures, your ground beef tacos will be a hit. Everyone will want more of this delicious dish.

Introduction to Ground Beef Tacos

A top ground beef tacos recipe starts with quality ingredients and a simple cooking method. By following a few steps and using the right ingredients, you can make a flavorful and authentic dish. Whether you’re experienced or new to cooking, a good recipe can help you make restaurant-quality tacos at home.

Ground beef tacos are loved for their rich flavors and hearty texture. A well-made recipe will quickly become a favorite among your family and friends.

Key Takeaways

  • Quality ingredients are essential for a great ground beef tacos recipe
  • A simple cooking method can help bring out the best flavors in your dish
  • Using the right combination of spices and seasonings can elevate your ground beef tacos recipe
  • A good ground beef tacos recipe can be customized to suit your tastes and preferences
  • With the right ingredients and cooking method, you can create a dish that’s both delicious and satisfying
  • A well-crafted ground beef tacos recipe can become a staple in your household

The History and Evolution of Ground Beef Tacos

Ground beef tacos have a rich history that spans the border of Mexico and the United States. Their evolution is a fascinating story. It shows how traditional Mexican cuisine blended with American tastes.

In traditional Mexican cuisine, tacos are a staple. They consist of a corn tortilla filled with meats, cheeses, and vegetables. The idea of easy ground beef tacos came to the United States from Mexican immigrants. They brought their culinary traditions with them.

Over time, American-style ground beef tacos emerged. They are filled with ground beef, lettuce, tomatoes, and cheese. They are wrapped in a crispy taco shell.

Traditional Mexican Tacos vs. American-Style Ground Beef Tacos

Traditional Mexican tacos use fresh, handmade tortillas. They are filled with meats like carnitas, al pastor, or carne asada. American-style ground beef tacos, on the other hand, use store-bought tortillas. They are filled with seasoned ground beef.

The differences between these tacos show the cultural exchange and adaptation. This happened as Mexican cuisine was introduced to the United States.

How Ground Beef Tacos Became an American Favorite

The popularity of ground beef tacos in the United States is due to their convenience and affordability. As Americans became more interested in international cuisine, the demand for easy ground beef tacos grew. Today, they are a staple in many American restaurants and households.

Their evolution is a testament to the power of cultural exchange and culinary innovation.

Essential Ingredients for Perfect Ground Beef Tacos

To make the best ground beef tacos, you need the right ingredients. The type of ground beef, spices, and toppings are key. They all help make a delicious and authentic taco.

Choose high-quality ground beef that’s lean and fresh. Consider grass-fed or organic beef for a better taste and a sustainable choice.

Some must-have spices and seasonings for best ground beef tacos include:

  • Cumin
  • Chili powder
  • Paprika
  • Garlic powder
  • Salt and pepper

How you prepare and cook the ground beef matters too. Make sure to cook it until it’s brown and fully cooked. Then, season it with your favorite spices and toppings.

IngredientQuantity
Ground beef1 pound
Cumin1 teaspoon
Chili powder1 teaspoon

With the right ingredients and these tips, you can make the best ground beef tacos. They’re sure to impress anyone.

Kitchen Tools and Equipment You’ll Need

To make delicious simple ground beef tacos, you need the right tools. Having the right items makes cooking easier and faster. Start by getting a large skillet, cutting board, and utensils like spatulas and tongs.

Basic Equipment Requirements

For simple ground beef tacos, you’ll need a few key tools. These include:

  • A large skillet for browning the ground beef
  • A cutting board for chopping onions, lettuce, and other toppings
  • Utensils like spatulas and tongs for handling the food

Optional Tools for Enhanced Preparation

Some optional tools can make preparation better. You might want a food processor for chopping and a grill for smoky flavor. With the right tools, you can make tasty simple ground beef tacos everyone will enjoy.

Storage Containers and Serving Dishes

Don’t forget about storage and serving items. You’ll need these to keep ingredients fresh and serve your tacos. Choose airtight containers and attractive, functional serving dishes.

Selecting and Preparing the Right Ground Beef

Choosing the right ground beef is key for quick ground beef tacos. You need a flavor-packed and safe option. Ground beef comes in lean and regular types. Lean is better for health, with less fat.

To cook the ground beef safely, follow some steps. Store it in a sealed container at 40°F (4°C) or below. Cook it to 160°F (71°C) or higher. A food thermometer helps check the temperature.

  • Choose a ground beef with a fat content that suits your taste preferences
  • Handle the ground beef safely to avoid cross-contamination
  • Cook the ground beef to an internal temperature of at least 160°F (71°C)

By following these tips, you can enjoy delicious and safe quick ground beef tacos. Always keep food safety in mind when handling and cooking ground beef.

The Ultimate Ground Beef Tacos Recipe

To make tasty ground beef tacos, you need a good recipe. The secret is using the right seasonings and cooking methods. Start by seasoning the ground beef with cumin, chili powder, and paprika.

A great recipe should guide you on seasoning, cooking, and assembling the tacos. Here are the key steps:

Meat Seasoning Instructions

  • Use 1 lb of ground beef and add 1/2 teaspoon of cumin, 1/2 teaspoon of chili powder, and 1/4 teaspoon of paprika.
  • Mix well and let it sit for a few minutes to allow the flavors to blend.

Cooking Temperature and Time

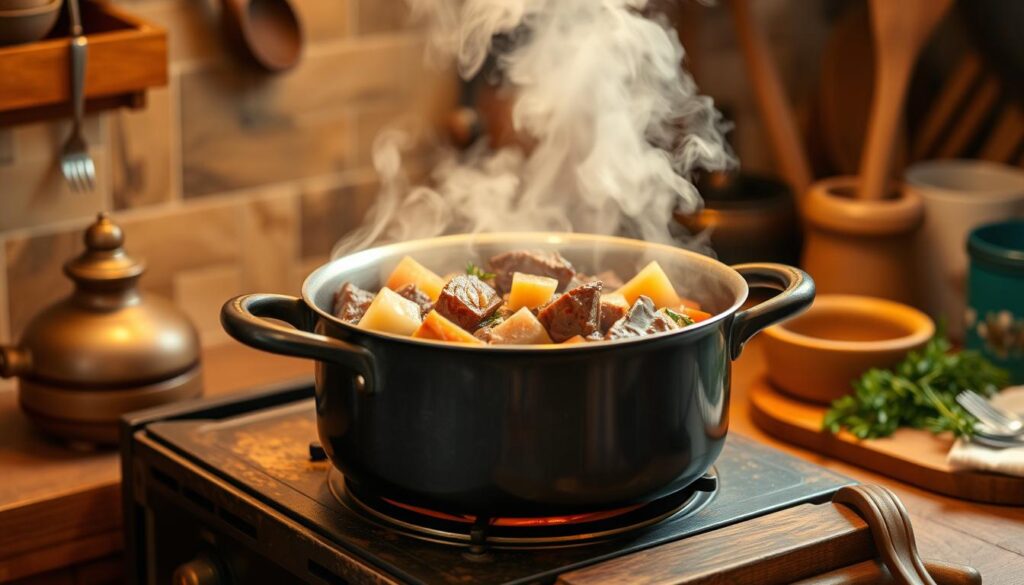
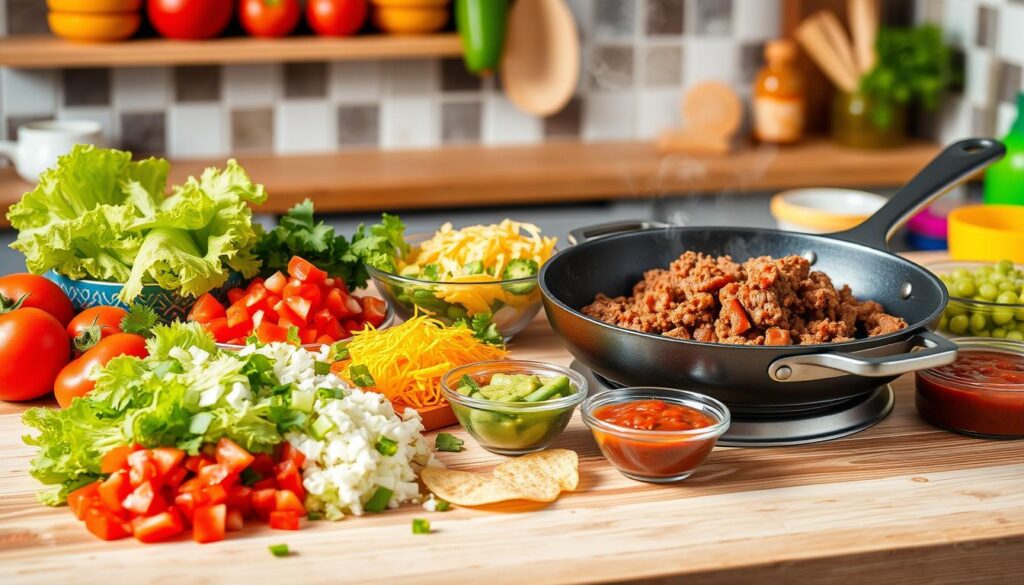
Cook the ground beef in a large skillet over medium-high heat. Break it up into small pieces as it cooks. Aim for a temperature of 375°F and cook for 5-7 minutes, until it’s fully browned.

Assembly Steps

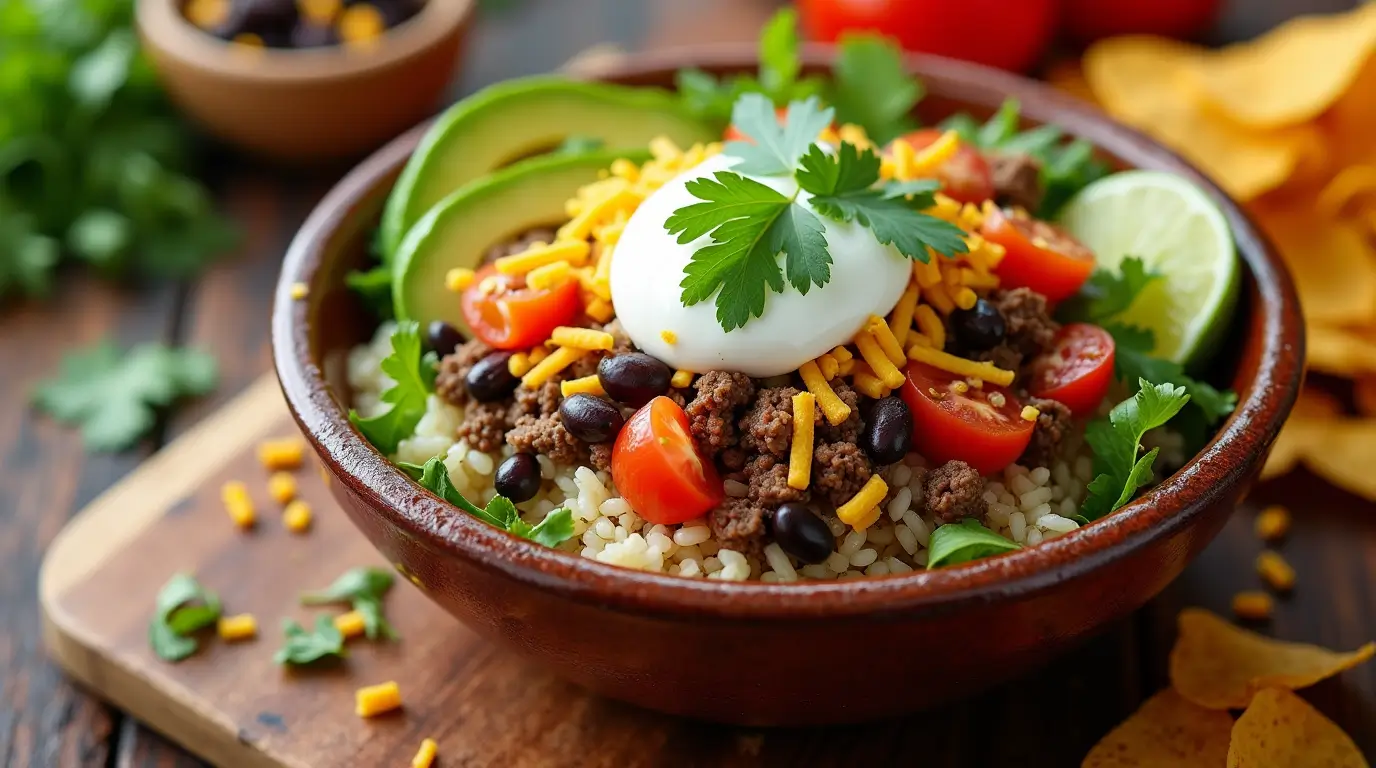
To assemble the tacos, place cooked ground beef in a taco shell. Add your favorite toppings like shredded lettuce, diced tomatoes, and cheese.

By following this recipe, you’ll make delicious and authentic tacos. They’re perfect for a quick meal or a flavorful dish for your next gathering.

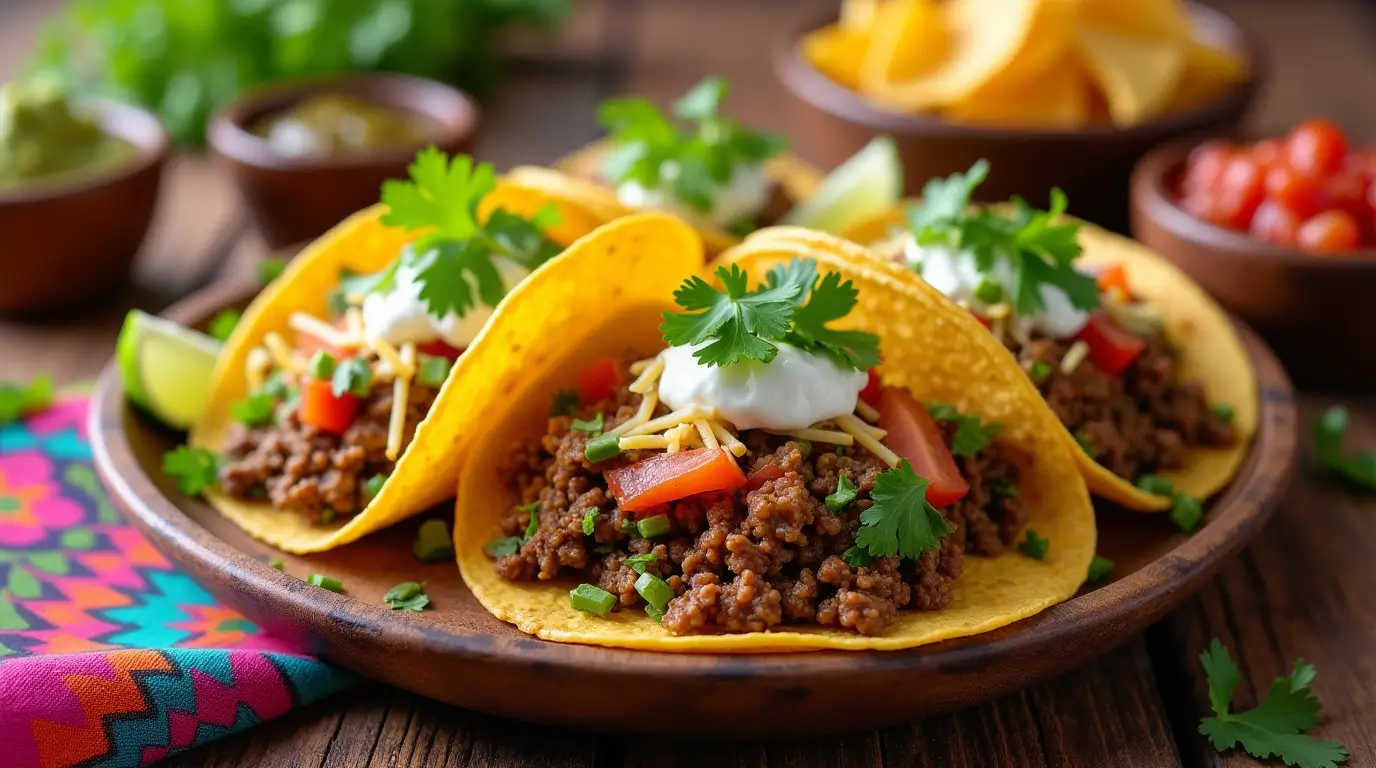
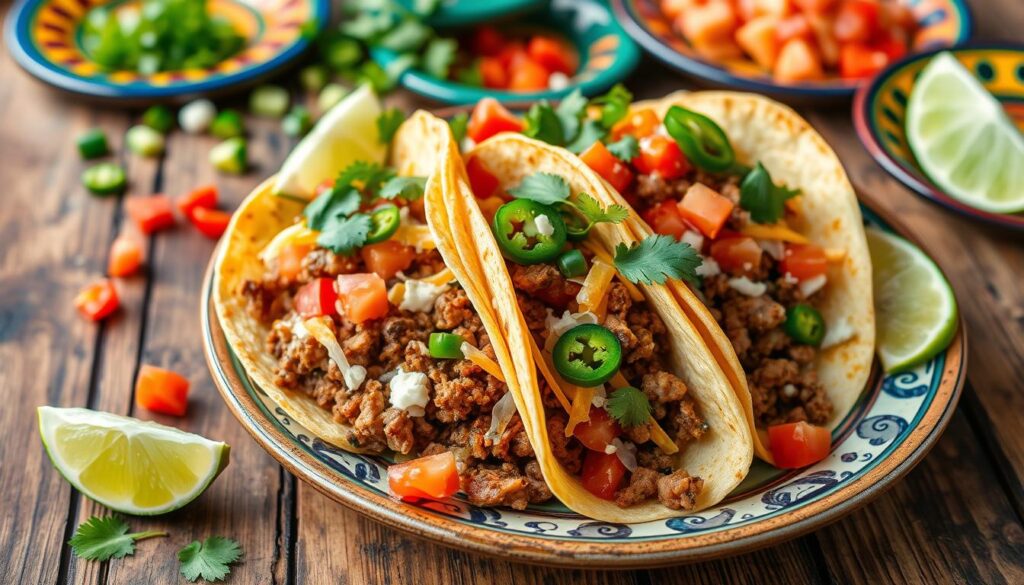
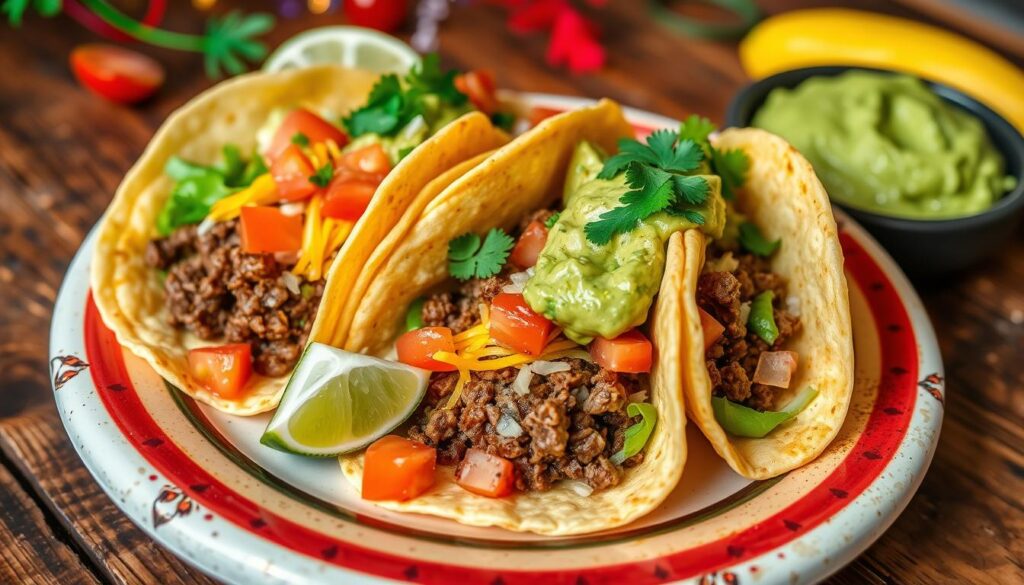
Fresh Toppings and Garnishes

When making homemade ground beef tacos, the toppings and garnishes are key. Fresh, quality ingredients can boost the flavor and texture. This makes the tacos truly memorable. For the best tacos, mix traditional and modern toppings.

A classic choice is lettuce, tomatoes, and cheese. These add a crisp, refreshing contrast to the savory ground beef. But, for something new, try avocado, salsa, or sour cream.

Traditional Toppings

  • Lettuce
  • Tomatoes
  • Cheese
  • Cilantro

Creative Modern Additions

  • Avocado
  • Salsa
  • Sour cream
  • Diced onions

By mixing traditional and modern toppings, you can create a unique flavor. Whether you prefer classic or adventurous, the right toppings make a big difference.

ToppingDescription
LettuceA crisp, refreshing green that adds texture to the tacos
AvocadoA creamy, rich fruit that adds a unique flavor and healthy fats
SalsaA spicy, tangy sauce that adds a burst of flavor to the tacos

Homemade Taco Sauce and Condiments

For simple ground beef tacos, the right condiments are key. Making your own taco sauce and condiments is simple. It lets you tailor the flavors to your taste. For quick tacos, having various condiments adds that extra flavor.

To start, you’ll need basic ingredients like diced tomatoes, onions, garlic, and jalapenos. These can make salsa, guacamole, and sour cream. Experimenting with different combinations helps find the perfect flavor for your tacos.

Here are tips for making your own taco sauce and condiments:

  • Use fresh, high-quality ingredients for the best flavor.
  • Don’t be afraid to try new ingredient combinations.
  • Adding a squeeze of fresh lime juice can add a citrus burst.

By making your own taco sauce and condiments, you can add a personal touch. Whether you want a spicy kick or a tangy twist, the right condiments elevate your tacos.

Homemade condiments are a great way to add a personal touch to your tacos and make them truly special.

Tips for Achieving the Perfect Texture

To make a great ground beef tacos recipe, focus on the perfect texture. Cook the meat right and choose the right taco shells. A well-cooked dish can greatly improve the meal’s flavor and satisfaction.

Cooking techniques are key to the ground beef’s texture. Overcooking makes it dry and tough, while undercooking makes it soft and unappealing. To get it just right, cook the beef to the recommended internal temperature.

Meat Cooking Techniques

  • Cook the ground beef in a skillet over medium-high heat, breaking it up into small pieces as it cooks.
  • Use a thermometer to ensure the internal temperature reaches 160°F (71°C) for optimal food safety and texture.
  • Avoid overmixing the ground beef, as this can lead to a dense and tough texture.

The type of taco shells also affects the dish’s texture. For an easy ground beef tacos recipe, crunchy taco shells are best. They hold their shape and add a nice crunch.

Shell Preparation Methods

To prepare the taco shells, warm them up in the oven or microwave as the package says. This crisps up the shells and improves their texture. Pair the perfectly cooked ground beef with crunchy taco shells for a dish that will impress everyone.

Making Ground Beef Tacos Ahead of Time

Preparing homemade ground beef tacos in advance can save time and ensure a tasty meal. It’s key to follow storage and reheating tips to keep the flavor and texture right. This way, your tacos will always be delicious.

When you make tacos ahead, store the parts separately. This means the cooked beef, tortillas, and toppings. This makes it easy to put the tacos together when you’re ready to eat.

Storage Guidelines

  • Store cooked ground beef in an airtight container in the refrigerator for up to 3 days.
  • Keep tortillas fresh by storing them in a cool, dry place or freezing them for up to 2 months.
  • Prepare toppings such as diced tomatoes, shredded lettuce, and diced avocado just before serving for optimal freshness.

Reheating Instructions

To reheat cooked ground beef, simply microwave it for 30-60 seconds or heat it in a pan over medium heat until warmed through. Assemble the tacos by placing the reheated ground beef onto a tortilla and adding your desired toppings.

By following these storage and reheating guidelines, you can enjoy delicious homemade ground beef tacos anytime. Whether it’s for a weeknight dinner or a weekend gathering, making tacos ahead of time makes things easier and more efficient.

Taco ComponentStorage MethodShelf Life
Cooked Ground BeefAirtight container in refrigeratorUp to 3 days
TortillasCool, dry place or freezerUp to 2 months
ToppingsPrepare just before servingBest when fresh

Common Mistakes to Avoid

When making simple ground beef tacos, it’s easy to make mistakes. These can ruin the dish. To make perfect quick ground beef tacos, avoid overcooking the meat, using low-quality ingredients, and not preparing taco shells right.

Some common mistakes to avoid include:

  • Overcooking the ground beef, making it dry and tough
  • Using low-quality ingredients, such as old spices or stale tortillas
  • Not preparing the taco shells properly, leading to a soggy or brittle texture

To avoid these mistakes, follow some simple tips. First, cook the ground beef until it’s just browned. Then, season it with fresh spices. Second, use high-quality ingredients like fresh lettuce and diced tomatoes. Finally, prepare taco shells as the package says, or make your own for a crispy texture.

By following these tips and avoiding common mistakes, you can make delicious simple ground beef tacos. They will please even the pickiest eaters. Whether for a weeknight dinner or a weekend gathering, with practice and patience, you’ll get better fast.

MistakeTip to Avoid
Overcooking the meatCook until just browned, then season with fresh spices
Using low-quality ingredientsUse fresh lettuce, diced tomatoes, and other high-quality ingredients
Not preparing the taco shells properlyFollow package instructions or make your own homemade shells

Healthy Adaptations and Dietary Modifications

Enjoying ground beef tacos can be healthy with the right tweaks. You can make easy ground beef tacos for different tastes and needs. Whether you want low-fat, gluten-free, or keto-friendly options, there are many ways to adapt the recipe.

Using fresh, wholesome ingredients is key for healthy tacos. Choose leaner ground beef or try turkey or chicken for less fat. Use whole-wheat or gluten-free tortillas for those with dietary restrictions.

Low-Fat Options

For less fat, consider leaner ground beef and less cheese. Add more veggies like lettuce, tomatoes, and bell peppers. Use herbs and spices for flavor instead of high-fat sauces.

Gluten-Free Variations

Make gluten-free tacos with gluten-free tortillas or lettuce wraps. Try different gluten-free seasonings and sauces. Use corn tortillas, gluten-free taco shells, or portobello mushroom caps for a low-carb option.

Keto-Friendly Alternatives

Keto tacos can be made with low-carb tortillas or lettuce wraps. Add avocado and sour cream for high fat. Use ground beef and cheese for more protein. These tweaks make keto tacos delicious and diet-friendly.

Conclusion

As we wrap up this guide on making the perfect homemade ground beef tacos, we invite you to become a taco expert. Try different ingredients and methods. The best ground beef tacos are what you like best, so feel free to mix and match.

Ground beef tacos can be anything from traditional Mexican to something entirely new. Their flexibility lets you get creative in the kitchen. Most importantly, enjoy the process and the joy of sharing these tasty meals.

Now that you know more about making tacos, you can impress everyone. Get ready to cook and make delicious tacos. It’s time to start your taco adventure!

FAQ

What are the key ingredients for making the perfect ground beef tacos?

To make great ground beef tacos, you need quality ground beef and taco seasoning. Don’t forget diced onions, minced garlic, and taco shells or tortillas. Toppings like shredded lettuce, diced tomatoes, and cheese can make them even better.

How do I properly cook the ground beef for tacos?

Start by browning the ground beef in a skillet over medium-high heat. Break it into small pieces as it cooks. Drain any extra fat. Add taco seasoning and a bit of water, then simmer until the flavors mix well and the liquid is gone.

What are some creative topping and garnish options for ground beef tacos?

Try adding avocado, diced onions, and sliced jalapeños for a twist. Fresh cilantro, salsa, and crumbled cheese like queso fresco or cotija can also add flavor.

Can I make ground beef tacos ahead of time?

Yes, you can make them ahead. Store the cooked beef in an airtight container in the fridge for 3-4 days. Reheat it and add your favorite toppings for a quick meal.

What are some common mistakes to avoid when making ground beef tacos?

Avoid overcooking the beef and using low-quality meat. Don’t forget to drain the fat and prepare taco shells right. Too many toppings or unbalanced flavors can also ruin the tacos.

Can I make healthier versions of ground beef tacos?

Definitely! Use lean beef and whole-wheat wraps or lettuce instead of taco shells. Add more veggies and choose low-fat cheese or Greek yogurt. Homemade taco seasoning can also cut down on sodium.

The Best Beef Stew Recipe for Cozy Nights

What makes a perfect beef stew recipe for a cold winter night? Is it the tender chunks of beef, the rich flavors of the broth, or the ease of preparation? A delicious beef stew recipe can be the ultimate comfort food, providing warmth and satisfaction on a chilly evening. With an easy beef stew recipe, you can create a hearty meal that’s perfect for cozy nights in with family and friends.

A great beef stew recipe should be easy to make, using simple ingredients and straightforward cooking techniques. The best beef stew recipe will result in a dish that’s both flavorful and comforting, making it an ideal choice for a cold winter’s night. By following a simple and easy beef stew recipe, you can create a delicious meal that’s sure to become a favorite.

Key Takeaways

  • Beef stew is a comforting and satisfying meal for cold winter nights
  • An easy beef stew recipe can be made with simple ingredients and techniques
  • A great beef stew recipe should result in tender beef and rich flavors
  • Beef stew is a perfect dish for cozy nights in with family and friends
  • A simple beef stew recipe can be customized to suit your tastes and preferences
  • Beef stew is a hearty and comforting meal that’s easy to make and enjoy

Why Beef Stew Is the Ultimate Comfort Food

Beef stew has been a comfort food for centuries. Its rich flavors and hearty ingredients are perfect for cold winter nights. A warm, delicious bowl of homemade beef stew brings nostalgia and comfort, making it great for family gatherings and special occasions.

The history of beef stew goes back to ancient times. It was found in medieval European cuisine. Over time, different regions added their own twists, creating a variety of flavors and ingredients. For a real experience, try a best beef stew recipe with fresh, local ingredients.

The History of Beef Stew

Beef stew has a long history in European cuisine. It was made with tough meat, slow-cooked in broth to make it tender and flavorful.

Health Benefits of Homemade Stew

Making homemade beef stew is healthy. It uses fresh ingredients, has low sodium, and is high in protein. It’s a great choice for a nutritious and satisfying meal.

Why This Recipe Stands Out

This best beef stew recipe is special because of its unique spices and cooking methods. The mix of tender beef, fresh veggies, and rich broth gives a memorable flavor.

  • High-quality protein from the beef
  • Fresh, locally sourced ingredients
  • Low sodium content
  • Rich, flavorful broth

By using this best beef stew recipe, you can make a delicious, comforting meal. It’s perfect for any occasion, whether it’s a hearty homemade beef stew for a cold winter night or a special dish for a family gathering.

Essential Ingredients for the Perfect Beef Stew Recipe

To make a delicious beef stew recipe, you’ll need tender beef, fresh veggies, and spices. These ingredients are easy to find. You can also adjust the recipe to fit your taste.

Some key ingredients for an easy beef stew recipe are:

  • Beef: Choose a cut like chuck or round for slow cooking.
  • Vegetables: Onions, carrots, potatoes, and celery are great for a beef stew recipe.
  • Spices: Bay leaves, thyme, and rosemary add flavor to the stew.

A good beef stew recipe is about balance and harmony. With the right ingredients and patience, you can make a hearty dish. It’s perfect for cozy nights.

Following a simple easy beef stew recipe lets you enjoy a tasty meal. It’s sure to become a favorite.

IngredientQuantity
Beef1 pound
Onions2 medium
Carrots3 medium

Choosing and Preparing Your Beef

Choosing the right beef is key to a great homemade beef stew. Use cuts like chuck, brisket, or round for a tender stew. These cuts need longer cooking but make the stew rich and satisfying.

Start by trimming off any extra fat from the beef. This keeps the stew from getting too oily. Cut the beef into small cubes, so they cook evenly. Seasoning with salt, pepper, and herbs will make the beef taste even better.

Best Cuts for Stewing

  • Chuck: A classic choice for beef stew, chuck is tender and flavorful.
  • Brisket: A leaner cut, brisket becomes tender and juicy when cooked low and slow.
  • Round: A lean cut that is perfect for stewing, round is packed with flavor and texture.

How to Trim and Cube Beef

Trimming and cubing beef is easy. Just use a sharp knife to remove excess fat. Then, cut the beef into cubes of the same size for even cooking.

Proper Seasoning Techniques

Seasoning is crucial for great beef flavor. Mix salt, pepper, and herbs for depth and complexity. Adding garlic or onion powder can also enhance the flavor of your stew.

Cut of BeefCooking TimeFlavor Profile
Chuck2-3 hoursRich and tender
Brisket3-4 hoursLean and juicy
Round2-3 hoursLean and flavorful

Required Kitchen Equipment and Tools

To make a tasty beef stew recipe, you’ll need some basic kitchen tools. You probably already have most of them. For an easy beef stew recipe, you’ll need a large pot, a cutting board, and some utensils.

Here are the essential tools you’ll need:

  • A large pot with a heavy bottom (at least 3-quart capacity)
  • A cutting board for chopping vegetables and meat
  • A set of utensils, including a wooden spoon, slotted spoon, and tongs
  • A colander or strainer for draining excess liquid

When picking your tools, think about the material and how long they’ll last. A stainless steel pot is good because it’s easy to clean and can handle high heat. A wooden cutting board is also a smart choice because it’s kind to knives and simple to keep clean.

With the right kitchen tools, making your beef stew recipe will be a breeze. It will be a truly easy beef stew recipe to follow.

EquipmentDescription
Large Pot3-quart capacity, heavy bottom
Cutting BoardWooden or plastic, for chopping vegetables and meat
UtensilsWooden spoon, slotted spoon, tongs

Step-by-Step Best Beef Stew Recipe

To make a delicious homemade beef stew, follow a well-structured recipe. The best beef stew recipe includes several key steps. These steps include browning the meat, preparing the vegetables, and creating the perfect broth.

The process starts with browning the meat. This step enhances the flavor and texture of the beef. Then, prepare the vegetables by chopping them into bite-sized pieces. The broth is made with beef stock and red wine, adding depth and richness.

Browning the Meat

Browning the meat is a key step in making the best beef stew. This process cooks the beef in a hot pan, creating a crispy exterior. This adds texture and flavor to the stew. To brown the meat, heat a tablespoon of oil in a large pan over medium-high heat. Then, add the beef and cook until browned on all sides.

Preparing the Vegetables

Preparing the vegetables is another important step in making a delicious homemade beef stew. This involves chopping the vegetables into bite-sized pieces and sautéing them in a pan until they’re tender. Common vegetables used in beef stew include carrots, potatoes, and onions.

By following these steps and using the best beef stew recipe, you can create a hearty and flavorful stew. It’s perfect for any occasion, whether you’re looking for a comforting meal on a cold winter night or a delicious dish to serve at a dinner party.

Secret Tips for Extra Tender Meat

To get extra tender meat in your beef stew recipe, follow some secret tips. Marinades are key. They help break down meat’s connective tissues, making it tender and tasty.

Slow cooking is also vital. Cooking meat slowly breaks down tissues, making it tender and juicy. This is crucial for an easy beef stew recipe. It lets flavors mix well and meat become tender.

Here are more tips for tender meat:

  • Use a meat tenderizer to break down connective tissues
  • Cook meat at a low temperature to keep it tender
  • Use a slow cooker for long, slow cooking

By using these tips, you can make a delicious, tender beef stew recipe. Always choose high-quality ingredients. Cook meat slowly and patiently for the best results.

Adding Vegetables: Timing and Techniques

When making homemade beef stew, timing is key for the perfect texture and taste. The best recipes include carrots, potatoes, and onions.

To get these veggies ready, peeling and chopping are crucial. Cut root veggies like carrots and potatoes into small pieces for even cooking. Onions can be chopped or sliced, depending on your preference.

The cooking times for these veggies differ. Add them to the stew 30-40 minutes before serving. This lets them cook fully and soak up the stew’s flavors. Here are some cooking times to remember:

  • Carrots: 20-25 minutes
  • Potatoes: 25-30 minutes
  • Onions: 15-20 minutes

By following these tips and using the best beef stew recipe, you’ll make a delicious, hearty stew. It’s perfect for any occasion.

Troubleshooting Common Stew Problems

Making a delicious beef stew recipe can sometimes come with a few hitches. To get your easy beef stew just right, knowing how to fix common problems is key. One common issue is a sauce that’s either too thin or too thick.

Fixing a sauce that’s off can be simple. If it’s too thin, cut down on the broth or wine. For a thicker sauce, add a bit more liquid. This will get your sauce just right.

Fixing Thin or Thick Sauce

Another problem is tough meat. To avoid this, cook your stew at a low heat for a long time. This breaks down the meat’s connective tissues, making it tender and flavorful. Also, browning the meat well before adding other ingredients boosts flavor and texture.

Dealing with Tough Meat

Seasoning is also crucial for a great beef stew. Taste the stew often and add salt, pepper, or herbs as needed. Adding bay leaves or thyme can also enhance the flavor. With these tips, you’ll make a delicious beef stew that everyone will love.

Adjusting Seasoning

Other issues like overcooked veggies or underseasoning can also happen. To avoid these, add veggies at the right time and season the stew often. With practice and patience, you’ll make a beef stew that’s perfect for any time.

Storage and Reheating Guidelines

After making your tasty homemade beef stew, it’s key to store and reheat it right. This keeps its flavor and texture just right. Cool the stew to room temperature first. Then, put it in an airtight container and chill it in the fridge within two hours.

For keeping it longer, freeze your best beef stew recipe. Split the stew into parts, put them in airtight containers or freezer bags. Don’t forget to label them with the date. When you reheat, make sure it hits 165°F (74°C) to stay safe.

  • Reheat the stew in the fridge overnight, then warm it up on the stovetop or in the microwave.
  • Use a microwave-safe dish to reheat, covering it with a lid or plastic wrap.
  • Don’t reheat the stew too many times to avoid foodborne illness.

By sticking to these tips, you can enjoy your best beef stew recipe for a longer time. And it will stay safe and delicious.

Serving Suggestions and Pairings

When serving your tasty beef stew, you have many choices. For an easy beef stew recipe, crusty bread or mashed potatoes are great. They match the stew’s rich flavors well.

Best Side Dishes

Other excellent side dishes include:

  • Roasted vegetables, such as carrots and Brussels sprouts
  • Garlic knots or other savory breads
  • A simple green salad with a light vinaigrette

Wine Pairing Recommendations

Choosing the right wine can make your meal better. For beef stew, try a red wine like Cabernet Sauvignon or Merlot. If you like white, Pinot Grigio or Chardonnay works well too.

Here’s a table with some wine pairing ideas:

Wine TypeWine Pairing
RedCabernet Sauvignon, Merlot
WhitePinot Grigio, Chardonnay

Conclusion

As we wrap up our exploration of the best homemade beef stew recipe, it’s clear this dish is special. It’s not just a meal; it’s a labor of love that brings warmth and comfort. Every bite showcases the power of patience and detail in cooking.

Whether you’re an experienced cook or just starting out, this recipe is a must-try. By following the steps and tips in this article, you’ll make a stew that rivals any restaurant. Feel free to add your own twist and discover flavors that are uniquely yours.

Enjoying the last spoonfuls of this dish is a treat. We encourage you to share your experiences and tips with others. The joy of cooking grows when we learn from each other. So, go ahead, show off your cooking skills, and enjoy the cozy, comforting taste of this timeless recipe.

FAQ

What are the essential ingredients for the perfect beef stew recipe?

For the perfect beef stew, you need tender beef, fresh veggies like carrots, potatoes, and onions. Also, add aromatic spices like garlic, thyme, and bay leaves. These ingredients make a rich, flavorful broth perfect for winter nights.

How do I choose and prepare the beef for the stew?

Choose chuck, brisket, or round for stewing. These cuts are tender and flavorful when cooked slowly. Trim excess fat, cube the meat, and season with salt, pepper, and herbs to enhance flavor.

What kitchen equipment and tools do I need to make the best beef stew?

You’ll need a large pot or Dutch oven, a cutting board, a sharp knife, and basic utensils. These tools are simple to find and use, making the recipe accessible.

What are the steps for making the perfect beef stew?

Start by browning the meat and preparing the veggies. Then, create a rich broth with beef stock and red wine. Simmer the stew at the right temperature and for the right time for a flavorful dish.

What are some tips for achieving extra tender meat in the beef stew?

For tender meat, use a marinade, slow cook at low temperatures, and season well. Avoid overcooking to keep the meat juicy and tender.

How do I troubleshoot common stew problems?

Common issues include a thin or thick sauce, tough meat, and unbalanced seasoning. To fix a thin sauce, thicken with a roux or cornstarch slurry. For tough meat, choose the right cut and cook slowly. Adjust seasoning with salt, pepper, or herbs to balance flavors.

What are the best ways to store and reheat the beef stew?

Store the stew in airtight containers in the fridge or freezer. Reheat safely on the stovetop or in the microwave. This keeps the stew flavorful and textured.

What are the best side dishes and wine pairings for the beef stew?

Serve with crusty bread, mashed potatoes, and roasted veggies. For wine, a full-bodied Cabernet Sauvignon or Merlot pairs well. A lighter Chardonnay or Pinot Grigio also complements the stew’s rich flavors.

The Best Waffle Recipe: Fluffy, Homemade Waffles

What makes a great waffle recipe? How can you make the fluffiest, most delicious homemade waffles in your kitchen? A good waffle recipe is key for a perfect breakfast. With the right ingredients and equipment, you can impress your family and friends with easy waffles.

Making homemade waffles has many benefits. You can customize the recipe to your taste. With the best waffle recipe, you can try different flavors and textures.

Key Takeaways

  • Using the right ingredients is key for a great waffle recipe
  • A good waffle iron makes a big difference in your homemade waffles
  • An easy waffle recipe can be tailored to your taste
  • Making homemade waffles is a fun and rewarding experience
  • The best waffle recipe lets you try many delicious flavors and textures
  • Don’t worry if your first batch of homemade waffles isn’t perfect

The History of Waffles: From Medieval Times to Modern Breakfast

Waffles have a long history, starting in medieval times. The idea of breakfast waffles we enjoy today is newer. But cooking batter between two hot irons has been around for ages. The first waffle irons were simple, made of iron, but later got more complex with fancy designs.

The change in waffle irons helped shape the waffle recipe. As irons became common, people tried new ingredients and cooking ways. This led to different waffles, like the Belgian and American styles. Homemade waffles became a family tradition, with recipes passed down through generations.

Origin of the Belgian Waffle

The Belgian waffle comes from Belgium and is known for its light texture. It’s made with yeast and cooked in a deep grid iron. Today, it’s a favorite breakfast dish worldwide, often topped with whipped cream, fruit, and syrup.

Evolution of Waffle Irons

Waffle irons have greatly evolved. Now, they’re made with non-stick materials and have cool features. You can find irons with adjustable heat, timers, and even built-in thermometers. These help cook waffles evenly and prevent sticking.

Essential Equipment for Perfect Waffles

To make perfect crispy waffles, you need the right tools. A good waffle iron is key. It helps you get the perfect golden-brown color and texture. Think about the waffle recipe you want and how brown you like them.

Here are some key factors to consider when selecting a waffle iron:

  • Non-stick surface for easy waffle release
  • Adjustable heat control for perfect browning
  • Durable construction for long-lasting use

You’ll also need a mixing bowl and a whisk for your easy waffle recipe. A digital thermometer helps make sure your waffle iron is at the right temperature.

With the right equipment, you’re on your way to making delicious, crispy waffles. They’ll impress your family and friends. Always follow the waffle iron’s instructions and clean it often to keep making perfect waffles.

EquipmentDescription
Waffle IronNon-stick surface, adjustable heat control, durable construction
Mixing BowlStainless steel or glass, easy to clean and mix
WhiskStainless steel or silicone, easy to mix and blend

Understanding Waffle Batter Ingredients

To make delicious homemade waffles, knowing the ingredients is key. A good recipe balances dry and wet ingredients. You can also add optional items for a unique taste.

The type of flour used affects your waffles’ texture. A mix of all-purpose flour and cornstarch makes them light and airy. Sugar and salt add flavor.

Dry Ingredients Guide

  • 2 cups all-purpose flour
  • 2 tablespoons cornstarch
  • 1 tablespoon sugar
  • 1/2 teaspoon salt

Wet Ingredients Selection

Wet ingredients like milk, eggs, and butter add moisture and richness. For a classic recipe, use 1 cup of milk, 2 large eggs, and 2 tablespoons of melted butter.

Optional Add-ins and Flavoring

For a unique flavor, try adding vanilla extract, cinnamon, or nuts. You can also use almond or soy milk for a non-dairy option.

The Classic Waffle Recipe You Need to Try

To make a delicious classic waffle recipe, you’ll need a few key ingredients. You’ll need all-purpose flour, sugar, baking powder, salt, milk, eggs, and melted butter. The secret to a best waffle recipe is balancing wet and dry ingredients perfectly.

A simple easy waffle recipe should be easy to follow and need little equipment. You’ll need a waffle iron, a large bowl, and a whisk. First, mix the dry ingredients. Then, add the wet ingredients and stir until the batter is slightly lumpy.

Here’s a basic classic waffle recipe to start with:

  • 2 cups all-purpose flour
  • 4 teaspoons sugar
  • 2 teaspoons baking powder
  • 1/4 teaspoon salt
  • 2 large eggs
  • 1 cup milk
  • 4 tablespoons melted butter

Preheat your waffle iron and grease it with butter or cooking spray. Pour about 1/4 cup of batter onto the iron and spread it out. Cook for 3-5 minutes, until the waffles are golden and crispy.

With this easy waffle recipe, you’ll make delicious waffles quickly. Just remember to use the right ingredients and don’t overmix the batter. Happy cooking!

IngredientQuantity
All-purpose flour2 cups
Sugar4 teaspoons
Baking powder2 teaspoons
Salt1/4 teaspoon
Large eggs2
Milk1 cup
Melted butter4 tablespoons

Mastering Waffle Batter Consistency

To make the perfect fluffy waffles, mastering the batter consistency is key. A classic waffle recipe needs a balance of ingredients for a light texture. Knowing the signs of perfect batter and avoiding mixing mistakes are important.

A smooth, thick batter without lumps is ideal. It should spread evenly on the waffle iron and turn golden brown. Using the right flour and adjusting the recipe is critical. For example, coarser flour might need more liquid.

  • Use a digital thermometer to ensure the waffle iron is at the right temperature.
  • Don’t overmix the batter, as this can lead to tough and dense waffles.
  • Let the batter rest for a few minutes to allow the flour to absorb the liquid ingredients.

By following these tips and using a classic waffle recipe, you’ll make delicious, fluffy waffles. They’ll impress your family and friends.

IngredientQuantityImportance
Flour2 cupsHigh
Sugar1 cupMedium
Eggs2High

Remember, practice makes perfect. Don’t get discouraged if your first batch doesn’t turn out right. Keep trying different ingredients and techniques until you find your perfect waffle recipe.

Step-by-Step Waffle Making Technique

To make delicious homemade waffles, follow this easy waffle recipe and technique. First, preheat your waffle iron as the manufacturer suggests. While it heats up, mix your waffle batter using a simple recipe.

When the iron is hot, pour about 1/4 cup of batter onto its center. This amount works for most standard waffle irons. Close the iron and cook for 3-5 minutes, until the waffle is golden and crispy.

  • Use the right amount of batter to avoid overflowing the iron.
  • Adjust the cooking time based on the thickness of your waffles and the heat of your iron.
  • Don’t open the iron too often, as this can cause the waffles to cook unevenly.

By following this easy waffle recipe and technique, you can create delicious homemade waffles. They’re perfect for breakfast, brunch, or dinner. Try different waffle recipes and toppings to find your favorite.

Waffle RecipeCooking TimeTemperature
Classic Waffle Recipe3-5 minutes375°F
Belgian Waffle Recipe5-7 minutes400°F

Achieving the Perfect Golden-Brown Color

To get the perfect golden-brown color on your crispy waffles, you need to control the waffle iron’s temperature. Also, time the cooking right. A good waffle recipe will give you guidelines. But, you must adjust these for your waffle iron and waffle type.

For an easy waffle recipe, here are some tips:

  • Preheat the waffle iron to the recommended temperature.
  • Use a small amount of oil to brush the waffle iron, ensuring the waffles don’t stick.
  • Cook the waffles for the recommended time, or until they’re golden brown and crispy.

By following these tips and using the right waffle recipe, you’ll get the perfect golden-brown color on your crispy waffles. Always adjust the recipe and cooking time for your waffle iron and waffle type.

Waffle Iron TemperatureCooking TimeResult
Medium-high heat3-5 minutesGolden brown and crispy
Medium heat5-7 minutesLight brown and cooked through

Creative Waffle Variations and Toppings

Homemade waffles offer endless possibilities. With a basic recipe, you can make sweet and savory waffles. For breakfast, add fresh fruits like strawberries or blueberries to the batter.

Customize your waffle recipe for unique flavors. Sweet options include:

  • Whipped cream and chocolate chips
  • Caramelized bananas and honey
  • Powdered sugar and cinnamon

For savory waffles, add cheese, herbs, or spices. Try these combinations:

  • Bacon and cheddar cheese
  • Spinach and feta cheese
  • Jalapeno peppers and cheddar cheese

Be creative with your waffles. Whether you like sweet or savory, there’s a recipe for you. Experiment and find your favorite!

ToppingDescription
Fresh FruitsAdd fresh fruits like strawberries or blueberries to the batter for added flavor and nutrition.
Whipped Cream and Chocolate ChipsA classic sweet combination that’s perfect for breakfast waffles.
Bacon and Cheddar CheeseA savory combination that’s great for a breakfast or brunch dish.

Storage and Reheating Methods

To keep your crispy waffles fresh, store them in an airtight container. This keeps their texture and prevents sogginess. For reheating, use a toaster or oven to get that golden-brown look. For an easy waffle recipe, reheat in the toaster for a few minutes or in the oven at 350°F for 5-7 minutes.

Here are some tips for storing and reheating waffle recipe creations:

  • Store waffles in an airtight container to maintain freshness
  • Reheat waffles in a toaster or oven to achieve the perfect golden-brown color
  • Adjust reheating time based on the type of waffle and desired crispiness

Freezing is a great option for enjoying crispy waffles later. Place waffles in a freezer-safe bag or container. Store in the freezer for up to 2 months. When ready, toast or bake until crispy.

By following these tips, you can enjoy your favorite waffle recipe creations anytime. Whether it’s a classic easy waffle recipe or something new, these methods ensure perfect crispy waffles every time.

Storage MethodReheating MethodResult
Airtight containerToaster or ovenFresh and crispy waffles
Freezer-safe bag or containerToaster or ovenCrispy waffles after reheating

Troubleshooting Common Waffle Problems

Making breakfast waffles can sometimes go wrong. To get light and fluffy waffles, you need to solve these problems. A great waffle recipe is key, but even with the best ingredients, issues can arise.

Sticky waffles, texture problems, and uneven cooking are common issues. Knowing the causes and how to prevent them is important. For example, the right waffle iron and heat can prevent sticky waffles. Also, the batter’s consistency is key for texture.

Fixing Sticky Waffles

  • Check the waffle iron’s heat and adjust as needed
  • Use a non-stick waffle iron or spray with cooking spray
  • Don’t overmix the waffle batter

Addressing Texture Issues

For perfect waffle texture, use the right ingredients and a good recipe. Fresh eggs and milk are essential. Avoid overmixing the batter. These tips will help you make tasty homemade waffles.

Common IssueCauseSolution
Sticky wafflesIncorrect heat or batter consistencyAdjust heat and batter consistency
Texture issuesOvermixing or incorrect ingredientsUse fresh ingredients and avoid overmixing

By solving common waffle problems and using a good recipe, you can make delicious breakfast waffles. Always use fresh ingredients and follow the right techniques. This way, your homemade waffles will be light and fluffy.

Expert Tips for Restaurant-Quality Waffles

To make waffles like restaurants, you need the best recipe and tools. A classic recipe includes flour, sugar, and eggs. But, the secret to a great waffle is in how you make it. Temperature control is key for the right texture and crispiness.

Here are some tips for making restaurant-quality waffles:

  • Use a high-quality waffle iron that can achieve the right temperature.
  • Experiment with different types of flour, such as whole wheat or oat flour, to create a unique flavor.
  • Don’t overmix the batter, as this can result in a dense waffle.

A great waffle recipe is essential for a top-notch waffle. By following these tips and using the best ingredients, you can make a waffle that’s as good as those in restaurants. Whether you’re making a classic waffle or trying something new, the most important thing is to have fun and try different flavors and techniques.

With practice and patience, you can become a waffle expert. You’ll make delicious, restaurant-quality waffles that will wow your friends and family. So, go ahead and try it out. Don’t be afraid to experiment with new ingredients and techniques to create your own unique waffle recipe.

Waffle RecipeIngredientsInstructions
Classic WaffleFlour, sugar, eggs, milkMix ingredients, cook in waffle iron
Belgian WaffleFlour, sugar, eggs, yeastMix ingredients, let rise, cook in waffle iron

Conclusion: Making Waffle Magic at Home

Making delicious homemade waffles is an art form. It’s something anyone can learn, whether you’re a pro in the kitchen or just starting out. This guide has given you the tools to make waffle recipe perfection right in your kitchen.

Success with easy waffle recipe comes from knowing the science behind the batter. It also means trying out different ingredients and getting better at making waffles. With a bit of patience and practice, you’ll be making fluffy, golden waffles that everyone will love.

Let your creativity run wild and make waffle magic at home. Enjoy making your waffles your own with your favorite toppings and flavors. Share your creations online and inspire others to try making waffles too. The world of waffles is full of possibilities, and you’re ready to explore them.

FAQ

What makes the best waffle recipe?

The best waffle recipe makes waffles that are fluffy inside and crispy outside. It needs the right mix of dry and wet ingredients. Also, using the right technique and tools is key.

How do I choose the right waffle iron?

Look at the size, shape, and temperature control of the waffle iron. A nonstick surface makes cleaning up easier.

What are the key ingredients in a classic waffle recipe?

Classic waffles need flour, sugar, baking powder, salt, eggs, milk, and melted butter or oil. The right mix of these ingredients is important for the perfect waffle.

How do I achieve the perfect waffle batter consistency?

To get the right batter, don’t overmix. Use ingredients at the right temperature. Adjust the wet and dry ingredients as needed. The batter should be thick but pourable.

What’s the best way to store and reheat leftover waffles?

Cool leftover waffles completely. Then, store them in an airtight container or plastic bag. Reheat them in a toaster or oven to keep them crispy.

How can I customize my waffles with different toppings and flavors?

You can top waffles with fruit, whipped cream, chocolate chips, or even chicken and syrup. Try different spices and extracts for unique flavors.

What are some common waffle problems and how can I fix them?

Waffles can stick, be soggy, or not brown evenly. Fix these by adjusting the batter, cooking temperature, and technique.

Easy Chicken Breast Recipes: Delicious & Quick Meals

Why are easy chicken breast recipes so popular in American homes? They offer quick and healthy dinner options that are easy to make. These recipes are great for busy weeknights because they require little effort. With the right ingredients and techniques, you can make tasty meals that everyone will enjoy.

Easy chicken breast recipes are ideal for those who want to cook healthy meals fast. They range from simple dishes to more complex meals, fitting any taste or diet. This guide will help you learn how to cook delicious, quick meals with ease.

Key Takeaways

  • Easy chicken breast recipes offer a wide range of simple poultry dishes that can be prepared with minimal effort
  • Quick chicken dinners can be healthy and delicious with the right techniques and ingredients
  • Easy chicken breast recipes are perfect for busy weeknights and can be adapted to suit any taste or dietary preference
  • Simple poultry dishes can be elevated to elaborate meals with the right cooking techniques
  • Mastering easy chicken breast recipes requires practice and patience, but the results are well worth the effort
  • Easy chicken breast recipes can be used to create a variety of quick chicken dinners that are perfect for any occasion

Getting Started with Chicken Breast Preparation

To start making tasty chicken dishes, you need the right tools and ingredients. Choosing high-quality chicken breasts is key for healthy meals. Look for fresh, plump breasts without any damage or color changes.

Having the right kitchen tools is also important for quick meals. You’ll need a sharp knife, cutting board, and cooking utensils. These tools help you prepare a variety of healthy chicken meals, like grilled chicken or chicken salads.

Essential Kitchen Tools You’ll Need

  • Sharp knife
  • Cutting board
  • Cooking utensils (tongs, spatula, etc.)

Choosing Quality Chicken Breasts

When picking chicken breasts, choose brands known for quality and freshness. Brands like Perdue and Tyson are good choices. Organic or free-range options are also healthy choices.

Basic Preparation Methods

With your tools and ingredients ready, it’s time to prepare your chicken. You can season, marinate, or cook it by grilling, baking, or sautéing. These methods help you make delicious chicken recipes for any meal.

Preparation MethodDescription
SeasoningAdding herbs and spices to enhance flavor
MarinatingSoaking chicken in a mixture of ingredients to add flavor and tenderize
GrillingCooking chicken over direct heat to achieve a crispy exterior and juicy interior

The Secret to Perfectly Tender Chicken Breasts

Cooking chicken breasts can be tricky, but it’s doable for beginners. The key is to not overcook them, which makes them dry. This is a common mistake that can ruin the dish.

Choosing the right cooking method is also important. Grilling or pan-searing helps keep the meat moist and flavorful. Adding marinades or sauces also helps, making the chicken tender and tasty. This is vital for low effort chicken dishes to avoid overcooking.

Here are some tips for tender chicken breasts:

  • Don’t overcrowd the pan to prevent steaming instead of searing.
  • Use a meat thermometer to check the chicken’s internal temperature.
  • Let the chicken rest for a few minutes before slicing to keep the juices in.

By following these tips, anyone can cook tender chicken breasts. With a bit of practice, you’ll be making delicious beginner-friendly chicken dishes and low effort chicken dishes in no time. Your family and friends will love them.

Quick Pan-Seared Chicken Breast Recipes

For a tasty and quick meal, try pan-searing chicken breasts. This method gives you a crispy outside and a soft inside. It’s ideal for easy chicken breast recipes. With just a few ingredients, you can make many flavors to enjoy.

When you need a quick chicken dinner, pan-searing is perfect. It’s fast, simple, and leaves little mess. You can pair pan-seared chicken with veggies, rice, or salad for a complete meal.

Classic Lemon Garlic Chicken

This recipe is loved for its bright and savory taste. Lemon, garlic, and herbs make the chicken taste amazing.

Honey Mustard Pan-Seared Chicken

For a sweeter twist, try the honey mustard recipe. Honey makes it smooth, while mustard adds a tangy flavor.

Mediterranean Style Chicken Breast

This recipe takes you to the Mediterranean. It’s filled with herbs and spices that remind you of the region’s flavors.

These easy chicken breast recipes are great for any night. They cook fast and taste amazing. Whether you want something classic or adventurous, pan-seared chicken is a fantastic choice for quick chicken dinners.

Healthy Baked Chicken Breast Variations

Baking chicken breasts is a healthy and easy way to cook. It offers a range of delicious chicken recipes. Start by preheating your oven to 375°F (190°C). Season the chicken with your favorite herbs and spices.

For a moist and flavorful dish, use a thermometer. This ensures the chicken reaches a safe internal temperature of 165°F (74°C).

Some healthy chicken meal ideas include baking chicken with lemon and garlic. Or try a Mediterranean-style dish with olives and sun-dried tomatoes. You can also experiment with different marinades, like olive oil, soy sauce, and honey, to add flavor.

Here are some tips for baking chicken breasts:

  • Use a rimmed baking sheet to prevent juices from spilling over
  • Line the baking sheet with parchment paper for easy cleanup
  • Baste the chicken with melted butter or olive oil for added moisture

For a crispy exterior and a juicy interior, bake the chicken at 425°F (220°C) for a shorter time. You can also add some crunch by topping the chicken with chopped nuts or seeds. With these healthy chicken meal ideas and delicious chicken recipes, you’ll be inspired to create a variety of tasty and nutritious meals.

By following these tips and experimenting with different seasonings and marinades, you can create a range of healthy and delicious baked chicken breast variations. Whether you’re looking for a quick and easy weeknight dinner or a special occasion meal, baked chicken breasts are a great option. So why not get creative and start baking your way to a healthier and more flavorful you?

RecipeIngredientsCooking Time
Lemon Garlic Chickenchicken breasts, lemon juice, garlic, olive oil25-30 minutes
Mediterranean Chickenchicken breasts, olives, sun-dried tomatoes, feta cheese30-35 minutes

Simple Marinades for Flavorful Results

Marinades are a great way to add flavor to chicken breasts. They’re perfect for quick meals on weeknights. With just a few ingredients, you can make tasty chicken dishes that everyone will love. The secret is to mix acid, oil, and spices well.

A good marinade can really change how your chicken tastes and feels. For example, a mix of lemon juice, olive oil, and herbs like thyme and rosemary can add a bright flavor. Or, a marinade with soy sauce, honey, and ginger can give a sweet and savory taste.

Basic Marinade Combinations

  • Lemon juice, olive oil, and herbs like thyme and rosemary
  • Soy sauce, honey, and ginger
  • Balsamic vinegar, olive oil, and garlic

These marinade mixes are great for beginners and can be used for many quick meals. By trying different marinades, you can make a variety of flavors. This will help you create dishes that you’ll want to make again and again.

Marinating Times and Tips

How long you marinate depends on the marinade and the chicken size. Generally, marinate for at least 30 minutes to an hour. But, you can marinate for up to several hours or even overnight for stronger flavors.

Marinade TypeMarinating Time
Acid-based marinade30 minutes to 1 hour
Oil-based marinade1-2 hours
Overnight marinade8-12 hours

By following these tips and trying different marinades, you can make delicious chicken breasts. They’re perfect for quick meals and easy chicken dishes.

One-Pan Easy Chicken Breast Recipes

One-pan easy chicken breast recipes are perfect for a quick, delicious meal. They’re great for busy weeknights, letting you cook a full meal in just one pan. You can choose from skillet dinners to sheet pan meals, with endless options.

These recipes are not only tasty but also healthy. They offer the benefit of less cleanup and the chance to cook multiple ingredients at once. This makes them ideal for quick chicken dinners. You can use a cast-iron skillet or a non-stick pan to cook your chicken and other ingredients.

Here are some tips for one-pan cooking:

  • Choose the right pan: A large skillet or sheet pan is perfect for one-pan meals.
  • Prepare your ingredients: Chop your vegetables and season your chicken breast before cooking.
  • Cook in stages: Cook your protein and vegetables in stages to ensure everything is cooked through.

One-pan easy chicken breast recipes simplify your cooking routine. They allow you to have a delicious, healthy meal in just a few minutes. Try adding your favorite ingredients, like vegetables and spices, to make a unique dish. For a quick and easy meal, try one-pan easy chicken breast recipes tonight.

Some popular one-pan easy chicken breast recipes include chicken and vegetable stir-fries, chicken and rice bowls, and chicken fajitas. These recipes are quick, easy, and delicious, making them perfect for busy weeknights. With one-pan cooking, you can have a healthy, tasty meal ready in no time, making it a great option for quick chicken dinners.

Quick Chicken Breast Meal Prep Ideas

Meal prep saves time and helps you eat healthy. With healthy chicken meal ideas, you can make tasty and nutritious dishes. Cooking chicken breasts in bulk is a smart move. Store them in the fridge or freezer for later.

There are countless delicious chicken recipes to try. Marinate chicken breasts and grill or bake them for a quick meal. Popular ideas include chicken salad, wraps, and stir-fries.

Weekly Prep Strategies

Set aside one day a week for meal prep. Cook chicken breasts, roast veggies, and portion meals. Use a slow cooker for soups or stews that simmer all day.

Storage and Reheating Tips

Cool cooked chicken to room temperature before refrigerating or freezing. This prevents bacterial growth and keeps chicken fresh. Reheat by microwaving or oven-heating until warm.

Versatile Recipe Combinations

Meal prep lets you mix ingredients for new dishes. Combine chicken with roasted veggies, quinoa, or brown rice for a filling meal. Add your favorite sauces or seasonings for extra flavor.

Meal Prep IdeaIngredientsInstructions
Chicken SaladCooked chicken breasts, mayonnaise, celery, onionMix all ingredients together and serve on a bed of lettuce
Chicken WrapsCooked chicken breasts, tortilla, lettuce, tomato, cheeseAssemble all ingredients in a tortilla and serve

Common Chicken Breast Cooking Mistakes to Avoid

Cooking chicken breasts can be tricky, even for beginners. It’s easy to end up with dry, overcooked, or underseasoned meat. To cook chicken breasts perfectly, it’s key to know these common mistakes and how to avoid them. Making simple chicken dishes is great for busy weeknights.

Common errors include overcooking, not seasoning enough, and not letting the chicken rest. To avoid these, use a meat thermometer to check the chicken’s temperature. Season the chicken well before cooking and let it rest before slicing. Grilled or baked chicken is quick and easy to make, yet delicious and moist.

Here are some more tips to remember:

  • Don’t overcrowd the pan, as this can cause the chicken to steam instead of sear.
  • Use a gentle touch when handling the chicken to avoid tearing the meat.
  • Don’t be afraid to experiment with different seasonings and marinades to add flavor to your chicken.

By following these tips and avoiding common mistakes, you can make delicious and moist chicken breasts. These are perfect for many beginner-friendly chicken dishes. Whether you’re looking for simple or more complex recipes, the secret to success is in the details and trying new things.

Time-Saving Tips for Weeknight Chicken Dishes

When cooking chicken breasts on weeknights, time is key. Prepare ingredients early for your easy chicken breast recipes. This can mean chopping veggies, marinating chicken, or cooking it ahead of time. Then, just reheat it for your fast weeknight meals.

Quick-cook methods like pan-searing or baking are great time savers. They cook chicken fast and evenly, making a tasty, healthy meal. Here are some tips:

  • Use a thermometer to ensure the chicken is cooked to a safe internal temperature.
  • Don’t overcrowd the pan, as this can lower the temperature and affect the cooking time.
  • Let the chicken rest for a few minutes before slicing and serving.

By using these tips and your favorite easy chicken breast recipes, you can make quick, healthy meals. Whether you want something classic or adventurous, there’s a recipe for you.

With a bit of planning and creativity, you can enjoy tasty meals on busy weeknights. Try out your favorite chicken breast recipes and see what you can make.

RecipeCooking TimeDifficulty Level
Chicken Breast with Lemon and Herbs20-25 minutesEasy
Chicken Breast with Honey and Mustard15-20 minutesMedium
Chicken Breast with Mediterranean Spices25-30 minutesHard

Pairing Suggestions and Side Dishes

There are countless ways to serve chicken breasts. Delicious chicken recipes can be paired with many side dishes for a complete meal. For beginners, try pairing chicken with rice and steamed veggies.

Other great pairings include:

  • Roasted potatoes and carrots
  • Quinoa and black beans
  • Grilled asparagus and bell peppers

These sides enhance the chicken’s flavor and add texture. Experimenting with different pairings can help you find your favorite chicken breast dishes.

Adding a salad or soup to your meal can also be a good idea. It offers a refreshing contrast to the chicken’s richness. With these ideas, you can make a variety of tasty chicken recipes for beginners that everyone will love.

Side DishDescription
Rice and Steamed VegetablesA classic combination that pairs well with chicken
Roasted Potatoes and CarrotsA hearty and flavorful side dish that complements chicken
Quinoa and Black BeansA nutritious and filling side dish that pairs well with chicken

Conclusion: Mastering Easy Chicken Breast Recipes

We’ve looked into easy chicken breast recipes and found many tasty, quick, and healthy meals. From simple dishes to creative marinades and one-pan wonders, chicken breasts are incredibly versatile. As we wrap up, remember to have fun and try new things in the kitchen.

The trick to quick chicken dinners is knowing how to prepare and cook chicken breasts well. With the right tools, quality ingredients, and creativity, you can make amazing meals from chicken breasts. Feel free to mix and match flavors to discover new favorites.

By using the tips and recipes from this article, you’ll become a skilled home chef. You’ll be able to make delicious and healthy chicken breast meals anytime. So, let’s celebrate the endless tasty adventures you’ll have with chicken breasts.

FAQ

What are the essential kitchen tools needed for chicken breast preparation?

You’ll need a sharp knife, a cutting board, and cooking tools like tongs or a spatula.

How do I choose quality chicken breasts?

Look for plump, firm chicken breasts without discoloration. Avoid any with a strong smell or slimy texture.

What are some basic preparation methods for chicken breasts?

Season with salt, pepper, and herbs. You can also marinate or cook by baking, pan-searing, or grilling.

How can I ensure my chicken breasts are perfectly tender?

Don’t overcook. Use the right cooking methods and add moisture with marinades or sauces.

What are some quick and easy pan-seared chicken breast recipes to try?

Try lemon garlic chicken, honey mustard chicken, or Mediterranean-style chicken breast for a tasty meal.

What are some healthy baked chicken breast variations I can try?

Try simple seasoning, complex marinades, or use a thermometer for safe cooking.

What are some tips for making flavorful chicken breast marinades?

Use basic marinade combinations and marinate for the right time. Prepare make-ahead marinades for convenience.

What are some one-pan easy chicken breast recipes I can try?

Skillet dinners and sheet pan meals are great for busy nights. They’re quick and easy to make.

What are some quick chicken breast meal prep ideas?

Use weekly prep strategies and proper storage and reheating tips. Choose versatile recipes for easy meals.

What are some common chicken breast cooking mistakes to avoid?

Avoid overcooking, underseasoning, and other mistakes that can ruin the dish’s texture and flavor.

What are some time-saving tips for cooking chicken breasts on weeknights?

Use smart shortcuts and quick-cook methods like pan-searing and baking to save time.

What are some pairing suggestions and side dish ideas for chicken breasts?

Pair chicken breasts with classic sides like chicken and rice or try adventurous options like chicken and quinoa.

The Best Turkey Soup Recipe for a Cozy Winter Meal

What makes a perfect turkey soup recipe for a cold winter day? As the temperature drops, a warm and comforting bowl of homemade turkey soup is just what you need to cozy up. Turkey soup is the perfect solution for a chilly winter evening. It has rich flavors and nourishing ingredients.

In this article, we will explore the best turkey soup recipe. We will cover essential ingredients, kitchen tools, and step-by-step instructions. This will help you make a delicious and easy turkey soup recipe.

A good turkey soup recipe can be a game-changer for your winter meals. Whether you’re looking for a comforting and healthy meal or a delicious way to use up leftover turkey, a homemade turkey soup is the perfect choice. Turkey soup is sure to become a staple in your household.

So, what are the key elements of a great turkey soup recipe? Let’s dive in and find out.

Key Takeaways

  • Learn how to make a delicious and easy turkey soup recipe
  • Discover the essential ingredients and kitchen tools needed for a great turkey soup
  • Get step-by-step instructions for preparing a homemade turkey soup
  • Understand the importance of using high-quality ingredients in your turkey soup recipe
  • Find out how to customize your turkey soup to suit your taste preferences
  • Learn how to store and reheat your turkey soup for later use

Why Turkey Soup Is the Perfect Winter Comfort Food

Turkey soup is a favorite in American cuisine. It’s not just tasty, but also full of nutrients. A warm bowl of delicious turkey soup can make a cold winter day better.

Some key benefits of turkey soup include:

  • High protein content to help keep you full and satisfied
  • Low calorie count, making it a great option for those watching their weight
  • Rich vitamin and mineral profile, including vitamins A and C, and minerals like potassium and iron

Turkey soup also has a rich history in American cuisine. It’s a dish that’s been passed down through generations. Each family adds their own twist and flavors.

Looking for a delicious turkey soup to warm you up? Or a healthy and easy turkey soup to nourish your body? This classic American dish is perfect.

NutrientAmount per serving
Protein25g
Calories150
Vitamin A10% of the Daily Value (DV)
Vitamin C20% of the DV

Essential Ingredients for Classic Turkey Soup Recipe

To make a tasty and healthy turkey soup, you need the right stuff. A classic turkey soup recipe has veggies, herbs, and spices that go well with turkey.

Here’s what you’ll need:

  • Turkey meat (use leftover or fresh turkey breast or thighs)
  • Vegetables like carrots, celery, and onions
  • Herbs such as thyme, rosemary, and parsley
  • Spices like salt, pepper, and bay leaves
  • Chicken or turkey broth for extra flavor

Pick fresh, quality ingredients for the best taste and health benefits. Use fresh herbs and low-sodium broth to make it a healthy turkey soup.

You can also add other veggies like potatoes, peas, or corn to your turkey soup recipe. The goal is to mix flavors and textures nicely.

IngredientNutritional Benefits
Turkey meatHigh-quality protein, low in fat
VegetablesRich in vitamins, minerals, and fiber
Herbs and spicesAntioxidant properties, anti-inflammatory effects

With these ingredients and a simple turkey soup recipe, you can make a delicious and healthy turkey soup. It’s great for a cozy winter meal.

Kitchen Tools and Equipment You’ll Need

To make a delicious homemade turkey soup, you’ll need the right kitchen tools and equipment. Having the essential cookware and utensils will make the cooking process easier and more efficient. For a classic easy turkey soup recipe, you’ll need a large pot, preferably one that’s at least 8 quarts in size. This will give you enough room to cook the turkey, vegetables, and broth.

When it comes to cookware, it’s essential to choose the right type of pot for your homemade turkey soup. A stainless steel or enameled cast iron pot is ideal, as they retain heat well and are easy to clean. You’ll also need a set of utensils, including a large spoon, whisk, and tongs. These will come in handy when preparing and cooking your easy turkey soup.

Essential Cookware

  • Large pot (at least 8 quarts)
  • Stainless steel or enameled cast iron pot
  • Set of utensils (large spoon, whisk, tongs)

Optional Kitchen Gadgets

While not essential, some kitchen gadgets can make the cooking process more convenient. An immersion blender, for example, can be used to puree the soup right in the pot. A meat thermometer will ensure that your turkey is cooked to a safe internal temperature.

Measuring Tools

Accurate measurements are crucial when making homemade turkey soup. You’ll need a set of measuring cups and spoons to ensure that you’re using the right amount of ingredients. This will help you achieve the perfect balance of flavors in your easy turkey soup recipe.

Preparing Your Turkey Stock from Scratch

To make a delicious traditional turkey soup, start with a rich turkey stock. It’s the base of a great turkey soup recipe. Making it is simpler than you might think. Here’s a step-by-step guide to help you begin:

First, collect your ingredients. You’ll need turkey bones, vegetables, and aromatics. Use leftover turkey bones or buy them from a butcher. Next, heat your oven to 400°F (200°C). Roast the turkey bones for about 30 minutes, until they’re browned.

While the bones roast, chop your vegetables like carrots, celery, and onions. Add herbs and spices, such as thyme and bay leaves, for extra flavor. Once the bones are done, put them in a large pot or stockpot. Add the chopped vegetables, herbs, and spices.

Now, add liquid to the pot. Use water and white wine, or just water if you like. Bring it to a boil, then lower the heat to a simmer. Let it cook for at least 6 hours, or overnight.

After cooking, strain the stock through a fine-mesh sieve into a clean pot or container. Throw away the solids. Let the stock cool to room temperature. Then, refrigerate or freeze it for later use in your favorite turkey soup recipe. With homemade turkey stock, you can make a delicious and comforting traditional turkey soup for any occasion.

IngredientQuantity
Turkey bones2-3 pounds
Carrots2-3
Celery2-3 stalks
Onions1-2
Herbs and spicesto taste

Step-by-Step Turkey Soup Recipe

To make a tasty turkey soup, start by cooking the base. Sauté onions, carrots, and celery in olive oil until they’re soft. Then, add turkey stock made from leftover bones and veggies for a rich flavor.

Next, add your favorite veggies like diced potatoes, green beans, and peas. They add sweetness and texture. Choose colorful veggies for a healthy soup with lots of nutrients.

Seasoning Guidelines

Season your soup with salt, pepper, and herbs like thyme, rosemary, and bay leaves. Taste and adjust the seasoning to your liking.

Cooking Time and Temperature

Cook the soup over medium heat, stirring now and then, until veggies are tender. This should take 20-25 minutes. Aim for a temperature of 180°F to 190°F for the best flavor.

By following these steps, you’ll make a healthy, delicious turkey soup. It’s perfect for a cozy winter meal, with its rich flavor and nutritious ingredients.

Creative Ways to Customize Your Turkey Soup

Making a delicious homemade turkey soup is fun because you can make it your own. This easy turkey soup recipe lets you add your favorite spices, herbs, and ingredients. This way, you can make it truly unique.

Think about adding noodles, rice, or other grains to make it more filling. You can also add different vegetables like carrots, celery, or potatoes. For a spicy touch, try red pepper flakes or diced jalapenos.

To elevate your turkey soup, add fresh herbs like parsley, thyme, or rosemary. A squeeze of fresh lemon juice or a splash of wine can also enhance the flavor. The key is to experiment and find what you like best.

  • Add your favorite spices, such as paprika or garlic powder
  • Include different vegetables, such as diced bell peppers or zucchini
  • Use various types of noodles or grains, such as egg noodles or quinoa

Customizing your homemade turkey soup lets you create a dish that’s truly yours. Whether you prefer it spicy, savory, or sweet, the options are endless. So, don’t be afraid to get creative and make your easy turkey soup recipe special.

Common Mistakes to Avoid When Making Turkey Soup

When making a tasty traditional turkey soup, knowing common mistakes is key. A good turkey soup recipe needs careful attention and knowledge of cooking pitfalls.

To make sure your turkey soup is delicious, watch out for these common mistakes:

  • Temperature control issues: Not keeping an eye on the temperature can result in overcooked or undercooked soup.
  • Seasoning errors: Wrong seasoning can upset the flavor balance in your turkey soup recipe.
  • Texture problems: If the texture is off, your soup might not be appealing.

By avoiding these mistakes, you can make a delicious traditional turkey soup that everyone will love. Always stick to a reliable turkey soup recipe and take steps to avoid common errors.

With time and effort, you’ll get your turkey soup just right. Then, you can enjoy a warm, comforting bowl on a cold day.

Storage and Freezing Guidelines

After making your homemade turkey soup, it’s key to store and freeze it right. This keeps it fresh and safe to eat. A healthy turkey soup is great for your meals, and with the right storage, you can enjoy it longer.

To keep your homemade turkey soup fresh, follow these tips:

  • Refrigerate the soup at a temperature of 40°F (4°C) or below within two hours of cooking.
  • Use airtight, shallow containers to prevent moisture from accumulating and to cool the soup quickly.
  • Label the containers with the date and contents, and use them within three to four days.

Freezing Methods

Freezing is a great way to keep your healthy turkey soup for longer. You can freeze it in airtight containers or freezer bags. Make sure to remove as much air as possible before sealing.

Reheating Instructions

When reheating your frozen homemade turkey soup, heat it to 165°F (74°C). This ensures it’s safe to eat. You can reheat it on the stovetop, in the microwave, or in the oven.

Reheating MethodTemperatureTime
Stovetop165°F (74°C)10-15 minutes
Microwave165°F (74°C)3-5 minutes
Oven165°F (74°C)20-25 minutes

By following these storage and freezing guidelines, you can enjoy your homemade turkey soup for a longer period while maintaining its quality and safety.

Pairing Suggestions and Serving Ideas

There are many ways to serve delicious turkey soup. You can pair it with sides, salads, and bread for a complete meal. Try crusty bread, a green salad, or roasted veggies for a great match.

How you present your delicious turkey soup matters. Add fresh herbs or grated cheese for elegance. For a casual vibe, serve with crackers or croutons. The goal is to make your dish look good and taste even better.

Here are some ideas to start:

  • Serve with warm bread, like baguette slices or cornbread
  • Offer toppings like shredded cheese, sour cream, or diced onions
  • Pair with a simple green salad or a grain salad

To make your delicious turkey soup stand out, add some extra touches. Sour cream or fresh herbs can add flavor and color. Serve your easy turkey soup with a smile and be ready to share.

With these ideas, you’ll create a memorable meal with your delicious turkey soup. Be creative and let your easy turkey soup shine!

Pairing SuggestionsDescription
Crusty BreadA classic pairing that is easy to execute and always a crowd-pleaser
Green SaladA light and refreshing option that pairs well with the rich flavors of the soup
Roasted VegetablesA hearty and flavorful option that complements the soup nicely

Conclusion: Mastering Your Homemade Turkey Soup

Congratulations on mastering the art of making perfect turkey soup. This dish is a beloved part of American cuisine, offering comfort in cold winter months. By following this guide, you now know how to make a delicious, healthy turkey soup for your family.

Remember, the secret to great turkey soup is in the details. Focus on making a rich stock and balancing the flavors. Feel free to try different vegetables or add-ins to make it your own. With each batch, you’ll get better and add your own twist to this classic dish.

Now, invite your loved ones over for a warm bowl of your homemade turkey soup. You’ve reached a new level in cooking, and you should be proud of mastering this recipe.

FAQ

What are the essential ingredients for a classic turkey soup recipe?

A classic turkey soup needs turkey, onions, carrots, and celery. You’ll also need herbs like thyme and parsley, and a savory broth.

What kitchen tools and equipment are needed to make homemade turkey soup?

To make homemade turkey soup, you’ll need a large pot or Dutch oven. You’ll also need a sharp knife, cutting board, ladle, spoon, and measuring cups and spoons.

How do I prepare turkey stock from scratch?

To make turkey stock, simmer the turkey carcass with onions, carrots, celery, and herbs for hours. This makes a rich, flavorful stock for your soup.

What are some common mistakes to avoid when making turkey soup?

Avoid not controlling the temperature, seasoning errors, and texture issues. Keep the soup at a gentle simmer, adjust seasoning, and balance ingredients for a smooth soup.

How can I store and freeze homemade turkey soup?

Cool the soup completely before storing it in airtight containers or freezer bags. It lasts 4-5 days in the fridge or months in the freezer. Reheat it to a full simmer for safety.

What are some creative ways to customize my turkey soup?

Customize your turkey soup with herbs, spices, noodles, or grains. Try adding mushrooms, greens, or potatoes. Top it with croutons, cheese, or cream for extra flavor.

What are some good pairing suggestions and serving ideas for turkey soup?

Serve turkey soup with crusty bread, a fresh salad, or roasted veggies. Garnish with parsley, bacon, or Parmesan cheese. Try it in a bread bowl or with a grilled cheese sandwich for a cozy meal.

Baked Ziti Recipe Without Meat – Easy, Cheesy Goodness

Can a baked ziti recipe without meat be as good as one with meat? This question has sparked debate among food lovers. Many wonder if it’s possible to get the rich flavors and textures of traditional baked ziti without meat. For those seeking a tasty and easy vegetarian baked ziti, the answer is yes. It’s all about finding the right mix of cheeses, sauces, and ingredients.

A meatless baked ziti is a tasty and flexible option for everyone. It’s creamy, cheesy, and comforting. By trying vegetarian baked ziti, you can find new flavors and ingredients that make this classic dish even better.

Key Takeaways

  • A baked ziti recipe without meat can be just as flavorful and satisfying as its meat-based counterpart
  • Vegetarian baked ziti offers a versatile and customizable alternative to traditional pasta dishes
  • A meatless baked ziti recipe combines the perfect blend of cheeses, sauces, and ingredients
  • This dish is perfect for vegetarians and non-vegetarians seeking a comforting and satisfying meal
  • A baked ziti recipe without meat can be easily customized to suit various tastes and dietary preferences
  • Exploring vegetarian baked ziti can lead to new flavor discoveries and ingredient combinations

The Perfect Meatless Baked Ziti: An Introduction

A plant-based ziti recipe is a great choice for a tasty meal. It combines flavors and textures that everyone loves. With more options for meat-free ziti, making a delicious, healthy meal is easy.

Choosing a meat-free option is good for the planet. It lowers your carbon footprint and supports sustainable food systems. Plus, these dishes are often more nutritious, making them a healthy choice.

Why Choose a Meat-Free Version

There are many reasons to pick a meat-free baked ziti. It helps you eat less meat and eat more plants. This can lower your risk of heart disease and some cancers. It’s also lower in calories and fat, helping with weight management.

Benefits of Vegetarian Pasta Dishes

Vegetarian pasta dishes offer several benefits:

  • Lower environmental impact
  • Higher nutritional value
  • Lower risk of heart disease and certain types of cancer
  • Lower in calories and saturated fat

What Makes This Recipe Special

This ziti recipe is special because of its flavors and textures. It has a tangy tomato sauce, savory vegan cheese, and sautéed veggies. It’s perfect for vegetarians or anyone looking to try something new.

Essential Ingredients for Your Baked Ziti Recipe Without Meat

To make a tasty baked ziti recipe without meat, you need the right stuff. This vegetarian baked ziti uses pasta, sauces, cheeses, and veggies for its flavor.

Here’s what you’ll need:

  • Ziti pasta
  • Marinara sauce
  • Ricotta cheese
  • Mozzarella cheese
  • Grated Parmesan cheese
  • Fresh veggies like spinach, bell peppers, and onions
  • Herbs and spices like basil, oregano, and garlic powder

Choose the freshest, best-quality ingredients for your baked ziti recipe without meat. Go for organic veggies and whole-milk cheeses for the best taste.

Here’s a table with the main ingredients and how much you’ll need:

IngredientQuantity
Ziti pasta1 pound
Marinara sauce2 cups
Ricotta cheese1 cup
Mozzarella cheese2 cups, shredded
Grated Parmesan cheese1 cup

With these ingredients, you can make a delicious vegetarian baked ziti for any event. Pick the freshest ingredients and follow the recipe well for the best taste.

Kitchen Tools and Equipment Needed

To make a tasty meatless baked ziti, you need the right tools and equipment. Having the right utensils and gadgets makes cooking easier and faster. You’ll need basic items like pots, pans, and baking dishes for an easy meat-free ziti.

A large baking dish is key for even cooking and presentation. You’ll also need a colander to drain pasta and a cutting board for chopping veggies. A food processor can help chop and slice ingredients fast.

Basic Utensils Required

  • Large baking dish
  • Colander
  • Cutting board
  • Measuring cups and spoons

Optional Tools for Better Results

Some optional tools can enhance your meatless baked ziti. A stand mixer is great for mixing cheese blends. A food processor makes chopping and slicing easier. With the right tools, you’ll make a delicious and satisfying easy meat-free ziti.

Step-by-Step Preparation Method

To make a tasty baked ziti recipe without meat, just follow these steps:

First, heat your oven to 375°F (190°C). Cook the ziti pasta as the package says until it’s al dente. Then, drain and set it aside.

Next, make the sauce. Mix canned tomatoes, tomato paste, and herbs in a saucepan. Let it simmer for 10-15 minutes, stirring now and then.

While the sauce cooks, mix ricotta cheese, parmesan cheese, and eggs in a bowl. Stir until it’s smooth.

Now, let’s build the vegetarian baked ziti. Start with a layer of tomato sauce in a big baking dish. Add a layer of ziti pasta, then the ricotta cheese mix. Keep layering until you’ve used up all the ingredients. Top it off with mozzarella cheese.

Put the baked ziti recipe without meat in the oven for 25-30 minutes. It’s ready when the cheese is melted and bubbly.

Here’s a quick summary of the steps:

  • Cook the ziti pasta
  • Prepare the sauce
  • Combine the ricotta cheese mixture
  • Assemble the vegetarian baked ziti
  • Bake the dish

By following these steps, you’ll get a delicious baked ziti recipe without meat. It’s great for any night or a special event.

IngredientQuantity
Ziti pasta1 pound
Canned tomatoes2 cups
Ricotta cheese1 cup
Mozzarella cheese1 cup

Creating the Perfect Cheese Blend

To make a tasty plant-based ziti, you need the right cheese mix. Mozzarella, parmesan, and ricotta give it a creamy taste. For a vegan version, try soy cheese or nutritional yeast instead.

Melting cheese well is key. Temperature control helps prevent burning or separation. Here’s how to melt cheese perfectly:

  • Use a low heat setting to prevent the cheese from burning
  • Stir the cheese constantly to ensure even melting
  • Add a little liquid, such as milk or cream, to help the cheese melt smoothly

For a cheesy tomato ziti, add herbs like basil, oregano, or thyme. These tips and the right cheese mix will make your vegan pasta dish delicious.

Here’s a simple table to help you choose the right cheese for your plant-based ziti recipe:

Cheese TypeFlavorMelting Point
MozzarellaMild, creamyLow
ParmesanSharp, saltyHigh
RicottaLight, airyLow

Sauce Preparation and Seasoning Tips

For a tasty baked ziti recipe without meat, the sauce is key. Start by cooking down high-quality tomatoes with olive oil, garlic, and herbs. This makes a rich, flavorful base for your meatless baked ziti. Use fresh or canned San Marzano tomatoes for the best taste.

Seasoning is important for the sauce. Mix salt, pepper, and dried herbs like basil and oregano for depth. A pinch of sugar can balance the tomatoes’ acidity. For more flavor, cook the sauce longer or add a bit of red wine.

To enhance your sauce, try different seasoning methods. Here are a few ideas:

  • Roast garlic before adding it for a richer taste
  • Use fresh herbs like parsley or basil for brightness
  • Add a splash of lemon juice for acidity

Follow these tips to make a delicious baked ziti recipe without meat. With practice and trying new things, you’ll become a pro at meatless baked ziti soon.

Vegetable Add-ins and Variations

To make your easy meat-free ziti better, add different vegetables. Try using zucchini, bell peppers, and mushrooms. Sauté them and mix them with the cheese and tomato ziti.

When preparing vegetables, cut them into small pieces. Cook them until they’re tender but still crisp. This adds texture and freshness. You can mix and match vegetables to suit your taste.

For a tasty meal, mix your favorite vegetables with cheese and tomato sauce. Layer them with ziti in a baking dish. This makes a hearty, satisfying vegetarian baked ziti, great for any meal.

These vegetables add flavor, texture, and nutrition. They make your cheese and tomato ziti a complete and satisfying meal.

Storage and Reheating Guidelines

After making your tasty baked ziti without meat, it’s key to store and reheat it right. This keeps the flavor and texture just right. A good plant-based ziti recipe can last for days if stored well. Here are some tips for keeping your vegan baked pasta fresh.

For a short time, keep your baked ziti in the fridge in an airtight container. Make sure it’s at 40°F (4°C) or colder. This stops bacteria and keeps it fresh for up to 3 days. To reheat, use the oven or microwave for the best taste.

Proper Storage Methods

  • Refrigerate at 40°F (4°C) or below
  • Use airtight containers to prevent moisture and contamination
  • Label and date containers for easy identification

Best Reheating Practices

To reheat your baked ziti, preheat your oven to 350°F (175°C). Bake for 15-20 minutes, or until it’s hot. Or, use the microwave with a microwave-safe lid or plastic wrap to keep it moist.

Freezing Instructions

For longer storage, freeze your baked ziti. Let it cool down to room temperature first. Then, put it in an airtight container or freezer bag, squeezing out air before sealing. Frozen baked ziti lasts up to 3 months. To thaw, leave it in the fridge overnight and then reheat in the oven or microwave.

Storage MethodTemperatureShelf Life
Refrigeration40°F (4°C)3 days
Freezing0°F (-18°C)3 months

Conclusion: Enjoying Your Homemade Meatless Baked Ziti

Congratulations, you’ve mastered the baked ziti recipe without meat! This recipe opens a world of vegetarian pasta joy. It’s not only tasty but also healthier than the traditional version.

As you enjoy your vegetarian baked ziti, try new things. Add seasonal veggies, unique cheeses, and your favorite spices. The secret to a great baked ziti recipe without meat is balancing flavors and textures.

This meatless baked ziti will be a hit at any dinner. Serve it with a salad and wine for a full meal. Enjoy every bite, knowing you made a delicious, vegetarian-friendly dish at home.

FAQ

What are the main ingredients in a baked ziti recipe without meat?

A meatless baked ziti recipe needs ziti pasta, tomato sauce, and ricotta cheese. Mozzarella and parmesan cheese are also key. Onions, garlic, and bell peppers add flavor and texture.

What are the benefits of choosing a vegetarian baked ziti recipe?

Choosing a vegetarian baked ziti is good for the environment and your health. It’s also great for those who follow a plant-based diet. Plus, it’s often cheaper and enjoyed by everyone.

What makes this baked ziti recipe unique?

This recipe stands out with its mix of flavors and textures. It uses a special blend of cheeses for creaminess. Seasonal veggies add freshness and depth to the dish.

What basic kitchen tools and equipment are needed to make baked ziti without meat?

You’ll need a large pot for pasta, a skillet for sauce, and a baking dish for the final dish. Tools like a food processor or stand mixer can help too.

How do I prepare the perfect cheese blend for my baked ziti?

For a great cheese blend, mix mozzarella, parmesan, and ricotta. Melt them well for a creamy texture. You can also use vegetarian cheese alternatives for a dairy-free option.

How can I store and reheat leftover baked ziti?

Store leftover baked ziti in the fridge for 4 days or freeze for 3 months. Reheat in the oven at 350°F or microwave, stirring often. Thaw frozen dishes in the fridge before reheating.

Discover the Secret to Mouthwatering Chicken Cutlets

What makes a chicken cutlet recipe unforgettable? Is it the tender chicken, the crispy breading, or the flavors? To impress, you need the right ingredients and cooking techniques. Learning to make chicken cutlets at home can change your meals.

Mastering chicken cutlets lets you make dishes that everyone loves. You can try classic Italian cutlets or new flavors. A simple recipe can turn a meal into a hit.

Key Takeaways

  • Learning how to make chicken cutlets at home can elevate your cooking skills
  • A good chicken cutlet recipe requires the right ingredients and cooking techniques
  • Mastering the art of making chicken cutlets can help you create a variety of dishes
  • Chicken cutlets can be made with a range of flavors and seasonings
  • With practice, you can create mouthwatering chicken cutlets that impress
  • Understanding the basics of how to make chicken cutlets is essential for success
  • A simple chicken cutlet recipe can be the starting point for many delicious meals

Introduction to Classic Chicken Cutlets

Chicken cutlets are loved worldwide for their simplicity and flexibility. The secret to a great dish is in the ingredients and cooking method. A classic cutlet starts with fresh chicken breast, pounded thin for tenderness.

Homemade chicken cutlets are cost-effective and customizable. You can add fresh herbs and spices to create your own flavor. Plus, cooking them at home is a fun way to try new breading and seasonings.

What Makes a Perfect Chicken Cutlet

A perfect cutlet has a crispy outside and a juicy inside. The right ingredients and cooking technique are key. Quality chicken, the right breading, and proper cooking time and temperature matter.

Origins and Cultural Significance

Chicken cutlets have a rich history and cultural importance. Different regions have their own versions, like Italian breaded cutlets and Japanese teriyaki cutlets. Exploring these variations can deepen your appreciation for this dish.

Benefits of Making Cutlets at Home

Making chicken cutlets at home has many advantages. You can choose the best ingredients and control the cooking method. This way, you can make a healthier, tastier dish that fits your diet. Plus, it’s a fun way to get creative in the kitchen.

Essential Ingredients for Perfect Chicken Cutlets

To make perfect chicken cutlets, you need the right ingredients. A classic recipe includes fresh chicken breasts, all-purpose flour, eggs, and breadcrumbs. Choose boneless, skinless breasts for the best results.

Freshness matters when picking chicken. Look for chicken with a nice smell and firm texture. For breading, use plain or seasoned breadcrumbs. Some recipes add grated Parmesan cheese, garlic powder, or dried herbs for extra flavor.

Having the right ingredients is key to making tasty chicken cutlets. Here are the must-haves:

  • Fresh chicken breasts
  • All-purpose flour
  • Eggs
  • Breadcrumbs
  • Salt and pepper
  • Optional: grated Parmesan cheese, garlic powder, or dried herbs

Keep chicken ingredients cool and dry. Store fresh chicken in the fridge at 40°F (4°C) or below. Breadcrumbs and flour go in airtight containers at room temperature.

With these ingredients, you can make a delicious chicken cutlet recipe quickly. Always follow food safety guidelines when handling and storing chicken for a healthy meal.

Required Kitchen Tools and Equipment

When cooking chicken cutlets, the right tools are key. You’ll need a frying pan, utensils, and a cutting board to start. These basics help you prepare and cook your chicken cutlets well.

There are also optional tools that can improve your results. A meat thermometer ensures your chicken is cooked safely. A food processor makes breading and seasoning easier. Having these tools can make cooking chicken cutlets faster and more enjoyable.

Basic Equipment Needs

  • Frying pan
  • Utensils (tongs, spatula, etc.)
  • Cutting board

Optional Tools for Better Results

  • Meat thermometer
  • Food processor
  • Breading station

Setting Up Your Workspace

To cook safely and efficiently, organize your tools and equipment. Keep your cutting board and utensils clean. Have a trash can nearby for waste. With these steps and the right tools, you’ll make delicious chicken cutlets.

Kitchen ToolPurpose
Frying PanCooking chicken cutlets
Meat ThermometerEnsuring safe internal temperature
Food ProcessorBreading and seasoning

How to Make Chicken Cutlets: Step-by-Step Process

To make delicious chicken cutlets, follow a simple recipe and technique. The key is to get a crispy outside and a juicy inside. Start by getting your ingredients ready, like fresh chicken breasts, breadcrumbs, and your favorite seasonings.

When making chicken cutlets, pound the chicken breasts to an even thickness. This ensures they cook evenly. Then, set up your breading station with flour, eggs, and breadcrumbs. Dip each chicken breast in flour, then eggs, and finally breadcrumbs, pressing the crumbs onto the chicken.

You can customize your chicken cutlet recipe with different seasonings and herbs. Some favorites include:

  • Italian-style with parmesan cheese and basil
  • Spicy with cayenne pepper and paprika
  • Lemon pepper for a bright, citrusy flavor

Heat about 1/2 inch of oil in a large skillet over medium-high heat. When hot, add the chicken cutlets. Cook for 3-4 minutes on each side, until golden brown and the internal temperature is 165°F.

For an extra crispy coating, chill the breaded chicken cutlets in the fridge for 30 minutes before cooking. This helps the breadcrumbs stick better and makes the outside crunchier. By following these steps and tips, you’ll make a delicious chicken cutlet dish that everyone will love.

IngredientQuantity
Chicken breasts4
Breadcrumbs1 cup
Eggs2
Flour1 cup

Breading Techniques for Maximum Crispiness

To get the perfect crispy chicken cutlets, mastering breading is key. The right technique can greatly improve the texture and taste. You can use traditional breadcrumbs, panko breadcrumbs, or even grated cheese for breading.

A good breading should be light and airy. This lets the chicken’s natural flavor come through. Avoid over-breading to keep the cutlets juicy inside and crispy outside. Panko breadcrumbs are great for this because they are light and airy.

Common mistakes include over-breading, which makes the cutlets greasy, and under-breading, which makes them lack texture. To avoid these, find the right balance and use the right techniques. Here are some tips for perfect breading:

  • Use the right type of breadcrumbs: Panko breadcrumbs or grated cheese can add a light and airy texture to your cutlets.
  • Don’t over-bread: A light coating of breadcrumbs is all you need to create a crispy exterior.
  • Experiment with different seasonings: Add some flavor to your breadcrumbs with herbs and spices to create a unique taste.

By following these tips and mastering breading, you can make crispy chicken cutlets that will wow anyone. Whether you’re experienced or new to cooking, the right breading technique can elevate your dishes.

Breading MaterialDescription
Panko BreadcrumbsLight and airy texture, perfect for creating crispy chicken cutlets
Grated CheeseAdds a rich and creamy flavor to your cutlets
Traditional BreadcrumbsA classic choice for breading chicken cutlets, but can be heavier than panko breadcrumbs

Proper Frying Temperature and Timing

Getting the right frying temperature and timing is key for chicken cutlet cooking. The best frying temperature is between 350°F and 375°F. It’s also important to cook the chicken for the right amount of time.

Here are some tips for achieving the perfect frying temperature and timing:

  • Use a thermometer to monitor the oil temperature.
  • Do not overcrowd the pan, as this can lower the oil temperature.
  • Cook the chicken cutlets for 3-4 minutes on each side, or until they reach an internal temperature of 165°F.

By following these tips, you can get the perfect frying temperature and timing for your chicken cutlet cooking. Always remember to cook the chicken to the recommended internal temperature for food safety.

With practice and patience, you can master frying chicken cutlets. The secret is finding the right balance between frying temperature and timing.

Cooking MethodFrying TemperatureCooking Time
Deep-frying350°F – 375°F3-4 minutes on each side
Pan-frying325°F – 350°F4-5 minutes on each side

Flavor Variations and Seasonings

Chicken cutlet seasonings offer endless possibilities. You can try different herbs and spices to make unique flavors. Italian seasoning is a favorite, mixing basil, oregano, and thyme for a savory taste. For something different, use lemon pepper or garlic parmesan for a citrus or umami kick.

Want to elevate your chicken cutlets? Try these flavor variations:

  • Classic Italian style, featuring tomato sauce and melted mozzarella cheese
  • International flavors, like Korean BBQ or Indian spices
  • Herb and spice mixes, such as rosemary and garlic or paprika and chili powder

Exploring different seasonings can lead to a variety of tasty dishes. Whether you prefer something traditional or bold, the right seasonings can transform your meal.

Storage and Reheating Guidelines

Keeping chicken cutlets fresh is key to their taste and safety. Cool them down to room temperature within two hours after cooking. This stops bacteria from growing. Once cooled, store them in airtight containers in the fridge for up to three days or freeze for up to three months.

There are several ways to reheat chicken cutlets safely. You can use the oven, microwave, or pan. Make sure they reach an internal temperature of 165°F (74°C) for food safety. Here are some reheating tips:

  • Oven reheating: Preheat the oven to 350°F (180°C) and bake the chicken cutlets for 10-15 minutes, or until heated through.
  • Microwave reheating: Place the chicken cutlets in the microwave and heat on high for 30-60 seconds, or until heated through.
  • Pan-frying: Heat a skillet with a small amount of oil over medium heat and cook the chicken cutlets for 2-3 minutes on each side, or until heated through.

By following these guidelines, you can enjoy your chicken cutlets safely and deliciously. Whether you store them in the fridge or freezer, or reheat them in the oven, microwave, or pan, proper handling and cooking are crucial.

Storage MethodStorage Time
RefrigeratorUp to 3 days
FreezerUp to 3 months

Serving Suggestions and Pairings

Chicken cutlet serving offers endless possibilities. Pair them with salads or vegetables for a complete meal. A classic choice is chicken cutlets with marinara sauce and a green salad.

Try different sauces like aioli or teriyaki for a twist. Exploring international flavors and seasonings can make your meal exciting. Here are some pairing ideas:

  • Grilled vegetables, such as zucchini or bell peppers
  • A side of quinoa or brown rice
  • A fresh salad with mixed greens and a light vinaigrette
  • A side of roasted potatoes or sweet potatoes

For a tasty meal, serve chicken cutlets with roasted vegetables and aioli sauce. The secret to a great meal is balancing flavors and textures. Experiment with different pairings and sauces to find your favorite.

These pairings and suggestions will please even the most finicky eaters. So, be creative and find your favorite chicken cutlet serving and pairing!

Chicken Cutlet PairingSide DishSauce
Grilled Chicken CutletRoasted VegetablesAioli
Breaded Chicken CutletQuinoaMarinara
Chicken Cutlet with HerbsGrilled VegetablesTeriyaki

Troubleshooting Common Chicken Cutlet Problems

When making chicken cutlets, you might face issues like breading problems and uneven cooking. Understanding the causes and using effective solutions is key. It’s all about paying attention to details and adjusting your cooking methods.

Common problems include breading falling off, oil temperature being off, and cutlets cooking unevenly. Here are some tips to help:

  • Check the breading mixture for the right balance of ingredients to prevent it from falling off.
  • Use a thermometer to ensure the oil temperature is within the ideal range for frying chicken cutlets.
  • Don’t overcrowd the pan, as this can lead to uneven cooking and increase the risk of chicken cutlet problems.

By following these tips, you can fix common chicken cutlet problems. Remember, making perfect chicken cutlets takes practice. Don’t get discouraged by initial challenges. With patience and persistence, you’ll master making delicious chicken cutlets.

Common IssuesTroubleshooting Tips
Breading falls offAdjust breading mixture, use proper coating technique
Uneven cookingDon’t overcrowd the pan, use thermometer to control oil temperature
Oil temperature too high or too lowUse thermometer to monitor oil temperature, adjust heat as needed

Conclusion

Creating delicious chicken cutlets is an art that you can master. You now know how to pick the best chicken and get that perfect crispy breading. You’re ready to make chicken cutlet recipes that will wow your loved ones.

Success comes from focusing on the details and trying new flavors. Don’t hesitate to mix up seasonings or explore different tastes. This will help you create your own unique chicken cutlet style.

Most importantly, enjoy the time you spend in the kitchen. With these tips, you’re on your way to becoming a pro at making chicken cutlets. You’ll be able to share your cooking skills with everyone at your table.

FAQ

What makes a perfect chicken cutlet?

A perfect chicken cutlet uses fresh, high-quality chicken. It has a crispy breading and is cooked right. This makes the inside juicy and the outside golden.

What are the essential ingredients for chicken cutlets?

For chicken cutlets, you need boneless, skinless chicken breasts. Also, all-purpose flour, eggs, breadcrumbs or panko, and seasonings like salt, pepper, and garlic powder are key.

What kitchen tools and equipment are needed to make chicken cutlets?

You’ll need a frying pan, a meat mallet or tenderizer, and a breading station. Tongs or a slotted spoon are also helpful. A meat thermometer can improve your results.

What are the steps to make chicken cutlets?

To make chicken cutlets, start by pounding the chicken to an even thickness. Then, bread the chicken in a three-step process. Finally, fry the cutlets in hot oil until they’re golden and cooked through.

What are some common breading techniques for chicken cutlets?

The traditional method is to dredge the chicken in flour, then in eggs, and lastly in breadcrumbs or panko. You can also try grated cheese, crushed crackers, or mix different coatings.

What is the proper frying temperature and timing for chicken cutlets?

The best frying temperature is 350°F to 375°F. Fry the cutlets for 3 to 5 minutes on each side. They should reach an internal temperature of 165°F.

What are some flavor variations and seasoning options for chicken cutlets?

Chicken cutlets can be seasoned in many ways. Try classic Italian herbs, international spices, or your favorite herbs and spices. Garlic, parmesan, lemon, paprika, and herbs like basil, oregano, or thyme are popular choices.

How should I store and reheat cooked chicken cutlets?

Cooked chicken cutlets can be stored in an airtight container in the fridge for 3-4 days. To reheat, bake at 400°F for 5-10 minutes or microwave in 30-second intervals until hot.

What are some common serving suggestions and pairings for chicken cutlets?

Chicken cutlets go well with salads, roasted vegetables, mashed potatoes, or pasta. Try them with marinara, pesto, or aioli for extra flavor.

What are some common problems that can occur when making chicken cutlets, and how can they be addressed?

Problems like uneven breading, oil temperature issues, and uneven cooking can happen. Use a consistent breading process, keep the oil at the right temperature, and ensure even cooking by turning the cutlets often.

The Best Tauhu Recipe for a Flavorful Meal

What makes a tauhu recipe unforgettable? How can you make a meal that leaves you wanting more? The secret is in tauhu’s versatility and ability to soak up flavors. It’s high in protein and low in calories, making it great for those who care about their health.

Whether you’re an expert in the kitchen or just starting out, a good tauhu recipe can take your cooking to new heights. It offers a delicious and nutritious meal experience.

Finding the right tauhu recipe can transform your dining experience. By trying different flavors and techniques, you can discover new dishes you’ll love. From classic Asian recipes to modern twists, the options are endless. The key is to find the perfect mix of tastes and textures.

Key Takeaways

  • Tauhu is a versatile ingredient that can absorb a wide range of flavors
  • A well-crafted tauhu recipe can provide a flavorful meal experience
  • Tauhu is an excellent choice for health-conscious individuals due to its high protein content and low calorie count
  • Exploring various flavorful meal ideas and techniques can help unlock the full potential of tauhu
  • Balance of flavors and textures is crucial in creating a successful tauhu recipe
  • Tauhu can be used in a variety of dishes, from traditional Asian-inspired recipes to modern fusion creations

Understanding Tauhu: An Introduction to Asian Tofu

Tauhu, also known as Asian tofu, is a key ingredient in many Asian dishes. It’s made from soybeans and is packed with protein. We’ll explore what tauhu is, its history, and its health benefits.

A tofu introduction wouldn’t be complete without talking about its history. Tauhu has been a staple in Asian diets for centuries, offering a rich source of protein. It’s believed to have started in China and spread to Japan and Korea.

What is Tauhu?

Tauhu is a soybean-based food. It’s made by curdling soy milk with a coagulant like calcium sulfate. The curds are then pressed into blocks, varying from soft to firm.

Historical Significance in Asian Cuisine

Tauhu has been crucial in Asian cuisine for ages. It’s used in many dishes, from stir-fries to desserts. In many cultures, it’s seen as a sign of good luck and prosperity.

Nutritional Benefits

Tauhu is a nutritious food, rich in protein, fiber, and iron. It’s perfect for those who don’t eat meat. It’s also low in calories and fat, making it great for a healthy diet.

Some key benefits of tauhu include:

  • High in protein
  • Rich in fiber
  • Good source of iron
  • Low in calories
  • Low in saturated fat

In conclusion, tauhu is a versatile and healthy ingredient that’s been part of Asian cuisine for centuries. Whether you’re new to it or already know about it, adding tauhu to your diet is a smart choice.

Essential Ingredients for the Perfect Tauhu Recipe

For tofu cooking, the right ingredients are key. A basic tauhu recipe has tauhu, veggies, and seasonings. First, pick a tauhu type that fits your taste and texture needs. You can choose from silken, firm, or extra-firm tauhu.

Vegetables add flavor and texture to tauhu. Popular choices include:

  • Bok choy
  • Mushrooms
  • Bell peppers
  • Carrots

Stir-fry or sauté these veggies with tauhu for a tasty dish.

Seasonings and sauces are crucial in tofu cooking. Soy sauce, garlic, ginger, and chili flakes are common. Mixing these with tauhu and veggies makes a flavorful meal.

Choose fresh ingredients for your tauhu recipe. Freshness ensures your dish is tasty, healthy, and safe. With the right ingredients, you can master tofu cooking and enjoy many delicious tauhu dishes.

Choosing the Right Type of Tauhu for Your Dish

Choosing the right type of tauhu is key to a tasty tau hu recipe. There are many types of tofu, each with its own special qualities. Knowing the differences will help you pick the best one for your dish.

The main types are silken, firm, and extra firm. Silken tauhu is soft and creamy, great for desserts and sauces. Firm tauhu is denser, perfect for stir-fries and braises. Extra firm tauhu is the driest, ideal for grilling and pan-frying.

Characteristics of Tauhu Types

  • Silken tauhu: soft and creamy texture, high water content
  • Firm tauhu: denser texture, medium water content
  • Extra firm tauhu: dense and dry texture, low water content

Think about the cooking method and texture you want. For stir-fries, firm tauhu is best. For desserts, go with silken tauhu. Choosing the right type ensures a delicious and authentic dish.

The brand and quality of tauhu also matter. Choose reputable brands for the best results. Follow the package instructions for storage and preparation. With the right tauhu and practice, you can make many tasty dishes.

Type of TauhuTextureWater ContentBest Uses
SilkenSoft and creamyHighDesserts, sauces
FirmDenserMediumStir-fries, braises
Extra FirmDense and dryLowGrilling, pan-frying

Preparation Techniques and Tips

Preparing tauhu requires the right cooking techniques for the best taste and texture. First, drain and press the tauhu to get rid of extra moisture. This helps it stay together while cooking. Then, marinating the tauhu with different preparation methods can make it even more flavorful.

Remember to handle the tauhu carefully to avoid it breaking. Also, use just the right amount of marinade to keep its natural taste. Here are some important preparation methods to try:

  • Draining and pressing the tauhu to remove excess moisture
  • Marinating the tauhu using a combination of soy sauce, garlic, and ginger
  • Freezing and thawing the tauhu to create a softer texture

By using these cooking techniques and preparation methods, you can make a tasty and authentic tauhu dish. Always be gentle with the tauhu and try different marinades to find your favorite flavor.

With time and practice, you’ll get better at preparing tauhu. You can make many dishes with this versatile ingredient. Whether you’re experienced or new in the kitchen, learning preparation methods and cooking techniques is key to success with tauhu.

Preparation MethodDescription
Draining and PressingRemoving excess moisture from the tauhu
MarinatingAdding flavor to the tauhu using a combination of ingredients
Freezing and ThawingCreating a softer texture by freezing and thawing the tauhu

Step-by-Step Tauhu Recipe for Beginners

To start cooking tauhu, it’s key to follow a simple tofu recipe. This step-by-step guide will show you how to prepare and cook tauhu perfectly.

First, drain and press the tauhu to get rid of extra liquid. This step is important for better flavor absorption. Then, marinate the tauhu with your favorite seasonings and sauces.

Draining and Pressing

Draining and pressing the tauhu is easy but takes patience. Use a clean kitchen towel or paper towels to soak up the excess liquid.

Marinating Methods

Marinating the tauhu lets you be creative with flavors. Choose from many seasonings, sauces, and herbs to make it taste great.

Cooking Instructions

After marinating, cook the tauhu your way, like pan-frying, baking, or grilling. Always follow a trusted tofu recipe and step-by-step guide for the best results.

Advanced Cooking Methods for Tauhu

For those who love to cook, advanced methods can really boost your tofu dishes. Techniques like stir-frying, baking, and deep-frying add texture and flavor. Stir-frying, in particular, requires high heat and a bit of oil for the best texture.

Some top methods for cooking tauhu include:

  • Stir-frying with veggies like bell peppers and broccoli for a tasty, healthy dish
  • Baking tauhu with herbs and spices for a crispy outside and soft inside
  • Deep-frying tauhu for a crispy outside and a soft inside, great for snacks or appetizers

To get the best results, mastering advanced cooking is key. Trying out different marinades and seasonings can also make your tauhu taste amazing. Whether you’re making a quick snack or a complex meal, these methods can elevate your dishes.

Learning advanced cooking techniques opens up a world of delicious tofu dishes. You can make everything from stir-fries to baked goods. With time and effort, you’ll become a pro at making tasty tauhu dishes that wow everyone.

Cooking MethodDescription
Stir-fryingCooking tauhu quickly over high heat with a small amount of oil
BakingCooking tauhu in the oven with herbs and spices to create a crispy exterior
Deep-fryingCooking tauhu in hot oil to create a crispy exterior and a soft interior

Tauhu is a versatile ingredient that can be paired with many flavors. The right flavor combinations can make any meal better. We’ll look at popular pairings, from Asian-inspired to Western fusion.

Asian-Inspired Seasonings

Asian seasonings like soy sauce, ginger, and garlic are key in tauhu dishes. They add depth and flavor. Here are some great options:

  • Soy sauce and ginger for a savory and umami flavor
  • Garlic and chili for a spicy and aromatic flavor
  • Ginger and lemongrass for a refreshing and citrusy flavor

Western Fusion Options

Western fusion brings a new twist to tauhu dishes. Think Italian tomato sauce or Mexican salsa. These pairings can turn tauhu into tacos or pasta.

Exploring different flavors can lead to many tasty tauhu dishes. Whether you like Asian or Western flavors, there’s always something new to try.

Common Mistakes to Avoid When Cooking Tauhu

Cooking tauhu can be tricky, even for experts. Knowing the common mistakes helps make a perfect dish. One big problem is controlling the temperature. If it’s off, the tauhu can end up too hard or too soft.

Other mistakes include temperature control issues and seasoning errors. These can make the dish taste bad. Also, texture problems happen if you’re not gentle when handling the tauhu.

Temperature Control Issues

To fix temperature problems, keep an eye on the heat. Use a thermometer to check the oil or liquid’s temperature. This ensures it’s just right.

Seasoning Errors

Seasoning mistakes can be fixed by tasting and adjusting. Use top-notch ingredients and balance the flavors. This makes the dish taste great.

Texture Problems

Texture issues are solved by being gentle and cooking it right. Don’t overcook or undercook. Follow the recipe to get the right texture.

Knowing these common mistakes helps make tasty tauhu dishes. Whether you’re new or experienced, avoiding cooking issues is key. This way, you’ll always get great results with tauhu.

Storage and Preservation Tips

Keeping tauhu fresh and safe is key. To do this, follow some simple storage tips. Refrigeration is a good way to slow down bacteria growth. Always store tauhu in a sealed container, away from strong-smelling foods.

Freezing is another great option for longer storage. Frozen tauhu can last up to 3 months. Wrap it tightly in plastic or foil to avoid freezer burn. To thaw, leave it in the fridge overnight or thaw quickly in cold water.

Some important preservation methods include:

  • Refrigeration: Store tauhu in a sealed container in the refrigerator at a temperature of 40°F (4°C) or below.
  • Freezing: Wrap tauhu tightly in plastic wrap or aluminum foil and store it in the freezer at 0°F (-18°C) or below.
  • Dehydration: Remove excess moisture from tauhu to prevent bacterial growth.

By using these tips, you can enjoy fresh tauhu for longer. Always check for spoilage before eating. Discard any tauhu with bad smells, slimy texture, or mold.

Different tauhu types need different storage. Silken tauhu spoils faster than firm tauhu. Store it in the fridge and eat it sooner. Knowing your tauhu’s needs helps keep it tasting and feeling its best.

Storage MethodShelf LifeTemperature
Refrigeration3-5 days40°F (4°C) or below
Freezing3 months0°F (-18°C) or below

Serving Suggestions and Meal Pairings

Tauhu is a versatile ingredient for any meal. It can be served in many ways. From traditional dishes to modern twists, tauhu pairs well with a variety of foods.

Traditional Accompaniments

Traditional sides for tauhu include steamed veggies, rice, and noodles. These meal ideas are tasty and easy to make. For instance, try tauhu with stir-fried veggies and steamed rice for a quick dinner.

Modern Fusion Combinations

Tauhu also works well in modern dishes. You can make tauhu tacos, salads, or wraps. These meal ideas are great for those who want to try something new. Tauhu’s flavor makes it perfect for any dish, limited only by your creativity.

Looking for something traditional or modern? Tauhu is a great choice. With so many serving suggestions and meal ideas, you’ll find something you like. So, why not try something new with tauhu today?

Conclusion

As we wrap up our journey into tauhu, it’s clear this Asian ingredient is a treasure trove of flavors. Its rich history and nutritional benefits make it a favorite in kitchens worldwide.

We’ve looked at how to pick the best tauhu, learn cooking techniques, and make tasty dishes. Whether you like silken or extra-firm tauhu, the fun is in finding your favorite flavors.

Keep exploring with tauhu in your cooking. Try it with Asian spices or mix it with Western flavors. The endless possibilities are a celebration of global cuisine.

So, food lovers, let this article kickstart your tauhu adventures. Don’t be afraid to try new things and enjoy the delicious dishes you make. The world of tauhu is waiting for you to discover it!

FAQ

What is Tauhu?

Tauhu, also known as tofu, is a traditional Asian food. It’s made from soybean curds. It’s a versatile ingredient used in many Asian dishes.

What are the different types of Tauhu?

There are several types of tauhu. These include silken, firm, and extra-firm. Each type has a unique texture and absorbs differently, making them perfect for various dishes.

What are the nutritional benefits of Tauhu?

Tauhu is low in calories but high in protein. It’s also packed with essential vitamins and minerals. It’s a great source of calcium, iron, and more, making it a healthy choice for meals.

How do I prepare and cook Tauhu?

To prepare tauhu, you need to drain, press, and marinate it. This ensures the right texture and flavor. You can cook it by stir-frying, baking, or deep-frying, creating many different dishes.

What are some common mistakes to avoid when cooking Tauhu?

Avoid common mistakes like temperature control issues, seasoning errors, and texture problems. Knowing the right cooking techniques can help you make a great tauhu dish.

How should I store and preserve Tauhu?

Store tauhu in the fridge and freeze it for longer preservation. Proper storage and thawing keep it fresh and of high quality.

Tauhu goes well with many flavors, from traditional Asian to Western fusion. You can try Asian-inspired seasonings or Western flavors like Italian and Mexican.

Homemade Macaroni Penne Recipe: Enjoy a Tasty Pasta Dish

What makes a great macaroni penne recipe? How can you make a homemade version as tasty as your favorite Italian restaurant? A classic macaroni penne recipe is a staple in Italian cuisine. Our easy recipe is perfect for any night or special event.

It has a rich flavor and a satisfying texture. This dish will quickly become a family favorite. Our recipe needs just a few ingredients and is simple to make. It’s ideal for a quick, delicious meal.

Our homemade macaroni penne recipe lets you enjoy a tasty pasta dish without losing flavor or quality. By following our easy recipe, you can make a meal that everyone will love. Whether you want a classic dish or something new, our recipe is a great starting point.

Key Takeaways

  • Our homemade macaroni penne recipe is easy to make and requires minimal ingredients
  • The recipe is perfect for a weeknight dinner or special occasion
  • Our easy macaroni penne recipe has a rich flavor and satisfying texture
  • The dish is a great option for those looking for a quick and delicious meal
  • Our homemade macaroni penne recipe is a great way to enjoy a tasty pasta dish without sacrificing flavor or quality
  • The recipe is versatile and can be customized to suit your tastes

Understanding the Classic Macaroni Penne Recipe

To make the best macaroni penne recipe, knowing its history is key. Penne pasta has been a favorite in Italy for centuries. It started in the 12th century and has evolved over time, with each region adding its own touch.

The secret to a great penne dish lies in the ingredients and how they’re prepared. Our recipe uses top-notch ingredients and modern cooking methods. This makes it both true to tradition and fresh.

  • High-quality penne pasta made from durum wheat semolina
  • A rich and flavorful sauce made with fresh tomatoes and herbs
  • A blend of traditional Italian cheeses, including parmesan and mozzarella

By following our recipe, you’ll make a dish that will wow your loved ones. It’s perfect for both experienced cooks and beginners. So, why not try it and taste the true flavors of Italy?

History of Penne Pasta

Penne pasta has a rich history, starting in the 12th century. The name “penne” means “quill” in Italian, describing its shape. Over time, it has become a beloved part of Italian cuisine, with each area adding its own special flavor.

Essential Ingredients for Perfect Penne

To make a tasty macaroni penne recipe, you need top-notch ingredients. The secret to a great easy macaroni penne recipe is picking the right pasta, sauces, and cheeses. For a homemade macaroni penne recipe, choose whole wheat penne pasta. It’s healthier than white pasta because it has more fiber and nutrients.

Here are some must-haves for a perfect penne dish:

  • Fresh veggies like cherry tomatoes and bell peppers
  • Lean proteins like grilled chicken or turkey
  • Whole grain pasta, like whole wheat penne
  • Low-fat cheeses, such as part-skim mozzarella or reduced-fat parmesan

A macaroni penne recipe can be tailored to your taste and dietary needs. For an easy macaroni penne recipe, use pre-made sauces or mix different cheeses for a special flavor. When making a homemade macaroni penne recipe, feel free to try new ingredients and flavors. This way, you can make a dish that’s uniquely yours.

By choosing quality ingredients and watching portion sizes, you can make a delicious macaroni penne recipe. It’s perfect for a weeknight dinner or a special event.

IngredientQuantityNotes
Whole wheat penne pasta8 ozCan be substituted with traditional white pasta
Marinara sauce2 cupsHomemade or store-bought
Part-skim mozzarella cheese1 cupCan be combined with other cheeses for unique flavor

Kitchen Tools and Equipment Needed

To make a tasty best macaroni penne recipe, you need the right tools. A classic macaroni penne recipe needs basic items. These include a big pot for boiling pasta, a colander for draining, and a saucepan for warming the sauce.

Some essential tools are:

  • A wooden spoon for stirring the sauce
  • A spatula for serving the pasta
  • A cheese grater for adding parmesan cheese

For a more detailed recipe, you might want a food processor for chopping veggies or a stand mixer for kneading dough. A traditional macaroni penne recipe can be done with simple tools. But, the right equipment makes the process smoother and more fun.

Investing in the right kitchen tools helps you make a delicious best macaroni penne recipe. It will surely impress your loved ones.

Step-by-Step Macaroni Penne Recipe Guide

To make a tasty easy macaroni penne recipe, start by cooking the penne pasta. Follow the package instructions. This homemade macaroni penne recipe is easy and doesn’t need much cooking skill.

Here are the steps for a perfect macaroni penne recipe:

  • Cook the penne pasta until it’s al dente
  • Prepare the sauce by mixing tomato sauce, olive oil, and herbs
  • Combine the cooked pasta and sauce, then top with grated cheese

This easy macaroni penne recipe is perfect for a quick, delicious meal. You can also make it your own by adding different herbs or spices.

With these simple steps, you can make a delicious macaroni penne recipe that everyone will love. It’s great for both beginners and experienced cooks. This easy macaroni penne recipe is a tasty and satisfying choice for any meal.

Sauce Variations and Flavor Combinations

The sauce in a macaroni penne recipe is key to making it great. A classic tomato sauce is common, but you can try other flavors. For a creamy version, mix heavy cream, parmesan, and a bit of nutmeg.

For a vegetarian dish, use a sauce with roasted veggies like eggplant, zucchini, and peppers. This adds taste and nutrients. Other sauce options include:

  • Arrabbiata sauce, with crushed tomatoes, garlic, and red pepper flakes
  • Pesto sauce, featuring basil, garlic, and olive oil
  • Mushroom sauce, with sautéed mushrooms and thyme

These variations can make your macaroni penne unique. Whether you like a classic tomato sauce or something creamy, there’s a choice for everyone.

Classic Tomato-Based Sauces

Tomato-based sauces are a favorite in many recipes. They’re made with crushed tomatoes, garlic, and herbs. You can also add ground beef or sausage for a meaty taste.

Creamy Sauce Options

For a rich macaroni penne, try a creamy sauce. It’s made with heavy cream, parmesan, and nutmeg. You can also add veggies or chicken for extra flavor and texture.

Vegetarian Alternatives

Vegetarian sauces are great for those who don’t eat meat. They’re made with roasted veggies like eggplant, zucchini, and peppers. You can also add tofu or tempeh for protein and texture.

Sauce VariationIngredientsTaste
Classic Tomato-Based SauceCrushed tomatoes, garlic, herbsSimple yet flavorful
Creamy SauceHeavy cream, parmesan cheese, nutmegRich and indulgent
Vegetarian SauceRoasted vegetables, tofu, tempehDelicious and nutritious

Tips for Achieving the Perfect Al Dente Texture

To get the perfect al dente texture in your best macaroni penne recipe, cooking time is key. The time needed varies by pasta type. But aim for a texture that’s still slightly firm.

The right sauce is crucial for your easy macaroni penne recipe. A great sauce can enhance the pasta’s texture. Use top-notch ingredients, cook the sauce right, and season it well.

Here are more tips for the perfect al dente texture in your homemade macaroni penne recipe:

  • Use a timer to ensure you’re cooking the pasta for the right amount of time
  • Don’t overcook the pasta – this can make it mushy and unappetizing
  • Use a variety of sauces to find the one that works best for you

By following these tips, you can make a delicious best macaroni penne recipe that everyone will love. With practice, you’ll get the perfect al dente texture every time.

Remember, the secret to a great easy macaroni penne recipe is to experiment. Try new ingredients and sauces until you find the perfect mix.

Pasta TypeCooking TimeTexture
Macaroni8-10 minutesAl dente
Penne10-12 minutesAl dente

Common Cooking Mistakes to Avoid

When making a macaroni penne recipe, it’s key to know common mistakes. These can ruin your dish. To get it right, watch out for temperature, sauce, and storage issues. With the right steps, your dish will be tasty and satisfying.

Temperature control is crucial in cooking macaroni penne. Incorrect water temperature can mess up the pasta. This affects the dish’s texture and taste. Always check and adjust the water temperature.

Temperature Control Issues

  • Using water that’s too hot or too cold
  • Not stirring the pasta regularly
  • Not checking the pasta’s doneness

Sauce consistency is also vital in a macaroni penne recipe. A good sauce can make the dish. Aim for a sauce that’s just right, not too thick or thin. Use the right ingredients and cook it for the right time.

Sauce Consistency Problems

By avoiding common mistakes and following a tested recipe, you can make a great dish. Stay alert and adjust your cooking as needed. This way, you’ll get the best results.

Nutritional Information and Dietary Considerations

When you make a macaroni penne recipe, think about the nutrition and diet it affects. A traditional recipe might have a lot of calories. But, you can make it healthier by changing a few things. For example, a vegetarian version is perfect for those who don’t eat meat.

A creamy version might have more calories because of the sauce. But, you can make it healthier by choosing lighter ingredients and eating smaller portions. Here are some important nutrition points for a macaroni penne recipe:

  • Caloric content: A traditional macaroni penne recipe can range from 500-700 calories per serving.
  • Dietary modifications: Vegetarian, gluten-free, and low-fat options can be made by substituting ingredients and adjusting the recipe.

If you want a healthier choice, try a vegetarian macaroni penne recipe. Use whole wheat penne and add lots of veggies. This makes the dish both healthy and tasty. You can also make a creamy version healthier by using low-fat cream and less cheese.

In conclusion, you can make a macaroni penne recipe fit many diets and tastes. Just a few tweaks, like using whole wheat penne and less cheese, can make it healthier. Whether you like creamy or vegetarian, there are many options to explore.

Dietary OptionCaloric ContentIngredients
Traditional Macaroni Penne Recipe500-700 calories per servingPenne pasta, tomato sauce, ground beef, cheese
Vegetarian Macaroni Penne Recipe400-600 calories per servingWhole wheat penne, marinara sauce, roasted vegetables, cheese
Creamy Macaroni Penne Recipe600-800 calories per servingPenne pasta, creamy sauce, chicken, cheese

Conclusion

This baked macaroni penne recipe is a complete guide to making a delicious pasta dish. You’ll learn about penne pasta’s history and how to cook it perfectly. This way, you can make the best macaroni penne recipe in your kitchen.

Whether you like a tomato-based sauce or something creamy, this recipe is versatile. It lets you explore different flavors and customize your dish.

With the right tools and ingredients, you’ll get the perfect texture and taste. Avoiding common mistakes and using helpful tips will make your dish a hit. It’s perfect for any event or just a cozy night at home. So, start cooking, be creative, and enjoy the delicious results of this classic pasta recipe.

FAQ

What is a macaroni penne recipe?

A macaroni penne recipe is a classic Italian dish. It combines penne pasta with various sauces and ingredients.

What are the main ingredients in a homemade macaroni penne recipe?

The main ingredients include penne pasta, a tomato-based or creamy sauce, cheese, and vegetables or proteins.

How do I achieve the perfect al dente texture for my macaroni penne?

To get the perfect al dente texture, watch the pasta’s cooking time closely. Avoid overcooking. The sauce’s choice and how it’s mixed with pasta also matter.

What are some common cooking mistakes to avoid when making macaroni penne?

Common mistakes include temperature control issues, sauce consistency problems, and errors in storing and reheating the dish.

Can I make a vegetarian or creamy version of the macaroni penne recipe?

Yes, you can make a vegetarian or creamy version. Just adjust the sauce options to suit your taste.

What kitchen tools and equipment are needed to make a homemade macaroni penne recipe?

You’ll need pots, pans, colanders, and basic utensils. Optional tools like food processors or stand mixers can help with advanced prep.

Easy Taco Bowl Recipe: Bring the Fiesta Home

What makes a taco bowl recipe special? Can you really bring the flavor of a fiesta home with an easy recipe? A delicious taco bowl is more than a meal. It’s an experience that combines fiesta food with homemade comfort. With a simple recipe, you can make a taco bowl for any occasion.

A taco bowl recipe is about mixing the right ingredients and flavors. It’s perfect for a quick meal or a traditional fiesta dish. So, what are the key elements of a great taco bowl, and how can you make it your own?

Key Takeaways

  • Learn how to make a delicious and easy taco bowl recipe at home
  • Discover the key elements of a great taco bowl, including the importance of fresh ingredients and bold flavors
  • Find out how to customize your taco bowl recipe to suit your tastes and dietary needs
  • Get tips and tricks for making a taco bowl that’s perfect for any occasion, from a quick weeknight dinner to a festive fiesta food celebration
  • Explore the world of fiesta food and learn how to bring the flavor and excitement of a taco bowl to your home
  • Learn how to make a taco bowl recipe that’s both easy and delicious, with a focus on using simple and accessible ingredients

What Makes a Perfect Taco Bowl

A perfect taco bowl is more than just ingredients. It’s an experience that combines flavors, textures, and presentation. To make a perfect taco bowl, you need to think about the essential parts. A traditional taco bowl has a base, protein, toppings, and sauce.

Building a perfect taco bowl starts with the essential components. You need a flavorful base like rice or beans. Then, add a protein like seasoned ground beef or chicken. Don’t forget the toppings like diced tomatoes, shredded lettuce, and sliced avocado.

Modern taco bowls add new ingredients like grilled salmon or roasted vegetables. These changes give the classic dish a fresh twist. By knowing the traditional taco bowl, you can create your own unique version.

Essential Components

  • Flavorful base, such as rice or beans
  • Protein source, like seasoned ground beef or chicken
  • Variety of toppings, including diced tomatoes, shredded lettuce, and sliced avocado

By mixing these essential components, you can make a delicious taco bowl. Whether you stick to the traditional or try something new, the key is to have fun. Be creative with your ingredients and presentation.

Essential Ingredients for Your Taco Bowl Recipe

To make a tasty taco bowl, you need the right taco bowl ingredients. These can be split into proteins, vegetables, grains, and toppings. Knowing what each part needs helps make a balanced and tasty dish.

Start with a base like rice, beans, or roasted veggies. Then, choose your protein: seasoned ground beef, shredded chicken, or refried beans for veggies. Next, add veggies like diced tomatoes, shredded lettuce, and sliced avocado.

  • Proteins: ground beef, shredded chicken, refried beans
  • Vegetables: diced tomatoes, shredded lettuce, sliced avocado
  • Grains: rice, beans, roasted vegetables
  • Toppings: shredded cheese, sour cream, salsa, cilantro

These taco bowl ingredients form a great base. Feel free to add your favorite toppings to make it yours. By following the recipe requirements and using the right essential ingredients, you’ll create a delicious taco bowl everyone will love.

Ingredient CategoryExamples
ProteinsGround beef, shredded chicken, refried beans
VegetablesDiced tomatoes, shredded lettuce, sliced avocado
GrainsRice, beans, roasted vegetables
ToppingsShredded cheese, sour cream, salsa, cilantro

Kitchen Tools and Equipment Needed

To make a tasty taco bowl, you need the right tools and utensils. The right cooking equipment can really improve your dish. A good kitchen has basics like a chef’s knife, cutting board, and measuring cups.

Some gadgets can also help. A food processor for chopping, a skillet for browning, and bowls for mixing and serving are good examples. Quality tools make cooking easier and better.

Basic Utensils Required

  • Chef’s knife
  • Cutting board
  • Measuring cups
  • Spatula
  • Wooden spoons

Optional Kitchen Gadgets

Optional gadgets for a taco bowl include:

  • Food processor
  • Skillet
  • Set of bowls
  • Colander

With the right tools, your taco bowl will be delicious and look great. Choose high-quality equipment that fits your needs and budget.

Kitchen ToolDescription
Chef’s knifeA versatile knife for chopping and slicing ingredients
Cutting boardA surface for chopping and preparing ingredients
Measuring cupsAccurate measurements for ingredients

Step-by-Step Taco Bowl Recipe

To make a tasty taco bowl, follow this easy recipe. Start by cooking the meat, like ground beef or chicken. The secret to a great taco bowl is in how you prepare and cook it.

First, brown the meat in a pan. Then, add your favorite spices. While the meat cooks, prepare the taco bowl base. This can be lettuce, rice, or both. The base is where everything else goes.

Preparing the Meat and Creating the Base

After the meat is done, set it aside. Now, add your favorite toppings. You can use diced tomatoes, shredded cheese, and sour cream. Make sure to follow the recipe for each topping.

Adding Toppings and Final Assembly

Next, put the meat on the base and add your toppings. The last step is to serve and enjoy. With these simple steps, you’ll have a delicious taco bowl.

Remember, the secret to a great taco bowl is in the preparation and cooking. By following this recipe, you’ll make a tasty and unique taco bowl that everyone will love.

Customization Options and Variations

Taco bowls offer endless possibilities. You can mix and match to create a flavor that’s just right for you. Choose from chicken, steak, or fish for protein, and add veggies like bell peppers, onions, and tomatoes. You can also try adding beans, cheese, or salsa for extra flavor.

Customize with cilantro, lime juice, or hot sauce for a unique taste. Use whole wheat or corn tortillas to change the bowl’s texture and taste. For a spicy kick, add hot peppers or sauces. For a cool touch, try sour cream or guacamole.

Want to get creative? There are many recipe variations to explore. Try a vegan bowl with roasted veggies or a gluten-free version with corn tortillas. Add international flavors like Korean BBQ or Indian spices for a twist. With so many options, you can make your taco bowl truly special.

Here are some ideas to get you started:

  • Grilled chicken or steak with roasted veggies and balsamic glaze
  • Spicy fish tacos with mango salsa and avocado
  • Vegan black bean and sweet potato bowl with salsa and guacamole

Remember, the secret to a great taco bowl is to have fun and experiment. Try new ingredients and flavors. You might just discover a new favorite dish!

Make-Ahead Tips and Storage

Preparing taco bowls ahead of time can save you a lot of stress. To make your meal prep easier, cook proteins like ground beef or chicken first. Store them in airtight containers. Also, prepare the base ingredients like rice, beans, and veggies, and keep them separate.

Having a plan is key for meal prep. Figure out how many meals you want to make and portion the ingredients. Use containers that are easy to stack and label them with the date and what’s inside.

For storage guidelines, remember that cooked foods can stay in the fridge for up to 3 days. Raw foods like veggies and fruits can last up to 5 days. Always use airtight containers to keep things fresh and prevent contamination.

  • Store cooked ingredients in airtight containers in the refrigerator.
  • Label containers with the date and contents.
  • Reheat cooked ingredients to an internal temperature of 165°F (74°C) before serving.
IngredientStorage TimeReheating Instructions
Cooked proteinsUp to 3 daysReheat to 165°F (74°C)
Raw vegetablesUp to 5 daysStore in airtight containers

Vegetarian and Vegan Alternatives

Taco bowls can be just as tasty and filling with vegetarian or vegan options. Plant-based proteins like beans, lentils, or tofu make for a satisfying meal. Roasted veggies, grilled mushrooms, and sautéed spinach are great choices.

Vegan alternatives offer many dairy-free options. Vegan cheese and plant-based sour cream can replace traditional cheese and sour cream. Vegetarian and vegan options bring a variety of flavors and textures to the table.

Some top plant-based proteins include:

  • Black beans
  • Chickpeas
  • Lentils
  • Tofu

These can be seasoned and cooked in many ways. They’re perfect for adding to taco bowls. With a bit of creativity, vegan and vegetarian bowls can be just as tasty as the originals.

In conclusion, vegetarian and vegan alternatives open up a world of possibilities for taco bowl lovers. Exploring plant-based proteins and dairy-free options lets you create a dish that’s both delicious and fits your diet.

Vegetarian OptionsVegan Alternatives
Roasted vegetablesVegan cheese
Grilled portobello mushroomsPlant-based sour cream
Sautéed spinachDairy-free yogurt

Serving Suggestions and Pairings

There are many ways to serve taco bowls. Try adding beverages like aguas frescas or iced tea. A simple green salad or grilled vegetables can also add a nice contrast.

Here are some popular pairing ideas for taco bowls:

  • Mexican street corn: a classic combination that is easy to make and always a crowd-pleaser
  • Black beans: a staple in Mexican cuisine, black beans can be cooked with onion, garlic, and cumin for added flavor
  • Grilled chicken or steak: for a heartier option, consider adding some grilled protein to your taco bowl

For a unique twist, try adding international flavors to your taco bowl. Korean BBQ tacos offer sweet and spicy flavors. You can also add Indian-inspired spices like cumin and coriander for a distinct taste.

Creating a delicious taco bowl is all about trying new things. Don’t be afraid to mix and match different flavors. Find your perfect taco bowl by experimenting with different pairings.

Taco Bowl PairingDescription
Mexican Street CornA classic combination of grilled corn, mayonnaise, and cotija cheese
Black BeansCooked with onion, garlic, and cumin for added flavor
Grilled Chicken or SteakA heartier option for those looking for a more substantial meal

Common Mistakes to Avoid

When making taco bowls, it’s key to know common mistakes. These can ruin the dish’s quality and taste. Mistakes include not cooking ingredients well, not seasoning enough, or missing out on important parts. To avoid these, stick to a good recipe and watch cooking times and temperatures closely.

Another big issue is assembly errors. This happens when ingredients aren’t layered right in the bowl. It can mess up the taste and look. To fix this, make a list of what you need and arrange the bowl in a neat, attractive way.

Preparation Pitfalls to Watch Out For

  • Insufficient cooking of the protein sources
  • Inadequate seasoning of the ingredients
  • Neglecting to prepare essential components, such as salsa or guacamole

Assembly Errors to Avoid

  • Improper layering of the ingredients
  • Insufficient distribution of the toppings
  • Neglecting to add a balanced mix of textures and flavors

Knowing these mistakes and how to avoid them helps make tasty, good-looking taco bowls. Stay focused and careful while preparing and putting together your bowls. This way, you’ll impress everyone with your delicious creations.

MistakeConsequenceSolution
Insufficient cookingFoodborne illnessCook ingredients to recommended temperatures
Inadequate seasoningUnbalanced flavorTaste and adjust seasoning as needed
Improper assemblyUnappealing presentationAssemble ingredients in a logical and visually appealing manner

Conclusion: Mastering Your Homemade Taco Bowls

Learning to make homemade taco bowls is a great way to enjoy Mexican flavors at home. You can use the right ingredients and techniques to make taco bowl recipes that fit your taste and diet.

To get good at making taco bowls, try new flavor mixes, use plant-based options, and improve your cooking. The best part is, you can change up the protein, toppings, and base to make many different tasty bowls.

Homemade taco bowls are perfect for any meal, big or small. They’re healthy and delicious, making them great for any time of the year. So, be creative, have fun, and improve your cooking by mastering the taco bowl.

FAQ

What are the essential components of a perfect taco bowl?

A perfect taco bowl has a tasty protein, fresh veggies, and a base like rice or beans. It also needs crunchy toppings, like tortilla chips, and vibrant sauces.

How do traditional and modern taco bowl recipes differ?

Traditional taco bowls use classic Mexican ingredients. Modern ones add diverse proteins and more toppings for different flavors.

What are the health benefits of taco bowls?

Taco bowls are nutritious because they mix lean proteins, carbs, fiber, and healthy fats. They’re good when made with fresh ingredients.

What are the essential ingredients needed for a taco bowl recipe?

You need a protein, like ground beef or chicken, and a base like rice or beans. Add fresh veggies and toppings like cheese and avocado.

What basic utensils are required to prepare a taco bowl?

You’ll need a skillet for cooking, a cutting board for veggies, and a bowl for assembling. Don’t forget a can opener and colander.

What optional kitchen gadgets can be helpful for making taco bowls?

Gadgets like a food processor for sauces, a rice cooker for grains, and a spiralizer for veggie toppings can be useful.

How do you prepare the meat for a taco bowl?

Brown ground beef or turkey, then drain fat. Or, season and shred cooked chicken or pork.

How do you create the base for a taco bowl?

Start with cooked rice, quinoa, or beans. Add lime juice and cilantro for flavor.

How do you assemble the final taco bowl?

Begin with the base, then add protein. Next, layer veggies and toppings. Finish with sauces like salsa or guacamole.

What are some customization options and variations for taco bowls?

Try different proteins and veggies. Use unique toppings to make your own taco bowl.

How can you make taco bowls ahead of time?

Cook protein and prep rice or beans ahead. Store them in the fridge. Assemble bowls just before serving.

What are some vegetarian and vegan alternatives for taco bowls?

Use tofu, tempeh, or mushrooms as protein. Legumes like black beans are also good. For dairy-free, try cashew sour cream or vegan cheese.

What are some common mistakes to avoid when preparing taco bowls?

Avoid overcooking protein and not seasoning the base. Don’t add too many toppings. Proper storage and reheating are key.

Get The Best Recipes In 2025

Exit mobile version