Christmas Dessert Recipes: Mouth-Watering Holiday Sweets

Christmas dessert recipes are key to holiday fun, making memories with loved ones. They offer a mix of old favorites and new twists. This variety makes your holiday celebrations even more special.

There’s a recipe for every skill level, from simple to complex. This means everyone can find something they’ll love to make and eat.

Whether you’re an expert or just starting, there’s a world of possibilities. You can make classic treats or try new, exciting flavors. The right dessert can turn your holiday into a memorable event.

Key Takeaways

  • Christmas dessert recipes are a vital part of holiday celebrations, offering a range of festive treats to enjoy.
  • From traditional favorites to modern twists, there’s a christmas dessert recipe to suit every taste and skill level.
  • Holiday sweets can create lasting memories for you and your loved ones, making them a crucial part of your festive experience.
  • Exploring different christmas dessert recipes can help you discover new favorite festive treats.
  • With the right holiday sweets, you can elevate your celebration and make it a truly special occasion.

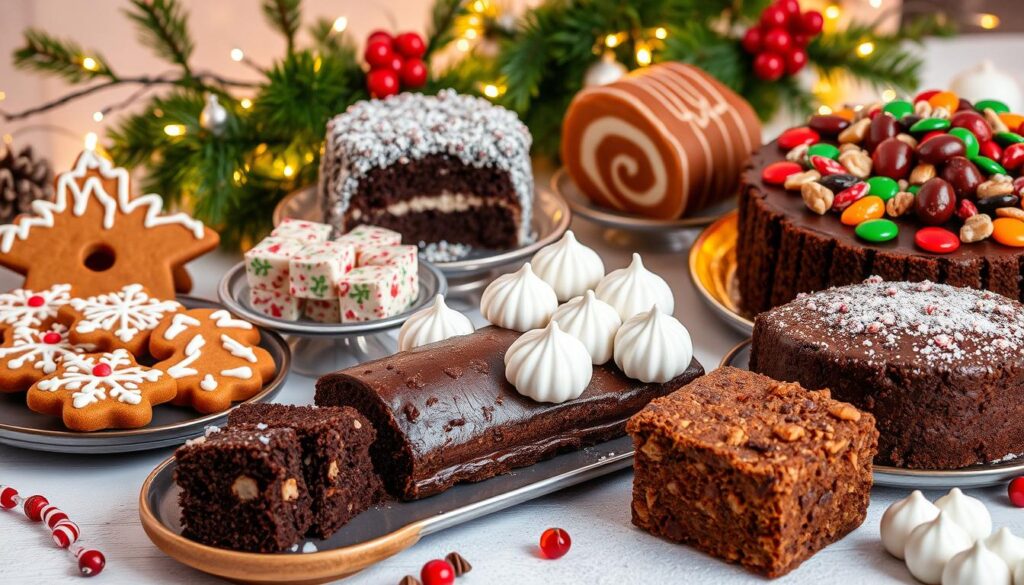
Traditional Christmas Dessert Favorites

Holiday celebrations are not complete without traditional Christmas desserts. These sweet treats bring families together. They add a festive touch to every gathering.

Classic Christmas Pudding

Christmas pudding is a big part of British tradition. It’s made with dried fruits, spices, and suet. It’s often aged for weeks to get its rich flavor.

This dessert is a symbol of prosperity and good fortune for the coming year.

Gingerbread House

Building a gingerbread house is a favorite holiday activity. It’s made from gingerbread cookies, icing, and decorations. It lets everyone show their creativity.

For a sturdy house, use royal icing as glue. Let each section dry before adding more decorations.

Fruit Cake Variations

Fruit cake has many variations, offering a modern twist. Different places add unique ingredients like nuts or tropical fruits. Some even add chocolate.

To make it more appealing today, recipes use lighter flavors. They also focus on creative presentation.

DessertKey IngredientsCultural Significance
Christmas PuddingDried fruits, suet, spicesSymbolizes prosperity and tradition
Gingerbread HouseGingerbread, royal icing, candiesFosters creativity and family bonding
Fruit CakeDried fruits, nuts, spicesRepresents abundance and festive spirit

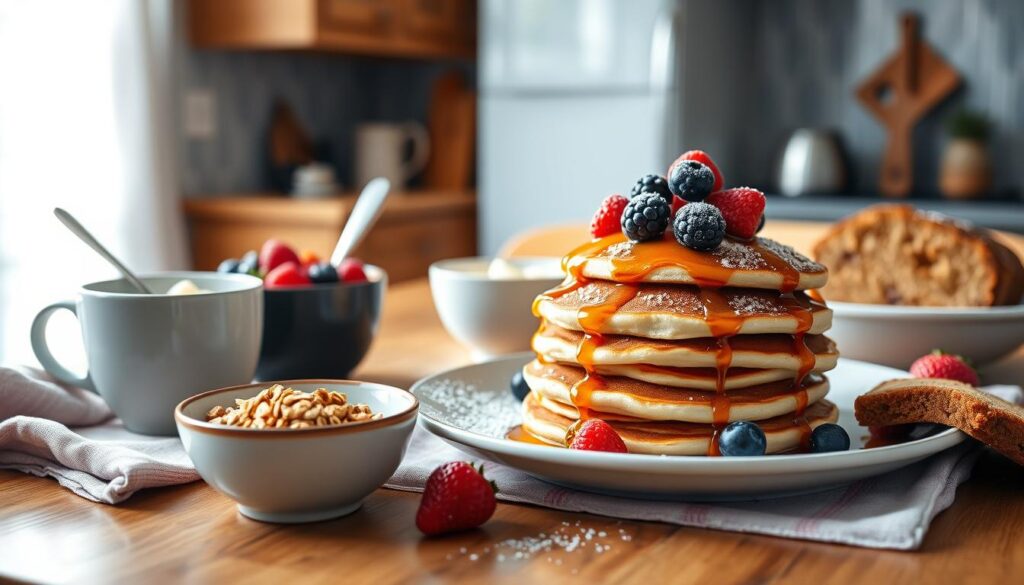
Quick and Easy Holiday Sweet Treats

Making easy Christmas desserts doesn’t need to take all day. Even if you’re short on time or new to baking, these quick holiday treats can add festive cheer to your table.

  • No-Bake Chocolate Oat Bars
  • Fruit Parfaits with Yogurt and Honey
  • Simple Sugar Cookies with Icing

Start by getting all your ingredients ready before you begin. Using pre-made parts can also save you time. This makes the holiday rush less stressful.

Give store-bought items a personal touch. For instance, add powdered sugar and sprinkles to brownies. Or, decorate cupcakes with fresh fruit and chocolate.

DessertIngredientsPrep Time
No-Bake Chocolate Oat BarsOats, chocolate, peanut butter, honey20 minutes
Fruit ParfaitsYogurt, mixed fruits, honey, granola10 minutes
Simple Sugar CookiesFlour, sugar, butter, eggs, icing30 minutes

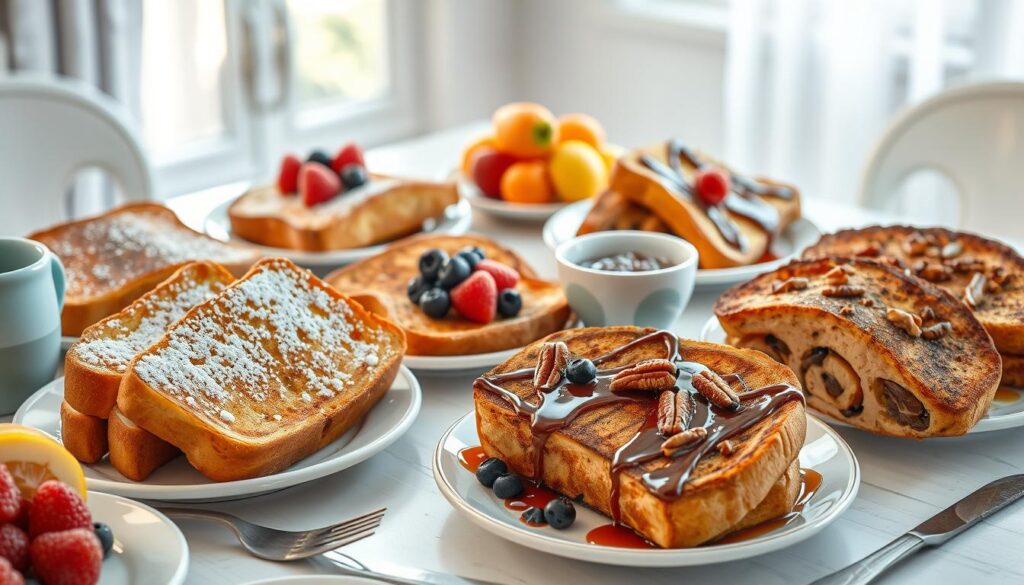
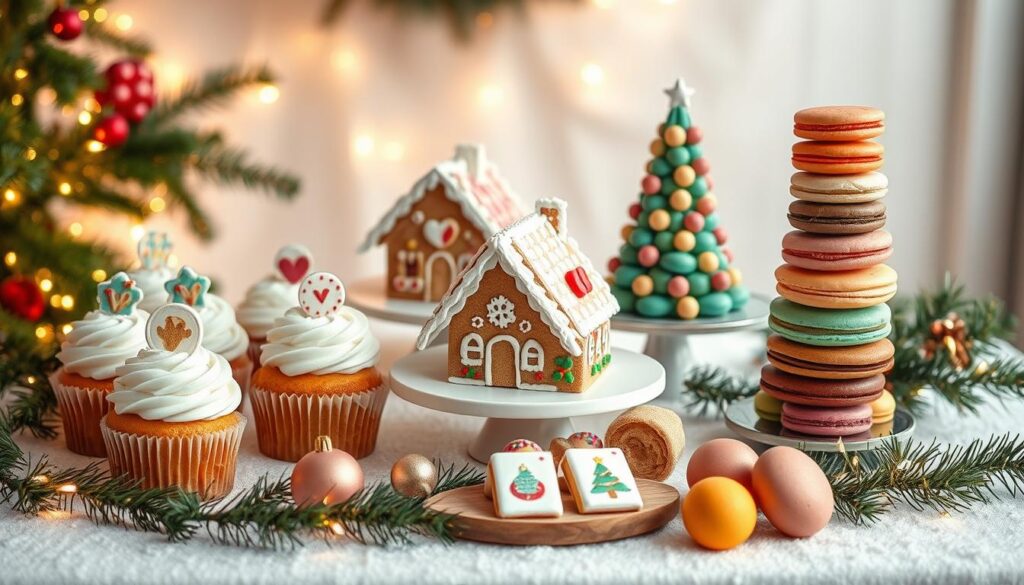
Modern Twists on Christmas Desserts

Make your holiday celebrations special with modern christmas desserts. These treats mix old favorites with new ideas. They look great and taste amazing.

Fusion Holiday Flavors

Try fusion holiday flavors by adding international touches. Think about a fruit cake with matcha or gingerbread with chai spices. It’s a fun twist on classics.

Creative Dessert Presentations

Stand out with creative dessert presentations. Use fancy plating, bright colors, and cool shapes. Your desserts will look amazing and be perfect for social media.

Dietary-Friendly Adaptations

Offer dietary-friendly christmas sweets for everyone. Change old recipes to fit different diets. This way, no one misses out on the fun.

Dietary NeedAdaptation
Gluten-FreeUse almond or coconut flour instead of wheat flour.
VeganReplace eggs with flaxseed meal and use plant-based milk.
Low-SugarIncorporate natural sweeteners like stevia or erythritol.

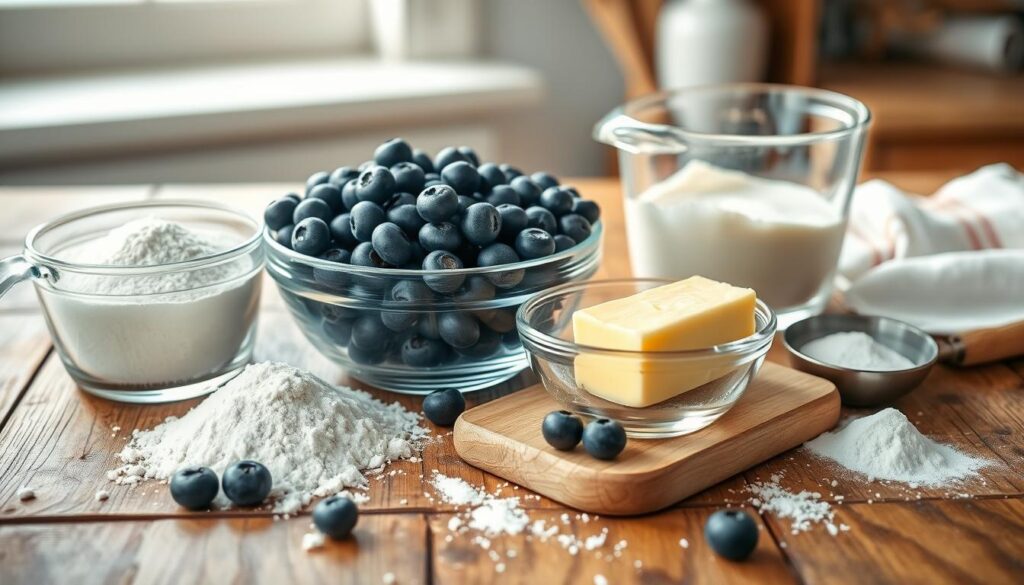
Essential Baking Tips for Christmas Treats

Getting perfect holiday desserts starts with the right baking essentials. Having quality tools in your kitchen helps you follow your Christmas baking tips well.

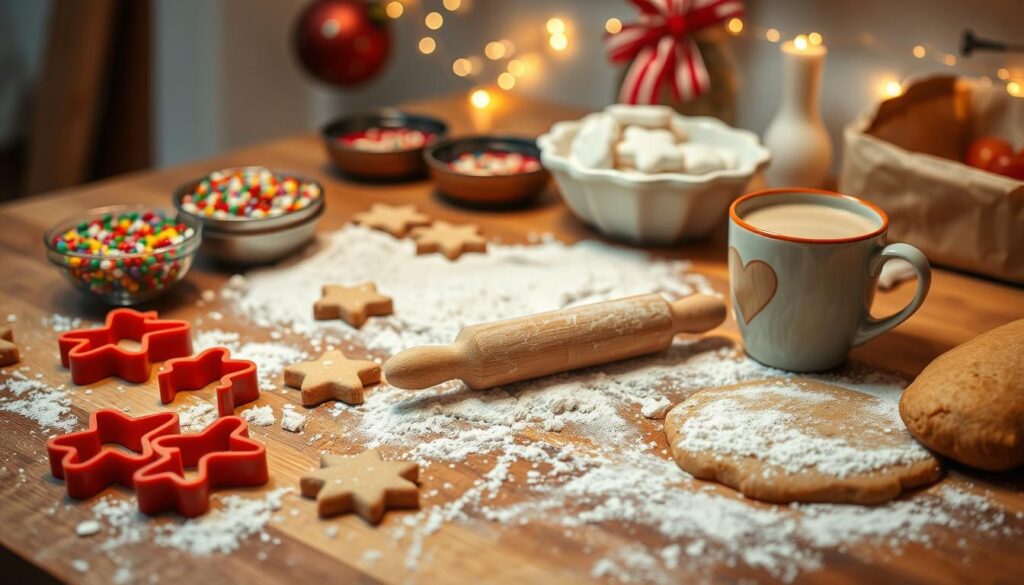
  • Accurate Measuring Tools: Precision is key for consistent results.
  • Quality Mixing Bowls: Different sizes assist in various recipes.
  • Non-Stick Baking Sheets: Prevent unwanted spreading of cookies.

Choosing the right ingredients is key for your holiday dessert techniques. Always use room temperature butter and eggs for the best dough texture. It’s important to measure ingredients correctly, like spooning flour into cups and leveling them.

Watch out for common baking mistakes:

  1. Avoid overmixing to keep baked goods tender.
  2. Preheat your oven to ensure even baking.
  3. Use parchment paper for easier cleanup and better results.
Baking EssentialPurpose
Digital ScaleProvides precise measurements by weight.
Stand MixerEfficiently mixes doughs and batters.
Cooling RackEnsures even cooling of baked goods.

Make-Ahead Christmas Dessert Solutions

Preparing desserts ahead of time can make the holiday rush easier. Organize your baking schedule to make sure every dessert is ready when needed.

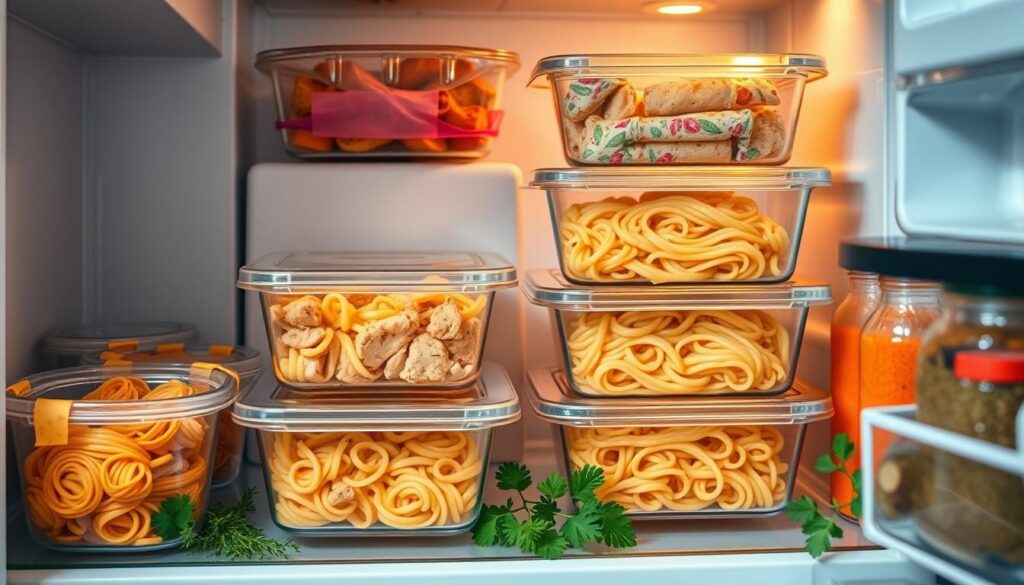
Freezer-Friendly Options

Many make-ahead christmas desserts can be frozen without losing flavor. Here are some freezer-friendly holiday sweets:

  • Cupcakes and muffins
  • Cookies and bars
  • Cheesecakes

Keep them in airtight containers and thaw in the fridge a day before serving.

Storage Guidelines

Proper dessert storage tips are key to keeping them fresh. Use airtight containers to avoid freezer burn. Store pastries in the fridge if not frozen. Label each container with the dessert name and date for easy organization.

Preparation Timeline

Creating a holiday baking timeline helps manage tasks well:

  1. Two weeks before: Bake and freeze desserts.
  2. One week before: Thaw and refrigerate as needed.
  3. Day before: Arrange and decorate your treats.

Follow this timeline for a stress-free holiday season with delicious desserts.

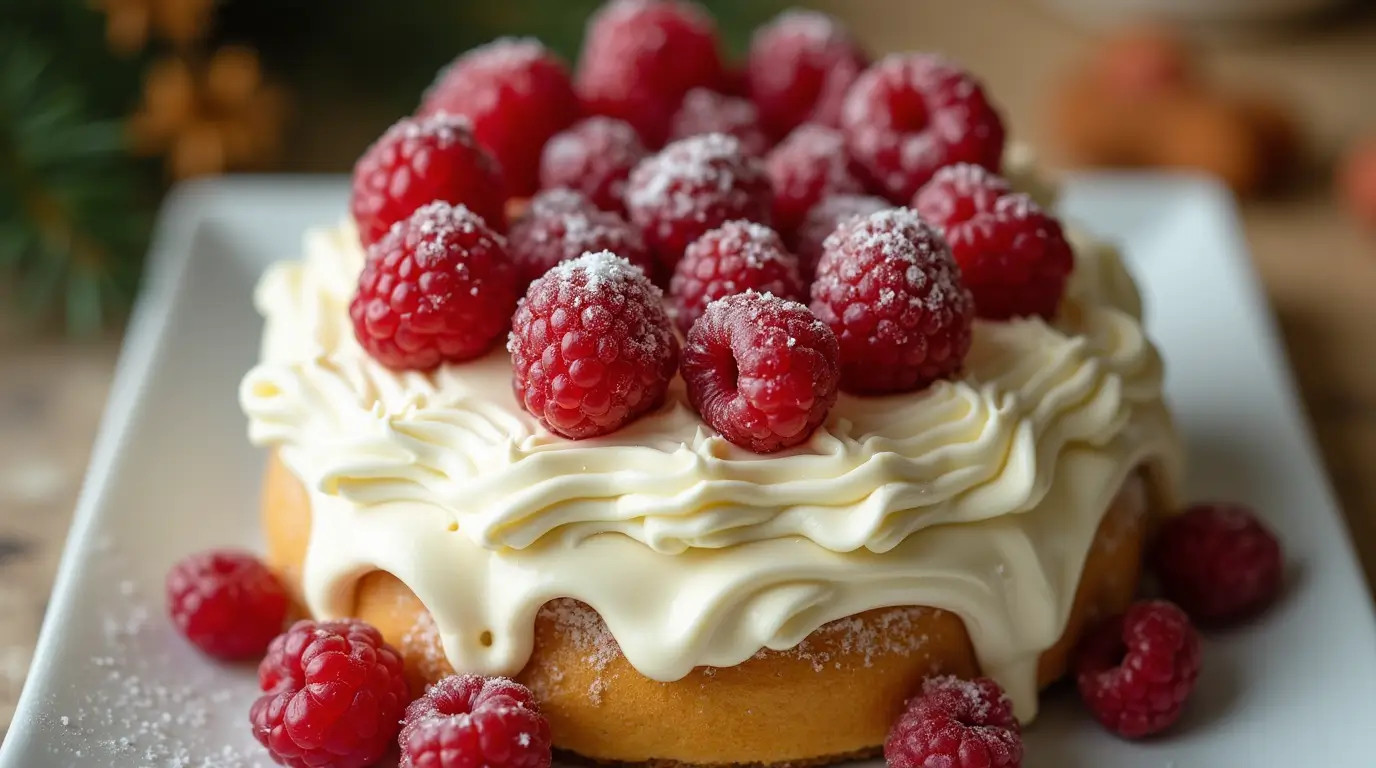
Decorating Your Holiday Sweets

Make your treats shine with christmas dessert decorations that wow your guests. You can use simple icing designs or get creative with sugar art. There are countless ways to make your holiday sweets stand out.

Boost your holiday cookie decorating with royal icing in holiday colors like red, green, and gold. Add sprinkles, edible glitter, or themed shapes to make each cookie special and fun.

For a challenge, try festive cake designs with fondant and piping. Make elegant patterns, holiday figures, or tiny scenes to top your cakes. They’ll be the stars of the show.

Use natural elements like fresh herbs or fruit for a touch of elegance. Pick colors that bring warmth and joy. This way, your desserts will be the highlight of any party.

  • Piping intricate designs with various tips
  • Working with fondant for smooth finishes
  • Creating edible decorations like sugar flowers

Set up your decorated sweets on a beautiful dessert table. By matching colors and styles, you’ll create a stunning centerpiece. It will add to the festive feel of your holiday parties.

Conclusion: Creating Sweet Holiday Memories

Embracing Christmas dessert traditions makes baking a fun family activity. Making family dessert recipes together creates lasting memories. Each recipe adds a new chapter to your family’s festive story.

Trying out different recipes and techniques helps you create unique holiday dessert traditions. Whether it’s a classic fruitcake or a modern gingerbread twist, each creation adds excitement to the season.

Sharing homemade sweets with loved ones strengthens bonds and spreads holiday cheer. These desserts are more than treats; they show care and create moments of happiness with friends and family.

These sweet gestures also benefit the community. Bringing desserts to gatherings or donating to local events can brighten the holidays for everyone. It’s a great way to connect and give back during this special time.

Remember, the most important ingredient in any Christmas dessert is the love and care you put into making it. These heartfelt efforts turn simple recipes into cherished memories, making your holiday celebrations truly special.

FAQ

What are some traditional Christmas desserts I can make?

Traditional Christmas desserts include classics like Christmas pudding, gingerbread houses, and fruit cake recipes. These treats have been loved for generations. They add a nostalgic touch to your holiday celebrations.

Can you recommend any easy Christmas dessert recipes for beginners?

Absolutely! Easy Christmas desserts include no-bake treats like chocolate peppermint bark and simple festive cookies. You can also make easy fruitcakes. These recipes need minimal ingredients and effort, perfect for beginners.

How can I make my Christmas desserts more modern and unique?

To modernize your Christmas desserts, try fusion flavors like matcha-infused fruit cakes or chai-spiced gingerbread. Use contemporary presentation ideas like geometric shapes or vibrant colors. This will make your desserts stand out.

What are some dietary-friendly Christmas sweets options?

There are many dietary-friendly Christmas sweets, like gluten-free cookies and vegan desserts. You can make delicious desserts by using alternatives like almond flour and natural sweeteners. This way, you can accommodate various dietary restrictions.

What essential baking tips should I follow for successful Christmas treats?

Key baking tips include accurately measuring ingredients and ensuring they’re at room temperature. Also, preheat your oven properly. Learn specific holiday dessert techniques, like perfecting Christmas pudding texture or building a sturdy gingerbread house.

How can I prepare Christmas desserts ahead of time?

Preparing desserts ahead of time can save you time during the holiday season. Choose freezer-friendly treats like brownies and decorated cookies. Use airtight containers and label each dessert with its date to keep them fresh.

What are some creative ways to decorate my holiday cookies and cakes?

For decorating cookies, use vibrant icing, edible glitter, and festive sprinkles. For cakes, try fondant decorations, intricate piping, or natural elements like herbs and fruits. These will make your desserts visually appealing and delicious.

How should I store different types of Christmas desserts to keep them fresh?

Proper storage is key to keeping your desserts fresh. Store gingerbread houses and fruit cakes in a cool, dry place or refrigerate if needed. Use airtight containers for cookies and freezer-friendly packaging for items you plan to freeze. This keeps your treats delicious throughout the holiday season.

What is a good preparation timeline for baking Christmas desserts?

Plan your make-ahead desserts first, like Christmas pudding and fruit cakes, which can be made weeks in advance. Decorate cookies and cakes closer to the holiday. Allocate specific days for each task to ensure a smooth baking experience leading up to Christmas.

Nourishing Breakfast Recipes to Power Your Athletic Performance

Nourishing Breakfast, What makes a great athlete? Is it the hard training or a smart nutrition plan? A good breakfast is key for athletes, giving them the energy to excel in training and competitions. Healthy breakfasts are vital for athletes to boost their performance. The right mix of sports nutrition helps athletes reach their goals.

Athletes need a diet full of nutrients to meet their physical needs. A great breakfast can significantly improve an athlete’s performance. By adding healthy breakfasts to their diet, athletes can enhance their nutrition and sports plans. But what makes a breakfast perfect for athletes, and how does it affect their training and competitions?

Key Takeaways

  • Healthy breakfast recipes for athletes are essential for optimal performance
  • Athletic nutrition plans should include a balance of nutrients
  • Sports nutrition plays a critical role in an athlete’s training and competition
  • A well-planned breakfast can provide the necessary energy for athletes
  • Incorporating healthy recipes into an athlete’s diet can improve overall performance
  • Athletes should focus on nutrient-dense foods to support their physical demands

Why Athletes Need a Power-Packed Breakfast

A nutritious breakfast is key for athletes to start their day right. Knowing sports nutrition science helps them make better food choices. These choices boost their performance and help them recover faster.

The Science Behind Athletic Nutrition

While we sleep, our bodies fix and heal. Eating a balanced breakfast fills up our energy tanks. It also gives us the fuel we need for our training.

Key Nutrients for Morning Energy

  • Complex Carbohydrates: Give us energy that lasts.
  • Lean Proteins: Help fix and grow our muscles.
  • Healthy Fats: Help make hormones and store energy.

Impact on Training Performance

BenefitDescription
Improved EnduranceSteady energy levels help us last longer in workouts.
Increased StrengthGood nutrition helps our muscles work better and stronger.
Enhanced Mental FocusHealthy meals improve our focus and decision-making.

Nourishing Breakfast Recipes for Athletes

A balanced breakfast is key for athletes to start their day right. It gives them the energy and nutrients they need. Here are some healthy options to boost your athletic performance.

Quick High-Protein Options

  • Egg White Frittatas: Full of protein and low in fat, great for muscle repair.
  • Greek Yogurt Parfaits: With fruits and nuts, they offer protein and healthy fats.
  • Protein Pancakes: Made with protein powder and oats, they give a filling start.

Complex Carbohydrate-Rich Meals

  • Overnight Oats: Easy to make and full of fiber for lasting energy.
  • Whole Grain Toast with Nut Butter and Banana: Offers complex carbs, healthy fats, and potassium.
  • Quinoa Breakfast Bowls: A versatile base with protein and essential minerals.

Smoothie Bowl Variations

  • Berry Blast Bowl: Mixed berries, spinach, and protein powder for a refreshing start.
  • Tropical Green Bowl: Mango, pineapple, kale, and Greek yogurt for a nutrient-dense option.
  • Chocolate Peanut Butter Bowl: Cocoa, banana, peanut butter, and almond milk for a tasty treat.

Adding these high-protein breakfast recipes, complex carb breakfast ideas, and athlete smoothie bowls to your morning can boost your energy. It also supports your training effectively.

Timing Your Pre-Workout Breakfast

Getting your pre-workout meal timing right is key for top performance. A balanced breakfast before exercise gives your body the energy it needs to do its best.

  • Eat a big meal 2-3 hours before you start training for lasting energy.
  • Go for smaller, easy-to-digest snacks 30 minutes to an hour before.
  • Choose foods high in complex carbs and moderate protein.

Knowing how digestion and athletic performance work helps plan your meals. The right pre-workout meal timing lets your body use nutrients well during exercise.

Meal SizeTiming Before ExerciseRecommended Foods
Large Meal2-3 HoursOatmeal with fruits, eggs with whole-grain toast
Small Snack30-60 MinutesBanana, yogurt, a handful of nuts

Post-Training Recovery Breakfast Ideas

After a tough workout, your body needs post-workout recovery meals to fix and grow muscle. Eating the right foods helps your body recover faster and get ready for the next workout.

Protein-Rich Recovery Meals

Protein is key in your recovery breakfast. Try salmon and avocado toast for a tasty and healthy choice. A tofu scramble with veggies is a great plant-based option. A high-protein smoothie is quick and filling.

Nutrient Replenishment Strategies

Replenishing nutrients after exercise means balancing electrolytes, restoring glycogen, and getting enough micronutrients. Eat foods high in potassium, magnesium, and calcium to help muscles and recovery.

Quick-Fix Options Under 15 Minutes

For those with tight schedules, quick athlete breakfasts are perfect. Grab-and-go overnight oats and protein bars are great. Quick smoothie recipes make a nutritious meal in minutes.

MealProtein (g)Carbohydrates (g)Preparation Time
Salmon and Avocado Toast253010 mins
Tofu Scramble201515 mins
High-Protein Smoothie30405 mins
Overnight Oats10505 mins (prep the night before)
Protein Bar1525Instant

Meal Prep Strategies for Athletic Success

Effective meal planning for athletes is key to staying energized and performing well. Set aside a day each week for planning your breakfast. This saves time and ensures you have healthy meals ready to start your day.

Try batch cooking breakfast by making big batches of important ingredients. Cook oatmeal, hard-boiled eggs, or sautéed veggies in advance. These can be mixed and matched to create different meals all week. It keeps your diet exciting and balanced.

  • Plan a diverse menu to avoid monotony.
  • Store meals in airtight containers to maintain freshness.
  • Incorporate different flavors and textures for variety.

Use time-saving meal prep to tackle busy mornings or travel days. Make quick meals like smoothie packs, overnight oats, or protein bars. These are perfect for when you’re in a rush but still want a healthy breakfast.

By using these meal prep tips, athletes can keep up a healthy breakfast habit. This boosts their performance and overall health.

Conclusion: Fueling Your Athletic Journey with Proper Nutrition

A well-planned breakfast is key for athletes. It boosts performance and health.

Starting with balanced nutrition gives your body the fuel it needs. High-protein foods, complex carbs, and vitamins keep energy up during workouts.

Meal prepping makes mornings easier. It helps you stay on track with healthy meals. This is vital for long-term success in sports.

Recovery is as important as training. A post-workout breakfast with protein and nutrients helps heal faster. Quick, healthy choices are best for refueling.

Focus on a nutritious breakfast to improve your sports performance and recovery. Try different recipes and strategies to find what suits you best.

See breakfast as a crucial part of your training. Good nutrition is a powerful ally for reaching your athletic goals and living a healthy, active life.

FAQ

Why is a healthy breakfast important for athletes?

A healthy breakfast gives athletes the nutrients and energy they need. It helps with muscle recovery and boosts endurance. It also improves focus during training and competitions.

What are some high-protein breakfast options for athletes?

High-protein breakfasts include egg white frittatas and Greek yogurt parfaits. Protein pancakes and tofu scrambles are also good. These meals help repair and grow muscles, giving athletes the energy they need for tough workouts.

How should athletes time their pre-workout breakfast?

Athletes should eat a big meal with carbs and proteins 2-3 hours before working out. For a quick meal, a small, easy-to-digest option can be eaten 30 minutes to an hour before.

What key nutrients should be included in an athlete’s breakfast?

Breakfasts for athletes should have complex carbs for energy, lean proteins for muscle repair, and healthy fats for health. Vitamins and minerals are also important for the body’s functions needed for performance.

What are some meal prep strategies for maintaining a nutritious breakfast routine?

Meal prep strategies include making breakfasts like overnight oats or quinoa bowls in advance. Preparing ingredients ahead of time and storing meals properly helps. Planning breakfasts for the week saves time and keeps the routine consistent.

Can you suggest quick post-training recovery breakfast ideas?

Quick recovery breakfasts include salmon and avocado toast, high-protein smoothies, and overnight oats. These meals provide the proteins and carbs needed to replenish muscle glycogen and aid in recovery.

How does meal timing affect athletic performance?

Proper meal timing gives athletes the energy they need for training and helps with recovery. Eating the right foods at the right time can boost endurance, strength, and mental focus during workouts and competitions.

Easy Creamy Shrimp Pasta Recipe Ready in 30 Minutes

Are you craving a delicious pasta dish that’s quick to make and full of flavor? This creamy shrimp pasta recipe is perfect. In just 30 minutes, you can enjoy a meal that will wow your family and friends.

This recipe is easy to follow. It combines tender shrimp, a rich cream sauce, and al dente pasta. It’s both comforting and sophisticated. Whether you love seafood or pasta, this dish will please your taste buds and become a favorite.

Key Takeaways

  • Ready in just 30 minutes for a quick and delicious dinner
  • Features a creamy, flavorful sauce that coats the tender shrimp and pasta
  • A versatile dish that appeals to both seafood lovers and pasta enthusiasts
  • Budget-friendly and easy to prepare, making it a great option for busy weeknights
  • Delivers restaurant-quality results in the comfort of your own home

Why This Creamy Shrimp Pasta Recipe Is Perfect for Quick Dinners

This creamy shrimp pasta recipe is a top pick for fast dinner ideas. It’s quick, delicious, and won’t break the bank. It’s perfect for busy weeknights.

Time-Saving Benefits

This recipe is made for those who are short on time. Prep takes just 10 minutes, and cooking is done in 20. You’ll have a tasty homemade pasta dish ready in under 30 minutes. It’s fast and easy, fitting right into your busy schedule.

Restaurant-Quality Results at Home

The secret to its great taste is the mix of flavors and creamy sauce. Using top-notch seafood and ingredients, you can make a dish as good as a restaurant’s. All from your kitchen.

Budget-Friendly Meal Option

Eating out can be pricey. But this affordable seafood meals recipe lets you enjoy a fancy dish without spending a lot. It’s great for families or anyone wanting to save money without losing flavor.

Whether you’re a busy parent, a young professional, or just love homemade pasta dishes, this recipe is a lifesaver. It’s fast, high-quality, and affordable. It’s the ideal choice for fast dinner ideas that everyone will love.

Essential Ingredients for Perfect Creamy Shrimp Pasta

Making a tasty creamy shrimp pasta needs the right ingredients. At the core are the shrimp pasta ingredients. These include top-notch seafood, a creamy sauce, and some key extras. Let’s look at what makes this dish a hit.

Choosing the Right Shrimp

The shrimp is the main attraction. They should be fresh, plump, and firm. Avoid any that look off or smell bad. Medium-sized shrimp work best for their texture and taste.

Pasta and Cream Sauce

For pasta, pick a shape that goes well with creamy sauce, like fettuccine or linguine. The sauce is made from heavy cream, Parmesan cheese, and a bit of white wine. This mix makes a rich, indulgent sauce.

Flavor-Enhancing Ingredients

  • Garlic: Minced or crushed garlic adds depth and aroma to the dish.
  • Fresh Herbs: Chopped parsley, basil, or thyme can brighten up the flavors.
  • Lemon Juice: A squeeze of lemon juice provides a subtle acidity to balance the richness.

With these key shrimp pasta ingredients, you’re ready to make a creamy shrimp pasta that will wow everyone.

IngredientQuantityPurpose
Shrimp1 lbThe star of the dish, providing the main protein and fresh seafood flavor.
Pasta (fettuccine or linguine)8 ozThe base of the dish, providing a sturdy platform for the creamy pasta sauce.
Heavy Cream1 cupThe foundation of the creamy pasta sauce, adding richness and creaminess.
Parmesan Cheese1/2 cup, gratedEnhances the creamy pasta sauce with its savory and umami flavors.
Garlic3 cloves, mincedAdds depth and aroma to the dish, complementing the shrimp pasta ingredients.
White Wine1/4 cupProvides a subtle acidity that balances the richness of the creamy pasta sauce.
Fresh Herbs (parsley, basil, or thyme)2 tbsp, choppedBrightens up the flavors and adds a fresh, herbaceous note to the dish.
Lemon Juice1 tbspAdds a touch of acidity to cut through the richness of the creamy pasta sauce.

With these essential shrimp pasta ingredients, you’re ready to make a delicious and creamy shrimp pasta that will impress your family and friends.

Kitchen Tools and Equipment Needed

To make a tasty creamy shrimp pasta, you need some key kitchen tools and equipment. The right pasta cookware and cooking utensils are crucial. They help you get restaurant-quality results at home.

Must-Have Utensils

  • Large pot for boiling pasta
  • Colander for draining cooked pasta
  • Skillet or saucepan for sautéing shrimp and making the sauce
  • Wooden spoon for stirring and scraping the bottom of the pan
  • Whisk for blending the sauce ingredients

Optional but Helpful Tools

  1. Garlic press for mincing garlic with ease
  2. Zester for adding a touch of lemon or Parmesan flavor
  3. Measuring cups and spoons for precise ingredient proportions
  4. Food processor or blender for making a smooth, creamy sauce

Pasta Cooking Essentials

For perfectly cooked pasta, you need the right tools. Pasta cookware like a large pot and a colander are essential. A pasta fork or tongs can also be helpful for handling and transferring the pasta.

“The right tools can make all the difference in the kitchen, transforming a simple dish into a culinary masterpiece.”

Step-by-Step Cooking Instructions

Making a tasty creamy shrimp pasta at home is simple. Just follow these easy steps to learn how to make shrimp pasta. You’ll enjoy a meal that tastes like it came from a restaurant, all in your own kitchen.

  1. Start by boiling a large pot of salted water. Add your favorite pasta and cook until it’s al dente, as the package says.
  2. While the pasta cooks, heat a big skillet over medium-high. Add olive oil and the shrimp. Cook the shrimp until they’re pink and done, about 2-3 minutes each side. Take the shrimp out and set them aside.
  3. In the same skillet, melt butter over medium. Add minced garlic and cook for 1-2 minutes, until it smells good.
  4. Now, pour in the heavy cream and mix in the Parmesan cheese. Let the sauce simmer and thicken for 2-3 minutes, stirring now and then.
  5. Drain the pasta and add it to the creamy sauce. Mix well to coat the pasta evenly.
  6. Finally, add the cooked shrimp to the pasta. Season with salt and pepper to taste.

Serve the how to make shrimp pasta hot. You can garnish with fresh parsley or basil if you like. Enjoy your homemade creamy shrimp pasta masterpiece!

Tips for Achieving the Perfect Sauce Consistency

Getting the right sauce consistency is crucial for a delicious creamy shrimp pasta dish. You might want a thick, velvety sauce or a smooth, pourable one. These expert tips will help you get it just right every time.

Sauce Troubleshooting Guide

If your sauce is too thick, add some pasta cooking water or milk to thin it. If it’s too thin, simmer it gently to reduce the liquid. Don’t forget to adjust the seasoning for the best flavor.

Making the Sauce Ahead

Make the creamy pasta sauce ahead of time to save effort on busy nights. Just follow the recipe, then store it in an airtight container in the fridge for up to 3 days. When you’re ready, reheat it gently and toss it with fresh pasta.

Storage and Reheating

Leftover creamy shrimp pasta can stay in the fridge for up to 3 days. To reheat, warm it in a saucepan over low heat, stirring now and then. Don’t microwave it, as it can make the sauce consistency grainy or separate.

“The secret to a perfect creamy pasta sauce is all in the technique. Follow these tips, and you’ll be serving up restaurant-quality creamy pasta dishes at home in no time.”

Recipe Variations and Substitutions

Explore the full potential of your creamy shrimp pasta dish with exciting variations and substitutions. You can switch up the seafood, add more veggies, or meet dietary needs. The options are endless.

Looking for seafood pasta alternatives? Try using scallops, mussels, or a mix of proteins instead of shrimp. Each choice brings a unique taste to your dish.

Want to try pasta recipe variations? Try different pasta shapes like spaghetti or zucchini noodles for a low-carb option. You can also tweak the sauce with creamier versions or herbs and spices.

Need to make dietary modifications? No worries. This recipe can be adapted for gluten-free, dairy-free, or vegetarian diets. Use gluten-free pasta, plant-based milk and cheese, or protein-rich veggies like mushrooms or tofu.

This creamy shrimp pasta dish is incredibly versatile. Feel free to get creative and make it your own. Enjoy the endless possibilities!

VariationIngredient SwapDietary Consideration
Seafood PastaScallops, Mussels, Crab Meat
Vegetarian PastaMushrooms, Tofu, ChickpeasVegetarian, Vegan
Gluten-Free PastaGluten-Free Pasta NoodlesGluten-Free
Dairy-Free PastaPlant-Based Milk, Vegan CheeseDairy-Free

Remember, the secret to enjoying this recipe is to have fun and try new things. Find your favorite pasta dish by exploring all the possibilities!

Conclusion

This creamy shrimp pasta recipe is a true delight. It’s quick, flavorful, and impressive. It’s perfect for those who want a satisfying meal without hassle.

The dish combines tender shrimp, a rich sauce, and perfectly cooked pasta in just 30 minutes. It’s great for a weeknight dinner or to impress guests. It’s both tasty and convenient.

We encourage you to try this recipe. Enjoy making a delicious, budget-friendly Italian dish at home. Share the experience with loved ones. Buon appetito!

FAQ

How long does it take to make this creamy shrimp pasta recipe?

This creamy shrimp pasta recipe is quick to make. It’s ready in just 30 minutes. It’s perfect for a fast and easy dinner any night of the week.

What type of pasta works best for this recipe?

Choose a long, thin pasta like linguine or fettuccine. It pairs well with the creamy sauce and shrimp.

Can I make the sauce ahead of time?

Yes, you can make the sauce ahead. Store it in the fridge for up to 3 days. Reheat it when you’re ready to serve with pasta and shrimp.

Is this recipe budget-friendly?

Yes, it’s a budget-friendly meal. The ingredients are easy to find and not expensive. It’s great for families or those watching their budget.

Can I substitute the shrimp with another type of seafood?

Absolutely! You can use scallops, salmon, or mix different proteins. It’s a versatile recipe.

How do I ensure the perfect sauce consistency?

For the perfect creamy sauce, add heavy cream and Parmesan slowly. Stir constantly to avoid lumps. Adjust the seasoning to taste.

Can I make this recipe gluten-free or dairy-free?

Yes, you can make it gluten-free or dairy-free. Use gluten-free pasta and replace heavy cream with coconut or cashew cream.

How to Make Fondant Recipe – Easy DIY Instructions

Unlock your creativity in the kitchen with homemade fondant! This icing gives your cakes a smooth finish and endless decorating options. But, what makes fondant special? And can you make it like a pro at home?

This guide will show you how to make fondant from scratch. It’s perfect for both experienced bakers and beginners. You’ll learn how to make fondant that’s as good as store-bought. We’ll cover everything from the types of fondant to kneading and coloring. Get ready to make cakes that wow your loved ones!

Key Takeaways

  • Discover the benefits of using homemade fondant for your cakes and confections.
  • Learn the various types of fondant and their unique properties.
  • Uncover the essential ingredients and tools needed to make fondant from scratch.
  • Explore step-by-step instructions for creating a perfect fondant recipe.
  • Gain valuable tips for achieving the perfect fondant consistency and troubleshooting common issues.

Understanding Fondant: Types and Basic Ingredients

Fondant comes in several types, each with its own special qualities. You can choose from rolled fondant, poured fondant, and marshmallow fondant. Knowing the differences helps you get better at decorating cakes with fondant.

Different Types of Fondant Explained

  • Rolled Fondant: This fondant is soft and easy to shape. It’s great for making cakes look smooth and for adding details.
  • Poured Fondant: Thinner and more liquid, poured fondant is perfect for glazing and filling. It has a shiny finish.
  • Marshmallow Fondant: Easy to make and use, marshmallow fondant is soft. It’s perfect for sculpting and modeling.

Essential Ingredients for Homemade Fondant

To make fondant at home, you need powdered sugar, gelatin, and glycerin. These ingredients make fondant smooth and pliable. They also help it last longer.

Tools and Equipment Needed

For homemade fondant, you’ll need a few tools. You’ll need a rolling pin, a fondant smoother, and corn starch to prevent sticking. With these tools, you can make cakes and decorations that look amazing and taste great.

How to Make Fondant Recipe: Step-by-Step Guide

Learning to make fondant at home is a fun and rewarding skill. It can take your baking to the next level. This guide will help you make a smooth, pliable homemade sugar paste for your cakes and treats.

Let’s start with the basics of marshmallow fondant tutorial. We’ll cover the essential steps to make your own tasty fondant from scratch:

  1. Gather and Measure the Ingredients: Get all the needed items like powdered sugar, light corn syrup, and water. Measure them carefully as the recipe calls for.
  2. Combine the Ingredients: Put the powdered sugar, corn syrup, and water in a big bowl. Mix until a dough starts to form.
  3. Knead the Fondant: Turn the dough onto a clean, lightly dusted area. Knead it for a few minutes until it’s smooth and soft.
  4. Wrap and Chill: Shape the fondant into a ball, wrap it in plastic wrap, and chill for at least 2 hours. This step makes the fondant perfect.
  5. Re-knead and Color (Optional): Take the fondant out of the fridge and knead it a bit. If you want, divide it and add food coloring for different colors.

Follow these easy steps to make your own fondant recipe. Remember, making fondant takes patience and care. Enjoy the process and don’t rush it.

“The key to perfect fondant is in the kneading – the more you work it, the smoother and more pliable it becomes.”

Preparing Your Workspace and Ingredients

Making fondant is more than just a recipe. You need a clean, organized space and accurate measurements. A clean workspace and precise measurements are key for success.

Proper Surface Preparation

Start by cleaning your work area well. Use a damp cloth to wipe down the counter or table. This removes crumbs, spills, and residue.

After drying, dust the surface with powdered sugar or cornstarch. This prevents the fondant from sticking.

Measuring and Organizing Components

Getting the measurements right is crucial for fondant. Use measuring cups and spoons to accurately measure each ingredient. Keep your ingredients organized and within reach for a smooth process.

Temperature and Humidity Considerations

The temperature and humidity in your workspace matter a lot. Aim for a cool, dry place. High temperatures and humidity can make the fondant sticky or hard to work with.

Use a dehumidifier or air conditioning to keep the ideal conditions for fondant preparation.

“Attention to detail is the key to successful fondant making. Take the time to set up a clean, organized workspace and measure your ingredients precisely.”

Workspace Preparation ChecklistIdeal Conditions
Surface CleaningThoroughly wiped down and dusted
Ingredient MeasurementPrecise, using appropriate tools
Temperature and HumidityCool, dry environment

Kneading and Coloring Techniques

Learning to knead fondant is key for a smooth, pliable texture. Dust your work area with powdered sugar or cornstarch to stop it from sticking. Use the heel of your hand to knead, folding the fondant to add air and make it silky. Don’t overwork it, or it will become stiff and brittle.

Gel colors are best for coloring fondant. They mix well without making the fondant too thin or changing its texture. Start with a little color and knead it in, adding more until you get the shade you want. For a marbled look, color different parts of the fondant, then fold them together gently.

Coloring TechniqueAdvantagesConsiderations
Fondant kneadingAchieves a smooth, pliable textureAvoid overworking to prevent a stiff, brittle fondant
Gel food coloringConcentrated pigments that blend well without thinning fondantStart with small amounts and gradually increase color intensity
MarblingCreates unique, eye-catching patternsRequires careful handling to achieve the desired effect

With practice in fondant kneading, food coloring, and marbling, you can make your cakes look amazing. Your creativity can turn cakes into stunning art pieces.

Tips for Achieving the Perfect Fondant Consistency

Getting the right fondant texture is a bit tricky. But, with the right methods, you can make it smooth and easy to work with. Here are some tips to fix common texture issues and keep your fondant in top shape, no matter the weather.

Common Texture Problems and Solutions

If your fondant feels dry and crumbly, it might not have enough moisture or you might have kneaded it too much. To fix this, add a little water or corn syrup and knead it gently until it’s smooth again. If your fondant is too sticky, it might have too much moisture. Add some powdered sugar or cornstarch to soak up the extra moisture and get the right texture.

Storage and Shelf Life Guidelines

Keeping your fondant in good shape starts with proper storage. Use an airtight container or wrap it tightly in plastic wrap to keep it from drying out. Fondant can last for weeks at room temperature when stored this way. For longer storage, refrigerate or freeze it to keep it fresh for months.

Working with Different Weather Conditions

Fondant can be tricky in different weather. In humid places, it gets sticky, and in dry areas, it dries out. To handle these issues, you might need to adjust your recipe or how you work with it. For example, add more powdered sugar or cornstarch in humid weather, and a bit of water or corn syrup in dry conditions to keep it just right.

“The key to troubleshooting fondant is understanding how temperature, humidity, and your ingredients work together to create the perfect consistency.”

Troubleshooting Common Fondant Issues

Working with fondant can be both exciting and challenging. You might face problems like cracks, tears, elephant skin, and air bubbles. But don’t worry, with the right techniques and patience, you can fix these issues and get perfect results.

Fixing Fondant Cracks and Tears

Fondant cracks and tears can be frustrating. But they’re often easy to fix. For small cracks, knead in some vegetable shortening or corn syrup to rehydrate and smooth the surface. For bigger tears, press the edges together and use a fondant smoother to blend the seam.

Working in a humid environment can help prevent fondant cracks. Or, mist your fondant lightly as needed.

Preventing Elephant Skin Texture

The “elephant skin” texture is a common problem. It happens when your workspace is too hot or dry. Fondant does best in cool, low-humidity places. If it’s too dry, knead in some vegetable shortening or corn syrup to rehydrate it.

Make sure your fondant is well-kneaded and free of air pockets. This helps avoid an uneven texture.

Dealing with Fondant Bubbles

Air bubbles in fondant can cause bumps and ruin the finish. To avoid them, knead your fondant well to remove air pockets. If bubbles do appear, use a toothpick or fondant smoother to gently pop them and smooth the surface.

Fixing fondant problems takes practice and patience. With time and effort, you’ll get better at solving any fondant challenge.

Common Fondant IssuePossible CausesSolutions
Fondant Cracks– Dry environment
– Overworked fondant
– Add vegetable shortening or corn syrup
– Increase humidity in workspace
Elephant Skin Texture– Dry environment
– Inadequate kneading
– Add vegetable shortening or corn syrup
– Knead fondant thoroughly
Fondant Bubbles– Air pockets in fondant– Pop bubbles with a toothpick or smoother
– Knead fondant thoroughly

Creative Ways to Use Your Homemade Fondant

Homemade fondant opens up a world of creativity. It can turn simple baked goods into stunning works of art. From basic cake covering to intricate designs, fondant is incredibly versatile.

Basic Cake Covering Techniques

Covering cakes with fondant makes them look professional. Learning to drape and smooth fondant is key. It also lets you add more decorations, making your cakes truly special.

Decorative Elements and Shapes

Fondant is great for making fondant flowers, 3D fondant figures, and more. You can create everything from simple flowers to detailed figures. These decorations add a touch of magic to any dessert.

Advanced Design Applications

For those who love a challenge, fondant can create amazing 3D designs. By experimenting with layering and texture, you can make cakes look like masterpieces. It’s a way to turn simple treats into edible art.

“Fondant is the ultimate medium for unleashing your creativity in the kitchen. With a little practice, the possibilities are truly limitless.”

Whether you’re new to fondant or have experience, it’s a great way to express yourself in the kitchen. It can lead to endless creativity and joy in your baking.

Conclusion

Congratulations on mastering homemade fondant! We’ve covered types, ingredients, tools, and how to make it. Now, you can improve your cake decorating skills.

Making your own fondant has many benefits. You control the ingredients and texture. Plus, you get to enjoy making a versatile cake topping from scratch.

Keep practicing and having fun with fondant. Try new flavors, colors, and designs. With effort and a love for learning, your desserts will amaze everyone. Bon appétit!

FAQ

What is fondant?

Fondant is a smooth, pliable icing used for cakes. It can be shaped and textured, giving cakes a professional look.

What are the different types of fondant?

There are three main types: rolled, poured, and marshmallow fondant. Each has its own uses and qualities.

What are the essential ingredients for making homemade fondant?

Homemade fondant needs confectioners’ sugar, gelatin, and glycerin. These ingredients help achieve the right texture and consistency.

What tools and equipment are needed for making fondant?

You’ll need a rolling pin, fondant smoother, cornstarch, and a clean surface. These tools help knead and roll the dough.

How do I properly knead and color fondant?

Kneading fondant makes it smooth and pliable. You can also add color gels or pastes for custom shades and marbled effects.

How do I troubleshoot common fondant issues?

Fixing problems like cracking and air bubbles involves adjusting moisture and technique. Patience and practice are crucial.

What are some creative ways to use homemade fondant?

Fondant is great for basic cake covering and making decorations like flowers and figures. Its versatility opens up endless creative options.

Delicious Chicken and Egg Noodles Recipe for Dinner

Imagine a meal that warms your heart and brings everyone together. This homemade chicken and egg noodles recipe does just that. It’s filled with tender chicken, savory broth, and perfectly cooked noodles. It’s a classic dish that will quickly become a favorite.

What makes this comfort food so irresistible? Can a simple recipe turn chicken and noodles into a masterpiece? Find out the secrets to making the most delicious chicken and egg noodles you’ve ever had.

Key Takeaways

  • Discover the key ingredients that elevate this classic chicken and noodles dish to new heights
  • Learn the essential steps to prepare the perfect tender chicken and flavorful broth
  • Explore tips and tricks for cooking the egg noodles to achieve the perfect texture
  • Uncover serving suggestions and pairing ideas to make this meal truly extraordinary
  • Understand the best storage and reheating methods to enjoy leftovers with ease

Why This Classic Comfort Dish Will Become Your Family’s Favorite

Chicken and egg noodles is a hearty meal loved by many. It’s a family-friendly recipe and traditional comfort food. It pleases everyone with its mix of flavors and textures.

This dish is loved because it’s so versatile. It’s perfect for a quick dinner or a cozy meal. The tender chicken, savory broth, and chewy noodles make it satisfying and nourishing.

It’s not just tasty; it’s also good for you. The chicken and egg noodles give you protein and carbs. You can add fresh veggies to make it even healthier. This way, everyone gets a hearty meal that’s right for them.

Chicken and egg noodles will be a favorite in your home for years. It’s a dish that brings people together. It satisfies hunger and nourishes the body, making it a family-friendly recipe to treasure.

“Chicken and egg noodles is a dish that truly embodies the essence of comfort and nostalgia. It’s a meal that warms the soul and brings families together around the table.”

Essential Ingredients for Perfect Chicken and Egg Noodles Recipe

Creating a tasty chicken and egg noodles dish starts with the right ingredients. Choosing the right chicken, egg noodles, and seasonings is key. Each part is important for that comforting taste we all love. Let’s explore what you need for this recipe.

Selecting the Best Chicken Cuts

For tender and flavorful chicken, use thighs and drumsticks. Their dark meat gives a richer taste that goes well with egg noodles. Don’t just use chicken breasts, as they can get dry and less tasty in this dish.

Choosing Quality Egg Noodles

The best egg noodles are wide, thick, and chewy. Look for ones made with real eggs and few additives. Brands like Amish Country, Reames, or homemade noodles work best.

Key Seasonings and Aromatics

  • Onions – Finely chopped onions add depth and sweetness to the dish.
  • Garlic – Minced garlic enhances the overall flavor profile.
  • Thyme – Fresh or dried thyme lends an earthy, herbaceous note.
  • Bay Leaves – Bay leaves infuse the broth with a subtle, savory aroma.
  • Salt and Pepper – Generous seasoning with salt and freshly ground black pepper is crucial for balancing the flavors.

By picking the right chicken cuts, egg noodle types, and essential seasonings, you’ll make a dish loved by all. It’s sure to become a family favorite.

Kitchen Equipment You’ll Need

To make the tasty chicken and egg noodles dish, you’ll need some basic cooking utensils and kitchen tools. You don’t need fancy cookware to follow this recipe. It’s easy for cooks of all levels with just a few simple items.

First, grab a big stock pot or Dutch oven for the broth. You’ll also need a sharp chef’s knife for cutting the chicken. A cutting board and measuring cups and spoons are also useful. For cooking the noodles, a colander or strainer is a must.

  • Stock pot or Dutch oven
  • Chef’s knife
  • Cutting board
  • Measuring cups and spoons
  • Colander or strainer

While not essential, some extra tools can make things easier. A food processor can quickly chop the aromatics. A ladle helps portion out the broth and chicken. And a whisk blends the seasonings into the broth.

Kitchen ToolUse
Food processorQuickly chop aromatics
LadlePortion out broth and chicken
WhiskBlend seasonings into broth

With these basic cooking utensils, kitchen tools, and cookware, you’re ready to make a delicious chicken and egg noodles dish at home.

Step-by-Step Cooking Instructions

Making a tasty chicken and egg noodle dish needs careful steps. From preparing the chicken to making the homemade broth and cooking the noodles, each step is key. Let’s explore each part to get the best taste and texture.

Preparing the Chicken

Start with top-notch chicken, like boneless, skinless thighs or breasts. Rinse it well and dry it with paper towels. Cut it into small pieces for even cooking.

Season the chicken with salt, pepper, and your favorite herbs and spices. This will make it taste amazing.

Making the Broth

To make a tasty broth, start by simmering the chicken in a big pot. Add water, onions, carrots, celery, herbs, and spices. Let it simmer for at least 30 minutes to get all the flavors.

After the chicken is done, take it out of the pot. Let the broth keep simmering.

Cooking the Noodles

While the broth cooks, boil a pot of salted water. Add the egg noodles and cook for 8-10 minutes, until they’re just right. Drain and set them aside.

Combining All Components

Finally, put the cooked chicken back in the broth. Add the noodles and stir gently. Let it heat up, adjusting the seasoning if needed.

When it’s ready, serve the chicken and egg noodle dish hot. Add fresh herbs or green onions for extra flavor and looks.

Tips for Achieving the Perfect Texture

Making the perfect chicken and egg noodle dish is all about the texture. Follow some easy tips to make this classic dish even better. Your family will love every bite.

To keep the chicken tender and juicy, don’t overcook it. Poach the chicken gently in the broth until it reaches an internal temperature of 165°F. This method keeps the chicken moist and tender. Also, avoid stirring the chicken too much to prevent it from breaking.

For the noodles, aim for a balance of firm and tender. Cook the egg noodles as the package says, but don’t overdo it. Drain them quickly and toss with some cooking liquid to stop them from sticking. This keeps the noodles just right.

“The secret to perfectly cooked chicken and noodles is all in the timing and gentle handling. With a little attention to detail, you’ll be rewarded with a dish that’s nothing short of comfort food perfection.”

If you like firmer noodles, cook them for a minute or two less. For softer noodles, cook them a bit longer. It’s all about what you prefer.

The secret to perfect texture is finding the right balance between chicken and noodles. Follow these tips to make a chicken and egg noodle dish your family will love.

Storing and Reheating Guidelines

Storing and reheating your leftover chicken and egg noodle dish right is key. It keeps the flavors and textures great. Follow a few easy steps to enjoy your leftovers for days.

Proper Storage Methods

Move the cooled dish to an airtight container or resealable bag to keep it fresh. This locks in moisture and stops the noodles from drying. For the best taste, store it in the fridge for up to 4 days.

Reheating Without Compromising Quality

There are good ways to reheat your leftovers. The stovetop method is excellent. It warms the dish gently without overcooking the noodles. Just put the leftovers in a skillet with a bit of broth or water, cover, and heat on medium until it’s warm.

The microwave is also a good choice. But, reheat in short bursts, stirring often. This stops the noodles from getting rubbery or dry.

Freezing Instructions

Want to enjoy your dish later? You can freezer meal it. Let it cool, then put it in an airtight, freezer-safe container or bag. Stored right, it stays tasty and fresh for up to 3 months.

To serve, thaw it in the fridge overnight. Then, reheat it on the stovetop or in the microwave.

Serving Suggestions and Pairing Ideas

Make your chicken and egg noodle dish even better with tasty side dishes and drinks. These ideas will make your family’s favorite meal even more special.

Flavorful Side Dishes

  • Try a fresh green salad with a light vinaigrette to balance the meal.
  • Roasted veggies like Brussels sprouts or carrots add color and nutrition.
  • Warm, crusty bread or garlic bread is great for soaking up the broth.

Beverage Pairings

  1. For a classic choice, enjoy a crisp white wine or light beer with the dish.
  2. Warm up with herbal tea or hot apple cider on a cold day.
  3. Stay cool with iced tea or lemonade in the warmer months.

Serving Suggestions

Present your chicken and egg noodles in a beautiful bowl or platter. Add some chopped parsley or chives for color and freshness. For a richer meal, top it with crumbled bacon or shredded cheese.

Side DishBeverage PairingServing Idea
Green saladWhite wineGarnish with parsley
Roasted vegetablesHerbal teaTop with crumbled bacon
Crusty breadIced teaSprinkle with shredded cheese

“The true alchemy in the kitchen is transforming everyday ingredients into a delightful dining experience.”

Conclusion

As we wrap up this tasty journey, it’s clear that Chicken and Egg Noodles is a family favorite. This dish satisfies your cravings for hearty, wholesome flavors. It’s also a simple and convenient option for family dinners.

We’ve covered all the key steps to make this recipe at home. From choosing the best chicken cuts to getting the perfect texture, you’re all set. With the right ingredients and a bit of cooking skill, you’ll serve a meal that everyone will love.

So, why not try making Chicken and Egg Noodles at home? It’s perfect for impressing guests or enjoying a cozy meal with your family. Share your experiences and any tasty variations you try. We’d love to hear how this recipe has become a favorite in your home.

FAQ

What makes this chicken and egg noodles recipe a family favorite?

This dish is loved for its hearty flavors and easy making. It suits many tastes. The mix of tender chicken, tasty broth, and egg noodles makes it a comforting meal.

What are the essential ingredients for the perfect chicken and egg noodles recipe?

Key ingredients are quality chicken, like breasts or thighs, and fresh egg noodles. Add aromatic herbs and spices like onions, garlic, parsley, and thyme. Together, they create rich flavors everyone loves.

What kitchen equipment is needed to prepare this recipe?

You’ll need a large pot or Dutch oven for the broth. A cutting board, knife, strainer, and ladle are also essential. Measuring cups and spoons help too.

What are the step-by-step instructions for making the chicken and egg noodles?

The steps are: cook the chicken, make the broth, boil the noodles, and mix everything together. Follow these steps for a delicious dish.

How can I achieve the perfect texture for the chicken and noodles?

To get tender chicken and just-right noodles, simmer the chicken well and cook noodles al dente. Avoid overcooking. Tips and techniques are given to help you achieve the perfect texture.

How should I store and reheat any leftover chicken and egg noodles?

Store leftovers in the fridge for 3-4 days or freeze for longer. Reheat gently to keep the dish moist. Instructions for storage and reheating are provided.

What are some serving and pairing ideas for this chicken and egg noodles recipe?

Try serving with a green salad, roasted veggies, or crusty bread. Pair with a white wine or iced tea. Garnish with herbs or serve in bowls for a personal touch.

Quick & Easy Homemade Blueberry Cobbler Recipe Easy

Craving a homemade dessert that’s easy to make and full of fresh blueberry taste? This quick and easy blueberry cobbler recipe is perfect. It mixes a buttery crust with the juicy sweetness of ripe blueberries. This homemade cobbler is a true delight for the senses.

It requires minimal effort and uses pantry staple ingredients. It’s the perfect treat to whip up for any occasion.

Key Takeaways

  • Quick and easy blueberry cobbler recipe with minimal preparation time
  • Combines a buttery crust with juicy, sweet blueberries for classic comfort food appeal
  • Made with simple pantry ingredients, no specialized equipment required
  • Versatile dessert that can be enjoyed year-round with fresh or frozen blueberries
  • Perfect for sharing with family and friends as a delicious homemade treat

What Makes This Blueberry Cobbler Special

This blueberry cobbler recipe is a true standout. It combines classic comfort food, quick preparation, and simple pantry ingredients. It’s perfect for both seasoned bakers and kitchen novices, becoming a family favorite.

Classic Comfort Food Appeal

Blueberry cobbler brings back memories of cozy family gatherings and grandma’s baking. It captures the comforting, old-fashioned flavor. It’s the perfect sweet treat for any time of year.

Time-Saving Preparation Methods

This blueberry cobbler is quick and easy to make. It requires simple mixing and short baking. You can have a delicious cobbler ready in no time, great for sudden cravings or guests.

Simple Pantry Ingredients

The recipe uses common pantry staples, making it easy for all bakers. It includes juicy blueberries and a flaky topping. You can make this comfort food delight whenever you want.

Essential Ingredients for Perfect Blueberry Cobbler

Making a delicious blueberry cobbler begins with the right ingredients. Whether you’re an experienced baker or new to cooking, this classic dessert is key. It needs fresh blueberries, flour, sugar, and butter to get the perfect taste and texture.

Here are the main ingredients for a blueberry cobbler that will impress everyone:

  • Blueberries: The heart of this dessert, blueberries add sweetness and color.
  • Flour: This is what makes the cobbler topping tender and biscuit-like.
  • Sugar: It sweetens the filling and helps the topping caramelize.
  • Butter: Unsalted butter gives the crust a rich, flaky texture and flavor.
  • Baking Powder: It makes the topping light and fluffy.
  • Salt: A little salt balances the sweetness and enhances the flavor.
  • Milk or Cream: Adds moisture and makes the topping tender.

With these ingredients, you’re ready to make a blueberry cobbler that’s full of flavor. Get ready to enjoy a homemade treat that’s both comforting and delicious.

Kitchen Tools and Equipment Needed

To bake a tasty blueberry cobbler, you need some key kitchen tools and equipment. From basic baking items to optional tools and precise measuring devices, the right gear is crucial. It can make a big difference in your homemade blueberry cobbler’s success.

Basic Baking Essentials

  • Baking dish or pie plate
  • Mixing bowls
  • Whisk or spoon for stirring
  • Spatula for spreading and serving
  • Knife for slicing and cutting

Optional Helpful Tools

  1. Food processor for quick dough preparation
  2. Stand mixer or hand mixer for effortless mixing
  3. Pastry cutter for achieving a flaky cobbler topping
  4. Parchment paper or silicone baking mat for easy cleanup

Measuring Equipment

Getting the measurements right is key for a perfect blueberry cobbler. Make sure you have these measuring tools:

  • Measuring cups for dry and liquid ingredients
  • Measuring spoons for accurate portioning
  • Digital scale for weighing ingredients like flour and sugar

With these baking tools, kitchen equipment, and measuring utensils, you’re ready to make this delicious blueberry cobbler. You’ll do it with confidence and ease.

Blueberry Cobbler Recipe Easy – Step-by-Step Guide

Making a delicious blueberry cobbler is simpler than you think. Follow this easy guide to make a homemade cobbler that will wow everyone. These cobbler recipe instructions are perfect for both beginners and experts. They’ll guide you through the baking steps for a tasty easy dessert guide.

  1. Preheat your oven to 375°F (190°C).
  2. In a large bowl, gently toss the fresh or frozen blueberries with granulated sugar, cornstarch, and a pinch of salt until well combined.
  3. Pour the blueberry mixture into a greased 9×13-inch baking dish.
  4. In a separate bowl, whisk together the all-purpose flour, baking powder, granulated sugar, and a pinch of salt.
  5. Cut in the cold, cubed butter until the mixture resembles coarse crumbs.
  6. Stir in the milk or buttermilk until just combined, being careful not to overmix.
  7. Drop spoonfuls of the cobbler topping over the blueberry filling, creating an even layer.
  8. Bake for 30-35 minutes, or until the topping is golden brown and the filling is bubbly.
  9. Allow the cobbler to cool for at least 15 minutes before serving.

Enjoy your fresh and easy blueberry cobbler with a scoop of vanilla ice cream or a dollop of whipped cream. This cobbler recipe instructions will quickly become a family favorite!

Tips for Selecting and Preparing Fresh Blueberries

Choosing the right fresh blueberries is key to a great blueberry cobbler. To make your dessert sweet and flavorful, follow these tips. They’ll help you pick, wash, and store your blueberries.

Seasonal Selection Guide

The best time for fresh blueberries is from June to August. The juiciest ones are usually in mid-summer. Choose plump, firm berries with a deep color. Stay away from shriveled, moldy, or off-color berries.

Washing and Storage Methods

Rinse your blueberries gently under cool water to get rid of dirt. Dry them with a clean towel. Store them in an airtight container in the fridge for up to a week.

Fresh vs. Frozen Options

Fresh blueberries are best for this recipe, but frozen ones work too. Frozen berries keep their nutrients and taste. Just thaw them before adding to your cobbler.

By picking and preparing your blueberries carefully, you’ll make a delicious homemade blueberry cobbler. It will be full of flavor and texture.

Customizing Your Cobbler Topping

Blueberry cobbler is a classic dessert. But, you can easily change the topping to make it unique. Try these simple ways to enhance your cobbler.

Add a Crunchy Topping

For a nice contrast, sprinkle chopped nuts like pecans or almonds on top. You can also add old-fashioned oats for a granola-like topping.

Spice it Up

Add a dash of ground cinnamon, nutmeg, or ginger to the topping. These spices complement the sweet blueberries perfectly.

Make it Indulgent

For a richer cobbler, add a crumbled cookie or shortbread topping. Dotting the top with cold butter makes it flaky and biscuit-like.

Dietary Adaptations

Want a gluten-free or vegan option? Use oats, almond flour, and coconut oil instead of flour. This makes a delicious, dairy-free cobbler for all diets.

These easy tips let you turn a simple blueberry cobbler into a unique dessert. Try different flavors to find your new favorite cobbler.

Common Mistakes to Avoid When Making Cobbler

Making the perfect blueberry cobbler needs focus and avoiding common mistakes. Issues like temperature problems, texture issues, and wrong ingredient amounts can ruin your cobbler. Knowing these mistakes helps you fix them and get great results every time.

Temperature Control Issues

Getting the oven temperature right is key for a good cobbler. If it’s too hot, the topping will burn before the filling is done. If it’s too cold, the cobbler will be soggy. Use an oven thermometer to check the temperature and adjust as needed.

Texture Problems and Solutions

  • Runny Filling: If your filling is too thin, add more thickener like cornstarch or flour to soak up the extra moisture.
  • Tough Topping: A tough topping comes from overworking the dough. Mix it gently to keep it light and tender.
  • Soggy Bottom: Baking on a preheated baking sheet helps the bottom crust stay crisp and prevents it from getting soggy.

Ingredient Measurements

Getting the right amounts of ingredients is crucial. Wrong amounts of sugar, flour, or butter can mess up the flavors and textures. Use digital scales and measuring cups and spoons to get it right.

Common Cobbler MistakesSolutions
Improper oven temperatureUse an oven thermometer to maintain the correct temperature
Runny fillingAdd more thickener, such as cornstarch or flour
Tough, dense toppingHandle the dough gently and avoid over-mixing
Soggy bottom crustBake the cobbler on a preheated baking sheet
Inaccurate ingredient measurementsUse proper measuring tools, such as a digital scale and graduated cups and spoons

By fixing these commonbaking tips,troubleshooting desserts, andcobbler mistakes, you can make your homemade blueberry cobbler even better.

Serving Suggestions and Storage Tips

Make your blueberry cobbler even better with these serving ideas and storage tips. Whether you’re having a party or a quiet night in, these tips will help you serve your dessert beautifully. They also keep it fresh for days.

Delightful Dessert Presentation

Enjoy your warm blueberry cobbler with vanilla ice cream or whipped cream. The mix of hot berries and cool cream is amazing. Add a sprig of mint or powdered sugar for a fancy touch.

Storing Leftover Cobbler

  • Let the cobbler cool before putting it in an airtight container.
  • Keep it in the fridge for up to 4 days to stay fresh.
  • Reheat it in the microwave or oven when you’re ready.

Extending the Cobbler’s Lifespan

Freeze leftover cobbler for longer storage. Wrap it in plastic or foil, then put it in a freezer-safe container. Frozen cobbler stays good for up to 3 months.

With these tips, you can enjoy your blueberry cobbler in many ways. It stays delicious for days. Enjoy the classic taste and flavors of this beloved dessert.

Conclusion

This easy homemade blueberry cobbler recipe is a true delight. It captures the essence of classic comfort food. Its simple preparation and impressive results make it a family favorite across the United States.

Looking for a quick and easy treat? Or a crowd-pleasing option for your next gathering? This blueberry cobbler is sure to exceed your expectations. It satisfies sweet cravings and is quick to make, becoming a new household staple.

Why not try making this delightful homemade blueberry treat? Its inviting aroma and irresistible flavor make it perfect for your recipe repertoire. Indulge in the comforting, homemade goodness of this easy dessert recipe today!

FAQ

What makes this blueberry cobbler recipe special?

This blueberry cobbler recipe is a classic comfort food. It’s easy to make and uses simple ingredients. This makes it a delicious homemade dessert option for everyone.

What are the essential ingredients for the perfect blueberry cobbler?

The key ingredients include fresh blueberries, flour, sugar, and butter. These ingredients are crucial for the right texture and flavor.

What kitchen tools and equipment are needed to make this blueberry cobbler?

You’ll need basic baking tools like a baking dish and mixing bowls. Optional tools and measuring equipment can also help.

How do I select and prepare the fresh blueberries for this recipe?

Choose the best blueberries by following a seasonal guide. Wash them well. You can use fresh or frozen berries. Proper storage keeps them fresh.

Can I customize the cobbler topping for this recipe?

Yes, you can add nuts, oats, or spices to the topping. This lets you tailor the flavor and texture to your liking.

What common mistakes should I avoid when making this blueberry cobbler?

Avoid temperature and texture issues, and make sure to measure ingredients correctly. These tips help ensure your cobbler turns out right.

How should I serve and store the blueberry cobbler?

Serve it with ice cream or whipped cream, or enjoy it plain. For storage, use proper techniques to keep it fresh longer.

10 Best Beef Top Round Steak Recipes for Dinner

Ever wondered how to make the most of budget-friendly beef top round steak? This article shows 10 tasty dinner recipes to make this lean meat a delicious treat. From classic pan-seared steaks to Asian-inspired dishes, we’ve got you covered.

Top round steak is a versatile and affordable cut that can be turned into many satisfying meals. But what makes this beef cut special? Let’s explore how to bring out its best in the kitchen.

Key Takeaways

  • Top round steak is a lean, budget-friendly cut of beef that can be transformed into a variety of delicious dinner recipes.
  • Explore diverse cooking methods, from pan-searing and grilling to slow-cooking, to bring out the best in this versatile cut.
  • Discover flavor-packed marinades, rubs, and sauce combinations that will make your top round steak the star of the show.
  • Learn how to select high-quality top round steak and properly prepare it for optimal tenderness and flavor.
  • Pair your top round steak dishes with the perfect side dishes and wine pairings for a complete and satisfying meal.

Understanding Top Round Steak: A Cut Above the Rest

Top round steak is a lean beef that’s packed with protein. It’s low in fat, making it a great choice for those watching their diet. This steak is also versatile, allowing for many tasty cooking methods.

Nutritional Benefits of Top Round Steak

Top round steak is a top source of quality protein. It has essential amino acids that help build and repair muscles. It’s also low in fat and cholesterol, which is good for your heart.

This lean beef is also rich in vitamins and minerals. It has iron, zinc, and B vitamins. These nutrients are key for overall health.

Best Cooking Methods for Top Round

  • Grilling: Top round steak loves high heat. It gets a nice sear on the outside while staying juicy inside.
  • Slow-cooking: Braising or slow-cooking makes it tender and flavorful. It breaks down tough fibers.
  • Pan-searing: A quick pan sear followed by oven cooking is perfect. It creates a tasty crust and keeps the protein-rich meat juicy.

Selecting Quality Top Round Steak

When buying top round steak, look for bright red color and fine grain. Avoid any with too much fat or discolored spots. Choosing high-quality low-fat steak ensures tender and flavorful cuts every time.

NutrientAmount per 3 oz Serving of Top Round Steak
Calories165
Protein26 g
Fat5 g
Saturated Fat2 g
Cholesterol72 mg
Iron2.4 mg
Zinc5.3 mg

“Top round steak is a versatile, protein-packed cut of beef that can be prepared in a variety of delicious ways.”

Essential Tools and Ingredients for Perfect Top Round Steak

To make a delicious top round steak, you need more than just good meat. You’ll also need some key tools and ingredients. These include special seasonings and the right cooking gear. Let’s look at what you need to make your top round steak stand out.

Essential Tools for Top Round Steak

  • High-quality cast iron skillet or heavy-duty grill pan for searing
  • Reliable meat thermometer to ensure optimal doneness
  • Sharp carving knife for clean, precision slicing
  • Sturdy meat tenderizer to break down tough muscle fibers

Flavorful Seasoning Blends

The secret to a tasty top round steak is in the seasoning. Try different steak seasonings to find your favorite. Here are some popular ones:

  • Classic salt and pepper
  • Garlic and herb blend
  • Smoky chipotle rub
  • Zesty Italian seasoning

Tenderizing Techniques

Top round steak can be a bit tough. So, it’s good to tenderize it. Use a meat tenderizer or marinate it in acidic stuff like wine or vinegar.

ToolPurpose
Cast Iron SkilletSearing and browning the steak for a crisp exterior
Meat ThermometerEnsuring the steak is cooked to your desired doneness
Meat TenderizerBreaking down the tough muscle fibers for a more tender texture
Steak SeasoningEnhancing the natural flavors of the top round steak

With the right tools and seasonings, you’ll get better at making top round steak. You’ll be a pro in no time.

Classic Pan-Seared Top Round Steak with Garlic Butter

Make your dinner special with a pan-seared top round steak and garlic butter sauce. This easy recipe will show you how to get a tender, medium-rare steak with a great crust.

Perfect Temperature Guide

To cook your top round steak just right, aim for 130°F to 135°F. This temperature gives you a juicy, pink center and a slightly charred outside.

Seasoning Combinations

  • Classic salt and pepper seasoning
  • Herbed blend with rosemary, thyme, and garlic powder
  • Spicy rub with chili powder, cumin, and paprika

Step-by-Step Cooking Process

  1. Pat the steak dry and season it well with your favorite spice mix.
  2. Heat a cast-iron or heavy-bottomed skillet over high heat and add a tablespoon of oil.
  3. Carefully pan-sear the steak for 3-4 minutes per side, until it’s nicely browned.
  4. Lower the heat to medium-low and keep cooking, flipping as needed, until it’s at your desired temperature.
  5. Move the steak to a cutting board and let it rest for 5-10 minutes.
  6. In the same pan, melt butter and sauté minced garlic until it smells good.
  7. Spoon the garlic butter sauce over the rested steak and serve right away.

“The secret to a perfect pan-seared steak is all in the temperature – both the pan and the meat itself. Follow this guide, and you’ll be a master of the medium-rare steak in no time.”

Marinated Asian-Style Top Round Steak

Take your dinner to the next level with a Asian marinade for top round steak. This recipe mixes soy sauce, ginger, and sesame oil for a delicious teriyaki steak. It’s sure to wow your guests.

Marinating the steak in this blend unlocks its full flavor. It adds an Asian twist and tenderizes the meat. This makes for a juicy and tasty meal.

Ingredients for the Asian Marinade:

  • 1/2 cup soy sauce
  • 2 tablespoons brown sugar
  • 2 tablespoons sesame oil
  • 3 cloves of garlic, minced
  • 2 tablespoons grated ginger
  • 1 teaspoon red pepper flakes (optional for added heat)

Marinating and Cooking Instructions:

  1. In a large resealable bag or shallow dish, mix all marinade ingredients well.
  2. Add the top round steak, making sure it’s covered in marinade.
  3. Refrigerate for at least 2 hours, or up to 8 hours, for flavor infusion.
  4. Preheat your grill or a large skillet over medium-high heat.
  5. Remove the steak from the marinade and discard the used marinade.
  6. Cook the steak for 3-5 minutes per side, or until it’s cooked to your liking.
  7. Let the steak rest for 5-10 minutes before slicing across the grain and serving.

Marinating the top round steak in this Asian blend brings out amazing flavors and tenderness. Serve it with steamed rice, roasted veggies, or your favorite Asian sides. It makes for a delicious and fulfilling meal.

Mediterranean Grilled Top Round Steak

Take your grilling to the next level with a Mediterranean-style top round steak. It’s packed with flavor thanks to a mix of herbs, spices, and the steak’s juicy texture.

Herb and Spice Blend

Begin by making a marinade that captures the Mediterranean’s essence. Mix olive oil, rosemary, thyme, garlic, lemon zest, and a bit of salt and pepper in a bowl. Rub this blend all over the steak, making sure it’s fully coated.

Grilling Techniques

Heat your grill to medium-high. Place the Mediterranean-marinated top round steak on the grill. Cook for 3-4 minutes on each side to get a nice char. Then, lower the heat and cook until it’s medium-rare, about 125°F.

Serving Suggestions

  • Enjoy the grilled Mediterranean top round steak with a fresh Greek salad. Add feta, olives, and a tangy lemon vinaigrette.
  • Pair it with roasted vegetables like zucchini, bell peppers, and onions. Drizzle them with olive oil and Mediterranean herbs.
  • End with garlic-infused mashed potatoes or grilled pita bread for a complete Mediterranean feast.

By blending the bold tastes of Mediterranean cuisine with the tender grilled top round steak, you’ll wow your guests. It’s a dish that will transport their taste buds to the Mediterranean’s sunny shores.

Slow-Cooked Beef Top Round Steak Recipes

Top round steak is a hidden gem for home cooks looking for tender, flavorful beef. Slow-cooking turns this lean cut into delicious one-pot meals and braised dishes. Discover the magic of slow cooker recipes and braised beef to make your family dinners unforgettable with tender steak.

Success with top round steak comes from patience and the right cooking method. Slow braising or simmering in a flavorful liquid breaks down the meat. This makes it tender steak that’s almost like butter. One-pot meals with slow-cooked top round are tasty and easy, great for busy weeknights.

Slow Cooker RecipesBraised Beef Dishes
Slow Cooker Beef StewClassic Braised Beef Brisket
Slow Cooker Beef RaguBalsamic Braised Short Ribs
Slow Cooker Beef StroganoffBurgundy Braised Beef Shanks

Slow cooking turns top round steak into tender, flavorful dishes that everyone will love. Choose from a hearty slow cooker recipe or a savory braised beef dish. This versatile meat offers endless possibilities.

“Slow cooking is the secret to transforming a tough cut of meat like top round steak into a melt-in-your-mouth delight.”

Top Round Steak Stir-Fry with Vegetables

Make your dinner special with a tasty beef stir-fry. It has tender top round steak and fresh veggies. It’s quick, easy, and great for busy nights. Everyone will love it.

Vegetable Pairing Guide

Stir-fries can have many veggie combinations. Here are some great ones for top round steak:

  • Broccoli: Adds a crunchy texture and a pop of color.
  • Bell peppers: Brings a sweet and vibrant flavor.
  • Mushrooms: Lends an earthy, umami-rich note.
  • Snap peas: Offers a delightful crunch and a sweet, fresh taste.
  • Carrots: Provides a bright, subtly sweet addition.

Sauce Variations

Choose from many sauces to match your taste. Here are some tasty options:

  1. Teriyaki Sauce: Create a classic Asian-inspired flavor profile.
  2. Garlic-Ginger Sauce: Elevate the dish with warm, aromatic notes.
  3. Spicy Chili Sauce: Add a touch of heat for a bolder, more adventurous experience.

Choosing the right sauce is key. Quick cooking keeps the beef and veggies tender and flavorful.

“A well-executed beef stir-fry is a perfect balance of tender meat, crunchy vegetables, and a flavorful sauce – the ultimate quick dinner recipe.”

Mexican-Inspired Top Round Steak Fajitas

Take your dinner to the next level with Mexican-inspired top round steak fajitas. This dish brings out the best in the top round steak. It’s filled with the bold flavors and zesty seasonings of Mexican cuisine.

Begin by marinating the top round steak in a mix of spices, fresh lime juice, and olive oil. This makes the meat taste amazing from the inside out. As it cooks, the smell of bell peppers and onions fills the air, making you excited for the first bite.

To make the perfect fajita, place the steak on warm tortillas. Add grilled bell peppers and onions on top. Don’t forget to add shredded cheese, guacamole, and salsa. This mix of flavors and textures is a hit with everyone.

These fajitas are perfect for a family dinner or a Taco Tuesday party. Serve them with a margarita or a cold beer for a real Mexican feast at home.

Healthy Top Round Steak Salad Creations

Discover the power of top round steak in making tasty, healthy salads. These recipes are packed with protein and offer a balanced meal. They’re perfect for those who want healthy, low-carb options.

Dressing Options

The dressing makes a steak salad truly special. Try out these tasty options to match the savory steak:

  • Zesty Balsamic Vinaigrette
  • Creamy Avocado Lime Dressing
  • Tangy Dijon Herb Vinaigrette
  • Light and Refreshing Lemon Garlic Dressing

Protein-Packed Combinations

For a fulfilling meal, mix your steak with fresh ingredients:

  1. Mixed Greens, Sliced Steak, Cherry Tomatoes, Cucumber, Feta
  2. Spinach, Grilled Steak, Roasted Sweet Potato, Avocado, Quinoa
  3. Arugula, Seared Steak, Roasted Beets, Goat Cheese, Walnuts
  4. Kale, Marinated Steak, Roasted Brussels Sprouts, Hard-Boiled Egg
Salad CombinationDressing PairingNutritional Benefits
Mixed Greens, Sliced Steak, Cherry Tomatoes, Cucumber, FetaBalsamic VinaigretteHigh in protein, vitamins, and minerals
Spinach, Grilled Steak, Roasted Sweet Potato, Avocado, QuinoaCreamy Avocado Lime DressingFiber-rich, antioxidant-packed, and satisfying
Arugula, Seared Steak, Roasted Beets, Goat Cheese, WalnutsDijon Herb VinaigretteNutrient-dense, with a balance of healthy fats and protein
Kale, Marinated Steak, Roasted Brussels Sprouts, Hard-Boiled EggLemon Garlic DressingPacked with vitamins, minerals, and anti-inflammatory properties

Make your weeknights special with these steak salad recipes. They’re a tasty, healthy way to enjoy healthy dinner ideas and low-carb meals. Try different salad dressings and protein combinations to find your favorite.

Quick and Easy Top Round Steak Sandwiches

Top round steak sandwiches are perfect for a quick lunch or dinner. This beef cut is great for making tasty sandwiches. Try out these easy recipes to enjoy the best of top round steak.

Choose sturdy bread like ciabatta, focaccia, or crusty rolls for your steak sandwich. Grill, toast, or butter the bread for extra texture and flavor. Add thinly sliced or shredded top round steak for tenderness and juiciness.

Add different sandwich toppings to make your steak sandwich special. Try sautéed mushrooms, caramelized onions, melted cheese, crisp lettuce, juicy tomatoes, and tangy sauces. You can make your own unique steak sandwich masterpiece.

Bread OptionsSandwich ToppingsSauce Ideas
Ciabatta Focaccia Crusty rolls Sourdough Pretzel bunsSautéed mushrooms Caramelized onions Melted cheese Crisp lettuce Juicy tomatoesHorseradish sauce Chimichurri Garlic aioli Barbeque sauce Pesto

With these tips and a bit of creativity, you can make delicious steak sandwich creations. They’re perfect for satisfying your hunger with a tasty lunch ideas or quick meal. Enjoy top round steak in a convenient sandwich form.

Wine Pairing and Serving Suggestions

Take your top round steak dinner to the next level with the right wine pairing. Red wines match perfectly with the rich flavors of top round steak. Let’s look at some great red wines and side dishes to make your meal special.

Red Wine Recommendations

There are many red wines that go well with top round steak. A full-bodied Cabernet Sauvignon or Merlot pairs well with the savory steak. A smooth Pinot Noir or Malbec can also highlight the beef’s natural sweetness.

For something different, try a bold Syrah or Tempranillo. These wines can match the steak’s intensity, making your meal unforgettable. Always let the wine breathe and warm up to the right temperature before serving.

Side Dish Ideas

Pair your top round steak with side dishes that complement it. Roasted potatoes or creamy mashed potatoes add a comforting touch. They balance the steak’s richness well.

  • Sautéed mushrooms and onions: Their earthy flavors match the beef nicely.
  • Grilled asparagus or roasted Brussels sprouts: These veggies offer a refreshing contrast to the steak.
  • Garlic-infused green beans: The savory garlic pairs well with the steak.

Choosing the right wine and side dishes can make your top round steak dinner unforgettable.

Conclusion

Top round steak is amazing, from classic pan-seared to Asian-inspired marinades and slow-cooked dishes. It’s affordable and nutritious, making it a favorite for dinner. You can grill, sear, or braise it to make many tasty meals.

Learning to cook top round steak means knowing the best ways to cook it. Try different recipes and techniques to bring out its flavor. This way, you can make many delicious beef dinners that feel like they’re from a restaurant.

Top round steak is great for any meal, whether you want a juicy steak, a hearty stir-fry, or a fresh salad. Use the tips and recipes from this article to make your cooking better. Let your creativity run wild as you try new ways to use this tasty beef in your top round steak recipes, cooking tips, and beef dinner ideas.

FAQ

What is the nutritional profile of top round steak?

Top round steak is lean and packed with protein. It’s low in fat and calories. This makes it a great choice for those wanting more lean protein in their diet.

What are the best cooking methods for top round steak?

You can cook top round steak in many ways. Try pan-searing, grilling, slow-cooking, or stir-frying. Just remember, don’t overcook it to avoid a tough texture.

How should I select quality top round steak?

Look for top round steak that’s bright red and has even marbling. Stay away from packages with too much liquid or discoloration. These signs often mean lower quality.

What essential tools and ingredients are needed for cooking top round steak?

To cook top round steak well, you’ll need a meat thermometer and a cast-iron skillet or grill. Also, have some seasonings and marinades ready, like garlic, herbs, and spices.

What is the best temperature for cooking top round steak?

Cook top round steak to 135°F for medium-rare or 140-145°F for medium. This ensures it stays tender and juicy.

How can I add flavor to top round steak?

Use different seasoning blends and marinades to flavor top round steak. Try Asian soy sauce and ginger, Mediterranean herbs, or garlic butter sauce.

What are some healthy and delicious side dish options for top round steak?

Serve top round steak with healthy sides like roasted veggies, quinoa, brown rice, or fresh salads. This makes for a balanced and tasty meal.

Can top round steak be used for stir-fries and fajitas?

Yes, top round steak is perfect for stir-fries and fajitas. Slice it thinly and cook it quickly to keep it tender.

How can I incorporate top round steak into salads?

Add top round steak to salads for extra protein and texture. Mix it with fresh greens, veggies, and tasty dressings.

What are some quick and easy top round steak sandwich ideas?

Use top round steak in sandwiches like classic steak sandwiches, steak fajita wraps, or steak and cheese melts. It’s a tasty and easy meal.

What type of red wine pairs well with top round steak?

Full-bodied red wines like Cabernet Sauvignon, Merlot, or Malbec go well with top round steak. They complement its rich flavor.

Easy Kefir Sheet Cake Recipe – Moist & Delicious Dessert

Take your baking to the next level with this simple yet amazing homemade kefir cake. It’s moist, tangy, and incredibly tasty. Perfect for any occasion or when you just want something comforting, this kefir sheet cake is a hit with its unique flavor and easy-to-make recipe.

So, what’s so special about this kefir cake? Let’s find out how kefir works its magic in baking. You’ll learn about its health perks and how it makes your sheet cake even better.

Ready to add a tangy twist to your desserts? Follow this easy kefir sheet cake recipe. It’s a moist, delicious treat that will make your taste buds happy.

Key Takeaways

  • Discover the secret behind kefir’s transformative powers in baking
  • Learn about the health benefits of using kefir in your cake recipes
  • Explore an easy-to-follow kefir sheet cake recipe for a moist and delicious dessert
  • Understand how kefir affects the texture and moisture of your sheet cake
  • Get tips on achieving the perfect moisture level and preventing common baking issues

Why Kefir Makes the Perfect Sheet Cake Ingredient

Kefir is a superstar in baking. It adds a tangy flavor and makes cakes moist and tender. Its unique nutritional profile and how it mixes with other ingredients are the secrets.

Health Benefits of Baking with Kefir

Kefir is full of probiotics, great for health-conscious bakers. These live cultures support gut health and overall well-being. Plus, it’s a rich source of probiotics in baking, boosting your treats’ nutrition.

How Kefir Affects Cake Texture

The kefir nutritional value is key to a perfect cake texture. Its natural acidity tenderizes flour, making the cake moist and delicate. This, along with kefir’s richness, creates a moist cake texture that everyone loves.

IngredientBenefit in Baking
KefirProvides probiotics for gut health Contributes to a moist and tender texture Adds a delightful tangy flavor

“Kefir is the secret ingredient that takes my sheet cakes to the next level. The texture is always perfectly moist and the flavor is simply divine.”

– Sarah, Avid Baker

Essential Ingredients for Your Kefir Sheet Cake

To make a delicious kefir sheet cake, you need the right ingredients. The flour is the base, and the tangy kefir adds a special touch. Each part is crucial for a moist, tasty dessert. Let’s look at what you need to make a kefir cake everyone will love.

The kefir is key, bringing a unique tang and moistness. It’s a baking staple that boosts nutrition and flavor in your recipes.

You’ll also need all-purpose flour and cake flour for the right texture. Don’t forget eggs, granulated sugar, and butter or oil for a cake that’s soft and delicious.

Adding vanilla extract and a bit of salt can enhance the taste. Try spices like cinnamon or nutmeg for different flavors.

With the right mix of kefir cake ingredients, you’re set to make a sheet cake that will wow. Using the best baking staples is key to a great result.

IngredientQuantity
Kefir1 cup
All-Purpose Flour1 1/2 cups
Cake Flour1 cup
Granulated Sugar1 1/4 cups
Eggs3 large
Unsalted Butter (or Oil)1/2 cup
Vanilla Extract1 teaspoon
Salt1/4 teaspoon

https://youtube.com/watch?v=MtCMSj_9T9E

With these quality ingredients, you’re all set to bake a tasty kefir sheet cake. It will satisfy your sweet cravings and impress your family and friends.

Kitchen Tools and Equipment Needed

Baking a kefir sheet cake needs the right tools and equipment. This ensures the cake turns out moist and flavorful. You’ll need a good baking pan and mixing tools to get it just right.

Baking Pan Recommendations

For a classic kefir sheet cake, use a 9×13 inch baking pan. This size lets the cake rise and bake evenly. Choose pans made of durable materials like aluminized steel or ceramic for even heat and easy release.

Mixing Equipment Essentials

You’ll need an electric mixer, either a stand or hand mixer, to mix the batter well. These tools blend the kefir, eggs, and dry ingredients quickly. A large mixing bowl is also crucial for this recipe.

Measuring Tools Required

  • Measuring cups for dry and liquid ingredients
  • Measuring spoons for precise portioning of spices and leavening agents
  • A digital scale for accurately weighing ingredients like flour and sugar

Accurate measurements are vital in baking. Make sure you have all the measuring tools you need. This ensures your kefir sheet cake turns out perfectly every time.

Baking EquipmentRecommended Items
Baking Pan9×13 inch aluminized steel or ceramic-coated metal pan
Mixing EquipmentStand mixer or hand mixer, large mixing bowl
Measuring ToolsMeasuring cups, measuring spoons, digital scale

With the right baking equipment, sheet cake pan, and kitchen essentials, you’re ready to make a delicious kefir sheet cake. It’s sure to impress your friends and family.

Step-by-Step Kefir Sheet Cake Recipe

Making a homemade kefir sheet cake is simple. Follow these steps to bake a moist, tasty dessert for any event.

  1. Preheat your oven to 350°F (175°C). Grease a 9×13-inch baking pan with butter or non-stick spray.
  2. In a large bowl, whisk together 2 cups of flour, 1 teaspoon of baking soda, and 1/2 teaspoon of salt.
  3. In a separate bowl, beat 1 cup of softened butter and 1 1/2 cups of sugar until fluffy.
  4. Add 3 large eggs, one at a time, beating well after each egg.
  5. Stir in 1 cup of kefir and 1 teaspoon of vanilla extract until mixed well.
  6. Gradually fold the dry ingredients into the wet ingredients, mixing until no flour pockets remain.
  7. Pour the kefir cake batter into the prepared pan and smooth the top with a spatula.
  8. Bake for 30-35 minutes, or until a toothpick inserted in the center comes out clean.
  9. Allow the kefir sheet cake to cool in the pan for 10 minutes. Then, transfer it to a wire rack to cool completely.

With these easy steps, you’ll have a moist, flavorful homemade sheet cake. Enjoy your delicious kefir-infused treat!

IngredientQuantity
All-purpose flour2 cups
Baking soda1 teaspoon
Salt1/2 teaspoon
Unsalted butter (softened)1 cup
Granulated sugar1 1/2 cups
Large eggs3
Kefir1 cup
Vanilla extract1 teaspoon

Tips for Achieving the Perfect Moisture Level

Getting the right moisture is key for a moist, tasty kefir sheet cake. To avoid a dry or crumbly cake, try these helpful tips.

Common Moisture Control Mistakes

One big mistake in baking is over-mixing the batter. This can make the cake dense and dry. Mix the ingredients gently until they’re just combined. Also, watch out for overbaking, as it can make the cake dry and tough.

Storage Solutions for Freshness

Proper storage keeps your kefir sheet cake moist and fresh. After it cools, wrap it tightly in plastic wrap or use an airtight container. This keeps moisture in and prevents drying. For longer storage, freeze the cake. It stays moist for weeks.

By avoiding common mistakes and using the right storage, your kefir sheet cake will stay moist and delicious. Enjoy its fresh, authentic taste for days.

Frosting and Topping Options

There are countless ways to make your homemade kefir sheet cake stand out. You can choose from classic buttercream to tangy cream cheese frosting. Each option brings a unique taste to this moist and flavorful dessert.

A simple vanilla buttercream is a timeless favorite. It’s creamy and sweet, which complements the kefir’s tanginess perfectly. For a richer taste, try a chocolate buttercream or a peanut butter buttercream.

Cream cheese frosting is also a great choice for kefir sheet cakes. It adds a tangy flavor that matches the kefir’s subtle tartness. You can go for a plain cream cheese frosting or add a twist with lemon zest or chopped nuts.

For a lighter topping, use fresh fruit. Sliced strawberries, blueberries, or diced pineapple can add sweetness and color to your kefir cake decoration.

Choosing the right cake frosting ideas or sheet cake toppings is key. Let the kefir’s delicate flavors be the star. With creativity and the right ingredients, your kefir sheet cake can become a stunning dessert.

Troubleshooting Common Baking Issues

Baking is a fun and rewarding hobby, but even experts face problems. Issues like uneven baking, over or under-baking, and texture problems can happen. Knowing how to fix these issues can help you make the perfect kefir sheet cake every time.

Temperature and Timing Solutions

Keeping the oven at the right temperature is key. If your cake browns too fast but is still raw inside, your oven might be too hot. Try lowering the temperature by 25°F and watch the baking time closely. On the other hand, if your cake takes too long or dries out, try raising the oven temperature by 25°F.

Getting the baking time right is also important. Baking for too long can make your cake dry and crumbly. Baking it too short can make it dense and uncooked. Start with the recommended time, but adjust it based on your oven and pan size.

Texture Problem Fixes

  • A tough, rubbery cake often comes from overmixing the batter. Mix ingredients gently and avoid overdoing it.
  • A crumbly, dry cake might be due to too much flour or not enough liquid. Double-check your measurements and adjust the flour-to-liquid ratio.
  • A dense, heavy cake could mean your baking soda or powder is old. Make sure to use fresh, active leavening agents.

Every oven is different, and your kitchen’s unique setup can affect baking. Try different temperatures and times to find what works best for your kefir sheet cake.

Baking IssuePossible CauseSolution
Uneven BakingOven temperature too highReduce oven temperature by 25°F
Dry, Crumbly TextureOverestimated baking timeReduce baking time and monitor closely
Dense, Heavy CakeExpired baking soda or powderReplace leavening agent

“Baking is a science, and understanding the fundamentals of troubleshooting can make all the difference in achieving the perfect cake texture.”

Recipe Variations and Flavor Combinations

Why not try new flavors with kefir sheet cake? Its tangy and creamy taste is perfect for many flavors. Unleash your inner pastry chef and explore kefir cake flavors and sheet cake variations.

Chocolate lovers will enjoy a kefir chocolate cake. It’s made with cocoa powder and dark chocolate chips. For a fresh twist, add lemon or orange zest. Spice fans can try cinnamon, ginger, or nutmeg for a warm and aromatic kefir cake.

Fruit-based kefir sheet cakes are also a great idea. Imagine a cake with juicy berries or apple-cinnamon. The options are endless with kefir.

Looking for vanilla or something special? Kefir can take your baking to new levels. Let your creativity shine and discover the many sheet cake variations kefir offers.

Make-Ahead and Storage Guidelines

Baking a delicious kefir sheet cake doesn’t have to be rushed. Planning ahead keeps your dessert fresh and tasty. With these tips, you can enjoy your homemade treat whenever you want.

Freezing Instructions

Freezing your kefir sheet cake is a smart move for make-ahead desserts. Let the cake cool completely first. Then, wrap it tightly in plastic wrap or foil.

Put the wrapped cake in a freezer bag or airtight container. This way, your kefir sheet cake can stay good for up to 3 months.

Reheating Methods

When it’s time to enjoy your frozen reheat cake, thaw it in the fridge overnight. After thawing, warm it up in a 350°F oven for 10-15 minutes. This will make it moist and delicious again.

Learning how to prepare and store your kefir sheet cake ahead of time makes it a hit. You can serve it whenever you like, and it will still impress everyone.

Serving Suggestions and Presentation Ideas

Turning a simple kefir sheet cake into a stunning dessert is all about how you present it. You can use creative garnishes and plating techniques to make it the highlight of any event.

First, think about the cake’s shape and size. A sheet cake is perfect for simple, elegant slices. You can also cut it into fun shapes or stack it for a tiered look. Adding a dusting of powdered sugar or caramel sauce can make it look even more special.

For garnishes, the choices are endless. Try using fresh berries, edible flowers, candied citrus peels, or toasted nuts. Arrange them in a way that looks good and tastes great, playing with colors and textures.

For a wow factor, serve the cake with vanilla ice cream or whipped cream. The contrast between the moist cake and the cool topping is a classic favorite.

Remember, the goal is to let the cake’s beauty shine. With a few simple touches, you can make this dessert a true showstopper that everyone will love.

Garnish IdeaFlavor PairingVisual Impact
Fresh BerriesLemon or VanillaVibrant and Colorful
Edible FlowersLavender or RosemaryElegant and Whimsical
Candied Citrus PeelsOrange or LimeBright and Zesty
Toasted NutsAlmond or HazelnutNutty and Crunchy

The secret to a stunning cake presentation is to highlight the sheet cake‘s natural beauty. With some creative dessert plating, you can turn this moist and tasty kefir cake into a memorable showstopper.

Conclusion

This kefir sheet cake recipe is a delightful homemade treat. It uses kefir, a probiotic-rich dairy product, for extra moisture and health benefits. It’s perfect for any occasion, whether you’re hosting a party or just want a cozy dessert.

The recipe is easy to follow, and you can find all the ingredients in most stores. It’s great for both beginners and experienced bakers. Plus, you can add your favorite flavors and toppings to make it unique.

We invite you to make this kefir sheet cake and enjoy the process. It’s a chance to create something delicious and healthy. Let your imagination run wild as you try different flavors and toppings.

FAQ

What is kefir, and how does it benefit baking?

Kefir is a fermented milk product. It’s full of probiotics and has special properties. These enhance baking, adding moisture, tenderness, and a tangy flavor to cakes.

What are the essential ingredients needed for a kefir sheet cake?

For a kefir sheet cake, you need flour, sugar, eggs, kefir, baking powder, baking soda, and salt. Using fresh, high-quality ingredients is crucial for great results.

What baking equipment is required to make a kefir sheet cake?

You’ll need a rimmed baking sheet or jelly roll pan, an electric mixer, and mixing bowls. Also, measuring cups and spoons, and a cooling rack. Accurate measurements are important.

How do I ensure the perfect moisture level in my kefir sheet cake?

To keep the cake moist, avoid overbaking. Be careful not to use too much flour or over-mix the batter. Store the cake covered to keep it fresh.

What are some tasty frosting and topping options for a kefir sheet cake?

Try classic buttercream, cream cheese frosting, or fresh fruit like berries or citrus. These toppings complement the tangy kefir sheet cake well. Feel free to get creative.

How can I troubleshoot common baking issues with a kefir sheet cake?

If the cake bakes unevenly or has texture problems, adjust the oven temperature and baking time. Follow the recipe’s guidelines and make adjustments for your oven.

What are some creative flavor variations for a kefir sheet cake?

You can add flavors like chocolate, fruit-infused, or spiced to kefir sheet cakes. The tangy kefir goes well with many ingredients.

How can I make and store a kefir sheet cake in advance?

Kefir sheet cakes can be made ahead and frozen. To serve, thaw in the fridge and gently reheat if needed. This preserves the texture and flavor.

Easy Sweet Breakfast Recipes to Start Your Morning

Are you tired of the same old boring breakfast routine? Imagine waking up to the aroma of freshly baked pastries, fluffy pancakes, or decadent French toast. These easy sweet breakfast recipes make it all possible. Whether you’re in a hurry or have more time, we’ve got you covered with quick, homemade sweet treats to start your day off right.

Key Takeaways

  • Discover a range of easy-to-make sweet breakfast recipes for busy mornings
  • Learn time-saving tips and essential ingredients to streamline your breakfast preparation
  • Explore delicious and creative variations on classic French toast, pancakes, and more
  • Find healthy and indulgent sweet breakfast options to suit your taste preferences
  • Get inspiration for special occasion and make-ahead sweet breakfast dishes

Starting your day with a nourishing and satisfying meal is key. But breakfast can be both healthy and delicious. In this article, we’ll show you a treasure trove of easy sweet breakfast recipes. They’ll have you jumping out of bed, ready to enjoy the flavors of the day.

So, what’s the secret to a truly remarkable sweet breakfast? Are there quick and hassle-free ways to enjoy homemade morning treats without spending hours in the kitchen? Dive in and discover the answers to these questions and more. We’ll explore a variety of easy sweet breakfast options that will delight your taste buds and energize your day.

Sweet Breakfast Recipes That Take Less Than 20 Minutes

Mornings can be busy, but you don’t have to give up tasty breakfasts. Find quick and easy recipes that are ready in under 20 minutes. This way, you can start your day with a delicious meal without stress.

Quick Assembly Tips for Busy Mornings

  • Choose no-bake or one-bowl recipes to save time and dishes.
  • Use blenders, toasters, and microwaves to cook faster.
  • Prepare parts ahead, like slicing fruits or mixing dry ingredients, to speed up your morning.

Essential Ingredients to Keep on Hand

Keep these staples in your pantry and fridge for quick sweet breakfasts:

Pantry ItemsRefrigerator/Freezer Items
Oats, granola, whole-grain cerealGreek yogurt, milk, eggs
Nut butters, honey, maple syrupFresh or frozen fruit, shredded cheese
Cinnamon, vanilla extract, cocoa powderButter, cream cheese

Time-Saving Preparation Methods

  1. Make smoothies or yogurt parfaits ahead and keep them in the fridge for a quick breakfast.
  2. Batch-cook oatmeal or overnight oats to reheat and customize all week.
  3. Prepare streusel toppings, pancake batter, or French toast mix early and store for fast morning prep.

With these tips, ingredients, and methods, you can enjoy tasty sweet breakfasts even on the busiest mornings.

Decadent French Toast Variations for Every Taste

Take your breakfast to the next level with our French toast recipes. From classic to gourmet, we have a wide range of sweet bread dishes. They are sure to excite your taste buds.

Begin with a classic – traditional French toast. It’s made with thick-cut brioche or challah bread, dipped in a custard-like egg mix, and grilled until golden. Add warm maple syrup and powdered sugar for a comforting start.

For something more indulgent, try our French toast casserole. It layers bread, custard, cinnamon, and fruit, then bakes until puffed. Top it with whipped cream and chopped nuts for a delightful treat.

Looking for something new? Check out our gourmet French toast ideas. Try brioche with bourbon-infused maple syrup or a savory version with bacon and hollandaise sauce. These recipes turn French toast into a luxurious breakfast.

Our collection of French toast recipes caters to all tastes. Whether you like classic or modern, our sweet bread dishes will make your breakfast gourmet. Start your day with a delicious treat.

Homemade Pancakes with Sweet Toppings

Start your day with a stack of fluffy, homemade pancakes. Learn how to make a classic buttermilk pancake base. Then, find out about sweet toppings to make your breakfast special. Also, discover make-ahead pancake mix options for busy mornings.

Classic Buttermilk Pancake Base

Making perfect pancakes is simpler than you think. Start with a classic buttermilk batter. Mix flour, baking powder, baking soda, sugar, and salt. Add buttermilk, eggs, and melted butter or oil until smooth.

Let the batter rest for a few minutes. This step helps the pancakes turn out great.

Creative Pancake Topping Combinations

  • Fresh berries (strawberries, blueberries, raspberries)
  • Warm maple syrup or honey
  • Whipped cream or Greek yogurt
  • Chopped nuts (pecans, walnuts, almonds)
  • Chocolate chips or Nutella
  • Caramelized bananas or apples
  • Crumbled bacon or sausage

Make-Ahead Pancake Mix Options

Save time with a homemade pancake mix. Mix dry ingredients like flour, baking powder, and sugar in a container. Store it in an airtight container.

When ready to cook, mix the dry ingredients with wet ones like buttermilk and eggs. This way, you can have fresh pancakes any day.

Irresistible Breakfast Pastries and Muffins

Start your day with sweet homemade pastries and muffins. Enjoy flaky croissants or fruity muffins. This section has tasty recipes for sweet breakfast treats.

Try homemade pastries for a special morning. Make flaky croissants or buttery danishes with your favorite fillings. Or, make quick and fluffy breakfast muffins with fresh fruit or spices.

Find something for every taste in this section. Try different sweet baked goods that are easy to make ahead. Enjoy these treats and start your day with a smile.

Healthy Sweet Breakfast Bowls and Parfaits

Start your day with a nutritious breakfast bowl or parfait. These meals mix fresh fruits, creamy yogurt, and crunchy granola. They’re a tasty and energizing way to begin your day.

Yogurt and Granola Combinations

Yogurt parfaits are a great choice for a healthy breakfast. Mix your favorite yogurt with granola and fresh berries or fruit. Try different yogurt flavors to find your favorite.

Fresh Fruit Selection Guide

  • Berries: Blueberries, raspberries, blackberries, and strawberries add a burst of sweetness and antioxidants.
  • Tropical Fruits: Mango, pineapple, and kiwi lend a tropical twist to your breakfast bowls.
  • Stone Fruits: Peaches, nectarines, and apricots offer a delightful seasonal flavor.
  • Citrus: Oranges, grapefruit, and clementines provide a refreshing tartness.

Nutritious Sweet Toppings

Add wholesome sweet toppings to your breakfast bowls and parfaits. Try honey, maple syrup, or nut butter for flavor and nutrients. Add slivered almonds, toasted coconut flakes, or cinnamon for crunch.

ToppingNutritional Benefits
HoneyNatural sweetener with antioxidants and antimicrobial properties
Almond ButterRich in healthy fats, protein, and fiber
Chia SeedsHigh in omega-3s, protein, and fiber
CinnamonAntioxidant-rich spice with anti-inflammatory benefits

Enjoy the mix of creamy yogurt, crunchy granola, and fresh fruits. It’s a healthy breakfast that will keep you going all morning.

No-Bake Sweet Breakfast Ideas

Start your day with a sweet treat. These no-cook breakfasts are perfect for hot summer mornings or when you’re in a rush. They offer a refreshing change from traditional cooked breakfasts.

Try chilled breakfasts like overnight oats, yogurt parfaits, and chia puddings. They’re easy to make and full of nutrients. With ingredients like fresh fruit, nuts, and dairy, they’ll keep you energized all morning.

For a quick breakfast, try creamy overnight oats with berries, bananas, and honey. Or, make a colorful parfait with Greek yogurt, granola, and fruit. For a protein boost, make chia pudding the night before and top it with fruit in the morning.

These sweet breakfasts are not only tasty but also flexible. You can adjust them to your liking. Keep them ready for busy mornings, hot days, or whenever you need a quick, healthy start.

Make-Ahead Sweet Breakfast Casseroles

Mornings can be busy, but with some prep, you can enjoy tasty breakfast casseroles. Learn how to prepare them overnight and store them for busy days or weekend brunches.

Overnight Preparation Tips

Assembling your breakfast casserole the night before makes mornings easier. Here are some tips for a smooth overnight prep:

  • Fully assemble the casserole, including any fillings or toppings, in a baking dish. Cover tightly with foil or plastic wrap and refrigerate.
  • For custard-based casseroles, whisk together the egg mixture in a separate bowl and pour it over the other ingredients just before baking.
  • Avoid adding any crunchy toppings or streusel until just before baking, as they can become soggy if left overnight.

Storage and Reheating Guidelines

Proper storage and reheating ensure your casserole tastes great every time. Follow these guidelines:

  1. Refrigerate the assembled, unbaked casserole for up to 2 days before baking.
  2. Bake the casserole according to the recipe instructions, adding a few extra minutes if it’s been chilled.
  3. Leftovers can be stored in the refrigerator for 3-4 days or frozen for up to 3 months.
  4. To reheat, simply cover and bake in a 350°F oven until heated through, or microwave individual portions until steaming hot.

With these tips, making sweet breakfast casseroles is easy. Enjoy the convenience of overnight breakfast recipes and meal prep ideas to start your day off right.

Kid-Friendly Sweet Morning Treats

Start your little ones’ day off right with these delightful and nutritious sweet breakfast recipes. They are designed to appeal to children’s taste buds while still providing valuable vitamins and minerals. These kid-friendly morning treats are sure to make the whole family smile.

Fruity Yogurt Parfaits

Layer colorful sliced fruit, such as strawberries, blueberries, and bananas, with creamy yogurt and a sprinkle of granola. This makes for a balanced and satisfying breakfast. Kids will love the fun layers and variety of flavors in every bite.

Chocolate Chip Pancake Bites

Transform classic pancakes into bite-sized morsels by folding in chocolate chips. Serve these delectable pancake bites with a side of fresh fruit. This breakfast is sure to delight even the pickiest eaters.

Cinnamon Sugar French Toast Sticks

Cut French toast into easy-to-hold strips and toss them in a mixture of cinnamon and sugar. This makes for a sweet and crunchy breakfast treat. Dipping the French toast sticks in maple syrup or fruit compote adds an extra layer of flavor that kids will love.

Baked Oatmeal Cups

Bake individual portions of oatmeal in a muffin tin, adding mix-ins like fresh or dried fruit, nuts, and a touch of honey or maple syrup. These portable and customizable oatmeal cups make a nutritious and satisfying breakfast on the go.

By incorporating these kid-friendly sweet breakfast recipes into your family’s routine, you can ensure that everyone starts the day off on a delicious and wholesome note.

Special Occasion Sweet Breakfast Recipes

Make your mornings special with these sweet breakfast recipes. They’re perfect for holidays and birthdays. These dishes will make your celebrations unforgettable.

Holiday Breakfast Ideas

Begin your holiday season with these delicious breakfast recipes. Enjoy a French toast bake on Christmas or pumpkin spice pancakes on Thanksgiving. These ideas will fill your guests with holiday cheer.

  • Eggnog French Toast Casserole
  • Gingerbread Pancakes with Maple Cream Syrup
  • Cranberry Orange Breakfast Muffins
  • Peppermint Mocha Overnight Oats

Celebration Morning Menus

For birthdays or bridal showers, these menus will impress. Serve decadent pastries, fruity bowls, and pancake stacks. These dishes will make your celebration unforgettable.

Menu ItemRecipe
Lemon Blueberry CrepesThin crepes filled with a tangy lemon cream cheese and fresh blueberries.
Strawberry Cheesecake French Toast BakeThick slices of challah bread baked with a creamy cheesecake filling and fresh strawberries.
Raspberry Almond Breakfast TartsButtery tart shells filled with a sweet raspberry jam and topped with a crumbly almond streusel.

Conclusion

In this article, we’ve looked at many sweet breakfast ideas. From quick meals to fancy French toast and homemade pancakes, we’ve got it all. This guide is full of sweet breakfast inspiration, morning meal ideas, and a big breakfast recipe roundup. It’s all here to make your mornings delicious.

There are recipes for healthy bowls and parfaits, and also for rich pastries and muffins. These recipes fit many tastes and diets. They’re easy to make, so you can enjoy a tasty start to your day.

Try out these morning meal ideas and see what you like. Find your favorite recipes and make them your own. Add something special to a classic or try a new twist. Enjoy the fun of sweet breakfast and make your mornings special.

FAQ

What are some quick and easy sweet breakfast recipes?

Our article has many sweet breakfast recipes ready in under 20 minutes. You’ll find quick tips, pantry essentials, and time-saving tricks.

Can you share some decadent French toast variations?

Yes! We dive into creative French toast recipes. From classic to unique flavors, we aim to make your breakfast special.

How can I make homemade pancakes with sweet toppings?

We show you how to make perfect buttermilk pancakes. Then, we share sweet topping ideas and make-ahead pancake mix tips.

What are some irresistible breakfast pastries and muffins I can make at home?

Our article has recipes for tasty homemade pastries and muffins. Enjoy flaky croissants and fruity muffins.

Can you recommend healthy sweet breakfast bowls and parfaits?

Certainly! We have healthy breakfast bowl and parfait recipes. Try yogurt and granola, fresh fruit, and wholesome toppings.

What are some no-bake sweet breakfast ideas?

Check out our no-bake sweet breakfast options. They’re perfect for hot days or when you’re in a rush.

How can I prepare make-ahead sweet breakfast casseroles?

Learn how to prep sweet breakfast casseroles overnight. We share storage tips and reheating advice for stress-free mornings.

Do you have any kid-friendly sweet morning treat recipes?

Yes, we have sweet breakfast recipes kids will love. They’re nutritious and fun, making mornings better for everyone.

What kind of special occasion sweet breakfast recipes can I find?

Find impressive sweet breakfast recipes for holidays and special days. From Christmas to birthdays, we’ve got you covered.

How to Fry Chicken: A Classic Southern Recipe Guide

Fried chicken is a favorite in Southern cooking, known for its crispy outside and juicy inside. Ever wondered what makes the best homemade fried chicken? This guide will show you how to fry chicken like a Southern cooking pro.

Ready to learn how to get that perfect crispy and tender fried chicken every time? Let’s dive into the history, techniques, and delicious possibilities of making the best fried chicken at home.

Key Takeaways

  • Uncover the origins and regional variations of classic Southern fried chicken
  • Understand the essential equipment and kitchen tools needed for successful frying
  • Learn how to select the best chicken cuts and prepare the perfect buttermilk marinade
  • Discover the secrets to creating a crispy, golden-brown breading coating
  • Master the art of temperature control and oil management for frying perfection

Understanding the Southern Fried Chicken Legacy

The history of Southern fried chicken is rich and varied. It comes from the mix of African and European cultures. This dish is now a key part of the American South, showing the traditions of both enslaved Africans and European settlers.

Over time, the flavors and ways of cooking have changed. Now, fried chicken is seen as a sign of Southern hospitality and pride.

Origins of Southern Fried Chicken

The roots of Southern fried chicken go back to West Africa. Deep-frying seasoned chicken was a common practice there. Enslaved Africans brought these cooking methods to the United States.

They adapted these techniques to the local ingredients and cooking styles of the American South. The Scottish and English settlers also fried chicken, adding to the dish’s evolution.

This mix of African and European traditions created a unique and tasty dish. It became a key part of Southern cuisine.

Regional Variations and Techniques

As Southern fried chicken spread, different local styles and cooking methods appeared. In Nashville, “hot chicken” became popular, known for its spicy and crispy coating. In Georgia, pressure-frying was used to make the chicken perfectly cooked and crunchy.

Other areas have their own twists, like Louisiana’s Creole flavors or South Carolina’s peppery rubs. Chefs also have their own ways, like brining or using buttermilk to tenderize the chicken.

Despite these differences, the love for Southern fried chicken remains strong. It’s a beloved and iconic part of the region’s culinary heritage.

Essential Equipment and Kitchen Tools Needed

Frying chicken right means having the right tools. You need special frying gear and basic cookware. Let’s look at what you need to make Southern-style fried chicken perfect.

Frying Equipment

  • Deep Fryer: A good deep fryer with precise temperature control is key. It cooks chicken evenly and keeps the oil at the right temperature.
  • Cast Iron Skillet: A seasoned cast iron skillet is great for frying chicken. It holds heat well, making the chicken crust crispy.
  • Cooking Thermometer: A digital or instant-read thermometer is crucial. It helps you keep the oil at the perfect temperature for juicy chicken.

Essential Kitchen Tools

  1. Tongs: You need sturdy, heat-resistant tongs for safely handling and turning chicken.
  2. Slotted Spoon: A long-handled slotted spoon helps you gently put chicken in the oil and take it out without messing up the crust.
  3. Paper Towels: Absorbent paper towels are key for draining fried chicken and getting rid of excess oil. This makes the chicken crisp and not greasy.
  4. Breading Trays: Having separate trays or bowls for seasoned flour and wet batter makes breading easier and more organized.
EquipmentBenefit
Deep FryerMaintains consistent oil temperature for even cooking
Cast Iron SkilletExcellent heat retention and distribution for a crispy crust
Cooking ThermometerEnsures the oil is at the optimal temperature for frying

With the right tools, you’ll get better at making Southern-style fried chicken. Get these essential items. Then, you’ll always get that crispy outside and juicy inside.

Selecting the Perfect Chicken Parts for Frying

Choosing the right chicken cuts is key for great fried chicken. You might like chicken wings for their bold flavor, chicken thighs for their tender bite, or chicken breasts for their lean taste. Knowing the best cuts for deep frying can elevate your Southern-style fried chicken.

Best Chicken Cuts for Deep Frying

  • Chicken wings: Their small size and high skin ratio make them perfect for frying. The wings’ shape and bone-in structure keep the meat moist and flavorful.
  • Chicken thighs: These are a favorite for fried chicken. The dark meat stays juicy, and the fat content adds richness.
  • Chicken drumsticks: Like thighs, drumsticks are great for frying. Their dark meat and bone-in structure help retain moisture and flavor.
  • Chicken breasts: Breasts can be tricky to fry but are a healthier option. Proper preparation and cooking techniques are essential for juicy, crispy breasts.

Fresh vs. Frozen Chicken Considerations

Fresh chicken is often preferred for frying because it has better flavor and texture. However, frozen chicken can also work well if thawed and handled correctly. It might release more moisture, but with the right care, it can still yield great results.

Size and Weight Guidelines

Chicken PartOptimal Size RangeOptimal Weight Range
Chicken Wings3-4 inches long2-3 ounces per wing
Chicken Thighs4-6 inches long4-6 ounces per thigh
Chicken Drumsticks4-6 inches long3-5 ounces per drumstick
Chicken Breasts6-8 inches long8-12 ounces per breast

Following these size and weight guidelines helps ensure even cooking. This way, your fried chicken will always be perfectly done.

The Secret to Perfect Buttermilk Marinade

Buttermilk is the secret to amazing Southern fried chicken. It makes the meat tender and adds delicious flavor. To get that perfect crunch and juiciness, you need the right buttermilk marinade.

For a great buttermilk marinade, you need the right mix of ingredients and time. Here’s what you’ll need:

  • Buttermilk
  • Salt
  • Pepper
  • Garlic powder
  • Onion powder

Start with 1 cup of buttermilk for every 1-2 pounds of chicken. Add a teaspoon of salt, 1/2 teaspoon of pepper, 1/2 teaspoon of garlic powder, and 1/2 teaspoon of onion powder. Mix well until everything is combined.

Then, put your chicken pieces in the marinade, making sure they’re fully covered. Cover it up and chill in the fridge for at least 30 minutes. But, for the best results, marinate for 2-4 hours or even overnight.

Marinating TimeTenderizing Effect
30 minutesMild tenderizing
2-4 hoursModerate tenderizing
OvernightMaximum tenderizing

The buttermilk marinade tenderizes the chicken and adds a tangy taste. This simple step is key to a perfect chicken marinade and tenderizing meat for your Southern fried chicken.

How to Fry Chicken: Step-by-Step Instructions

Frying chicken is a skill that can make your meals better. Whether you want Southern-style fried chicken or something new, this guide will help you. It’s easy to follow and will make your chicken crispy and golden.

Preparation Process

First, dry the chicken with paper towels. This helps the batter stick better. Then, season the chicken with your favorite spices and herbs. Make sure to cover each piece well.

Temperature Control Tips

  • Keep the oil between 350°F and 375°F for the best results. If the temperature changes, your chicken might not cook right.
  • Use a thermometer to check the oil temperature. This helps you adjust it if needed.
  • Don’t put too much chicken in the pan at once. It can lower the oil temperature and affect the frying.

Cooking Time Guidelines

The time it takes to fry chicken depends on the meat’s size and type. Here are some general guidelines:

  • Bone-in chicken pieces (like thighs, drumsticks, and wings) need 12-15 minutes.
  • Boneless, skinless chicken breasts take 8-10 minutes.
  • Always check the chicken’s internal temperature. It should be at least 165°F before you serve it.

By following these steps and paying attention to the frying process, you’ll get delicious, crispy fried chicken every time.

Creating the Perfect Seasoned Flour Coating

Making the ultimate seasoned flour coating is key for that crispy, golden-brown crust on Southern-style fried chicken. It’s all about a balanced mix of spices and herbs. They boost flavor and help the coating stick to the chicken.

Begin with top-notch all-purpose flour as your base. Then, add a mix of spices for depth and complexity in your flour. Essential spices include:

  • Garlic powder
  • Onion powder
  • Paprika
  • Cayenne pepper
  • Black pepper
  • Salt

Adjust the spice amounts to match your taste. For a spicy kick, use more paprika and cayenne. For a milder flavor, add more garlic and onion powder.

After mixing your seasoned flour, make sure it sticks well to the chicken. Dredge the chicken in flour, shaking off extra. This creates a thin, even layer that turns crispy when fried.

The quality of your seasoned flour is crucial for great fried chicken. Try different spice mixes to find your favorite. With practice, you’ll get the hang of making that perfect Southern-style crispy coating.

Oil Selection and Temperature Management

Choosing the right oil and keeping the temperature right are key to perfect fried chicken. Not all oils are the same for frying. You want an oil with a high frying oil smoke point. This lets you cook at high temperatures without the oil burning or smoking.

Best Oils for Chicken Frying

Peanut oil, vegetable oil, and canola oil are top choices for frying chicken. They have high smoke points, usually over 450°F (232°C). This makes them great for high-heat frying. Stay away from oils like olive oil, as they can burn easily and taste bad when heated too high.

Temperature Monitoring Techniques

  • Use a reliable cooking thermometer to check the oil temperature while cooking. The best frying temperature for chicken is between 350°F (177°C) and 375°F (191°C).
  • Keep the oil temperature steady by adjusting the heat as needed. If the temperature changes too much, your chicken might not cook evenly.
  • Think about getting a deep-fry thermometer or a digital cooking thermometer for precise temperature readings.

By picking the right frying oil and keeping an eye on the oil temperature, you’ll make perfect Southern-style fried chicken every time.

Common Mistakes to Avoid When Frying Chicken

Frying chicken can be a fun cooking adventure, but it comes with its own set of challenges. As a professional copywriting journalist, I’ve seen many home cooks face common mistakes. These mistakes can turn a great meal into a disaster. In this section, we’ll look at the most common errors, share frying tips, and offer solutions to make your Southern-style fried chicken a hit.

One big mistake is overcrowding the pan. Adding too many pieces of chicken at once can drop the oil temperature. This results in soggy, greasy chicken. To fix this, fry the chicken in batches. This way, each piece has enough room to cook evenly and get that crispy, golden crust.

Another common problem is not controlling the oil temperature right. The perfect fry needs the right oil temperature. If the oil is too cold, the chicken will soak up too much oil, making it heavy and greasy. On the other hand, if the oil is too hot, the outside will burn before the inside is cooked. Use a meat thermometer to keep the oil between 350°F and 375°F for the best results.

Timing is also a challenge for many home cooks. Undercooked chicken is unsafe, while overcooked chicken is dry and tough. Stick to the cooking time guidelines, adjusting as needed for the size and thickness of your chicken. Use a meat thermometer to check the chicken’s internal temperature. It should reach 165°F before you take it out of the oil.

By avoiding these common mistakes, you’ll get better at making Southern-style fried chicken. Remember, practice makes perfect. Even if your first few tries aren’t perfect, keep trying. With the right techniques and patience, you’ll soon be serving crispy, juicy fried chicken that everyone will love.

Serving and Storage Recommendations

Presenting your fried chicken is an art. Start by arranging the crispy pieces on a platter or plate. Make sure they’re evenly spaced for a nice look. Add fresh parsley or green onions for color and flavor.

Storing leftover fried chicken right is crucial. Let it cool down first. Then, put it in an airtight container or bag. Keep it in the fridge for 3-4 days to stay fresh. Reheating it can be tricky, but follow these steps for a crispy texture again.

Presentation Tips

  • Arrange fried chicken pieces on a platter with even spacing for a polished, restaurant-worthy look.
  • Garnish with fresh herbs like parsley or sliced green onions to add visual interest and complementary flavors.
  • Serve fried chicken with your choice of dipping sauces, such as honey mustard or ranch, for an interactive dining experience.

Proper Storage Methods

  1. Allow fried chicken to cool completely before transferring to an airtight container or resealable plastic bag.
  2. Refrigerate leftover fried chicken and consume within 3-4 days for optimal freshness and texture.
  3. When reheating fried chicken, use the oven at 400°F (200°C) for 10-15 minutes to restore the crispy exterior without drying out the meat.
Leftover Storage TipsReheating Fried Chicken
Allow to cool completely before storingPreheat oven to 400°F (200°C)
Use airtight containers or resealable bagsBake for 10-15 minutes
Refrigerate and consume within 3-4 daysMaintain crispy texture without drying out

Complementary Side Dishes and Sauces

Fried chicken is more than just food in the South. It’s about the side dishes and sauces that go with it. These classics add flavor, tradition, and depth to the meal.

Coleslaw is a favorite side. It’s creamy and crunchy, a perfect match for fried chicken. Try a Southern-style slaw with shredded cabbage, carrots, and tangy dressing.

Fluffy biscuits are another Southern staple. They’re buttery and flaky, great for sopping up chicken juices. Serve them warm with honey or jam.

Delectable Dipping Sauces

Every Southern fried chicken meal needs dipping sauces. From honey mustard to ranch, these sauces enhance the chicken’s flavor.

  • Honey Mustard Sauce: A mix of honey, Dijon mustard, and vinegar is sweet and tangy.
  • Ranch Dressing: It’s cool, creamy, and full of herbs, a classic choice.
  • Barbecue Sauce: For a smoky taste, choose a homemade or high-quality BBQ sauce.
Side DishDipping Sauce
ColeslawHoney Mustard
BiscuitsBarbecue Sauce
Mashed PotatoesRanch Dressing

Pairing fried chicken with Southern sides and sauces makes a complete meal. It celebrates the South’s rich culinary heritage.

Conclusion

Mastering fried chicken is key to Southern cooking. We’ve covered its history, techniques, and tips to improve your skills. Choosing the right chicken, making the perfect buttermilk marinade, and seasoned flour coating are all important steps.

Practice and patience are essential for making great fried chicken. Try different seasonings, frying temperatures, and cooking times. This way, you can create your own special recipe that captures the South’s unique flavors.

This guide has given you the tools to become a fried chicken expert. Whether you’re new to cooking or already skilled, you now have the knowledge to impress. Keep practicing and sharing your delicious fried chicken with loved ones.

FAQ

What is the key to achieving the perfect crispy exterior on fried chicken?

The secret to crispy fried chicken is in the seasoned flour coating. It’s important to mix the right spices and herbs. Also, make sure the flour sticks well to the chicken for that crunch.

What is the best oil to use for frying chicken?

Use oils with a high smoke point like peanut, vegetable, or canola oil. These oils handle high temperatures well. They help get a golden-brown, crispy crust without burning.

How do I prevent the chicken from drying out during the frying process?

Marinate the chicken in buttermilk before frying. This tenderizes the meat and keeps it moist. Even after frying, the inside stays juicy.

What is the ideal oil temperature for frying chicken?

The best temperature for frying chicken is between 350°F and 375°F. Keeping this temperature ensures a crispy outside and fully cooked chicken without burning.

How do I know when the chicken is fully cooked?

Check the chicken’s internal temperature with a meat thermometer. The thickest part should be at least 165°F. This means the chicken is ready to eat.

Can I reuse the frying oil?

Yes, you can reuse frying oil. Just strain and store it properly. As long as it’s kept at the right temperature and doesn’t degrade, you can use it many times.

What are some common mistakes to avoid when frying chicken?

Avoid overcrowding the pan, as it lowers the oil temperature. Also, dry the chicken well before frying to prevent splattering. Keeping the oil at the right temperature is key to avoid burning or undercooking.

How should I store leftover fried chicken?

Store leftover fried chicken in an airtight container in the fridge. To keep it crispy, reheat in the oven or air fryer. The microwave can make it soggy.

Get The Best Recipes In 2025

Exit mobile version