Creamy Boursin Cheese Pasta: A Simple and Satisfying Recipe

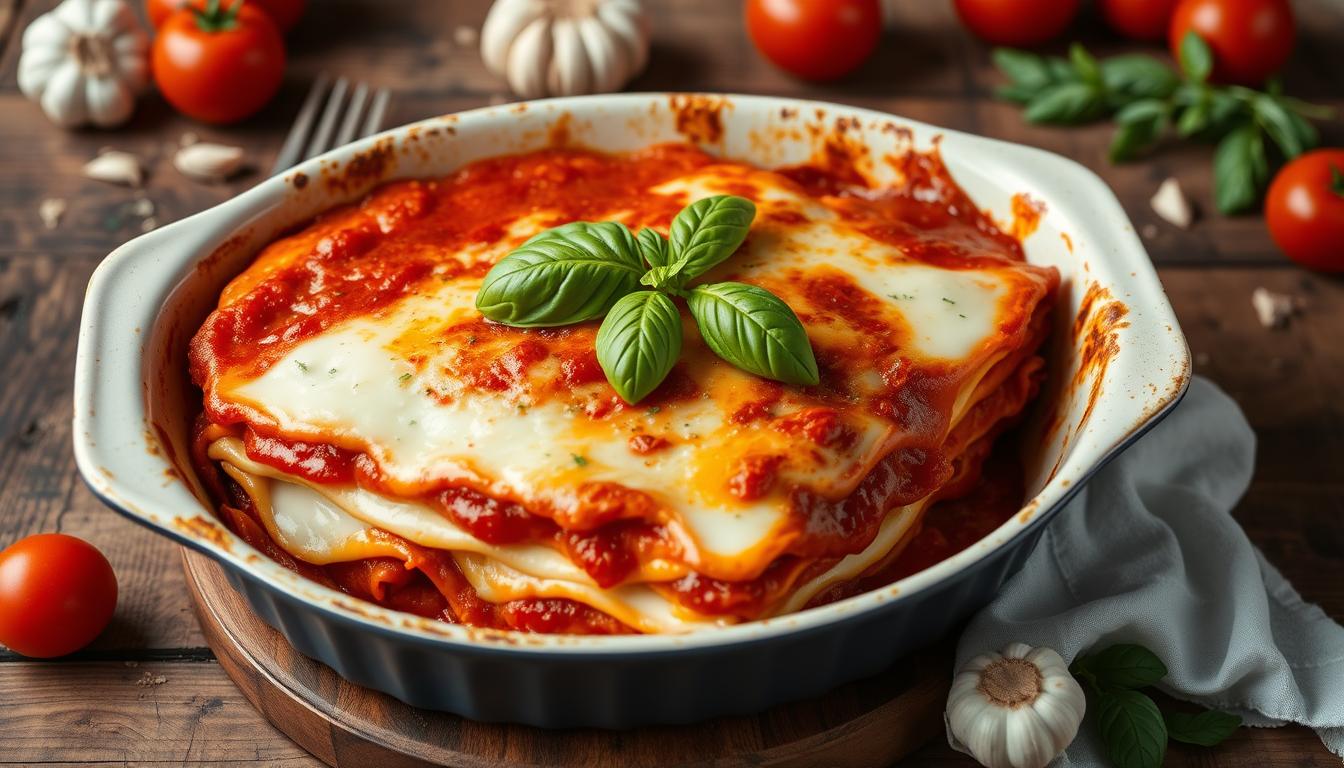
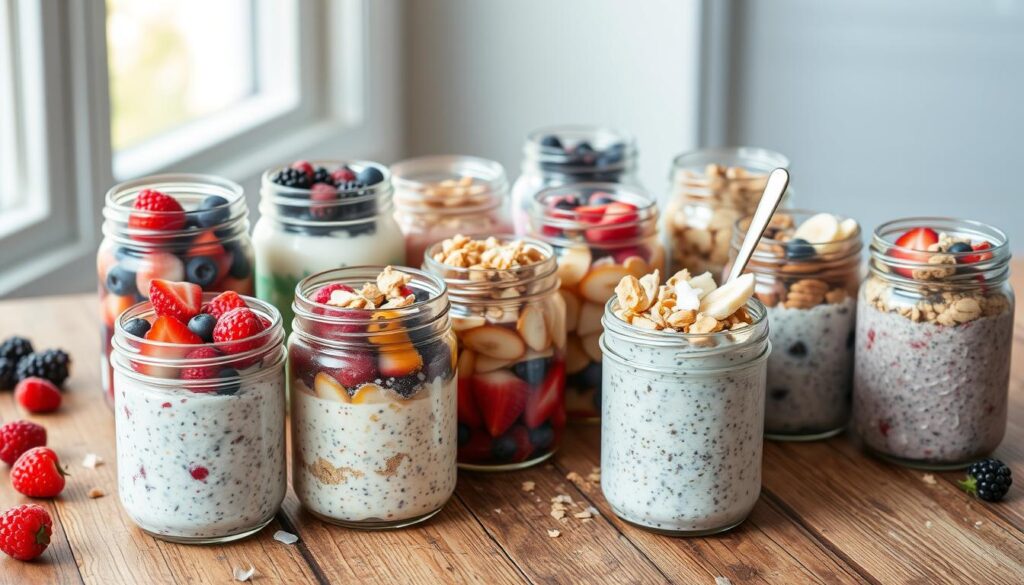
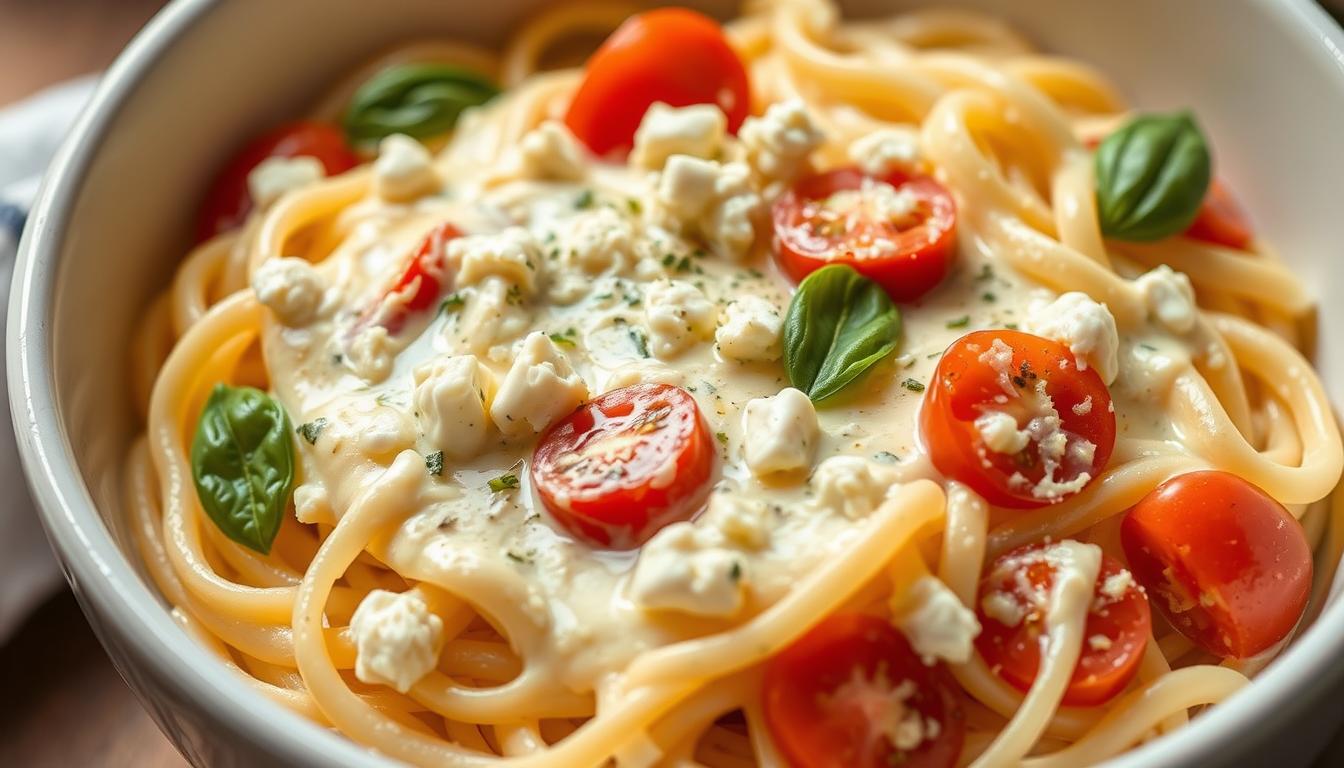
A delicious and easy boursin pasta recipe can be a game-changer for a quick weeknight dinner. It has a rich and creamy flavor, making it perfect for a satisfying meal. The creamy boursin pasta sauce is made with high-quality ingredients, including boursin cheese, that make it a standout dish.

A good boursin cheese pasta recipe should be easy to follow and require minimal ingredients. This easy boursin pasta recipe is a great option for those looking for a simple and delicious meal. The creamy boursin pasta is a great way to enjoy a satisfying and flavorful dish without spending hours in the kitchen.

Key Takeaways

  • Easy boursin pasta recipe for a quick weeknight dinner
  • Creamy boursin pasta sauce made with high-quality ingredients
  • Boursin cheese pasta is a satisfying and flavorful dish
  • Minimal ingredients required for this easy boursin pasta recipe
  • Creamy boursin pasta is a great option for a simple and delicious meal
  • Boursin cheese pasta recipe is perfect for a satisfying and easy dinner
  • This boursin cheese pasta recipe is a great way to enjoy a creamy and flavorful dish

Introduction to Boursin Cheese Pasta

Boursin cheese is a French delicacy known for its rich and creamy flavor. It’s perfect for homemade boursin pasta. Made from cream cheese, butter, and herbs, it has a unique taste and texture. This cheese makes a creamy and flavorful sauce for pasta, ideal for boursin pasta ideas.

Boursin cheese is great for pasta sauce because it blends well with other ingredients. It pairs well with garlic, parsley, and herbs for a delicious sauce. You can use it in many boursin pasta dish recipes, from simple to complex.

What is Boursin Cheese?

Boursin cheese comes from France and is known for its creamy texture and rich flavor. It’s made from cream cheese, butter, and herbs. It’s often used as a spread or dip. In cooking, it adds a unique and delicious flavor to homemade boursin pasta recipes.

Why It Makes the Perfect Pasta Sauce

Boursin cheese is perfect for pasta sauce because of its creamy texture and rich flavor. It can be mixed with garlic and herbs for a tasty sauce. It’s also a great base for boursin pasta dish recipes, offering many sauce and flavor options.

History of Boursin Cheese in Cooking

Boursin cheese has a long history in French cuisine, often used as a spread or dip. It’s also used in cooking, including pasta dishes, adding a unique flavor. In boursin pasta ideas, it creates a creamy and flavorful sauce that’s sure to impress.

Essential Ingredients for Your Boursin Pasta

To make a tasty boursin cheese pasta sauce, you need a few important things. You’ll need top-notch Boursin cheese, pasta, garlic, and herbs. The pasta you pick is key, as some shapes work better with boursin cheese pasta sauce than others.

Here are the must-haves for your best boursin pasta recipe:

  • Boursin cheese: This is the main ingredient, so pick a good one.
  • Pasta: Choose shapes that catch the creamy boursin cheese pasta sauce well, like penne or fusilli.
  • Garlic: Mince a few cloves to add depth and flavor.
  • Herbs: Use fresh or dried herbs like parsley, basil, or thyme for a fresh taste in your best boursin pasta recipe.

Remember, the quality of your boursin cheese pasta sauce depends on your ingredients. Go for the best you can find. Feel free to try different mixes to find your ideal best boursin pasta recipe.

With these key ingredients and a simple recipe, you can whip up a yummy boursin cheese pasta sauce. It’s sure to become a hit.

Kitchen Equipment You’ll Need

To make a tasty boursin pasta recipe, you need some key kitchen tools. The right equipment makes a big difference in taste and quality. You’ll need a big pot for boiling pasta, a saucepan for warming the Boursin cheese, and a colander to drain the pasta.

The kitchen tools you choose can change how your pasta turns out. For example, a quality saucepan helps prevent the Boursin cheese from burning. This makes your sauce smooth and creamy.

Essential Tools

  • Large pot for boiling pasta
  • Saucepan for heating Boursin cheese
  • Colander for draining pasta
  • Wooden spoon for stirring
  • Cheese grater for grating additional cheese (optional)

Optional Equipment for Best Results

Some optional tools can make your homemade boursin pasta even better. A food processor can mix the Boursin cheese with garlic and herbs. This creates a tasty sauce for your pasta.

Investing in the right kitchen tools helps you make a delicious boursin pasta. With practice, you’ll soon be a pro at making homemade boursin pasta.

EquipmentPurpose
Large potBoiling pasta
SaucepanHeating Boursin cheese
ColanderDraining pasta

The Perfect Boursin Cheese Pasta Recipe

Making a tasty meal starts with a good boursin cheese pasta recipe. It mixes boursin cheese’s richness with pasta’s comfort. This creates a creamy dish that everyone will love. The secret is balancing flavors and textures for a perfect mix of sauce and pasta.

Here are some tips for the best results:

  • Preparation time: This includes getting ingredients, chopping veggies, and cooking pasta.
  • Cooking time: This is how long to cook pasta and heat the boursin cheese sauce.
  • Serving size: Plan for 1/2 cup of cooked pasta per serving, based on hunger and the event.

A great boursin cheese pasta recipe is simple and needs few ingredients. The creamy sauce is the main attraction. With a bit of effort, you’ll soon enjoy a delicious boursin cheese pasta dish.

By using this recipe and quality ingredients, you’ll make a creamy pasta dish loved by all. So, try it out and enjoy the blend of boursin cheese and pasta.

Step-by-Step Cooking Instructions

To make a tasty easy boursin pasta recipe, boil the pasta as the package says. This makes sure it’s just right. While the pasta cooks, warm the Boursin cheese in a saucepan on low heat. This melts the cheese into a smooth sauce.

After the pasta is cooked, drain it and mix it with the Boursin cheese in the saucepan. Stir until the cheese is fully melted and the pasta is coated. You can add garlic or herbs for more flavor. For a homemade boursin pasta recipe, use fresh ingredients and customize the sauce.

  • Choose high-quality ingredients, like fresh pasta and real Boursin cheese.
  • Avoid overcooking the pasta to prevent it from becoming mushy.
  • Try different flavors and ingredients to make a unique homemade boursin pasta recipe.

By following these steps and tips, you can make a delicious easy boursin pasta recipe. It’s great for a weeknight dinner or a special occasion. Whether you love creamy sauces or want to try something new, this homemade boursin pasta will be a hit.

Choosing the Right Pasta Shape

Choosing the right pasta shape is key to a tasty boursin pasta dish. There are many shapes and sizes to pick from. Think about how the sauce will mix with the pasta.

A creamy sauce like boursin cheese pasta sauce is great with pasta that has lots of nooks. Shapes like penne, fusilli, and farfalle work well. They let the sauce stick to the pasta, making it flavorful.

Best Pasta Types for Creamy Sauces

  • Penne: A tube-shaped pasta that pairs well with creamy sauces
  • Fusilli: A corkscrew-shaped pasta that holds onto sauce nicely
  • Farfalle: A bow-tie shaped pasta that adds a playful touch to your boursin pasta ideas

Choosing the right pasta shape is all about how it works with the sauce and other ingredients. Pick a shape that fits well with your boursin pasta dish. This way, you’ll make a balanced and tasty dish that everyone will enjoy.

Tips for Creating the Creamiest Sauce

To make the creamiest boursin cheese pasta sauce, choose top-notch ingredients. Fresh herbs and spices boost flavor and texture. Also, heating the Boursin cheese just right is key for a smooth sauce.

Here are some tips for a creamy sauce:

  • Blend heavy cream and grated cheese for richness and depth.
  • Add a pinch of salt to enhance flavors.
  • Spices like garlic, onion, and nutmeg add complexity.

By using these tips and quality ingredients, you’ll get a tasty, creamy

IngredientQuantity
Boursin cheese8 oz
Heavy cream1 cup
Grated cheese1/2 cup

Flavor Variations and Add-ins

Boursin cheese pasta is super versatile. You can make it your own with different flavors and ingredients. It’s perfect for those who love trying new things.

For a simple yet customizable boursin pasta, start with a few basic ingredients. You can add veggies, proteins, and herbs to make it your own.

Vegetable Options

  • Cherry tomatoes
  • Spinach
  • Mushrooms

Protein Additions

  • Grilled chicken
  • Shrimp
  • Bacon

Herb Combinations

Herbs like basil, parsley, and thyme can make your pasta taste fresh and aromatic. Try mixing different herbs to find your favorite flavor.

With these add-ins, you can make a unique and tasty boursin pasta. Whether you want something classic or something new, this dish will hit the spot.

Common Mistakes to Avoid

When making a boursin cheese pasta recipe, watch out for common mistakes. Temperature control is key to the dish’s quality. It affects the creamy boursin pasta’s texture and consistency.

Avoid overheating the sauce. It can make the cheese separate and the sauce too thick. Underheating leads to a thin sauce that lacks flavor. Keep an eye on the temperature and adjust cooking time to get it right.

Temperature Control Tips

  • Use a thermometer to ensure the sauce reaches the optimal temperature.
  • Stir the sauce constantly to prevent it from sticking to the bottom of the pan.
  • Adjust the heat as needed to maintain a consistent temperature.

Sauce Consistency Solutions

To get the sauce just right for your creamy boursin pasta, try these tips. If it’s too thick, add a bit of pasta water or cream. If it’s too thin, simmer it to reduce the liquid and thicken the sauce.

Storage and Reheating Guidelines

After making the perfect boursin pasta dish, it’s key to store and reheat it right. This keeps the creamy texture and flavor just right. Using the right storage and reheating methods lets you enjoy your boursin pasta ideas for more time.

To store your boursin pasta dish, let it cool down first. Then, put it in an airtight container. You can keep it in the fridge for up to 3 days. When you reheat it, do so gently over low heat, stirring often, until the sauce is smooth and the pasta is coated well.

If you want to store it longer, freeze your boursin pasta dish. Split it into portions, put them in airtight containers or bags, and freeze for up to 3 months. To reheat frozen pasta, thaw it in the fridge overnight. Then, reheat it like you would fresh pasta.

  • Adding a little cream or milk to the sauce when reheating to maintain its creaminess
  • Stirring constantly when reheating to prevent the sauce from sticking to the bottom of the pan
  • Not overheating the pasta, as this can cause the sauce to break and become oily

By following these tips, you can enjoy your boursin pasta dish for longer. It keeps the flavor and texture delicious.

Wine Pairing Suggestions

Enjoying a boursin cheese pasta sauce is even better with the right wine. A good wine can enhance the creamy texture and rich flavors of the best boursin pasta recipe. Here are some great options:

A dry and crisp white wine is perfect for cutting through the sauce’s richness. Some top picks include:

  • Pinot Grigio
  • Sauvignon Blanc
  • Chardonnay

If you like red wine, a light-bodied option with moderate acidity works well. Some good choices are:

  • Pinot Noir
  • Beaujolais
  • Dolcetto

The right wine choice depends on your taste. Think about the flavors in your boursin cheese pasta sauce and best boursin pasta recipe. A wine that complements these can make your meal even better.

Pairing your boursin cheese pasta sauce with a great wine makes for a satisfying meal. Whether you prefer white or red, there’s a perfect match for your best boursin pasta recipe.

Wine TypeDescription
White WineDry and crisp, pairs well with creamy sauces
Red WineLight-bodied, moderate acidity, complements rich flavors

Conclusion

As we wrap up our exploration of Boursin cheese pasta, we hope you’re eager to try it at home. The creamy Boursin cheese pairs perfectly with pasta, creating a delicious homemade dish. With just the right ingredients and a few easy steps, you can make your dinner special and impress everyone.

Remember, the secret to a great Boursin cheese pasta is finding the right balance of flavors and textures. Feel free to get creative and make it your own. Enjoy your culinary adventure!

FAQ

What is Boursin cheese?

Boursin cheese is a French cheese known for its creamy taste. It’s made from cream cheese, butter, and herbs.

Why does Boursin cheese make the perfect pasta sauce?

Boursin cheese’s creamy texture is perfect for pasta sauce. Its herbs and spices add depth to the dish.

What is the history of Boursin cheese in cooking?

Boursin cheese has been a staple in French cooking for decades. It’s often used as a spread or dip. Lately, it’s become popular for creamy pasta sauces and savory dishes.

What are the essential ingredients for making Boursin pasta?

To make Boursin pasta, you need Boursin cheese, pasta, garlic, and herbs. Adding vegetables or proteins can make it even better.

What kitchen equipment do I need to make Boursin pasta?

You’ll need a pot for boiling pasta, a saucepan for the cheese, and a colander for draining. A food processor or immersion blender can make the sauce smooth.

What is the perfect Boursin cheese pasta recipe?

The perfect recipe boils pasta, heats Boursin cheese, and mixes them. You can add veggies or proteins to customize it.

What are the step-by-step cooking instructions for making Boursin pasta?

First, boil pasta as directed. Heat Boursin cheese in a saucepan. Drain pasta, then mix it with the cheese until coated.

What type of pasta is best for Boursin cheese sauce?

Shapes like penne, farfalle, or fusilli work well with creamy sauces. The pasta’s shape affects the dish’s texture and taste.

How can I create the creamiest Boursin cheese sauce?

Use quality ingredients and heat the cheese right. Adding a bit of cream or milk can make it silky.

What are some flavor variations and add-ins for Boursin pasta?

You can add sautéed mushrooms, grilled chicken, or herbs like basil and oregano. These enhance the flavor.

What are some common mistakes to avoid when making Boursin pasta?

Avoid overheating the cheese and ensure the sauce is just right. This prevents a broken sauce and keeps the dish tasty.

How should I store and reheat Boursin pasta?

Store it in an airtight container in the fridge for 3-4 days. Reheat with a splash of milk or cream to restore creaminess.

What wine pairings work best with Boursin pasta?

White wines like Chardonnay or Sauvignon Blanc pair well. Light-bodied reds, like Pinot Noir, also complement the creamy and herbal flavors.

Do You Like Our Recipe ?

0.0
0.0 out of 5 stars (based on 0 reviews)
Excellent0%
Very good0%
Average0%
Poor0%
Terrible0%

Homemade Lasagna Recipe: Cheesy, Flavorful, and Simple

A homemade lasagna is a classic Italian dish loved for its simplicity and taste. With just a few ingredients, you can make a delicious lasagna that everyone will enjoy. It’s all about the balance of tender pasta, rich sauce, and melted cheese.

Homemade lasagna is more than just a meal; it’s a tradition that brings families together. It’s a dish that has been shared for generations, with each family adding their own special touch. Whether you’re an experienced cook or just starting, making lasagna is a great way to create memories.

This easy lasagna recipe will help you make a dish that’s both tasty and satisfying. We’ll show you how to layer and bake your lasagna to perfection. So, why not try making a homemade lasagna and see how easy it is?

Introduction to Homemade Lasagna

In this article, we’ll dive into the world of homemade lasagna. We’ll cover its history, the best ingredients to use, and how to layer and bake it. You’ll learn how to make a perfect lasagna every time.

Key Takeaways

  • Make a delicious homemade lasagna with a few simple ingredients
  • Learn the basics of a great lasagna recipe, including layering and baking
  • Discover the history and origins of this beloved Italian dish
  • Get tips and tricks for making the perfect easy lasagna recipe
  • Explore variations on the classic homemade lasagna recipe
  • Learn how to store and reheat your homemade lasagna for maximum flavor

The History and Origins of Traditional Lasagna

Traditional lasagna has a long history that goes back centuries. Its origins are in ancient Italy. The name “lasagna” comes from the Greek word “laganon,” meaning flat bread.

Over time, it spread across the Mediterranean. Different cultures made their own versions, using local ingredients.

The history of lasagna shows how diverse Italian cuisine is. From Campania in the south to Lombardy in the north, each place has its own lasagna. Some use fresh pasta, while others prefer dried noodles. Fillings also vary, with meat sauces and vegetarian options.

Italian Roots and Evolution

In Italy, lasagna is a favorite at special occasions. It’s made with pasta, sauce, and cheese. Each family has its own secret recipe.

Regional Variations

There are many lasagna variations across Italy. Here are a few:

  • Sicilian lasagna, with eggplant and ricotta cheese
  • Neapolitan lasagna, featuring fresh tomatoes and mozzarella
  • Emilian lasagna, with prosciutto and Parmesan

Modern Adaptations

Today, lasagna is loved worldwide. Modern recipes add new ingredients like spinach and feta, or mushroom and truffle sauce. Chefs and home cooks are always trying new things.

RegionTraditional Lasagna Variation
SicilyEggplant and ricotta cheese
NaplesFresh tomatoes and mozzarella cheese
Emilia-RomagnaProsciutto and Parmesan cheese

Essential Ingredients for the Perfect Lasagna Recipe

To make a tasty homemade lasagna, picking the right ingredients is key. A classic easy lasagna recipe has layers of pasta, sauce, cheese, and sometimes meat. For a cheesy lasagna, mix mozzarella, parmesan, and ricotta cheese.

Choose between fresh or dried lasagna noodles. Fresh noodles make your dish softer, but dried noodles are easier to store. For the sauce, pick a tomato sauce or a meat-based one, based on what you like.

  • Lasagna noodles
  • Tomato sauce
  • Ground beef or sausage
  • Mozzarella cheese
  • Parmesan cheese
  • Ricotta cheese

With the right ingredients and a simple easy lasagna recipe, you can make a delicious cheesy lasagna. It’s great for any time.

IngredientQuantity
Lasagna noodles8-10 sheets
Tomato sauce2 cups
Ground beef or sausage1 pound
Mozzarella cheese2 cups, shredded
Parmesan cheese1 cup, grated
Ricotta cheese1 cup

Choosing the Right Pasta Sheets

Choosing the right pasta sheets is key to a great lasagna. Traditional lasagna uses wide, flat noodles from wheat flour. For meat lasagna, pick sheets that can hold the meat sauce’s rich flavors and textures.

There are many pasta sheet types, like fresh and dried lasagna noodles. Fresh noodles are egg-based and soft, while dried ones are easier to store. No-boil noodles save time and effort.

Some popular pasta sheets for lasagna include:

  • Wide flat noodles
  • Ribbed lasagna noodles
  • Whole wheat lasagna noodles

Making your own pasta sheets can elevate your lasagna. It lets you control the ingredients and texture. With practice, homemade sheets can become a must-have for any lasagna, including traditional and meat lasagna.

Pasta TypeDescription
Fresh NoodlesMade with eggs, delicate texture
Dried NoodlesConvenient, longer shelf life
No-Boil NoodlesTime-saving, easy to use

Creating the Ultimate Meat Sauce

To make a delicious meat lasagna, you need a rich and flavorful meat sauce. High-quality ingredients and careful cooking are key. Use ground beef, pork, or a mix for the best flavor.

A good easy lasagna recipe starts with browning the meat. Then, add onions and garlic. Next, add crushed tomatoes, tomato paste, and herbs like basil and oregano. Let it simmer for at least an hour to develop the flavors.

Here are some tips for making the ultimate meat sauce:

  • Use a mix of ground meats for a more complex flavor
  • Don’t overcook the meat, as it can become dry and tough
  • Add a pinch of salt and sugar to balance the flavors
  • Let the sauce rest for a few hours or overnight to allow the flavors to meld together

By following these tips and using fresh, high-quality ingredients, you can create a delicious and flavorful meat sauce for your homemade lasagna. This sauce is the foundation of a great meat lasagna, and with an easy lasagna recipe, you can enjoy a satisfying and tasty meal.

Meat Sauce IngredientsQuantity
Ground beef1 lb
Onions1 medium
Garlic3 cloves
Crushed tomatoes2 cups
Tomato paste2 tbsp

Mastering the Bechamel Sauce

To make a delicious cheesy lasagna, a great Bechamel sauce is key. This white sauce is a must in traditional lasagna. It’s what makes a best lasagna recipe stand out. The sauce is made with butter, flour, milk, and cheese, seasoned with salt, pepper, and nutmeg.

When you make the Bechamel sauce, cooking the roux right is important. This avoids a raw flour taste. The sauce should be smooth and creamy. To get this, whisk constantly and cook it over low heat. Adding more cheese, like Parmesan and mozzarella, makes it richer.

Problems like lumps, too-thin sauce, or not enough flavor can happen. To fix these, whisk harder, add more roux or cheese, or season with more salt, pepper, or nutmeg. With practice, you’ll get the Bechamel sauce just right. Then, your cheesy lasagna will wow everyone.

Here are some tips for the perfect Bechamel sauce:

  • Use high-quality cheese for the best flavor
  • Cook the roux for the right amount of time to avoid a raw flour taste
  • Whisk constantly to avoid lumps
  • Season with salt, pepper, and nutmeg for added depth of flavor

Step-by-Step Lasagna Assembly Guide

Making a homemade lasagna is fun and rewarding. It’s great when you use an easy lasagna recipe. To make a classic lasagna, follow a few simple steps. First, prepare your ingredients like pasta sheets, meat sauce, and cheese.

When layering your lasagna, keep a few things in mind. Here are some tips for perfect layers:

Layering Techniques

  • Start with a thin layer of meat sauce at the bottom of the dish.
  • Place pasta sheets on top of the sauce, covering the whole surface.
  • Add a layer of cheese, then another layer of meat sauce.

Proper Proportions

Using the right sauce and cheese is key for a perfect lasagna. Use about 1/3 of the total sauce for each layer.

Top Layer Tips

For the top layer, use a lot of cheese and a sprinkle of parsley. This adds flavor and looks great. By following these steps and using a classic lasagna recipe, you’ll make a delicious homemade lasagna that will impress everyone.

LayerIngredients
BottomMeat sauce
First layerPasta sheets, cheese, meat sauce
Second layerPasta sheets, cheese, meat sauce
TopCheese, parsley

Vegetarian Lasagna Variations

For a tasty vegetarian lasagna, try using spinach, mushrooms, and bell peppers. These add flavor and texture to your homemade lasagna. It’s perfect for a meatless meal.

A great easy lasagna recipe focuses on layering. Start with pasta, then sauce, and then veggies. Keep layering until you top it with cheese.

Some favorite vegetarian lasagna types are:

  • Roasted vegetable lasagna, with zucchini and eggplant
  • Mushroom and spinach lasagna, with sautéed mushrooms and spinach
  • Grilled vegetable lasagna, with bell peppers and onions

Try different ingredients and layering to make a unique vegetarian lasagna. Whether you want a homemade lasagna or an easy lasagna recipe, there’s something for everyone.

Baking Times and Temperatures

Baking a delicious lasagna recipe needs the right baking times and temperatures. A traditional lasagna cooks best in a moderate oven. This ensures the cheese melts and the pasta is just right.

The baking time depends on the lasagna’s size and thickness. Preheat your oven to 375°F (190°C). Bake a standard-sized lasagna for 30-40 minutes. It should be golden brown and the pasta cooked.

Conventional Oven Methods

In a conventional oven, rotate the lasagna halfway through. This ensures even cooking. It makes a big difference in the final dish.

Make-Ahead Instructions

Want to make a lasagna ahead of time? You can assemble it and refrigerate or freeze it. When baking, add a few extra minutes for it to heat through. This is great for busy days or special events.

By following these baking tips, you’ll make a lasagna that impresses everyone. Whether you’re experienced or new to cooking, a homemade lasagna is easy to make.

Storage and Reheating Tips

After making your homemade lasagna with an easy lasagna recipe, it’s key to store it right. This keeps the taste and texture good. Use airtight containers to stop moisture and other tastes from getting in.

For a few days, keep your homemade lasagna in the fridge. Cover it with foil when reheating to avoid drying. You can also reheat parts in the microwave, but watch it to avoid hard cheese.

Freezing Guidelines

Freezing is great for longer storage. Divide the lasagna into parts or batches for easier reheating. Wrap each part in plastic or foil and put it in a freezer bag.

Best Reheating Practices

To reheat your cheesy lasagna, use the oven or microwave. For the oven, preheat to 350°F (180°C) and bake for 20-30 minutes. For the microwave, cook on high for 2-3 minutes until hot and bubbly.

Follow these tips to enjoy your easy lasagna recipe and homemade lasagna longer. Always use airtight containers and reheat safely to avoid illness.

Common Mistakes to Avoid

Making a traditional lasagna can be tricky. It’s easy to overcook the pasta, use too much sauce, or not layer it right. A good lasagna has balanced flavors and textures in each layer.

Some common mistakes to watch out for include:

  • Overcooking the lasagna noodles, making them mushy and unappetizing
  • Using too much sauce, resulting in a soggy and overwhelming dish
  • Not layering the ingredients correctly, leading to an uneven distribution of flavors and textures

To avoid these mistakes, follow a reliable lasagna recipe. Pay close attention to cooking time and technique. This way, you’ll make a delicious traditional lasagna that everyone will love.

By being careful and perfecting your technique, you’ll make a lasagna that will be a hit. So, try it out and enjoy making a homemade lasagna that’s uniquely yours.

Conclusion: Mastering Your Homemade Lasagna Journey

Creating the perfect homemade lasagna is a fun journey. It’s filled with rich flavors and comforting textures. By mastering the key elements, like the meat sauce and bechamel, you’ll make a lasagna that wows everyone.

Don’t forget to try new ingredients and techniques. This way, you’ll find the flavors you love. Whether you like a traditional lasagna or something new, the important thing is to enjoy the process.

As you keep making homemade lasagna, add your own twist to the recipe. Let your creativity shine. With these tips, you’re on your way to becoming a lasagna expert in your kitchen.

FAQ

What are the essential ingredients for the perfect lasagna recipe?

For the best lasagna, you need good pasta sheets, tasty meat sauce, creamy Béchamel sauce, and lots of cheese. Mozzarella and Parmesan are key.

What is the difference between fresh and dried lasagna noodles?

Fresh noodles are soft and delicate. Dried ones are firmer and chewier. Your choice depends on taste and cooking method.

How do I make the ultimate meat sauce for my lasagna?

Mix ground beef and Italian sausage with onions, garlic, and herbs. Simmer it for an hour to blend the flavors.

What is the Béchamel sauce and how do I make it?

Béchamel, or white sauce, is creamy and smooth. Make it by mixing butter and flour, then adding warm milk slowly until it thickens.

How do I properly layer the ingredients in my lasagna?

Start with meat sauce, then noodles, Béchamel sauce, and cheese. Keep layering until you top it with cheese.

Can I make a vegetarian lasagna?

Yes, use sautéed veggies like mushrooms and spinach instead of meat. Tofu or lentils can add protein.

What’s the best way to store and reheat leftover lasagna?

Cool it, then cut into portions and store in airtight containers. Refrigerate for 5 days or freeze for 3 months. Reheat in the microwave or oven.

What are some common mistakes to avoid when making lasagna?

Avoid overcooking pasta and using too much or too little sauce. Layer correctly and let it rest before serving. Use quality ingredients and don’t overfill the dish.

Do You Like Our Recipe ?

0.0
0.0 out of 5 stars (based on 0 reviews)
Excellent0%
Very good0%
Average0%
Poor0%
Terrible0%

Discover the Delicious Secrets of Gipfeli Recipe

Imagine waking up to the smell of freshly baked gipfeli. This traditional Swiss pastry is both flaky and buttery. With this guide, you’ll learn how to bake delicious gipfeli at home.

Whether you’re new to baking or have experience, this article has you covered. You’ll get the steps and tips to make authentic Swiss gipfeli. We’ll use a classic Swiss pastry recipe.

We’ll cover everything from the basics to advanced techniques. You’ll learn about Swiss gipfeli’s rich heritage and the essential ingredients. You’ll also find out what tools and equipment you need to make this Swiss pastry.

With this knowledge, you’ll be able to make gipfeli that will wow your friends and family.

Key Takeaways

  • Learn the secrets to baking delicious gipfeli at home using a traditional gipfeli recipe
  • Discover the rich heritage of Swiss gipfeli and its significance in Swiss culture
  • Get the essential ingredients and required tools and equipment to make a classic swiss pastry recipe
  • Master the techniques for creating flaky and buttery gipfeli
  • Learn how to store and reheat your gipfeli to keep it fresh
  • Explore creative variations and fillings to take your gipfeli to the next level

The Rich Heritage of Swiss Gipfeli

Swiss gipfeli has a long history in Swiss baking. It’s a beloved pastry in Swiss cuisine. The secret recipe is closely kept, but you can make your own delicious gipfeli at home.

Making gipfeli is a bit of work, but it’s worth it. It has flaky, buttery layers and a sweet crust. Whether you’re an experienced baker or new, making gipfeli lets you enjoy Swiss baking traditions.

Origins in Swiss Baking Tradition

Gipfeli started as a breakfast pastry in Swiss baking. Now, it’s enjoyed any time of day. To make authentic gipfeli, use quality ingredients and a traditional recipe. With patience and practice, you’ll make gipfeli that impresses.

How Gipfeli Differs from French Croissants

Gipfeli and French croissants may look alike, but they’re different. Gipfeli uses special yeast for its unique taste and texture. It also has more butter, making the crust richer and tenderer. By using a Swiss recipe, you can make gipfeli that’s uniquely Swiss.

Essential Ingredients for Perfect Gipfeli

To make a tasty easy gipfeli recipe, you need the right stuff. The flour, butter, and yeast you pick matter a lot. For real gipfeli recipe goodness, use top-notch ingredients that are fresh and stored right.

For flour, go for something high in protein. It makes your gipfeli flaky and strong. European-style butter with lots of fat is key for a rich taste. And don’t forget fresh, active yeast for a good rise.

  • High-protein flour
  • European-style butter
  • Fresh and active yeast
  • Salt and sugar to balance the flavor

With these key ingredients and a classic gipfeli recipe, you can make yummy gipfeli at home.

Required Tools and Equipment

To make delicious homemade gipfeli, you’ll need the right tools and equipment. A well-stocked kitchen is key for a perfect swiss pastry recipe. You’ll need mixing bowls, baking sheets, and a pastry blender.

Temperature control is crucial when baking gipfeli. A digital thermometer helps you get the perfect temperature for proofing and baking. Also, a stand mixer with a dough hook attachment makes mixing and kneading easier.

Basic Kitchen Equipment

  • Mixing bowls
  • Baking sheets
  • Pastry blender
  • Digital thermometer

Optional Professional Tools

For advanced gipfeli-making, consider these optional tools. Pastry brushes, dough scrapers, and a bench scraper can enhance your skills. They help achieve a professional finish and streamline the process.

Temperature Control Essentials

Temperature control is vital for gipfeli. Proofing should be between 75°F and 80°F, and baking between 375°F and 400°F. A digital thermometer and a temperature-controlled oven ensure perfect gipfeli every time.

Master Gipfeli Recipe: Step-by-Step Instructions

To make a tasty gipfeli, start by mixing the dough. It should have flour, yeast, and salt. Letting the dough rest and rise is key for a light texture. An easy recipe makes this process simple.

Here’s how to make gipfeli:

  • Mix the dough ingredients together until a shaggy dough forms
  • Knead the dough for about 10 minutes, until it becomes smooth and elastic
  • Let the dough rise in a warm place for about an hour, or until it has doubled in size
  • Roll out the dough to a thickness of about 1/4 inch
  • Cut the dough into triangles and roll each one into a crescent shape

Follow these steps to make a delicious gipfeli. Keep your ingredients simple and your steps easy. You’ll soon have a tasty gipfeli recipe.

Remember, practice makes perfect. If your first batch doesn’t turn out right, don’t worry. With patience and practice, you’ll make great gipfeli. Use your favorite easy gipfeli recipe to do it.

The Art of Lamination in Gipfeli Making

To make a tasty Swiss pastry, you must master lamination. Lamination is when you fold and roll the dough to layer butter and dough. This makes gipfeli flaky and delicious. When making homemade gipfeli, knowing how to laminate is key.

First, you need to make perfect butter layers. Roll out the dough to 1/4 inch thick and spread butter on it. The butter should be soft, not melted, for even spreading. After spreading, fold the dough in half and roll it out again for another layer.

Key Lamination Techniques

  • Folding: Fold the dough in half to create a layer of butter and dough.
  • Rolling: Roll out the dough to create another layer of butter and dough.
  • Rotating: Rotate the dough 90 degrees to ensure even lamination.

By using these techniques and being patient, you can make a flaky, buttery homemade gipfeli. Remember, the secret to a great Swiss pastry is in the lamination. So, take your time and keep trying until you get it right.

Proofing and Rising Techniques

To make perfect gipfeli, you need to get good at proofing and rising. This step makes the dough soft and tasty. A good gipfeli recipe will tell you how to help yeast grow well.

Watch the dough closely while it’s rising. Look for bubbles or if it’s getting bigger. The best place for rising is at room temperature, away from cold air, and with little disturbance.

When handling the dough, gently fold it to spread yeast evenly. This helps it rise evenly and prevents it from becoming too dense. By doing this, your gipfeli will be light and delicious.

Important things to remember for proofing and rising are:

  • Keep the temperature steady for yeast to work well.
  • Handle the dough gently to avoid over-working it.
  • Check the dough often to prevent it from rising too much.

Mastering these techniques will make your gipfeli recipe better. Your baked goods will be light, fluffy, and full of flavor.

Shaping Your Gipfeli Like a Pro

To get the perfect shape for your homemade gipfeli, you need to know the basics. With practice and patience, you can become a pro at shaping your gipfeli.

The crescent shape is a favorite for gipfeli and is easy to make. First, roll out the dough thinly. Then, cut out crescent shapes with a pastry cutter or knife. You can also try different shapes like spirals or braids to make your gipfeli unique.

  • Use a light touch when handling the dough to avoid stretching or tearing it.
  • Make sure the dough is at room temperature before shaping to ensure it’s pliable and easy to work with.
  • Don’t overwork the dough, as this can lead to a dense and tough texture.

By following these tips and practicing, you’ll make beautiful and tasty homemade gipfeli. These will impress your friends and family. Shaping gipfeli like a pro is achievable with patience and practice, using a traditional Swiss pastry recipe.

Baking Temperature and Timing Guide

To make perfect gipfeli, following a good recipe is key. Paying attention to baking temperature and timing is crucial. You can find easy gipfeli recipes online, but knowing how to bake is important.

When baking gipfeli, watch the temperature and timing closely. Here are some important points to remember:

  • Preheat the oven to the correct temperature, usually around 375°F (190°C).
  • Place the gipfeli on a baking sheet lined with parchment paper, leaving enough space between each pastry.
  • Bake for 15-20 minutes, or until the gipfeli are golden brown.

Proper Oven Settings

Make sure your oven is at the right temperature before baking. An easy gipfeli recipe can go wrong if the oven temperature is off.

Visual Doneness Indicators

Look for visual signs of doneness, like a golden brown color and a firm texture. A well-baked gipfeli should have a delicate crust and a soft inside.

By following these tips and using a reliable gipfeli recipe, you’ll make delicious, flaky pastries. Always keep an eye on the baking temperature and timing for the best results.

Gipfeli RecipeBaking TemperatureBaking Time
Classic Gipfeli375°F (190°C)15-20 minutes
Chocolate Gipfeli350°F (180°C)12-15 minutes

Troubleshooting Common Gipfeli Problems

When making swiss pastry recipe, including homemade gipfeli, you might face some issues. Overproofing or underbaking can be a real challenge. But, there are ways to fix these problems. It’s key to know what causes them and how to avoid them.

Some common problems you might run into include:

  • Overproofing, which can cause the gipfeli to collapse
  • Underbaking, resulting in a dense or raw interior
  • Incorrect lamination, leading to a lack of flaky layers

To avoid these issues, it’s important to follow the swiss pastry recipe closely. Make sure your ingredients and tools are top-notch. Also, watch the proofing and baking times carefully. This will help you get the right texture and taste in your homemade gipfeli.

By knowing the common problems and how to prevent them, you can make perfect homemade gipfeli every time. With a bit of practice and patience, you’ll get the hang of making delicious swiss pastry recipe gipfeli.

Common ProblemCauseSolution
OverproofingToo much yeast or overproofing timeReduce yeast amount or proofing time
UnderbakingInsufficient baking time or temperatureIncrease baking time or temperature
Incorrect laminationIncorrect folding or rolling techniquePractice lamination technique to achieve flaky layers

Storage and Reheating Tips

Mastering the easy gipfeli recipe is just the start. Storing and reheating your gipfeli right is key to keeping it fresh and tasty. The right storage helps keep your gipfeli’s texture and flavor just right.

To store your gipfeli, use an airtight container at room temperature for up to 2 days. For longer storage, freeze it for up to 2 months. Wrap it tightly in plastic wrap or foil to avoid freezer burn.

Proper Storage Methods

  • Store gipfeli in an airtight container at room temperature
  • Freeze gipfeli for up to 2 months
  • Wrap gipfeli tightly in plastic wrap or aluminum foil before freezing

Reheating Instructions

To reheat, bake at 350°F (180°C) for 5-10 minutes. Or, use the microwave for 20-30 seconds. This will warm it up nicely.

Freezing Guidelines

Freezing your gipfeli? Label the container with date and contents. Store it at 0°F (-18°C) or below. To eat, thaw overnight in the fridge and then reheat.

Follow these tips to enjoy your gipfeli recipe longer. It keeps the flavor and texture delicious.

Storage MethodStorage TimeReheating Instructions
Airtight container at room temperatureUp to 2 daysBake in oven at 350°F (180°C) for 5-10 minutes
FreezerUp to 2 monthsReheat in oven at 350°F (180°C) for 5-10 minutes or in microwave for 20-30 seconds

Creative Variations and Fillings

When making homemade gipfeli, you can try many things. Add chocolate or nuts for a new twist on the swiss pastry recipe. Just put your filling between the dough layers before baking.

Here are some filling ideas:

  • Chocolate chips or shavings
  • Chopped nuts, such as almonds or hazelnuts
  • Dried fruit, like cranberries or cherries
  • Caramel or nutella

For a savory gipfeli, use cheese, herbs, or spices. Try different doughs like whole wheat or rye for more flavor. With creativity, your homemade gipfeli can become a special swiss pastry recipe.

Remember, making great gipfeli is all about having fun and being creative. Try new fillings and flavors. You might discover a delicious new treat!

Conclusion: Mastering the Art of Swiss Gipfeli

Our journey through gipfeli has shown us that mastering this Swiss pastry is a challenge. It requires patience, practice, and a love for Swiss baking traditions. Now, you have the knowledge to make your own gipfeli at home.

Creating perfect gipfeli is all about following each step carefully. This includes the lamination, shaping, and baking. Your first tries might not be perfect, but that’s okay. Enjoy the process of getting better with each batch.

Sharing your gipfeli with others or enjoying them yourself is the best part. It’s about the joy of making something special. So, let your creativity flow and keep exploring this Swiss tradition. Happy gipfeli-making!

FAQ

What is a gipfeli?

A gipfeli is a Swiss pastry that tastes like a croissant but is flakier and butterier.

How does a gipfeli differ from a French croissant?

Gipfeli and French croissants are both flaky pastries. But gipfeli are shaped like a crescent and taste richer and butterier.

What are the essential ingredients for making gipfeli?

To make gipfeli, you need good flour, butter, yeast, and a bit of salt. The right mix and method are key for the perfect taste and texture.

What kind of equipment is needed to bake gipfeli at home?

You’ll need basic kitchen tools like bowls, a rolling pin, and baking sheets. A pastry brush and dough scraper can also help with the dough.

How do you properly proof and rise the dough for gipfeli?

To proof and rise the dough right, create a good environment for yeast. Watch the dough closely and handle it gently during these steps.

What are some common issues that can arise when making gipfeli, and how can they be troubleshooted?

Issues like overproofing, underbaking, and lamination problems can happen. Knowing these problems and how to fix them can help you avoid and solve them.

How should gipfeli be stored and reheated to maintain their freshness?

Store gipfeli in an airtight container or the freezer. To reheat, use the oven or toaster. This keeps the pastry flaky and tasty.

Can you make creative variations or fillings with gipfeli?

Yes! You can fill gipfeli with chocolate or nuts. Try savory or fruit fillings for a twist on the traditional.

How to Make Asparagus: Simple Asparagus Recipe

Asparagus is a tasty and flexible vegetable. It can be cooked in many ways. With lots of asparagus recipes out there, starting to cook asparagus is easy. Whether you’re new to cooking or have experience, learning to cook asparagus can make your meals better and healthier.

Cooking asparagus is fun and rewarding. You can try different recipes and techniques. From simple steaming to complex roasting, there’s a method for everyone. By following a simple recipe and using the right tools and ingredients, you can make delicious, healthy meals that highlight asparagus’s unique flavor and texture.

Key Takeaways

  • Asparagus is a versatile vegetable that can be prepared using various asparagus cooking methods
  • There are numerous asparagus recipes available to suit different tastes and dietary preferences
  • Mastering the art of asparagus preparation can elevate your meals and provide essential nutrients
  • Simple asparagus recipes can be a great starting point for beginners
  • Exploring different asparagus cooking methods and techniques can help you create delicious and healthy meals
  • Using the right tools and ingredients is crucial for preparing perfect asparagus dishes

Understanding Asparagus: A Versatile Spring Vegetable

Asparagus is a favorite spring veggie packed with asparagus nutrition benefits. It’s great for a healthy diet. Its unique taste and texture make it perfect for many dishes.

There are green, white, and purple types of asparagus. Each has its own taste and look. Asparagus is in season from February to June, peaking in March to May.

Asparagus is full of vitamins A, C, and K, and is low in calories. Knowing about the types of asparagus helps you pick and prepare it wisely.

Different Types of Asparagus

  • Green asparagus: This is the most common type. It tastes slightly sweet and tender.
  • White asparagus: Grown underground, it’s milder than green asparagus.
  • Purple asparagus: It has a richer flavor than green asparagus. It’s often used in special dishes.

Seasonal Availability

Asparagus is available from February to June. The best time is March to May. This is when it’s freshest and tastiest.

Nutritional Benefits

Asparagus is full of nutrients. It’s low in calories but rich in vitamins A, C, and K. It’s a great choice for a healthy diet.

Selecting the Perfect Asparagus Spears

Choosing the right asparagus is key to a great dish. Look for spears that are firm, straight, and bright green. Stay away from wilted, bent, or brown-tipped spears, as they might be old or damaged.

Think about the thickness of the spears too. Thicker spears are great for grilling or roasting. They can handle high heat well. Thinner spears are better for sautéing or steaming because they cook fast and evenly.

  • Choose spears with tightly closed buds, as these will be more tender and flavorful.
  • Avoid spears with open or flowering buds, as these can be bitter and tough.
  • Consider the season and choose spears that are in season, as these will be fresher and more flavorful.

By following these tips, you can pick the best asparagus spears for your dish. Whether you’re grilling, roasting, or sautéing, the right spears will make a big difference.

Essential Tools and Ingredients for How to Make Asparagus Recipe

To make a tasty asparagus dish, you need the right tools and ingredients. A well-stocked kitchen is key to a great final product.

Start by getting the basic kitchen equipment. You’ll need a pot, steamer basket, and cutting board. These help clean, trim, and cook the asparagus. Sharp knives and a colander are also useful for prep.

Kitchen Equipment Needed

  • Pot
  • Steamer basket
  • Cutting board
  • Sharp knives
  • Colander

For asparagus ingredients, start with olive oil, salt, and pepper. These basics enhance the asparagus’s natural taste. You can also add garlic, lemon juice, and parmesan for extra flavor.

Basic Ingredients List

  • Olive oil
  • Salt
  • Pepper

With the right tools and ingredients, you’re ready to make a delicious asparagus dish.

Properly Cleaning and Trimming Asparagus

Cleaning asparagus is key before cooking. Start by rinsing it under cold water to get rid of dirt. Then, dry it with a paper towel to remove extra moisture.

Next, trim the asparagus to get rid of tough parts. Cut off the bottom inch of each spear. You can also peel it to remove tough skin. Here’s how to clean and trim asparagus right:

  • Rinse the asparagus under cold running water
  • Pat the asparagus dry with a paper towel
  • Trim the ends of the asparagus, removing any tough or woody parts
  • Peel the asparagus, if desired, to remove any tough skin

Cleaning and trimming asparagus well can really improve its taste and texture. By following these steps, your asparagus will be clean, tender, and ready to cook.

Be gentle when handling asparagus to avoid breaking it. With the right cleaning and trimming, you can enjoy healthy asparagus dishes all year.

StepDescription
1Rinse the asparagus under cold running water
2Pat the asparagus dry with a paper towel
3Trim the ends of the asparagus, removing any tough or woody parts
4Peel the asparagus, if desired, to remove any tough skin

Basic Preparation Methods

Cooking asparagus can be easy and tasty. There are many ways to do it, like blanching. This method involves boiling the spears briefly. It keeps them green and crunchy.

Other methods include steaming, roasting, and grilling. Each one needs just a few tools and ingredients. For instance, steaming needs a steamer basket and boiling water. Roasting requires a hot oven and a baking sheet.

Blanching Technique

Blanching asparagus is quick and simple. Just boil the spears for 3-5 minutes. Then, cool them in an ice bath to stop cooking.

Steaming Process

Steaming asparagus is good for keeping nutrients and flavor. Place the spears in a steamer basket over boiling water. Cover and cook for 4-6 minutes.

Roasting Instructions

Roasting asparagus brings out its sweetness. Preheat the oven to 425°F (220°C). Toss the spears with olive oil, salt, and pepper. Cook for 12-15 minutes.

Grilling Guidelines

Grilling asparagus adds a smoky taste. Brush the spears with olive oil. Grill over medium-high heat for 3-5 minutes on each side.

MethodEquipmentCooking Time
BlanchingPot, boiling water, ice bath3-5 minutes
SteamingSteamer basket, pot, boiling water4-6 minutes
RoastingOven, baking sheet, olive oil12-15 minutes
GrillingGrill, olive oil3-5 minutes per side

Seasoning Your Asparagus

Seasoning asparagus opens up a world of flavors. You can use salt, pepper, garlic powder, and paprika to enhance its taste. For a zesty twist, squeeze some lemon juice or sprinkle parmesan cheese on top.

Here are some popular seasoning options for asparagus:

  • Salt and pepper: a classic combination that enhances the natural flavor
  • Garlic powder: adds a savory and aromatic flavor
  • Paprika: provides a smoky and slightly sweet flavor
  • Lemon juice: adds a bright and tangy flavor
  • Parmesan cheese: adds a nutty and savory flavor

Trying different asparagus recipes and seasonings can lead to your favorite way to enjoy asparagus. Whether it’s a simple or complex mix, the goal is to highlight the asparagus’s natural taste.

Exploring various seasoning options and asparagus recipes can introduce new flavors. So, don’t hesitate to be creative and find your ideal seasoning mix.

Common Cooking Mistakes to Avoid

When cooking asparagus, it’s key to know common mistakes. These can ruin your dish. Overcooking asparagus is a big mistake. It makes the asparagus mushy and not tasty.

Some common mistakes to watch out for include:

  • Overcooking, which can be avoided by checking the asparagus frequently during the cooking process
  • Seasoning errors, such as adding too much salt or not enough seasoning
  • Storage mistakes, like storing asparagus at room temperature, which can cause it to spoil quickly

To avoid these mistakes, it’s crucial to understand the basics of asparagus cooking. Following a tried-and-true recipe is key. By being mindful of these common errors, you can ensure that your asparagus dish turns out delicious and enjoyable.

MistakeEffectPrevention
OvercookingMushy asparagusCheck asparagus frequently during cooking
Seasoning errorsUnappetizing flavorUse the right amount of seasoning
Storage mistakesSpoilageStore asparagus in the refrigerator

Pairing and Serving Suggestions

Asparagus is a versatile vegetable that pairs well with many main dishes. Try it with grilled chicken, pan-seared salmon, or roasted beef. These options complement asparagus’s earthy flavor, making for a balanced meal.

Consider serving asparagus as a side dish or adding it to salads, pasta, and risottos. It also goes great with creamy sauces like hollandaise or beurre blanc. Here are some favorite ways to enjoy asparagus:

  • Grilled chicken with roasted asparagus and quinoa
  • Pan-seared salmon with steamed asparagus and brown rice
  • Roasted beef with sautéed asparagus and roasted vegetables

Main Dish Combinations

Asparagus pairs well with a variety of main dishes. It’s great with grilled chicken, pan-seared salmon, and roasted beef. These combinations make for a satisfying meal.

Wine Pairing Recommendations

For wine, asparagus goes well with crisp white wines like Sauvignon Blanc and Pinot Grigio. These wines enhance asparagus’s delicate flavor. For something richer, try asparagus with hollandaise or beurre blanc and a glass of Chardonnay or Champagne.

WinePairing Suggestions
Sauvignon BlancGrilled chicken, steamed asparagus, and quinoa
Pinot GrigioPan-seared salmon, roasted asparagus, and brown rice
ChardonnayRoasted beef, sautéed asparagus, and roasted vegetables

Storage and Leftover Management

Keeping asparagus fresh is key. To store it, wrap it in a paper towel or plastic bag and put it in the fridge. This keeps it moist and fresh for 3-5 days. You can also freeze it, blanched or unblanched, for soups, stews, and casseroles.

Reheating asparagus leftovers safely is important. Heat it to 165°F (74°C) to avoid foodborne illness. Here are some tips for handling asparagus leftovers:

  • Store leftovers in a covered container in the fridge for up to 3 days.
  • Freeze leftovers for later use in soups, stews, or casseroles.
  • Reheat leftovers to 165°F (74°C) for food safety.

By following these tips, you can enjoy asparagus while reducing waste. Proper storage and handling are key to keeping it fresh and safe.

Asparagus is a versatile vegetable that can be stored and reheated safely with proper techniques.

Always check the freshness and safety of your asparagus before eating it. Enjoy this nutritious veggie in many dishes.

Storage MethodShelf Life
Refrigeration3-5 days
FreezingUp to 8 months

Conclusion: Mastering the Art of Asparagus Preparation

Through this guide, you’ve learned how to master asparagus cooking. Choosing fresh asparagus spears and using the right techniques are key. Seasoning with care brings out the true flavor and texture of this spring veggie.

With practice, you’ll become skilled at making delicious asparagus dishes. These dishes will impress everyone you share them with. You’ll be able to create beautiful and tasty asparagus dishes with ease.

Success in cooking asparagus comes from paying attention to the details. From trimming the ends to choosing the best cooking method, these tips will help you. Follow them to make asparagus dishes that will wow your guests.

Now that you know how to cook asparagus, start exploring its many uses. This nutritious veggie offers endless possibilities for delicious meals. So, use your new skills to create amazing asparagus dishes and enjoy the process.

FAQ

What are the different types of asparagus?

Asparagus comes in three main types: green, white, and purple. Each type has its own unique taste and look.

When is asparagus in season?

Asparagus is in season from February to June. The best time is from March to May.

What are the nutritional benefits of asparagus?

Asparagus is packed with vitamins A, C, and K. It’s also low in calories.

How do I select the perfect asparagus spears?

Choose spears that are firm, straight, and bright green. Avoid wilted, bent, or brown spears.

What kitchen equipment do I need to make asparagus?

You’ll need a pot, steamer basket, and cutting board. Optional tools include a vegetable peeler and sharp knife.

How do I properly clean and trim asparagus?

Rinse under cold water, pat dry, and trim the ends. You can also peel it if you like.

What are the basic preparation methods for asparagus?

Common methods include blanching, steaming, roasting, and grilling.

How can I season my asparagus to enhance the flavor?

Season with spices and herbs like salt, pepper, garlic powder, paprika, lemon juice, or parmesan cheese.

What are some common cooking mistakes to avoid when making asparagus?

Avoid overcooking, bad seasoning, and wrong storage.

What are some good pairing and serving suggestions for asparagus?

Asparagus goes well with grilled chicken or pan-seared salmon. It’s great as a side or in salads, pasta, and risottos. It also pairs well with crisp white wines, like Sauvignon Blanc.

How should I store and manage leftover asparagus?

Store in the fridge, wrapped in a paper towel or plastic bag. Use within 3-5 days. You can also freeze it for longer.

Mouthwatering Cube Steak Crock Pot Meal – Family Favorite

A delicious cube steak crock pot recipe is perfect for a family dinner. It’s easy to make with little effort. This meal is both flavorful and tender, making it a great choice for family gatherings.

A cube steak crock pot meal is an excellent choice for a family dinner. It’s easy to prepare and cooks perfectly in a crock pot. This recipe is perfect for those who want a quick and delicious meal for their family.

Key Takeaways

  • A cube steak crock pot recipe is perfect for a family dinner
  • The recipe is easy to prepare and requires minimal effort
  • A cube steak crock pot meal is a delicious and flavorful option
  • The recipe can be cooked to perfection in a crock pot
  • A cube steak crock pot meal is a great option for those looking for a quick and easy recipe
  • The recipe is perfect for a family dinner or a special occasion

Understanding Cube Steak: Your Guide to This Budget-Friendly Cut

Cube steak is a favorite among home cooks because it’s budget-friendly and versatile. It’s made from tougher cuts like top round or sirloin, tenderized by machines. This makes it tender and easy to chew, perfect for many recipes.

Choosing quality meat is key. Look for fresh cube steak with a good texture. You can find it in most supermarkets, labeled as “cube steak” or “minute steak.” Brands like Tyson and Swift are known for their quality.

What Makes Cube Steak Special

Cube steak stands out because it’s affordable and full of flavor. It’s great for cube steak sandwiches and stews. It’s also a budget-friendly choice compared to pricier meats.

Best Grades and Cuts to Choose

Choosing the right cube steak is crucial. Here are some top options:

  • USDA Choice: Known for tenderness and flavor.
  • USDA Select: Offers quality at a slightly lower price.
  • Top Round: Leaner and sweeter than other cuts.

How to Select Quality Cube Steak

To pick quality meat, look for fresh cube steak. It should smell good and feel firm. Avoid damaged packages and check the expiration date. These tips help you get the best cube steak for a tasty meal.

Essential Ingredients for Your Crock Pot Cube Steak

To make a tasty crock pot cube steak recipe, you need the right crock pot ingredients. These will make your dish flavorful and tender, loved by all. Quality ingredients are key for slow cooking.

A classic cube steak recipe mixes meats, veggies, and spices. You’ll need:

  • 1-2 pounds of cube steak
  • 1 onion, sliced
  • 3 cloves of garlic, minced
  • 1 cup of beef broth
  • 1 tablespoon of tomato paste
  • 1 teaspoon of dried thyme
  • Salt and pepper, to taste

These crock pot ingredients are a great start. Feel free to add mushrooms, bell peppers, or potatoes to your liking. The goal is to balance flavors with your cube steak.

Choose top-notch ingredients for the best taste. Your cube steak is the main attraction. With the right mix and slow cooking, you’ll get a delicious crock pot cube steak recipe.

Preparing Your Cube Steak for Slow Cooking

To make your cube steak tender and flavorful, you need to prepare it right for slow cooking. This involves seasoning, pre-searing, and using marinades. These steps will improve the taste and texture of your steak.

Slow cooking is all about cooking the steak at a low temperature for a long time. This breaks down the meat’s connective tissues, making it tender and juicy. Begin by seasoning the steak to enhance its natural flavor.

Proper Seasoning Techniques

Seasoning is key when preparing cube steak for slow cooking. Use herbs and spices like garlic, onion, and paprika to add flavor. Choose seasonings that work well for slow cooking.

Pre-Searing Tips

Pre-searing is another crucial step. It involves searing the steak in a hot pan before slow cooking. This step locks in juices and adds a rich flavor.

Marinade Options

Marinades can also enhance your cube steak’s flavor. Mix ingredients like soy sauce, Worcestershire sauce, and brown sugar for a tasty marinade. By combining seasoning, pre-searing, and marinades, you’ll get a delicious, tender steak through slow cooking.

The Perfect Cube Steak Crock Pot Recipe

A cube steak recipe is a tasty and simple choice for dinner. This crock pot meal is ideal for family dinners and is easy to make. You’ll need a pound of cube steak, olive oil, and your favorite seasonings to start.

Some key ingredients to keep in mind when making this recipe include:

  • 1 pound of cube steak
  • 1/4 cup of olive oil
  • 1 teaspoon of salt
  • 1/2 teaspoon of black pepper
  • 1/2 teaspoon of garlic powder

This recipe is great for busy days because it cooks in a crock pot. Just add all the ingredients and cook on low for 6-8 hours. You’ll get a tender, flavorful steak that everyone will love.

This recipe is also very flexible. You can serve it with mashed potatoes, steamed veggies, or a salad. You can even use leftovers for sandwiches or wraps.

In summary, this cube steak crock pot meal is perfect for anyone looking for a tasty and easy recipe. It’s great for weeknight dinners or special occasions. So, why not try it and see how delicious it is?

Time and Temperature Guidelines

Cooking cube steak in a crock pot needs the right time and temperature. The goal is to make it tender and flavorful. The cooking time depends on the steak’s size and thickness, and how you like it cooked.

Temperature is key to a great dish. Low heat is best for cube steak. It makes the meat tender. Always follow the crock pot’s instructions for temperature.

Low vs High Heat Settings

Cooking on low heat takes longer, from 8 to 10 hours. It’s perfect for a ready-to-eat meal when you get home. High heat cooks it faster, in 4 to 6 hours, but might make it a bit tougher.

Optimal Cooking Duration

The best cooking time for cube steak is 6 to 8 hours on low heat. This ensures even cooking and prevents overcooking. Check the steak often to get it just right.

By following these guidelines, you’ll get a delicious, tender cube steak. Always prioritize food safety and handle the steak carefully to avoid health risks.

Cooking TimeTemperature SettingResult
8-10 hoursLow heatTender and flavorful
4-6 hoursHigh heatSlightly tougher texture

Companion Side Dishes and Serving Suggestions

Side dishes are key to a great family dinner. For a cube steak crock pot meal, try different flavors and textures. Mashed potatoes, roasted vegetables, and garlic bread are all good choices.

Make your family dinner special with thoughtful serving ideas. Here are a few to start with:

  • Pair your cube steak with steamed broccoli or green beans for a healthy meal
  • Offer a variety of salads or side dishes to please everyone
  • Try corn on the cob or grilled vegetables for a summer vibe

Think about presentation and ambiance too. Use tablecloths, candles, and flowers to warm up the atmosphere. With these ideas, your family dinner will be unforgettable.

Other side dishes to consider are baked beans, coleslaw, and fried okra. Choose sides that match your cube steak’s flavors and textures. Don’t be afraid to try new things. With a bit of planning, you can make a dinner that’s both tasty and memorable.

Troubleshooting Common Cooking Issues

When cooking cube steak in a crock pot, several issues can arise. These include tough meat and inconsistent sauce consistency. To prevent these problems, it’s important to understand their causes and take corrective measures.

One common problem is tough meat. This can happen if you overcook the steak or use low-quality cube steak. To avoid this, pay close attention to cooking time and temperature. Also, choose the right grade and cut of cube steak, as some types are more prone to becoming tough.

Another issue is sauce consistency. Achieving the right sauce consistency is key for a delicious meal. It can be challenging, but it’s essential for a satisfying dish.

Preventing Tough Meat

  • Choose the right grade and cut of cube steak
  • Avoid overcooking, as this can lead to tough meat
  • Use a meat thermometer to ensure the correct internal temperature

Sauce Consistency Solutions

To achieve the right sauce consistency, balance the liquid and thickening agents. Use a mix of broth and flour or cornstarch to thicken. Adjusting the seasoning can also enhance the flavor and texture of the sauce.

Seasoning Adjustments

Making seasoning adjustments is crucial to bring out the flavors. This involves adding herbs and spices and adjusting salt and pepper. By doing this, you can create a delicious and well-balanced meal.

Cooking IssueSolution
Tough MeatChoose the right grade and cut of cube steak, avoid overcooking
Sauce ConsistencyBalance the amount of liquid and thickening agents, adjust seasoning
SeasoningAdjust the amount of herbs and spices, salt and pepper

Storage and Reheating Tips

Storing and reheating leftovers safely is key. Cool your cube steak to room temperature in two hours. Then, refrigerate or freeze it in airtight containers. For reheating, use the microwave, oven, or stovetop. Make sure the internal temperature hits 165°F (74°C) to avoid foodborne illness.

Here are some helpful tips for storing and reheating leftovers:

  • Use shallow containers to cool leftovers quickly and prevent bacterial growth.
  • Label and date containers so you can easily keep track of how long they’ve been stored.
  • Avoid overcrowding the refrigerator or freezer, as this can lead to uneven cooling and reheating.

By following these storage tips and reheating guidelines, you can enjoy your cube steak leftovers safely and conveniently. Always check leftovers for spoilage before eating. If unsure, throw them away.

Conclusion: Mastering Your Cube Steak Crock Pot Creation

The cube steak crock pot meal is a hit with families. It’s affordable and tastes great. By using the tips from this guide, you’ll learn to make a delicious cube steak in your slow cooker.

For a great crock pot meal, season well, pre-sear, and be patient. Try out different flavors and sides to make your cube steak just right. Soon, you’ll be making this tasty dish all the time.

FAQ

What is cube steak, and why is it a budget-friendly cut?

Cube steak is a thin, tender cut from the cow’s round area. It’s tenderized, making it perfect for quick cooking. This makes it a great, affordable choice for meals.

What are the best grades and cuts of cube steak to choose?

Look for USDA Choice or Select grades for the best flavor and tenderness. The top or bottom round cuts are the most affordable and easy to find.

What are the essential ingredients needed for a crock pot cube steak recipe?

You’ll need cube steak, broth, onions, garlic, and seasonings like salt and pepper. Add potatoes, carrots, and mushrooms for a full meal.

How should I prepare the cube steak for slow cooking in a crock pot?

Season the steak with salt, pepper, and spices. Pre-searing can lock in flavors. Marinating also tenderizes the meat and boosts taste.

What are the optimal time and temperature settings for cooking cube steak in a crock pot?

Cook on low for 6-8 hours or high for 3-4 hours. This ensures the meat is tender and flavors are rich.

What are some good companion side dishes to serve with crock pot cube steak?

Try mashed potatoes, roasted veggies, or buttered noodles. A green salad is also great. These sides complement the steak well.

How can I troubleshoot common cooking issues with crock pot cube steak?

Choose quality steak and avoid overcooking to prevent toughness. For a thicker sauce, use a cornstarch slurry. Adjust seasoning as needed.

How should I store and reheat leftover crock pot cube steak?

Store in an airtight container in the fridge for 3-4 days. Reheat in a saucepan or microwave, keeping it warm but not overcooked.

Easy Crockpot Steak and Potatoes Recipe – Delicious Slow Cooker Meal

Imagine coming home to a warm, comforting meal that’s been cooking all day. Our easy crockpot steak and potatoes recipe is perfect for a delicious dinner. It’s simple to make and will impress your family and friends.

This recipe is great for any night or special occasion. It’s easy to make a tasty meal with little effort. Just add your ingredients to the slow cooker and let it cook for you.

Key Takeaways

  • Our easy crockpot steak and potatoes recipe is a simple and delicious meal solution
  • The slow cooker steak and potatoes recipe is perfect for a weeknight dinner or a special occasion
  • This recipe requires minimal effort and can be prepared in just a few minutes
  • The easy crockpot steak and potatoes recipe is a great way to enjoy a home-cooked meal without spending hours in the kitchen
  • The slow cooker steak and potatoes recipe is a great option for a stress-free dinner
  • This recipe is perfect for families and individuals who want to enjoy a delicious and easy meal

Why Choose This Easy Crockpot Steak and Potatoes Recipe

This recipe is perfect for a busy day. You can just throw everything into the crockpot and forget about it. When you’re done, you’ll have a delicious meal that everyone will love.

This recipe has many benefits. It’s cheap to make and can feed a lot of people. It’s also great for family dinners because it’s easy to prepare and can be served with many sides. Some of the benefits include:

  • Time-saving: simply add all the ingredients to the crockpot and let it cook
  • Cost-effective: uses affordable ingredients and can feed a large family
  • Perfect for family dinners: easy to make and can be served with a variety of sides

This recipe is a great choice for anyone looking for a tasty and easy meal. The combination of a delicious steak and potatoes with the ease of preparation makes it perfect for a family dinner.

This recipe is sure to become a favorite in your home. It’s easy to make and stress-free. So why not try it and enjoy a delicious meal with your family?

BenefitsDescription
Time-savingSimply add all the ingredients to the crockpot and let it cook
Cost-effectiveUses affordable ingredients and can feed a large family
Perfect for family dinnersEasy to make and can be served with a variety of sides

Essential Equipment and Ingredients

To make this tasty easy crockpot steak and potatoes recipe, you’ll need some basic stuff. You’ll need a crockpot, a big bowl, and some common kitchen tools. For the ingredients, you’ll need steak, potatoes, onions, garlic, and spices for extra flavor.

Here’s what you’ll need for this slow cooker steak and potatoes recipe:

  • 1-2 pounds of steak
  • 2-3 large potatoes
  • 1 large onion
  • 3 cloves of garlic
  • Salt and pepper to taste
  • Other spices and seasonings of your choice

Having the right stuff is key to making this easy crockpot steak and potatoes recipe a hit. With these basics, you’ll make a tasty meal perfect for any time.

You might also want to add some extra things to make your dish even better. Consider adding:

  • Fresh herbs, such as thyme or rosemary
  • A sprinkle of paprika or other spices
  • A squeeze of fresh lemon juice

By using this slow cooker steak and potatoes recipe and the right tools and ingredients, you’ll make a meal that everyone will love.

IngredientQuantity
Steak1-2 pounds
Potatoes2-3 large
Onion1 large
Garlic3 cloves

Selecting the Perfect Cut of Steak for Slow Cooking

Choosing the right steak is key for a tasty best crockpot steak and potatoes recipe. Even tough cuts become tender and flavorful with slow cooking. For a slow cooker steak and potatoes dish, pick a cut that’s good for long cooking and soaks up flavors well.

Chuck roast, round steak, and flank steak are top picks for crockpot cooking. They’re tough and full of connective tissue. This tissue breaks down, making the meat tender and juicy.

Best Steak Cuts for Crockpot Cooking

  • Chuck roast: a classic choice for slow cooking, it’s tender and flavorful
  • Round steak: a leaner cut, it’s perfect for those looking for a healthier option
  • Flank steak: a flavorful cut, it’s great for those who want a lot of flavor in their dish

Budget-Friendly Options

Looking for affordable options? Skirt steak or tri-tip are great choices. They’re cheaper but just as tasty as pricier cuts.

What to Avoid

When picking a steak for slow cooking, avoid lean cuts like sirloin or tenderloin. They can get dry and tough. Also, skip very thick cuts as they might not cook evenly.

Cut of SteakPrice RangeSuitability for Slow Cooking
Chuck Roast$5-$10Excellent
Round Steak$4-$8Good
Flank Steak$6-$12Excellent

Potato Selection and Preparation Guidelines

Choosing the right potatoes is key for a great steak and potato slow cooker dish. Opt for high-starch potatoes like Russet or Yukon Gold. These keep their shape well and offer a nice contrast to the steak.

To prep your potatoes, peel and chop them into small pieces. You can keep the skin on for extra fiber and texture. Make sure to remove any eyes or blemishes for even cooking. Then, soak the chopped potatoes in cold water to remove excess starch. After that, drain and pat them dry with a paper towel.

Here are some tips for selecting and preparing the perfect potatoes:

  • Choose high-starch potatoes like Russet or Yukon Gold
  • Peel and chop potatoes into bite-sized pieces
  • Remove eyes and blemishes for even cooking
  • Soak chopped potatoes in cold water to remove excess starch

By following these simple guidelines, you’ll be well on your way to creating a delicious steak and potato slow cooker dish. With the right potatoes and a little preparation, you can enjoy a tasty slow cooker steak and potato dinner any night of the week.

Potato VarietyCharacteristicsSuitability
RussetHigh starch, dry textureExcellent for slow cooking
Yukon GoldButtery, yellow fleshGreat for slow cooking and roasting

Step-by-Step Preparation Method

To make the easy crockpot steak and potatoes recipe, start with morning prep. Chop the onions and garlic, and get the steak and potatoes ready. This makes layering in the crockpot easier.

Morning Prep Work

In the morning, prepare the ingredients for the slow cooker steak and potatoes. Chop the onions and garlic, and season the steak with your favorite spices. Choose a cut of steak like a chuck roast or a round steak for slow cooking.

Layering Ingredients

After preparing the ingredients, layer them in the crockpot. Start with onions and garlic, then add potatoes. Next, put in the steak and any other ingredients like carrots or peas. Make sure to leave space for even cooking.

Setting Your Crockpot

Set your crockpot to the right temperature and cooking time. Cook on low for 8-10 hours or on high for 4-6 hours. This ensures the steak is tender and the potatoes are cooked. Follow these steps for a delicious slow cooker steak and potatoes meal.

Seasoning and Marinade Options

Seasoning and marinade are key to a great crockpot steak and potatoes recipe. The right mix of herbs and spices can make a big difference. Start with basics like salt, pepper, and garlic powder for a solid base.

For more flavor, try making your own marinade. Mix soy sauce, Worcestershire sauce, and brown sugar for a tangy taste. Or, use store-bought marinades for a variety of flavors.

Look for marinades from Kraft and McCormick for different tastes. Always check the label to match your dish’s flavors. Experimenting with marinades can make your dish unforgettable.

Here are some tips for using marinades:

  • Always read the label and follow the instructions for use
  • Choose a marinade that complements the other ingredients in your dish
  • Don’t be afraid to experiment and try new flavors

By trying different seasonings and marinades, you can make a delicious crockpot steak and potatoes recipe. Whether using a slow cooker or oven, the right flavors can transform your dish.

Cooking Times and Temperature Settings

When cooking an easy crockpot steak and potatoes recipe, knowing the cooking times and temperature is key. To get tender and flavorful results, keep an eye on the temperature and time. Cook on low for 8-10 hours or on high for 4-6 hours for a slow cooker steak and potatoes dish.

Cooking the steak and potatoes at a low temperature for a long time is crucial. This makes the steak tender and juicy. The potatoes become creamy and soft, soaking up all the flavors.

To get the best results, use a meat thermometer to check the steak’s internal temperature. For medium-rare, it should be at least 130°F (54°C). For medium, it should be at least 140°F (60°C). Also, check the potatoes by inserting a fork or knife. If they slide in easily, they’re done.

Some tips for cooking an easy crockpot steak and potatoes recipe include:

  • Always brown the steak before adding it to the slow cooker to enhance the flavor
  • Use a variety of spices and herbs to add depth and complexity to the dish
  • Don’t overcook the steak or potatoes, as this can result in a tough and unappetizing texture

By following these guidelines and using a slow cooker, you can make a delicious and satisfying easy crockpot steak and potatoes recipe. It’s perfect for any occasion.

Troubleshooting Common Issues

When making a delicious steak and potato slow cooker dish, it’s key to know about common problems. By tackling these issues, your tasty slow cooker steak and potato dinner will be perfect. Tough meat is a common problem. You can fix it by cooking it longer or choosing a tender steak.

Mushy potatoes are another issue. To avoid this, don’t overcook them. It’s important to watch the cooking time and adjust the liquid. Here are some tips to solve common problems:

  • Check the steak’s tenderness by inserting a fork; if it’s still tough, cook for an additional 30 minutes.
  • Prevent mushy potatoes by cooking them for 6-8 hours on low heat.
  • Adjust the liquid levels by adding more broth or water if the dish seems too dry.

By using these tips, you can make a delicious steak and potato slow cooker dish. It will impress your family and friends. Always check the cooking time and adjust the seasoning. Then, you’ll enjoy a tasty slow cooker steak and potato dinner soon.

With these tips, you’re ready to make a delicious and flavorful dish. It’s perfect for any occasion. Whether it’s a special event or a weeknight dinner, a tasty slow cooker steak and potato dinner will be a hit.

IssueSolution
Tough MeatAdjust cooking time or use a more tender cut
Mushy PotatoesMonitor cooking time and adjust liquid levels
Dry DishAdd more broth or water

Serving Suggestions and Side Dishes

When serving your best crockpot steak and potatoes recipe, you have many options. Try it with steamed veggies, a fresh salad, or crusty bread for a complete meal.

Here are some great side dish ideas for slow cooker steak and potatoes:

  • Roasted veggies like asparagus or Brussels sprouts
  • Mashed potatoes for a cozy side
  • Garlic bread to soak up juices

To enhance your meal, add slow cooker gravy or sour cream. You can also play with seasonings and herbs for a special touch.

With these ideas, you can make a tasty and satisfying meal. It’s perfect for pleasing even the most finicky eaters. So, get creative and enjoy your best crockpot steak and potatoes recipe!

Conclusion: Mastering Your Crockpot Steak and Potatoes

Learning to make a tasty easy crockpot steak and potatoes recipe is easy. Just follow the steps and try out different flavors. You’ll soon be making slow cooker steak and potatoes that everyone will love.

Success comes from using the best ingredients and following cooking times. Don’t be afraid to try new flavors. With practice, you’ll become great at this dish. It’s perfect for any day of the week.

So, get creative in the kitchen. Use your crockpot to make amazing meals. Enjoy your cooking!

FAQ

What makes this crockpot steak and potatoes recipe so easy?

This recipe is simple because it needs little prep work. The slow cooker does most of the cooking. Just add the ingredients and let it simmer while you do other things.

What are the benefits of making this slow cooker steak and potato dish?

This recipe saves time, is affordable, and great for family dinners. The slow cooker makes it easy to cook without much effort. Plus, the ingredients are cheap, making it budget-friendly.

What type of steak is best for this crockpot recipe?

Chuck roast, round steak, and flank steak work well in the crockpot. These cuts get tender and flavorful when cooked slowly.

How should I prepare the potatoes for this dish?

Use Russet or Yukon Gold potatoes for the best taste. Peel and cut them into small pieces before adding to the crockpot.

Can I customize the seasoning and marinade for this recipe?

Yes, you can! Try classic flavors like salt, pepper, and garlic powder. Or, make your own marinade with soy sauce, Worcestershire sauce, and brown sugar. You can also buy a marinade for ease.

How long does this crockpot steak and potatoes recipe take to cook?

Cooking time varies with your crockpot settings. But, it usually takes 6-8 hours on low or 3-4 hours on high to get the meat tender.

What are some common issues I should watch out for when making this recipe?

Watch for tough meat, mushy potatoes, and wrong liquid levels. Follow the recipe closely and adjust as needed to avoid these issues.

What are some good side dish options to serve with this crockpot steak and potatoes?

Try steamed veggies, a fresh salad, mashed potatoes, or crusty bread. These sides enhance the meal and match the steak and potatoes’ flavors.

Creamy Chicken Pot Pie: Quick Homemade Recipe

Does comfort food really have to take hours to prepare? Or can a delicious creamy chicken pot pie be made fast? This question is at the heart of why many families love this dish. It’s perfect for busy weeknights when you want a hearty meal without spending hours in the kitchen.

Using cream of chicken soup as a key ingredient saves time. It also makes the dish creamy, which is a big part of its charm. Read on to find out how to make an easy chicken pot pie with cream of chicken soup that will be a hit at home.

Key Takeaways

  • This recipe offers a quick homemade version of a classic comfort food.
  • Using cream of chicken soup simplifies and enhances creaminess.
  • A quick chicken pot pie is ideal for busy families.
  • Rich flavors can be achieved with minimal preparation time.
  • This dish can become a staple in any household!

Introduction to Creamy Chicken Pot Pie

Creamy chicken pot pie is a beloved dish in American cuisine. It has its roots in traditional chicken pot pie, a comfort food loved by families for years. This dish combines tender chicken, savory vegetables, and a flaky crust, bringing nostalgia to family gatherings.

The beauty of creamy chicken pot pie is its versatility. Home cooks can adjust the ingredients to their liking or based on what they have at home. Some prefer the classic version, while others like to add their own twist with different seasonings and vegetables.

Using cream of chicken soup makes the dish easy to prepare, perfect for busy families. This ingredient boosts the flavor and adds to the dish’s creamy texture. Whether enjoyed on a cold evening or at a family event, creamy chicken pot pie remains a favorite, bringing warmth and comfort to all who enjoy it.

Why Choose a Quick Chicken Pot Pie?

A quick chicken pot pie is perfect for busy weeknights. It’s an easy dinner recipe that doesn’t take long to make. You can enjoy a comforting meal without spending hours in the kitchen.

Using frozen vegetables and pre-made pie crusts makes it even quicker. These ingredients save you time on chopping and baking. You get to enjoy a delicious dinner without the hassle.

You can also make it your own with whatever ingredients you have. Whether it’s leftover chicken or different veggies, you can get creative. A quick chicken pot pie is all about great taste and saving time, ideal for a busy schedule.

Key Ingredients for Your Creamy Chicken Pot Pie

Making a delicious chicken pot pie starts with knowing the right ingredients. The mix of flavors and textures turns a simple meal into a family favorite. Here, we look at the must-have ingredients for your creamy chicken pot pie. We also suggest some optional add-ins to make it even better.

Essential Ingredients

  • Cooked chicken: Shredded or cubed chicken breast offers a tender and savory base.
  • Cream of chicken soup: This serves as a creamy, rich sauce that ties everything together.
  • Frozen mixed vegetables: Peas, carrots, and corn provide color and nutrition, making the dish wholesome.
  • Pre-made pie crust: A flaky crust creates the perfect vessel for all the delicious pot pie flavors.

Optional Add-Ins for Extra Flavor

To make your chicken pot pie your own, try these extras:

  • Fresh herbs: Thyme or parsley can introduce fragrant notes.
  • Garlic: A few cloves can boost the dish’s overall flavor profile.
  • A splash of white wine: This can deepen the savory taste of the filling.

Choosing the right ingredients for your chicken pot pie makes for a tasty and fulfilling meal. Adding your own touches with optional ingredients lets you create a unique dish. This way, your pot pie will be a hit at any dinner.

Easy Chicken Pot Pie Recipe with Cream of Chicken Soup

Making an easy chicken pot pie recipe with cream of chicken soup is fun and simple. Start by preparing your ingredients well. Then, follow the cooking steps to make a meal that everyone will love. Here’s how to begin.

Prepping Ingredients for Success

First, collect all the ingredients you need. Cooking chicken efficiently saves time. Use a rotisserie chicken for its tenderness and flavor. If you have frozen veggies, thaw them quickly under water or in the microwave.

This prep work makes cooking easier and improves the taste of your dish.

Step-by-Step Cooking Instructions

Here’s how to make your chicken pot pie:

  1. Preheat the oven to 425°F (220°C).
  2. In a large bowl, mix cooked chicken, thawed veggies, and cream of chicken soup. Make sure everything is well combined.
  3. Roll out your pie crust and put it in a pie dish. Fill it with the chicken and veggie mix.
  4. Put another pie crust on top, sealing the edges by pressing. Cut slits for steam to get out.
  5. Bake for 30 to 35 minutes until the crust is golden.
  6. Let the pie cool a bit before you serve it.

Tips for Making the Perfect Pot Pie

Making a delicious chicken pot pie requires a few key techniques. The right pie crust and a creamy filling are essential. Here are some tips for the best pie crust and how to get a creamy texture.

Creating the Best Pie Crust

The crust is as important as the filling for a perfect pot pie. Here are some pie crust tips:

  • Butter vs. Shortening: Butter makes the crust flaky and flavorful. Mixing both for a richer taste is a good idea.
  • Chill Your Ingredients: Keep your butter and water cold. This helps the crust stay flaky.
  • Don’t Overwork the Dough: Mix just until combined. Overworking makes the crust tough.

How to Achieve Creaminess

A creamy filling is key for a great pot pie. To get the right consistency:

  • Thickening Agents: Use flour or cornstarch to thicken. Mix them in before baking.
  • Proper Cooking Time: Cook the filling until it’s just thick. This avoids a soggy pie.
  • Incorporate Dairy Gradually: Add cream or milk slowly. This helps control the creaminess.

Serving Suggestions for Chicken Pot Pie

Turning your chicken pot pie into a full meal is easy with the right serving ideas. Choose side dishes and drinks that make the meal richer and more fun.

Pairing Side Dishes

Think about side dishes that balance out the creamy chicken pot pie. Here are some ideas:

  • Side Salads: A crisp salad with a light vinaigrette dressing is a great contrast.
  • Roasted Vegetables: Seasonal veggies like carrots or asparagus add color and nutrients.
  • Crusty Bread: Artisan bread or baguette is perfect for dipping into the pot pie’s filling.

Perfect Beverage Choices

Choosing the right drinks can make your meal even better. Drinks should enhance the pot pie’s flavors without overpowering them.

  • White Wine: Sauvignon Blanc or Chardonnay complements the pot pie’s richness.
  • Sparkling Water: Sparkling water with lemon is a refreshing choice for those who don’t drink alcohol.
  • Homemade Iced Tea: Mint or lemon iced tea adds a refreshing touch to the savory flavors.

Storing and Reheating Your Pot Pie

Managing your chicken pot pie after cooking is key to keeping it tasty. Knowing how to store and reheat it is important. This ensures the pie stays flavorful and moist. Follow these tips for storing and reheating your pie.

Proper Storage Techniques

Start by letting the pie cool down before storing it. Here are some tips for storing chicken pot pie:

  • Use an airtight container or cover it tightly with foil or plastic wrap. This keeps the pie moist and prevents freezer burn.
  • Store leftover pie in the fridge for 3 to 4 days. Make sure it’s cooled first.
  • Freeze the pie for longer storage. Wrap it in plastic wrap and then foil to prevent freezer burn. A well-wrapped pie can last up to 3 months.
  • Freeze uncooked pie for a fresh-baked option. This way, you can bake it whenever you want.

Best Reheating Methods

Reheating chicken pot pie needs care to keep the crust crispy and filling creamy. Here are two methods:

MethodStepsBenefits
OvenPreheat the oven to 350°F (175°C). Cover the pie with foil to prevent over-browning. Bake for 25 to 30 minutes or until hot.Keeps the crust crispy and filling warm.
MicrowavePlace a slice on a microwave-safe plate. Cover with a damp paper towel. Heat on medium for 2 to 3 minutes, checking often.Fast and easy for single servings.

By using these storage and reheating tips, you can enjoy your chicken pot pie any time.

Variations on the Classic Recipe

Exploring new twists on the classic chicken pot pie is exciting. It can meet different dietary needs while keeping the taste great. Adding unique ingredients can make delicious alternatives for everyone.

Vegetarian Options

Looking for a vegetarian chicken pot pie? Try using mushrooms, lentils, or chickpeas instead of chicken. These add a meaty texture and a rich taste. Add lots of veggies like carrots, peas, and corn for extra nutrition.

Top it with a flaky crust or mashed potatoes for that cozy feel.

Variations for Different Diets

Chicken pot pie can be made for various diets. For a gluten-free option, use almond flour or a gluten-free mix for the crust. If you’re watching carbs, try a cauliflower mash instead of crust.

Each change keeps the dish comforting, making it fit into many meal plans.

Health Benefits of Homemade Chicken Pot Pie

Making chicken pot pie at home has many health perks. Unlike store-bought pies, homemade ones let you pick the ingredients. This means you get a meal full of nutrition, which is key for staying healthy.

Chicken is a lean protein that helps muscles grow and repair. Adding veggies like carrots, peas, and potatoes makes the pie tasty and nutritious. These veggies add vitamins and minerals, and they’re good for your digestive health.

Using healthy fats like olive oil or butter in moderation is good for your heart. This is a big plus compared to frozen pies, which often have bad fats. Making your own pie is a healthier choice.

The table below shows how homemade chicken pot pie compares to a store-bought one.

NutrientHomemade Chicken Pot PieStore-Bought Chicken Pot Pie
Calories350480
Total Fat18g25g
Saturated Fat7g12g
Protein25g15g
Fiber4g2g

Homemade chicken pot pie is a balanced meal. It’s tasty and packed with health benefits chicken pot pie offers. Cooking meals from scratch means your family gets better nutrition and stays healthy.

Why This Recipe is a Family Favorite

The creamy chicken pot pie is a favorite in many homes. Its rich flavors and comforting texture make it perfect for family dinners. It brings warmth and togetherness, becoming a staple in American homes.

Family traditions often include recipes passed down through generations. Chicken pot pie is no exception. Families share memories of making it together, creating a sense of closeness.

Baking a chicken pot pie is more than cooking; it’s a symbol of love and care. The aroma fills the house, building excitement. Enjoying it reminds families of good times, creating lasting memories.

The creamy chicken pot pie is more than food; it’s about heart and heritage. It evolves with family tastes but keeps its comfort food core. Every bite tells a story, strengthening family bonds.

Conclusion

The quick chicken pot pie recipe is a true gem of easy comfort food. It brings warmth and joy to any family gathering. Its simplicity and delicious taste make it perfect for busy weeknights.

Using cream of chicken soup boosts the flavor and saves time. This makes it a favorite in many family recipes.

Every bite of this creamy dish reminds us of the memories we make over meals. It’s great for cozy evenings or big family gatherings. It strengthens bonds and whets appetites.

Getting everyone involved in making it adds to the fun. The process is as enjoyable as the final dish.

Homemade meals are more than just food; they’re filled with love and care. They are the heart of lasting family traditions. So, get your ingredients ready, put on your apron, and make this classic dish in your kitchen.

Enjoy every moment and let the comforting aroma of this pot pie fill your home.

FAQ

What is a creamy chicken pot pie?

A creamy chicken pot pie is a cozy dish. It’s filled with cooked chicken, veggies, and a creamy sauce. Cream of chicken soup is a key part. It’s baked in a flaky pie crust.

How long does it take to make a quick chicken pot pie?

A quick chicken pot pie takes about 45 minutes to an hour. This time includes getting ready, putting the pie together, and baking it until it’s golden.

Can I use homemade chicken soup instead of cream of chicken soup?

Yes, you can use homemade chicken soup instead. Make sure it’s creamy enough. Or add cornstarch or flour to thicken it.

What are some easy add-ins for the chicken pot pie?

Adding herbs like thyme or rosemary, diced potatoes, mushrooms, or cheese can make your pie better. They add flavor and texture.

Is chicken pot pie a good choice for meal prep?

Yes! Chicken pot pie is perfect for meal prep. It reheats well and can be made ahead. Freeze it for later.

Can I make a vegetarian chicken pot pie?

Yes, you can make a vegetarian version. Use plant-based proteins like lentils, chickpeas, or mushrooms. Use vegetable broth instead of chicken soup.

How can I make the perfect pie crust for my chicken pot pie?

To make a great pie crust, use cold butter for flakiness. Mix ingredients just until they come together. Chill the dough before rolling it out. Adding butter and shortening can add flavor.

What are the best ways to store and reheat chicken pot pie?

Store your pie in an airtight container in the fridge for up to three days. Reheat it in the oven at 350°F until warm. Or microwave slices, but the oven is better for texture.

How to Make Delicious Marry Me Chicken Recipe

What makes a dish special enough to win over your loved ones? Is it the flavors, the chicken’s tenderness, or the sauce’s richness? The marry me chicken recipe has it all. It’s a mix of creamy sauce, tender chicken, and sun-dried tomatoes that will impress anyone.

The marry me chicken has become very popular, and for good reasons. Its unique blend of flavors and ingredients stands out. It’s perfect for impressing your partner or trying something new. The marry me chicken recipe is a great choice.

Key Takeaways

  • The marry me chicken recipe is a perfect blend of flavors and ingredients
  • The dish features tender chicken, creamy sauce, and sun-dried tomatoes
  • The recipe is a must-try for any occasion
  • The marry me chicken is a sensational dish that has gained popularity in recent years
  • The recipe is easy to make and requires minimal ingredients
  • The dish is perfect for impressing your loved ones

The Romance Behind Marry Me Chicken

The marry me chicken recipe has a captivating history. It started with a social media post. The person claimed it was so good, it could make anyone want to marry them. The post quickly went viral, spreading the recipe everywhere online.

This easy marry me chicken recipe became a hit on social media. It’s loved for its special mix of flavors and ingredients. Chicken, sun-dried tomatoes, and a creamy sauce make it rich and indulgent. Plus, it’s simple to make and needs just a few ingredients, making it popular.

  • Its unique flavor mix of savory, sweet, and tangy
  • How easy it is to prepare, welcoming cooks of all levels
  • Its flexibility, perfect as a main dish or side

The marry me chicken recipe has won the hearts of many food lovers. Its fame keeps growing. It’s perfect for a romantic dinner or a tasty meal with family and friends. Give it a try!

Essential Ingredients for the Perfect Marry Me Chicken Recipe

To make the best marry me chicken, you need the right ingredients. The dish includes chicken breasts, sun-dried tomatoes, garlic, cream, and parmesan cheese. Each ingredient is key to the dish’s flavor and texture.

Choosing high-quality ingredients is important. Good sun-dried tomatoes and fresh garlic make a big difference. Fresh garlic adds a flavor that jarred or powdered garlic can’t match.

Here are the main ingredients for your marry me chicken recipe:

  • 1 1/2 pounds boneless, skinless chicken breasts
  • 1/2 cup sun-dried tomatoes, chopped
  • 3 cloves garlic, minced
  • 1 cup heavy cream
  • 1/2 cup grated parmesan cheese
IngredientQuantity
Chicken breasts1 1/2 pounds
Sun-dried tomatoes1/2 cup
Garlic3 cloves
Heavy cream1 cup
Parmesan cheese1/2 cup

Kitchen Tools and Equipment Needed

To make a tasty marry me chicken dish, you need the right tools and equipment. This makes cooking smooth and efficient. A big skillet is key for sautéing the chicken and veggies. A saucepan is needed for the creamy sauce.

For utensils, silicone spatulas, tongs, and a whisk are handy. They help cook the chicken and sauce perfectly. This makes your delicious marry me chicken meal even better.

Essential Cookware

  • Large skillet
  • Saucepan
  • Utensils (silicone spatulas, tongs, whisk)

Optional Kitchen Gadgets

Some optional gadgets can make cooking easier and more fun. A stand mixer is great for whipping cream. A food processor helps chop veggies quickly.

Preparation Tools

Tools like a cutting board, knife, and measuring cups are also needed. They help you prepare ingredients and cook the dish well. With these, you’ll make a delicious marry me chicken meal that will impress everyone.

Step-by-Step Marry Me Chicken Recipe

To make the perfect Marry Me Chicken, follow these simple steps. Learning how to make marry me chicken is easier than you think. With these marry me chicken instructions, you’ll impress everyone.

Here are the basic steps to get you started:

  • Preheat your oven to 375°F (190°C).
  • Season the chicken with your favorite herbs and spices.
  • Heat a skillet over medium-high heat and sear the chicken until browned on both sides.
  • Transfer the chicken to a baking dish and bake for 25-30 minutes, or until cooked through.

For a complete and delicious meal, serve the Marry Me Chicken with your favorite sides. Try roasted vegetables or mashed potatoes. These marry me chicken instructions help you make a dish that’s tasty and looks great.

By following these simple steps and using the right ingredients, you’ll make a delicious Marry Me Chicken. Remember, practice makes perfect. Don’t be afraid to try new things. Happy cooking!

IngredientQuantity
Chicken breasts4
Olive oil2 tablespoons
Salt and pepperTo taste

Creating the Perfect Creamy Sauce

To make your marry me chicken with sun-dried tomatoes even better, a creamy sauce is key. The sauce’s base is important, with heavy cream, butter, and Parmesan cheese being the main ingredients. Using top-quality ingredients will help you get the best taste.

A great sauce can make your dish unforgettable. Seasoning is essential for flavor. Add a bit of salt, black pepper, and dried herbs like thyme or basil. For more flavor, garlic or onion powder can be added.

Sauce Base Ingredients

  • Heavy cream
  • Butter
  • Parmesan cheese
  • Garlic powder
  • Onion powder

Seasoning Tips

When seasoning your sauce, start with a little. Add salt, pepper, and herbs a bit at a time. Taste as you go and adjust until it’s just right. This way, your sauce will perfectly match your marry me chicken.

Achieving the Right Consistency

The sauce’s consistency is important. Too thick, and it’s overwhelming; too thin, and it’s not good. To get it just right, whisk in more heavy cream or simmer it until it’s perfect. With practice, your sauce will be creamy and delicious, making your dish even better.

Sauce IngredientQuantity
Heavy cream1 cup
Butter2 tablespoons
Parmesan cheese1/2 cup

The Secret to Perfectly Tender Chicken

To get tender chicken in the marry me chicken recipe, cooking it right is key. You need to use the best cooking methods and not overcook it. Also, picking the right chicken breasts is important for the dish’s texture and taste.

When picking chicken breasts, choose fresh and high-quality ones. It’s also vital to store them well to keep them fresh. Tips for storing chicken include using a sealed container, labeling it, and keeping it in the fridge at 40°F (4°C) or below.

Here are some tips for cooking tender chicken:

  • Cook the chicken at the right temperature, which is 165°F (74°C) for breast meat and 180°F (82°C) for thigh meat.
  • Use a meat thermometer to ensure the chicken is cooked to a safe internal temperature.
  • Avoid overcooking the chicken, as it can become dry and tough.

By following these tips, you can make tender and tasty chicken for your marry me chicken recipe. Always handle and store chicken safely to avoid foodborne illness.

The secret to a fantastic marry me chicken recipe is tender chicken. With these tips, you’ll impress your loved ones with a delicious dish.

Chicken Breast Storage TipsTemperatureStorage Method
Fresh Chicken Breasts40°F (4°C) or belowSealed container, labeled with date
Cooked Chicken Breasts40°F (4°C) or belowSealed container, labeled with date

Sun-Dried Tomatoes: The Game-Changing Ingredient

Sun-dried tomatoes are key in marry me chicken ingredients. They add a burst of intense tomato flavor and a touch of sweetness. This makes them a great match for the creamy sauce.

Choosing high-quality sun-dried tomatoes is important. Look for ones that are perfectly dried, without mold or too much moisture. You can find them at specialty food stores or online.

Selecting Quality Sun-Dried Tomatoes

  • Choose tomatoes with a deep red color and a slightly chewy texture
  • Avoid tomatoes with visible signs of mold or moisture
  • Opt for tomatoes that are packaged in airtight containers to preserve freshness

After picking your sun-dried tomatoes, prepare them for the marry me chicken recipe. Soak them in hot water or olive oil, then chop and add to the sauce.

Preparation Methods

Rehydrating sun-dried tomatoes is quick and easy. You can soak them in hot water, olive oil, or chicken broth for extra flavor. Once soaked, chop them up and mix into the sauce. They’ll add a rich, tangy taste to the marry me chicken ingredients.

Preparation MethodDescription
Soaking in hot waterRehydrates the tomatoes quickly and easily
Soaking in olive oilAdds a rich, fruity flavor to the tomatoes
Soaking in chicken brothInfuses the tomatoes with a savory, meaty flavor

Common Mistakes to Avoid

When making the marry me chicken recipe, it’s key to know common mistakes. Issues like temperature control, sauce problems, and timing errors can ruin it. Understanding the importance of precise temperature, sauce prep, and timing is vital.

To avoid these mistakes, pay close attention to detail. Knowing the recipe well helps. Watch out for overcooking the chicken, underseasoning the sauce, and not letting it rest before serving.

  • Use a thermometer to ensure the chicken is cooked to the correct temperature.
  • Taste and adjust the sauce regularly to avoid underseasoning.
  • Let the dish rest for a few minutes before serving to allow the flavors to meld together.

By following these tips, you can make a delicious marry me chicken dish. It will surely impress your loved ones.

MistakeSolution
Overcooking the chickenUse a thermometer to ensure the chicken is cooked to the correct temperature.
Underseasoning the sauceTaste and adjust the sauce regularly to avoid underseasoning.
Not letting the dish restLet the dish rest for a few minutes before serving to allow the flavors to meld together.

Delicious Side Dish Pairings

When it comes to the Marry Me Chicken recipe, the right side dishes make a big difference. You can choose from many options to make a complete meal. Some favorites include roasted vegetables, mashed potatoes, and garlic bread.

It’s important to pick side dishes that match the chicken’s flavors and textures. For instance, the creamy sauce in the Marry Me Chicken goes great with crunchy roasted veggies or soft mashed potatoes. You can also try different seasonings and herbs to make your side dishes even better.

Here are some tips for choosing the right side dishes for your Marry Me Chicken recipe:

  • Consider the flavor profile: Choose side dishes that complement the rich and creamy sauce of the Marry Me Chicken recipe.
  • Vary the textures: Mix soft and crunchy textures to add depth to the meal.
  • Keep it simple: Don’t overcomplicate the side dishes – simple recipes can be just as delicious.

By picking the right side dishes, you can make a meal that everyone will remember. Whether it’s for a romantic dinner or a special occasion, the Marry Me Chicken with tasty side dishes will impress your guests.

Make-Ahead and Storage Tips

The marry me chicken recipe is great because you can make it ahead. It’s perfect for meal prep or impressing guests. To keep it fresh, follow the right storage and reheating steps.

Before refrigerating or freezing, let the dish cool to room temperature. This stops bacteria growth and keeps flavors strong. You can store it in airtight containers in the fridge for three days or freeze for two months.

Proper Storage Methods

  • Use airtight containers to prevent moisture and other flavors from affecting the dish.
  • Label and date the containers so you can easily keep track of how long they’ve been stored.
  • Store the containers in the refrigerator at a temperature of 40°F (4°C) or below.

Reheating Guidelines

To reheat, use the oven or microwave. For the oven, preheat to 350°F (180°C) and heat for 15-20 minutes. For the microwave, heat on high for 30-60 seconds. Always check the dish’s temperature before serving to ensure it’s at least 165°F (74°C).

By following these tips, you can enjoy your marry me chicken recipe anytime. It’s perfect for meal prep or special occasions. These tips will help you keep your dish delicious and fresh.

Recipe Variations and Dietary Modifications

The marry me chicken recipe can be changed to fit different diets and tastes. With a few tweaks, you can make a dish that’s both tasty and meets your needs. Whether you want dairy-free, gluten-free, or different spice levels, there are many ways to customize this recipe.

Exploring recipe variations is key. You can swap heavy cream for a non-dairy option, use gluten-free flour, or add more spices. These dietary modifications let you enjoy the marry me chicken while sticking to your diet.

Here are some tips for marry me chicken recipe variations:

  • Use dairy-free milk and cheese alternatives to create a creamy sauce
  • Substitute gluten-containing ingredients with gluten-free options
  • Adjust the spice level to suit your taste preferences

By trying these tips and experimenting with recipe variations and dietary modifications, you can make a delicious marry me chicken dish. So, don’t hesitate to get creative and make this recipe your own!

ModificationDescription
Dairy-FreeUse non-dairy milk and cheese alternatives
Gluten-FreeSubstitute gluten-containing ingredients with gluten-free options
Spice Level AdjustmentsAdjust the amount of spices to suit your taste preferences

Conclusion

As we wrap up our exploration of “Marry Me Chicken,” we hope you’ve seen its charm. This dish has gone from simple to social media sensation. It has won over many with its delicious taste.

This recipe is perfect for any occasion. It’s great for a romantic dinner, a family meal, or just a cozy night in. The chicken, creamy sauce, and sun-dried tomatoes make it a standout dish.

Keep trying new things with “Marry Me Chicken.” Try different flavors and make it fit your diet. Share your versions with friends and family for a memorable meal.

Cooking is more than just making food. It’s about the journey, the smells, and the taste. Enjoy every step as you make “Marry Me Chicken” for your family. Happy cooking, and enjoy your meal!

FAQ

What is the origin of the “Marry Me Chicken” recipe?

The “Marry Me Chicken” recipe has a romantic story. It started with a social media post. The poster said this dish was so good, it could make anyone want to marry you. The post quickly went viral, spreading the recipe everywhere online.

What are the essential ingredients for the “Marry Me Chicken” recipe?

To make the “Marry Me Chicken” recipe, you need chicken breasts, sun-dried tomatoes, garlic, cream, and parmesan cheese. These ingredients make a rich, creamy sauce that goes well with the chicken.

What kitchen tools and equipment are needed to make the “Marry Me Chicken” recipe?

You’ll need a large skillet, a saucepan, and utensils to cook the “Marry Me Chicken” recipe. Optional gadgets like a food processor or blender can help with the sauce.

How do you create the perfect creamy sauce for the “Marry Me Chicken” recipe?

The creamy sauce is key to the “Marry Me Chicken” recipe. Focus on the sauce base, seasonings, and getting the right consistency.

What is the secret to achieving perfectly tender chicken in the “Marry Me Chicken” recipe?

To cook the chicken right, use the right techniques. Avoid overcooking to keep the chicken tender.

Why are sun-dried tomatoes an important ingredient in the “Marry Me Chicken” recipe?

Sun-dried tomatoes add flavor and texture to the “Marry Me Chicken” recipe. They complement the creamy sauce and tender chicken.

What are some common mistakes to avoid when making the “Marry Me Chicken” recipe?

Avoid temperature control issues, sauce problems, and timing errors when making the “Marry Me Chicken” recipe. Paying attention to these details ensures a perfect dish.

What are some delicious side dish pairings for the “Marry Me Chicken” recipe?

You can pair the “Marry Me Chicken” recipe with roasted vegetables, mashed potatoes, and garlic bread. These sides are delicious with the dish.

Can the “Marry Me Chicken” recipe be made ahead and stored for later use?

Yes, you can make the “Marry Me Chicken” recipe ahead and store it. Just follow proper storage and reheating guidelines to keep it fresh and flavorful.

Can the “Marry Me Chicken” recipe be adapted to suit different dietary needs and preferences?

The “Marry Me Chicken” recipe can be adapted for different diets. You can make dairy-free or gluten-free versions, and adjust the spice level to your liking.

The Ultimate Beef Stroganoff Recipe

What makes a beef stroganoff recipe unforgettable? Is it the tender beef, the creamy sauce, or the blend of herbs? The classic beef stroganoff has been a staple in American cuisine for decades. Its rich history is as fascinating as the dish itself.

From its origins in Russian cuisine to becoming a modern American favorite, the beef stroganoff recipe has changed. Yet, its essence remains the same. A great beef stroganoff recipe is all about balance and harmony of flavors. This is why using high-quality ingredients is crucial.

As we explore beef stroganoff, we’ll look at the right cut of beef, the perfect creamy mushroom sauce, and serving suggestions. Whether you’re a seasoned chef or a beginner, this classic beef stroganoff recipe will become a favorite. So, what are the key elements that make a beef stroganoff recipe truly exceptional?

Key Takeaways

  • High-quality ingredients are essential for a great beef stroganoff recipe
  • The right cut of beef can make a significant difference in the dish
  • A creamy mushroom sauce is a crucial component of the classic beef stroganoff
  • Traditional and modern serving suggestions can elevate the dish
  • Balance and harmony of flavors are key to a memorable beef stroganoff recipe
  • Using a beef stroganoff recipe as a base, you can create many variations
  • A classic beef stroganoff is a versatile dish that can be served on many occasions

The Rich History of Beef Stroganoff

Beef Stroganoff has been a favorite in restaurants and homes for centuries. The beef stroganoff recipe has changed over time. It comes from Russian cuisine and was named after Count Pavel Stroganov, a Russian aristocrat.

The easy beef stroganoff we know today has roots in many cultures. It’s now a favorite in America. It’s made with sautéed beef, mushrooms, and a creamy sauce, served over egg noodles.

Origins in Russian Cuisine

In Russia, Beef Stroganoff was a fancy dish. It was made with beef, mushrooms, and sour cream. It was served at fancy dinner parties and was seen as a delicacy.

Evolution to Modern American Favorite

Over time, Beef Stroganoff became a staple in America. The easy beef stroganoff recipe was adapted to use common ingredients. It became a hit for family dinners and special occasions.

Cultural Significance

Beef Stroganoff has become a cultural icon. It has been featured in cookbooks, restaurants, and blogs. It’s known for its rich flavor and creamy texture.

IngredientQuantity
Beef strips1 pound
Mushrooms1 cup
Sour cream1 cup

Essential Ingredients for Perfect Beef Stroganoff

To make the best beef stroganoff, use top-notch ingredients. You’ll need fresh mushrooms, tender beef, and a mix of herbs and spices. Each ingredient’s quality and freshness are key for great taste and texture.

Some key ingredients to focus on include:

  • High-quality beef, such as sirloin or ribeye, sliced into thin strips
  • Fresh mushrooms, preferably button or cremini, sliced and sautéed to bring out their natural flavor
  • A blend of herbs and spices, including paprika, garlic powder, and onion powder, to add depth and complexity to the dish

With these ingredients, you can make a tasty homemade beef stroganoff. It will be as good as any restaurant dish. Just follow a simple recipe and use the freshest ingredients for a meal you’ll love.

When prepping, slice the beef and mushrooms thinly. Sauté them in a hot pan to enhance their flavors. Add herbs and spices to taste. Serve over egg noodles or rice for a filling meal. With these ingredients and a bit of cooking know-how, your homemade beef stroganoff will impress everyone.

Choosing and Preparing the Right Cut of Beef

Choosing the right beef is key to a tasty beef stroganoff. The dish needs tender and flavorful beef to match the rich sauce. It’s important to pick the right cut and prepare it well.

The best cuts for stroganoff are leaner ones like sirloin or ribeye. These cuts are tender and have a fine texture, perfect for thin strips. Proper slicing techniques are also crucial for even and quick cooking.

Best Cuts for Stroganoff

  • Sirloin: A popular choice for beef stroganoff, sirloin is lean and tender, with a mild flavor.
  • Ribeye: A slightly fattier cut, ribeye adds a richer flavor to the dish and a tender texture.

Proper Slicing Techniques

To slice the beef right, slice against the grain. This makes the beef less chewy and more tender. Cut the beef into thin strips, about 1/4 inch thick, for quick and even cooking.

Meat Tenderizing Tips

To make the beef even more tender, try marinating or pounding. Marinating in oil, acid, and spices breaks down fibers and adds flavor. Pounding the beef also tenderizes it and makes it more even.

Classic Beef Stroganoff Recipe

To make an easy beef stroganoff, you’ll need a few key ingredients. These include beef strips, mushrooms, and beef broth from a can. The best beef stroganoff recipe is about finding the right balance of flavors. So, use top-notch ingredients and follow the steps closely.

Here’s what you’ll need:

  • 1 pound beef strips
  • 1 cup mushrooms, sliced
  • 1 onion, chopped
  • 2 cloves garlic, minced
  • 1 cup beef broth
  • 1 tablespoon tomato paste
  • 1 teaspoon Dijon mustard
  • Salt and pepper, to taste

First, cook the beef and mushrooms in a pan until they’re browned. Then, add the onion, garlic, beef broth, tomato paste, and mustard. Stir well and let it simmer until the sauce thickens. Serve the easy beef stroganoff over egg noodles or rice for a delicious meal.

The secret to a great best beef stroganoff recipe is to cook the beef and mushrooms right. Brown them well before adding the sauce. You can also add other ingredients like bell peppers or sour cream to make it your own.

A good beef stroganoff recipe should be flavorful and satisfying. It should have a nice balance of textures and tastes. By following this recipe and using quality ingredients, you’ll make a delicious easy beef stroganoff dish that everyone will love.

IngredientQuantity
Beef strips1 pound
Mushrooms1 cup
Onion1
Garlic2 cloves

Mastering the Creamy Mushroom Sauce

To make a tasty creamy beef stroganoff, you need to get the mushroom sauce right. This sauce is key and needs careful making. It’s made with butter, flour, and beef broth for a smooth texture.

First, you melt butter in a pan and mix in flour to make a roux. Cook the roux a bit to get rid of any flour taste. Then, add beef broth slowly to get the right thickness. For a homemade beef stroganoff, use fresh mushrooms and quality beef broth.

Sauce Base Preparation

Preparing the sauce base is crucial for the creamy mushroom sauce. Here’s how to do it:

  • Melt 2 tablespoons of butter in a pan over medium heat.
  • Add 1 tablespoon of flour and cook for 1-2 minutes, stirring constantly.
  • Gradually add 1 cup of beef broth, whisking continuously to avoid lumps.

Achieving the Perfect Consistency

Getting the sauce just right is important. It should be smooth and creamy but not too thick or thin. Here are some tips to get it just right:

ConsistencyDescription
Too thickAdd a little more beef broth to thin out the sauce.
Too thinAdd a little more flour to thicken the sauce.
PerfectThe sauce is smooth and creamy, coating the back of a spoon.

By following these tips and using top-notch ingredients, you can make a delicious creamy mushroom sauce for your homemade beef stroganoff.

Traditional and Modern Serving Suggestions

There are many ways to serve a tasty beef stroganoff recipe. The classic choice is with egg noodles. But, you can also try it with rice or other sides.

Here are some serving suggestions:

  • Egg noodles: a classic combination that pairs well with the creamy sauce
  • Rice: a lighter option that allows the flavors of the dish to shine
  • Roasted vegetables: adding some roasted vegetables such as broccoli or carrots can add texture and flavor to the dish

To make your beef stroganoff recipe more elegant, garnish it with fresh herbs or a dollop of sour cream. Serving it with crusty bread or crackers is also a great idea.

For a modern twist on the classic beef stroganoff, use different proteins like chicken or pork. You can also add unique ingredients like mushrooms or bell peppers. The key is to experiment and find what you like best.

Serving SuggestionsDescription
Egg NoodlesA classic combination that pairs well with the creamy sauce
RiceA lighter option that allows the flavors of the dish to shine
Roasted VegetablesAdding some roasted vegetables such as broccoli or carrots can add texture and flavor to the dish

Common Cooking Mistakes to Avoid

When making easy beef stroganoff, knowing common mistakes is key. These mistakes can ruin the dish. They include issues with temperature, sauce consistency, and timing.

Temperature control is crucial. Overcooking the beef or sauce makes it tough and dry. To avoid this, cook the beef to the right temperature and stir the sauce constantly.

Temperature Control Issues

Some common temperature control issues include:

  • Overcooking the beef, making it tough and dry
  • Scorching the sauce, leading to a bitter taste
  • Not cooking the dish to the recommended internal temperature, potentially leading to foodborne illness

By avoiding these mistakes, you can make a delicious and safe beef stroganoff. With practice, you’ll get better at cooking it and enjoy every meal.

Sauce Problems and Solutions

Sauce consistency is also important in beef stroganoff. A sauce that’s too thick or too thin can ruin the dish. To fix this, adjust the liquid in the sauce and stir constantly to avoid lumps.

Variations and Dietary Adaptations

There are many ways to make homemade beef stroganoff fit different tastes and diets. For those who can’t have gluten, using gluten-free flour or noodles is a good choice. This small change can make a big difference for those with gluten issues, letting them enjoy a tasty and creamy dish.

For those who can’t have dairy, non-dairy milk or cheese can be used to make a creamy sauce. This is great for those with lactose intolerance or dairy allergies. Almond milk, soy milk, and coconut milk are popular choices. They help keep the sauce rich and creamy.

Modern Twists

There are also many new ways to make beef stroganoff. You can use different proteins like chicken or pork, or add new veggies like bell peppers or mushrooms. Trying different seasonings and spices can also give the dish a unique taste. A little paprika or thyme can add a lot of flavor to the sauce.

Gluten-Free Options

  • Use gluten-free flour to make a gluten-free roux
  • Choose gluten-free noodles, such as rice noodles or quinoa noodles
  • Be mindful of cross-contamination with gluten-containing ingredients

Exploring these variations can help you make a homemade beef stroganoff that fits your needs. Whether you’re looking for a gluten-free, dairy-free, or a modern twist, there are many ways to make it your own. So, get creative and enjoy a delicious and creamy beef stroganoff!

Conclusion: Mastering Your Homemade Beef Stroganoff

Exploring the classic beef stroganoff recipe shows us its rich history and key elements. Mastering this dish means paying close attention to every detail. It also requires using high-quality ingredients.

Choosing the right beef and making a creamy mushroom sauce are crucial steps. Each step is important for a perfect dish.

By using the techniques and tips from this guide, you can make your beef stroganoff even better. Make sure to prepare and sear the beef well. Also, simmer the sauce gently for the right consistency.

Don’t be afraid to try new things to make it your own. With practice, you’ll soon be making beef stroganoff like a pro.

So, get your ingredients ready and start cooking. You’ll impress everyone with your delicious homemade beef stroganoff. Bon appétit!

FAQ

What is the origin of beef stroganoff?

Beef stroganoff comes from Russian cuisine. It was a dish with sautéed beef in a sour cream sauce. It became popular in the U.S. and is now a beloved comfort food.

What are the best cuts of beef to use for beef stroganoff?

For beef stroganoff, use tender cuts like sirloin, ribeye, or filet mignon. These cuts stay tender and flavorful in the sauce.

How do I prepare the beef for beef stroganoff?

Slice the beef thinly against the grain for tender bites. You can also tenderize it by pounding lightly or marinating in wine or soy sauce.

What are the key ingredients in a classic beef stroganoff?

A classic beef stroganoff includes tender beef, mushrooms, onions, garlic, and beef broth. It also has sour cream and spices like Dijon mustard and paprika.

How do I make the creamy mushroom sauce for beef stroganoff?

Start by sautéing mushrooms and onions in butter. Then, make a roux with flour, beef broth, and sour cream. Season with salt, pepper, and spices for a creamy sauce.

What are some common serving suggestions for beef stroganoff?

Serve beef stroganoff over egg noodles, rice, mashed potatoes, or crusty bread. Garnish with parsley, chives, or a dollop of sour cream.

Can I make beef stroganoff ahead of time?

Yes, you can make beef stroganoff ahead of time. The flavors get better as it sits. Just store the beef and sauce separately and reheat gently.

What are some variations or dietary adaptations of beef stroganoff?

You can make beef stroganoff with chicken or turkey for a change. There are also gluten-free and dairy-free versions. Adding veggies like peas or spinach makes it healthier.

Overnight Oats: Easy, Healthy Breakfast

What makes a perfect breakfast? Is it quick to make, or full of nutrients? Overnight oats offer both. They mix rolled oats, milk, and your favorite ingredients in a jar. This makes a tasty, healthy meal ready for morning.

Starting your day with overnight oats gives you energy and satisfaction. But what are overnight oats, and how can you make them a daily part? We’ll dive into the world of overnight oats and guide you to begin.

Key Takeaways

  • Overnight oats are a convenient and healthy breakfast option
  • They can be made with a variety of ingredients, including rolled oats, milk, and fruit
  • Overnight oats are easy to prepare and can be ready to go in the morning
  • This healthy recipe is packed with nutrients and can provide a boost of energy
  • Overnight oats are a great way to start your day and can be customized to suit your tastes

What Are Overnight Oats?

Overnight oats are a quick breakfast favorite for many. They are made by soaking oats in milk or another liquid overnight. This makes them soft and ready to eat in the morning. This no-cook oats method has gained popularity thanks to social media and the desire for healthy, easy meals.

The history of overnight oats is not well-known, but it’s thought to have started in Europe. Oats were a common food there. The idea of soaking oats in liquid overnight for a quick breakfast has been around for centuries. But the modern version, with its many flavors and toppings, is a more recent trend.

The Basic Concept

To make overnight oats, you mix rolled oats, milk, and flavorings or toppings in a jar. Then, you refrigerate it overnight. In the morning, the oats are soft and ready to eat. You can top them with fresh fruit, nuts, or other favorites.

History and Origins

The exact start of overnight oats is unclear, but it’s believed to come from traditional European porridge. Soaking oats in liquid overnight for a quick breakfast has been a long-standing tradition. Recently, social media and food bloggers have made it more popular.

Overnight oats are loved for their convenience, health benefits, and flexibility. They’re a quick breakfast that can be made ahead of time, perfect for busy mornings. They’re also nutritious, high in fiber, and can be customized with various toppings. This makes them a hit for people with different dietary needs.

These are just a few tasty ways to enjoy overnight oats. Their ease, health benefits, and adaptability have made them a favorite no-cook oats choice for many.

Essential Ingredients for Perfect Overnight Oats

To make delicious oats, you need a few key ingredients. These are rolled oats, milk or a milk substitute, and a sweetener or flavor. Overnight oats are great because you can add many ingredients to make them your own.

Some common ingredients in overnight oats include:

  • Fruits such as berries, bananas, or mangoes
  • Nuts like almonds, walnuts, or pecans
  • Seeds like chia, flax, or hemp
  • Spices such as cinnamon, vanilla, or nutmeg

Overnight oats are perfect for breakfast. They’re easy to make, healthy, and can fit your diet. By mixing your favorite ingredients with oats, you get a nutritious breakfast that lasts all morning.

To start, mix your ingredients in a jar or container and chill it overnight. In the morning, you’ll have a tasty breakfast ready. With a bit of creativity, you can make many different breakfasts using overnight oats.

IngredientQuantityOptional
Rolled Oats1/2 cupNo
Milk or Milk Alternative1/2 cupNo
Fruit1/2 cupYes
Nuts or Seeds1 tablespoonYes

The Health Benefits of Starting Your Day with Overnight Oats

Starting your day with overnight oats can greatly improve your health. These oats are a fantastic breakfast choice. They give you energy and help with digestion. The fiber in oats keeps your bowel movements regular and prevents constipation.

Overnight oats are also packed with nutrients. They have protein, healthy fats, and complex carbs. This makes them a great way to start your day with a healthy meal. Some key benefits include:

  • Improved digestive health due to the high fiber content
  • Support for healthy blood sugar levels
  • Aid in weight management by keeping you fuller for longer

Adding overnight oats to your breakfast can boost your energy. There are many tasty and easy recipes to try.

NutrientAmount per serving
Fiber4-6 grams
Protein10-15 grams
Healthy fats10-15 grams

Overall, overnight oats are a nutritious and tasty breakfast option. They offer many health benefits. By making them a daily part of your routine, you can improve your health and enjoy a delicious meal.

Step-by-Step Guide to Making Overnight Oats

Making overnight oats is easy and quick. It’s a great way to start your day with a healthy easy breakfast. Just mix your oats, milk, and any flavorings or sweeteners in a jar or container.

Here’s how to do it:

  • Combine oats, milk, and flavorings in a jar or container
  • Mix well to ensure all ingredients are fully incorporated
  • Cover the jar or container and refrigerate overnight or for at least 4 hours
  • In the morning, your quick breakfast will be ready to eat

By following these steps, you can have a tasty and healthy easy breakfast for busy mornings. Plus, you can add your favorite ingredients. This makes it a quick breakfast that you’ll love.

With this guide, you can make your own overnight oats. Enjoy a healthy and convenient easy breakfast option every day.

IngredientQuantity
Rolling Oats1/2 cup
Milk1 cup
Flavorings (optional)1 tablespoon

Best Container Options and Storage Tips

Choosing the right container is key when making no-cook oats. Mason jars are a favorite because they’re easy to use and look good. But, any container with a lid works well for storing oats.

Storing oats in the fridge is important to keep them fresh and safe. Here are some tips for storing overnight oats:

  • Use a container with a tight-fitting lid to prevent contamination and spoilage.
  • Keep the container in the refrigerator at a temperature of 40°F (4°C) or below.
  • Consume the oats within 5 days of preparation.

Container Options

Other good containers for overnight oats include glass or plastic containers with lids. Pyrex or Tupperware are great options.

Storage Methods

To keep your oats fresh, store them in the fridge at a steady temperature. Freezing them for up to 2 months is also an option.

Shelf Life

Overnight oats can last up to 5 days in the fridge if stored right. Always check for any signs of spoilage before eating, like a bad smell or slimy texture.

Container TypeShelf LifeStorage Method
Mason Jar5 daysRefrigerator
Glass Container5 daysRefrigerator
Plastic Container5 daysRefrigerator

Top Flavor Combinations and Mix-ins

Overnight oats are a great way to start your day. They let you try out many flavors and mix-ins. This makes it easy to find a healthy recipe that you’ll love.

Some favorite flavors are vanilla and cinnamon, peanut butter and banana, and pumpkin spice. You can also add fruits, nuts, or spices to make your oats even better. Try adding sliced bananas, almonds, or cinnamon for extra taste and health benefits.

Here are some more ideas for flavor combinations and mix-ins:

  • Berry bliss: mix in some fresh or frozen berries, such as blueberries or strawberries, for a sweet and antioxidant-rich breakfast
  • Tropical twist: add some diced mango or pineapple to give your oats a tropical flavor
  • Nutty delight: mix in some chopped nuts, such as walnuts or pecans, for a crunchy texture and a boost of healthy fats

Remember, the key to a tasty and healthy recipe is to keep trying new things. With overnight oats, you can explore endless breakfast ideas every day.

Common Mistakes to Avoid When Preparing Overnight Oats

Making overnight oats for a quick breakfast requires avoiding common mistakes. The wrong ratio of oats to liquid can make them too dry or soggy. It’s key to balance the ingredients for the perfect texture.

Temperature matters too. Cold ingredients can slow down soaking. Old oats or poor mixing can also cause texture problems.

Ingredient Ratios

Start with the right ingredient ratios to avoid mistakes. Use 1/2 cup of oats with 1/2 cup of liquid like milk or yogurt. Adjust this as you like, but it’s a good starting point.

Temperature Considerations

Temperature is crucial for overnight oats. Cold ingredients slow soaking, leading to uncreamy oats. Use room temperature ingredients for the best results.

Texture Issues

Texture problems are common in overnight oats. Old oats or poor mixing can make them too dense or watery. Use fresh oats and mix well to avoid this.

By following these tips, you can make a delicious, quick breakfast. It’s perfect for any day of the week.

Seasonal Variations for Year-Round Enjoyment

Delicious oats are perfect for any time of the year. You can make them exciting by adding seasonal ingredients. For example, in fall, pumpkin puree or cinnamon can add a cozy flavor.

In winter, cranberries or orange zest bring a burst of citrus. Spring and summer are great for adding fresh berries like strawberries or raspberries. These changes keep your breakfasts interesting and delicious all year.

  • Apples or pears in the fall
  • Cranberries or cherries in the winter
  • Bananas or mangoes in the spring
  • Peaches or pineapples in the summer

These add natural sweetness and essential vitamins and minerals. By using seasonal ingredients, you can enjoy healthy and tasty breakfasts all year.

With a bit of creativity, overnight oats can be a fun and healthy breakfast any time of the year. Try these seasonal variations and start your day with a delicious bowl of oats.

SeasonIngredientsFlavor Combinations
FallPumpkin puree, cinnamon, applesPumpkin spice, apple cinnamon
WinterCranberries, orange zest, cherriesCranberry orange, cherry vanilla
SpringFresh berries, bananas, mangoesStrawberry banana, mango peach
SummerPeaches, pineapples, coconut flakesPeach coconut, pineapple upside-down cake

Making Overnight Oats for Special Dietary Needs

Overnight oats can be made to fit many dietary needs. This makes them a great choice for those with special requirements. It’s easy to make changes to suit different needs, making them a flexible breakfast option.

For those with gluten intolerance, using gluten-free oats is a simple fix. This change lets them enjoy oats without worrying about gluten reactions. Vegans can also make their oats cruelty-free by using plant-based milks and avoiding honey.

To lower sugar, try using natural sweeteners like stevia or monk fruit. You can also use less sweetener. These tweaks make oats healthier and better for those watching their sugar intake. They ensure a tasty, easy breakfast that fits your dietary needs.

Gluten-Free Options

  • Use gluten-free oats as a direct substitute in any overnight oats recipe.
  • Explore different types of gluten-free milks to find the one that works best for you.

Vegan Adaptations

  • Choose plant-based milk alternatives like almond, soy, or coconut milk.
  • Avoid using honey; instead, opt for maple syrup or other vegan-friendly sweeteners.

Low-Sugar Alternatives

  • Use natural sweeteners like stevia or monk fruit to reduce sugar content.
  • Limit the amount of sweetener used in the recipe to minimize sugar intake.

By making these changes, you can make a healthy breakfast that fits your needs. Whether you need gluten-free, vegan, or low-sugar options, overnight oats can be adapted. This makes them a favorite for many, as they’re easy to customize for any diet.

Time-Saving Meal Prep Strategies with Overnight Oats

Overnight oats are a fantastic way to get a quick breakfast in the morning. You can make several jars at once. This means you have a healthy breakfast for every day of the week. It’s a great choice for meal prep, saving you time during the week.

To make meal prep even easier, scale up your recipe and prep ingredients ahead of time. Use containers that are easy to carry, like mason jars or ones with lids. This makes it simple to take your oats on the go.

Here are some tips for meal prepping with overnight oats:

  • Prepare a large batch of oats and divide it among multiple containers
  • Add different toppings or flavorings to each container to keep things interesting
  • Store the containers in the refrigerator and grab one on your way out the door in the morning

By using no-cook oats in your meal prep, you save time and have a healthy breakfast ready. A bit of planning and prep work means you can enjoy a tasty breakfast every day.

Conclusion

Overnight oats have become a great breakfast choice for many. They are easy to make and offer lots of health benefits. This breakfast is perfect for those looking for a quick and healthy start to their day.

With overnight oats, you can try new flavors and ingredients. You can add fresh fruits, nuts, or even spices. This makes your breakfast exciting and tailored to your taste.

As we’ve seen, overnight oats are not just tasty but also good for you. They can help you feel energized and ready for the day. Adding them to your morning routine can make a big difference in your health and happiness.

FAQ

What are overnight oats?

Overnight oats are a simple breakfast. They involve soaking rolled oats in milk or another liquid overnight. This makes them soft and ready to eat in the morning.

What are the essential ingredients for making overnight oats?

To make overnight oats, you need rolled oats, milk, and a sweetener or flavoring. You can also add fruits, nuts, seeds, and spices to make it your own.

What are the health benefits of eating overnight oats?

Overnight oats are very nutritious. They are high in fiber, which is good for your digestive health and blood sugar. They also help you feel full longer, which can aid in weight management.

What is the best way to store overnight oats?

Store overnight oats in an airtight container, like a mason jar, in the fridge. This way, they can last up to 5 days.

Popular flavors include vanilla and cinnamon, peanut butter and banana, and pumpkin spice. You can also mix fruits and nuts for different tastes.

How can I adapt overnight oats for special dietary needs?

For gluten-free oats, use gluten-free oats. For vegan options, use plant-based milks and avoid honey. For less sugar, try stevia or monk fruit.

What are some time-saving meal prep strategies with overnight oats?

Overnight oats are great for meal prep. You can make many jars at once. This way, you have a healthy breakfast ready for each day of the week.

Get The Best Recipes In 2025

Exit mobile version