Homemade Gingerbread Latte Cookies

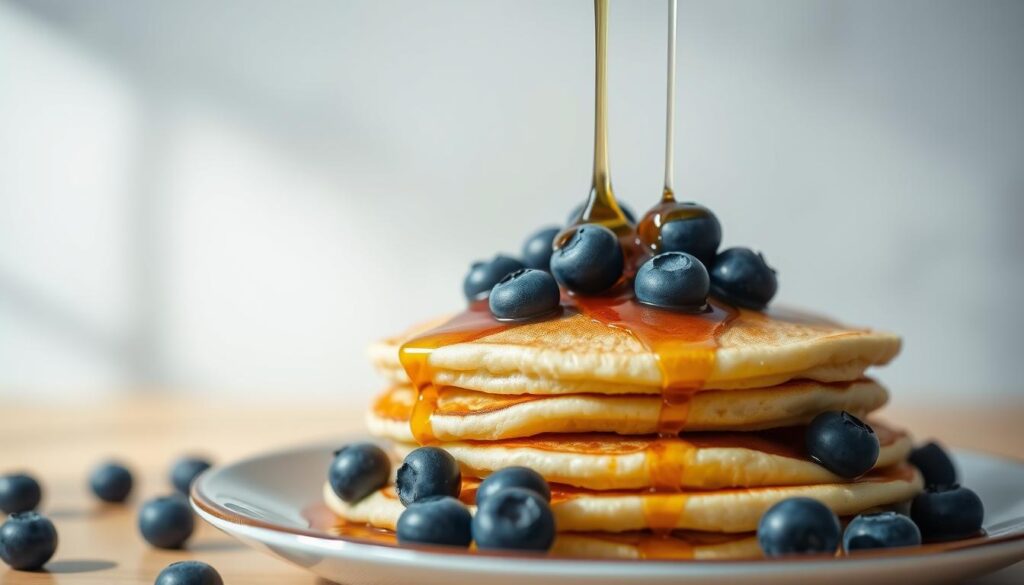
What makes the perfect holiday treat? Is it the warm spices, rich coffee, or sharing homemade goodies? For us, it’s the mix of gingerbread and latte in a cookie. Gingerbread latte cookies are a fun twist on holiday baking. They offer a tasty project for anyone wanting to try something new.

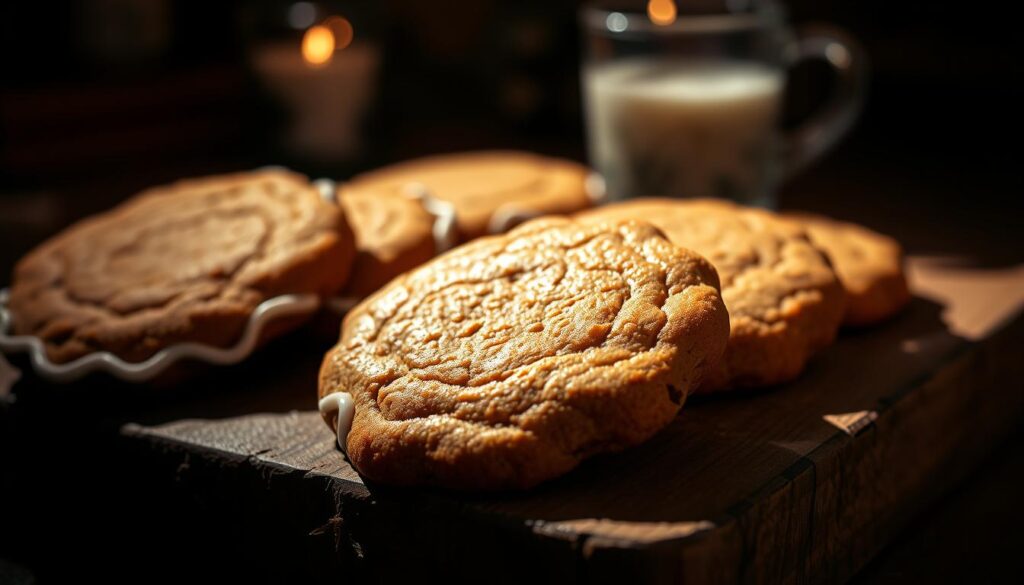
Gingerbread latte cookies are a standout holiday treat. They blend gingerbread and latte flavors for a unique taste. Whether you’re an experienced baker or just starting, these cookies are a great way to feel festive.

Key Takeaways

  • Homemade gingerbread latte cookies make a great holiday treat
  • Gingerbread and latte flavors combine for a unique cookie
  • Perfect for holiday baking, these cookies offer a delicious twist on traditional treats
  • Gingerbread latte cookies are a great way to get into the holiday spirit
  • Holiday baking with gingerbread latte cookies is a fun and exciting project
  • Gingerbread latte cookies are a delicious addition to any holiday celebration

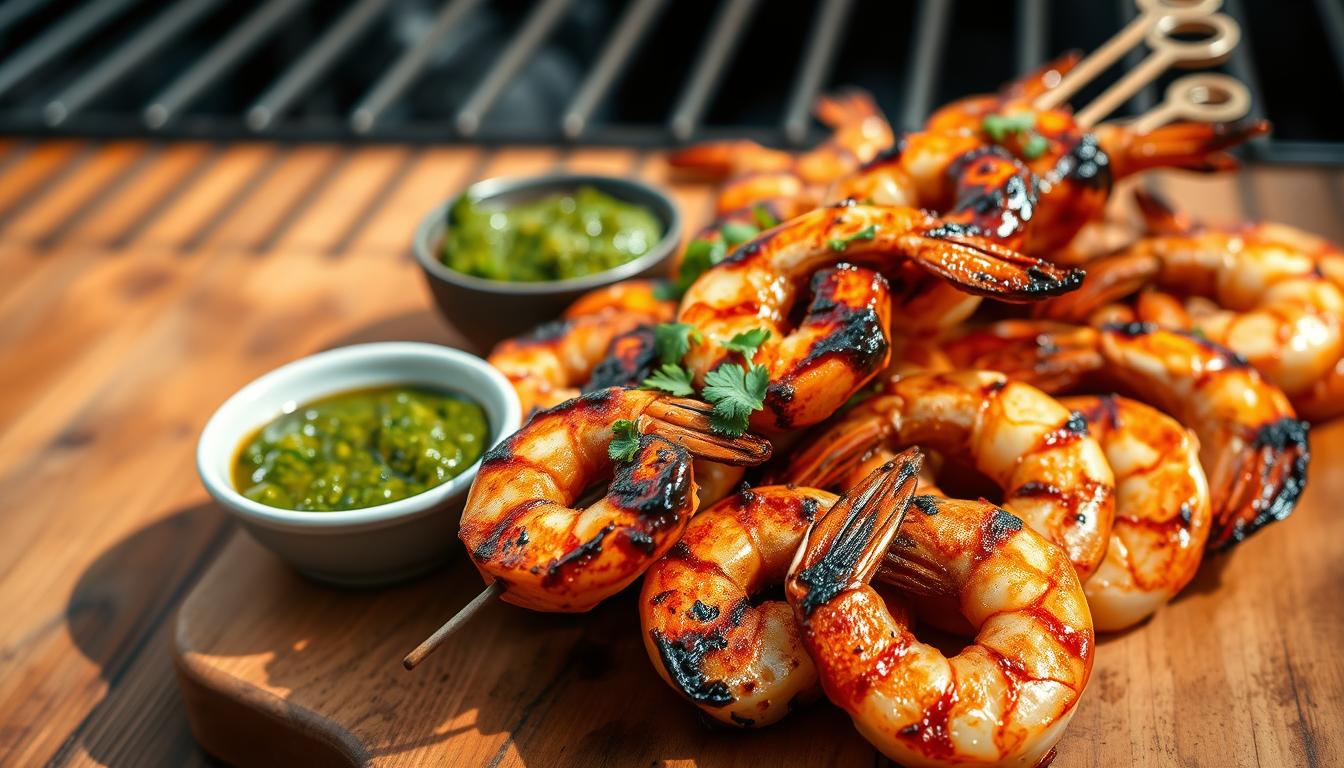
The Magic of Gingerbread Latte Cookies

We love baking easy gingerbread cookies during the holiday season. Adding a latte twist makes them even better. These treats are great for sharing with family and friends, impressing everyone with their unique taste.

The mix of coffee and spice in these cookies is irresistible. It adds a depth of flavor that’s hard to resist. This makes them a standout holiday treat.

For easy gingerbread cookies, the secret is using top-notch ingredients and a simple recipe. Quality spices and coffee make these treats special for the holidays. They’re perfect for both seasoned bakers and beginners.

  • The perfect balance of sweet and spicy flavors
  • The unique twist of adding coffee to traditional gingerbread
  • The ease of making them at home with simple ingredients

We hope you’ll try these easy gingerbread cookies. Experience the magic of gingerbread latte cookies for yourself. They’re delicious and easy to make, making them a holiday tradition.

Making delicious gingerbread latte cookies starts with the right ingredients. High-quality ingredients are key for the best taste and texture. You’ll need all-purpose flour, baking soda, and salt as the base.

Spices like cinnamon, ginger, and nutmeg are also important. Using fresh and aromatic spices makes a big difference. White and brown sugar add a rich, caramel-like flavor.

Adding coffee or espresso makes gingerbread latte cookies special. It gives them a mocha flavor and a boost of energy. You can use instant coffee or espresso powder, or even brew a shot of espresso.

  • All-purpose flour
  • Baking soda
  • Salt
  • Cinnamon
  • Ginger
  • Nutmeg
  • White and brown sugar
  • Coffee or espresso

With these ingredients and our guide, you’ll make delicious, unique cookies. They’re perfect for the holiday season.

Kitchen Tools and Equipment Needed

To make delicious gingerbread spice cookies, we need the right kitchen tools and equipment. Having the necessary tools makes the process easier and more efficient. We will outline the basic baking equipment, optional specialty tools, and measuring and mixing tools required to make these cookies.

When baking gingerbread spice cookies, accuracy is key. Measuring cups and spoons are essential for the right amount of ingredients. A digital scale can also help with precise measurements. Plus, a stand mixer or hand mixer can make mixing easier.

A well-stocked kitchen with the right equipment is key for making gingerbread spice cookies. Some other necessary tools include:

  • Baking sheets lined with parchment paper
  • A medium-sized bowl for whisking together dry ingredients
  • A large bowl for mixing the dough
  • A cookie scoop or spoon for portioning out the dough

Optional specialty tools, like a cookie press or a pastry bag, can be useful for decorative cookies. But they’re not necessary for making delicious gingerbread spice cookies. With the right kitchen tools and equipment, we can create a variety of gingerbread spice cookies that are perfect for the holiday season.
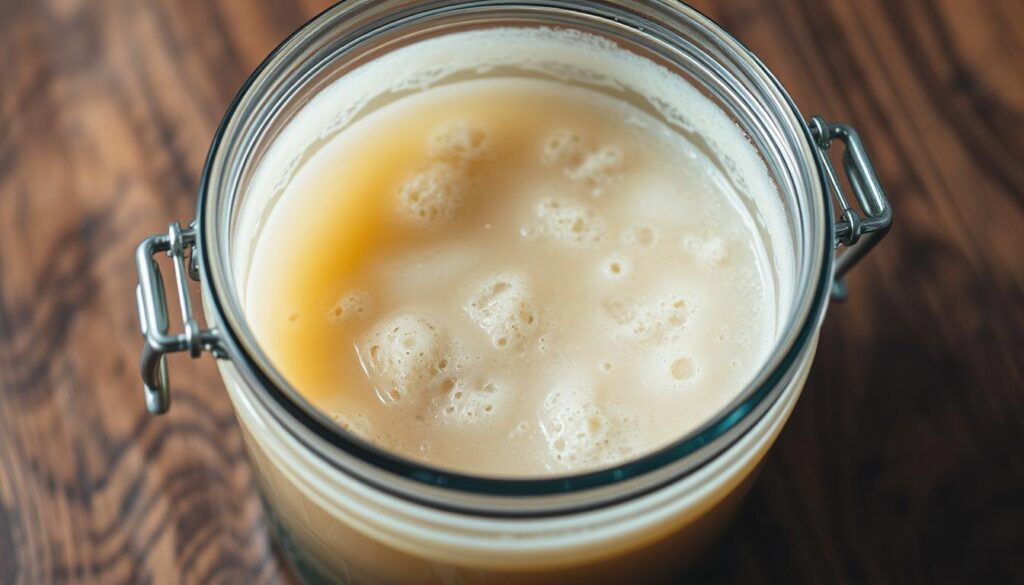
As we explore holiday baking, starting with the right dough is key. Making the dough for our gingerbread latte cookies needs focus and patience. We’ll show you how to mix and prepare the dough, making sure it’s just right.

First, we mix the dry ingredients like flour, baking soda, and spices. It’s important to sift them to blend well. Then, we add wet ingredients like butter, sugar, and eggs. We mix until the dough is smooth.

Now, let’s focus on adding the coffee flavor and spices. This is where our gingerbread latte cookies come to life. We mix in the coffee and spices until they’re evenly spread. This step gives our cookies a unique taste, perfect for holiday baking.

  • Use top-notch ingredients, like fresh spices and real coffee grounds.
  • Don’t overmix the dough to avoid tough cookies.
  • Chill the dough for at least 30 minutes to let the flavors mix.

By following these steps and preparing your dough carefully, you’ll get amazing gingerbread latte cookies. They’re ideal for the holiday season.

Mastering the Perfect Coffee-Infused Spice Blend

We’re excited to explore gingerbread dessert recipes. The right spice blend can make a big difference. For gingerbread spice cookies, finding the perfect mix is key.

Traditional spices include cinnamon, nutmeg, and ginger. They give a warm, comforting taste. To enhance our cookies, we can mix in coffee in various ways.

  • Adding instant coffee powder to the dry ingredients
  • Using brewed coffee as a substitute for some of the liquid ingredients
  • Infusing the dough with coffee beans or grounds

By perfecting the coffee-infused spice blend, we can make unforgettable gingerbread desserts. Whether you love classic cookies or want to try something new, finding the right flavor balance is crucial. With some experimentation and patience, you can craft a unique blend that will wow everyone.

As we dive deeper into gingerbread dessert recipes, remember the possibilities are endless. With creativity and practice, you can become a skilled baker. Your delicious creations will surely impress. So, start baking and don’t be afraid to try new things. Your taste buds will love it!

Baking Tips and Techniques

To make the perfect easy gingerbread cookies, follow some key baking tips. Mix traditional gingerbread spices with a hint of coffee for a unique taste. It’s important not to overbake the cookies. This can make them dry and hard.

Here are some tips to keep in mind:

  • Use a medium-sized baking sheet to ensure the cookies have enough space to spread out.
  • Keep an eye on the cookies while they’re baking, as the baking time may vary depending on the size and thickness of the cookies.
  • Remove the cookies from the oven when they’re lightly golden brown and still slightly soft to the touch.

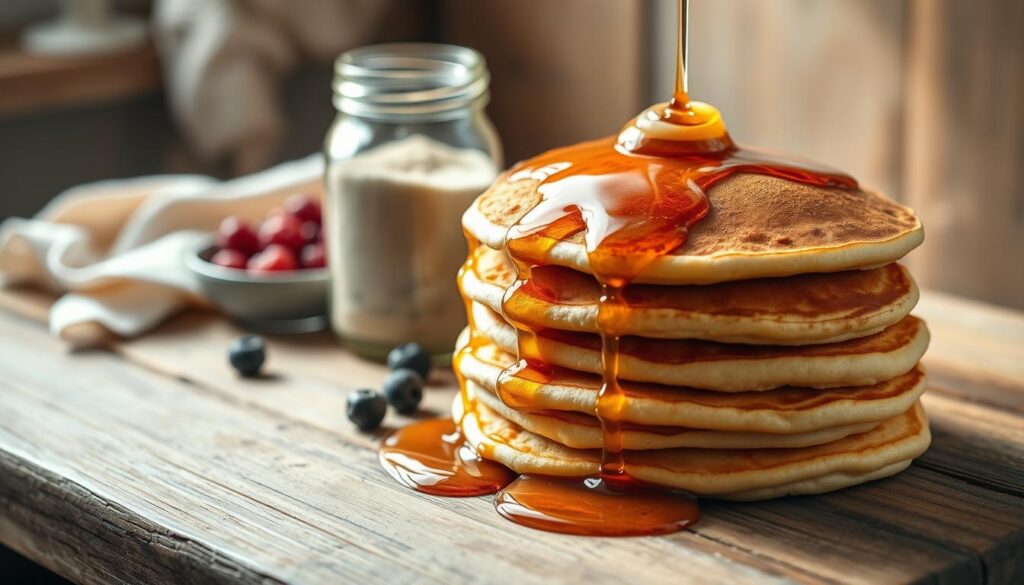
By following these tips, you’ll make delicious homemade holiday treats. These are great for sharing with friends and family. With the right techniques, your easy gingerbread cookies will be soft, flavorful, and look great.

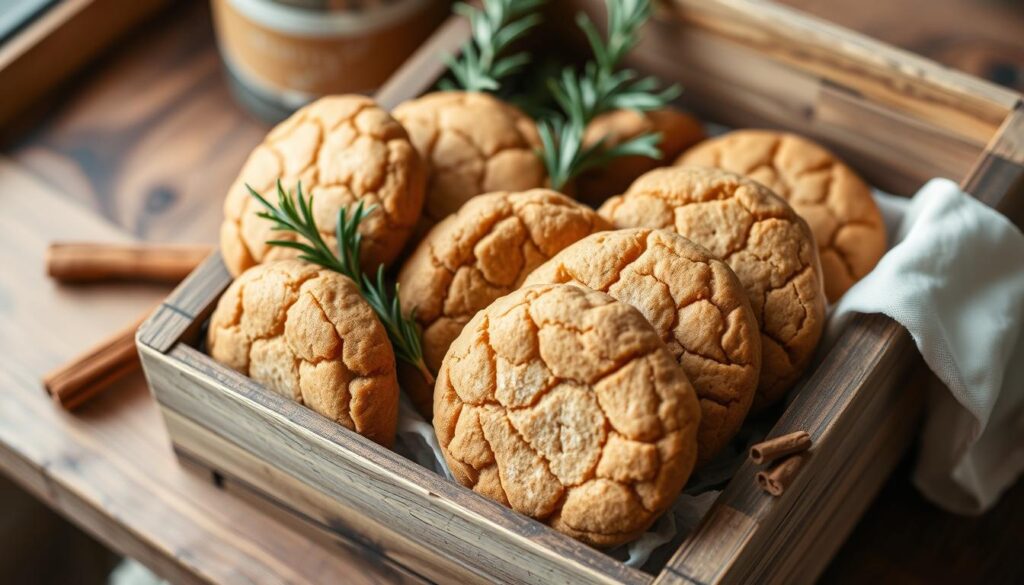
Decorating Your Holiday Cookies

Decorating gingerbread latte cookies is a fun part of holiday baking. We make these cookies delicious and pretty. The right decorations turn them into a holiday showstopper.

We have many decorating choices. We can use powdered sugar glaze or royal icing for a detailed look. Creative toppings and garnishes like sprinkles or nuts add a personal touch.

Some popular decorating ideas include:

  • Using festive cookie cutters to create shapes like trees, snowflakes, or bells
  • Creating a cookie bouquet with a variety of decorated cookies
  • Making a gingerbread latte cookie sandwich with a dollop of whipped cream or icing in the middle

With a bit of creativity, our gingerbread latte cookies become a beautiful holiday treat. Decorating them is a fun way to celebrate the season. It makes our holiday baking even more special.

Decorating IdeaMaterials NeededDifficulty Level
Simple Powdered Sugar GlazePowdered sugar, milk, food coloringEasy
Royal Icing DesignRoyal icing, piping bag, tipsMedium
Cookie BouquetCookie cutters, icing, sprinklesHard

Storage and Freshness Guidelines

Enjoying gingerbread dessert recipes, like gingerbread spice cookies, requires proper storage. This keeps their flavor and texture just right. We aim to keep our treats fresh and tasty all holiday season.

Choosing the right storage is key. For short-term, store cookies in an airtight container at room temperature. This keeps them moist and flavorful. Here are some tips for short-term storage:

  • Store cookies in a single layer to prevent them from becoming misshapen
  • Keep the container away from direct sunlight and heat sources
  • Use a paper towel or parchment paper to separate layers of cookies

For longer-term storage, freezing is a great choice. Freezing our gingerbread treats lets us enjoy them for months. Here are some freezing instructions:

Freezing cookies requires placing them in a single layer in a freezer-safe bag or container. We can also freeze the dough, thawing and baking as needed. By following these guidelines, we can savor our gingerbread spice cookies and other treats all holiday season.

Conclusion

As we wrap up our journey into gingerbread latte cookies, we feel a sense of pride. You’ve learned to make these treats that mix gingerbread’s warmth with latte’s rich taste. These gingerbread latte cookies are perfect for any holiday gathering or a cozy moment at home.

These cookies capture the holiday spirit in a delicious way. They offer a mix of spices and coffee-infused dough. Every step is designed to help you make a masterpiece that will wow your family and friends. Enjoying each bite brings joy and satisfaction from holiday baking and the memories it creates.

Whether you’re an experienced baker or new to cooking, we hope this guide has inspired you. It’s time to embrace the holiday spirit, gather your loved ones, and fill your home with the aroma of these cookies. Let it bring warmth and comfort to your holiday season.

FAQ

What makes gingerbread latte cookies unique?

Gingerbread latte cookies mix gingerbread flavors with latte coffee notes. This creates a tasty holiday treat that’s different from regular gingerbread cookies.

What ingredients are needed to make gingerbread latte cookies?

You’ll need flour, sugar, butter, and molasses for these cookies. Don’t forget spices like ginger, cinnamon, and cloves. Coffee or espresso powder adds the latte flavor.

What kitchen tools and equipment are required?

You’ll need basic baking tools like bowls, a mixer, baking sheets, and a rolling pin. Having a cookie cutter and cooling rack can also help.

First, cream the butter and sugar. Then, add molasses, spices, and coffee powder. Mix the dough, chill it, and roll out to cut into shapes.

What’s the secret to the perfect spice blend?

The secret is balancing gingerbread spices with coffee powder. Try different mixes to find your favorite flavor.

What are some tips for baking gingerbread latte cookies?

To get the right texture, don’t overbake. Watch them closely and chill the dough. Cool and store them properly to keep them fresh.

How can you decorate gingerbread latte cookies?

Decorating is fun and creative. Use icing, festive toppings, or professional finishes to make them special.

How should gingerbread latte cookies be stored?

Store them in an airtight container at room temperature for a short time. Freezing is best for longer storage to keep them fresh.

Do You Like Our Recipe ?

0.0
0.0 out of 5 stars (based on 0 reviews)
Excellent0%
Very good0%
Average0%
Poor0%
Terrible0%

BBQ Shrimp Recipe: The Ultimate Grilling Guide

Imagine the smell of sizzling grilled bbq shrimp on a summer evening. The sound of laughter and conversation fills the air as you gather with friends and family. You can create this experience with the perfect bbq shrimp recipe. This guide will show you how to make mouth-watering grilled bbq shrimp that will leave everyone wanting more.

This guide focuses on the ultimate grilling guide for bbq shrimp. You’ll learn the tips and tricks for achieving perfect results. From the rich heritage of bbq shrimp in New Orleans cuisine to the essential ingredients and techniques, this article will cover everything. You’ll become a master griller of bbq shrimp recipe and grilled bbq shrimp.

Key Takeaways

  • Learn the ultimate grilling guide for bbq shrimp recipe
  • Discover the rich heritage of bbq shrimp in New Orleans cuisine
  • Get the essential ingredients and techniques for perfect grilled bbq shrimp
  • Master the art of creating mouth-watering bbq shrimp recipe
  • Improve your grilling skills with tips and tricks for bbq shrimp recipe and grilled bbq shrimp
  • Enjoy delicious grilled bbq shrimp with your friends and family

The Rich Heritage of BBQ Shrimp in New Orleans Cuisine

New Orleans is famous for its rich flavors and history. BBQ shrimp holds a special spot in the city’s food scene. By trying a new orleans cuisine bbq shrimp recipe, you can taste the city’s unique flavors. Each chef adds their own twist to this classic dish, making it a family tradition.

In New Orleans, you’ll find many restaurants with their own BBQ shrimp dishes. They range from traditional to modern, showing off the city’s culinary heritage. You can enjoy a classic bbq shrimp recipe or try something new with fresh ingredients.

  • Grilling with a sweet and spicy sauce
  • Sauteing with garlic and herbs
  • Serving with crusty bread or over rice

These methods highlight BBQ shrimp’s versatility. It can be paired with many flavors and ingredients. Whether you prefer traditional or modern bbq shrimp recipe, New Orleans has something for everyone.

Essential Ingredients for Perfect BBQ Shrimp

To make delicious grilled bbq shrimp, you need the right stuff. The type of shrimp, marinades, and seasonings are key. They affect the taste and feel of your dish. Here are the freshest ingredients for a great bbq shrimp recipe.

Fresh, sustainable shrimp are a must. They should be firm, smell mild, and look good. You can pick from Gulf, whiteleg, or Pacific white shrimp. The marinade is also important, adding flavor and softness. It usually has olive oil, garlic, lemon, and herbs like parsley or thyme.

For the best taste, choose the right seasonings. Paprika, cayenne pepper, and Old Bay are popular choices. A bit of lemon juice or vinegar adds a nice tang. With these ingredients, you’ll make a tasty grilled bbq shrimp dish that everyone will love.

  • Fresh and sustainable shrimp
  • Mixture of olive oil, garlic, and herbs for the marinade
  • Paprika, cayenne pepper, and Old Bay seasoning for added flavor
  • Acidity from lemon juice or vinegar

With these ingredients, your bbq shrimp recipe will be unforgettable. It’s perfect for any occasion, whether you’re grilling for a big group or a cozy night in. The right ingredients make all the difference in your grilled bbq shrimp.

Selecting and Preparing Your Shrimp

Choosing the right shrimp is key for a tasty bbq shrimp recipe. You need fresh, juicy shrimp that can handle the grill. For a spicy shrimp recipe, go for jumbo or extra-large shrimp. They can take the bold flavors better.

To get your shrimp ready, rinse them under cold water and dry them with a paper towel. Then, clean and devein the shrimp. This removes the shell and the dark vein, ensuring they’re clean and cook evenly.

  • Choose fresh, sustainably-sourced shrimp for the best flavor and texture
  • Opt for larger shrimp, such as jumbo or extra-large, for a spicy shrimp recipe
  • Clean and devein the shrimp to ensure they are free of impurities and will cook evenly
  • Store the shrimp in a sealed container in the refrigerator to keep them fresh

By following these tips, you’ll make a delicious bbq shrimp recipe. It will impress everyone. Whether you’re making a spicy shrimp recipe or a traditional bbq shrimp recipe, the secret is in the shrimp selection and preparation.

Creating Your Signature BBQ Shrimp Marinade

To make a tasty grilled bbq shrimp dish, a great marinade is crucial. In new orleans cuisine, the secret is mixing flavors and spices well. Start with olive oil, garlic, and herbs like thyme and rosemary.

A good marinade balances acidic, sweet, and savory tastes. For grilled bbq shrimp, mix lemon juice, honey, and hot sauce. Lemon juice breaks down proteins, honey adds sweetness, and hot sauce brings spice.

Here are some key ingredients for your marinade:

  • Lemon juice
  • Garlic
  • Herbs like thyme and rosemary
  • Honey
  • Hot sauce

Adjust each ingredient to your taste. You can also add Worcestershire sauce or paprika for a unique flavor. The goal is to find the perfect mix for you.

By following these tips, you can make a signature bbq shrimp marinade. It will take your dish to the next level. Whether for a big group or a few friends, a good marinade makes a meal unforgettable. So, don’t hesitate to try new things – your taste buds will love it!

The Ultimate BBQ Shrimp Recipe: Step-by-Step Guide

To make a delicious bbq shrimp recipe, start with fresh, large shrimp. Prepare them for the marinade first. A great spicy shrimp recipe needs a mix of flavors. So, choose your seasonings carefully to get the right taste.

Here are the main steps:

  • Make your marinade with olive oil, garlic, and spices.
  • Season the shrimp with salt, pepper, and other seasonings you like.
  • Grill the shrimp over medium-high heat, turning them often for even cooking.

For a spicy twist, add diced jalapenos or cayenne pepper to your bbq shrimp recipe. It’s important to balance flavor and heat. Taste and adjust as you go. With these steps and basic ingredients, you’ll make a tasty spicy shrimp recipe.

Focus on the flavors and techniques that make a bbq shrimp recipe stand out. Follow these steps and try different seasonings and ingredients. You’ll impress your friends and family with a great spicy shrimp recipe. So, get grilling and enjoy!

Mastering the Grilling Temperature and Timing

To get perfectly grilled bbq shrimp, you need to know how to control the heat and time. Aim for a medium-high heat, around 400-450°F, for a nice sear. The recipe you choose will also affect the best temperature and cooking time.

Grill the shrimp for 2-3 minutes on each side. They should turn pink and not be translucent anymore. To avoid overcooking, use a food thermometer. It should read 145°F inside.

Here are some tips for grilling like a pro:

  • Preheat your grill to the right temperature before adding the shrimp
  • Use a timer to ensure you’re cooking the shrimp for the right amount of time
  • Don’t overcrowd the grill, as this can lower the temperature and affect cooking time

Follow these tips and use a good bbq shrimp recipe. Stay focused on temperature and timing. Don’t be afraid to try new things to find what works best for you.

Sauce and Basting Techniques for Extra Flavor

To make your BBQ shrimp dish better, learning sauce and basting techniques is key. In New Orleans, a great sauce can change everything. For a spicy shrimp recipe, getting the flavors right is crucial. Start with a basic sauce of butter, garlic, and herbs, a common New Orleans choice.

Exploring sauce and basting methods can add layers of flavor. Here are some tips:

  • Marinate your shrimp in olive oil, lemon juice, and spices before grilling. This boosts your spicy shrimp’s flavor.
  • Baste your shrimp with a tasty sauce while grilling. This adds moisture and flavor, a New Orleans favorite.
  • Try different sauces like BBQ, cocktail, or remoulade. Find the best match for your spicy shrimp.

Getting the sauce’s consistency right is important. It should coat the shrimp well but not be too thick. Aim for a sauce like honey, a staple in New Orleans sauces.

Mastering sauce and basting techniques will make your BBQ shrimp dish delicious. With practice and trying new things, you’ll impress everyone with your cooking skills.

Serving Suggestions and Perfect Pairings

When serving your bbq shrimp, aim for a dish that looks and tastes great. You’ve grilled your shrimp perfectly. Now, think about what sides will go well with it.

Consider sides like garlic mashed potatoes, grilled vegetables, and corn on the cob. These options are tasty and balance the shrimp’s richness. For a heartier meal, try cajun rice or hushpuppies with your shrimp.

For drinks, a crisp white wine like Sauvignon Blanc or Pinot Grigio is a good match. If you prefer beer, a light lager or pale ale works well. For something non-alcoholic, fresh lemonade or iced tea are refreshing choices.

To enhance your dish, add fresh herbs, lemon wedges, or cocktail sauce. Paying attention to presentation makes your meal memorable and enjoyable. It will surely impress your guests.

Troubleshooting Common BBQ Shrimp Challenges

When you make a spicy shrimp recipe, you might face some common problems. New Orleans cuisine is famous for its bold tastes. But, even with great skills, things can still go wrong. Issues like overcooking or undercooking the shrimp can mess up the dish’s texture and taste.

To solve these problems, you need to find the cause and change your methods. If your shrimp are always overcooked, you might need to adjust the grilling time or heat. If they’re undercooked, try grilling them for longer or at a higher temperature.

Some common problems with BBQ shrimp include:

  • Overcooking or undercooking the shrimp
  • Insufficient or excessive seasoning
  • Inadequate marinade time

Knowing these common issues and how to fix them will help your spicy shrimp recipe always be a hit. Whether you’re experienced or new to grilling, mastering BBQ shrimp takes practice and patience. With these tips, you’ll be on your way to making delicious, authentic New Orleans cuisine that will wow your loved ones.

Conclusion: Mastering Your BBQ Shrimp Game

Learning to make BBQ shrimp is a journey that takes dedication and patience. You now know the history, traditional ways, and key ingredients. This knowledge lets you make delicious grilled BBQ shrimp that will wow your loved ones.

The secret to great BBQ shrimp is finding the right flavors and grilling them just right. Also, using basting and saucing techniques well is important. With more practice, you’ll find your own way to make BBQ shrimp and become an expert.

So, get your grill ready, gather your ingredients, and start cooking. Let the smell of tasty BBQ shrimp fill your space. Enjoy making a dish that honors New Orleans’ rich food culture. Happy grilling!

FAQ

What are the essential ingredients for making the perfect BBQ shrimp dish?

To make the perfect BBQ shrimp, you need fresh, high-quality shrimp. You also need a tasty marinade with Worcestershire sauce, lemon juice, and spices. Don’t forget the right seasonings to enhance the flavor.

How do I choose the best type and size of shrimp for my BBQ shrimp recipe?

Choose larger, peeled, and deveined shrimp for your BBQ. Look for jumbo or extra-large sizes. The size and type of shrimp affect the dish’s texture and taste.

What are some tips for creating the perfect BBQ shrimp marinade?

For a great marinade, mix Worcestershire sauce, lemon juice, garlic, and spices. Let the shrimp marinate for at least 30 minutes. This lets the flavors soak in fully.

How do I properly grill BBQ shrimp to achieve the perfect level of doneness?

Grilling BBQ shrimp needs attention to temperature and timing. Grill over medium-high heat, turning often, until they’re opaque and cooked, about 2-3 minutes per side.

What are some tasty side dish and beverage pairings that complement BBQ shrimp?

Pair BBQ shrimp with creamy grits, crisp coleslaw, and roasted veggies. For drinks, try a crisp white wine, a refreshing lager, or a New Orleans-style cocktail like a Hurricane or Sazerac.

How can I add a spicy twist to my BBQ shrimp recipe?

For a spicy twist, add Cajun seasoning, hot sauce, or crushed red pepper flakes to your marinade or seasoning. Serve with spicy remoulade or cocktail sauce for extra heat.

What are some common challenges when grilling BBQ shrimp, and how can I troubleshoot them?

Common grilling challenges include overcooking or undercooking, and marinade or sauce issues. To fix these, watch the cooking time and temperature closely. Adjust your methods to get the perfect flavor and doneness.

Do You Like Our Recipe ?

0.0
0.0 out of 5 stars (based on 0 reviews)
Excellent0%
Very good0%
Average0%
Poor0%
Terrible0%

Quick & Tasty Chopped Steak Recipe: A Family Favorite

Looking for a meal that everyone will enjoy? This chopped steak recipe is a classic American dish. It’s easy to make and full of flavor. It’s perfect for busy parents and cooks of all levels.

This homemade chopped steak is ready in under an hour. It’s ideal for those crazy weeknights.

Key Takeaways

  • Discover a chopped steak recipe that’s quick, easy, and delicious for the whole family.
  • Learn how to prepare a homemade chopped steak with minimal ingredients and maximum flavor.
  • Master the art of creating a chopped steak recipe that’s ready in under an hour.
  • Find out why this dish is a timeless favorite in American cuisine.
  • Get tips for serving and pairing your chopped steak recipe with complementary sides.

Understanding Chopped Steak: A Classic American Dish

Chopped steak is a favorite in many American homes for years. It’s made from ground beef, often mistaken for hamburg steak. But they are different. Let’s dive into its history and what makes it special.

A classic chopped steak combines ground beef with spices, shaped into patties. This mix creates a tasty and soft patty. Chopped steak has been a part of American food since the early 1900s. It was a cheap option compared to steak.

Key Characteristics of Chopped Steak

  • Made with ground beef and seasonings
  • Formed into a patty shape
  • Can be cooked to various levels of doneness

Chopped steak is a tasty and flexible dish. It can be enjoyed in many ways. If you’re searching for a delicious chopped steak recipe or just curious about it, knowing its history and how it’s made is key.

Essential Ingredients for the Perfect Chopped Steak Recipe

To make a tasty and simple chopped steak, you need the right stuff. The key ingredients are ground beef, breadcrumbs, egg, onion, salt, and pepper. These mix together to form a patty, making it easy to cook and serve.

Breadcrumbs help hold the mix together. The egg adds moisture and richness. The onion brings a sweet and savory taste that goes well with the beef. Salt and pepper add depth and complexity, making it a classic American dish.

When making your chopped steak, remember these important ingredients:

  • Ground beef: the main part of the dish
  • Breadcrumbs: help bind the mix
  • Egg: adds moisture and richness
  • Onion: adds a sweet and savory flavor
  • Salt and pepper: add depth and complexity

A good chopped steak recipe is a staple in many homes. With these key ingredients, you’re on your way to making a delicious and easy dish. Whether you’re an experienced cook or just starting, this recipe will be a hit with your family.

Kitchen Tools and Equipment Needed

To make a tasty homemade chopped steak, you need the right tools and equipment. A quick recipe for chopped steak requires basic utensils and cookware. These help get the perfect texture and flavor.

A large bowl, meat thermometer, spatula, and a cooking surface like a skillet or grill are essential. These tools ensure your chopped steak turns out juicy and flavorful. For a quick recipe, having these tools is crucial.

Must-Have Utensils

  • Fork
  • Knife
  • Spoon

Optional but Helpful Tools

  • Food processor
  • Stand mixer

With these tools, you’re ready to make a delicious homemade chopped steak. It will impress even the most finicky eaters. Whether you want a quick recipe or a more detailed dish, the right tools are key.

Preparing Your Meat for Success

To make the perfect ground beef chopped steak, start with top-notch ingredients. Choose lean and fresh ground beef. Handle the meat gently to prevent it from becoming dense and tough.

Cooking the meat to the right temperature is key. The ideal internal temperature for ground beef chopped steak is 160°F. Use a meat thermometer to check this. It ensures the meat is safe and tender.

Some important tips for meat preparation include:

  • Picking the right fat content for your ground beef chopped steak
  • Not overmixing the meat to avoid compacting
  • Cooking the classic chopped steak to the recommended internal temperature

By following these steps and preparing your meat well, you’ll make a tasty classic chopped steak. It will impress everyone at your table.

Step-by-Step Chopped Steak Preparation Method

To make a tasty chopped steak, follow a simple step-by-step guide. It’s important to handle the meat gently. This prevents it from becoming dense and tough.

Begin by mixing ground beef with breadcrumbs, egg, onion, salt, and pepper. Just mix until they’re combined. Don’t overdo it to keep the texture right.

Mixing and Seasoning

  • Combine ground beef with breadcrumbs, egg, onion, salt, and pepper
  • Mix ingredients until just combined
  • Avoid overmixing to prevent a dense texture

Shaping Techniques

After mixing, shape the steak into a patty. Try to make it about 3/4 inch thick. This ensures it cooks evenly and tastes great.

Pre-cooking Tips

Before cooking, handle the steak gently. This keeps it tender and juicy. By following these steps, you’ll get a delicious chopped steak for any meal.

Mastering the Cooking Process

To make a tasty chopped steak recipe, you need to get the cooking right. Cook the chopped steak to 160°F. You can use pan-frying, grilling, or broiling to cook it.

When making a homemade chopped steak, cook it slowly. This helps prevent the outside from burning before the inside is done.

Here are some tips for cooking your chopped steak recipe:

  • Cook the chopped steak in a skillet over medium-high heat.
  • Use a thermometer to check if the internal temperature is 160°F.
  • Don’t press down on the chopped steak while it’s cooking. This can make it dry.

By following these tips, you’ll make a delicious homemade chopped steak. It will be a hit with everyone. Always cook your chopped steak recipe safely to avoid foodborne illness.

Sauce and Gravy Options

When you make a quick chopped steak recipe, the right sauce or gravy can make it even better. For a ground beef chopped steak, the right sauce adds flavor, moisture, and texture. There are many options to choose from, each with its own special taste.

A classic brown gravy is a traditional choice that goes well with chopped steak. It’s made with beef broth and flour, seasoned with salt, pepper, and spices. This gravy brings a rich, savory flavor to the dish.

Variations and Alternatives

  • Mushroom sauce variation: This creamy and savory option is made with sautéed mushrooms and heavy cream.
  • Horseradish sauce: This spicy and tangy option adds a unique flavor and texture to the dish.
  • BBQ sauce: This sweet and smoky option is perfect for those who like a little bit of sweetness with their chopped steak.

These sauce and gravy options can enhance the flavor of a quick chopped steak recipe, made with ground beef chopped steak. By picking the right sauce, you can add a new dimension to the dish and make it even more enjoyable.

Serving Suggestions and Side Dishes

There are many ways to serve a tasty chopped steak. You can pair it with sides like mashed potatoes, steamed veggies, or a fresh salad. The goal is to find sides that make the steak even better without taking over.

Try serving the steak with roasted Brussels sprouts, sautéed spinach, or creamy coleslaw. These options add a nice contrast in texture and taste. For a cozy meal, pair the steak with garlic mashed potatoes or roasted sweet potatoes. Sweet potatoes’ earthy sweetness complements the steak’s savory flavor.

Here are some popular side dishes that go well with a classic chopped steak:

  • Roasted vegetables: Brussels sprouts, broccoli, or carrots
  • Sautéed greens: spinach, kale, or collard greens
  • Creamy sides: coleslaw, mashed potatoes, or sweet potatoes
  • Fresh salads: garden salad, Caesar salad, or caprese salad

The choice of side dishes depends on what you like and the event. A delicious chopped steak is perfect for any meal. It’s sure to impress anyone. Whether it’s a classic or a modern twist, the right sides can make it even more special.

Conclusion: Making This Chopped Steak Recipe Your Own

This chopped steak recipe is a true American classic. You can easily make it your own. Just try different ingredients and seasonings to find the perfect flavor.

Whether you like a classic homemade chopped steak or something new, it’s easy to make. This dish can be customized to your liking.

This recipe is very versatile. You can serve the tender, flavorful chopped steak with your favorite sides. Try it with mashed potatoes or roasted vegetables, and add a rich sauce or gravy.

The possibilities are endless. You can create a memorable meal that everyone will love. It’s a great way to satisfy your taste buds and your family’s preferences.

So, don’t be afraid to try new things. With a few simple changes, you can make this chopped steak recipe a new family favorite. Enjoy finding the perfect ingredients and techniques to make it shine in your kitchen.

FAQ

What is chopped steak?

Chopped steak is a classic American dish. It’s made with ground beef seasoned and shaped into a patty. It’s different from hamburg steak, even though many think they’re the same.

How is chopped steak different from hamburg steak?

Chopped steak uses ground beef mixed with seasonings. Hamburg steak, on the other hand, has a coarser beef grind and less seasoning.

What are the essential ingredients for a chopped steak recipe?

To make chopped steak, you need ground beef, breadcrumbs, egg, onion, salt, and pepper. These ingredients make a flavorful and tender patty.

What kitchen tools and equipment do I need to make chopped steak?

You’ll need a large bowl, a meat thermometer, a spatula, and a cooking surface like a skillet or grill. A food processor and stand mixer can also be helpful.

How do I prepare the ground beef for the chopped steak recipe?

Choose a lean and fresh ground beef. Handle it gently to avoid compacting. Cook it to 160°F to ensure it’s safe to eat.

What are the steps for preparing the chopped steak?

First, mix and season the ground beef. Then, shape it into a patty. Cook it slowly to the right temperature. This way, the outside won’t burn before the inside is cooked.

What are some sauce and gravy options for chopped steak?

You can try a classic brown gravy or a mushroom sauce. Horseradish sauce or BBQ sauce are also great options.

What are some good side dishes to serve with chopped steak?

Serve it with mashed potatoes, steamed vegetables, or a salad. Choose sides that enhance the flavor and texture of the steak without overpowering it.

Do You Like Our Recipe ?

0.0
0.0 out of 5 stars (based on 0 reviews)
Excellent0%
Very good0%
Average0%
Poor0%
Terrible0%

Delicious Cucumber Kimchi Recipe – Easy to Make at Home

Cucumber kimchi is a favorite Korean side dish. It mixes fresh cucumbers with spicy Korean chili flakes and spices. This dish is tasty, nutritious, and easy to make at home.

Making cucumber kimchi is simple. This recipe makes it easy for anyone to try this Korean dish. It’s great for both seasoned cooks and beginners.

Introduction to Cucumber Kimchi

Cucumber kimchi is a hit in Korea. It’s perfect for any meal because of its unique spices and flavors. You can enjoy it as a side, in other dishes, or as a snack.

Key Takeaways

  • You can easily make a delicious cucumber kimchi recipe at home with a few simple ingredients.
  • This traditional cucumber kimchi recipe is perfect for anyone looking to try a new Korean dish.
  • Cucumber kimchi is a great addition to any meal, with its balance of spicy, sour, and sweet flavors.
  • Making cucumber kimchi is easier than you think, and it’s a great way to add some excitement to your meals.
  • Cucumber kimchi is a popular Korean side dish that is perfect for any occasion.

Understanding Cucumber Kimchi: A Korean Culinary Treasure

Cucumber kimchi is a key part of Korean food, with a deep history and cultural value. For generations, people have used fermentation to keep vegetables fresh. Cucumber kimchi is a favorite among these.

To make a tasty cucumber kimchi recipe, you need to know its roots and cultural importance. This dish is more than food in Korea. It’s about community and sharing.

The act of making and eating kimchi brings people together. It creates a sense of belonging. Plus, cucumber kimchi is full of vitamins, minerals, and probiotics from fermentation.

  • High in vitamins and minerals
  • Rich in probiotics from fermentation
  • Low in calories and rich in fiber

These benefits make cucumber kimchi a healthy choice. Its unique taste and health perks have made it a favorite in Korea.

Essential Ingredients for the Perfect Cucumber Kimchi Recipe

To make delicious cucumber kimchi, you need a few key ingredients. You can find these in Asian markets or well-stocked supermarkets. The secret to great homemade cucumber kimchi is using fresh, quality ingredients. This includes crisp cucumbers, spicy Korean chili flakes, pungent garlic and ginger, and savory fish sauce.

Here are the essential ingredients you’ll need:

  • Cucumbers: The main ingredient, cucumbers should be crisp and fresh.
  • Korean chili flakes: These flakes add a spicy kick and can be found in most Asian markets.
  • Garlic and ginger: These add a pungent flavor and can be found in most supermarkets.
  • Fish sauce: This savory sauce adds depth and umami flavor to your kimchi.

Making easy cucumber kimchi at home is simple. With these ingredients, you’ll be on your way to a delicious homemade cucumber kimchi recipe.

You might also want to add other seasonings and spices for a unique flavor. Some options include:

  1. Salt: To bring out the flavors of the other ingredients.
  2. Sugar: To balance out the spiciness of the Korean chili flakes.
  3. Scallions: To add a fresh and oniony flavor to your kimchi.

With these ingredients and a bit of creativity, you can make a delicious cucumber kimchi. It’s perfect for snacking, cooking, or sharing with friends and family. Making homemade cucumber kimchi is a fun and rewarding hobby that’s sure to become a favorite.

Choosing and Preparing Your Cucumbers

To make the best cucumber kimchi, picking the right cucumbers is key. Look for firm ones with few seeds. This ensures a better texture and taste in your spicy cucumber kimchi. Cleaning and cutting them right is also important. It helps remove bitterness and makes sure the flavors mix well.

Here’s how to prepare your cucumbers:

  • Wash the cucumbers well to get rid of dirt and bacteria.
  • Cut off the ends and slice them into thin rounds or spears, depending on what you like.
  • Soak the cucumber slices in a salt brine to boost flavor and help with fermentation.

The salt-brining step is vital for making spicy cucumber kimchi. It adds flavor and sets up the perfect environment for fermentation. By following these steps and choosing the right cucumbers, you’ll make a delicious and authentic spicy cucumber kimchi.

The type of cucumber you use can really change the taste and texture of your kimchi. With the right cucumbers and proper preparation, you’ll make a spicy cucumber kimchi that will wow your friends and family.

Cucumber VarietyCharacteristicsSuitability for Kimchi
Slicing cucumbersLong, thin, and seedlessExcellent
Pickling cucumbersShort, stout, and bumpyGood
English cucumbersLong, thin, and seedlessFair

Creating Your Signature Kimchi Paste

To make delicious homemade cucumber kimchi, you need a great kimchi paste. The basic recipe includes Korean chili flakes, garlic, ginger, and fish sauce. But, making kimchi at home lets you customize the paste to your liking. You can make it spicier, more sour, or add a deeper umami flavor.

Here are some suggestions for customizing your kimchi paste:

  • Add more Korean chili flakes for an extra spicy kick
  • Use fresh ginger for a more vibrant flavor
  • Incorporate other ingredients like carrots, onions, or mushrooms to add texture and flavor

When making easy cucumber kimchi, remember to balance the flavors. You can adjust the amount of each ingredient to your liking. With a bit of experimentation, you can create a signature kimchi paste that makes your homemade cucumber kimchi even better.

Here’s a simple table to get you started:

IngredientBasic RecipeCustomization Options
Korean chili flakes2 tablespoonsAdd more for extra spice
Garlic3 clovesUse fresh or roasted garlic for different flavors
Ginger1 tablespoonUse fresh or ground ginger for varying intensities

Step-by-Step Cucumber Kimchi Preparation Method

To make a tasty cucumber kimchi recipe, follow a step-by-step guide. You’ll need your ingredients and kimchi paste ready. Then, mix the seasonings, combine them with cucumbers, and start the fermentation.

Each step is important for a delicious kimchi. The initial fermentation is key for the kimchi’s sour and spicy cucumber kimchi flavors.

Mixing the Seasonings

Mixing the seasonings is the first step. Combine garlic, ginger, fish sauce, and spices to make a flavorful paste. It’s crucial to balance the flavors, so taste and adjust as needed.

Combining Ingredients

After mixing the seasonings, combine them with cucumbers. Coat the cucumbers evenly with the kimchi paste. This mix of crunchy cucumbers and spicy paste makes spicy cucumber kimchi so tasty.

Initial Fermentation Process

The magic happens in the initial fermentation. This is when flavors develop, and the kimchi gets its sour taste. To start, leave the cucumber kimchi at room temperature for a few days. Check on it often, as fermentation time can vary.

By following these steps, you’ll make a delicious cucumber kimchi recipe. Its spicy and sour flavors will make it a favorite dish.

Fermentation and Storage Guidelines

To make the best cucumber kimchi, you need to know about fermentation. This process lets the natural bacteria on cucumbers grow. It makes kimchi sour and healthy. For a traditional recipe, let it ferment at room temperature for a few days. Then, move it to the fridge to slow down.

Getting the right conditions is key for great flavor and texture. The best temperature for fermentation is between 64°F and 75°F. Also, keep it in a place with good air flow, but not in direct sunlight.

Optimal Fermentation Conditions

  • Temperature: 64°F – 75°F (18°C – 24°C)
  • Humidity: 60% – 70%
  • Time: 1-5 days at room temperature, then store in the refrigerator

Storage Tips for Maximum Freshness

Storing kimchi right is crucial for keeping it fresh and tasty. After fermentation, put it in the fridge to slow down the process. Use containers that keep air out to avoid spoilage. A ceramic or glass container with a tight lid is best.

By following these tips, your homemade cucumber kimchi will last for weeks. Always use the best ingredients and stick to a traditional recipe for the best taste and texture.

Storage MethodTemperatureTime
Room Temperature64°F – 75°F (18°C – 24°C)1-5 days
Refrigerator39°F – 41°F (4°C – 5°C)Several weeks

Serving Suggestions and Pairing Ideas

Cucumber kimchi is a versatile side dish that can be served in many ways. It goes well with traditional Korean dishes like bibimbap and bulgogi. It also pairs well with international cuisines. You can use it as a topping for noodles, a side for grilled meats, or in salads. Easy cucumber kimchi brings flavor and nutrition to any meal.

Some popular ways to serve homemade cucumber kimchi include:

  • Using it as a topping for tacos or grilled meats
  • Adding it to salads for a spicy kick
  • Serving it as a side dish for Korean dishes like bibimbap or bulgogi
  • Incorporating it into noodle dishes for added flavor

Homemade cucumber kimchi is great as a condiment to enhance other dishes. Try different ways to enjoy easy cucumber kimchi and find your favorite.

Troubleshooting Common Issues

When making spicy cucumber kimchi, you might run into texture, fermentation, or flavor problems. We’ve got solutions for these common issues. This way, your spicy cucumber kimchi will turn out just right.

Texture issues, like soft or too crunchy kimchi, can be fixed. Just adjust the fermentation time or salt content. If fermentation is slow or uneven, check the temperature, salt levels, and make sure the kimchi is sealed well.

Common Issues and Solutions

  • Soft texture: Check if the kimchi is over-fermented and adjust the fermentation time.
  • Too crunchy texture: Check if the kimchi is under-fermented and adjust the fermentation time.
  • Fermentation issues: Check the temperature, salt levels, and ensure the kimchi is properly sealed.

By following these tips, you’ll make delicious spicy cucumber kimchi. Always use fresh ingredients and follow proper fermentation techniques for the best results.

Conclusion: Mastering Your Homemade Cucumber Kimchi

Making cucumber kimchi at home is a fun and rewarding journey. It mixes traditional Korean methods with your own creativity. By following this guide, you can make a tasty and real cucumber kimchi that shows off your taste.

The secret to great kimchi is using fresh, top-notch ingredients. Also, let the natural fermentation happen. This makes your kimchi even better.

With time and effort, you’ll get better at making your own cucumber kimchi. You’ll enjoy its health perks and delicious taste. Try new flavors, change the spice level, and find the perfect mix for you.

Enjoy the fermentation process and let your homemade cucumber kimchi become a favorite in your kitchen. It will add a lively and tangy flavor to your dishes.

FAQ

What is cucumber kimchi?

Cucumber kimchi is a Korean side dish. It’s made by fermenting cucumbers with chili flakes, garlic, ginger, and seasonings. It’s spicy, sour, and sweet.

What are the health benefits of cucumber kimchi?

It’s full of vitamins, minerals, and probiotics. It helps with digestion, boosts immunity, and has antioxidants.

What are the best cucumbers to use for making kimchi?

Choose firm, crisp cucumbers with few seeds. Korean or Persian cucumbers work best because of their thin skin and fewer seeds.

How do I make the perfect kimchi paste?

The kimchi paste is key. You can mix Korean chili flakes, garlic, ginger, and fish sauce to taste. Feel free to add more to make it your own.

How long does the fermentation process take?

It starts at room temperature for 3-5 days. Then, it goes in the fridge to slow down. It can take 1 to 4 weeks, depending on how sour you like it.

How should I store my homemade cucumber kimchi?

Keep it in an airtight container in the fridge. It lasts weeks and gets better with time. Make sure it’s covered in brine to stay fresh.

What are some ways to serve and enjoy cucumber kimchi?

It’s great with Korean dishes like bibimbap and bulgogi. You can also top noodles, use it as a meat condiment, or add it to salads.

How can I troubleshoot common issues with my homemade cucumber kimchi?

If it’s too soft or crunchy, check the fermentation time. Adjust the salt or time to get the right texture. If the taste is off, tweak the seasoning mix.

Do You Like Our Recipe ?

0.0
0.0 out of 5 stars (based on 0 reviews)
Excellent0%
Very good0%
Average0%
Poor0%
Terrible0%

Easy & Flavorful Purple Sweet Potato Dish

Imagine a dish that’s not only delicious but also packed with nutrients. A purple sweet potato recipe can be just that. It offers health benefits and versatility in cooking. With an easy purple sweet potato recipe, you can make a variety of healthy dishes for any occasion.

Cooking with purple sweet potatoes adds excitement to your meals. With the right techniques, you can bring out their natural sweetness. Whether you’re looking for a simple side dish or a main course, a purple sweet potato recipe is a great option. In this article, we’ll explore the basics of cooking with purple sweet potatoes. We’ll cover tips for selecting the perfect potatoes and essential kitchen tools.

Key Takeaways

  • Purple sweet potatoes are a nutrient-rich food that can be used in a variety of dishes
  • An easy purple sweet potato recipe can be a great addition to your meal
  • Healthy purple sweet potato dishes can be created with simple ingredients and techniques
  • Cooking with purple sweet potatoes can add excitement to your meals
  • With the right techniques, you can bring out the natural sweetness of purple sweet potatoes
  • A purple sweet potato recipe can be a great option for a simple side dish or main course
  • Cooking with purple sweet potatoes requires some basic kitchen tools and techniques

Introduction to Purple Sweet Potatoes

Purple sweet potatoes are packed with nutrients and offer many health benefits. They are full of fiber, vitamins, and minerals. This makes them a great choice for healthy purple sweet potato dishes. Their unique taste and texture make them perfect for both savory and sweet dishes.

These potatoes are also high in antioxidants, which can fight chronic diseases. They are rich in vitamins A and C, potassium, and fiber. This makes them ideal for those seeking simple purple sweet potato meal ideas. Purple sweet potatoes are a fantastic choice for a tasty and healthy meal or snack.

What Makes Purple Sweet Potatoes Unique

Purple sweet potatoes have a naturally sweet taste and a soft, creamy texture. They are also full of antioxidants and have anti-inflammatory properties. This makes them a great pick for delicious purple sweet potato dishes. Here are some key features that make them stand out:

  • High antioxidant content
  • Rich in vitamins and minerals
  • Anti-inflammatory properties
  • Naturally sweet flavor

Nutritional Benefits and Health Properties

Purple sweet potatoes are a nutrient-dense food with many health benefits. They are loaded with fiber, vitamins, and minerals. This makes them a top choice for a healthy and tasty meal. Here are some of the key nutritional benefits:

  1. High in fiber and vitamins
  2. Rich in minerals such as potassium and iron
  3. Anti-inflammatory properties

Selecting the Perfect Purple Sweet Potatoes

Choosing the right ingredients is key for a tasty purple sweet potato recipe. Look for purple sweet potatoes that are firm and have a deep purple color. Stay away from potatoes with soft spots or bruises, as they might be spoiled.

For an easy purple sweet potato recipe, keep these tips in mind:

  • Look for purple sweet potatoes that are heavy for their size
  • Choose potatoes with a smooth, even skin
  • Avoid potatoes with green spots or sprouts, as they can be toxic

A great purple sweet potato recipe starts with top-notch ingredients. By picking the perfect purple sweet potatoes, you’ll make a dish that’s not just tasty but also healthy. Follow these tips to make an easy purple sweet potato recipe that will wow everyone.

Whether you’re an experienced chef or just starting out, picking the right purple sweet potatoes is crucial. By using these simple tips, you’ll make a delicious and easy purple sweet potato recipe perfect for any event.

Purple Sweet Potato VarietyCharacteristicsTaste
Stokes PurpleDeep purple color, firm textureSweet, nutty flavor
OkinawanLight purple color, soft textureSweet, slightly sweet flavor

Essential Kitchen Tools and Equipment

To make tasty purple sweet potato dishes, you need the right tools. Simple recipes can be done with basic items. A chef’s knife, cutting board, and large pot are must-haves. They help you chop, boil, and mash the potatoes easily.

For more complex recipes, you might need a food processor or slow cooker. These tools help you make everything from mashed potatoes to soups. With the right gear, you can try out many purple sweet potato recipes and even create your own.

  • Chef’s knife
  • Cutting board
  • Large pot
  • Colander
  • Measuring cups and spoons

Optional tools for advanced recipes include:

  • Food processor
  • Slow cooker
  • Mixer

With these tools, you can make a wide range of purple sweet potato dishes. From simple meals to complex recipes, you’re all set.

Tool/EquipmentDescription
Chef’s knifeUsed for chopping and slicing purple sweet potatoes
Cutting boardUsed for chopping and preparing purple sweet potatoes
Large potUsed for boiling and cooking purple sweet potatoes

Preparation and Cleaning Methods

To start cooking purple sweet potatoes, you need to clean them first. Wash them well, scrub off dirt, and dry them with a towel. A good easy purple sweet potato recipe begins with clean, dry potatoes.

Here’s how to do it:

  • Wash the potatoes under cold running water to remove any dirt or debris.
  • Use a vegetable brush to scrub off any stubborn dirt or stains.
  • Dry the potatoes with a clean towel to remove excess moisture.

By following these steps, your healthy purple sweet potato dishes will be made with fresh ingredients. Clean and prepared potatoes are key for a tasty and healthy easy purple sweet potato recipe.

Choosing the right cooking method is also important. It helps bring out their natural sweetness and flavor. This makes them a great addition to any healthy purple sweet potato dishes.

Preparation MethodDescription
BoilingCooking the potatoes in boiling water until they are tender.
RoastingCooking the potatoes in the oven with some oil and seasoning until they are crispy on the outside and tender on the inside.

Basic Purple Sweet Potato Recipe for Beginners

Cooking purple sweet potatoes is easy and fun. This simple recipe is great for beginners. You’ll need just a few things: 2-3 large purple sweet potatoes, 2 tablespoons of olive oil, and a pinch of salt.

There are many ways to cook purple sweet potatoes. You can bake or boil them. For extra flavor, add herbs and spices. Try mashing with garlic and rosemary or roasting with olive oil and paprika.

Ingredients List

  • 2-3 large purple sweet potatoes
  • 2 tablespoons of olive oil
  • 1 teaspoon of salt
  • 1/2 teaspoon of black pepper
  • 1/4 teaspoon of paprika

Step-by-Step Cooking Instructions

  1. Preheat the oven to 400°F (200°C).
  2. Wash and peel the purple sweet potatoes.
  3. Cut the sweet potatoes into 1-inch cubes.
  4. Place the sweet potatoes on a baking sheet lined with parchment paper.
  5. Drizzle with olive oil and sprinkle with salt, black pepper, and paprika.
  6. Bake for 20-25 minutes or until the sweet potatoes are tender.

Common Mistakes to Avoid

Don’t overcook purple sweet potatoes. It makes them dry and taste bad. Check them often while baking. Take them out when they’re tender but still a bit firm.

IngredientQuantity
Purple sweet potatoes2-3
Olive oil2 tablespoons
Salt1 teaspoon

Advanced Cooking Techniques

For those who love to cook, purple sweet potatoes offer a chance to get creative. Advanced cooking techniques can make these potatoes even sweeter and more flavorful. Roasting them brings out their natural sweetness and adds a caramelized layer. Grilling adds a smoky taste that pairs well with their sweetness.

Consider sautéing purple sweet potatoes for a different twist. This method lets you add garlic and onions, boosting the flavor. It’s key to cook them until they’re tender but still firm. Try adjusting cooking times and temperatures to get the perfect texture.

Here are some advanced cooking techniques to try with purple sweet potatoes:

  • Roasting with herbs and spices for added depth of flavor
  • Grilling with a drizzle of olive oil and a sprinkle of salt
  • Sautéing with garlic and onions for a savory flavor

Using these techniques, you can make a variety of purple sweet potato recipes. They’re perfect for impressing guests or making a weeknight meal special. These methods will help you bring out the best in purple sweet potatoes, making your dishes truly delicious.

Cooking TechniqueFlavor ProfileTexture
RoastingCaramelized, sweetTender, slightly firm
GrillingSmoky, savoryCharred, tender
SautéingSavory, aromaticCrispy, tender

Creative Seasoning and Flavor Combinations

Purple sweet potatoes can be seasoned in many ways. You can go from sweet and spicy to savory and umami. It’s key to try out different flavors to make tasty purple sweet potato dishes.

For sweet flavors, think cinnamon, nutmeg, and maple syrup. These can make a dish sweet and indulgent. For savory tastes, garlic, rosemary, and thyme add a rich, earthy flavor.

Sweet Flavor Profiles

  • Cinnamon and sugar
  • Nutmeg and honey
  • Maple syrup and ginger

Savory Seasoning Options

  • Garlic and rosemary
  • Thyme and olive oil
  • Paprika and chili powder

Global flavors can also make purple sweet potatoes delicious. Korean chili flakes add spice, while Indian spices like cumin and coriander bring warmth. Trying new flavor mixes can lead to unique and tasty purple sweet potato recipes.

Flavor CombinationIngredientsDescription
Sweet and SpicyCinnamon, nutmeg, maple syrup, Korean chili flakesA sweet and spicy flavor combination that adds a kick to purple sweet potato dishes
Savory and UmamiGarlic, rosemary, thyme, olive oilA savory and umami flavor combination that adds depth and richness to purple sweet potato dishes

Storage and Preservation Tips

To keep your purple sweet potatoes fresh, store them right. Place them in a cool, dark spot with air flow. This way, they can stay fresh for weeks. For healthy purple sweet potato dishes, keeping them fresh is key.

Here are some tips for storing and preserving purple sweet potatoes:

  • Keep them away from direct sunlight and heat sources.
  • Store them in a breathable bag or container to maintain air circulation.
  • Do not wash the sweet potatoes before storing them, as excess moisture can cause them to rot.

For simple purple sweet potato meal ideas, freezing or canning is great. To freeze, wash, peel, and chop the sweet potatoes. Then, blanch them in boiling water for a few minutes before freezing. Canning is also a good choice, as it keeps the sweet potatoes for months.

Here is a summary of the storage and preservation methods:

MethodDescription
Room TemperatureStore in a cool, dark place with good ventilation.
FreezingWash, peel, chop, and blanch before freezing.
CanningPreserve sweet potatoes for several months by canning.

Pairing Suggestions and Side Dishes

There are many ways to make a meal complete with purple sweet potatoes. You can pair them with proteins and veggies to bring out their taste. Try them with grilled chicken or roasted turkey breast for a tasty dish.

For more flavor, add salmon or shrimp to your purple sweet potatoes. These not only taste great but also offer omega-3s and other nutrients. If you prefer plants, pair them with roasted veggies like brussels sprouts or asparagus.

Complementary Proteins

  • Grilled chicken
  • Roasted turkey breast
  • Salmon
  • Shrimp

Vegetable Combinations

  • Roasted brussels sprouts
  • Grilled asparagus
  • Sauteed spinach
  • Roasted bell peppers

Pairing purple sweet potatoes with these options makes for a tasty and easy recipe. It’s perfect for anyone, even the pickiest eaters. So, get creative and enjoy the health benefits of purple sweet potatoes.

ProteinVegetablePurple Sweet Potato Recipe
Grilled chickenRoasted brussels sproutsMashed purple sweet potatoes with grilled chicken and roasted brussels sprouts
SalmonGrilled asparagusRoasted purple sweet potatoes with salmon and grilled asparagus
ShrimpSauteed spinachPurple sweet potato soup with shrimp and sauteed spinach

Troubleshooting Common Cooking Issues

When cooking with purple sweet potatoes, you might run into problems like undercooked or overcooked potatoes. Understanding the causes and taking steps to prevent these issues is key. A well-thought-out purple sweet potato recipe can help avoid mistakes and result in a tasty dish.

Some common issues and their solutions include:

  • Undercooked potatoes: Check the cooking time and temperature to ensure they are cooked through.
  • Overcooked potatoes: Reduce the cooking time and check for doneness regularly.
  • Mushy or dry potatoes: Adjust the cooking method, such as boiling or roasting, to achieve the desired texture.

For simple purple sweet potato meal ideas, start with roasting or boiling. These methods are simple and can lead to a flavorful dish. By following some basic tips and solving common problems, you can make a variety of tasty meals with purple sweet potatoes.

With practice and patience, you’ll get better at cooking with purple sweet potatoes. You’ll be able to make a range of delicious, healthy meals. Whether you’re after a simple purple sweet potato meal idea or a more complex purple sweet potato recipe, success comes from understanding the basics and being open to trying new things.

Cooking MethodCooking TimeTemperature
Roasting45-60 minutes425°F (220°C)
Boiling15-20 minutes212°F (100°C)

Health-Conscious Cooking Modifications

Preparing healthy purple sweet potato dishes is easy with a few tweaks. These changes make it simple to create recipes that fit different diets. For example, those with dietary restrictions can find low-fat options and special adaptations.

For a healthier approach, use herbs and spices for flavor instead of salt and sugar. Choose low-fat cooking methods like baking or steaming. These methods keep the natural nutrients of purple sweet potatoes, making them a great choice for a healthy diet.

There are many options for different dietary needs. Vegans can use plant-based alternatives instead of dairy. Those with gluten-free diets can find gluten-free flours and ingredients. These changes allow for tasty and easy purple sweet potato recipes for various diets.

Low-Fat Alternatives

  • Use herbs and spices for flavor instead of salt and sugar
  • Opt for low-fat cooking methods such as baking or steaming
  • Substitute dairy products with plant-based alternatives

Dietary Restriction Adaptations

With a few simple changes, you can make healthy purple sweet potato dishes for any diet. Whether you need low-fat options or special adaptations, there are many choices. This way, you can enjoy delicious and easy purple sweet potato recipes.

Conclusion

Cooking with purple sweet potatoes is a fun and creative journey. It lets you try out many tasty purple sweet potato recipes. You can add this versatile ingredient to your meals in many ways.

Whether you’re new to cooking or have lots of experience, we hope this guide helps you. It teaches you how to work with purple sweet potatoes. You’ll learn to make dishes that are not only good for you but also look amazing.

Now, it’s time to dive into the world of purple sweet potatoes! Try out different recipes and cooking methods. Finding your favorite purple sweet potato dishes is a fun and tasty adventure.

FAQ

What are the unique characteristics of purple sweet potatoes?

Purple sweet potatoes have a deep purple skin and vibrant, almost violet-colored flesh. They taste sweet and earthy. Their dense, creamy texture is different from traditional orange sweet potatoes.

What are the health benefits of purple sweet potatoes?

Purple sweet potatoes are full of antioxidants, vitamins, and minerals. They are rich in fiber, vitamin C, and vitamin A. They also have potassium and manganese. The purple color comes from anthocyanins, which fight chronic diseases.

How do I select the best purple sweet potatoes?

Choose tubers that are firm, heavy, and have a deep purple color. Avoid soft spots, blemishes, or sprouts. These signs indicate spoilage.

What essential kitchen tools are needed to cook purple sweet potatoes?

You’ll need a sharp chef’s knife, a cutting board, a large pot or baking sheet, and a vegetable peeler. For advanced recipes, consider a food processor, slow cooker, or grill.

How do I properly prepare and clean purple sweet potatoes?

Wash them under running water to remove dirt. Use a vegetable brush to scrub the skin. Pat dry with a clean towel. Peel if desired, or leave the skin for extra texture and nutrition.

What is a basic recipe for cooking purple sweet potatoes?

Peel and cube the potatoes. Toss with olive oil, salt, and pepper. Roast in a preheated oven at 400°F (200°C) for 20-25 minutes, until tender and lightly browned.

What are some advanced cooking techniques for purple sweet potatoes?

Experienced cooks can grill, sauté, mash, or puree purple sweet potatoes. These methods enhance their natural sweetness and texture.

How can I add flavor to my purple sweet potato dishes?

Season with sweet spices like cinnamon and nutmeg, or savory herbs and spices. Try global flavors like curry powder or miso paste for unique dishes.

How can I properly store and preserve purple sweet potatoes?

Store them in a cool, dark place like a pantry or root cellar. Refrigeration can affect texture and sweetness. Freeze cooked or raw cubes or puree for longer storage.

What are some good pairing suggestions and side dishes for purple sweet potatoes?

Pair with grilled chicken, roasted pork, or sautéed tofu. They’re also great with roasted vegetables, quinoa, or leafy greens. Serve with a protein, vegetable, and whole grain for a complete meal.

How can I troubleshoot common cooking issues with purple sweet potatoes?

If they’re undercooked, cook longer or at a higher temperature. If overcooked, cook less or at a lower temperature. Even-sized pieces help prevent uneven cooking.

How can I modify purple sweet potato recipes to be more health-conscious?

Use low-fat or non-dairy alternatives like Greek yogurt or almond milk. Adapt recipes for vegan, gluten-free, or other diets by choosing the right ingredients and methods.

Do You Like Our Recipe ?

0.0
0.0 out of 5 stars (based on 0 reviews)
Excellent0%
Very good0%
Average0%
Poor0%
Terrible0%

Easy Hotcake Mix Recipe: Fluffy Homemade Pancakes

Start your day with a stack of fluffy pancakes, made from a simple hotcake mix. This recipe is a game-changer for breakfast, letting you choose your ingredients and flavors. You’ll enjoy making delicious, fluffy pancakes for a quick breakfast.

Using a hotcake mix makes mornings easier. With just a few ingredients, you can have a tasty breakfast ready fast. It’s perfect for a quick breakfast or a fun weekend brunch.

Key Takeaways

  • Make fluffy pancakes with a simple hotcake mix recipe
  • Control the ingredients and customize the flavor to your taste
  • Perfect for easy breakfast ideas and quick morning meals
  • Great for weekend brunch or special occasions
  • Customize with your favorite toppings or mix-ins
  • Easy to make and fun to eat

Understanding the Basics of Homemade Hotcake Mix

Making delicious homemade hotcakes starts with knowing the basics. You can make your own pancake mix from scratch. This lets you pick the ingredients and make the mix just right for you. Your homemade hotcakes will be light and fluffy, just how you like them.

One great thing about making your own mix is choosing the ingredients. You can pick the flour, sugar, and leavening agents. This is super helpful if you have special dietary needs, like gluten-free or low-sugar. You can make a mix that fits your taste and needs.

Benefits of Making Your Own Mix

  • Control over ingredients
  • Customization of recipe
  • Ability to cater to dietary restrictions

Essential Ingredients Overview

The basic ingredients for homemade hotcake mix are flour, sugar, and leavening agents. You can also add eggs, milk, and flavorings for a special touch. Making your mix from scratch lets you try different ingredients to find your favorite.

Storage and Shelf Life

Keep your homemade hotcake mix in an airtight container to keep it fresh. It can last for months, which is great for busy families. By following these steps, you can make your own mix and enjoy fluffy pancakes whenever you want.

IngredientQuantity
Flour2 cups
Sugar1 cup
Leavening agents2 teaspoons

Kitchen Tools and Equipment Needed

To make delicious pancakes, you’ll need the right kitchen tools and equipment. Having the right tools is key to making great pancakes. You’ll need a large mixing bowl, a whisk, and a non-stick pan to cook your pancakes.

Here’s a list of the essential tools and equipment you’ll need:

  • Mixing bowl
  • Whisk
  • Non-stick pan
  • Measuring cups and spoons
  • Electric mixer (optional)

Using the right tools helps make light and fluffy pancakes. The quality of your tools and equipment also matters. For example, a non-stick pan is crucial for cooking pancakes. It prevents them from sticking and makes flipping easier.

When making breakfast recipes like pancakes, having the right tools is important. With the right tools, you can make pancakes that taste great and look good. So, make sure you have all the necessary tools and equipment before you start making your pancakes.

Having the right kitchen tools and equipment lets you make delicious pancakes. Whether you’re making pancakes for yourself or a crowd, the right tools make a big difference. They ensure your pancakes are of high quality.

Tool/EquipmentDescription
Mixing BowlA large bowl used for mixing ingredients
WhiskA kitchen tool used for mixing and blending ingredients
Non-stick PanA pan coated with a non-stick material to prevent food from sticking

Perfect Hotcake Mix Recipe for Fluffy Results

To make a tasty hotcake mix, you need the right ingredients in the right amounts. A good mix should have flour, sugar, and leavening agents. It’s a great choice for easy breakfast ideas.

Here’s a list of dry ingredients you’ll need:

  • 2 cups all-purpose flour
  • 2 tablespoons sugar
  • 2 teaspoons baking powder
  • 1/4 teaspoon salt

Dry Ingredients List

You can also add optional ingredients for extra flavor. Some ideas include:

  • Chopped nuts or chocolate chips
  • Dried fruit, such as cranberries or blueberries
  • A sprinkle of cinnamon or nutmeg

Optional Add-ins

To mix the batter, combine the dry ingredients in a bowl. Whisk until well combined. Add optional ingredients and stir until they’re evenly distributed. This recipe makes delicious and fluffy hotcakes for a quick breakfast.

Mixing Instructions

Follow this hotcake mix recipe for a tasty and easy breakfast. It’s perfect for any day. Whether you’re looking for a simple recipe or easy breakfast ideas, start with this one.

IngredientQuantity
Flour2 cups
Sugar2 tablespoons
Baking powder2 teaspoons
Salt1/4 teaspoon

Turning Your Mix Into Perfect Pancakes

To make fluffy pancakes, use the right amount of batter and cook at the correct temperature. When making homemade hotcakes, avoid overmixing the batter. This is key for a light and airy texture. As you prepare your breakfast recipes, ensure the pan temperature is just right.

Here are some tips to help you turn your mix into perfect pancakes:

  • Use a non-stick pan or griddle to prevent the pancakes from sticking and to make them easier to flip.
  • Adjust the heat as needed to maintain a consistent temperature.
  • Don’t overcrowd the pan – cook the pancakes one or two at a time, depending on their size.

As you cook your fluffy pancakes, keep an eye on the time and the heat. With a little practice, you’ll be making perfect homemade hotcakes every time. Your breakfast recipes will be a hit with family and friends.

By following these simple tips and using your favorite breakfast recipes, you’ll enjoy delicious homemade hotcakes in no time. So go ahead, get creative with your fluffy pancakes and make breakfast a meal to look forward to!

Mastering the Cooking Technique

To make delicious pancakes, you need to know how to cook them right. This means getting the pan temperature just right, flipping them correctly, and avoiding common mistakes. By doing this, you can make tasty and beautiful breakfasts.

Getting the pan temperature right is key for golden-brown pancakes. Use a thermometer to check the temperature. Also, grease the pan with a bit of oil or butter to stop pancakes from sticking.

Proper Pan Temperature

A medium heat is best for pancakes. If the pan is too hot, pancakes will burn before they’re fully cooked. If it’s too cold, they’ll cook too slowly and might be dense.

Flipping Tips

Flipping pancakes can be tricky at first. But with a bit of practice, you’ll get better. Use a spatula to loosen the pancake, then flip it quickly. Flip when bubbles appear and the edges start to dry.

Common Cooking Mistakes

Some common mistakes to avoid include overmixing the batter, using too much oil or butter, and cooking too long. By avoiding these, you can make pancakes that everyone will love. With the right mix and a bit of practice, you’ll be a pancake pro in no time.

Cooking MistakeEffect on Pancakes
Overmixing the batterDense and tough pancakes
Using too much oil or butterGreasy and soggy pancakes
Cooking for too longBurned and dry pancakes

Creative Variations for Your Hotcake Mix

Now that you have a basic hotcake mix recipe, it’s time to get creative. Try adding fresh or dried fruits, like blueberries or bananas, for a sweet twist. This adds a fruity flavor to the classic hotcake.

Adding nuts or chocolate chips can give your hotcakes a crunchy texture and extra flavor. You can also use different milks, such as almond or soy milk, for a non-dairy version. The possibilities are endless, and it’s up to you to find the perfect mix.

  • Blueberry hotcakes with fresh blueberries and a hint of lemon zest
  • Banana hotcakes with sliced bananas and a drizzle of honey
  • Chocolate chip hotcakes with dark chocolate chips and a sprinkle of cinnamon

These are just a few ideas for creative hotcake variations. Don’t be afraid to try new things and make your own unique flavors. This way, your breakfast recipes will always be exciting and delicious.

Storage and Make-Ahead Tips

To keep your homemade hotcakes fresh, it’s key to store them right. Store your pancake mix in an airtight container. This keeps it fresh and ready for easy breakfasts.

Freezing your hotcakes is a great way to enjoy them later. Here are some tips:

  • Store your hotcake mix in an airtight container to keep it fresh.
  • Freeze your hotcakes for up to 2 months for later use.
  • Reheat your frozen hotcakes in the microwave or toaster for a quick and easy breakfast.

By following these tips, you can enjoy your homemade hotcakes whenever. They’ll stay fresh and delicious. Perfect for a quick breakfast or a weekend brunch.

Remember, the secret to fresh hotcakes is proper storage and freezing. With these tips, enjoy your favorite breakfast anytime, always delicious and fresh.

Troubleshooting Common Issues

When making fluffy pancakes, you might run into some common problems. These can mess up the texture and taste of your breakfast. It’s key to find out what’s causing the issue and fix it.

Start by checking your ingredients and tools. Make sure you’re using fresh stuff and the right tools for mixing and cooking. If your pancakes are dense or tough, try changing the dry to wet ingredient ratio. Or add a leavening agent to help them rise.

Texture Problems

Some common texture issues include:

  • Dense or tough pancakes: This can be caused by overmixing the batter or using too much flour.
  • Soggy or undercooked pancakes: This can be caused by not cooking the pancakes for long enough or using too much liquid in the batter.

Cooking Challenges

Cooking can also be a challenge. Some common problems are:

  • Burning or overcooking the pancakes: This can be caused by the pan being too hot or not adjusting the heat properly.
  • Undercooking the pancakes: This can be caused by not cooking the pancakes for long enough or not using the right type of pan.

By following these tips, you can make delicious pancakes. Always use fresh ingredients and the right tools for the best results.

Common IssueSolution
Dense or tough pancakesAdjust the ratio of dry to wet ingredients or add a leavening agent
Soggy or undercooked pancakesCook the pancakes for a longer time or use less liquid in the batter
Burning or overcooking the pancakesAdjust the heat or use a thermometer to ensure the right temperature

Serving Suggestions and Toppings

When serving your hotcakes from a tasty hotcake mix recipe, you have endless options. You can go classic with butter and syrup or try fresh fruit, whipped cream, or chocolate chips. The goal is to mix and match toppings to make your hotcakes special.

For easy breakfast ideas, top your hotcakes with yogurt and granola, honey and banana, or peanut butter and bacon. You can also use almond or soy milk for a different flavor. The most important thing is to have fun and be creative.

  • Fresh fruit, such as strawberries or blueberries
  • Whipped cream or whipped coconut cream
  • Chocolate chips or chocolate shavings
  • Nuts, such as walnuts or pecans
  • Caramel sauce or honey

Remember, making your own hotcake mix recipe lets you customize it. So, don’t be shy to try new toppings and serving ideas. This way, you can create a tasty hotcake mix recipe that’s uniquely yours.

Conclusion: Mastering Your Homemade Hotcake Adventures

Creating your own homemade hotcake mix is a fun journey. You get to choose the flavors and textures you love. By trying different recipes, you can make fluffy, tasty pancakes whenever you want.

Success comes from measuring ingredients right, getting the batter just right, and mastering cooking. With practice, you’ll impress everyone with your homemade hotcakes.

Don’t be shy to try new things and have fun. Mix up flavors, try different toppings, and find your favorite pancake mix. The fun of making homemade hotcakes is unmatched.

FAQ

What are the benefits of making your own hotcake mix?

Making your own hotcake mix lets you control the ingredients. This way, you can make it just how you like it. You also avoid additives and preservatives found in store-bought mixes.

What are the essential ingredients needed for a homemade hotcake mix?

For a basic homemade hotcake mix, you need flour, baking powder, sugar, and salt. Sometimes, you might add milk powder or other dry ingredients. These ingredients help make your pancakes fluffy and delicious.

How long can a homemade hotcake mix be stored?

You can store homemade hotcake mix in an airtight container for 2-3 months. If you want to keep it longer, freeze it for up to 6 months.

What kitchen tools and equipment are needed to make hotcakes?

To make hotcakes, you’ll need a mixing bowl, whisk, ladle or measuring cup, and a non-stick pan or griddle. A spatula is also important for flipping the pancakes.

How do I turn my homemade hotcake mix into perfect pancakes?

To make perfect pancakes, follow the mixing instructions carefully. Use the right amount of batter for each pancake. Cook them at the right temperature for the best results.

What common mistakes should I avoid when cooking hotcakes?

Avoid overmixing the batter and using a pan that’s too hot or too cool. Also, make sure pancakes cook through before flipping them.

How can I add different flavors to my hotcake mix?

To add flavors, try adding blueberries, bananas, chocolate chips, or nuts to your mix. Experiment with different combinations to find your favorite.

How should I store and reheat my leftover hotcakes?

Store leftover hotcakes in an airtight container in the fridge for up to 3 days. To reheat, use the microwave, toaster oven, or a skillet over low heat until warm.

What should I do if my hotcakes turn out too dense or tough?

If your hotcakes are too dense or tough, adjust your mixing technique or the liquid amount. Too little liquid or overmixing can make them tough.

What toppings and serving suggestions work best with homemade hotcakes?

Classic toppings like butter, syrup, and powdered sugar are great. But, you can also try fresh fruit, whipped cream, nuts, or even bacon or cheese for a savory twist.

Do You Like Our Recipe ?

0.0
0.0 out of 5 stars (based on 0 reviews)
Excellent0%
Very good0%
Average0%
Poor0%
Terrible0%

Homemade Chicken Cheese Steak: Easy Recipe

Can you make a tasty chicken cheese steak at home? Yes, you can with our easy recipe. This homemade version is a twist on the famous Philadelphia cheese steak. You’ll learn how to make it and enjoy a delicious homemade dish.

Key Takeaways

  • You can make a delicious homemade chicken cheese steak using a simple and easy-to-follow recipe.
  • This chicken cheese steak recipe is a popular variation of the classic Philadelphia cheese steak.
  • With this easy recipe, you can create a mouth-watering dish in the comfort of your own home.
  • The homemade chicken cheese steak recipe requires essential ingredients and step-by-step cooking process.
  • You will learn the history of the chicken cheese steak and how to make it using an easy recipe.
  • This chicken cheese steak recipe is perfect for those who want to enjoy a homemade meal.
  • The easy recipe makes it possible to prepare a chicken cheese steak at home.

The History of Philadelphia-Style Chicken Cheese Steak

Exploring the Philadelphia cheese steak reveals a rich history. The dish started with thinly sliced beef. Over time, variations like the chicken cheese steak emerged. This shows how the classic cheese steak evolved.

The cheese steak evolution started in the 1930s. The chicken cheese steak became popular in the 1980s. People wanted a leaner option, making chicken a favorite.

  • 1930s: The original Philadelphia cheese steak was born, featuring thinly sliced beef and melted cheese.
  • 1980s: The chicken cheese steak emerged as a popular variation, offering a leaner protein option.
  • Present day: The Philadelphia cheese steak continues to evolve, with various toppings and fillings being added to create unique flavor profiles.

Exploring Philadelphia cheese steak, remember the chicken cheese steak’s history is key. Knowing its roots helps us appreciate its rich flavors.

YearEventDescription
1930Birth of the Philadelphia cheese steakThe original cheese steak was made with thinly sliced beef and melted cheese.
1980Emergence of the chicken cheese steakThe chicken cheese steak gained popularity as a leaner protein option.
Present dayContinued evolution of the Philadelphia cheese steakVarious toppings and fillings are being added to create unique flavor profiles.

Essential Ingredients for the Perfect Chicken Cheese Steak Recipe

To make a delicious chicken cheese steak, you need a few key ingredients. These include thinly sliced chicken breast, cheese, vegetables, and a hoagie roll. Popular choices for cheese and veggies are provolone, bell peppers, and onions.

The quality of your chicken cheese steak ingredients matters a lot. Choose fresh, flavorful ingredients for a tasty dish. Don’t forget to add lettuce, tomatoes, and mayo for extra flavor.

Here are some recipe requirements to keep in mind:

  • 1 pound thinly sliced chicken breast
  • 4 slices of cheese (such as provolone or American)
  • 1 large onion, sliced
  • 2 large bell peppers, sliced
  • 4 hoagie rolls
  • Lettuce, tomatoes, and mayo (optional)

With these chicken cheese steak ingredients and a simple recipe, you can make a delicious meal. Choose the best essential ingredients and follow the recipe requirements for a perfect dish.

IngredientQuantity
Chicken breast1 pound
Cheese4 slices
Onion1 large
Bell peppers2 large
Hoagie rolls4

Kitchen Tools and Equipment You’ll Need

To make a tasty chicken cheese steak, you need the right tools and equipment. A well-stocked kitchen makes cooking easier and faster. You’ll need a skillet, cutting board, and cheese slicer for the ingredients.

A clean and stable surface is key for food safety. Use a wooden or plastic cutting board for chopping and assembling. It’s easy to clean and keeps your kitchen tidy.

Required Cooking Tools

  • Skillet or frying pan
  • Cutting board
  • Cheese slicer
  • Measuring cups and spoons

Optional Equipment

  • Meat slicer for thinly sliced chicken
  • Food processor for chopping vegetables

With the right tools, making a delicious chicken cheese steak is easy. Choose a good preparation surface for safety and hygiene.

Selecting and Preparing Your Chicken

Choosing the right chicken is key to a tasty chicken cheese steak. You need a fresh and lean chicken breast. This will give your dish the best taste and texture.

To get ready, slice the chicken breast into thin strips. This makes it easier to cook and put together your chicken cheese steak.

Here are some tips for chicken preparation:

  • Choose boneless, skinless chicken breast for the best results.
  • Slice the chicken breast into thin strips, about 1/4 inch thick.
  • Season the chicken breast with your favorite spices and herbs to add flavor.

By following these tips, you’ll make a delicious and tender chicken breast. It’s perfect for your chicken cheese steak. Always handle the chicken breast safely and cook it to the right temperature for food safety.

Choosing the Right Cheese Blend

Choosing the right cheese is key to a great chicken cheese steak. You can pick from many cheeses, each with its own taste and texture. The right mix can make your dish even better.

Start with classics like provolone and mozzarella. They melt well and add a creamy flavor. But, you might also like newer mixes like cheddar and parmesan for a bolder taste.

Traditional Cheese Options

  • Provolone: a mild, smooth cheese with a buttery flavor
  • Mozzarella: a soft, white cheese with a high moisture content

Modern Cheese Combinations

  • Cheddar and parmesan: a sharp, savory blend with a rich flavor
  • Gouda and havarti: a creamy, mild combination with a smooth texture

Melting Techniques

To melt your cheese right, use high heat and gentle stirring. Or, try a cheese sauce for extra flavor. Find what works best for you.

With the right cheese and melting methods, your chicken cheese steak will be a hit. Be adventurous with cheese choices and blends. You might find a new favorite.

Cheese TypeMelting PointFlavor Profile
Provolone105-115°FMild, buttery
Mozzarella90-100°FSoft, creamy
Cheddar100-110°FSharp, savory

Preparing Your Vegetables and Seasonings

Preparing your vegetables and seasonings for a chicken cheese steak is fun. You can pick from many vegetable options like bell peppers, onions, and mushrooms. These can be sautéed with seasonings like salt, pepper, and oregano for extra flavor.

Start by picking the freshest vegetables. This makes your chicken cheese steak both tasty and healthy. After choosing your veggies, prepare them by slicing or chopping them into smaller pieces.

Popular ways to prepare your veggies include grilling, roasting, or sautéing. Each method highlights the unique flavors and textures of your veggies. For instance, grilling adds a smoky taste, while roasting brings out their sweetness.

Don’t forget about the seasonings to add flavor to your dish. You can use herbs and spices like thyme, rosemary, or garlic powder. Also, try different sauces like marinara or teriyaki to enhance your chicken cheese steak’s taste.

Here are some tips for preparing your veggies and seasonings:

  • Choose fresh, high-quality vegetables for the best flavor and texture.
  • Experiment with different seasonings and sauces to find the combination that works best for you.
  • Consider using a variety of vegetable preparation methods to add texture and interest to your dish.

Master Chicken Cheese Steak Cooking Method

To make a tasty chicken cheese steak, you need to know how to cook it right. This means slicing the meat well, cooking it at the right temperature, and putting it all together. Follow these steps to make a dish that everyone will love.

Slicing the chicken thinly and against the grain is key. This makes the chicken tender and easy to chew. It also helps prevent it from becoming tough or chewy.

Proper Meat Slicing Technique

For good meat slicing, use a sharp knife and slice the chicken when it’s a bit frozen. This stops the meat from tearing and makes sure it’s even. You can also use a meat slicer for thin, uniform slices.

Cooking Temperature Guide

The cooking temperature for chicken cheese steak is important. It should be between 165°F and 180°F. This makes sure the chicken is cooked and safe to eat. Use a thermometer to check the chicken’s internal temperature and adjust cooking time if needed.

Assembly Process

After cooking the chicken, it’s time to put the cheese steak together. Place the chicken on a hoagie roll, add cheese, and top with your favorite veggies. The secret to a great cheese steak is balancing the flavors and textures of the ingredients.

By mastering the cooking method, including meat slicing, cooking temperature, and assembly, you’ll make a delicious chicken cheese steak. It will quickly become a favorite dish.

Cooking MethodMeat SlicingCooking Temperature
GrillingThinly sliced165°F – 180°F
Pan-fryingSliced against the grain165°F – 180°F

Roll Selection and Preparation

Choosing the right roll is key to a great chicken cheese steak. You can pick from hoagie roll, Italian, or French bread. Each roll adds its own special touch to the dish.

A hoagie roll is a top pick for chicken cheese steaks. It’s soft but slightly crispy, perfect for holding the chicken and cheese. Just slice it in half and toast it lightly. This brings out the bread’s sweetness and gives a solid base for the filling.

Here are some tips for the best roll preparation:

  • Go for a fresh, quality roll without preservatives.
  • Toast the roll lightly to enhance its flavor and texture.
  • Think about adding a spread or sauce, like mayonnaise or marinara, for extra taste.

Choosing the right roll and preparing it well can elevate your chicken cheese steak. Whether you like a traditional hoagie roll or something different, the goal is to match the roll with the chicken and cheese. With a bit of practice, you’ll be making amazing chicken cheese steaks in no time.

Roll TypeDescription
Hoagie RollA classic, soft roll with a slightly crispy texture.
Italian BreadA crusty, flavorful bread with a firmer texture.
French BreadA light, airy bread with a delicate crust.

Customizing your chicken cheese steak opens up a world of possibilities. You can try different regional style variations, like Philadelphia or New York. These use unique cheeses, meats, or veggies to give your dish a personal flair.

Adding add-ons can also make your chicken cheese steak special. Some favorites include:

  • Mushrooms and bell peppers for added crunch and flavor
  • Caramelized onions for a sweet and savory taste
  • Jalapenos or hot sauce for an extra kick of heat

Don’t forget to play with sauce options too. From marinara to ranch, the right sauce can take your dish to the next level. By trying these variations and add-ons, you can make a chicken cheese steak that’s all your own.

Whether you want a classic Philly-style or something new, the secret to a great dish is to experiment. So, don’t be shy to try new things. Your taste buds will love you for it!

Storage and Reheating Tips

When storing and reheating your chicken cheese steak, food safety is key. Wrap the steak tightly in plastic wrap or foil. Then, refrigerate it at 40°F (4°C) or below.

To reheat, use a microwave, oven, or pan. Make sure the steak hits 165°F (74°C) for food safety. A food thermometer can help check the temperature.

Here are more tips for storing and reheating your chicken cheese steak:

  • Keep the steak in a sealed container to avoid moisture and flavor changes.
  • Reheat the steak just before serving to keep it fresh and safe.
  • Think about using a storage container with a built-in thermometer for temperature control.

Common Mistakes to Avoid

When making a chicken cheese steak, it’s important to avoid common mistakes. These include cooking errors like overcooking or undercooking the chicken. Also, ingredient selection mistakes, such as using low-quality cheese or vegetables, can ruin the dish.

Some common mistakes to watch out for include:

  • Overcooking the chicken, leading to dry and tough meat
  • Underseasoning the dish, resulting in a lack of flavor
  • Not using the right type of cheese, which can affect the melting and flavor of the dish

To avoid these mistakes, plan ahead and pay attention to detail. Choose the right ingredients and cook the chicken to the right temperature. Also, assemble the dish carefully to ensure all flavors and textures come together.

By being mindful of these common mistakes and taking steps to avoid them, you can create a delicious chicken cheese steak. It’s a dish you’ll want to make again and again.

Conclusion

Making homemade chicken cheese steak is a fun and rewarding journey. By following the tips and techniques in this article, you can improve your cooking. You’ll enjoy a delicious sandwich that will please your taste buds.

Choosing the right ingredients and preparing the chicken and veggies well is key. Assembling the sandwich with care will make it even better. This way, you’ll get a satisfying result every time.

This chicken cheese steak recipe is great for anyone, whether you’re experienced or just starting out. It lets you dive into the rich history and changing tastes of this classic dish. With a bit of practice, you’ll become a pro at making this tasty sandwich. You’ll impress your loved ones with your cooking skills.

Start making your own chicken cheese steak today. Enjoy the process of creating a dish that celebrates Philadelphia’s flavors and more. Bon appétit!

FAQ

What is the history of the Philadelphia-style chicken cheese steak?

The Philadelphia cheese steak started in the 1930s. The chicken version became popular in the 1980s. It’s made with thinly sliced chicken, cheese, and veggies on a hoagie roll.

What are the essential ingredients for a perfect chicken cheese steak recipe?

You need thinly sliced chicken, cheese, and veggies like bell peppers and onions. A hoagie roll is also key.

What kitchen tools and equipment are needed to make a chicken cheese steak?

You’ll need a skillet, cutting board, and cheese slicer. A meat slicer or food processor is optional. You also need a surface to assemble the sandwich.

How should the chicken be selected and prepared for a chicken cheese steak?

Choose a fresh, lean chicken breast. Slice it thinly for the best taste and texture.

What are the best cheese options and melting techniques for a chicken cheese steak?

Use provolone or mozzarella for a classic taste. Cheddar and parmesan are also great. Low heat and stirring help melt the cheese right.

How should the vegetables and seasonings be prepared for a chicken cheese steak?

Bell peppers, onions, and mushrooms are great choices. Season them with salt, pepper, and oregano for extra flavor.

What is the master cooking method for a chicken cheese steak?

Slice the meat thinly and control the heat. Assemble the sandwich carefully. This ensures the chicken is cooked and the cheese is melted.

What are the best roll options and preparation techniques for a chicken cheese steak?

Hoagie rolls are classic, but Italian or French bread works too. Toasting or buttering the roll adds flavor and texture.

Try different styles, like Philadelphia or New York. Add marinara or ranch sauce and various veggies for a twist.

How should a chicken cheese steak be stored and reheated?

Store it properly to keep it fresh. Reheat it using methods that preserve the taste and texture.

What are the common mistakes to avoid when making a chicken cheese steak?

Avoid cooking errors and wrong ingredient choices. Also, make sure the sandwich is assembled right. This ensures a tasty and successful chicken cheese steak.

Do You Like Our Recipe ?

0.0
0.0 out of 5 stars (based on 0 reviews)
Excellent0%
Very good0%
Average0%
Poor0%
Terrible0%

Simple Salmon Bites: A Tasty Appetizer Recipe

Imagine a delicious and easy-to-make appetizer perfect for any occasion. Salmon bites are a favorite among food lovers. They’re versatile and full of flavor, making them a staple in many homes. This recipe is a great way to impress your guests with a healthy and tasty dish.

The salmon bites recipe is perfect for those looking to try something new without spending hours in the kitchen. It’s great for both seasoned chefs and beginners. You can play with different flavors and ingredients to make it your own.

Key Takeaways

  • Salmon bites recipe is a simple and delicious appetizer option
  • It’s perfect for any occasion, whether it’s a party or a family gathering
  • The recipe is versatile and can be customized with different flavors and ingredients
  • Salmon bites are a healthy and mouth-watering choice
  • The salmon bites recipe is easy to make and requires minimal time in the kitchen
  • It’s a great option for those who want to try something new and exciting
  • The recipe is suitable for both beginners and experienced chefs

Understanding the Perfect Salmon Bites Recipe

Making the perfect salmon bites is all about keeping it simple. A good recipe should be straightforward and need only a few ingredients. This makes it ideal for a quick, tasty meal. The right mix of fresh salmon, tasty marinades, and cooking methods is key.

Using fresh, high-quality ingredients is crucial. Fresh salmon gives a light flavor and firm texture, essential for great bites. The right marinades also add a rich flavor, taking the dish to new heights.

What Makes a Great Salmon Bite

A top-notch salmon bite balances flavors and textures. The salmon should be cooked just right, with a crispy outside and soft inside. The marinade should enhance the salmon’s taste without overwhelming it.

Essential Components

Key parts of a great salmon bite recipe include:

  • Fresh salmon fillets
  • A flavorful marinade, like soy sauce, lemon juice, and herbs
  • A cooking method, such as baking or pan-frying, for a crispy texture

Time and Difficulty Level

Easy salmon bites are quick to make and cook. With a simple recipe and few ingredients, anyone can whip up delicious bites. The recipe is easy and fast, perfect for a weeknight dinner or a quick lunch.

Essential Ingredients for Salmon Bites

To make a tasty quick salmon snack, you need fresh, high-quality ingredients. The base of a great salmon bite recipe includes salmon fillets, olive oil, lemon juice, and herbs. These add flavor and ensure the snack’s texture is perfect.

Having the right ingredients is key for a quick salmon snack. Common ones in salmon bite recipes are:

  • Salmon fillets
  • Olive oil
  • Lemon juice
  • Herbs like parsley, dill, or basil

Using fresh, top-notch ingredients will make your quick salmon snack even better. When you mix them with the right seasonings and cooking methods, you get a meal that’s both enjoyable and satisfying.

By choosing quality ingredients, you’ll make a quick salmon snack that’s not just tasty but also looks great. This focus on detail will make your dish memorable and impress your guests.

Kitchen Tools and Equipment Needed

To make tasty homemade salmon bites, you need the right tools and equipment. These help make the process easier and ensure your bites are cooked just right. Having the right tools is key to a great dish.

You’ll need a sharp knife to cut the salmon, a cutting board for prep, and a baking sheet with parchment paper for cooking. Also, a mixing bowl and spoon are needed for the marinade and seasoning.

Must-Have Tools

  • Sharp knife
  • Cutting board
  • Baking sheet
  • Mixing bowl
  • Spoon

Optional Equipment

Tools like a food processor and pastry brush can be helpful. They make prep work easier and help you get consistent results.

With the right tools, making homemade salmon bites is easy and fun. Whether you’re experienced or new to cooking, good tools make a big difference in your dishes.

ToolDescription
Sharp knifeFor cutting the salmon into bite-sized pieces
Cutting boardFor preparing the ingredients
Baking sheetFor cooking the salmon bites

Preparing Your Salmon

To make the best salmon bites, start with fresh, high-quality salmon. Look for fillets that are vibrant pink and smell pleasant. Avoid salmon with a strong fishy smell or visible spoilage.

Choose wild-caught Alaskan or Pacific salmon for the best flavor and texture. They have a richer taste and firmer flesh.

After picking your salmon, prepare it for cooking. If it’s frozen, thaw it in the fridge or under cold water. Handle the fish gently to prevent damage. Pat the salmon dry with paper towels to remove excess moisture.

This helps the salmon cook evenly and prevents it from steaming instead of searing.

Here are some tips for preparing your salmon:

  • Remove any bloodlines or dark meat, as they can give the salmon a stronger flavor.
  • Cut the salmon into small, uniform pieces, about 1-2 inches in size, to ensure they cook evenly.
  • Remove any skin or bones, as they can be tough and chewy.

By following these simple steps, you’ll be well on your way to making the best salmon bites. With fresh, high-quality salmon and proper preparation, you’ll create a delicious dish. It’s sure to impress your friends and family.

Step-by-Step Salmon Bites Recipe

To make tasty salmon bites, follow this simple recipe. Begin by making the marinade. This step is key to adding flavor to the salmon. Mix your favorite ingredients like soy sauce, lemon juice, and olive oil in a bowl.

Preparing the Marinade

In a small bowl, whisk together 1/2 cup of soy sauce, 1/4 cup of lemon juice, and 1/4 cup of olive oil. Add 2 cloves of minced garlic and 1 teaspoon of dried thyme. This marinade is a crucial part of the recipe.

Cutting and Portioning

Cut the salmon into bite-sized pieces, about 1 inch in size. Place the salmon pieces in a shallow dish and pour the marinade over them. Let it marinate for at least 30 minutes, or up to 2 hours in the refrigerator.

Cooking Instructions

Preheat your oven to 400°F (200°C). Remove the salmon from the marinade and place it on a baking sheet lined with parchment paper. Bake for 12-15 minutes, or until the salmon is cooked through and flakes easily with a fork. This easy salmon bites recipe is perfect for a quick and delicious meal.

StepInstructions
1Preheat the oven to 400°F (200°C)
2Remove the salmon from the marinade
3Place the salmon on a baking sheet lined with parchment paper
4Bake for 12-15 minutes, or until the salmon is cooked through

By following this salmon bites recipe, you can create a delicious and easy meal that is perfect for any occasion.

Sauce and Seasoning Options

Adding the right sauce and seasoning can really boost the taste of your salmon bites. For a quick snack, try squeezing some fresh lemon juice or sprinkling dill on top. These simple touches can make your homemade salmon bites taste amazing without taking much time.

Here are some other great sauce and seasoning choices for salmon bites:

  • Garlic butter: a rich and savory option that pairs well with the natural flavor of salmon
  • Asian-inspired soy sauce and ginger: a sweet and sour combination that adds a unique twist to traditional salmon bites
  • Mediterranean-style olive oil and oregano: a light and refreshing option that complements the delicate flavor of salmon

These are just a few examples of the many sauce and seasoning options available for salmon bites. Whether you’re making a quick snack or a more elaborate dish, the right sauce and seasoning can elevate your dish.

By trying out different sauce and seasoning combinations, you can find the perfect match for your taste. This way, you can create a delicious quick salmon snack or homemade salmon bites dish.

Sauce/SeasoningDescription
Lemon JuiceA bright and citrusy option that pairs well with salmon
DillA light and refreshing herb that complements the natural flavor of salmon
Garlic ButterA rich and savory option that adds depth to salmon bites

Creative Variations and Flavor Combinations

Looking for the best salmon bites? Try mixing up flavors to take this dish to new heights. The basic recipe can be tweaked to suit many tastes. This way, you can make a dish that stands out.

Being creative with flavors is key. Experiment with seasonings, marinades, and sauces. Here are some ideas:

  • Asian-inspired: soy sauce, ginger, and sesame oil
  • Mediterranean: lemon juice, garlic, and oregano
  • Spicy: chili flakes, cumin, and smoked paprika

Remember, the goal is to highlight the salmon’s natural taste. Finding the right mix of flavors makes your dish unique. Whether you want something spicy or tangy, the options are endless.

Don’t be shy to try new flavors. This will elevate your salmon bites. With practice, you’ll impress everyone with your creations.

Serving and Presentation Tips

When serving easy salmon bites, how you present them matters a lot. You want to impress your guests. A well-presented dish can make the whole experience better. Start by thinking about how to plate your homemade salmon bites.

Consider serving them on a bed of mixed greens. Or with a tangy sauce. You could also add them to a larger appetizer platter.

A good garnish can really enhance your easy salmon bites. Try using fresh herbs like parsley or dill. Or, use thinly sliced lemon or orange. Even a sprinkle of capers can add a nice touch.

Be creative with your garnishes. Edible flowers or microgreens can make your dish stand out.

Plating Suggestions

  • Use a variety of colors on the plate to add visual interest
  • Consider the texture of the dish and add contrasting elements, such as crunchy vegetables or crispy bread
  • Don’t be afraid to get creative with your plating, and have fun with it

Garnish Ideas

Here are some more garnish ideas for your homemade salmon bites:

  • Fresh fruit, such as sliced strawberries or grapes
  • Nuts or seeds, like chopped almonds or sesame seeds
  • A dollop of creme fraiche or sour cream

By following these tips, you can impress your guests with your easy salmon bites. Whether it’s for a dinner party or a quick snack, the right presentation can make a big difference.

Storage and Make-Ahead Guidelines

For a quick salmon snack, it’s key to store cooked salmon bites right. Cool them down to room temperature first. Then, put them in an airtight container. Keep them in the fridge for up to 24 hours.

When you’re making a salmon bites recipe ahead of time, cook them until they’re 80% done. Let them cool down, then refrigerate or freeze them. To reheat, bake them in the oven at 350°F (180°C) for a few minutes. They should be crispy on the outside and fully cooked.

Here are some tips for making ahead and reheating salmon bites:

  • Make the salmon bites mixture ahead of time and keep it in the fridge for up to a day.
  • Cook a lot of salmon bites at once and freeze them for later.
  • Reheat cooked salmon bites in the oven or microwave, but don’t overcook them.

By following these tips, you can enjoy a quick salmon snack anytime. Just reheat your pre-cooked salmon bites and serve them with your favorite dipping sauce. It’s a delicious and easy snack.

Storage MethodShelf Life
RefrigeratorUp to 24 hours
FreezerUp to 3 months

Troubleshooting Common Issues

When making homemade salmon bites, several issues can arise. These can affect the texture, flavor, and quality of the dish. To get the best salmon bites, it’s key to tackle these common problems.

Texture issues are a big concern. They can come from overcooking or undercooking the salmon. Temperature control is also crucial. It affects the doneness and safety of the salmon.

Ensuring the salmon is cooked to the right internal temperature is vital. This prevents foodborne illness. Seasoning balance is also key. It can make or break the flavor of the dish.

Common Issues and Solutions

  • Texture issues: Adjust cooking time and temperature to achieve the desired texture.
  • Temperature control: Use a food thermometer to ensure the salmon is cooked to a safe internal temperature.
  • Seasoning balance: Taste and adjust the seasoning as needed to achieve a balanced flavor.

By tackling these common issues, you can make delicious homemade salmon bites. With practice and patience, you’ll master the recipe. Then, you can enjoy the best salmon bites possible.

IssueSolution
OvercookingReduce cooking time and temperature
UndercookingIncrease cooking time and temperature
Seasoning imbalanceAdjust seasoning to taste

With these tips and solutions, you’ll be well on your way to creating the best salmon bites. You’ll enjoy a delicious and satisfying homemade dish.

Conclusion

Our journey ends, and it’s clear the simple salmon bites recipe is a hit. Using fresh ingredients and following the steps, you can make a tasty appetizer. It’s all about the details, trying new flavors, and enjoying the making.

Whether you stick to the classic or try something new, this recipe is versatile. It lets you please different tastes. So, don’t hesitate to try new flavors. The world of salmon bites is full of possibilities.

Now, what are you waiting for? Get your ingredients ready and start cooking. Prepare to enjoy the delicious flavors of these salmon bites. Bon appétit!

FAQ

What are the key ingredients for making salmon bites?

To make salmon bites, you need fresh salmon fillets, olive oil, lemon juice, and herbs and seasonings for flavor.

How difficult is it to prepare salmon bites?

Making salmon bites is quite easy. Just use top-quality ingredients and follow the recipe well.

What type of tools and equipment are needed for making salmon bites?

You’ll need a sharp knife, cutting board, baking sheet, and mixing bowls. A food processor can also help with prep work.

How should the salmon be prepared before cooking the bites?

It’s important to prepare the salmon right. Choose fresh, quality fillets, thaw them if needed, and cut them into small pieces.

Can I make variations on the classic salmon bites recipe?

Yes, you can! The salmon bites recipe is flexible. Try different flavors like Asian, Mediterranean, or spicy.

How can I store and reheat leftover salmon bites?

Store cooked salmon bites in the fridge for 3-4 days. Reheat in the oven or microwave, but avoid overcooking.

What are some common issues that may arise when making salmon bites?

Issues like texture problems, temperature control, and seasoning balance can happen. The article offers tips to solve these problems.

Do You Like Our Recipe ?

0.0
0.0 out of 5 stars (based on 0 reviews)
Excellent0%
Very good0%
Average0%
Poor0%
Terrible0%

Creamy Chicken Alfredo Using Jar Sauce

Imagine coming home to a delicious, easy chicken alfredo recipe with jar sauce that’s ready in no time. This quick chicken alfredo recipe is perfect for a weeknight meal. Using jar sauce makes the dish creamy and flavorful, saving you time and money.

With an easy chicken alfredo recipe with jar sauce, you can enjoy a restaurant-quality meal at home. This quick chicken alfredo recipe is great for those who want to cook a tasty meal without spending too much time in the kitchen. Using jar sauce makes the process even simpler, allowing you to focus on other aspects of your meal.

Key Takeaways

  • You can make a delicious easy chicken alfredo recipe with jar sauce at home.
  • Using jar sauce saves time and money.
  • A quick chicken alfredo recipe is perfect for a weeknight meal.
  • Jar sauce makes the cooking process simpler.
  • You can achieve restaurant-quality results with an easy chicken alfredo recipe with jar sauce.
  • The quick chicken alfredo recipe is a great option for those who want to cook a tasty meal without spending too much time in the kitchen.
  • Using jar sauce allows you to focus on other aspects of your meal.

Why This Easy Chicken Alfredo Recipe with Jar Sauce Works

Using a jar sauce can make a tasty chicken alfredo dish. It lets you enjoy a simple alfredo sauce recipe without spending hours cooking. You get a homemade alfredo sauce taste without the effort of making it from scratch.

Here are some benefits of using a jar sauce:

  • Time-saving: Jar sauce saves you time and effort in preparing the sauce from scratch.
  • Restaurant-quality results: Jar sauce can help you achieve a rich and creamy sauce, similar to what you would find in a restaurant.
  • Budget-friendly: Jar sauce is often more affordable than buying individual ingredients to make the sauce from scratch.

Time-Saving Benefits

With a jar sauce, you can save time and focus on cooking the chicken and pasta. This is great on busy weeknights when you need to get dinner ready fast.

Restaurant-Quality Results

A good jar sauce can give you a rich and creamy sauce, just like in a restaurant. This is because jar sauces are made with quality ingredients and have a consistent flavor.

Budget-Friendly Approach

Using a jar sauce is a budget-friendly way to make chicken alfredo. Jar sauces are cheaper than buying all the ingredients to make the sauce from scratch. This can help you save money and still make a delicious meal.

Essential Ingredients for Your Chicken Alfredo

To make a tasty chicken alfredo with jar sauce, you need some key ingredients. You’ll need fresh chicken, pasta, parmesan cheese, and jar sauce. The quality of these ingredients really matters for the flavor and texture.

Choosing high-quality ingredients is important for your easy chicken alfredo recipe. Look for a jar sauce that’s made with good stuff and tastes rich and creamy. Many brands offer jar sauces that can make your dish even better.

Here are the main ingredients you’ll need for your easy chicken alfredo recipe with jar sauce:

  • Fresh chicken breast or thighs
  • Pasta of your choice (e.g. fettuccine, spaghetti, or linguine)
  • Parmesan cheese
  • Jar sauce
  • Fresh parsley or basil for garnish

With these ingredients and a simple recipe, you can make a delicious chicken alfredo with jar sauce.

Remember, the secret to a great chicken alfredo is using top-notch ingredients. Don’t be afraid to try new things with your recipe. With a bit of practice, you’ll make a dish that everyone will love.

Choosing the Best Jarred Alfredo Sauce

Choosing the right jarred alfredo sauce is key for a quick and tasty chicken alfredo. With many options, picking the best can be tough. Let’s look at what matters most.

A good jarred sauce can make a simple alfredo recipe shine. Look for brands that use fresh ingredients and have balanced flavors. Top brands include Barilla, Bertolli, and Classico.

Top Brands to Consider

  • Barilla: Known for their high-quality pasta sauces, Barilla offers a range of alfredo sauce options.
  • Bertolli: This brand offers a rich and creamy alfredo sauce that is perfect for a quick chicken alfredo.
  • Classico: Classico’s alfredo sauce is made with fresh ingredients and has a smooth, creamy texture.

What to Look for on the Label

When buying jarred alfredo sauce, check the label. Look for low sodium and wholesome ingredients.

Price vs. Quality Considerations

Don’t always go for the cheapest option. Higher prices often mean better ingredients. Choose a sauce that’s within your budget but meets your quality standards.

BrandPriceQuality
Barilla$3-$5High
Bertolli$4-$6High
Classico$3-$5High

Preparing Your Chicken for Perfect Alfredo

To make an easy chicken alfredo recipe with jar sauce, start by preparing your chicken right. Choose fresh, high-quality chicken for the best flavor and texture. Look for breasts or thighs that are plump and have a good color.

Before cooking, season your chicken with salt, pepper, and your favorite herbs. You can also marinate it in your favorite seasonings for a few hours or overnight. For an easy chicken alfredo recipe with jar sauce, cook your chicken until it’s just done. This prevents it from becoming dry and tough.

Here are some tips for cooking your chicken:

  • Cook chicken breasts in a skillet with a little oil until they’re browned on both sides and cooked through.
  • Use a meat thermometer to ensure your chicken is cooked to a safe internal temperature.
  • Let your chicken rest for a few minutes before slicing or chopping it, as this will help the juices to redistribute and the chicken to stay moist.

By following these tips, you’ll create a delicious and easy chicken alfredo recipe with jar sauce. Always handle and cook your chicken safely to avoid foodborne illness.

With your chicken prepared, you’re now ready to move on to the next step in making your easy chicken alfredo recipe with jar sauce. Stay tuned for more tips and instructions on how to create this classic Italian dish.

Pasta Selection and Cooking Tips

Choosing the right pasta is key for a tasty homemade alfredo sauce. You need a pasta that keeps the sauce without getting too soggy.

Fettuccine, linguine, and spaghetti are great choices. These long noodles let the sauce stick well, making each bite enjoyable.

Best Pasta Types for Alfredo

  • Fettuccine: a classic choice for alfredo, with a wide, flat shape that holds sauce well
  • Linguine: similar to fettuccine, but slightly narrower and more delicate
  • Spaghetti: a good option for those who prefer a thinner noodle

Al Dente Cooking Guide

Cooking pasta al dente is crucial for a perfect 30-minute chicken alfredo. This means the pasta should still have a bit of chew.

To get this right, cook your pasta 2-3 minutes less than the package says. Then, check if it’s done by biting into a noodle. If it’s still a bit firm, it’s perfect.

Step-by-Step Cooking Instructions

To make a tasty easy chicken alfredo recipe with jar sauce, start by cooking your pasta. Follow the package instructions until it’s al dente. While your pasta cooks, heat a large skillet over medium-high heat.

Add your chicken to the skillet. Cook until it’s browned and fully cooked. Then, set it aside.

Next, add the jar sauce to the skillet. Stir to mix it well. Let the sauce simmer for a few minutes until it’s hot.

Add the cooked pasta to the skillet. Toss it with the sauce until the pasta is well coated. Put the cooked chicken back in the skillet and stir to mix.

When making quick chicken alfredo, use top-notch ingredients. Choose fresh pasta and a quality jar sauce. You can also add your favorite veggies or spices to make it your own. Here are some ideas:

  • Add steamed broccoli or bell peppers to the skillet with the chicken and sauce
  • Try different pasta types, like linguine or fettuccine
  • Add red pepper flakes for a spicy twist

By following these steps and tips, you can whip up a delicious easy chicken alfredo recipe with jar sauce. It’s perfect for a quick weeknight dinner. And with a quick chicken alfredo recipe, you’ll have a tasty meal ready in no time.

Remember to serve your easy chicken alfredo recipe with jar sauce hot. Garnish with chopped parsley or parmesan cheese. Enjoy!

Enhancing Your Jarred Alfredo Sauce

To make your jarred alfredo sauce better, add some flavor boosters. Try adding dried or fresh herbs like basil or parsley for a fresh taste. You can also add garlic or onion powder for a savory flavor.

If you want a simple alfredo sauce recipe, start with a basic jarred sauce. Then, add your own ingredients to make it more flavorful.

Flavor Boosters

  • Garlic powder
  • Onion powder
  • Dried or fresh herbs like basil or parsley

To improve the texture of your jarred alfredo sauce, add heavy cream or half-and-half. This will make it creamy. You can also add grated Parmesan cheese for a rich flavor.

Professional Chef Tips

Professional chefs suggest adding a pinch of nutmeg or cayenne pepper for a unique taste. You can also add cooked vegetables like spinach or mushrooms for extra nutrition and flavor. These tips will help you make a delicious and flavorful alfredo sauce that will impress everyone.

IngredientQuantity
Garlic powder1/2 teaspoon
Onion powder1/2 teaspoon
Heavy cream1/4 cup

Common Problems and Easy Solutions

When you make an easy chicken alfredo recipe with jar sauce, you might run into some common issues. One big problem is overcooking the pasta, which can make it mushy. To fix this, adjust the cooking time as the package says and check the pasta often to keep it al dente.

Another issue is using too much sauce, which can make the dish too rich. To fix this, start with a small amount of sauce and add more if you need it. You can also try using pasta like pappardelle or fettuccine, which holds sauce better.

Here are some common problems and easy solutions to consider when making an easy chicken alfredo recipe with jar sauce:

  • Overcooking the pasta: adjust the cooking time and check regularly
  • Using too much sauce: start with a small amount and add more to taste
  • Underseasoning: taste and adjust the seasoning as you go

By following these tips and being mindful of common problems, you can make a delicious easy chicken alfredo recipe with jar sauce.

ProblemSolution
Overcooking the pastaAdjust the cooking time and check regularly
Using too much sauceStart with a small amount and add more to taste
UnderseasoningTaste and adjust the seasoning as you go

Serving Suggestions and Garnishes

When serving your quick chicken alfredo, how you present it matters a lot. A nicely set table can make your meal feel like it’s from a fancy restaurant. Try adding fresh herbs like parsley or basil to add color and freshness.

Here are some ideas to make your quick chicken alfredo even better:

  • Fresh herbs, such as parsley or basil
  • Grated parmesan cheese
  • Garlic bread or a green salad for a side dish

Presenting your dish well can really enhance your dining experience. When you serve your quick chicken alfredo, remember the importance of presentation. With these tips, you can make your 30-minute chicken alfredo feel like a fancy meal at home.

Storage and Reheating Guidelines

Storing and reheating your easy chicken alfredo recipe with jar sauce is important. You need to keep it safe from contamination. Also, make sure it stays creamy and flavorful.

For storing, use airtight containers to keep out moisture and other tastes. Freezing is also an option for later. When reheating, aim for an internal temperature of 165°F (74°C) for safety. You can use the microwave or stovetop for reheating.

  • Use airtight containers to store your chicken alfredo
  • Freeze for later use
  • Reheat to an internal temperature of 165°F (74°C)

By following these guidelines, your chicken alfredo will stay delicious for days. Whether it’s for a quick lunch or a future meal, it will be safe and tasty.

Always prioritize food safety when storing and reheating chicken alfredo. This way, you and your family can enjoy it without worrying about getting sick.

Storage MethodReheating Method
Airtight containersMicrowave
FreezerStovetop

Variations on Classic Chicken Alfredo

When making homemade alfredo sauce, you can get creative. Try adding new vegetables or proteins. For example, steamed broccoli or roasted bell peppers can add color and flavor.

You can also change the recipe to fit your diet. For a vegetarian option, use roasted eggplant or zucchini. Or, try shrimp or tofu for a unique twist.

Some popular variations include:

  • Adding sautéed mushrooms or spinach for extra flavor and nutrition
  • Using different pasta types, like whole wheat or gluten-free, for dietary needs
  • Experimenting with garlic or paprika for a distinct taste

By trying these variations, you can make a simple alfredo sauce that fits your taste and diet. So, don’t be afraid to experiment with new ingredients. Make your homemade alfredo sauce truly special.

VariationIngredientsDescription
VegetarianEggplant, zucchini, bell peppersA plant-based twist on the classic recipe, using roasted vegetables as a substitute for chicken.
SeafoodShrimp, scallops, musselsA seafood-inspired variation, featuring a medley of seafood options to add a touch of the ocean to your alfredo sauce.

Conclusion

Creating a tasty easy chicken alfredo recipe with jar sauce is a great way to enjoy top-notch food at home. Using high-quality jarred Alfredo sauce saves time and money. It doesn’t mean you have to give up on flavor or how it looks.

Perfecting your quick chicken alfredo is all about trying new things and practicing. Feel free to experiment with different jarred sauces. Adjust the recipe to your liking and get creative. Soon, you’ll be making Alfredo dishes that wow everyone.

Don’t be afraid to add your own twist to the recipe. Becoming a skilled home chef is both fun and rewarding. Enjoy the process, relish the flavors, and let your love for cooking show in every bite of your amazing chicken Alfredo.

FAQ

What are the essential ingredients for making this easy chicken alfredo recipe with jar sauce?

You’ll need fresh chicken, pasta like fettuccine or linguine, and a good jarred alfredo sauce. Don’t forget parmesan cheese and seasonings like garlic, salt, and pepper.

How can using a jarred alfredo sauce save time and money?

Jarred alfredo sauce saves time by skipping homemade sauce prep. It’s also cheaper than making it from scratch, making it a budget-friendly choice.

What should you look for when choosing the best jarred alfredo sauce?

Look for high-quality brands with real parmesan cheese and cream. Avoid sauces with lots of additives or preservatives. Also, check the price to fit your budget.

How can you enhance the flavor and texture of a jarred alfredo sauce?

Add fresh herbs, garlic, or white wine to boost flavor. Stir in heavy cream or parmesan for better texture. Taste and adjust seasoning as you go, like a pro chef.

What are some common problems that can arise when making chicken alfredo with a jarred sauce, and how can you solve them?

Issues like overcooked pasta or too thick sauce can happen. To fix, adjust pasta cooking time, add pasta water, or use less sauce.

What are some variations on the classic chicken alfredo recipe that can be made with a jarred sauce?

Try adding sautéed veggies like broccoli or spinach for nutrition. Swap chicken for shrimp or mushrooms for a veggie option. Use lactose-free or low-fat sauce for dietary needs.

Do You Like Our Recipe ?

0.0
0.0 out of 5 stars (based on 0 reviews)
Excellent0%
Very good0%
Average0%
Poor0%
Terrible0%

How to Make Bush’s Baked Beans at Home

Imagine the sweet and tangy taste of Bush’s Baked Beans, a classic American favorite, made right in your own home. With a homemade baked beans recipe, you can enjoy this beloved dish anytime. You won’t need to rely on store-bought versions. The bush’s baked beans recipe is a staple in many American households. Making it from scratch can be a fun and rewarding experience.

Making bush’s baked beans at home lets you control the ingredients, sweetness, and spice. This way, you can create a personalized flavor that suits your taste. Whether you’re a fan of the original Bush’s Baked Beans or want to try a new twist, this guide will help. You’ll learn how to make a mouth-watering homemade baked beans recipe.

Key Takeaways

  • Learn how to make a delicious homemade baked beans recipe
  • Discover the benefits of making bush’s baked beans at home
  • Get tips on customizing the recipe to suit your taste preferences
  • Understand the importance of using high-quality ingredients
  • Find out how to store and reheat your homemade baked beans
  • Explore ideas for serving and pairing your homemade bush’s baked beans

The Story Behind Bush’s Baked Beans

Bush’s baked beans have been a favorite in America for many years. Their story shows how family traditions and new recipes can make a big impact. It all started with a simple best baked beans recipe that grew into the bush’s baked beans recipe we all love.

Bush’s success comes from their focus on quality and making delicious baked beans. They aim to bring people together with their bush’s baked beans recipe. Whether you want to try their best baked beans recipe or make your own, Bush’s story is both inspiring and delightful.

History of Bush’s Family Business

The Bush family started in a small cannery in Tennessee. They created a bush’s baked beans recipe that quickly became popular. They’ve always used the best ingredients and traditional methods to make their famous baked beans.

What Makes Bush’s Baked Beans Special

So, what makes Bush’s baked beans stand out? It’s their special blend of spices and cooking process. This gives their bush’s baked beans recipe a unique taste that’s both sweet and tangy. Bush’s uses top-quality ingredients to make a best baked beans recipe for any event.

Why Make Them at Home

Making bush’s baked beans recipe at home lets you adjust the flavor to your taste. It’s rewarding to make a delicious meal yourself. With just a few ingredients and some basic cooking skills, you can make a best baked beans recipe that will wow everyone.

IngredientQuantity
Baked beans1 can
Brown sugar1/4 cup
Ground mustard1 tsp

Essential Ingredients for Bush’s Baked Beans Recipe

To make a true easy baked beans recipe, you need top-notch ingredients. The heart of a great homemade baked beans recipe is the beans, sauces, and spices. For a classic Bush’s Baked Beans taste, navy beans are key. They’re small, white, and mild.

Other must-haves include a blend of sauces like tomato sauce, brown sugar, and apple cider vinegar. These give the beans a sweet and tangy flavor. Spices like ground mustard, ground cloves, and smoked paprika add warmth and depth. Using these will help you get the real Bush’s Baked Beans taste in your homemade version.

Here’s a list of the key ingredients you’ll need:

  • Navy beans
  • Tomato sauce
  • Brown sugar
  • Apple cider vinegar
  • Ground mustard
  • Ground cloves
  • Smoked paprika

Remember, the quality of your ingredients will directly impact the flavor of your easy baked beans recipe. Choose the best ingredients you can find to ensure your homemade baked beans recipe turns out delicious.

Required Kitchen Equipment and Tools

To make a tasty homemade baked beans recipe, you’ll need some basic kitchen tools. The right tools can greatly improve your easy baked beans recipe. A large pot, preferably stainless steel or cast iron, is key for cooking the beans. You’ll also need a colander, a can opener, and a wooden spoon for stirring.

There are also optional tools that can make cooking better. These include a slow cooker, a pressure cooker, and a food processor. A slow cooker is great for long cooking times. A pressure cooker can cook beans faster. A food processor helps with chopping onions and other ingredients.

Basic Kitchen Tools Needed

  • Large pot (stainless steel or cast iron)
  • Colander
  • Can opener
  • Wooden spoon

Optional Equipment for Best Results

  • Slow cooker
  • Pressure cooker
  • Food processor

With these kitchen tools, you’re ready to make a delicious homemade baked beans recipe. Choose the right tools for your easy baked beans recipe for the best results.

EquipmentDescription
Large potFor cooking the beans
Slow cookerFor cooking the beans over a long period
Food processorFor chopping onions and other ingredients

Preparing Your Beans from Scratch

To make the best baked beans, start with the right ingredients. Bush’s recipe uses navy or haricot beans. These beans have a mild flavor and smooth texture.

Soaking the beans is key to rehydrate them and save time. You can soak them overnight, quickly, or under pressure. Choose based on your schedule and tools.

Selecting the Right Beans

  • Navy beans: These small, white beans are a classic choice for baked beans and have a mild, slightly sweet flavor.
  • Haricot beans: Similar to navy beans, haricot beans are small, white, and have a mild flavor, making them an excellent choice for bush’s baked beans recipe.

Soaking Methods

Soaking the beans is a crucial step. The most common methods include:

  1. Overnight soak: Soak the beans in water for at least 8 hours or overnight.
  2. Quick soak: Soak the beans in boiling water for 1-2 hours.

Pre-cooking Process

After soaking, pre-cook the beans to make them tender. You can boil them or use a pressure cooker to speed up the process.

Soaking MethodCooking TimeResult
Overnight soak1-2 hoursTender beans with a mild flavor
Quick soak30 minutes to 1 hourSlightly firmer beans with a more pronounced flavor

The Secret Sauce: Making the Perfect Bean Base

To make a great easy baked beans recipe, focus on the bean base. This is where the magic happens. The flavors blend together to create a rich, velvety sauce that goes well with the beans. A homemade baked beans recipe needs a top-notch base, so it’s key to get it right.

When making the bean base, consider these key ingredients:

  • Brown sugar
  • Apple cider vinegar
  • Tomato paste
  • Spices like ground mustard and ground cloves

These ingredients will give you a deep, complex flavor. This is what makes a classic easy baked beans recipe. By mixing these elements just right, you’ll make a homemade baked beans recipe that will wow everyone.

Remember, the secret to a great bean base is balance. You want a mix of sweet, tangy, and spicy flavors. Don’t be shy to adjust the ingredients to taste. With practice and patience, you’ll make a delicious, easy baked beans recipe for any event.

Mastering the bean base is the first step to a fantastic homemade baked beans recipe. So, take your time to experiment and improve your skills. The effort will be worth it.

IngredientQuantity
Brown sugar1/2 cup
Apple cider vinegar1/4 cup
Tomato paste2 tablespoons

Step-by-Step Cooking Instructions

To make the perfect bush’s baked beans recipe, follow a step-by-step guide. This guide includes an initial cooking phase, adding special flavors, and a final simmer. These steps help you create a best baked beans recipe that tastes great and is true to its roots.

First, cook the beans in a big pot of water until they’re soft. It’s important to watch them closely. This way, they won’t get too soft or mushy.

Initial Cooking Phase

After the beans are cooked, it’s time to add the special flavors. Mix in tomato sauce, brown sugar, and spices. Finding the right mix of sweet and tangy is key to a great bush’s baked beans recipe.

Adding the Signature Flavors

The final step is simmering the beans in the flavor mix for at least an hour. This lets the flavors blend together. The result is a best baked beans recipe that’s rich, flavorful, and perfect for any event.

Final Simmering Process

Here are some tips for cooking:

  • Use top-quality ingredients for the best taste.
  • Keep an eye on the cooking time to avoid overcooking.
  • Adjust the seasoning to your liking.

By following these steps and tips, you’ll make a delicious bush’s baked beans recipe. It’s sure to impress even the most finicky eaters.

Customization Options and Variations

Customizing Bush’s Baked Beans at home is fun and easy. You can make it vegetarian or try new flavors. Using a vegetarian baked beans recipe is a tasty option.

Adjusting the spice level is a big part of customization. If you like it milder, use less spice. For a spicy kick, add more or try different peppers. It’s also a quick way to make an easy baked beans recipe.

Vegetarian Adaptations

Vegetarians can make simple changes to enjoy a great meal. Try using vegetarian bacon or sausage. Add extra veggies like bell peppers or mushrooms. You can also use different beans for a unique taste.

Regional Style Variations

Each region has its own baked beans style. Try a Boston-style with molasses and salt pork. Or go Southern with brown sugar and bacon. The fun is in experimenting with flavors and ingredients.

Storage and Reheating Guidelines

Perfecting your homemade baked beans recipe is just the start. It’s key to store and reheat them right to keep their taste and texture. A great homemade baked beans recipe can be a family favorite. With the right storage and reheating, you can enjoy them for days.

To store your homemade baked beans, use airtight containers. Keep them in the fridge for up to 5 days. For longer storage, freeze them in airtight containers or bags. When reheating, heat them slowly over low heat, stirring often, to avoid burning or sticking.

Here are some tips for reheating your homemade baked beans:

  • Reheat them in the oven: Place the beans in a covered dish and heat them in a preheated oven at 250°F (120°C) for about 30 minutes.
  • Reheat them on the stovetop: Place the beans in a saucepan and heat them over low heat, stirring occasionally, until they’re warmed through.
  • Reheat them in the microwave: Place the beans in a microwave-safe dish and heat them on high for about 2-3 minutes, stirring every minute, until they’re warmed through.

By following these storage and reheating tips, you can enjoy your homemade baked beans for longer. They’ll stay delicious and fresh. Whether you’re using a homemade or the best baked beans recipe, proper storage and reheating are key to keeping them great.

Perfect Pairings and Serving Suggestions

There are endless ways to serve your homemade bush’s baked beans recipe. You can choose from classic pairings or modern twists. This easy recipe lets you create dishes that everyone will love.

Traditional Accompaniments

Classic pairings for bush’s baked beans include grilled meats like burgers or hot dogs. Sides like coleslaw or baked potatoes are also great. You can also serve them with other barbecue favorites, like ribs or chicken.

Modern Serving Ideas

For a modern twist, try pairing your easy baked beans with unique ingredients. Here are some ideas:

  • Grilled vegetables, like asparagus or bell peppers
  • Crusty bread or cornbread
  • A fresh green salad with a tangy vinaigrette

These modern ideas will give your traditional bush’s baked beans a fresh spin.

With these serving suggestions, you can enjoy your homemade bush’s baked beans in new ways. So, get creative and find your favorite way to serve this delicious dish!

Traditional AccompanimentsModern Serving Ideas
Grilled meats (burgers, hot dogs)Grilled vegetables (asparagus, bell peppers)
Coleslaw, baked potatoesCrusty bread, cornbread
Barbecue favorites (ribs, chicken)Fresh green salad with vinaigrette

Conclusion: Mastering Your Homemade Bush’s Baked Beans

Creating your own version of Bush’s Baked Beans at home is rewarding. By following our guide and trying different options, you can make a delicious homemade version. You can choose from classic flavors or add your own twist, making it unique.

We hope you’ll keep trying new recipes and share your homemade baked beans with others. There’s nothing like enjoying a homemade batch with loved ones. So, get creative with flavors and enjoy making a dish that brings everyone together.

FAQ

What are the key ingredients in Bush’s Baked Beans?

To make homemade Bush’s Baked Beans, you need navy or Great Northern beans. Also, brown sugar, molasses, and mustard are key. Don’t forget Worcestershire sauce and spices like garlic, onion, and chili powder.

How do I prepare the beans from scratch?

Start by soaking the beans overnight. Then, drain and rinse them. Pre-cook the beans before mixing them with the sauce. This makes them tender and perfect.

Can I make a vegetarian version of Bush’s Baked Beans?

Yes, making a vegetarian version is easy. Just skip the bacon or ham and use vegetable broth instead of chicken broth. Adding bell peppers or mushrooms can also enhance flavor and texture.

How can I adjust the spice level of the baked beans?

To change the spice level, tweak the chili powder, cayenne pepper, or hot sauce. Start with a little spice and add more until it’s just right for you.

How long do homemade baked beans last, and how should they be stored?

Homemade baked beans keep well in the fridge for 5 days or in the freezer for 3 months. Cool them down first, then put them in an airtight container or bag. Reheat them until hot and simmering.

Do You Like Our Recipe ?

0.0
0.0 out of 5 stars (based on 0 reviews)
Excellent0%
Very good0%
Average0%
Poor0%
Terrible0%

Get The Best Recipes In 2025

Exit mobile version