Tasty Beef Broth Recipes for Every Meal

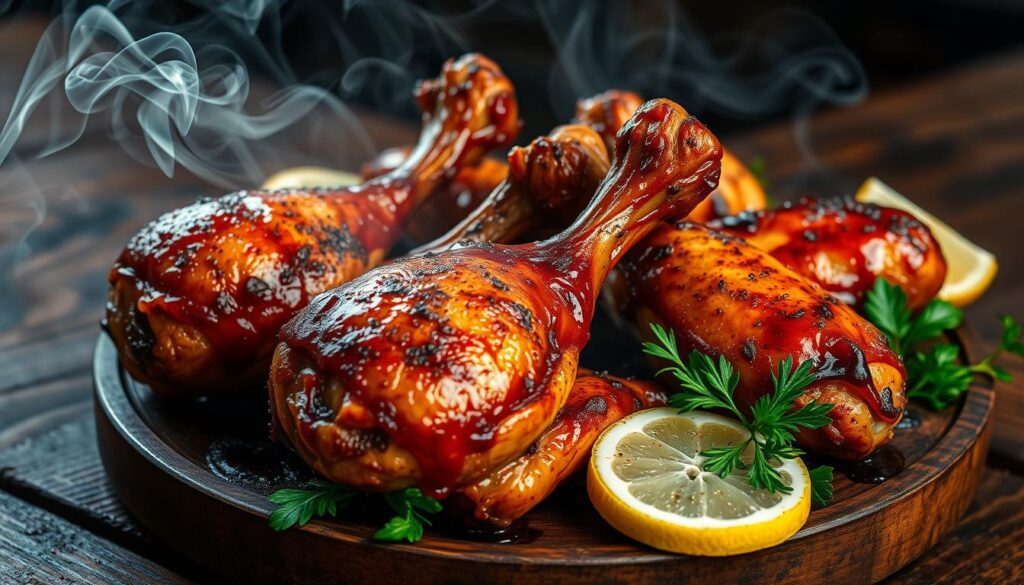
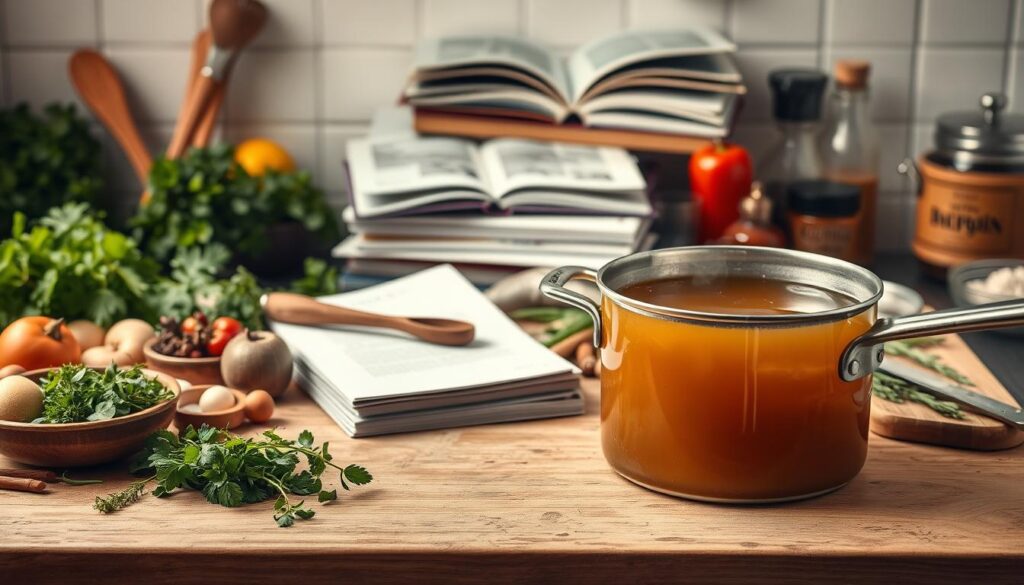
75% of American households use beef broth in their cooking. It’s a favorite because of its rich, savory taste. Beef broth is great for many dishes, like stews and soups. I’m excited to share how homemade beef broth recipes can make your cooking better.

Beef broth is perfect for both slow-cooked meals and quick dinners. It’s great for anyone, whether you’re a pro chef or just starting. I’ll show you how to use beef broth to make delicious meals that will wow your guests.

Introduction to Beef Broth

We’ll look at how to use beef broth in soups, stews, sauces, and more. You’ll learn a lot about this amazing ingredient. Beef broth is loved for its flavor and health benefits, making it a staple in many homes.

Key Takeaways

  • Beef broth is a versatile ingredient that can be used in a wide range of dishes
  • Homemade beef broth recipes offer numerous health benefits and a richer flavor than store-bought alternatives
  • Recipes with beef broth can be used to create comforting, slow-cooked meals or quick and easy weeknight dinners
  • Beef broth is a great base for soups, stews, sauces, and gravies
  • With a little creativity, you can use beef broth to elevate your cooking and create delicious, mouth-watering meals
  • Beef broth is a staple ingredient in many American households, and its popularity continues to grow

Understanding the Magic of Beef Broth in Cooking

Exploring cooking with beef broth has been a thrilling journey. It’s not just about the flavor; it’s also about the health benefits. Beef broth can make any dish better, and I’m excited to try out different recipes.

Beef broth is great at bringing out the taste of other ingredients. It’s perfect for stews or soups, making them both tasty and healthy. Using high-quality beef broth means my dishes are not only delicious but also good for me.

I always choose homemade beef broth over store-bought. Homemade beef broth lets me control the ingredients and cooking process. This way, I get a more flavorful and nutritious dish. But, I know store-bought broth is handy for those who are short on time.

Here are some common uses for beef broth in cooking:

  • As a base for soups and stews
  • As a cooking liquid for grains and vegetables
  • As a ingredient in sauces and marinades

Adding beef broth to my cooking has opened up a world of tasty and healthy meals. Its rich flavor and health perks make it a must-have in my kitchen. I’m looking forward to trying more beef broth recipes.

Essential Tips for Cooking with Beef Broth

When cooking with beef broth, a few key tips are important. First, pick the right broth for your recipe. You can use store-bought or make your own. Homemade broth is often tastier and healthier, but store-bought is quick when you’re in a rush.

Proper storage is also key. Keep it in the fridge for up to a week or freeze it. When you’re ready, thaw and heat it up. Beef broth is great for soups, stews, and sauces.

Here are some tips for cooking with beef broth:

  • Use it as a base for soups and stews
  • Add it to sauces and gravies for extra flavor
  • Use it to cook vegetables, rice, and other grains
  • Make a big batch and freeze it for later use

By following these tips and using easy beef broth recipes, you can make delicious dishes. Beef broth is versatile and can help you create many tasty meals. It’s great for both seasoned chefs and beginners.

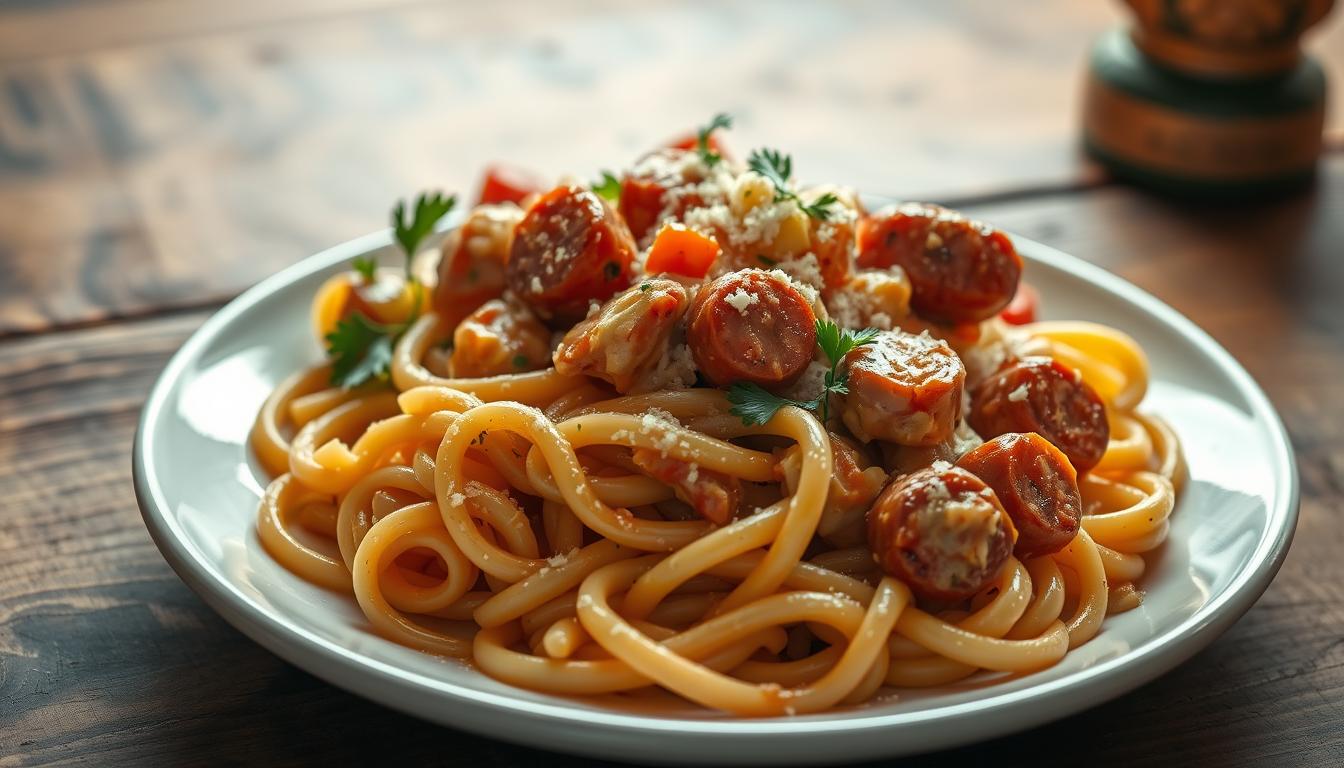
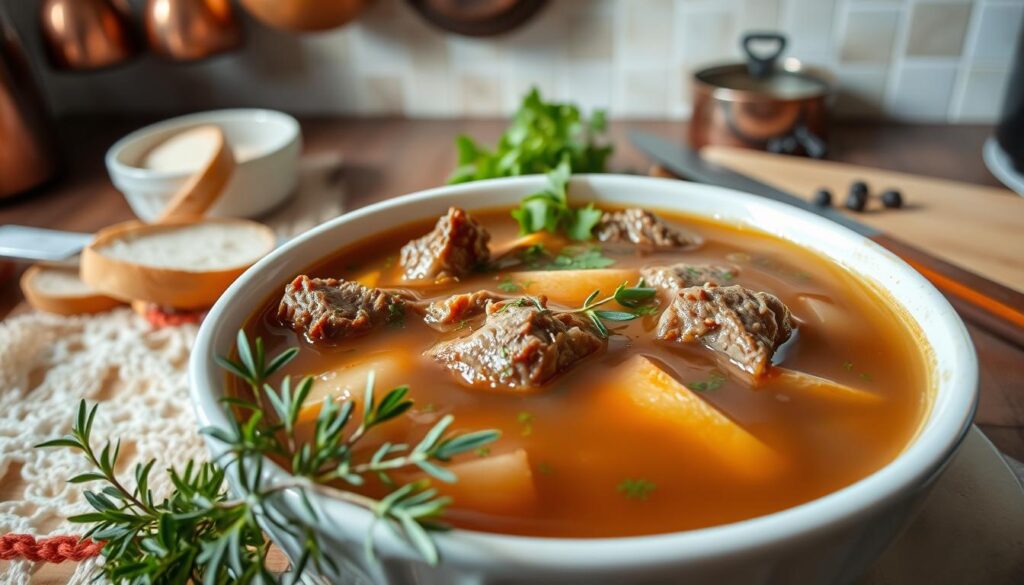
Classic Soup Recipes with Beef Broth

Soups are a comfort food favorite in many cultures. Beef broth adds flavor and nutrition to meals. Let’s look at some classic soups that use beef broth.

Homemade beef broth can make your soups taste better. Here are some tips to start:

  • Choose high-quality ingredients, like beef bones and fresh veggies.
  • Simmer the broth for at least an hour to get all the flavors.
  • Season it with salt, pepper, and herbs to taste.

French Onion Soup

This classic soup has caramelized onions, beef broth, and is topped with croutons and melted cheese.

Beef and Barley Soup

This hearty soup combines beef broth, barley, and tender beef chunks.

Asian-Inspired Noodle Soups

These soups use beef broth, noodles, and Asian ingredients like soy sauce and ginger.

Savory Main Dishes Using Beef Broth

Beef broth opens up a world of flavors in cooking. It’s great for making savory main dishes. Braised short ribs and roasted chicken are just a few examples. These dishes get a rich flavor boost from beef broth.

Here are some top ways to use beef broth in main dishes:

  • Braising short ribs or lamb shanks in beef broth for a fall-off-the-bone tender dish
  • Using beef broth as a base for a hearty beef stew
  • Adding beef broth to a roasted chicken recipe for extra moisture and flavor

Choosing high-quality beef broth is key. Look for low-sodium options made with wholesome ingredients. You can also make your own broth from beef bones, veggies, and aromatics.

Beef broth can make your main dishes taste amazing. It’s perfect for both seasoned chefs and beginners. So, try out different recipes and find your new favorite dish.

DishIngredientsCooking Time
Braised Short RibsShort ribs, beef broth, vegetables2-3 hours
Roasted ChickenChicken, beef broth, herbs45-60 minutes
Beef StewBeef, beef broth, vegetables1-2 hours

Creating Rich Sauces and Gravies

Adding a great sauce or gravy can really elevate savory dishes with beef broth. We’ll dive into making rich, flavorful sauces with beef broth. You’ll learn from basic pan sauces to more complex wine-enhanced ones.

Beef broth is key in sauce making. It brings depth of flavor and moisture. With simple ingredients and basic techniques, you can whip up tasty sauces for your favorite meals.

  • Basic pan sauce: a simple and versatile sauce made with beef broth, butter, and flour
  • Mushroom gravy: a hearty and flavorful sauce made with sautéed mushrooms and beef broth
  • Wine-enhanced sauce: a rich and complex sauce made with red wine, beef broth, and a touch of cream

Using savory dishes with beef broth can add flavor and moisture to many dishes. And with these easy beef broth recipes, making delicious sauces and gravies is a breeze. So, why not give it a try and see the difference for yourself?

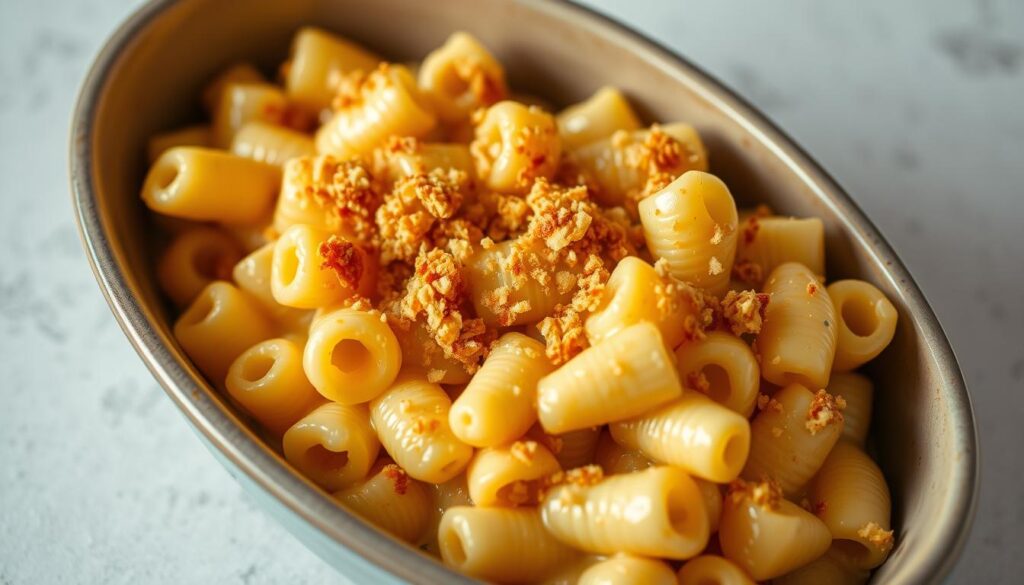
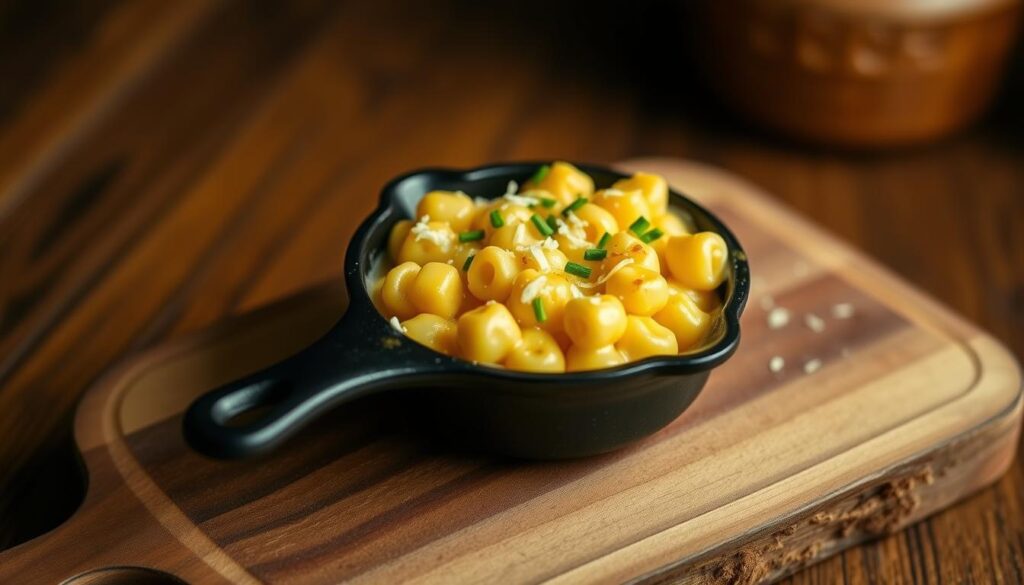
Elevating Rice and Grain Dishes with Beef Broth

Rice and grain dishes can become more flavorful with recipes with beef broth. A simple way to do this is by swapping water with homemade beef broth recipes. This change brings a deep, savory taste that boosts the dish’s flavor.

Popular dishes like chicken and rice, beef and barley, and paella can benefit from beef broth. When using recipes with beef broth, it’s key to balance the flavors. A good rule is to mix beef broth with water to get the right taste.

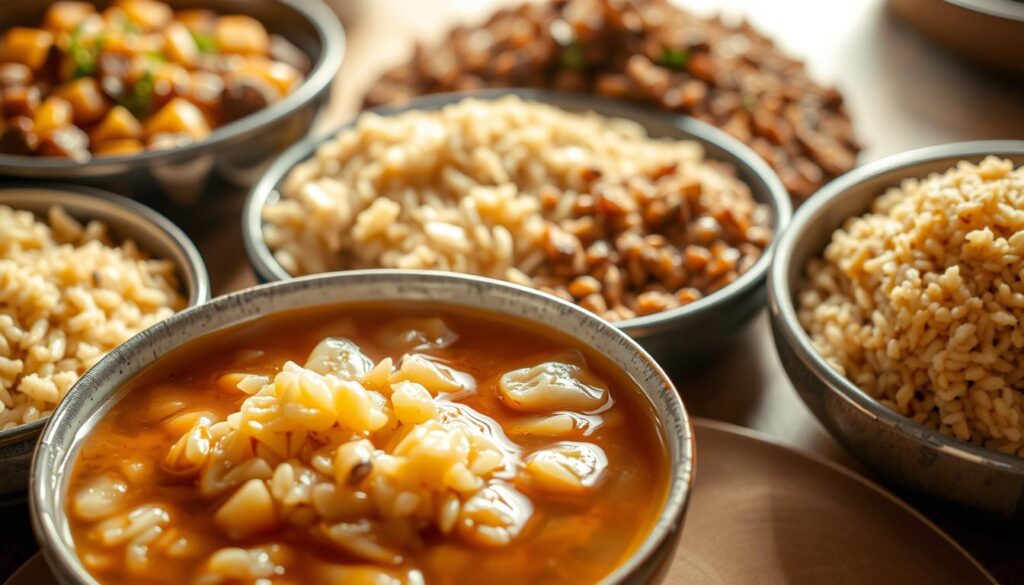
You can also use homemade beef broth recipes as a base for sauces and gravies. This adds more flavor to your rice and grain dishes. By trying out different recipes with beef broth, you can make a variety of tasty meals. These are sure to delight your family and friends.

Quick and Easy Recipes with Beef Broth

When it comes to cooking with beef broth, I always look for ways to make it easier and faster. Our busy lives mean we need quick and easy recipes. In this section, we’ll explore delicious and easy dishes that use beef broth.

Cooking with beef broth adds flavor to your meals. A simple soup with beef broth, veggies, and protein is a favorite of mine. You can also make sauces and gravies with beef broth. For example, a tasty gravy for roast beef is made by reducing broth and adding flour.

15-Minute Dinner Solutions

  • Beef and vegetable stir-fry: Cook your favorite vegetables and beef in a wok or large skillet with some beef broth and soy sauce.
  • One-pot pasta: Cook pasta, tomato sauce, and beef broth in one pot for a quick and easy dinner.
  • Tacos: Use beef broth to make a delicious and flavorful taco filling with ground beef and your favorite toppings.

These quick and easy recipes are perfect for busy weeknights. They let you add flavor and moisture to your dishes without spending hours cooking. Whether you’re making a hearty soup or a quick stir-fry, beef broth makes mealtime easier and more enjoyable.

Creative Ways to Use Leftover Beef Broth

When I cook with beef broth, I often have some left over. I don’t want to throw it away. So, I’ve found some creative ways to use it. I love using it as a base for soups or stews. Just add veggies, noodles, or meat, and you get a tasty meal.

Another great idea is to make flavorful sauces or gravies with it. I reduce the broth to intensify the flavors. Then, I mix it with flour or butter for a creamy sauce. It’s perfect over mashed potatoes, rice, or roasted veggies. I also use it to cook grains like rice, quinoa, or barley, adding flavor and moisture.

  • Make a hearty beef and vegetable soup
  • Use it as a braising liquid for pot roast or short ribs
  • Add it to scrambled eggs or omelets for extra flavor
  • Use it as a base for homemade noodle soups

By being creative with leftover beef broth, I can cut down on waste. And I get to enjoy tasty and easy beef broth recipes all week.

Troubleshooting Common Issues When Cooking with Beef Broth

Cooking with beef broth can be tricky. Sometimes, problems pop up that mess with your dish. Knowing common issues and how to fix them is key, whether you’re using store-bought or homemade broth.

Common problems include too much salt, uneven flavors, and bad storage. Understanding the basics of using beef broth is vital. Having some quick fixes ready can save your dish.

Fixing Over-Salted Broth

Too much salt is a big problem. To fix it, you can water down the broth or add potatoes or rice. These absorb the salt, making the broth just right.

Adjusting Flavors and Consistency

Flavors or textures that don’t match can also be a problem. Adding onions, carrots, and celery can help with flavors. For texture, try reducing the broth to concentrate it or add cornstarch to thicken.

Storage and Preservation Tips

Storing your beef broth right is important for its quality and safety. You can keep it in the fridge for up to 5 days or freeze it for 3 months. Always label the containers with the date and contents. Thaw slowly in the fridge or on the counter.

By using these tips and quality recipes, you can make tasty dishes. They’ll highlight the rich flavors of homemade beef broth.

Conclusion: Making the Most of Your Beef Broth Adventures

We’ve explored the world of beef broth together. Now, you’re ready to use it in many ways. It can make soups, main dishes, sauces, and even rice and grain dishes better.

Try making your own broth or use store-bought. I want you to keep trying new things with cooking with beef broth. The beef broth recipe ideas and tips we shared will help you discover new flavors.

Beef broth makes your food richer and more nutritious. So, use what you’ve learned and start cooking with beef broth. Enjoy your meals!

FAQ

What makes beef broth special in cooking?

Beef broth adds a rich, savory flavor to dishes. It has natural gelatin that enhances its taste. This makes it key in many cuisines.

What are the nutritional benefits of beef broth?

Beef broth is full of protein, minerals, and vitamins. It boosts the nutrition of your meals. It’s also known for its health benefits.

How do homemade and store-bought beef broth differ?

Homemade broth tastes richer and more complex than store-bought. You can customize it to your taste. Store-bought is convenient but often less flavorful.

What are some essential tips for cooking with beef broth?

Choose the right broth and store it well. Use it to enhance flavors in your dishes. Try different recipes to find the best ways to use beef broth.

What are some classic soup recipes that feature beef broth?

Beef broth is great in French onion soup, beef and barley soup, and Asian noodle soups. These dishes highlight its rich flavor.

How can I use beef broth to create delicious savory main dishes?

Beef broth adds moisture and depth to dishes like braised short ribs and roasted chicken. It’s also good for beef stew and lamb shanks. Use it for braising or as a sauce base.

What techniques can I use to create rich sauces and gravies with beef broth?

For rich sauces, try a basic pan sauce or a mushroom gravy. You can also experiment with wine-enhanced sauces. Beef broth adds complexity to these dishes.

How can I use beef broth to elevate my rice and grain dishes?

Use beef broth instead of water for a savory flavor in rice and grain dishes. It’s great in chicken and rice, beef and barley, risotto, or paella.

What are some quick and easy recipes that feature beef broth?

Beef broth is perfect for quick meals like 15-minute dinners and one-pot dishes. It’s also great for make-ahead meals. It saves time and effort.

How can I use leftover beef broth creatively?

Use leftover broth in soups, sauces, stews, and braises. It reduces waste and boosts flavor. Proper storage and freezing help preserve it for later.

How can I troubleshoot common issues when cooking with beef broth?

For over-salted broth or flavor issues, adjust seasonings and consistency. Proper storage helps too. These tips ensure success with beef broth.

Do You Like Our Recipe ?

0.0
0.0 out of 5 stars (based on 0 reviews)
Excellent0%
Very good0%
Average0%
Poor0%
Terrible0%

Delightful Turkey Meatball Recipe You’ll Love

Imagine biting into a juicy, flavorful turkey meatball. It’s made with love and care, using a healthy turkey meatball recipe that’s easy to make. This recipe is perfect for those who want a delicious and nutritious meal. It uses turkey meat, making it a tasty and healthy alternative to traditional beef meatballs.

As you explore this delightful turkey meatball recipe, you’ll find it’s simple and fun to make. It’s perfect for any occasion, whether you’re a busy parent or someone who cares about their health. The best part? It’s an easy turkey meatball recipe.

Key Takeaways

  • You’ll learn how to make a delicious and healthy turkey meatball recipe
  • This easy turkey meatball recipe is perfect for busy weeknights or special occasions
  • Turkey meatballs are a great alternative to traditional beef meatballs
  • This recipe is easy to customize with your favorite herbs and spices
  • You’ll discover the benefits of using turkey meat in your cooking
  • This healthy turkey meatball recipe is perfect for meal prep or freezing for later

Why Turkey Meatballs Are Your New Favorite Healthy Alternative

Turkey meatballs are a great choice for a healthy meal. They are easy to make with a homemade turkey meatball recipe. This dish is tasty and full of good stuff for your body. Turkey meatballs have less fat than beef, which is good for your weight or muscle growth.

A best turkey meatball recipe mixes ground turkey, breadcrumbs, and spices. This mix gives you the right amount of nutrients. Turkey’s lean protein helps muscles, and breadcrumbs give you energy. Spices and herbs add flavor and antioxidants without extra calories.

Choosing turkey meatballs over beef has many benefits. Here are a few:

  • Lower fat content
  • Higher protein content
  • Rich in antioxidants and vitamins
  • Perfect for weight management and muscle building

Adding a homemade turkey meatball recipe to your meals is a smart move. It makes for a healthy and tasty meal. Turkey meatballs are great for dinner or a snack.

Essential Ingredients for Perfect Turkey Meatballs

To make delicious turkey meatballs, use fresh, high-quality ingredients. The secret to great meatballs is mixing ground turkey, breadcrumbs, and spices. Choose lean ground turkey for healthy, tasty meatballs.

Here are some must-have ingredients:

  • Ground turkey
  • Breadcrumbs
  • Olive oil
  • Onion
  • Garlic
  • Spices, such as salt, pepper, and Italian seasoning

You can also add ingredients like chopped bell peppers or mushrooms to your turkey meatballs. This lets you customize the recipe to your liking.

Keep your ingredients in a cool, dry place to keep them fresh. This ensures your turkey meatballs are moist and full of flavor. By following these tips and using the right ingredients, you’ll make a delicious turkey meatball recipe with sauce that everyone will love.

Kitchen Tools and Equipment You’ll Need

To make an easy turkey meatball recipe, you’ll need the right tools. Having these essentials will help you prepare and cook your turkey meatballs efficiently. The right tools can make a big difference in making delicious turkey meatballs.

First, let’s talk about the must-have utensils. You’ll need a mixing bowl, a meatball scoop, and a baking sheet. Also, basic tools like a wooden spoon, a spatula, and tongs are essential. Having these utensils ready is key for an easy turkey meatball recipe.

Must-Have Utensils

  • Mixing bowl
  • Meatball scoop
  • Baking sheet
  • Wooden spoon
  • Spitula
  • Tongs

Optional but Helpful Tools

Some tools are optional but very helpful. A food processor can quickly chop onions and garlic. A stand mixer makes mixing the meatball mixture easy. These tools are great for making a big batch of turkey meatballs.

Cooking Surface Options

You have several options for cooking your turkey meatballs. You can bake them, grill them, or sauté them. Each method gives a different texture and flavor. Feel free to try different ways to find your favorite.

The Best Turkey Meatball Recipe Step by Step

To make a delicious and healthy turkey meatball recipe, follow a few simple steps. First, preheat your oven to 400°F (200°C). While the oven heats up, prepare the ingredients for your turkey meatballs.

Here’s a list of ingredients you’ll need:

  • 1 pound ground turkey
  • 1/2 cup breadcrumbs
  • 1/2 cup grated Parmesan cheese
  • 1 egg
  • 1/4 cup chopped onion
  • 2 cloves garlic, minced
  • Salt and pepper to taste

Now, let’s move on to the instructions. In a large bowl, mix together the ground turkey, breadcrumbs, Parmesan cheese, egg, onion, garlic, salt, and pepper. Use your hands or a wooden spoon to mix until just combined. Be careful not to overmix.

Shape the mixture into small meatballs, about 1 1/2 inches (3.8 cm) in diameter. Place the meatballs on a baking sheet lined with parchment paper. You should get around 20-25 meatballs.

Put the baking sheet in the oven and bake the meatballs for 18-20 minutes. They should be cooked through and lightly browned on the outside. Remove the meatballs from the oven and let them cool on the baking sheet for a few minutes.

Once the meatballs cool slightly, serve them with your favorite sauce. Enjoy a tasty and healthy turkey meatball recipe. You can also store the meatballs in an airtight container in the fridge for up to 3 days or freeze them for up to 2 months.

Secret Tips for Moist and Flavorful Turkey Meatballs

Creating a tasty homemade turkey meatball recipe requires some secrets. To make your meatballs moist and flavorful, focus on the ingredients and cooking method. Start with fresh, high-quality ground turkey.

Choosing the right ground turkey is key. It should be lean but not too lean to keep meatballs moist. Adding breadcrumbs and eggs to your recipe helps keep them juicy and full of flavor.

Moisture-Adding Ingredients

  • Breadcrumbs: help to add texture and moisture to your turkey meatballs
  • Eggs: act as a binder and add moisture to your meatballs
  • Onions and garlic: add flavor and moisture to your turkey meatballs

Seasoning Secrets

To enhance flavor in your turkey meatballs, use herbs and spices. Italian seasoning, garlic powder, and paprika are great choices. Try different mixes to find the perfect taste for your meatballs.

Cooking Methods and Times

There are several ways to cook the best turkey meatball recipe. You can bake, grill, or sauté them. Each method gives a different texture and taste. It’s important to cook them to the right temperature for safety.

Cooking times vary by method. Baking takes 15-20 minutes. Grilling is quicker, at 10-15 minutes per side. Sautéing is the fastest, at 5-7 minutes per side.

Here are some general guidelines for cooking your turkey meatballs:

  • Baking: 15-20 minutes at 400°F (200°C)
  • Grilling: 10-15 minutes per side at medium-high heat
  • Sautéing: 5-7 minutes per side at medium heat

Always check the internal temperature of your meatballs. This ensures they are cooked safely. With these methods and times, you can make the best turkey meatballs for your taste.

Delicious Sauce Pairings for Your Turkey Meatballs

When it comes to a great turkey meatball recipe with sauce, the sauce is key. You’ve worked hard on your turkey meatballs. Now, it’s time to pick the right sauce. A good sauce can make your meatballs taste even better and add moisture.

A classic marinara sauce is a top pick for turkey meatballs. It’s made with crushed tomatoes, garlic, and herbs. It’s simple yet full of flavor. For something creamier, try a creamy garlic sauce. It’s made with garlic, heavy cream, and parmesan cheese.

Looking for something unique? Try an Asian-inspired glaze. These glazes use soy sauce, honey, and ginger. They give your meatballs a sweet and savory taste. Other great sauce options include:

  • BBQ sauce for a sweet and tangy flavor
  • Teriyaki sauce for a sweet and savory flavor
  • Pesto sauce for a creamy and herby flavor

Choosing the right sauce can really enhance your turkey meatball dish. So, don’t be shy to try different sauces. Find the perfect one to go with your turkey meatballs.

Serving Suggestions and Side Dishes

There are many ways to serve your easy turkey meatball recipe. You can enjoy them as a main dish, an appetizer, or a snack. A favorite way is with pasta like spaghetti or linguine. Just cook the pasta, then add your turkey meatballs and marinara sauce.

For side dishes, you have many options. Here are a few:

  • Roasted vegetables, such as broccoli or Brussels sprouts
  • Mashed potatoes or sweet potatoes
  • Garlic bread or crusty bread
  • A green salad or a Caesar salad

Feel free to try new things like roasted sweet potato fries or a quinoa salad.

Don’t forget to serve your turkey meatballs with different sauces. Some favorites are:

  • Marinara sauce
  • Alfredo sauce
  • BBQ sauce
  • Honey mustard sauce

Or, make your own sauce with olive oil, garlic, and herbs.

Storage and Reheating Guidelines

After making your tasty healthy turkey meatball recipe, it’s key to store and reheat them right. This keeps their flavor and texture just right. Storing them properly helps avoid foodborne illnesses and keeps them fresh longer.

You can store your turkey meatballs in the fridge or freezer. The fridge is best for short storage, and the freezer for longer. Always use an airtight container in the fridge and keep it at 40°F (4°C) or below.

To freeze, lay the meatballs on a baking sheet and then put them in a container or bag. Frozen meatballs can last 3-4 months. Always heat them to 165°F (74°C) when you reheat to stay safe.

  • Reheat in the oven at 350°F (180°C) for 10-15 minutes.
  • Use the microwave by covering with a lid for 30-60 seconds.
  • Simmer in your favorite sauce on the stovetop over low heat.

By following these tips, you can enjoy your healthy turkey meatball recipe for a longer time. And they’ll still taste great and feel tender.

Common Mistakes to Avoid When Making Turkey Meatballs

When you make turkey meatballs at home, it’s easy to miss important steps. To get your meatballs just right, steer clear of common errors like overmixing, undercooking, and overcooking. Overmixing makes meatballs dense and tough. Undercooking or overcooking can mess up their texture and safety.

To sidestep these issues, gently handle the meat mix and don’t overwork it. Also, use a thermometer to check the meatballs’ internal temperature. This ensures they’re cooked safely. By following these tips and using the right ingredients and techniques, you’ll make delicious turkey meatballs everyone will enjoy.

Other mistakes include using low-quality ingredients, not enough moisture, and not enough seasoning. To avoid these, pick fresh, high-quality ingredients. Add moisture with eggs and breadcrumbs. Season your meat mix well. By being careful and avoiding these mistakes, you’ll make a tasty homemade turkey meatball recipe that’s a hit.

Here are some key takeaways to keep in mind:

  • Handle the meat mixture gently to avoid overmixing
  • Use a thermometer to check the internal temperature of your meatballs
  • Choose fresh and high-quality ingredients
  • Add moisture-adding ingredients like eggs and breadcrumbs
  • Season your meat mixture generously

By following these tips and avoiding common mistakes, you’ll create a delicious homemade turkey meatball recipe. It’s perfect for any occasion.

Conclusion: Mastering Your Turkey Meatball Game

Creating the best turkey meatball recipe is an art that needs practice and trying new things. By following this guide, you’re on your way to becoming a turkey meatball expert. Try different seasonings, mix-ins, and cooking methods to find your favorite low-carb turkey meatball recipe.

Don’t be shy to add your own twist to this tasty dish. Turkey meatballs are like a blank canvas, letting you explore many flavors and textures. Be open-minded, trust your gut, and most importantly, enjoy the cooking process.

With the right skills and a willingness to keep improving, you’ll make turkey meatballs that everyone will love. Enjoy the journey, appreciate the process, and relish the tasty outcomes of your cooking. Happy meatballing!

FAQ

What makes turkey meatballs a healthier alternative to traditional beef meatballs?

Turkey meatballs are healthier than beef ones because they have less fat and more protein. Turkey is a lean protein, great for weight management or muscle building.

What are the essential ingredients needed to make the perfect turkey meatballs?

To make perfect turkey meatballs, you need ground turkey, breadcrumbs, eggs, onions, garlic, and spices. Using fresh, quality ingredients is key.

What kitchen tools and equipment do I need to make turkey meatballs?

You’ll need a mixing bowl, meatball scoop, and baking sheet to make turkey meatballs. A food processor and stand mixer can be helpful. You can cook them by baking, grilling, or sautéing.

What are some secret tips for making moist and flavorful turkey meatballs?

For moist, flavorful meatballs, choose the right ground turkey. Add breadcrumbs and eggs for moisture. Use various seasonings to boost flavor.

What are the best cooking methods and times for turkey meatballs?

You can bake, grill, or sauté turkey meatballs. Cooking time varies by method. Always cook to the right internal temperature for safety.

What are some delicious sauce pairings for turkey meatballs?

Try marinara, creamy garlic sauce, or Asian glazes with turkey meatballs. The right sauce enhances their flavor.

What are some serving suggestions and side dish ideas for turkey meatballs?

Serve turkey meatballs with pasta, rice, or roasted veggies. Choose sides that match their flavor for a balanced meal.

How should I store and reheat leftover turkey meatballs?

Refrigerate leftover meatballs for up to 4 days or freeze for 3 months. Reheat in the oven, microwave, or on the stovetop until hot.

What are some common mistakes to avoid when making turkey meatballs?

Avoid overmixing, undercooking, or overcooking. Use the right ingredients and techniques. Follow the recipe and experiment to find what works best.

Do You Like Our Recipe ?

0.0
0.0 out of 5 stars (based on 0 reviews)
Excellent0%
Very good0%
Average0%
Poor0%
Terrible0%

Crispy Smoked Chicken Legs: The Ultimate Flavor Sensation

Imagine biting into a juicy, smoky chicken leg. It’s crunchy on the outside and tender inside. This is why crispy smoked chicken legs are so loved. You can make this dish at home with the right tools and techniques. It’s a simple recipe to learn, perfect for anyone wanting to improve their cooking skills.

Crispy chicken drumsticks are a hit for many. They’re easy to make and full of flavor. With a bit of practice, you can master the art of crispy smoked chicken legs. So, let’s start our journey into the world of crispy smoked chicken legs.

Introduction to Crispy Smoked Chicken

Exploring crispy smoked chicken legs, you’ll find a mix of tender, smoky taste and crunchy texture. This recipe is sure to become a favorite. With the right methods, you can make crispy chicken drumsticks that will wow your guests.

Key Takeaways

  • Mastering crispy smoked chicken legs is a great way to elevate your barbecue game
  • Crispy chicken drumsticks are a popular choice for their ease and flavor
  • An easy smoked chicken recipe can be achieved with the right equipment and techniques
  • Crispy smoked chicken legs offer a perfect combination of tender, smoky flavor and crunchy texture
  • With practice, you can perfect the art of crispy smoked chicken legs and enjoy this delicious dish whenever you want
  • Crispy smoked chicken legs are a great place to start for those looking to try a new recipe

Essential Equipment for Smoking Chicken Legs

To get the best crispy chicken legs, you need the right tools. Smoking chicken legs needs the right gear and technique. The smoker you pick can greatly affect the taste of your chicken legs. You can choose from charcoal, gas, or electric smokers, based on what you like and can afford.

It’s not just about the smoker for delicious smoked chicken legs. You also need to control the temperature and smoke level. Tools like thermometers and vents are key to cooking your chicken legs just right.

Smoker Options

  • Charcoal smokers for a traditional flavor
  • Gas smokers for ease of use and convenience
  • Electric smokers for a modern and efficient approach

Along with a smoker and temperature control tools, you’ll need more gear. This includes wood chips, a water pan, and other accessories. With the right equipment and a few tips, you can make delicious smoked chicken legs that everyone will love.

Selecting and Preparing Your Chicken Legs

Choosing the right chicken is key for crispy bbq chicken legs. Look for fresh, plump legs without any damage. Start by trimming fat, then rinse and dry them with paper towels. This helps get that crispy skin.

When prepping your homemade smoked chicken legs, add your favorite spices and herbs. A mix of paprika, garlic powder, and salt can give a smoky flavor. Always handle the chicken safely and keep it at the right temperature.

Here are some tips for selecting and preparing chicken legs:

  • Choose fresh, plump chicken legs
  • Trim excess fat and rinse under cold water
  • PAT dry with paper towels to remove excess moisture
  • Season with your favorite spices and herbs

By following these steps, you’ll make delicious, crispy bbq chicken legs. They’re perfect for any occasion. The secret to success is in the quality of your chicken.

The Perfect Chicken Leg Brine Recipe

To get crispy smoked chicken legs, start with a great brine recipe. Brining makes your chicken legs tender and full of flavor. It’s essential for an easy smoked chicken recipe.

A good brine has salt, sugar, and spices. You can tweak a basic recipe with garlic, herbs, or citrus. This adds extra flavor to your chicken.

Brine Ingredients

  • Salt
  • Sugar
  • Spices (such as black pepper, paprika, and garlic powder)
  • Optional flavorings (such as garlic, herbs, or citrus)

Choose ingredients that match your chicken’s flavor. Try different flavorings to find your favorite. With a great brine and recipe, you’ll make delicious, crispy chicken legs.

Creating Your Signature Chicken Rub

To get the perfect taste for your crispy chicken and smoked chicken legs, making a special chicken rub is key. Try mixing different spices, herbs, and ingredients to find the right mix. Start with paprika, brown sugar, garlic powder, and chili powder.

Finding the right balance in your rub is important. It should enhance the chicken’s natural taste without being too strong. Adding a bit of smoked paprika can give your chicken a rich, smoky flavor. Experimenting with different rubs will help you find the perfect one for you.

By adjusting the amounts of these ingredients, you can make a unique flavor for your chicken. This will take your crispy chicken and smoked chicken legs to a whole new level.

Mastering Crispy Smoked Chicken Legs: Step-by-Step Process

To get the perfect crispy bbq chicken legs, follow a step-by-step guide. Learning how to smoke chicken legs takes patience and the right techniques. First, prepare your smoker. Make sure it’s at the right temperature and has good airflow.

When your smoker is ready, add your chicken legs. Start smoking at a low temperature, around 225-250°F. This helps the meat soak up smoky flavors. Near the end, raise the temperature to 375-400°F. This crisps the skin and adds texture.

  • Use the right type of wood to add flavor to your chicken
  • Maintain a consistent temperature to ensure even cooking
  • Don’t overcrowd the smoker, as this can affect airflow and temperature

Follow these tips and practice your smoking skills. You’ll get crispy bbq chicken legs that are full of flavor and tender. Always follow a step-by-step guide when learning how to smoke chicken legs for the best results.

Wood Selection for Ultimate Flavor

Choosing the right wood is key to perfect crispy smoked chicken legs. As you follow an easy smoked chicken recipe, pick wood that enhances the flavors. Different woods bring unique tastes and smells to your chicken.

Hickory, oak, and maple are top picks for smoking chicken. Hickory gives a strong, sweet taste. Oak adds a milder, smokier flavor. Try different woods to find your favorite for crispy smoked chicken legs.

Best Wood Types for Chicken

  • Hickory: strong, sweet flavor
  • Oak: subtle, smoky flavor
  • Maple: mild, slightly sweet flavor

The wood you choose also affects the smoking time for crispy smoked chicken legs. Adjust your smoking time based on the wood. Feel free to try various woods to discover your top choice.

Troubleshooting Common Smoking Issues

Smoking chicken legs or drumsticks can sometimes go wrong. It’s key to find out why and fix it. This way, you’ll get the best taste and texture.

Common problems include uneven cooking, dry meat, and not enough flavor. If your chicken cooks unevenly, try changing the temperature or rotate it more. Adding a water pan can also help with even cooking.

To avoid dry meat, brine your chicken properly. You might also want to add more moisture to the smoker. Wrapping your chicken in foil can keep it juicy. For crispy drumsticks, make sure the temperature is just right.

By following these tips, you can make delicious smoked chicken. It’s important to be patient and keep trying. Smoking is an art that takes practice.

Remember to watch your smoker’s temperature and use the right wood. Don’t overcrowd the smoker. These steps will help you make tasty, tender chicken.

Serving and Pairing Suggestions

There are many ways to serve your crispy bbq chicken legs. You can have them as a snack or with sides for a full meal. Try them with coleslaw, baked beans, or corn on the cob for a classic taste.

For more flavor, try different sauces. Barbecue sauce is great, but honey mustard or ranch can add a twist. You can also serve them with mashed potatoes, grilled veggies, or a green salad for a heartier meal.

  • Coleslaw
  • Baked beans
  • Corn on the cob
  • Mashed potatoes
  • Grilled vegetables

Pairing your smoked chicken legs with various flavors and textures can make a meal unforgettable. With a bit of creativity, you’ll impress everyone. Whether you prefer classic or adventurous, your crispy bbq chicken legs will be a hit.

Conclusion: Mastering Your Smoked Chicken Game

Getting perfect crispy smoked chicken legs takes time and practice. But the taste is worth it. Follow the steps in this article to become a pro at this tasty cooking method.

For a great easy smoked chicken recipe, use top-notch ingredients. Keep your smoker at the right temperature. Try different woods and rubs to find your favorite flavor. With effort, you’ll make chicken that everyone loves.

So, fire up your smoker and start cooking. The more you do it, the better you’ll get. Soon, you’ll be the top choice for crispy smoked chicken legs in your circle.

FAQ

What are the key pieces of equipment needed for smoking chicken legs?

You’ll need a smoker, like charcoal, gas, or electric. Also, tools for temperature control, such as thermometers and vents. Don’t forget wood chips and a water pan.

How do I select and prepare the chicken legs for smoking?

Choose fresh, plump chicken legs without damage. Trim fat, rinse, and dry them. Season with your favorite spices and herbs.

What is the perfect brine recipe for crispy smoked chicken legs?

A good brine has salt, sugar, and spices. It tenderizes and flavors the meat. Brine for 30 minutes to an hour, depending on the chicken size.

How do I create a signature chicken rub for my smoked chicken legs?

Mix spices, herbs, and ingredients like paprika and garlic powder. Find a flavor balance that complements the chicken.

What is the step-by-step process for achieving crispy smoked chicken legs?

Prepare the smoker and smoke the chicken at 225-250°F for hours. Then, raise the temperature to 375-400°F for 30 minutes to crisp the skin.

What types of wood are best for smoking chicken legs?

Hickory, oak, and maple add unique flavors. Hickory gives a strong, sweet taste, while oak offers a subtle smokiness.

How can I troubleshoot common issues that arise during the smoking process?

Issues like uneven cooking or dry meat can be fixed. Adjust the temperature or add moisture to the smoker.

Try coleslaw, baked beans, and corn on the cob. Experiment with sauces like barbecue or honey mustard for extra flavor.

Do You Like Our Recipe ?

0.0
0.0 out of 5 stars (based on 0 reviews)
Excellent0%
Very good0%
Average0%
Poor0%
Terrible0%

Celebrate Ramadan with These Flavorful Recipes

What makes traditional Ramadan recipes so special during this Islamic holiday? How can you prepare delicious Middle Eastern recipes for Ramadan to impress your family and friends? Ramadan is a time for spiritual reflection, and food is a big part of this celebration. With many Ramadan recipes to choose from, you can make a memorable and tasty experience for your loved ones.

Introduction to Ramadan Cuisine

Ramadan is a time for spiritual growth, and traditional Ramadan recipes are key to this journey. From savory dishes to sweet treats, Middle Eastern recipes for Ramadan offer a wide range of flavors and ingredients. In this article, we’ll explore the world of Ramadan recipes. We’ll give you the inspiration and guidance you need to create a memorable and delicious Ramadan experience.

Key Takeaways

  • Discover the significance of food during Ramadan and its role in spiritual reflection
  • Explore a variety of traditional Ramadan recipes and Middle Eastern recipes for Ramadan
  • Learn how to prepare delicious and flavorful dishes for your family and friends
  • Get inspired by the diverse range of Ramadan recipes and their cultural significance
  • Find out how to make your Ramadan celebration even more special with these flavorful recipes
  • Understand the importance of traditional Ramadan recipes in bringing people together

Understanding the Significance of Ramadan Meals

Ramadan is a time for spiritual growth, and food is key. Muslims fast from dawn to sunset. The meals before and after fasting are important for their health and spirit. Ramadan recipes aim to nourish the body and honor the spiritual aspect of eating.

The main meals are suhoor and iftar. Suhoor is eaten before dawn and should include fiber, protein, and carbs. Iftar, eaten after sunset, helps replenish nutrients. Iftar recipes often feature dates and fruits for quick energy.

For suhoor recipes, choose foods that are easy to digest and keep you hydrated. Watermelon and cucumbers are great choices. Nuts and seeds add healthy fats to keep you full.

By following these tips and ramadan recipes, you can have a healthy and meaningful Ramadan. Whether you’re looking for iftar recipes or suhoor recipes, there are many tasty and nutritious options. This makes it easy to stay nourished and focused during the holy month.

Essential Ingredients for Your Ramadan Kitchen

To make tasty middle eastern recipes for ramadan, you need the right stuff. Traditional recipes use aromatic spices, fresh herbs, and key ingredients. These add flavor and depth to your dishes.

Make sure you have olive oil, cumin, coriander, cinnamon, and cardamom. These spices and herbs are key in traditional ramadan recipes. They make stews, soups, and rice pilafs warm and aromatic.

Here are some must-haves for your Ramadan kitchen:

  • Basmati rice
  • Canned chickpeas and beans
  • Fresh parsley and cilantro
  • Lemons and lime juice
  • Sumac and paprika

With these ingredients, you can whip up a bunch of tasty middle eastern recipes for ramadan. They’ll impress your loved ones. Whether it’s dolmas or kebabs, these ingredients will bring Middle Eastern flavors to your home.

Traditional Ramadan Recipes for Iftar

As the sun sets during Ramadan, families and friends come together. They share delicious iftar recipes. Traditional Ramadan dishes are key, blending flavors and ingredients that unite people.

Popular iftar dishes include dates, samosas, and kebabs. They’re often paired with dips and sauces. Also, lentil soup, chickpea salad, and grilled meats are iftar favorites. These dishes not only taste great but also give energy after fasting.

Here are some traditional Ramadan recipes for iftar:

  • Lentil soup with a side of pita bread
  • Grilled chicken or beef skewers with a variety of vegetables
  • Chickpea salad with a dollop of yogurt and a sprinkle of cumin
  • Dates and samosas with a side of cardamom tea

These Middle Eastern recipes for Ramadan are simple to make and can be tailored to your liking. Whether you’re after something classic or something new, there’s an iftar recipe for you. So, why not try something new this Ramadan and dive into the rich culinary heritage of the Middle East?

Energizing Suhoor Meal Ideas

During Ramadan, a nutritious suhoor meal is key to give you energy for the day. Healthy ramadan recipes help you get the nutrients needed to stay focused and energized. Make sure your suhoor includes complex carbs, protein, and healthy fats to keep you full.

A good suhoor meal can greatly help you fast and stay energized. Try overnight oats with fruit and nuts, whole grain toast with avocado and eggs, or a smoothie bowl with spinach, banana, and almond milk. These recipes are not only tasty but also full of nutrients to power your day.

Remember to drink plenty of water when preparing your suhoor meal. You can also add healthy drinks like coconut water or low-sugar juice to replace lost electrolytes. By using these healthy ramadan recipes and tips, you’ll be ready for a successful fasting day.

Here are some more suhoor recipes to try:

  • Whole grain cereal with milk and fruit
  • Scrambled eggs with whole grain toast and vegetables
  • Greek yogurt with honey and nuts

These suhoor recipes are simple to make and can be tailored to fit your dietary needs. Starting your day with a nutritious suhoor meal will help you tackle fasting challenges and stay energized all day.

Quick and Easy Ramadan Recipes for Busy Days

During Ramadan, it can be hard to balance work, family, and spiritual duties. Cooking can be a big challenge. That’s why easy Ramadan recipes are a big help. They are quick, tasty, and save you time, so you can focus on what’s important.

Planning your meals ahead is a smart move. Look for recipes that take less than 30 minutes, like one-pot dishes or simple salads. You can also prep ingredients early, like chopping veggies or marinating meat. This makes cooking quicker and easier.

For iftar, make dishes that are quick to prepare and serve. Some ideas include:

  • Grilled meats or vegetables
  • Simple soups or stews
  • Salads with pre-cooked ingredients

These easy Ramadan recipes will help you make tasty meals, even when you’re very busy.

Healthy Alternatives for Modern Ramadan Meals

During Ramadan, it’s key to eat healthily to keep your energy up. Adding healthy ramadan recipes to your meals can really help. These recipes include lots of fruits, veggies, and whole grains. They give you the nutrients you need for a balanced diet.

Starting with vegetarian ramadan recipes is a smart move. They’re not only good for you but also taste great. You can make dishes like vegetable stir-fries, lentil soups, and grilled vegetable skewers. These are simple to make and you can change them to fit your taste.

  • Choose whole grains over refined grains
  • Incorporate a variety of fruits and vegetables into your meals
  • Use herbs and spices to add flavor instead of salt and sugar

By following these tips and trying vegetarian ramadan recipes, you can make a healthy Ramadan meal plan. It will feed your body well and please your taste buds.

Sweet Treats and Desserts for Special Ramadan Moments

Ramadan is a time for joy and thought. What’s better than enjoying tasty sweets and desserts? Ramadan recipes often include traditional Middle Eastern desserts. These treats are key to the Ramadan spirit, enjoyed at iftar and other celebrations.

There’s a wide range of desserts to try, from classic traditional ramadan recipes like baklava and ma’amoul. You can also find modern sweets that mix old flavors with new twists. For something different, try kunafeh or umm ali.

Whether you’re hosting a big iftar or just want to share sweets with loved ones, these desserts will impress. This Ramadan, why not try something new? Dive into the world of ramadan recipes and Middle Eastern desserts.

Vegetarian and Vegan Ramadan Dishes

Many people seek vegetarian ramadan recipes and vegan ramadan recipes during Ramadan. These dishes are both healthy and tasty. They are ideal for those who eat vegetarian or vegan and want to enjoy the holy month with great food.

For vegetarian ramadan recipes, you can use lentils, chickpeas, and veggies. For vegan ramadan recipes, try vegan yogurt and vegan cheese. Some favorites include vegetable stir-fries, lentil soups, and grilled portobello mushroom burgers.

Here are some tips for making vegan ramadan recipes:

  • Use a variety of spices and herbs to add flavor to your dishes
  • Incorporate plant-based protein sources like beans, lentils, and tofu
  • Choose whole grains like brown rice, quinoa, and whole wheat bread

By following these tips and exploring different vegetarian ramadan recipes and vegan ramadan recipes, you can make delicious meals for Ramadan. Whether you’re vegetarian or vegan, there are many tasty options for your Ramadan meals.

Meal Planning and Preparation Guidelines

During Ramadan, planning and preparing meals is key for a smooth experience. With the right ramadan recipes and meal planning strategies, you can save time and reduce stress. It’s important to create a weekly menu plan with a variety of iftar recipes and suhoor meals.

A well-planned menu keeps you organized and ensures you have all the ingredients. Here are some tips for a successful meal plan:

  • Plan your meals in advance and make a grocery list to avoid last-minute trips to the store
  • Consider your dietary needs and preferences when selecting ramadan recipes
  • Choose recipes that can be prepared ahead of time to save time during busy periods

Proper storage and reheating of food are also key during Ramadan. Here are some tips for safe storage and reheating:

Food TypeStorage TipsReheating Tips
Cooked MealsStore in airtight containers in the refrigeratorReheat to an internal temperature of 165°F (74°C)
Raw IngredientsStore in separate containers to prevent cross-contaminationHandle and prepare safely to prevent foodborne illness

By following these guidelines, you can enjoy a stress-free and delicious Ramadan with your loved ones. Remember to stay hydrated, eat nutritious meals, and take breaks when needed. This ensures a healthy and happy fasting period.

Hosting Memorable Ramadan Gatherings

Hosting Ramadan gatherings is key during this spiritual time. Delicious ramadan recipes and thoughtful decorations make your home welcoming. Serving traditional iftar recipes like dates, samosas, and kebabs helps everyone come together.

Adding middle eastern recipes for ramadan to your menu makes your gathering special. These dishes are tasty and carry deep cultural meaning. Try shawarma, falafel, and ma’amoul to share Ramadan’s spirit.

Here are some tips for hosting a memorable Ramadan gathering:

  • Plan ahead and create a menu that includes a variety of dishes to suit different tastes and dietary needs.
  • Use decorative elements such as lanterns, flowers, and traditional clothing to create a festive atmosphere.
  • Encourage guests to share their own favorite ramadan recipes and cooking traditions.

Follow these tips and include tasty iftar recipes and middle eastern recipes for ramadan to make your gathering memorable. Focus on hospitality and generosity. Make sure to have plenty of food and drinks to break the fast.

Special Recipes for Eid al-Fitr Celebration

Eid al-Fitr is a big Islamic holiday that ends Ramadan. Food is a key part of this celebration. Different countries have their own eid al-fitr recipes for Eid al-Fitr.

At Eid al-Fitr, people enjoy traditional and tasty dishes. These include sweet pastries, fragrant rice, and tender meat stews. These recipes have been passed down for generations and are a big part of Eid al-Fitr.

Here are some ideas for Eid al-Fitr recipes:

  • Traditional Middle Eastern desserts like baklava and ma’amoul
  • Savory dishes like kebabs and falafel
  • Flavorful rice dishes like biryani and pilaf

To make your Eid al-Fitr celebration special, try new eid al-fitr recipes. You can find many online or try new ingredients. Make sure it’s delicious for you and your family.

Conclusion: Embracing the Spirit of Ramadan Through Food

Food is at the heart of Ramadan, more than just fuel for our bodies. It brings families and communities together. This is a time to share blessings and create lasting memories.

The meals of Ramadan are special. They go beyond just eating. They are about reflection, gratitude, and strengthening bonds. By following these culinary traditions, we honor our faith and connect with our heritage.

As you celebrate Ramadan, let these recipes guide you. May your kitchen fill with the scents of traditional dishes. And may your gatherings show the power of food to nourish both body and soul.

FAQ

What are some traditional Ramadan recipes?

Traditional Ramadan recipes include savory dishes like lamb or chicken stews. They also feature vegetable-based main courses and refreshing drinks like mint lemonade or hibiscus tea. Popular dishes are maqloobeh, fattoush, and baklava.

How can I plan and prepare for Ramadan meals?

Start by making a weekly menu and a detailed shopping list. Stock your pantry with spices, herbs, and Middle Eastern staples. Meal prepping suhoor and iftar dishes can save time during Ramadan.

What are some healthy and nutritious Ramadan recipes?

Healthy Ramadan recipes include grilled or baked fish, lentil soups, and roasted vegetable platters. Focus on balanced meals that provide energy and nourishment during fasting.

How can I incorporate vegetarian or vegan options into my Ramadan meals?

Explore vegetarian and vegan recipes like stuffed grape leaves, roasted cauliflower, and lentil stews. These dishes can be as flavorful as traditional meat-based recipes.

What are some quick and easy Ramadan recipes for busy days?

For busy days, try 30-minute iftar solutions like one-pot meals or easy salads. Make-ahead suhoor options like overnight oats or breakfast burritos can also save time.

How can I incorporate special treats and desserts into my Ramadan celebrations?

Ramadan is a great time for traditional Middle Eastern desserts like baklava, kunafa, or umm ali. You can also try modern fusion sweets or sugar-free options to satisfy your sweet tooth.

What are some tips for hosting memorable Ramadan gatherings?

Create a warm and welcoming atmosphere with decorations, music, and activities. Offer a variety of delicious Ramadan-inspired dishes, both savory and sweet, to make the event memorable for your guests.

Do You Like Our Recipe ?

0.0
0.0 out of 5 stars (based on 0 reviews)
Excellent0%
Very good0%
Average0%
Poor0%
Terrible0%

Tini Mac and Cheese Recipe: Quick, Creamy, and Delicious

Imagine a party appetizer that’s both comforting and elegant – that’s what you get with a tini mac and cheese recipe. You can create a mini mac and cheese that’s perfect for any gatherin. It has a creamy sauce and a crispy top. This small mac and cheese dish is easy to make and fun to eat, and it’s sure to be a hit with your guests.

As you explore the world of tini mac and cheese, you’ll discover the joy of creating a delicious, bite-sized dish that’s perfect for any occasion. With a tini mac and cheese recipe, you can make a big impact with a small, creamy, and delicious dish. Whether you’re looking for a quick snack or a party appetizer, a mini mac and cheese is the perfect choice. You’ll learn how to make a small mac and cheese that’s both flavorful and fun to eat.

Introduction to Tini Mac and Cheese

In this article, you’ll learn the secrets of making a perfect tini mac and cheese recipe. From the essential ingredients to the step-by-step preparation guide, you’ll get everything you need to create a delicious mini mac and cheese. You’ll discover how to make a small mac and cheese that’s both creamy and crispy, and you’ll learn how to customize it to your taste.

Key Takeaways

  • You can make a delicious tini mac and cheese recipe at home
  • A mini mac and cheese is perfect for parties and gatherings
  • You can customize your small mac and cheese with different ingredients
  • A tini mac and cheese recipe is easy to make and fun to eat
  • You’ll learn how to make a creamy sauce and a crispy top
  • You’ll discover the secrets of making a perfect small mac and cheese

Understanding Tini Mac and Cheese: A Perfect Party Appetizer

Easy mac and cheese is a hit at parties. Tini mac and cheese is a mini version of this classic dish. Its small size is perfect for grabbing off the platter.

You can make a big batch of homemade mac and cheese. Then, divide it into smaller portions for each guest.

Tini mac and cheese is also customizable. You can add different toppings or mix-ins for unique flavors. Some ideas include:

  • Adding cooked bacon or ham for a smoky flavor
  • Mixing in steamed vegetables, such as broccoli or carrots
  • Using different types of cheese, such as cheddar or parmesan

This dish is also great because it’s easy to make ahead. Prepare the mac and cheese mixture, then assemble the portions just before serving. It’s perfect for busy hosts who want to impress their guests with a delicious pasta appetizer.

Essential Ingredients for the Perfect Tini Mac and Cheese Recipe

To make a tasty macaroni and cheese, pick the right ingredients. Start with top-notch pasta like macaroni or elbow macaroni. The pasta you pick changes the dish’s texture and taste.

For cheese, you have many choices. Cheddar, parmesan, and gouda are popular. Mixing different cheeses can make a unique taste. For a fancy mac and cheese, try a mix of artisanal cheeses.

Other key ingredients include:

  • Milk or cream for a creamy sauce
  • Butter or oil for flavor and texture
  • Seasonings like salt, pepper, and paprika

With these ingredients, you can make a creamy gourmet mac and cheese. Don’t be afraid to try new combinations to find your favorite flavor.

Kitchen Equipment and Tools You’ll Need

To make tasty cheesy pasta bites like mini mac and cheese, you need the right tools. Having the right equipment makes cooking easier and more fun. You can then focus on making the best mini mac and cheese recipe.

For baking, you’ll need small dishes for each cheesy pasta bite. These dishes should handle high heat and have a non-stick surface. This prevents the mac and cheese from sticking.

Required Baking Dishes

  • Mini cast-iron skillets
  • Small ceramic ramekins
  • Individual-sized baking dishes

Optional Equipment for Enhanced Results

Some optional tools can make cooking better and the results even tastier. A food processor helps mix the cheese sauce. A pastry brush adds a golden-brown crust to the cheesy pasta bites.

Cheese Selection Guide for Maximum Flavor

The type of cheese used in a tini mac and cheese recipe is crucial. For a standout homemade mac and cheese, pick a mix of cheeses for a creamy flavor. A blend of cheddar, parmesan, and mozzarella offers a classic taste.

When choosing cheese, think about the flavor, melting point, and texture. Aged cheeses like parmesan and cheddar have a sharp taste. Soft cheeses like mozzarella and brie melt better. Try different cheese mixes to find your perfect homemade mac and cheese.

Here are some popular cheese options to consider:

  • Cheddar: a classic choice for mac and cheese, with a sharp, tangy flavor
  • Mozzarella: a mild, creamy cheese that melts well and adds a smooth texture
  • Parmesan: a nutty, aged cheese that adds depth and complexity to your tini mac and cheese recipe

Choosing the right cheese mix can make your homemade mac and cheese both delicious and unique. Whether you want a classic comfort or something new, the right cheese selection is key.

Step-by-Step Tini Mac and Cheese Preparation

To make a tasty easy mac and cheese, follow a few easy steps. This pasta appetizer is great for parties and gatherings. With these steps, you can make it easily.

First, cook your pasta as the package says. This makes sure it’s just right, not too hard or too soft. While your pasta cooks, start making the cheese sauce.

Pasta Cooking Instructions

  • Bring a large pot of salted water to a boil
  • Add your pasta and cook until al dente
  • Drain the pasta and set it aside

Creating the Perfect Cheese Sauce

To make the cheese sauce, mix cheddar, parmesan, and mozzarella. This mix gives your easy mac and cheese a creamy taste.

Assembly and Baking Tips

After you’ve cooked your pasta and made the cheese sauce, it’s time to put it together. Mix the pasta and cheese sauce in a baking dish. Then, add more cheese and breadcrumbs on top.

Customization Options and Flavor Variations

Gourmet mac and cheese offers endless possibilities. You can mix and match ingredients, spices, and seasonings for unique flavors. Try adding caramelized onions or crispy bacon for a smoky taste.

Here are some ways to enhance your tini mac and cheese:

  • Spicy: Add diced jalapenos or red pepper flakes for a spicy kick
  • Smoky: Use smoked paprika or chipotle peppers for a deep flavor
  • Herby: Add fresh herbs like parsley or thyme for a fresh taste

Quality ingredients are key to a great gourmet mac and cheese. Don’t be afraid to try new things. With creativity, you can make a mac and cheese that’s uniquely yours.

Consider adding cooked veggies like broccoli or bell peppers. Or, use different cheeses like goat cheese or feta. You could also add cooked meats like ham or chicken for a heartier meal.

Make-Ahead and Storage Guidelines

Preparing homemade mac and cheese is convenient. It’s perfect for parties or weeknight dinners. To keep it fresh, follow proper storage methods.

Store it in an airtight container in the fridge for up to 3 days. Reheat it in the oven at 350°F (180°C) for 15-20 minutes. For a crispy top, broil for 2-3 minutes more.

Here are some reheating and freezing tips:

  • Reheat in the oven or microwave until hot and creamy.
  • Freeze for up to 2 months. Thaw overnight in the fridge before reheating.
  • Freeze individual portions for a quick snack or lunch.

Follow these guidelines to enjoy your mac and cheese anytime. It’s a comforting dish that will become a favorite.

Serving Suggestions and Presentation Ideas

When serving your mini mac and cheese, how you present it matters a lot. You want to impress your guests, whether at a party or at home. Think about the look you want to achieve. Do you prefer a rustic, homemade feel or something sleek and modern?

To make your dish more appealing, try garnishing with fresh herbs like parsley or thyme. You can also add some crunch with breadcrumbs or crushed crackers. For a richer topping, consider cooked bacon or a dollop of sour cream.

Garnishing Tips

  • Choose fresh, high-quality herbs for the best flavor and appearance
  • Don’t be afraid to get creative with your garnishes – try using edible flowers or microgreens for a unique touch
  • Keep your garnishes simple and understated if you want the focus to be on the mac and cheese itself

Plating Recommendations

To make your plate look great, think about colors and textures. A white or beige plate can be a clean base for your dish. A colorful plate can add to the visual appeal. Make sure to leave some space on the plate for balance.

Troubleshooting Common Issues

When making a tini mac and cheese recipe, you might face some common problems. We’ve gathered some tips to help you solve these issues. If your mac and cheese is too dry, add a bit more milk or cheese to the sauce. If it’s too wet, add more pasta or cheese to fix it.

Common issues include overcooked or undercooked pasta. To avoid this, carefully follow the cooking instructions. Check the pasta often. Using a thermometer can help ensure the cheese sauce is at the right temperature. Stir the sauce constantly for a creamy, smooth mac and cheese.

  • Use high-quality cheese for the best flavor
  • Don’t overmix the pasta and cheese sauce
  • Experiment with different seasonings to find your favorite

By following these tips, you’ll make a delicious tini mac and cheese. Remember, practice makes perfect. Don’t worry if your first try isn’t perfect. With patience and practice, you’ll soon be a pro at making easy mac and cheese.

Conclusion: Mastering Your Tini Mac and Cheese Creation

Now that you know how to make delicious macaroni and cheese in small sizes, it’s time to get creative. Try out different cheese mixes and unique flavors. You can also customize your tini mac and cheese to your liking.

Whether you’re having a party or just want a cozy treat, your homemade mac and cheese will impress. Keep these tips in mind to become a pro at making tini mac and cheese. Enjoy your culinary adventures!

FAQ

What is tini mac and cheese?

Tini mac and cheese is a mini version of the classic macaroni and cheese. It’s perfect for parties or as a snack. You can enjoy the comfort of mac and cheese in a small, easy-to-eat format.

What makes tini mac and cheese special?

Tini mac and cheese is special because it’s a fun twist on the classic dish. The small size makes it great as an appetizer. It still has the creamy, cheesy flavor you love, but in a bite-sized way.

What are the essential ingredients for tini mac and cheese?

You’ll need small pasta, like elbow macaroni or mini shells. Also, shredded cheese, milk or cream, butter, and seasonings like salt, pepper, and paprika. These ingredients make the dish creamy and flavorful.

What kitchen equipment do I need to make tini mac and cheese?

You’ll need a small baking dish or muffin tin for the portions. A saucepan for cooking pasta and a mixing bowl for the cheese sauce. A piping bag or small spoon helps fill the portions.

How do I choose the right cheese for tini mac and cheese?

Choose cheeses that melt well, like cheddar, gruyere, and parmesan. The right cheese mix affects the taste and creaminess. Pick wisely for the best flavor.

What are the steps to prepare tini mac and cheese?

First, cook the pasta. Then, make a creamy cheese sauce. Fill the baking cups or muffin tins with pasta and sauce. Bake until the cheese is melted and bubbly. Serve your delicious tini mac and cheese bites.

Can I customize or add variations to tini mac and cheese?

Yes! You can add different cheeses, herbs, spices, or mix-ins like bacon, spinach, or caramelized onions. Get creative and make your tini mac and cheese unique.

How can I make tini mac and cheese in advance?

You can prepare the cheese sauce and pasta ahead of time. Assemble the dish and bake it just before serving. You can also freeze and reheat it later.

How can I present and serve tini mac and cheese?

You can garnish the bites with fresh herbs, grated cheese, or a drizzle of sauce. Serve them on a platter or in individual ramekins or cupcake liners. It’s a fun and easy-to-grab party appetizer.

What are some common issues with tini mac and cheese, and how can I troubleshoot them?

Common issues include overcooked pasta, a too-thin or too-thick cheese sauce, and trouble removing the bites. Follow the cooking instructions carefully, adjust the cheese sauce as needed, and use proper baking dishes or liners for easy removal.

Do You Like Our Recipe ?

0.0
0.0 out of 5 stars (based on 0 reviews)
Excellent0%
Very good0%
Average0%
Poor0%
Terrible0%

Indulge in Homemade Matcha Madeleines: A Delightful Recipe

What makes a perfect matcha madeleine recipe? How can you make these tasty cookies at home? Matcha madeleines are loved by many, thanks to matcha’s growing popularity. By following a simple recipe, you can enjoy the rich, green tea taste of homemade matcha madeleines.

Introduction to Matcha Madeleines

Matcha madeleines mix French and Japanese flavors for a unique taste. They use high-quality matcha powder for their green color and flavor. To make perfect matcha madeleines, it’s key to know the right ingredients and techniques.

Key Takeaways

  • Matcha madeleines are a delicious fusion of French and Japanese flavors
  • A good matcha madeleine recipe requires high-quality matcha powder
  • Understanding the right ingredients and techniques is crucial for creating perfect matcha madeleines
  • Matcha madeleine cookies are a great way to indulge in the rich, green tea-infused flavor of matcha
  • With a simple matcha madeleine recipe, readers can create delicious matcha madeleines at home
  • Using the right equipment and ingredients is essential for achieving the perfect matcha madeleine texture and flavor

The Magic of Matcha Madeleines: A French-Japanese Fusion

Matcha madeleines are a mix of French and Japanese flavors. They started in France as a small cake with a unique shape. Now, they include Japanese matcha powder, making them special.

When you make how to make matcha madeleine, using the best matcha madeleine ingredients is key.

Matcha madeleines have a special taste. The matcha’s bitterness meets the cake’s sweetness in a perfect mix. Knowing their history and cultural value makes them even more magical.

  • Origins of traditional madeleines in France
  • The influence of Japanese matcha on the recipe
  • The importance of using high-quality matcha madeleine ingredients

Understanding these points helps you see the charm of matcha madeleines. It also lets you make your own tasty ones at home.

Essential Equipment for Perfect Matcha Madeleines

To make perfect matcha madeleines, you need the right tools. Start with fresh, vibrant green matcha powder. The flour you choose is also key, as it affects the madeleines’ texture and shape. A madeleine pan is essential for the madeleines’ signature shell shape.

Here are some key equipment and matcha madeleine baking tips to remember:

  • A digital scale for accurate ingredient measurements
  • A stand mixer or handheld electric mixer for creaming butter and sugar
  • A silicone spatula for gentle ingredient folding
  • A madeleine pan for the madeleines’ unique shape

With the right tools and these matcha madeleine baking tips, you’ll make light, fluffy, and tasty matcha madeleines. Always use top-quality ingredients and follow the recipe closely for the best results.

Understanding Your Ingredients

To make the best matcha madeleine, knowing your ingredients is key. The quality of what you use can really make a difference. When you follow a step-by-step guide, pay close attention to each ingredient’s role.

Choosing the right ingredients can be tough, but it’s very important. Knowing what each ingredient does helps you make better choices. This ensures your matcha madeleines will taste great.

  • High-quality matcha powder for the best flavor and color
  • Finely milled flour for a tender texture
  • Granulated sugar to balance the bitterness of the matcha
  • Eggs for moisture and richness

By picking the right ingredients and following a guide, you can make delicious and beautiful matcha madeleines.

The Classic Matcha Madeleine Recipe

To make perfect matcha madeleines, follow a detailed recipe. This classic guide will help you get light, fluffy, and tasty results. First, preheat your oven to 375°F (190°C). Then, prepare your madeleine pan with butter and flour.

Whisk together 1 1/2 cups of all-purpose flour, 1/2 cup of granulated sugar, and 2 teaspoons of matcha powder in a medium bowl. In another bowl, mix 1/2 cup of whole milk, 2 large eggs, and 1/4 teaspoon of salt. Combine the wet and dry ingredients, folding gently until just combined.

Pour the batter into the madeleine pan, filling each shell about 3/4 of the way. Bake for 12-15 minutes, or until the edges are lightly golden. Let the matcha madeleines cool in the pan for 5 minutes before transferring them to a wire rack to cool completely.

By following this recipe and guide, your homemade matcha madeleines will be delicious and authentic. With practice, you’ll master the technique and create stunning, green tea-infused matcha madeleines that will impress everyone.

Some important tips for making matcha madeleines include using high-quality matcha powder. Also, avoid overmixing the batter and make sure the madeleine pan is well-prepared. By keeping these tips in mind and following the classic recipe, you’ll be on your way to making delicious matcha madeleines at home.

Preparation Techniques for Beautiful Results

To get beautiful matcha madeleines, you need to master some key techniques. This includes proper mixing methods, getting the batter just right, and preparing the pan. These steps help you make matcha madeleines with special matcha madeleine flavor variations.

Proper Mixing Methods

Mixing well is key to get air in and make the batter smooth. Here are some matcha madeleine baking tips for mixing:

  • Mix the dry ingredients separately from the wet ingredients.
  • Gently fold the wet ingredients into the dry ingredients.
  • Avoid overmixing, as this can result in dense madeleines.

Batter Consistency Tips

The batter’s consistency is important for the right texture. It should be smooth and without lumps. If it’s too thick, add a bit more liquid. If it’s too thin, add a bit more flour.

Pan Preparation Secrets

To make sure the madeleines come out easily, prepare the pan well. Here are some tips:

  • Butter the pan generously.
  • Dust the pan with flour.
  • Tap out any excess flour.

By using these preparation techniques and matcha madeleine baking tips, you can make beautiful and tasty matcha madeleines. They’ll have unique matcha madeleine flavor variations.

Mastering the Baking Process

To make perfect matcha madeleines, you need to follow a guide. It’s important to know about temperature, baking time, and other factors. By mastering these, you can make matcha madeleines that are just right and full of flavor.

Following a step-by-step guide can help you get the right texture and taste. This means preheating your oven, using the right amount of matcha, and not overmixing. With the right techniques, your matcha madeleines will be light, fluffy, and tasty.

Here are some key tips for baking matcha madeleines:

  • Use high-quality matcha powder for the best taste.
  • Don’t overbake, as it can dry out the madeleines.
  • Let the madeleines cool completely before serving.

By following these tips and a baking guide, you can make delicious matcha madeleines. They’re perfect for any occasion. Whether you’re experienced or new to baking, a step-by-step guide can help you get great results.

Troubleshooting Common Madeleine Problems

When baking matcha madeleines, you might face issues like texture, shape, or color problems. To get your matcha madeleines just right, it’s key to know how to solve these common issues. You’ll need the right ingredients and some helpful baking tips.

Fixing Texture Issues

Texture problems often come from overmixing or using the wrong flour. To fix this, mix all-purpose flour with cornstarch. Only mix until the ingredients just come together. This makes your madeleines tender and delicate, just like they should be.

Addressing Shape Concerns

Shape problems might stem from not greasing the pan well or filling it too much. To fix this, grease the pan well and fill it only 3/4 of the way. This ensures your madeleines bake evenly and keep their shape.

Color Correction Tips

If your matcha madeleines aren’t the right green, you can adjust the matcha powder amount. This tweak can change the color of your madeleines. With the right ingredients and tips, you’ll make matcha madeleines that look and taste great.

Creative Matcha Madeleine Variations

Want to elevate your matcha madeleine game? Try out different flavor variations. By adding unique ingredients and presentation ideas, you can make special treats that match your taste.

Here are some ideas for matcha madeleine flavor variations:

  • Adding a hint of lemon or orange zest to complement the brightness of the matcha
  • Incorporating chopped nuts or seeds for added texture and flavor
  • Using different types of milk, such as almond or coconut milk, to create a non-dairy matcha madeleine recipe
  • Adding a drizzle of honey or maple syrup for a touch of sweetness

When trying new flavors, keep your matcha madeleine recipe as a base. Make small changes to keep the essence of traditional matcha madeleines. This way, you can still express your creativity and preferences.

Exploring these creative matcha madeleine variations will deepen your understanding of the recipe. Whether you’re an experienced baker or just starting, trying new flavors keeps you inspired and engaged in matcha madeleines.

Storage and Freshness Tips

To keep your matcha madeleines fresh, follow proper storage methods. Let them cool completely on a wire rack after baking. This step is key to keeping their texture and flavor, as the guide shows.

Once cooled, store them in an airtight container at room temperature for up to 3 days. The quality of matcha madeleine ingredients affects their shelf life. High-quality matcha powder helps preserve flavor and aroma.

For longer storage, freezing is great. Place cooled madeleines in a single layer in a freezer-safe bag or container. Press out air before sealing. Frozen madeleines can last up to 2 months. Thaw at room temperature or reheat in the oven when ready.

Shelf Life Guidelines

  • Room temperature: up to 3 days
  • Refrigerator: up to 5 days
  • Freezer: up to 2 months

Follow these tips to enjoy your matcha madeleines longer. The baking guide will be worth it. Always check for staleness or mold before eating. Use the best ingredients for the best taste.

Serving Suggestions and Pairings

Enjoying matcha madeleine cookies is a fun experience. Pairing them with coffee or tea is a great start. The coffee’s bitterness and the tea’s floral notes mix well with the matcha’s bright taste.

For something different, try them with fruit preserves or whipped cream. The sweetness of these toppings balances the matcha’s bitterness. You can also pair them with ice cream or cake for a fancy dessert.

Present your matcha madeleines in a decorative tin or jar. Line it with parchment paper and sprinkle matcha powder on top. This makes them perfect for special occasions or gifts. By trying different pairings, you can make a unique and tasty experience for your loved ones.

Here are some great pairing ideas for matcha madeleine cookies:

  • Earl Grey tea: The bergamot flavor in the tea complements the matcha nicely, creating a refreshing and citrusy combination.
  • Fresh fruit: A simple but delicious option, pairing your matcha madeleines with fresh fruit such as strawberries or blueberries adds natural sweetness and flavor.
  • Chocolate: For a more indulgent treat, try pairing your matcha madeleines with a piece of dark chocolate or a chocolate truffle, creating a rich and decadent combination.

Conclusion: Mastering Your Matcha Madeleine Journey

Starting your matcha madeleine baking journey is exciting. The path to making these treats is as enjoyable as the taste. Follow the matcha madeleine baking guide in this article to make delicious, tasty treats. These will surely impress your friends and family.

With time and effort, you’ll get better at making matcha madeleine step-by-step. Try different matcha powders, adjust the batter, and improve your baking. The fun is in finding what you like best and making something special.

Keep trying new flavors, designs, and sharing your matcha madeleines. As you get better, you’ll find the journey is as rewarding as the treats. Enjoy every step, savor each bite, and let your love for baking show in every madeleine.

FAQ

What is a matcha madeleine?

A matcha madeleine is a twist on the classic French cookie. It includes matcha green tea powder. This gives the cookie a green color and a unique, earthy taste.

What are the key ingredients in a matcha madeleine recipe?

The main ingredients are flour, sugar, eggs, butter, and matcha powder. How you mix these ingredients is key to getting the right taste and texture.

How do I choose the right matcha powder for my madeleines?

Choose a high-quality, ceremonial-grade matcha. It should be vibrant green and have a smooth flavor. This will enhance the taste of your madeleines.

What equipment do I need to make matcha madeleines?

You’ll need a madeleine pan, a mixer, a sifter, and a whisk or spatula. These tools help mix and shape the batter.

How do I ensure my matcha madeleines have the classic shell-like shape?

Grease and flour the pan well. Fill molds only three-quarters full. Bake at the right temperature and time for the perfect shape.

Can I make variations on the classic matcha madeleine recipe?

Yes, you can try new flavors. Add lemon zest, white chocolate, or a matcha glaze on top. It’s a fun way to experiment.

How do I store matcha madeleines to keep them fresh?

Store them in an airtight container at room temperature for 3-5 days. For longer storage, freeze them for up to 2 months.

Do You Like Our Recipe ?

0.0
0.0 out of 5 stars (based on 0 reviews)
Excellent0%
Very good0%
Average0%
Poor0%
Terrible0%

Steak Butter Recipe: Elevate Your Steak Experience

We all love a great steak, and making it even better with a tasty steak butter recipe is a game-changer. A homemade steak butter can transform your steak’s flavor and texture. With a simple recipe, you can add a rich, savory taste that pairs perfectly with your steak.

Picture this: biting into a juicy steak, with creamy, flavorful steak butter on top that melts in your mouth. It’s a total game-changer for steak lovers. In this article, we’ll dive into the world of steak butter recipes. We’ll also give you a step-by-step guide to making your own homemade steak butter.

Introduction to Steak Butter

For any steak lover, a great steak butter recipe is key. It’s a simple way to take your steak to the next level and add a new flavor dimension. Whether you prefer ribeye, filet mignon, or strip steak, a steak butter recipe can bring out the best in your steak.

Key Takeaways

  • We will provide a simple and easy-to-follow steak butter recipe
  • Homemade steak butter can elevate your steak experience
  • A steak butter recipe is a great way to add flavor to your steak
  • We will discuss the benefits of using steak butter
  • A step-by-step guide will be provided to make your own steak butter
  • Steak butter is a great way to enhance the natural flavors of your steak

The Magic of Compound Butter for Steaks

Compound butter is a mix of butter, seasonings, herbs, and spices. It’s a game-changer for steak lovers. It adds a rich flavor to the steak, making it a must-try for anyone wanting to improve their steak experience. With an easy steak butter recipe, you can create your own unique flavors and elevate your steak.

We’ll explore the history of compound butters, their benefits, and what makes steak butter special. We’ll cover the best steak butter recipe and tips for making your own. Whether you’re a seasoned chef or a beginner, making compound butter is simple and rewarding.

  • Added flavor: Compound butter adds a rich and complex flavor profile to the steak, making it more enjoyable to eat.
  • Easy to make: With a few simple ingredients, you can make your own compound butter at home.
  • Customizable: You can create your own unique flavor combinations to suit your taste preferences.

By understanding compound butter, you can create your own easy steak butter recipe. This will take your steak experience to new heights. With the best steak butter recipe, you’ll impress your friends and family with your culinary skills.

Essential Ingredients for the Perfect Steak Butter Recipe

To make a tasty steak butter recipe, we must use top-notch ingredients. The key is the butter, which should be rich and creamy. Choose European-style butter with a high fat content for the best taste.

Other must-haves are garlic, parsley, and lemon zest. They bring a rich flavor and a zesty citrus taste to the steak butter recipe. For garlic, pick fresh, firm cloves without blemishes. Choose fresh, green parsley leaves. Lemon zest comes from grating the outer lemon peel layer.

Here are the main ingredients for your homemade steak butter recipe:

  • 1/2 cup high-quality butter, softened
  • 2 cloves garlic, minced
  • 1/4 cup fresh parsley, chopped
  • 1 tablespoon lemon zest

By mixing these ingredients, you’ll make a rich, flavorful steak butter recipe. It will take your steak to the next level. This homemade steak butter will impress your friends and add a new flavor to your meals.

Kitchen Tools and Equipment Needed

To make the perfect easy steak butter, you need the right tools. Having these essentials makes the process smoother and more efficient. We’ll talk about the must-have utensils and optional equipment for advanced preparation.

Making steak butter is all about the right tools. With the right equipment, you can create a smooth, creamy butter perfect for steak. You’ll need a mixing bowl, whisk, and spatula.

Must-Have Utensils

  • Mixing bowl: This is where you’ll combine all the ingredients for your steak butter.
  • Whisk: This is used to mix and blend the ingredients until they’re smooth and creamy.
  • Spatula: This is used to scrape the bowl’s sides and fold in any leftover ingredients.

Optional Equipment for Advanced Preparation

For advanced steak butter, you can use optional equipment. A stand mixer and a pastry blender can help. These tools allow for a more complex, flavorful butter that will impress.

Step-by-Step Steak Butter Preparation

We’ll show you how to make a tasty steak butter. This guide will help you make a perfect steak butter recipe. It will make your steak taste even better.

Start with the best ingredients for your steak butter. Use fresh herbs and spices for a unique flavor. Try different mixes to find your favorite.

  • Softening the butter: Leave the butter at room temperature for a few hours to soften it.
  • Adding seasonings and herbs: Mix in your desired herbs and spices to create a unique flavor profile.
  • Shaping and storage: Shape the steak butter into a log or roll, and store it in the refrigerator or freezer for later use.

Follow these steps to make a delicious homemade steak butter. It will perfectly complement your steak. Our guide will help you make a flavorful steak butter that makes your meal special.

Flavor Variations and Combinations

Creating the best steak butter recipe is all about exploring new flavors. We can mix and match ingredients to make a unique and tasty easy steak butter. Some favorite combinations include:

  • Garlic and parsley: a classic mix that brings a savory taste to the steak
  • Lemon and herbs: a fresh and zesty blend that complements the steak’s richness
  • Spicy and smoky: a bold mix that adds a kick to the steak

To make these flavors, we can use ingredients like garlic powder, dried parsley, lemon zest, and smoked paprika. The goal is to find the perfect balance of tastes for a delicious easy steak butter. By trying out different mixes, we can find the best steak butter recipe for our taste.

These flavor combinations can take our steak to the next level. Whether we like a classic taste or something bold and spicy, we can make the perfect easy steak butter. Using the best steak butter recipe, we can make our steak experience even better and enjoy a tasty meal.

Best Practices for Applying Steak Butter

Enjoying a delicious steak with homemade steak butter is all about the application. It’s important to apply the butter at the right time. This enhances your dining experience. Think about the steak’s temperature and the room’s environment when you apply it.

Temperature control is key when applying steak butter. Make sure your steak is at the right internal temperature before adding butter. This lets the butter melt and add rich flavors to your steak. For the best results, add the butter when the steak is still warm. This way, the butter melts and spreads evenly.

Here are some tips to keep in mind:

  • Use 1-2 tablespoons of steak butter per serving.
  • Adjust the butter amount based on the steak type.
  • Try different flavors like garlic and herbs for a unique taste.

By following these tips, you can make your steak even better. Enjoy a memorable meal with your homemade steak butter.

Pairing Your Steak Butter with Different Cuts

Pairing steak butter with various cuts of meat opens up a world of flavors. An easy steak butter recipe can make even simple cuts taste amazing. Try it with a ribeye or strip steak for a rich, savory taste. The goal is to match the meat’s tenderness with the butter’s richness.

A great steak butter can enhance the meat’s natural flavors. Using a top-notch recipe, you can make a meal that highlights the butter’s taste. Whether it’s a special event or a casual dinner, choosing the right meat is key.

  • Ribeye and strip steak: These cuts are perfect for a rich and savory steak butter.
  • Filet mignon: A more delicate cut that pairs well with a lighter and more subtle steak butter.
  • Other meats: Don’t be afraid to experiment with pairing your steak butter with other meats, such as chicken or pork.

Exploring different pairings can help you find the ideal match for your taste. This way, you can enjoy the full flavor of your easy steak butter.

Storage and Preservation Tips

To keep your steak butter fresh, store it right. Put it in an airtight container in the fridge. This keeps it tasting great.

Freezing is good for longer storage. Shape it into a log, wrap it in plastic or foil, and bag it. Thaw it in the fridge or at room temperature when you need it. This keeps the flavors strong.

Here are some extra tips:

  • Always use clean and sanitized equipment when handling your steak butter to prevent contamination.
  • Keep your steak butter away from strong-smelling foods, as it can absorb odors easily.
  • Label and date your stored steak butter so you can keep track of how long it’s been stored.

Follow these tips to enjoy your steak butter longer. It’s perfect for grilled steak or adding flavor to dishes. Your homemade steak butter will stay fresh and tasty.

Common Mistakes to Avoid

When making easy steak butter, it’s key to know common mistakes. These can ruin the quality and taste of your butter. We’ll cover these errors and offer tips to make sure your butter is always great.

One common mistake is not controlling the temperature right. This can make the butter melt or get too soft. To fix this, let the butter sit at room temperature for a bit before mixing. Another error is getting the seasoning wrong, leading to too much or too little flavor. To avoid this, taste the butter as you mix it and adjust the seasoning as needed.

Here are some more tips to keep in mind:

  • Use high-quality ingredients for the best taste.
  • Avoid overmixing the butter to keep it firm.
  • Keep the butter in an airtight container to stay fresh.

By following these tips and avoiding common mistakes, you can make delicious easy steak butter. Always use the best recipe and taste the butter as you mix it. Adjust the seasoning to your liking.

Conclusion

As we wrap up our exploration of steak butter recipes, it’s clear that this condiment is a game-changer. It’s a must-have for steak lovers. Now, you can make a delicious homemade steak butter to elevate your steak experience.

With the tips from this article, you can make a custom easy steak butter. It will perfectly match your favorite steak cuts.

Whether you’re grilling a juicy ribeye or searing a tender filet mignon, our best steak butter recipe will elevate your meal. The rich, creamy texture and bold flavors will make your steak a culinary masterpiece.

So, go ahead and try making your own steak butter. It will make your next steak night unforgettable.

FAQ

What makes steak butter special?

Steak butter, also known as compound butter, is a mix of butter and seasonings. It adds a rich flavor to steak, making meals more enjoyable.

What is the historical background of compound butters?

Compound butters come from French cooking traditions. They were used to flavor and moisten meats, like steak.

What are the benefits of using flavored butter on steak?

Flavored butter, like steak butter, adds richness and moisture to steak. It also creates a flavorful crust on the outside.

What are the essential ingredients for the perfect steak butter recipe?

For a tasty steak butter, you need high-quality butter, garlic, parsley, and lemon zest. These ingredients make a flavorful compound butter.

What kitchen tools and equipment are needed to make steak butter?

To make steak butter, you’ll need a mixing bowl, whisk, and spatula. You might also use a food processor or stand mixer for extra help.

What is the step-by-step process for preparing steak butter?

To prepare steak butter, soften the butter, add seasonings and herbs, and shape it. Then, store it for later use.

What are some flavor variations and combinations for steak butter?

You can experiment with different flavors in your steak butter. Try garlic and parsley, lemon and herbs, or spicy and smoky. This way, you can make a unique butter that goes well with your steak.

What are the best practices for applying steak butter to your steak?

For the best steak butter experience, consider timing, temperature, and portion control. Proper application ensures the butter melts well and enhances the steak’s flavor.

How can I pair steak butter with different cuts of meat?

Steak butter goes well with many meats, like ribeye, strip steak, and filet mignon. You can also use it with chicken, pork, or lamb. Just pick flavors that match the meat’s taste.

How should I store and preserve my steak butter?

To keep your steak butter fresh, store it in the fridge or freezer. Use proper wrapping or portioning to extend its shelf life.

What are some common mistakes to avoid when making steak butter?

Avoid temperature control errors, seasoning mistakes, and storage issues. Being careful about these can help you make great steak butter every time.

Do You Like Our Recipe ?

0.0
0.0 out of 5 stars (based on 0 reviews)
Excellent0%
Very good0%
Average0%
Poor0%
Terrible0%

Blueberry Breakfast Recipes: Delicious Meals to Start Your Day

Starting your day with a nutritious breakfast is key. Adding blueberry breakfast recipes to your morning can greatly improve your health. Blueberries are full of antioxidants, fiber, and vitamins. They make a great addition to your breakfast.

There are many blueberry breakfast recipes to choose from. You can find something that you love, from classic pancakes to overnight oats. Adding blueberries to your breakfast boosts your energy and helps you have a productive day.

Key Takeaways

  • Blueberry breakfast recipes are a great way to start your day with a nutritious meal
  • Incorporating blueberries into your breakfast can provide a boost of antioxidants and fiber
  • Healthy blueberry recipes can be easy to make and delicious
  • Blueberries can help increase energy levels and support a productive day
  • Exploring various blueberry breakfast recipes can help you find a dish that suits your taste preferences

Why Blueberries Are the Perfect Breakfast Ingredient

Blueberries are a great choice for breakfast. They are packed with nutrients like antioxidants, fiber, and vitamins. Adding them to pancakes, waffles, or muffins makes for delicious homemade treats.

Blueberries are full of antioxidants. These help protect your cells from damage and inflammation. This can lower the risk of heart disease and cancer. They also have fiber, which helps with digestion and keeps you full until lunch.

Nutritional Benefits of Morning Blueberries

Blueberries are also rich in vitamins C and potassium. They are low in calories and high in water, making them nutritious and filling. Adding blueberries to your breakfast can greatly improve your health and wellbeing.

Energy-Boosting Properties

Blueberries can also give you a boost of energy. Their mix of natural sugars, fiber, and antioxidants provides a lasting energy boost. They are perfect for starting your day feeling energized and focused.

Essential Tips for Selecting and Storing Fresh Blueberries

Creating a tasty fresh blueberry recipe inspiration starts with quality blueberries. To get the best taste and texture, learn how to pick and store them right. Look for plump, firm blueberries with a deep purple color. Soft, mushy, or grayish blueberries are old and not good.

To keep blueberries fresh, store them in a cool, dry spot. Don’t wash them until you’re ready to use them. This keeps them fresh and flavorful, perfect for your breakfast dishes.

  • Check the packaging: Make sure the container is clean and dry, and the blueberries are not packed too tightly.
  • Store in the refrigerator: If you don’t plan to use the blueberries immediately, store them in the refrigerator to keep them fresh for a longer period.
  • Freeze for later: If you want to keep blueberries for a longer period, consider freezing them. This will help preserve their flavor and nutritional value.

By following these tips, your fresh blueberries will stay fresh and tasty. This gives you the best fresh blueberry recipe inspiration for your breakfast dishes.

Classic Blueberry Breakfast Recipes You Need to Try

Starting your day with a delicious blueberry breakfast can boost your energy. It sets a positive tone for the day. Blueberry breakfasts are not only tasty but also full of nutrients and antioxidants. They support your health and well-being.

There are many blueberry breakfast dishes to choose from. Some favorites include:

  • Traditional blueberry pancakes, made with fresh blueberries and a hint of sweetness
  • Blueberry French toast, topped with a dollop of whipped cream and a sprinkle of sugar
  • Homemade blueberry muffins, perfect for a quick and easy breakfast on-the-go

These recipes are not only delicious but also simple to make. They require minimal ingredients. Adding fresh blueberries to your breakfast adds flavor and nutrition.

So, why not try one of these classic blueberry breakfast recipes? They offer fresh flavor and nutritional benefits. They’re perfect for a quick meal or a more elaborate dish.

Quick and Easy Blueberry Breakfast Ideas

Starting your day with a tasty and healthy breakfast is key. Easy blueberry breakfast ideas make it simple. You can whip up healthy blueberry recipes in minutes, even when you’re in a rush. Try blueberry smoothie bowls or overnight oats for a quick start.

Popular ideas include blueberry muffins, pancakes, and waffles. You can also toss fresh or frozen blueberries into your breakfast favorites like yogurt, oatmeal, or scrambled eggs. These recipes are not only yummy but also full of nutrients and antioxidants.

Here are some tips to make your blueberry breakfasts even better:

  • Use fresh or frozen blueberries instead of dried or processed ones
  • Choose whole grain options for your breakfast dishes, such as whole wheat muffins or oatmeal
  • Add nuts or seeds, such as almonds or chia seeds, for extra crunch and nutrition

With these easy blueberry breakfast ideas, you can kick off your day with a nutritious and tasty meal. Try adding healthy blueberry recipes to your breakfast routine. Enjoy the amazing benefits of this fantastic fruit.

Healthy Blueberry Breakfast Smoothie Combinations

Starting your day with a nutritious breakfast is key. A delicious and healthy blueberry breakfast smoothie is a great choice. These smoothies are full of antioxidants, vitamins, and minerals. They keep you energized all morning.

You can try many healthy blueberry recipes. For example, mix blueberries with spinach, banana, and almond milk for a green smoothie. This green blueberry protein smoothie is both tasty and nutritious.

Blueberry breakfast recipes offer endless possibilities. You can mix different ingredients to make unique and tasty smoothies. Try blending blueberries with yogurt, honey, and milk for a blueberry yogurt breakfast shake. This smoothie is not only yummy but also gives you protein and calcium for strong bones.

Here are some other healthy blueberry breakfast smoothie combinations to try:

  • Antioxidant-rich berry blast: Combine blueberries with raspberries and strawberries for a smoothie full of antioxidants.
  • Blueberry banana boost: Blend blueberries with banana, spinach, and almond milk for a smoothie rich in potassium and vitamins.
  • Blueberry protein punch: Mix blueberries with protein powder, Greek yogurt, and milk for a smoothie great for post-workout recovery.

The secret to a delicious and healthy blueberry breakfast smoothie is to experiment. Find the ingredients that work best for you. With these healthy blueberry recipes, you’ll start your day with a nutritious and tasty breakfast. This will keep you energized and focused all morning.

Make-Ahead Blueberry Breakfast Options

Busy mornings can be tough. But, having some homemade blueberry recipes ready can save the day. Try making blueberry muffin tin frittatas or blueberry breakfast burritos ahead of time. They’re simple to make and ensure a healthy, tasty start to your day.

Here are some make-ahead blueberry breakfast ideas:

  • Blueberry muffin tin frittatas: Mix eggs, milk, and blueberries, then pour into muffin tins. Bake until they’re set.
  • Blueberry breakfast burritos: Scramble eggs, add blueberries and cheese, and wrap in tortillas.
  • Blueberry overnight oats: Combine oats, milk, and blueberries, then chill overnight.

These delicious blueberry breakfast dishes are not only easy but also full of nutrients. Blueberries are rich in antioxidants. When paired with other healthy ingredients, they create a balanced breakfast. Adding homemade blueberry recipes to your morning routine boosts your day with a nutritious and tasty meal.

Incorporating Blueberries into Your Breakfast Bowls

Adding blueberries to your breakfast bowls is a fantastic way to start your day. They’re not only nutritious but also add a burst of flavor. Here are some blueberry breakfast recipes to try in your morning routine.

Overnight Oats with Blueberries

Overnight oats are a favorite breakfast choice. Blueberries make them even better. Just mix oats, milk, and blueberries in a jar. Then, refrigerate it overnight.

Blueberry Chia Seed Pudding

Chia seed pudding is another healthy option. Mix chia seeds with almond milk and chill it overnight. Top it with fresh blueberries and honey for a tasty breakfast.

Greek Yogurt Parfait Ideas

Greek yogurt parfaits are perfect for blueberries. Layer yogurt, blueberries, and granola for a delicious breakfast. You can also add honey or nuts for extra flavor.

Here are some tips for the perfect breakfast bowl:

  • Use fresh and high-quality ingredients
  • Experiment with different combinations of ingredients
  • Add a source of protein, such as nuts or seeds, to keep you full until lunchtime

Creative Ways to Elevate Your Blueberry Breakfast Recipes

To make your blueberry breakfast dishes even better, try adding spices and nuts. A little cinnamon or some walnuts can give your dishes a special flavor and texture. You can also use different milks and yogurts, like almond milk or Greek yogurt, for a creamy base.

Other ideas include mixing blueberries with bananas or strawberries. Adding a drizzle of honey or maple syrup can also sweeten things up. Using whole wheat or oat flour can add a nutty taste to your recipes.

  • Add a sprinkle of cinnamon or nutmeg to your blueberry pancakes or waffles
  • Mix in some chopped nuts or seeds, such as walnuts or chia seeds, into your blueberry muffin batter
  • Use fresh blueberries in a fruit salad with other fruits, such as grapes or kiwi
  • Try using different types of milk, such as soy milk or coconut milk, in your blueberry smoothie recipes

By trying out these ideas, you can make a variety of tasty and healthy blueberry breakfast dishes. Whether you like sweet or savory, there are many ways to make your blueberry breakfasts special. They can become a favorite part of your morning routine.

Seasonal Variations for Your Blueberry Breakfast Dishes

Exploring blueberry breakfast recipes can be exciting. Each season brings new ingredients and flavors. This lets you make unique and tasty dishes. Whether you want something light or warm, the seasons help guide your cooking.

In summer, add fresh blueberries to pancakes or waffles for a sweet start. Winter brings warm dishes like blueberry oatmeal or muffins for a cozy morning. All year, try new ingredients and flavors to show blueberries’ versatility in breakfast.

  • Summer: Add fresh blueberries to your yogurt or oatmeal for a burst of flavor and nutrition
  • Winter: Use frozen blueberries to make a warm and comforting blueberry compote to top your pancakes or waffles
  • Year-round: Experiment with different spices and flavor combinations, such as cinnamon or vanilla, to create unique blueberry breakfast recipes

By using seasonal changes and fresh ideas, you can enjoy many blueberry breakfasts all year. This makes your mornings delicious and healthy.

Common Mistakes to Avoid When Cooking with Blueberries

When making healthy blueberry recipes, it’s key to steer clear of common mistakes. One big error is overwashing the blueberries. This can make them lose their sweetness and texture. To fix this, just rinse them gently with cold water and dry them with a paper towel before adding them to your blueberry breakfast recipes.

Another mistake is using the wrong sugar. White sugar can make things too sweet, while brown sugar adds a caramel flavor. Try using natural sweeteners like honey or maple syrup for a touch of sweetness in your healthy blueberry recipes.

  • Not using fresh blueberries: Fresh ones are crucial for the best taste and texture in your blueberry breakfast recipes.
  • Overcooking the blueberries: They can get mushy and lose flavor if cooked too long. Cook them briefly to keep their texture and taste.
  • Not storing blueberries properly: Keep them in a cool, dry place to make them last longer.

By avoiding these mistakes, you can make tasty and healthy blueberry recipes for your blueberry breakfast recipes. Try out different ingredients and cooking methods to find your favorite blueberry dishes.

Conclusion: Making the Most of Your Morning Blueberries

Adding blueberry breakfast recipes to your morning can be tasty and healthy. You can make everything from pancakes and French toast to smoothies and overnight oats. Blueberries are full of antioxidants, making them perfect for a variety of delicious blueberry breakfast dishes.

Blueberries can give you energy, boost your immune system, or just add sweetness to your day. This article has lots of ideas for using blueberries in your breakfast. Try mixing different flavors and textures to find your favorite.

To really enjoy blueberries, make them a part of your daily breakfast. Try new recipes and enjoy the fresh taste they bring to your mornings. It’s a great way to start your day off right.

FAQ

What are the nutritional benefits of incorporating blueberries into my breakfast?

Blueberries are full of antioxidants, fiber, and vitamins. They boost your morning meal’s nutrition. They’re rich in vitamin C, vitamin K, and manganese. Plus, they have anthocyanins that protect cells and fight inflammation.

How can I select and store fresh blueberries for the best quality?

Choose plump, firm blueberries with a deep purple color. Avoid soft or grayish berries. Store them in a cool, dry place. Wash them just before using to keep them fresh and flavorful.

What are some classic blueberry breakfast recipes I should try?

Try blueberry pancakes, French toast, and muffins for a classic start. These recipes are simple and pack a blueberry punch to begin your day.

What are some quick and easy blueberry breakfast ideas?

For quick mornings, go for blueberry smoothie bowls, overnight oats, or blueberry toasts. These are fast to make and still offer blueberry’s health benefits.

How can I incorporate blueberries into my breakfast bowls?

Enjoy blueberries in overnight oats, chia seed pudding, or Greek yogurt parfaits. These are tasty and healthy ways to start your day.

What are some common mistakes to avoid when cooking with blueberries?

Avoid overwashing blueberries to prevent sogginess. Use the right sugar to keep flavors and textures right. Don’t overcook blueberries to avoid them becoming too soft.

Do You Like Our Recipe ?

0.0
0.0 out of 5 stars (based on 0 reviews)
Excellent0%
Very good0%
Average0%
Poor0%
Terrible0%

Cabbage Egg Recipe: A Savory and Simple Dish

70% of Americans are searching for easy and healthy meals. That’s why the cabbage egg recipe is so popular. It’s great for busy weeknights or weekend brunch. Plus, it’s a tasty way to add veggies to your meal.

The cabbage egg recipe is perfect for adding veggies to your diet. It’s also super flexible, so you can make it your own. This dish is full of health benefits and is easy to make. We’ll show you how to make a delicious and simple cabbage egg recipe.

Introduction to Cabbage Egg Recipe

This article will guide you through making a tasty cabbage egg recipe. We’ll cover the ingredients and tools you need. Plus, we’ll share tips for cooking it. Whether you’re busy or love cooking, this recipe will be a hit.

Key Takeaways

  • The cabbage egg recipe is a healthy and easy meal option
  • This recipe is perfect for busy weeknights or weekend brunch
  • The combination of cabbage and eggs provides a delicious and nutritious meal
  • The cabbage egg recipe is a versatile dish that can be customized to suit your taste preferences
  • This recipe is a great way to incorporate vegetables into your diet
  • The cabbage egg recipe has numerous health benefits and nutritional value

The Perfect Combination of Cabbage and Eggs

Cabbage and eggs are a perfect pair, making a healthy cabbage egg recipe that’s both good for you and tasty. Cabbage is full of vitamins and minerals like vitamin C and K. Eggs are a great source of protein.

Together, they make a delicious cabbage egg recipe that’s full of flavor and nutrients. This mix is great for anyone wanting a healthy, filling meal.

  • High protein content from the eggs
  • Rich in vitamins and minerals from the cabbage
  • Low in calories and fat

The mix of cabbage and eggs is a great choice for a healthy cabbage egg recipe. It’s perfect for a quick breakfast or a satisfying lunch. This combo is sure to please.

Essential Ingredients for Your Cabbage Egg Recipe

To make a tasty and healthy simple cabbage egg recipe, you need some key ingredients. You’ll need fresh cabbage, eggs, and any extra veggies or spices you like. For a vegetarian cabbage egg recipe, pick veggies that go well with cabbage and eggs.

Here are the basic ingredients you’ll need:

  • Fresh cabbage
  • Eggs
  • Salt and pepper
  • Optional: additional vegetables, such as onions or bell peppers, and spices, such as garlic or paprika

Choosing fresh and quality ingredients makes a big difference. For a simple cabbage egg recipe, stick to basics and get creative. If you’re making a vegetarian cabbage egg recipe, add more veggies to boost flavor and nutrition.

With these ingredients and your own flair, you can make a delicious and healthy simple cabbage egg recipe or vegetarian cabbage egg recipe. It will be perfect for your taste and diet.

Kitchen Tools and Equipment Needed

To make a tasty easy cabbage egg recipe, you need the right tools. Having the right utensils and cookware makes a big difference. It ensures your simple cabbage egg recipe is perfect every time.

It’s important to use high-quality cookware and utensils. For a simple cabbage egg recipe, a non-stick frying pan is best. It prevents eggs from sticking and makes cooking easier.

  • Frying pan: A non-stick frying pan is ideal for cooking eggs and cabbage.
  • Spatula: A heat-resistant spatula is necessary for flipping and stirring the ingredients.
  • Colander: A colander is useful for draining excess water from the cabbage.

Optional tools can make cooking more convenient. A food processor helps shred the cabbage. A whisk is great for beating the eggs. With the right tools, making a delicious easy cabbage egg recipe is easy.

Preparing Your Ingredients

To make a tasty cabbage egg recipe, start by washing and chopping the cabbage into thin strips. This helps it cook evenly and quickly. For a healthier dish, choose fresh and organic ingredients.

Next, beat the eggs in a separate bowl. Add salt and pepper to taste. You can also add spices or herbs for a unique flavor. Always handle ingredients safely to avoid contamination.

Here are some tips to make preparation easier:

  • Use a food processor to chop the cabbage quickly and efficiently
  • Beat the eggs in advance and store them in the refrigerator until ready to use
  • Prepare any additional ingredients, such as onions or garlic, according to your recipe

By following these steps, you’ll make a tasty and healthy cabbage egg recipe. Always use fresh and organic ingredients for the best taste and nutrition. With a bit of practice, you’ll quickly make a delicious cabbage egg recipe for a healthy meal.

Step-by-Step Cabbage Egg Recipe Instructions

To make a tasty cabbage egg recipe, follow simple steps. This recipe is quick and healthy. Start by getting your ingredients ready, like fresh cabbage and eggs.

For a great cabbage egg recipe, mix flavors and textures well. Chop the cabbage into thin strips and slice the onions small. This makes your dish taste better.

Preparing the Cabbage

First, wash and drain the cabbage. Take out any tough or damaged leaves. Then, cut it into thin strips. This makes your cabbage egg recipe tender and tasty.

Cooking the Eggs

Cook the eggs in a pan, scrambling them lightly. This makes the eggs fluffy and flavorful for your dish.

Combining the Ingredients

Put the cooked eggs and cabbage in a big pan. Add salt and pepper to taste. Stir-fry until everything is mixed well. This makes your cabbage egg recipe delicious.

Seasoning Tips

Now, add herbs and spices for extra flavor. Try paprika, garlic powder, or chili flakes. Find the perfect mix for your taste.

By following these steps, you can make a tasty and healthy cabbage egg recipe. It’s perfect for any meal. This recipe will quickly become a favorite in your home.

Customization Options and Variations

Exploring a vegetarian cabbage egg recipe opens up a world of flavors. You can play with spices to make your dish stand out. For instance, adding cumin or coriander gives it a warm, earthy taste. Or, keep it simple with a squeeze of fresh lemon juice.

Adding other veggies like bell peppers, carrots, or mushrooms boosts nutrition and texture. Sauté them with cabbage and eggs for a hearty meal. You can also add tofu, tempeh, or seitan for extra protein.

Here are some ideas for customizing your vegetarian cabbage egg recipe:

  • Try different types of cabbage, such as green, red, or savoy, to change up the flavor and texture
  • Add some heat with a diced jalapeño or serrano pepper
  • Use different types of eggs, such as duck or quail eggs, for a unique twist

By trying these customization options, you can make a simple cabbage egg recipe that fits your taste and diet. It’s perfect for vegetarians or anyone looking for a healthy, tasty meal.

Common Cooking Mistakes to Avoid

When making a healthy cabbage egg recipe, it’s key to avoid common mistakes. Overcooking the cabbage can make it soggy and unappealing. This is a major error.

To fix this, cook the cabbage until it’s tender but still crisp. Another mistake is undercooking the eggs, which can make them runny or raw. Make sure the eggs are cooked well but not too hard.

Here are some common cooking mistakes to avoid:

  • Overcooking the cabbage
  • Undercooking the eggs
  • Not seasoning the dish properly
  • Not using fresh ingredients

By avoiding these mistakes, you can make a healthy and tasty cabbage egg recipe. Use fresh ingredients, cook the cabbage and eggs right, and season well.

Storage and Reheating Tips

After making your easy cabbage egg recipe, it’s key to store and reheat it right. This keeps the taste and texture fresh. A simple cabbage egg recipe can be just as tasty the next day, if you follow some basic steps.

To store your cabbage egg dish, put it in an airtight container in the fridge for up to three days. For freezing, use a freezer-safe container or bag and mark it with the date. When reheating, thaw it in the fridge overnight and then heat it in the microwave or on the stovetop.

Proper Storage Methods

  • Refrigerate at 40°F (4°C) or below
  • Use airtight containers to prevent moisture and other flavors from affecting the dish
  • Label containers with the date and contents

Reheating Instructions

To reheat your cabbage egg recipe, use the microwave or stovetop. For the microwave, heat in 30-second bursts until warm. On the stovetop, heat over low-medium, stirring often, until warm.

By following these tips, you can enjoy your easy cabbage egg recipe for days. It’s perfect for a quick breakfast or a simple lunch. Its simple ingredients and easy prep make it a great choice for any meal.

Serving Suggestions and Pairings

There are many ways to serve your cabbage egg recipe. This healthy cabbage egg recipe goes well with different sides. Try it with whole grain toast, roasted veggies, or a simple green salad.

This cabbage egg recipe is perfect for any meal. It’s great for breakfast, lunch, or dinner. Add grilled chicken or bacon for more protein. Cheese, like cheddar or feta, adds a nice flavor.

Here are some ideas for serving and pairing your healthy cabbage egg recipe:

  • Serve with fresh fruit or hash browns for a filling breakfast
  • Pair with a green salad and whole grain bread for a light lunch
  • Add grilled chicken or steak for a hearty dinner

Whichever way you serve your cabbage egg recipe, it’s a winner. The mix of flavors and textures makes it both healthy and tasty. So, get creative and enjoy your cabbage egg recipe!

Conclusion: Mastering Your Cabbage Egg Recipe

Congratulations on mastering the delicious cabbage egg recipe! This dish is a gem in vegetarian cooking. You’ve learned the key ingredients, how to prepare it, and how to make it your own. Experimenting with veggies, spices, and proteins will help you find your favorite taste.

This recipe is all about being flexible. Try new ingredients, cooking ways, and how you present it. With practice, it will become a favorite in your kitchen. It’s a healthy and tasty meal for any time.

So, get creative and make your own version of this delicious cabbage egg recipe. Enjoy learning and tasting every delicious bite of this vegetarian treat.

FAQ

What are the main ingredients in a cabbage egg recipe?

The main ingredients are cabbage and eggs. You can also add veggies, spices, or proteins to make it your own.

Is a cabbage egg recipe healthy?

Yes, it’s a healthy dish. Cabbage is full of vitamins, minerals, and fiber. Eggs are a great protein source.

How do I prepare the cabbage for the recipe?

Chop or shred the cabbage into small pieces. Use a sharp knife or a food processor to make it easier.

Can I add other vegetables to the cabbage egg recipe?

Absolutely! Adding onions, bell peppers, or carrots can make it tastier and more nutritious.

How do I cook the eggs for the cabbage egg recipe?

You can cook eggs scrambled, fried, or poached. Just make sure they’re fully cooked but still tender.

Can I make the cabbage egg recipe in advance?

Yes, you can make it ahead and store it in the fridge or freezer. Just reheat it well before serving.

What are some good serving suggestions for the cabbage egg recipe?

Serve it alone or with rice, bread, or a salad. It’s perfect for breakfast or brunch.

Can I customize the seasoning for the cabbage egg recipe?

Absolutely! Try garlic, onion, or hot sauce to make it your own.

Do You Like Our Recipe ?

0.0
0.0 out of 5 stars (based on 0 reviews)
Excellent0%
Very good0%
Average0%
Poor0%
Terrible0%

Creamy Chicken and Italian Sausage Pasta Recipes

Imagine a dish that mixes creamy sauce with chicken and Italian sausage. It’s all served over perfectly cooked pasta. Our creamy chicken and Italian sausage pasta recipes will impress your family and friends. They’ll love the rich flavors of this dish.

Key Takeaways

  • You’ll learn how to create a delicious creamy chicken and Italian sausage pasta dish
  • Our recipe combines the richness of creamy sauce with the savory flavors of chicken and Italian sausage
  • You’ll be able to impress your family and friends with a flavor-packed meal
  • Our creamy chicken and italian sausage recipes with pasta are easy to follow and require minimal ingredients
  • You’ll discover the secret to making the perfect creamy sauce for your pasta
  • Our delicious pasta recipes are perfect for a quick and satisfying meal

Introduction to Creamy Chicken and Italian Sausage Pasta Recipes

Easy creamy chicken and sausage pasta is a treat for the taste buds. It combines rich flavors and satisfying textures. This dish, rooted in Italian cuisine, brings together savory chicken, spicy Italian sausage, and a creamy sauce. It’s both comforting and exciting.

Exploring easy creamy chicken and sausage pasta reveals the importance of balance. The slow-cooked sauce, perfectly cooked pasta, and spices come together for a memorable meal. Whether you’re experienced or new to cooking, making a great Italian sausage pasta dish is achievable.

  • The use of high-quality Italian sausage, which adds a depth of flavor and a touch of spice to the dish.
  • The slow-cooked sauce, which is simmered to perfection to create a rich, creamy texture that coats the pasta perfectly.
  • The addition of fresh herbs and spices, which add a bright, freshness to the dish and balance out the richness of the sauce.

Understanding these elements will help you create your own signature dish. Your easy creamy chicken and sausage pasta will impress everyone.

Essential Ingredients for Your Pasta Creation

To make a tasty creamy chicken and sausage pasta recipe, start with the best ingredients. You’ll need fresh veggies, top-notch meats, and cheeses. Think about the flavors you want in your homemade creamy pasta recipes.

Here are some key ingredients for your creamy chicken and sausage pasta recipe:

  • Fresh chicken breast or thighs
  • Italian sausage, such as sweet or hot sausage
  • Onions, garlic, and bell peppers
  • Mushrooms, such as button or cremini
  • Heavy cream or half-and-half
  • Grated Parmesan cheese
  • Fresh parsley or basil

When you shop, pick the freshest ingredients. Choose organic or hormone-free meats. Go for high-quality, freshly grated cheeses. With the right ingredients, you’ll make a rich and satisfying homemade creamy pasta recipe that everyone will love.

Kitchen Equipment and Tools Needed

To make a tasty pasta dish like creamy pasta with italian sausage, you need the right tools. Having the right tools makes cooking easier and more fun. You’ll be able to make a perfect meal with the right equipment.

When cooking pasta, the right tools are key. Here are some must-haves to get started:

  • Large pot for boiling pasta
  • Skillet or sauté pan for cooking italian sausage
  • Colander for draining pasta
  • Measuring cups and spoons for accurate ingredient measurement

There are also optional tools that can help with creamy pasta with italian sausage. A food processor for chopping and a stand mixer for the cream sauce are great.

With the right tools, you’ll make a delicious creamy pasta with italian sausage. It’s sure to please everyone. With practice, you’ll become a pro at making tasty pasta dishes.

EquipmentDescription
Large PotFor boiling pasta
SkilletFor cooking italian sausage
ColanderFor draining pasta

Preparing Your Ingredients

To start making your creamy chicken and italian sausage recipes with pasta, get your ingredients ready. This step is key to a tasty dish. Chop your onions and bell peppers into small pieces first.

Then, prepare your proteins. Slice the sausage thinly and cut the chicken into small pieces. Marinating the chicken in your favorite seasonings can add more flavor.

Here are some tips for preparing your ingredients:

  • Wash and dry your vegetables before chopping to avoid moisture issues.
  • Use a sharp knife for chopping and slicing to ensure even cooking.
  • Avoid overcooking your chicken and sausage to keep them tender.

By following these tips, you’ll make a delicious creamy chicken and italian sausage recipes with pasta dish. Stay organized and work efficiently to prepare your meal quickly and easily.

Step-by-Step Cooking Instructions for Creamy Chicken and Italian Sausage Pasta

To make a tasty italian sausage pasta dish, follow some steps. First, cook your pasta as the package says. This makes it al dente and ready for the creamy sauce.

Then, slice the italian sausage into thin rounds. Season the chicken with your favorite herbs and spices. This adds extra flavor to the dish.

Cooking the Pasta

Cooking the pasta is key to a great creamy chicken and sausage pasta recipe. Make sure not to overcook it. Overcooked pasta is mushy and not good.

Preparing the Meat

Preparing the meat means cooking the italian sausage and chicken until they’re browned and cooked through. Then, set them aside to start making the cream sauce.

Creating the Cream Sauce

The cream sauce is a vital part of the creamy chicken and sausage pasta recipe. Mix heavy cream, parmesan cheese, and your favorite seasonings in a pan. Simmer it until it thickens.

Combining Components

After cooking the pasta, preparing the meat, and making the cream sauce, it’s time to mix everything. Add the cooked pasta to the cream sauce and toss until coated. Then, add the cooked italian sausage and chicken and stir to combine.

By following these steps, you can make a delicious creamy chicken and sausage pasta recipe. It’s sure to please even the pickiest eaters. So, go ahead and try it out. Enjoy your tasty italian sausage pasta dish!

Mastering the Perfect Cream Sauce

Creating a tasty creamy pasta with italian sausage starts with the cream sauce. Use heavy cream, Parmesan cheese, and garlic for a rich flavor. This will make your homemade creamy pasta recipes stand out.

When making the sauce, whisk constantly to avoid lumps. Add salt and black pepper to enhance the taste. This ensures a smooth sauce.

For an extra flavor, sauté onions or mushrooms in the sauce. Try different cheeses like Gruyère or Asiago for a unique taste. With practice, you’ll make a perfect cream sauce for your creamy pasta with italian sausage dishes.

Troubleshooting Common Issues

  • Too thick: add a little more heavy cream or milk
  • Too thin: add a little more Parmesan cheese or simmer for a few minutes
  • Lumpy: whisk constantly and add a pinch of salt

Follow these tips to make a delicious cream sauce for your homemade creamy pasta recipes. Taste and adjust as you go. Don’t hesitate to try new ingredients for a unique dish.

Recipe Variations and Customizations

Exploring creamy chicken and italian sausage recipes with pasta opens up a world of possibilities. You can make this dish your own by adding new ingredients. Try adding fresh vegetables or herbs for a flavor boost.

Customizing your delicious pasta recipes also means trying different pasta types. You might choose whole wheat pasta for health or gluten-free pasta for dietary needs. The goal is to find what you like best.

Here are some ideas to make your creamy chicken and italian sausage recipes with pasta unique:

  • Adding a sprinkle of parmesan cheese for extra flavor
  • Using different types of sausage, such as sweet or hot Italian sausage
  • Adding some heat with red pepper flakes or diced jalapenos

By trying these variations, you can make a delicious pasta recipe that’s uniquely yours. So, don’t hesitate to experiment with new ingredients and ideas. Your taste buds will appreciate it!

Serving Suggestions and Presentation Tips

Your easy creamy chicken and sausage pasta is now ready. It’s time to think about how to present it. You want it to look as appealing as it tastes. Adding fresh herbs like parsley or basil can add color.

Grated Parmesan cheese can also enhance the flavor. When serving, consider garlic bread or a side salad. These can make the meal more satisfying. Serving with steamed vegetables like broccoli or asparagus is also a good idea.

Garnishing Options

There are many ways to garnish your pasta. Chopped fresh herbs like parsley or basil can add color. Grated Parmesan cheese can also add flavor. Here are some other options:

  • Chopped fresh herbs, such as parsley or basil
  • Grated Parmesan cheese
  • Sliced cherry tomatoes
  • Chopped fresh bell peppers

Wine Pairing Recommendations

Choosing the right wine for your pasta can be fun. Here are some good choices:

  • Pinot Grigio
  • Chardonnay
  • Merlot

Storage and Reheating Guidelines

Storing and reheating your creamy chicken and sausage pasta recipe right is key. To keep it fresh and tasty, proper storage is a must. You can chill your homemade creamy pasta recipes for up to three days. Or, freeze them for up to two months.

Here are some tips for reheating your creamy chicken and sausage pasta:

  • Reheat it in the microwave, covered, for 2-3 minutes or until heated through.
  • Reheat it on the stovetop, over low heat, stirring occasionally, until warmed through.
  • Reheat it in the oven, covered, at 350°F (180°C) for 10-15 minutes or until heated through.

By following these guidelines, you can enjoy your creamy chicken and sausage pasta recipe for longer. These tips are great for reheating a homemade creamy pasta recipe for a quick meal. They ensure your dish stays delicious and fresh.

Conclusion

This creamy pasta with italian sausage dish is a true delight for the senses. The rich, velvety sauce perfectly complements the juicy chicken and spicy Italian sausage. This creates a harmonious blend of flavors that will have you coming back for more.

Whether you’re serving it for a cozy family dinner or impressing guests at a dinner party, this delicious pasta recipes is sure to be a hit. It’s perfect for any occasion.

We hope you’ve found our step-by-step instructions and expert tips helpful. With the right techniques and a little attention to detail, you can elevate your pasta game. You’ll wow your loved ones with a dish that’s both comforting and sophisticated.

So, gather your ingredients, fire up the stove, and get ready to savor every bite of this creamy and satisfying pasta creation.

FAQ

What are the key ingredients in a creamy chicken and Italian sausage pasta dish?

The main ingredients are chicken, Italian sausage, and cream or milk. You’ll also need Parmesan cheese, garlic, onions, and spices like oregano and basil.

How do I achieve the perfect creamy sauce for my pasta?

For a creamy sauce, cook it slowly. This lets the flavors blend well. Use heavy cream, milk, and Parmesan cheese for the right consistency.

Can I make this dish ahead of time?

Yes, you can prepare it ahead. It can stay in the fridge for 3-4 days or in the freezer for 2-3 months. Just reheat it well before serving.

What type of pasta works best for this recipe?

Penne, rigatoni, or fettuccine are great choices. These shapes match well with the creamy sauce.

Can I substitute the Italian sausage with something else?

Absolutely! You can use chorizo or turkey sausage instead. Ground beef or turkey also work well for a different taste.

How do I know when the pasta is perfectly cooked?

Check the package for cooking times. Taste it a few minutes before the time. It should be slightly firm but tender.

Can I add any additional vegetables to this dish?

Yes, adding vegetables is a great idea. Bell peppers, mushrooms, spinach, or sun-dried tomatoes are good choices. Just adjust the cooking time.

What’s the best way to reheat leftover creamy chicken and Italian sausage pasta?

Reheat it on the stovetop or in the microwave. Add milk or cream to keep the sauce creamy.

Do You Like Our Recipe ?

0.0
0.0 out of 5 stars (based on 0 reviews)
Excellent0%
Very good0%
Average0%
Poor0%
Terrible0%

Get The Best Recipes In 2025

Exit mobile version