Simple & Sweet Homemade Cranberry Bread Recipes

As the holiday season comes closer, the smell of freshly baked cranberry bread fills the air. It’s a sign that festive times are near. Cranberry bread is loved for its vibrant flavors, moist texture, and versatility. These cranberry loaf recipes are perfect for making homemade holiday treats that everyone will love.

Homemade Cranberry Bread Recipe

Cranberry bread is a treat that’s enjoyed all year, not just during the holidays. These homemade bread recipes highlight the natural sweetness and tartness of fresh cranberries. They create a perfect balance that everyone will enjoy. Baking festive desserts with cranberries is a cherished tradition that brings seasonal charm to any event.

Key Takeaways

  • Cranberry bread is a beloved holiday treat with a wide range of recipes to explore
  • Homemade cranberry bread offers versatility and can be enjoyed year-round
  • Baking cranberry bread is a cherished tradition that adds festive charm to any occasion
  • Cranberry bread recipes cater to both novice and experienced bakers
  • Fresh cranberries provide a unique flavor profile that balances sweetness and tartness

Why Cranberry Bread Is a Perfect Holiday Treat

As the holiday season comes near, the smell of freshly baked cranberry bread fills homes. It brings a sense of nostalgia and warmth. This festive treat is a favorite in many homes, thanks to its tangy-sweet flavor and health benefits.

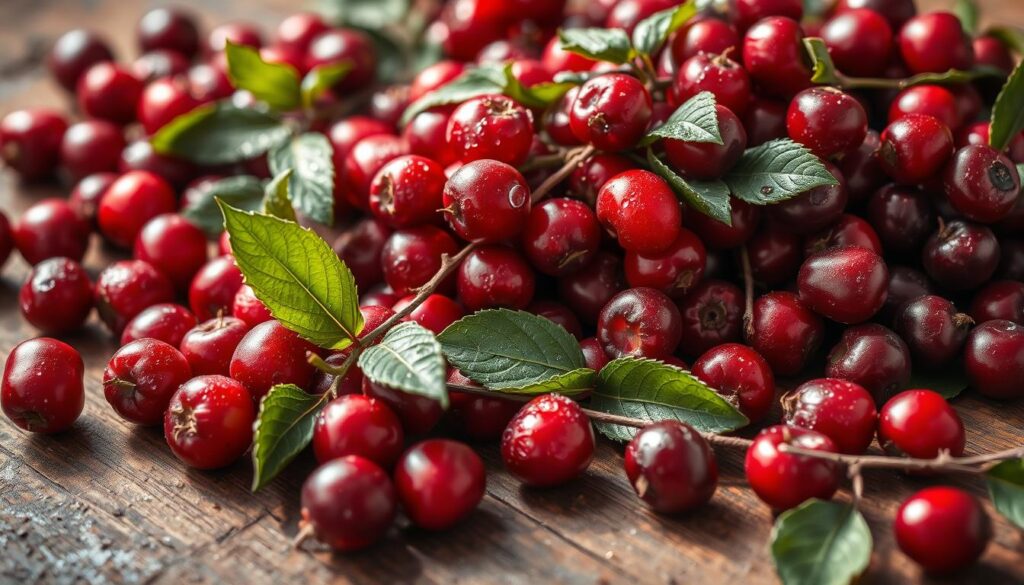
Health Benefits of Fresh Cranberries

Cranberries are packed with antioxidants, which protect the body from harm. They are especially rich in vitamin C, a key antioxidant for the immune system. Enjoying cranberry bread during the holidays is a tasty way to get these nutrients and boost your health.

Seasonal Appeal and Traditions

Cranberries’ vibrant red color and tart taste fit perfectly with the holiday season. Cranberry bread is a cherished part of many families’ holiday traditions. Sharing homemade cranberry bread with loved ones creates lasting memories and strengthens community bonds.

Cranberry bread is a versatile and delightful treat for any holiday gathering. Its unique flavor and health benefits make it a great choice for any holiday menu, from Thanksgiving to Christmas and beyond.

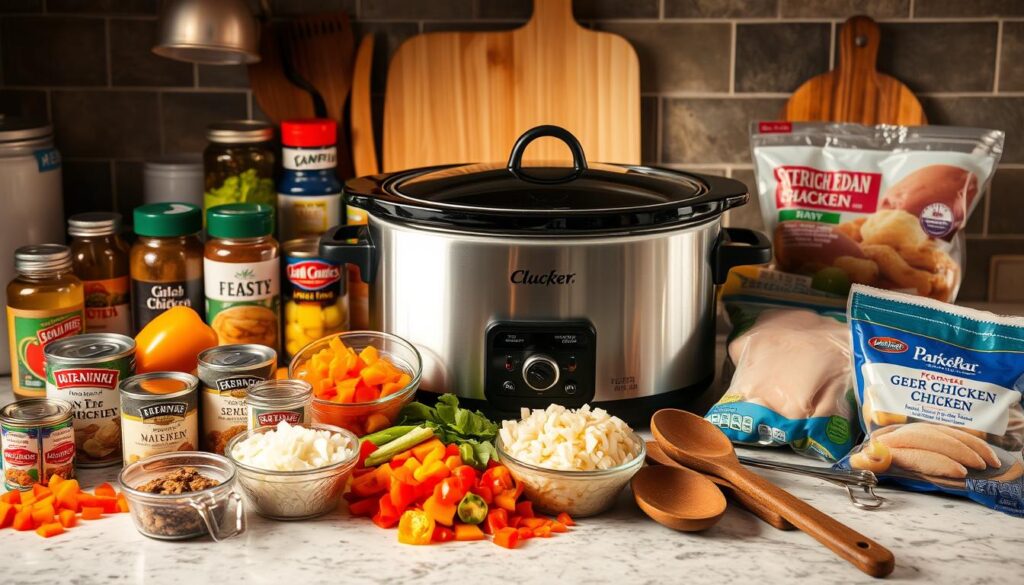
Essential Ingredients for Perfect Cranberry Bread

Making the perfect cranberry bread needs careful picking of key ingredients. You can choose between fresh cranberries for a bold taste or dried cranberries for a chewy texture. These berries are the main attraction. They mix well with all-purpose flour, baking powder, and sugar to make a moist and tasty loaf.

For a beautiful cranberry bread, let’s look at the must-have ingredients and their roles:

  • Fresh Cranberries: These tart, juicy berries add a burst of flavor and color. They contrast nicely with the sweetness of other ingredients.
  • Dried Cranberries: If you like a chewier texture, dried cranberries are great. They offer a strong cranberry taste and a chewy bite.
  • All-Purpose Flour: This is the base of your cranberry bread. It gives structure and makes the bread tender and moist.
  • Baking Powder: This ingredient makes the bread rise and gives it a fluffy texture. It ensures the loaf is light and airy.
  • Sugar: The right amount of sugar adds sweetness. It balances the tartness of the cranberries perfectly.

Using top-quality ingredients is crucial for a truly amazing cranberry bread. It will impress your taste buds and your guests.

Classic Cranberry Bread Recipe

Enjoy the tangy and sweet taste of homemade cranberry bread. It’s great for the holidays or when you want something comforting and flavorful.

Tips for Measuring Ingredients

Getting the right measurements is crucial for perfect cranberry bread. Use a digital scale or measuring cups and spoons for accuracy. Make sure to fluff your flour before measuring and level it off for the exact amount.

When using cranberries, choose fresh or frozen. But avoid mixing them too much to prevent them from bursting.

Mixing and Baking Instructions

First, preheat your oven to 350°F (175°C). Grease a 9×5-inch loaf pan. Then, whisk together the dry ingredients: flour, baking powder, baking soda, and a pinch of salt.

In another bowl, beat the eggs and mix in sugar, vegetable oil, and vanilla extract. Slowly add the wet ingredients to the dry ones, mixing just until combined. Don’t overmix. Gently add the cranberries to the batter.

Pour the batter into the prepared pan. Bake for 55-65 minutes. The bread is done when a toothpick inserted in the center comes out clean.

Storage Guidelines

  1. Let the bread cool completely on a wire rack before slicing.
  2. Store it in an airtight container at room temperature for up to 4 days.
  3. For longer storage, freeze the bread for up to 3 months. Wrap it tightly in plastic wrap or aluminum foil to prevent freezer burn.
  4. To serve, thaw the frozen bread at room temperature or warm it in the oven for a few minutes to restore its fresh-baked texture.

Gluten-Free Cranberry Bread Variations

Enjoying cranberry bread doesn’t have to be hard if you’re gluten sensitive. You can make a gluten-free version using special flours. This way, you can still enjoy the tangy-sweet taste of this holiday treat.

Using a mix of gluten-free flour like almond flour or coconut flour is a good start. Add xanthan gum to get the right texture. Xanthan gum helps the bread stay together and feel soft.

Gluten-Free FlourBenefits
Almond FlourAlmond flour is full of protein and healthy fats. It makes the bread moist and adds a nutty taste.
Coconut FlourCoconut flour is packed with fiber and a bit sweet. It pairs well with the tart cranberries.
Gluten-Free All-Purpose FlourThis flour mix, made from rice, tapioca, or sorghum, gives a bread-like texture.

When baking gluten-free cranberry bread, remember to adjust the liquid and rising times. Try different flour mixes to find the perfect taste and texture for you.

Exploring gluten-free flours lets you enjoy cranberry bread without dietary worries. Treat yourself to the seasonal flavors while staying healthy.

Best Cranberry Bread Recipes for Beginners

If you’re new to baking and want to try cranberry bread, you’re in the right spot. This holiday treat is easy to make, even for beginners. We’ll look at simple recipes and share tips to avoid common mistakes.

Quick Mix Method

The quick-mix method is a great way to make cranberry bread. It involves mixing all ingredients in one bowl. This makes it easy to create a tasty loaf. Just gather your ingredients, mix them, and bake.

Common Mistakes to Avoid

  • Overmixing the batter: Be gentle when combining the ingredients to prevent a tough, dense texture.
  • Underbaking the bread: Keep a close eye on the oven and use a toothpick to check for doneness. Overbaked cranberry bread can dry out quickly.
  • Forgetting to grease the pan: Make sure to thoroughly coat the baking pan with nonstick spray or butter to ensure easy release.
  • Using frozen cranberries: Fresh or dried cranberries work best for achieving the perfect balance of tart and sweet.

By following these tips and trying simple recipes, you can enjoy homemade cranberry bread. It’s a great way to start baking and enjoy a delicious holiday treat.

Adding Nuts and Fruits to Your Cranberry Bread

Cranberry bread is a holiday favorite. But, you can make it even better by adding nuts and fruits. Try using walnuts, pecans, orange zest, raisins, or dried apricots for a special touch. This will make your loaf stand out to your loved ones.

Adding nuts like walnuts or pecans gives a nice crunch. Toasting them first adds a richer flavor. This pairs well with the tart cranberries.

Orange zest is great for adding a citrusy twist. It brightens the flavor and balances the sweetness and tartness. Start with a small amount and adjust as needed.

Raisins or dried apricots add sweetness and chewiness. But, don’t overdo it. You want the cranberries to be the main attraction.

Play with different combinations to find your favorite. A little creativity can turn a simple bread into a holiday hit.

Moist Orange Cranberry Bread Recipe

Make your holiday baking special with a moist orange cranberry bread. It’s a perfect mix of citrus and tart berry flavors. This loaf is great for any festive table, with fresh cranberries and orange juice and zest adding vibrant taste.

Citrus Glaze Options

Take your orange cranberry bread to the next level with a citrus glaze. Here are a few options to add more flavor:

  • Orange Zest Glaze: Mix powdered sugar, fresh orange juice, and a bit of orange zest for a shiny, flavorful topping.
  • Lemon Drizzle: For a tangy contrast, blend powdered sugar with lemon juice and a bit of lemon zest.
  • Creamy Citrus Glaze: Combine softened cream cheese, powdered sugar, and orange and lemon juices for a creamy glaze.

Flavor Enhancement Tips

Here are some tips to make your orange cranberry bread even more delicious:

  1. Use both orange juice and zest to boost the citrus flavor in the bread.
  2. Add chopped walnuts or pecans for a nice texture contrast.
  3. Top the loaf with orange zest before baking for a stunning, aromatic look.
  4. Play with the cranberry to orange ratio to find your favorite balance of tart and sweet.

With these easy yet effective tips, you’ll make an orange cranberry bread that will wow your loved ones this holiday.

Make-Ahead and Freezing Instructions

Preparing cranberry bread ahead of time can save you a lot of time during the holiday rush. It’s perfect for serving at gatherings or as gifts. These tips will help keep your cranberry bread fresh and tasty.

Cranberry bread is freezer-friendly. You can bake it early and freeze it for up to 3 months. This way, you can start your holiday baking early and have fresh bread whenever you need it.

When freezing, wrap the bread tightly in plastic wrap or foil to avoid freezer burn. For extra protection, put it in a resealable freezer bag. This long-term storage keeps your bread moist and flavorful until you’re ready to serve it.

To thaw frozen cranberry bread, place it in the fridge and let it thaw slowly. This can take 6 to 12 hours. You can also thaw it at room temperature, but it takes longer. Once thawed, your bread is ready to enjoy or use in holiday recipes.

By following these easy steps, you can enjoy homemade cranberry bread all holiday season. Whether you’re hosting a party or giving gifts, having frozen bread on hand makes things sweeter.

Troubleshooting Common Cranberry Bread Issues

Baking the perfect cranberry bread can be a delightful challenge. Sometimes, you might face some common pitfalls. Don’t worry! We’re here to help you troubleshoot and overcome these issues for consistently moist, flavorful, and well-risen cranberry bread.

Addressing Dry Bread

If your cranberry bread turns out dry and crumbly, there are a few potential culprits. Double-check that you haven’t over-measured the flour, which can lead to a dry, dense texture. Also, make sure you’re not overbaking the bread, as this can also result in a dry crumb. Adjust your baking time and temperature accordingly.

Preventing a Sunken Middle

A sunken middle in your cranberry bread can be frustrating. It’s often caused by under-mixing the batter or opening the oven door too frequently during baking. Ensure you’re thoroughly mixing all the ingredients, and resist the urge to peek inside the oven until the bread has had a chance to rise properly.

Achieving Even Baking

Uneven baking can result in some areas of the cranberry bread being overbaked while others remain undercooked. To combat this, make sure your oven is properly preheated. Consider rotating the pan halfway through the baking time. Investing in an oven thermometer can also help you identify and address any hot spots in your oven.

Troubleshooting Rising Issues

If your cranberry bread fails to rise as expected, it could be due to a few factors. Ensure your leavening agents, such as baking soda or baking powder, are fresh and properly measured. Additionally, make sure you’re not undermixing the batter, as this can prevent the bread from achieving the desired rise.

Common IssuePotential CausesSolutions
Dry breadOver-measured flour, overbakingAdjust flour measurement, monitor baking time
Sunken middleUnder-mixing, frequent oven door openingThoroughly mix the batter, limit oven door opening
Uneven bakingInconsistent oven temperature, hot spotsUse an oven thermometer, rotate the pan
Bread not risingStale leavening agents, undermixingCheck expiration dates, mix the batter thoroughly

By addressing these common cranberry bread issues and applying the suggested solutions, you’ll be well on your way to baking the perfect, moist, and flavorful loaf every time.

Holiday Gift-Giving Tips for Cranberry Bread

As the holiday season comes near, cranberry bread is a great homemade gift. To make it extra special, try these creative packaging and presentation ideas. They will make your holiday food gifts stand out.

Packaging Ideas

Wrap your cranberry bread in festive holiday packaging for a personal touch. Here are some ideas:

  • Decorative gift boxes or tins with holiday-themed designs
  • Clear cellophane bags tied with colorful ribbon or twine
  • Reusable fabric gift bags or wraps in seasonal colors and patterns

Remember to add a personalized gift tag. Write a heartfelt message or include the recipe details.

Presentation Suggestions

There are many ways to present your cranberry bread. Here are some ideas to make your gifts memorable:

  1. Slice the bread and arrange the slices on a decorative platter or wooden board
  2. Place the whole loaf on a cake stand or pedestal for a stunning display
  3. Incorporate fresh cranberries, sprigs of rosemary, or other festive garnishes for a visually appealing touch
  4. Tie a ribbon around the loaf or attach a decorative gift tag to the packaging

By focusing on thoughtful packaging and creative presentation, you can turn your homemade cranberry bread into a memorable holidayfood gift.

Conclusion

In this article, we’ve explored the wonders of homemade cranberry bread recipes, perfect for the holiday season. Cranberries add a burst of tart and tangy flavor. This perfectly complements the sweetness of bread, making it a beloved treat among family and friends.

We’ve provided a comprehensive guide to help you master the art of baking the perfect cranberry bread. From classic recipes to gluten-free variations and creative mix-ins like nuts and citrus, we’ve got you covered. Whether you’re a seasoned baker or a novice in the kitchen, our tips and tricks will ensure your cranberry bread recipes turn out moist, flavorful, and irresistible.

As you venture into the world of cranberry bread recipes, don’t be afraid to experiment and find your own unique twist. The beauty of homemade holiday baking lies in the opportunity to create something truly special. So, preheat your oven, gather your ingredients, and let the joy of baking cranberry bread fill your home this holiday season.

FAQ

What are the health benefits of fresh cranberries?

Fresh cranberries are full of antioxidants and vitamin C. They’re great for your immune system. They also offer other health perks.

Cranberry bread is loved for its festive look and taste. It’s a holiday tradition. It’s also enjoyed all year, but more in winter.

What are the essential ingredients for making perfect cranberry bread?

You need flour, baking powder, sugar, eggs, butter or oil, and cranberries. Fresh ingredients make the bread better.

How can I make a gluten-free version of cranberry bread?

Use gluten-free flours like almond or coconut. Add xanthan gum to get the right texture.

What are some common mistakes to avoid when baking cranberry bread for the first time?

Don’t mess up ingredient measurements or overmix. Make sure your oven is at the right temperature. This prevents a dry or sunken middle.

How can I enhance the flavor of my cranberry bread?

Try adding orange zest, nuts, or dried fruits. Mix different ingredients to find your favorite taste.

Can I make cranberry bread in advance and freeze it?

Yes, it freezes well. Wrap it tightly and keep it in the freezer for up to 3 months. Thaw at room temperature or in the fridge.

How can I troubleshoot common cranberry bread problems?

If it’s dry or sunken, check your ingredients and baking. Adjust as needed. The right baking time and technique are key.

Easy Chipotle Steak Recipe for Perfect Mexican Flavor

Discover the exciting world of Mexican cuisine with our simple chipotle steak recipe. This dish combines the smoky taste of chipotle peppers with the rich flavor of beef. It’s a true taste of Mexico. It’s great for making dinner more exciting or for impressing friends with a delicious Mexican meal.

Key Takeaways

  • Chipotle steak is a popular Mexican dish that showcases the unique smoky flavor of chipotle peppers.
  • This recipe offers a simplified approach to creating an authentic chipotle steak at home.
  • The marinade is the key to unlocking the rich, complex flavors of the dish.
  • Choosing the right cut of beef is crucial for achieving the perfect texture and tenderness.
  • Serving chipotle steak with traditional Mexican accompaniments enhances the overall dining experience.

What Makes Chipotle Steak Special in Mexican Cuisine

The chipotle pepper has a long history in Mexican cooking, dating back to the Aztecs and Mayans. These dried and smoked jalapeño peppers add a smoky flavor to many dishes. They are a key part of Mexico’s rich culinary heritage.

Origins of Chipotle Peppers in Mexican Cooking

Chipotle peppers were first grown in Mexico’s central and southern regions. They were valued for their smoky, earthy taste. Over time, they became a symbol of true Mexican cuisine.

The Unique Smoky Flavor Profile

  • Chipotle peppers get their flavor from being smoke-dried jalapeños. This process makes them sweet and smoky.
  • This smoky taste makes chipotle steak different from other Mexican dishes. It adds depth and complexity.
  • The mix of chipotle’s smoky flavor and the steak’s richness is amazing. It creates a perfect taste experience.

Chipotle steak shows how Mexico’s history and traditions shaped its dishes. The use of these special peppers makes it a standout. It offers a unique and delicious experience for those who try it.

Essential Ingredients for Authentic Chipotle Steak Recipe

Making a delicious chipotle steak dish needs the right mix of ingredients. At its core, the recipe uses chipotle peppers in adobo sauce. These add a smoky and spicy kick to the marinade. A variety of spices also play a big part in making the dish taste great.

The marinade for the chipotle steak includes a few key things:

  • Chipotle Peppers in Adobo Sauce: These smoked jalapeño peppers give the dish its unique flavor and heat.
  • Garlic: Minced or crushed garlic adds a rich and pungent taste to the marinade.
  • Cumin: This spice adds a warm, earthy flavor that goes well with the chipotle peppers.
  • Oregano: Whether fresh or dried, oregano adds a fresh herbaceous note.
  • Lime Juice: Lime juice’s zesty acidity helps tenderize the steak and balance the heat.
  • Olive Oil: A bit of high-quality olive oil helps mix the marinade ingredients together.
  • Salt and Pepper: Salt and black pepper add to the overall flavor.

By picking and mixing these key marinade ingredients, you can make a delicious chipotle steak. It will truly capture the spirit of Mexican cuisine.

Selecting the Best Cut of Beef for Chipotle Steak

Choosing the right beef cut is key to a delicious chipotle steak. Flank steak and skirt steak are top picks for their flavor and texture. Knowing about meat quality and finding affordable options can also make your dish stand out.

  • Flank Steak: This lean and flavorful cut is a popular choice for chipotle steak. Its coarse grain and robust texture stand up well to the bold flavors of the marinade.
  • Skirt Steak: Another versatile option, skirt steak boasts a rich, beefy taste that pairs beautifully with the smoky essence of chipotle peppers.
  • Hanger Steak: Often referred to as the “butcher’s steak,” hanger steak is a tender and flavor-packed cut that can elevate your chipotle steak dish.

Meat Quality Guidelines

When picking the best beef for your chipotle steak, quality matters. Choose cuts that are well-marbled for juiciness and flavor. Also, look for deep, rich colors to ensure freshness and quality.

Budget-Friendly Options

For a tasty chipotle steak without spending a lot, try hanger or flank steak. These cuts may not be the tenderest, but they offer great flavor with the right marinade and cooking.

Preparing Your Chipotle Marinade

Making the perfect chipotle marinade is key to unlocking bold, smoky flavors. These flavors make Mexican-style steaks truly exceptional. By balancing the right ingredients, you can infuse your meat with a depth of flavor. This will transport your taste buds south of the border.

The foundation of a great chipotle marinade is the mix of three essential components: chipotle marinade, adobo sauce, and a robust spice blend. Let’s explore how to make this flavor-packed marinade step by step.

  1. Begin by gathering your ingredients: chipotle peppers in adobo sauce, garlic, cumin, oregano, lime juice, and a touch of honey or brown sugar for balance.
  2. In a blender or food processor, puree the chipotle peppers and adobo sauce until smooth. This will create the backbone of your chipotle marinade.
  3. Add the remaining spices – garlic, cumin, and oregano – to the blender and pulse until the spice blend is well incorporated.
  4. Finally, stir in the lime juice and a drizzle of honey or brown sugar. This will round out the flavors and bring balance to the marinade.

The key to unlocking the full potential of your chipotle marinade is allowing enough marination time. You should let your steak bathe in the flavorful mixture for at least 2-4 hours. Or, for maximum flavor absorption, up to 24 hours. This patience will be rewarded with a steak that is bursting with the authentic taste of Mexico.

IngredientQuantity
Chipotle peppers in adobo sauce2-3 tablespoons
Garlic, minced3 cloves
Ground cumin1 teaspoon
Dried oregano1/2 teaspoon
Fresh lime juice2 tablespoons
Honey or brown sugar1 tablespoon

Step-by-Step Chipotle Steak Recipe

Improve your cooking skills with this simple chipotle steak recipe. Learn how to bring out the amazing flavors of Mexican food. You’ll master the marinade, cooking, resting, and slicing.

Marinade Instructions

Start by making a real chipotle marinade. Mix chopped chipotle peppers, garlic, lime juice, olive oil, brown sugar, cumin, salt, and pepper in a bowl. Whisk until smooth. Put your steak in a bag or dish, add the marinade, and chill for 2 hours or up to 24 hours for the best taste.

Cooking Temperature Guide

Heat your grill or skillet to high. Cook the steak for 3-5 minutes on each side, depending on its thickness. This will give it a nice char. Use a thermometer to check the meat’s temperature. Aim for medium-rare (130°F) to medium (140°F) for the best taste and tenderness.

Resting and Slicing Tips

After cooking, move the steak to a cutting board and let it rest for 5-10 minutes. This step is key for juicy and flavorful meat. Then, slice the steak against the grain with a sharp knife. This will make it tender and delicious.

Cooking Techniques for Perfect Results

Choosing the right cooking method is key to a perfect chipotle steak. Grilling, pan-searing, and broiling each have their own benefits and challenges. Let’s look at the pros and cons of these methods to help you pick the best one for your steak.

Grilling for Smoky Flavor

Grilling is a top choice for chipotle steak because it adds a smoky taste. The grill’s high heat sears the steak, keeping the juices inside and creating a tasty crust. But, grilling needs careful temperature control to cook the steak evenly and avoid burning.

Pan-Searing for Consistent Doneness

Pan-searing is great for chipotle steak because it lets you control the heat precisely. This method ensures the steak is cooked perfectly all the way through. It also helps create a delicious crust on the outside.

Broiling for Faster Results

Broiling is quick and easy for cooking chipotle steak. It uses direct heat from above to sear the meat fast. But, you need to watch it closely to prevent overcooking or drying out the steak.

The best cooking method for your chipotle steak depends on your preferences, available equipment, and time. Try different methods to find the one that gives you the tastiest results every time.

Ideal Side Dishes and Accompaniments

When you serve a delicious chipotle steak, it’s key to match its bold flavors with the right sides. Traditional Mexican dishes are a great choice. But, if you’re looking for something new, modern fusion options can add a creative twist.

Traditional Mexican Pairings

Classic Mexican sides are a must with chipotle steak. Rice and beans are a staple that pairs well with the meat’s richness. Try a cilantro-lime rice and creamy pinto or black beans for a true Mexican taste.

A fresh, zesty salsa is also essential. Make your own salsa verde or pico de gallo with tomatoes, onions, cilantro, and a bit of spice. For creaminess, add guacamole with avocados, lime, and sea salt.

Modern Fusion Options

While traditional sides are great, don’t shy away from fusion cuisine. Try a colorful quinoa salad with roasted veggies, herbs, and citrus dressing for a twist.

For a sweet and savory option, serve the steak with a sweet potato hash. Add caramelized onions, bell peppers, and maple syrup for a delicious contrast.

Tips for Achieving Restaurant-Quality Results

To make your chipotle steak taste like it’s from a restaurant, focus on flavor and presentation. As someone who loves cooking, I’m happy to share my best tips. These will help you make a dish that will wow your guests.

First, think about flavor. A good marinade is key for a strong, smoky taste. Use plenty of chipotle peppers but balance them with other spices. Try adding cumin, garlic, and oregano to make the flavors work together.

Then, pay attention to how you present your steak. Slice it against the grain for tenderness and a nice look. Arrange the slices nicely on the plate. Add fresh cilantro, diced onions, or avocado sauce for color and freshness.

Remember to mix flavors and textures. The smoky chipotle should match the steak’s juiciness, the avocado’s creaminess, and the onions’ crunch. Try adding roasted veggies or a tangy slaw for a complete and beautiful dish.

By using these tips, you’ll get your chipotle steak to restaurant quality. Focus on flavor and presentation, and your guests will want more.

Common Mistakes to Avoid When Making Chipotle Steak

Making a delicious chipotle steak is a fun cooking adventure. But, it’s key to steer clear of common mistakes. These include temperature control and marinade errors.

Temperature Control Issues

Getting the steak’s temperature wrong can mess up its taste and texture. If it’s overcooked, it becomes dry and tough. Undercooked, it’s raw and not good to eat. To get it just right:

  • Use a meat thermometer to check the internal temperature. Aim for medium-rare to medium (135°F to 145°F).
  • Let the steak rest for 5-10 minutes before slicing. This makes it juicier and more flavorful.
  • Adjust cooking time and temperature for thicker steaks. They need more time to cook through.

Marinade Mistakes

The marinade is crucial for a tasty chipotle steak. Mistakes in making it can ruin the dish. Common errors include:

  1. Overcooking the marinade, making it bitter and overpowering.
  2. Undercooking the marinade, leaving the steak without the smoky-sweet chipotle flavor.
  3. Marinade errors, like using the wrong ingredient ratio or not marinating long enough.
  4. Seasoning mistakes, where the steak is not seasoned enough or too much.

By avoiding these mistakes, you can make a chipotle steak that rivals restaurant quality. Enjoy the bold, rich flavors that make this dish a Mexican cuisine favorite.

Storage and Leftover Guidelines

Proper food storage and handling are key to keeping your chipotle steak leftovers safe and fresh. Follow these tips to ensure the best taste and avoid food-borne illnesses:

Refrigeration Practices

  • Refrigerate leftover chipotle steak within 2 hours of cooking. Make sure it’s below 40°F (4°C).
  • Use an airtight container or resealable plastic bag to keep air and moisture out.
  • Put the container on the bottom shelf of the fridge. This spot keeps the temperature steady.

Safe Reheating Methods

  1. Reheat the steak in the oven, on the stovetop, or in the microwave. Aim for an internal temperature of 165°F (74°C).
  2. Don’t let the steak sit at room temperature for more than 2 hours. This can lead to bacterial growth.
  3. If microwaving, stir the steak often. This ensures it heats evenly and avoids cold spots.

Repurposing Leftover Chipotle Steak

Don’t waste those tasty leftovers! Get creative with your chipotle steak. Try it in:

DishDescription
Chipotle Steak TacosSlice the steak and serve it in warm tortillas with your favorite taco toppings.
Chipotle Steak SaladCut the steak into bite-sized pieces and add it to a fresh green salad.
Chipotle Steak Fried RiceChop the steak and sauté it with cooked rice, vegetables, and a touch of chipotle sauce.

By following these guidelines, you can enjoy your chipotle steak for longer. Try new recipes to use up your steak and cut down on waste.

Conclusion

In this guide, we’ve explored the world of the chipotle steak recipe. We looked at its rich history and unique flavors. These make it a favorite in Mexican cuisine.

We talked about the origins of the chipotle pepper and the best cuts of beef. We also shared foolproof cooking techniques. Now, you have all the tools and knowledge to master this dish.

The secret to cooking success with chipotle steak is embracing authentic Mexican flavors. Try different marinades and master searing and resting the meat. Follow the step-by-step instructions and tips in this guide to make your meals restaurant-quality.

Remember, the chipotle steak recipe is versatile. You can add your own twist by trying different beef cuts and side dishes. You can also mix in your own flavors. The possibilities are endless, and with this guide, you’re ready to make delicious Mexican-inspired meals that will wow everyone.

FAQ

What makes chipotle steak special in Mexican cuisine?

Chipotle steak is a unique dish in Mexican cuisine. It uses chipotle peppers, which are smoked jalapeños. This gives the steak a smoky flavor that’s different from other Mexican dishes.

What are the essential ingredients for an authentic chipotle steak recipe?

For a real chipotle steak, you need chipotle peppers, garlic, cumin, oregano, lime juice, and olive oil. These ingredients mix to create a marinade. It makes the steak taste smoky and slightly spicy, just like in Mexican cooking.

What is the best cut of beef for chipotle steak?

Flank steak or skirt steak are the best for chipotle steak. They’re cheap, tasty, and take the marinade well. They also cook up tender and juicy.

How do I prepare the chipotle marinade?

To make the marinade, blend chipotle peppers, garlic, cumin, oregano, lime juice, and olive oil. Let the steak marinate for at least 2 hours. For even more flavor, marinate it for up to 24 hours.

What are the key steps in cooking chipotle steak?

Cooking chipotle steak involves a few steps. First, marinate the steak for the right amount of time. Then, cook it over high heat, like grilling or pan-searing. Finally, let it rest for 5-10 minutes before slicing it against the grain.

What are some ideal side dishes and accompaniments for chipotle steak?

Good sides for chipotle steak include rice and beans, fresh salsa, guacamole, and grilled veggies. For a twist, try it with Mexican slaw, roasted sweet potatoes, or a citrus salad.

What are some common mistakes to avoid when making chipotle steak?

Avoid overcooking or undercooking the steak. It should be juicy and tender. Also, don’t forget to marinate it long enough and season it right. Too much or too little spice can ruin the flavor.

Healthy Breakfast Curry Recipe Ready in 15 Minutes

Imagine waking up to the enticing aroma of a freshly prepared curry. It’s bursting with aromatic spices and packed with nourishing ingredients. What if you could enjoy this flavorful delight without spending hours in the kitchen? Introducing a quick and healthy breakfast curry recipe that can be ready in just 15 minutes!

This protein-packed morning curry is not only a delightful way to start the day. It’s also a nutritious and convenient meal option. Infused with a blend of fragrant spices, fresh vegetables, and your choice of protein, this dish promises to energize and sustain you throughout the morning. Say goodbye to boring breakfast routines and hello to a vibrant, flavor-packed meal that will have you looking forward to your mornings.

Key Takeaways

  • Prepare a healthy and flavorful breakfast curry in just 15 minutes
  • Enjoy a protein-packed meal that will energize you for the day ahead
  • Explore a unique and versatile breakfast option beyond the traditional
  • Discover the convenience of a quick and nutritious morning curry
  • Indulge in the aromatic blend of spices and fresh ingredients

But what exactly makes this breakfast curry so special? And how can you incorporate it into your daily routine? Dive into the following sections to uncover the secrets to this delightful and nourishing morning meal.

Why Start Your Day with a Breakfast Curry

Starting your day with a breakfast curry can change your health and productivity. This tasty dish gives you an energy boost and lots of morning nutrition benefits.

Nutritional Benefits of Morning Curry

Breakfast curries are full of vitamins, minerals, and antioxidants. Spices like turmeric, cumin, and coriander have anti-inflammatory properties. They also have protein from chickpeas or lean meats, keeping you full and happy in the morning.

Energy-Boosting Properties

Breakfast curries have complex carbs, healthy fats, and slow-releasing proteins. They give you energy all morning. This mix keeps your blood sugar stable, avoiding the energy crash after a carb-heavy breakfast.

Time-Saving Advantages

In today’s fast world, a quick breakfast is key. A curry-based meal can be ready in 15 minutes. It’s a great choice for busy mornings, letting you start your day right without losing time.

Looking to improve your morning routine? Try a delicious breakfast curry. It’s good for your taste buds and energy levels.

Essential Ingredients for Quick Morning Curry

Making a tasty breakfast curry is easy and quick. You just need the right curry ingredients. These include fragrant spices and healthy vegetables. Together, they make a delicious breakfast staple.

The base of a great curry is aromatic spices. You’ll need ground cumin, turmeric, coriander, and ginger. These spices add flavor and color. Onions and garlic are also key, giving a savory taste that goes well with the spices.

  • Ground cumin
  • Turmeric
  • Coriander
  • Ginger
  • Onions
  • Garlic

Adding fresh veggies like tomatoes, spinach, and bell peppers boosts nutrition and texture. These breakfast staples add color and important nutrients. They help start your day off right.

  1. Tomatoes
  2. Spinach
  3. Bell peppers

If you want more protein, add chickpeas, lentils, or lean turkey. These quick recipe components make the curry more filling and healthy. They help you make a balanced breakfast curry fast.

Kitchen Tools You’ll Need

Making a tasty breakfast curry is easy with the right tools. You don’t need a lot of kitchen essentials. Just a few key items can help you make a delicious dish fast. Let’s look at the basic tools and some optional gadgets that can make your morning curry prep quicker.

Basic Equipment Requirements

To make a quick breakfast curry, you’ll need a few basic tools:

  • A sturdy saucepan or skillet for sautéing and simmering the ingredients
  • A sharp knife for chopping fresh herbs, vegetables, and spices
  • A cutting board to provide a stable surface for your knife work
  • Measuring cups and spoons to ensure accurate seasoning
  • A wooden spoon or spatula for stirring and scraping the pan

Optional Time-Saving Gadgets

While the basic tools work well, some gadgets can make things even faster:

  1. A high-powered blender or food processor for quickly pureeing spices and herbs into a fragrant curry paste
  2. An electric pressure cooker that can drastically reduce the simmering time for your breakfast curry
  3. A rice cooker to prepare perfectly fluffy basmati rice, a classic accompaniment to the morning curry

With these kitchen essentials and optional cooking tools, you’re ready to make a tasty and time-saving breakfast curry at home.

Healthy Breakfast Curry Recipe Step-by-Step Guide

Ready to make a tasty and healthy breakfast curry in 15 minutes? Follow these simple steps. You’ll get a flavorful meal to start your day.

  1. Gather your ingredients: diced onions, minced garlic, curry powder, canned diced tomatoes, coconut milk, baby spinach, and your favorite protein (like chicken, shrimp, or tofu).
  2. Heat a large skillet or wok over medium heat. Add a tablespoon of oil and sauté the onions until they’re translucent, about 3-4 minutes.
  3. Stir in the garlic and curry powder. Cook for another minute, until it smells great.
  4. Pour in the canned diced tomatoes and coconut milk. Let it simmer for 5-7 minutes, so the flavors mix well.
  5. Add your chosen protein and baby spinach. Cook for 3-4 minutes, until the protein is done and the spinach is soft.
  6. Season with salt and pepper to taste.
  7. Serve your healthy breakfast curry right away. Garnish with fresh cilantro or a squeeze of lime juice, if you like.

With these easy curry recipe instructions and cooking steps, you can make a nutritious and easy preparation breakfast curry. It will keep you energized and happy all morning.

Protein Options for Your Morning Curry

Protein is key for a balanced breakfast, and morning curry can be a great source. You can choose from vegetarian, non-vegetarian, or plant-based options. Each offers delicious and nutritious choices.

Vegetarian Choices

For a meat-free curry, try tofu or legumes. Firm tofu diced in the curry adds texture and plant-based protein. Chickpeas, lentils, or kidney beans also add protein, fiber, and carbs for energy.

Non-Vegetarian Alternatives

Animal-based proteins can also make your curry better. Eggs or lean meats like chicken or turkey add savory flavor and protein.

Plant-Based Substitutions

Plant-based options like tempeh or seitan are great for protein. Tempeh has a firm texture and nutty taste. Seitan, made from wheat gluten, feels like meat.

Protein SourceNutritional ProfileFlavor and Texture
TofuHigh in plant-based protein, low in fatSoft, smooth, and takes on the flavors of the curry
Legumes (chickpeas, lentils, kidney beans)High in protein, fiber, and complex carbohydratesHearty, earthy, and add a satisfying texture
EggsHigh in protein and other essential nutrientsCreamy, rich, and complement the spices
Lean Meats (chicken, turkey)High in protein, low in fatSavory, tender, and provide a substantial mouthfeel
TempehHigh in plant-based protein, fiber, and probioticsFirm, nutty, and absorbs the flavors of the curry
SeitanHigh in protein, low in fatChewy, meaty, and can mimic the texture of animal-based proteins

Adding different proteins to your curry makes it more nutritious and flavorful. Try various combinations to find your favorite.

Spice Blend and Seasoning Tips

Making the perfect spice blend is crucial for a great breakfast curry. The spices and seasonings you pick greatly affect the taste and smell of your dish. Here are some tips to make a spice blend that will excite your taste buds and kickstart your day.

Unlock the Power of Traditional Curry Spices

Curry powders mix spices like cumin, coriander, turmeric, and chili peppers. Each spice adds something special:

  • Cumin: It has an earthy, nutty taste and is full of antioxidants.
  • Coriander: It adds a citrusy flavor and fights inflammation.
  • Turmeric: It gives the curry a bright yellow color and is packed with health benefits.
  • Chili Peppers: They add heat and flavor, plus a vitamin C boost.

Using these spices, you’ll make a breakfast curry that’s not just tasty but also healthy.

Balance Flavors and Adjust Heat Levels

Finding the right balance in your spice blend is key. Start with a basic curry powder, then tweak the spice ratios to your liking. For a milder curry, use less chili peppers. For more heat, add more. The best spice blend is what you like, so experiment until you find it.

Mastering spice blending opens up a world of flavors. It lets you create a breakfast curry that’s hard to resist. Let your creativity shine in every bite.

Make-Ahead and Storage Instructions

Preparing parts of your breakfast curry ahead of time can save you a lot of time in the morning. Smart meal prep strategies make it easy to create a healthy and tasty meal quickly.

Meal Prep Strategies

Precook the rice or quinoa a day or two before. Just reheat it when you’re ready to make your curry. You can also chop veggies ahead of time and store them in the fridge for quick use. Plus, mix your spice blend ahead and keep it in an airtight container.

Proper Storage Methods

After making your breakfast curry, it’s important to store it right to keep it fresh and safe. Put leftovers in an airtight container and refrigerate for 3-4 days. For longer storage, freeze it for 2-3 months.

Reheating Guidelines

When reheating your leftover breakfast curry, make sure it’s hot all the way through. The best way is to reheat it on the stovetop over medium heat, stirring often. Don’t microwave it, as it can heat unevenly and lose texture.

Storage MethodShelf Life
Refrigerator3-4 days
Freezer2-3 months

By using these make-ahead and storage tips, you can enjoy a nutritious breakfast curry any day. You won’t have to give up on taste or quality.

Customization and Dietary Modifications

This healthy breakfast curry recipe is very versatile. You can make it fit your dietary needs or personal taste. Let’s look at how you can change the recipe to make it your own.

Accommodating Dietary Restrictions

For those who need gluten-free or low-carb options, try cauliflower rice or zucchini noodles instead of basmati rice. If you’re allergic to nuts, skip the cashews or use sunflower seeds or roasted chickpeas. Vegans and vegetarians can use tofu, tempeh, or roasted veggies instead of eggs or chicken.

Spice and Flavor Adjustments

Customize the spice blend to your liking. For a milder taste, use less chili powder or cayenne pepper. Add red pepper flakes or sriracha for more heat. Try fresh cilantro or mint to add a fresh aroma.

Dietary RestrictionModification
Gluten-FreeUse cauliflower rice or zucchini noodles instead of basmati rice
Low-CarbSubstitute basmati rice with cauliflower rice or zucchini noodles
Nut AllergyOmit the cashews or replace with sunflower seeds or roasted chickpeas
Vegan/VegetarianUse tofu, tempeh, or a medley of roasted vegetables instead of eggs or chicken

Looking to meet dietary needs or just want to try something new? The options are endless. Get creative and make a dish that’s good for you and tastes great.

Serving Suggestions and Accompaniments

When serving your delicious breakfast curry, think about pairing it with different sides. This will make your meal complete and enjoyable. Try both classic and modern options to make your morning curry special.

Traditional Sides

Naan, a soft Indian flatbread, and basmati rice are perfect with breakfast curry. These traditional sides offer a nice contrast to the curry’s bold flavors. They make for a comforting and classic meal.

Modern Pairings

For something new, pair your curry with modern sides. Avocado toast is a great choice, with its creamy texture and nutty taste. Or, try a smoothie bowl with fruits and greens. It balances the curry’s spices and gives you energy for the day.

Traditional Curry SidesModern Breakfast Pairings
NaanAvocado Toast
Basmati RiceSmoothie Bowls
Raita (Yogurt Sauce)Whole Grain Muffins
ChutneyRoasted Vegetable Medley

By trying both traditional and modern sides, you can make a breakfast curry that’s tasty and looks good. Experiment with different pairings to find the best match for your morning curry.

Common Recipe Mistakes to Avoid

Mastering the perfect breakfast curry is a rewarding challenge. It’s key to avoid common recipe pitfalls. Knowing the most frequent cooking errors helps you troubleshoot and achieve curry perfection easily.

Overspicing is a common mistake. While bold flavors are good, too much spice can overwhelm the dish. Start with small amounts of spices and add more to taste.

Another mistake is undercooking the curry. This can make it watery and unfinished. To fix this, follow the recipe’s cooking time and watch the consistency closely, adjusting the heat as needed.

  • Avoid overspicing the curry
  • Ensure the curry is simmered for the full recommended time
  • Adjust the heat as needed to maintain the desired consistency

Texture issues, like graininess, can also happen. This might be due to poor blending or not letting spices mix well. For a smooth texture, blend the curry base well before simmering.

Common Cooking ErrorTroubleshooting Tip
OverspicingStart with smaller quantities of spices and gradually increase to taste
UndercookingSimmer the curry for the full recommended time and adjust heat as needed
Texture issuesUse a high-powered blender or immersion blender to purée the curry base

Avoiding these common mistakes and following the recipe will help you make perfect breakfast curry. With practice and these tips, you can improve your curry-making skills. Enjoy a delicious, flavorful start to your day.

Conclusion

This healthy breakfast curry recipe is quick and nutritious. It’s a great way to start your day with a protein-packed, energy-boosting meal. It only takes 15 minutes to make.

We’ve given you all the details you need to make a delicious curry. You can choose between a vegetarian or non-vegetarian option. This recipe is flexible to fit your dietary needs.

Try this healthy breakfast curry and mix up the spices and proteins. Find your favorite quick curry mix. Enjoy a tasty and healthy start to your day with this recipe.

FAQ

What are the main nutritional benefits of starting the day with a breakfast curry?

Breakfast curries are full of vitamins, minerals, and antioxidants. They give you energy that lasts and help keep you healthy. The spices and veggies add a nutritious start to your day.

How does a curry breakfast differ from traditional breakfast options in terms of energy-boosting properties?

Curries have carbs, protein, and fats that give energy slowly. This keeps you full longer and stops the midmorning crash. Unlike sugary or carb-heavy breakfasts, curries are a better choice.

What are the time-saving advantages of preparing a breakfast curry?

This quick 15-minute recipe lets you make a healthy meal fast. It’s perfect for busy mornings. The simple ingredients and quick prep make it a great choice for weekdays.

What are the essential ingredients needed to make a quick breakfast curry?

You’ll need spices like cumin, coriander, and turmeric. Add fresh veggies like onions, tomatoes, and spinach. You can also add eggs, tofu, or lean meats for extra protein.

What basic kitchen equipment is required to prepare the breakfast curry?

You’ll need a saucepan or skillet, a sharp knife, and a cutting board. Basic cooking tools are also a must. Using gadgets like a food processor can make prep even quicker.

How can I customize the breakfast curry recipe to suit my dietary needs or preferences?

You can make the recipe fit your diet by using plant-based proteins for veggie or vegan options. For low-carb, try cauliflower rice or zucchini noodles instead of grains.

What are some common mistakes to avoid when making the breakfast curry?

Avoid over-spicing, undercooking veggies, or not balancing flavors. Watch cooking times, adjust seasoning, and make sure all ingredients are cooked well. This will help you avoid mistakes and get a tasty curry.

Golden Corral Baked Chicken Recipe – A Family Favorite

Golden Corral’s baked chicken is a comfort food classic. It brings back memories and joy. Now, you can make this dish at home, just like Golden Corral.

Key Takeaways

  • Golden Corral’s baked chicken is a beloved family favorite.
  • Recreating the restaurant’s signature flavor at home is possible with the right recipe.
  • The recipe features unique seasonings and cooking techniques that set it apart.
  • Achieving the perfect balance of crispy skin and juicy, tender meat is the key to nailing this copycat recipe.
  • Serving this homemade baked chicken brings the comforting taste of Golden Corral to your own kitchen.

The Secret Behind Golden Corral’s Famous Baked Chicken

Golden Corral is a favorite in America for its delicious baked chicken. The secret is their focus on quality and special seasonings. They use a mix of seasonings and cooking methods that make their chicken stand out.

History of the Golden Corral Restaurant Chain

Golden Corral started in 1973 and has grown big. It’s known for its tasty buffet-style meals. Their baked chicken is a big hit with customers.

What Makes Their Chicken Special

Golden Corral’s chicken is special because of its flavor and tenderness. Chefs use a secret mix of herbs and spices. This gives the chicken a unique taste that beats others.

Key Ingredients That Set It Apart

Golden Corral’s chicken is also great because of its ingredients. They use top-quality chicken from trusted sources. The chicken is prepared with care to keep it moist and tender.

IngredientContribution to Flavor
Proprietary Seasoning BlendProvides a unique and complex flavor profile that sets Golden Corral’s baked chicken apart
Fresh, High-Quality ChickenEnsures a tender and juicy texture that complements the seasoning
Careful Cooking TechniqueRetains the chicken’s natural moisture and enhances the overall flavor

Golden Corral’s secret seasoning, top-quality chicken, and careful cooking make their baked chicken the best. It’s why it’s loved by so many for years.

Best Golden Corral Baked Chicken Recipe

Do you love the baked chicken from Golden Corral? Now, you can make it at home with this copycat recipe. This Golden Corral-inspired chicken is a great way to enjoy the restaurant’s taste in your kitchen.

The secret to Golden Corral’s chicken is in the seasoning and cooking. Follow this guide to make the homemade version of this favorite dish.

  1. Marinate the chicken in buttermilk, garlic, and herbs. This makes the meat tender and flavorful.
  2. Coat the chicken in seasoned flour for a crispy outside.
  3. Bake the chicken at high heat to keep the juices in and get that Golden Corral texture.
  4. Brush with basting sauce in the last minutes for extra flavor.

With this copycat recipe, you can enjoy Golden Corral’s baked chicken at home. Serve it with your favorite sides for a meal everyone will love.

Essential Ingredients and Kitchen Equipment

To make the famous Golden Corral baked chicken, you need the right seasonings and spices. You also need the right kitchen tools. These things together make the dish taste amazing, just like the family loves it.

Required Seasonings and Spices

For the taste of Golden Corral’s baked chicken, you’ll need certain seasonings and spices. The spice blend includes:

  • Kosher salt
  • Black pepper
  • Paprika
  • Garlic powder
  • Onion powder
  • Dried thyme
  • Dried oregano

Along with the spice blend, you need the right kitchen tools for the perfect Golden Corral baked chicken. Some must-haves are:

  1. Large baking sheet or roasting pan
  2. Meat thermometer
  3. Tongs or forks for handling the chicken
  4. Mixing bowls
  5. Measuring cups and spoons

Ingredient Substitutions

While sticking to the traditional spice blend and tools is best, you can make some changes. For example, you can use paprika or cayenne pepper instead of the spice blend. Or, you can choose olive oil or melted butter over the usual kitchen essentials.

With the right cooking tools and alternative ingredients, you can make a tasty Golden Corral-inspired baked chicken. Your family will love it.

Step-by-Step Cooking Instructions

Learning to make Golden Corral-style baked chicken is easy and fun. You’ll get to enjoy a dish that tastes just like the restaurant’s. Just follow these simple steps to make it in your kitchen.

Start by marinating the chicken in a mix of garlic, paprika, oregano, and black pepper. This blend enhances the chicken’s natural flavor. Let it marinate for at least 30 minutes or up to 24 hours for even more flavor.

After marinating, get ready to bake. Heat your oven to 400°F (200°C). Line a baking sheet with parchment paper or foil. Place the chicken on the sheet, leaving enough space for even cooking.

To get the Golden Corral baked chicken crispy exterior, brush the chicken with olive oil or melted butter. This step helps the skin get crispy while keeping the inside juicy.

Bake the chicken for 30-40 minutes, until it reaches 165°F (75°C). Halfway through, flip the chicken for even browning.

Let the chicken rest for a few minutes before serving. This step makes the juices spread evenly, improving the taste and texture. Serve it hot and enjoy your homemade Golden Corral-inspired baked chicken.

Conclusion

Making the famous homemade Golden Corral chicken at home is very rewarding. By following the detailed recipe and instructions, you can enjoy the same tender, flavorful baked chicken. This chicken has made Golden Corral a favorite for family meals and comfort food lovers everywhere.

This recipe is a true gem, letting you bring the signature taste of Golden Corral into your kitchen. Whether you’re hosting a special gathering or just want a delicious meal, this homemade Golden Corral chicken will be a hit. So, don’t wait to try this recipe and enjoy the authentic flavors that have made Golden Corral famous.

Enjoy making this iconic dish and share your experiences with friends and family. With this recipe, you can create unforgettable family meals and serve the comfort food everyone loves. Happy cooking!

FAQ

What is the history of the Golden Corral restaurant chain?

Golden Corral is a well-known American restaurant chain. It’s famous for its buffet-style dining and comfort food. Founded in 1973 in Fayetteville, North Carolina, it now has over 500 locations across the United States.

What makes Golden Corral’s baked chicken so special?

Golden Corral’s baked chicken is loved for its unique taste and texture. The chain uses a special blend of seasonings and cooking techniques. Over the years, they’ve perfected the recipe, making it a customer favorite.

What are the essential ingredients and kitchen equipment needed to make Golden Corral-style baked chicken at home?

To make Golden Corral-style baked chicken at home, you need certain ingredients and tools. You’ll need a baking sheet, oven, and mixing bowls. Key ingredients include chicken, breadcrumbs, butter, and herbs and spices.

What are the steps to prepare and cook the Golden Corral baked chicken recipe?

To make Golden Corral-style baked chicken, start by marinating the chicken. Then, season it with the signature spice blend. Bake it until it’s crispy on the outside and juicy inside. Follow the recipe for the best texture and flavor.

Can I make substitutions to the Golden Corral baked chicken recipe?

Yes, you can make substitutions to fit dietary needs or preferences. This way, you can still enjoy the Golden Corral baked chicken. Some alternatives or options are suggested to personalize the recipe for you.

How to Make Chicken Alfredo – Easy Homemade Recipe

Are you craving a comforting, creamy pasta dish? Homemade chicken alfredo is the answer. It’s a classic Italian-American favorite that’s easy to make. But what makes the best chicken alfredo stand out?

Discover the secrets to making a mouthwatering chicken alfredo. It will make your taste buds dance with joy.

Key Takeaways

  • Homemade chicken alfredo is a classic Italian-American comfort food dish that’s easy to make at home.
  • The key to a delicious chicken alfredo lies in the creamy, rich alfredo sauce and perfectly cooked pasta.
  • Selecting the right ingredients, such as high-quality chicken and cheese, is crucial for achieving the best flavor.
  • Proper preparation and cooking techniques can make all the difference in the texture and creaminess of the final dish.
  • Healthy variations and side dish pairings can elevate your chicken alfredo experience.

Classic Chicken Alfredo: An Italian-American Comfort Food Story

The story of chicken alfredo starts in Italy’s rich culinary world. The alfredo sauce first appeared in Rome. But it was Italian-American chefs who made it famous.

In the early 1900s, Italian immigrants came to the U.S. They mixed their old recipes with what Americans liked. Chicken alfredo was born, blending Italian sauce with American love for meaty dishes. It quickly became a favorite in Italian-American food.

Years went by, and chicken alfredo grew from a simple dish to a beloved comfort food. It’s now a favorite in homes and restaurants everywhere. The mix of tender chicken, pasta, and creamy sauce has won many hearts and taste buds.

Today, chicken alfredo is still a classic, showing the beauty of Italian-American food. It’s enjoyed by families and in fancy restaurants alike. This dish brings a piece of Italy to America, offering a cozy and fulfilling meal.

Key Milestones in the History of Chicken AlfredoYear
Original alfredo sauce created in Rome, Italy1914
Italian immigrants bring traditional recipes to the United StatesEarly 20th century
Chicken alfredo becomes a staple of Italian-American cuisineMid-20th century
Chicken alfredo gains widespread popularity in American households and restaurantsLate 20th century

Essential Ingredients for the Perfect Chicken Alfredo

Making a great chicken alfredo dish starts with picking the right ingredients. The pasta, cheese, and sauce all matter a lot. They help make the dish taste and feel just right.

Choosing the Right Pasta Type

Fettuccine pasta is the top pick for chicken alfredo. Its long, flat shape is perfect for holding the creamy sauce. But, you can also try other pasta shapes like linguine or tagliatelle if you like.

Best Cheese Options for Alfredo Sauce

For a creamy Alfredo sauce, use high-quality Parmesan cheese. Grated or shredded Parmesan mixed with heavy cream makes the sauce silky and rich. Adding other cheeses like Pecorino Romano or Asiago can make it even more special.

Selecting Quality Chicken Cuts

Boneless, skinless chicken breasts are best for chicken alfredo. They’re tender and juicy, which pairs well with the creamy sauce. You can grill, sauté, or bake the chicken to keep it moist and flavorful.

IngredientImportanceContribution to Dish
Fettuccine PastaEssentialProvides the perfect surface area for the Alfredo sauce to cling to, creating a harmonious texture.
Parmesan CheeseCriticalLends a rich, nutty flavor and creamy texture to the Alfredo sauce.
Heavy CreamCrucialAdds the necessary creaminess and silkiness to the sauce, balancing the flavors.
Boneless Chicken BreastEssentialProvides the protein and heartiness to the dish, complementing the creamy sauce.

Kitchen Tools and Equipment Needed

To make a tasty chicken alfredo dish, you need the right kitchen tools. A large pot is key for cooking pasta. A skillet is also important for sautéing the chicken. Each tool is vital for a great dish. Let’s look at what you need to make this classic Italian-American comfort food at home.

  • A large pot for boiling the pasta: Choose a sturdy, high-quality pot that can hold the right amount of water and pasta.
  • A skillet or sauté pan for cooking the chicken: Pick a pan with a wide surface for even cooking.
  • A whisk for preparing the creamy alfredo sauce: This tool helps make the sauce smooth and lump-free.
  • A colander for draining the cooked pasta: A sturdy colander makes it easy to separate the pasta from the water.
  • A set of measuring cups and spoons: Accurate measurements are key for the perfect flavor balance in your alfredo sauce.
  • A cutting board and sharp knife: These are for slicing and dicing the chicken and other ingredients.
  • A wooden spoon or spatula: These are for stirring the sauce and pasta, ensuring even cooking and distribution.

With these essential tools, you’re ready to make a delicious chicken alfredo dish. It will impress your family and friends. The right tools can greatly improve your homemade meals.

How to Make Chicken Alfredo from Scratch

Making chicken alfredo from scratch is a fun cooking adventure. We’ll cover how to sear the chicken, make the creamy sauce, and cook the pasta just right.

Preparing the Chicken

Begin by seasoning the chicken breasts with salt, pepper, and any other spices you like. Heat a large skillet over medium-high heat and add some oil. Place the chicken in the hot pan and sear for 4-5 minutes on each side. This will make the chicken cooked through and nicely browned.

After cooking, take the chicken out of the pan and let it rest for a few minutes. Then, slice or shred it into small pieces. This keeps the chicken juicy and full of flavor.

Creating the Creamy Alfredo Sauce

In the same skillet, melt butter over medium heat. Mix in flour to make a roux, stirring constantly for 1-2 minutes. Then, slowly add heavy cream, milk, and Parmesan cheese, whisking until smooth and creamy.

Season the sauce with salt and pepper to taste. If it’s too thick, add a little pasta cooking water to thin it out.

Cooking Perfect Al Dente Pasta

Boil a large pot of salted water. Add your pasta, like fettuccine or linguine, and cook as the package says, stirring now and then. When it’s al dente, drain it and save a cup of the water. Then, add the pasta to the creamy sauce.

Mix the pasta and sauce together, adding some saved water if it’s too thick.

By following these steps, you’ll make a tasty chicken alfredo dish. It will have perfectly seared chicken, a rich sauce, and al dente pasta.

Tips for Creating the Creamiest Alfredo Sauce

Making a smooth, creamy Alfredo sauce is key to a great chicken Alfredo dish. Here are some expert tips to get the perfect sauce and avoid common mistakes.

Incorporate Cheese Gradually

The secret to a silky-smooth Alfredo sauce is adding cheese slowly. Add it a little at a time while whisking constantly. This ensures the cheese melts evenly and avoids lumps.

Maintain Proper Temperature

Temperature control is vital when making Alfredo sauce. Use medium-low heat to prevent curdling. If it starts boiling, reduce the heat and stir to avoid breaking the sauce.

Achieve the Ideal Consistency

The perfect Alfredo sauce is velvety and creamy, not too thick or thin. Add milk or cream gradually, tasting and adjusting as needed. It should coat the spoon without dripping.

TipDescription
Gradually Add CheeseIncorporate the cheese in small amounts while continuously whisking to prevent lumps.
Maintain Proper TemperatureKeep the heat at medium-low to avoid curdling and reduce the heat if the sauce starts to boil.
Achieve Ideal ConsistencyThe sauce should have a velvety, creamy texture that coats the back of a spoon without dripping off.

By following these tips, you’ll make a smooth, lump-free Alfredo sauce. It will elevate your chicken Alfredo dish to new heights of flavor.

Common Mistakes to Avoid When Making Chicken Alfredo

Making chicken alfredo can be a fun cooking adventure. But, it comes with its own set of challenges. To make a great dish, it’s important to avoid common mistakes. These include temperature issues, sauce problems, and pasta cooking errors.

Temperature Control Issues

Keeping the right temperature is crucial when cooking chicken alfredo. Overcooked chicken can be dry and tough. On the other hand, a sauce that’s too hot can curdle. To avoid these problems, control the heat well. Simmer the sauce gently and check the chicken’s doneness carefully.

Sauce Consistency Problems

The alfredo sauce is the dish’s heart, and getting it right is key. A sauce that’s too thin can be watery, while a curdled sauce is a letdown. To fix this, watch the sauce’s thickness as it cooks. Add milk or cream slowly to get the right texture. Also, add cheese slowly and avoid high heat to prevent curdling.

Pasta Cooking Errors

Overcooked pasta can ruin chicken alfredo. Soggy noodles are a big mistake. It’s important to cook the pasta just right, with a bit of bite. Use a timer and check the pasta often. Also, drain it well and add it to the sauce at the right time.

By watching out for these common mistakes and fixing them, you can make amazing chicken alfredo. With practice and attention to detail, you’ll create dishes that please everyone.

Storing and Reheating Your Chicken Alfredo

Making homemade chicken alfredo is a joy. But the real test is how well it keeps and reheats. Whether you have leftovers or are meal-prepping, knowing how to store and reheat is crucial. This keeps the creamy texture and flavors of this dish perfect.

Proper Storage for Chicken Alfredo Leftovers

Keeping your chicken alfredo fresh and safe is key. Here are some tips:

  • Put leftovers in an airtight container, making sure there are no air pockets.
  • Put the container in the fridge within two hours of cooking. Eat leftovers within 3-4 days for the best food safety.
  • Don’t let the dish sit at room temperature for more than two hours. This can cause bacteria to grow.

Reheating Chicken Alfredo: Preserving Creaminess

When reheating chicken alfredo, do it gently to keep it creamy. Here’s how:

  1. Put leftover alfredo in a saucepan or microwave-safe dish.
  2. Heat it on the stove over low heat, stirring often, until it’s hot.
  3. Or, microwave it in 30-second bursts, stirring between each, until it’s hot.
  4. If it’s too thick, add a little milk or cream to thin it out.

By using these simple steps, you can enjoy your chicken alfredo as if it were the first time. Every bite will be as delicious as when you first made it.

Healthy Variations and Substitutions

The classic chicken alfredo is tasty, but you can make it healthier. Use lightened-up alfredo sauce, whole wheat pasta, and add veggies. This way, you can enjoy the dish without extra calories.

Lower-Calorie Options

For a lighter alfredo sauce, try low-fat or nonfat milk instead of heavy cream. Adding pureed cauliflower or low-fat Greek yogurt makes it creamy without the fat. Switch to whole wheat pasta for more fiber and nutrients without losing flavor.

Gluten-Free Alternatives

If you’re gluten-free, there are tasty chicken alfredo options. Look for gluten-free pasta made from quinoa, brown rice, or chickpeas. These options are not only gluten-free but also packed with nutrients and flavor.

To make your chicken alfredo even healthier, add sautéed veggies like broccoli, spinach, or zucchini. These veggies add nutrition and flavor to the classic dish.

IngredientTraditional Chicken AlfredoHealthier Variation
PastaSemolina pastaWhole wheat pasta
Alfredo SauceHeavy cream, butter, ParmesanLow-fat milk, pureed cauliflower, low-fat Greek yogurt
ProteinChicken breastChicken breast
VegetablesBroccoli, spinach, zucchini

Delicious Side Dishes to Serve with Chicken Alfredo

Choosing the right side dishes can make a classic chicken alfredo dish even better. You can pick from refreshing salads to savory roasted vegetables. These options complement the rich, creamy flavors of this Italian-American favorite.

A crisp Caesar salad is a great choice to go with chicken alfredo. The tangy dressing and crunchy lettuce offer a nice contrast. For something heartier, try roasted garlic bread. Its golden crust and fragrant aroma are perfect.

Roasted vegetables also pair well with chicken alfredo. Mix seasonal produce like Brussels sprouts, carrots, and bell peppers. Drizzle with olive oil and roast until tender. The sweetness of the vegetables balances the creamy sauce.

Side DishWhy it Works
Caesar SaladThe bright, tangy dressing and crunchy romaine lettuce provide a refreshing contrast to the creamy alfredo sauce.
Garlic BreadThe golden, buttery crust and fragrant aroma complement the richness of the alfredo sauce.
Roasted VegetablesThe natural sweetness of roasted vegetables, like Brussels sprouts, carrots, and bell peppers, balances the creamy alfredo.

By choosing side dishes with contrasting flavors and textures, you can make a delicious chicken alfredo meal. It will delight your taste buds and have your guests wanting more.

Conclusion

In this article, we’ve explored the delightful world of homemade chicken alfredo. This classic Italian-American cuisine has won hearts around the globe. We’ve shown you how to make this easy pasta recipe in your kitchen.

By following our step-by-step guide and expert tips, you’re now ready to make a chicken alfredo dish that’s restaurant-quality. You can stick to the traditional recipe or try a healthier version. This dish is very flexible, so you can make it your own.

So, get ready to cook up a storm in your kitchen. Start making your own homemade chicken alfredo. With the right ingredients and a bit of practice, you’ll impress everyone with your delicious dish.

FAQ

What is the history of chicken alfredo?

Chicken alfredo is a favorite comfort food in the US. It comes from Italy, where it was called fettuccine alfredo. This dish was simple but rich, with pasta and a creamy sauce.

In the US, people started adding chicken to make it chicken alfredo. This made it even more popular.

What are the essential ingredients for making chicken alfredo?

To make chicken alfredo, you need fettuccine pasta, heavy cream, Parmesan cheese, butter, and chicken breasts. The pasta is the base. The cream and cheese make the sauce rich. The chicken adds protein.

What kitchen tools and equipment are needed to make chicken alfredo?

You’ll need a big pot for pasta, a skillet for chicken, and a whisk for the sauce. A colander is for draining pasta. You also need measuring tools, a cutting board, and a sharp knife.

What are the steps for making chicken alfredo from scratch?

Making chicken alfredo involves a few steps. First, season and sear the chicken. Then, mix the sauce with cream, Parmesan, and butter. Cook the pasta until it’s just right.

Finally, combine the chicken, sauce, and pasta for the final dish.

How can you ensure the creamiest alfredo sauce?

For a smooth sauce, keep the temperature right when cooking. Slowly add the cheese to avoid lumps. Don’t overcook the sauce to keep it creamy.

What are some common mistakes to avoid when making chicken alfredo?

Avoid overcooking pasta and chicken. This makes the pasta mushy and the chicken tough. Also, be careful with the sauce’s temperature to prevent it from curdling.

How should you store and reheat leftover chicken alfredo?

Store leftover chicken alfredo in a sealed container in the fridge for 3-4 days. Reheat it gently over low heat, stirring often. This keeps the sauce and pasta from drying out.

Are there any healthy variations or substitutions for chicken alfredo?

Yes, you can make chicken alfredo healthier. Use whole wheat pasta and low-fat dairy. Add more veggies. Choose grilled or baked chicken instead of seared. Serve with a salad or roasted veggies.

Delicious & Nutritious Healthy Soup Recipes to Try

When it’s cold outside, nothing warms us up like a hot bowl of homemade soup. But did you know these soups can do more than just taste good? They can also boost your health, from fighting off sickness to helping with weight loss.

Are you ready to find new, tasty, and healthy soup recipes? Get ready to be amazed as we show you a variety of soups that will become your family’s new favorites.

Imagine making a simple soup that not only tastes great but also makes you feel good. A world where your favorite soups are full of good stuff like vitamins and antioxidants is real. It’s waiting for you to start exploring.

Key Takeaways

  • Homemade soups offer a wealth of nutritional benefits compared to store-bought options.
  • Soup recipes can be tailored to support specific health goals, from weight management to immune system support.
  • Incorporating a variety of fresh, wholesome ingredients into your soup-making can unlock a world of delicious and nourishing possibilities.
  • Mastering a few essential kitchen tools and techniques can help you create the perfect homemade soup every time.
  • Exploring international flavors and culinary traditions can introduce you to a diverse array of healthy soup recipes to enjoy.

The Health Benefits of Homemade Soups

Homemade soups are packed with health benefits. They are nutritious and add joy to any meal. These soups keep important nutrients from fresh ingredients. They also help with digestion and weight management.

Nutrient Retention in Fresh Ingredients

Using fresh ingredients in homemade soup keeps more nutrients than canned or packaged soups. Vegetables, herbs, and other produce stay full of vitamins and minerals. This means your body gets a lot of good stuff with each spoonful.

Hydration and Digestive Benefits

Soups are great for staying hydrated. They provide the body with the fluids it needs. The warm, soothing nature of homemade soup helps digestion by making digestive enzymes and promoting regular bowel movements.

The fiber in many soups also supports gut health and regularity.

Weight Management Advantages

Adding nutrient-dense soups to your diet can help with weight management. Soups are low in calories but fill you up, which can lower your calorie intake. The hydration, fiber, and nutrients in homemade soups also boost metabolic health and support weight loss.

Essential Kitchen Tools for Perfect Soup Making

Making delicious soups needs the right tools. You’ll need sturdy soup pots and precise cutting boards. These tools are key to making your soups perfect. Let’s look at the must-have items for every home chef.

The Importance of a Quality Soup Pot

A good soup pot is crucial for any soup recipe. Choose a heavy-duty, high-quality pot. Stainless steel or enameled cast iron pots are great. They heat evenly and last a long time.

Sharp Knives for Efficient Chopping

A sharp chef’s knife is essential for soup making. A good knife makes chopping vegetables easy. You’ll also need a sturdy cutting board for safe food prep.

Embrace the Convenience of an Immersion Blender

An immersion blender makes creamy soups easy. It blends ingredients right in the pot. This saves time and effort compared to using a traditional blender.

The Humble Ladle: A Soup-Making Essential

A reliable ladle is a must for soup making. It helps serve and portion soups perfectly. This ensures each bowl gets the right amount of broth and ingredients.

Kitchen ToolPurposeRecommended Features
Soup PotSimmering and cooking soupsHeavy-duty, high-quality material (stainless steel or enameled cast iron)
Chef’s KnifeDicing, slicing, and mincing vegetablesSharp, well-maintained blade
Cutting BoardProviding a stable surface for choppingLarge, durable, and easy to clean
Immersion BlenderBlending and puréeing soup ingredientsPowerful motor and various blade attachments
LadleServing and portioning soupLong handle for easy reaching and scooping

Having these essential tools will help you make delicious soups. Invest in quality, and enjoy making soup perfection.

Understanding Basic Soup Bases and Broths

Every delicious soup starts with a flavorful base or broth. Learning about these basics can make your soups better. We’ll look at vegetable stock, bone broth, and the difference between clear and cream-based soups.

Vegetable Stock Fundamentals

Vegetable stock is great for many soups because it’s full of nutrients. To make it, boil onions, carrots, celery, and herbs in water. The longer it cooks, the tastier it gets.

Using different vegetables makes the stock taste better.

Bone Broth Preparation

Bone broth is packed with collagen, minerals, and amino acids. To make it, cook bones in water for hours or even days. This process pulls out lots of nutrients, making the broth very flavorful and healthy.

Clear vs. Cream-Based Foundations

Choosing between clear or cream-based soups depends on what you like. Clear broths, like vegetable or bone broth, are light and let the flavors of the ingredients shine. Cream-based soups, with milk or cream, are rich and creamy.

Knowing how to make these soup bases and broths will help you make tasty and healthy soups. You can choose what suits your taste and diet best.

Best Healthy Soup Recipes for Beginners

Starting a healthy eating journey can feel overwhelming. But, making easy soup recipes is a great way to get started. These soups are tasty and full of nutrients to help your body stay healthy.

The Classic Tomato Basil Soup is perfect for beginners. It’s made with simple ingredients like fresh tomatoes, basil, and garlic. This soup is creamy, vibrant, and sure to please.

The Lentil and Vegetable Soup is another great choice. Lentils are rich in protein, fiber, and vitamins. This soup mixes tender lentils with colorful veggies for a filling meal.

  • Creamy Butternut Squash Soup
  • Chicken Noodle Soup with Homemade Broth
  • Minestrone Soup with Whole-Grain Pasta

These easy soup recipes are not only tasty but also easy to make. They let you enjoy cooking and the satisfaction of a healthy meal. So, get creative and try these beginner-friendly soups today!

Immune-Boosting Vegetable Soup Variations

Nourishing vegetable soups are great for your immune system. They can be made with ingredients that boost immunity. This way, you get tasty and healthy soups that strengthen your body’s defenses.

Garlic and Ginger Combinations

Garlic and ginger are super for your immune system. Together in a soup, they add flavor and health benefits. Garlic has allicin, which fights off microbes and viruses. Ginger is full of antioxidants and anti-inflammatory stuff.

Antioxidant-Rich Ingredients

  • Colorful veggies like bell peppers, carrots, and greens are full of antioxidants. These help fight off harmful free radicals and keep you healthy.
  • Tomatoes, with their lycopene, are great for immune-boosting soups.
  • Herbs and spices like turmeric, rosemary, and thyme add antioxidants to your soup.

Seasonal Vegetable Options

Using seasonal produce is good for local farms and your soups. It makes them fresh and full of nutrients. Try squash, sweet potatoes, and kale for vibrant, healthy soups.

IngredientImmune-Boosting Properties
GarlicRich in allicin, with antimicrobial and antiviral effects
GingerContains antioxidants and anti-inflammatory compounds
Bell PeppersHigh in vitamin C and other antioxidants
CarrotsContain beta-carotene, which supports immune function
Leafy GreensRich in vitamins, minerals, and antioxidants

Adding these immune-boosting ingredients to your soups makes them nourishing and tasty. They support your health and well-being.

Low-Calorie Soup Options for Weight Loss

Starting a healthier lifestyle often begins in the kitchen. Adding diet-friendly soups to your meals can help with weight management. These calorie-conscious recipes are tasty and full of nutrients, keeping you full and energized.

Looking to lose weight or keep a balanced diet? These low-calorie soups are a tasty and flexible choice. You can make a variety of soups, from vegetable broths to lentil and bean soups. They’re all packed with flavor and nutrients to support your health.

  1. Roasted Tomato and Basil Soup: This soup is bright and tangy, made with fresh tomatoes, basil, and garlic. It has 200 calories per serving.
  2. Zucchini Noodle Soup with Chicken: This soup uses zucchini noodles instead of pasta, cutting carbs and calories. It also has lean chicken for protein.
  3. Black Bean and Vegetable Soup: This soup is a mix of black beans, bell peppers, onions, and spices. It’s nutritious and has only 180 calories per bowl.
  4. Butternut Squash Bisque: This creamy soup is low in calories. It’s made with roasted butternut squash and warming spices.
Soup RecipeCalories per ServingProtein (g)Fiber (g)
Roasted Tomato and Basil Soup20084
Zucchini Noodle Soup with Chicken250203
Black Bean and Vegetable Soup180128
Butternut Squash Bisque19056

Adding these diet-friendly soups to your meals can be comforting and support your weight management goals. Focus on using fresh ingredients and watch your portion sizes. These calorie-conscious recipes are great for a healthy diet.

Protein-Packed Soup Recipes for Athletes

As an athlete, you know how crucial good nutrition is. High-protein soups can be a big help. They offer a tasty way to get the amino acids your body needs. Here, we’ll look at some top protein-packed soup recipes for athletes and active people.

Plant-Based Protein Soups

Looking to eat more plant-based proteins? There are many tasty and healthy soup options. Lentil soup is a great choice, packed with fiber and nutrients. Chickpea and kale soup is also excellent, with protein from chickpeas and antioxidants from kale.

Lean Meat Soup Options

Lean meats fans have plenty of high-protein soup choices. Chicken noodle soup with shredded chicken breast is a classic. It offers lean protein and a nourishing broth. Beef and barley soup, with lean ground beef or sirloin, is another hearty option.

Post-Workout Recovery Recipes

Recovering from hard workouts is key for athletes. Protein-packed soups can be a big help. Try turkey and wild rice soup for a mix of lean turkey and complex carbs from wild rice. For a plant-based choice, creamy lentil and sweet potato soup is both nourishing and satisfying.

Adding these protein-packed soups to your diet can help meet your protein needs. They support muscle recovery and fuel your active life. Experiment with different ingredients and flavors to find your favorite high-protein soups.

International Healthy Soup Recipes

Discover a world of flavors with our global cuisine-inspired healthy soup recipes. Enjoy the rich tastes and cultural traditions from around the world. Plus, get the health benefits of making your own soups.

Try Japanese miso soup for its soothing warmth or Indian dahl for its complex aromas. These soups are a great way to explore new tastes and keep your body healthy. Learn about the special ingredients, spices, and cooking methods from different cultures.

Explore the Flavors of the World

  • Authentic Thai Tom Yum Goong: A fragrant lemongrass-infused broth brimming with shrimp, mushrooms, and fresh herbs.
  • Hearty Mexican Chicken Pozole: A traditional hominy-based soup featuring tender chicken, vibrant chilies, and a tantalizing array of toppings.
  • Nourishing Italian Minestrone: A vegetable-packed soup that celebrates the bounty of the Mediterranean, with a touch of Parmesan for depth of flavor.
Soup RecipeKey IngredientsHealth Benefits
Peruvian Quinoa SoupQuinoa, vegetables, chicken brothHigh in protein, fiber, and antioxidants
Korean Kimchi StewKimchi, tofu, ginger, garlicSupports gut health and immune function
Greek Avgolemono SoupChicken broth, eggs, lemonProvides a source of protein and vitamin C

Check out our collection of international healthy soup recipes. They offer a taste of global cuisine, cultural flavors, and ethnic dishes. Enjoy these delicious and nutritious soups that will nourish your body and please your taste buds.

Time-Saving Soup Preparation Tips

Finding time to cook healthy meals can be tough. But, with a few easy tips, you can make delicious, nutritious soups quickly. This way, you can enjoy homemade meals every day.

Batch Cooking Methods

Batch cooking is a great time-saver. Spend a few hours on the weekend making your favorite soups in bulk. This method gives you a steady supply of healthy soups and saves you time during the week.

  • Double or triple your soup recipes to create multiple servings.
  • Portion the soup into individual or family-sized containers for easy reheating.
  • Freeze the soup in airtight containers or freezer-safe bags for up to 3 months.

Storage and Freezing Guidelines

Storing and freezing your soups right is crucial. It keeps them fresh and flavorful. Here’s how to do it:

  1. Allow soups to cool completely before storing or freezing.
  2. Use airtight containers or freezer-safe bags to prevent freezer burn.
  3. Label each container with the soup name, date, and portion size.
  4. Thaw frozen soups in the refrigerator overnight before reheating.

With these tips, making homemade, freezer-friendly soups is easy. Start batch cooking today. Enjoy your evenings with tasty, healthy soups.

Common Soup Making Mistakes to Avoid

Making homemade soups can be a fun and rewarding experience. But, even skilled cooks can run into problems. Knowing the common cooking errors and troubleshooting tips can help you make the perfect soup consistency and seasoning.

One big mistake is overseasoning. Too much salt, spices, or herbs can ruin the taste. Start with a little seasoning and add more as needed to get it just right.

  • Taste your soup often while it cooks and adjust the seasonings.
  • Watch the salt in broth or stock, as it adds a lot to the flavor.
  • Try low-sodium or unsalted broth or stock to control the flavor better.

Getting the right soup consistency can also be tricky. Soups can be too thin or too thick. Pay attention to the liquid to solid ratio. Use thickening agents like roux, purees, or cornstarch if it’s too thin.

IssueSolution
Thin, Watery SoupSimmer the soup longer to allow the ingredients to release their natural thickening agents, or add a roux or cornstarch slurry.
Thick, Heavy SoupAdd more broth or stock to thin out the consistency, or dilute with water or milk.

By avoiding common cooking errors and focusing on seasoning and troubleshooting, you can improve your soup-making skills. This way, you’ll always make delicious, balanced soups.

Conclusion

Homemade soups are a treasure trove of health benefits. They keep nutrients fresh and offer hydration and digestive health. These nourishing bowls add variety and satisfaction to your diet.

Whether you’re new to cooking or experienced, you can make delicious soups. Try different bases, broths, and veggies to find your favorites. This will help you grow your cooking skills.

Adding immune-boosters, low-calorie, and protein-rich ingredients to your soups can help you reach your health goals. Whether it’s losing weight, recovering from exercise, or just feeling good, soups can help. Discover international flavors and recipes to make your meals exciting and healthy.

FAQ

What are the health benefits of homemade soups?

Homemade soups are great for your health. They keep nutrients from fresh ingredients. They also help you stay hydrated and support your digestion.

Plus, they can help you manage your weight. This is because they are filling and have fewer calories.

What are the essential kitchen tools for perfect soup making?

To make perfect soups, you need the right tools. You’ll need good pots, sharp knives, and appliances like immersion blenders. These tools help you get the best results.

How do I create flavorful soup bases and broths?

Start by learning to make tasty vegetable stocks and bone broths. Understanding the difference between clear and cream-based soups is also key.

What are some beginner-friendly healthy soup recipes?

We have simple yet tasty soup recipes for beginners. They use easy-to-find ingredients and techniques. This helps beginners feel more confident in the kitchen.

How can I incorporate immune-boosting ingredients into my soups?

Find out how to make soups that boost your immune system. Use ingredients like garlic and ginger. Also, add foods rich in antioxidants and seasonal veggies for a healthy soup.

What are some low-calorie soup options for weight loss?

We have low-calorie soup recipes for those trying to lose weight. These soups are filling, nutritious, and delicious. They keep calories low.

What are the best protein-packed soup recipes for athletes?

Check out our protein-rich soup recipes for athletes. We have plant-based and lean meat options. Plus, post-workout soups to help with muscle repair.

Where can I find healthy soup recipes from around the world?

Explore healthy soup recipes from around the globe. Discover new flavors and ingredients. It’s a fun way to stay healthy and try new things.

How can I save time when preparing homemade soups?

Learn how to make soups quickly and efficiently. We’ll show you batch cooking and storage tips. This way, you can make healthy soups without spending too much time.

What common mistakes should I avoid when making soups?

Find out how to avoid common soup-making mistakes. We’ll cover issues like overseasoning and texture problems. This will help you make perfect soups every time.

Classic Nestle Chocolate Chip Cookie Recipe for Baking

Imagine the smell of fresh chocolate chip cookies in your kitchen. This recipe from Nestle Toll House has been loved for years. What makes it so popular? We’ll look into its history, key ingredients, and how to make the perfect cookie.

Ever wondered why Nestle Toll House cookies are so loved? What’s the secret to making them at home? Let’s dive into the story of this beloved cookie.

Key Takeaways

  • Discover the captivating story behind the Nestle Toll House chocolate chip cookie recipe
  • Learn the essential ingredients and proper techniques to bake the perfect cookies
  • Explore a variety of recipe variations and modifications to suit your taste preferences
  • Uncover tips and tricks to achieve the perfect cookie texture, from soft and chewy to crisp and golden
  • Gain insights on proper storage and freshness guidelines to enjoy your homemade cookies for longer

The Nestle Toll House Chocolate Chip Cookie recipe started at the Toll House Inn in Whitman, Massachusetts. In the 1930s, Ruth Wakefield, the inn’s owner, made delicious desserts. She created a cookie with chopped Nestle chocolate.

The Ruth Wakefield Story

Ruth Wakefield, a dietitian and food lecturer, made the Toll House cookie. In 1938, she added broken Nestle semi-sweet chocolate to her cookie dough. This created the famous chocolate chip cookie. Guests at the Toll House Inn loved it.

Evolution of the Original Recipe

  • Wakefield’s first recipe used chopped baker’s chocolate.
  • Later, Nestle’s semi-sweet chocolate chips were used for a better result.
  • The dough was adjusted for flour, sugar, and butter to get the right texture.

How Nestle Made It Famous

In 1939, Wakefield gave Nestle her recipe. Nestle saw its potential and started putting it on their chocolate chip packaging. This made the Toll House cookie a favorite across America. Nestle’s efforts made it a staple in kitchens for many years.

YearEvent
1930sRuth Wakefield creates the Toll House Cookie at the Toll House Inn
1939Wakefield shares the recipe with Nestle, who begins including it on their chocolate chip packaging
1940s-PresentNestle’s marketing and distribution of the recipe helps popularize the chocolate chip cookie nationwide

Essential Ingredients for Perfect Chocolate Chip Cookies

Making the classic Nestle chocolate chip cookie recipe needs the right mix of ingredients. Each part, from baking basics to Nestle Toll House morsels, is vital. They help get the perfect texture and taste.

The base of this recipe is butter, brown sugar, and vanilla extract. These ingredients work together. They make the cookies taste like Nestle and have a soft, chewy feel.

IngredientImportance
ButterProvides richness, texture, and helps create the signature chewiness.
Brown SugarAdds depth of flavor and contributes to the cookie’s soft, moist center.
Vanilla ExtractEnhances the overall flavor profile and complements the chocolate chips.
Nestle Toll House MorselsThe iconic chocolate chips that give these cookies their signature taste.

Nestle Toll House morsels are the best for chocolate chips. They have just the right sweetness and cocoa flavor. This makes them key to the classic recipe.

With these ingredients, you’re ready to make perfect Nestle chocolate chip cookies. They will surely please your family and friends.

Kitchen Tools and Equipment You’ll Need

To make the perfect Nestle chocolate chip cookies, you need the right tools. Essential baking tools and optional accessories are key. The right kitchen gear helps get the perfect texture and flavor.

Must-Have Baking Tools

  • Baking sheets: Choose high-quality baking sheets for even heat and to prevent warping.
  • Mixing bowls: Get a set of mixing bowls in different sizes for all your mixing needs.
  • Spatula: A flexible silicone or heat-resistant spatula is key for scraping and folding the dough.
  • Cookie scoop: A cookie scoop with a spring-loaded mechanism ensures even dough portions.

Optional Equipment for Better Results

While the basics are essential, some extra tools can improve your baking:

  • Electric mixer: An electric mixer makes creaming butter and sugar easier, for a lighter cookie.
  • Silicone baking mats: Silicone baking mats prevent cookies from sticking and make cleanup easy.

Measuring Tools Guide

Accurate measurements are key for perfect Nestle chocolate chip cookies. Use these tools for precise ingredient amounts:

ToolPurpose
Dry measuring cupsFor accurately measuring dry ingredients like flour, sugar, and chocolate chips.
Liquid measuring cupFor precisely measuring wet ingredients such as melted butter or vanilla extract.
Digital scaleFor the most accurate measurements, especially for smaller quantities of ingredients.

Learn how to make perfect Nestle chocolate chip cookies with this simple recipe. We’ll show you how to prepare the dough and bake them to perfection. Your homemade cookies will be delicious and hard to resist.

First, get all your ingredients ready. You’ll need flour, baking soda, salt, butter, sugars, eggs, and Nestle chocolate chips. Then, heat your oven to 375°F (190°C).

  1. In a medium bowl, whisk together the flour, baking soda, and salt. Set aside.
  2. In a large mixing bowl, cream the butter and sugars until light and fluffy, about 2-3 minutes.
  3. Beat in the eggs one at a time, then stir in the vanilla extract.
  4. Gradually add the dry ingredients to the wet ingredients, mixing just until combined. Fold in the Nestle chocolate chips.
  5. Scoop the cookie dough onto a baking sheet, spacing them about 2 inches apart.
  6. Bake for 9-11 minutes, or until the edges are golden brown and the centers are still slightly soft.
  7. Allow the cookies to cool on the baking sheet for 5 minutes before transferring them to a wire rack to cool completely.

The secret to perfect Nestle chocolate chip cookies is in the mixing and oven temperature. By following these steps, you’ll get cookies that are crispy on the edges and soft in the center.

Baking the perfect chocolate chip cookies is an art. Knowing how to get the right texture is key. You want soft centers and crispy edges for the best taste.

Understanding Butter Temperature

The butter’s temperature affects your cookies’ texture. Use butter that’s room temperature but not melted. This gives you a soft center and crispy edges.

If the butter is too cold, cookies spread too much and become flat. Too warm butter makes them greasy and cakey.

Mixing Techniques

  • Cream the butter and sugars well to add air. This makes your cookies light and airy.
  • Don’t over-mix the dough. This can make cookies tough and dense.
  • Gently fold in chocolate chips. This keeps them from breaking down too much.

Proper Dough Chilling

Chilling the dough for at least 24 hours is crucial. It lets flour hydrate, flavors develop, and dough firm up. This gives you cookies with crispy edges and a chewy center.

Texture PreferenceBaking Tips
Soft CookiesUse room-temperature butter, chill the dough for a shorter period, and bake at a slightly lower temperature.
Crispy Edges, Chewy CenterChill the dough for at least 24 hours, and bake at a higher temperature for a shorter time.

By mastering butter temperature, mixing, and chilling, you can perfect your cookies. You’ll make chocolate chip cookies that everyone loves.

Common Baking Mistakes to Avoid

Baking the perfect batch of chocolate chip cookies needs precision and care. Even experienced bakers can make mistakes that spoil the cookies. Let’s look at common errors and how to fix them for perfect cookies every time.

Overmixing the Dough

Overmixing the dough makes cookies tough and dense. Mix ingredients gently and stop when they’re just combined. Mixing too much develops gluten, making the cookies dry and crumbly.

Incorrect Oven Temperature

Baking at the wrong temperature can ruin cookies. Make sure your oven is set right and preheated well before baking. Adjust the temperature to get the perfect golden color and soft texture.

Improper Ingredient Measurements

Measuring ingredients correctly is key for consistent cookies. Too much or too little flour, sugar, or butter changes the cookies’ texture. Use the right tools and methods to get the dough just right.

Common Baking MistakePossible OutcomeHow to Avoid
Overmixing the doughTough, dense cookiesStop mixing as soon as the ingredients are just combined
Incorrect oven temperatureFlat cookies, overbakingEnsure accurate oven calibration and preheat thoroughly
Improper ingredient measurementsInconsistent cookie texture and appearanceUse proper measuring tools and techniques

Avoiding these common baking errors will help you make perfect Nestle Chocolate Chip Cookies every time. Cookie baking is an art. With practice and attention to detail, you’ll get it right soon.

Storage and Freshness Guidelines

Keeping your homemade Nestle Chocolate Chip Cookies fresh is crucial. Whether you’ve baked them or have dough ready, the right storage keeps them delicious. Proper storage helps keep the cookies soft and flavorful.

Short-term Storage Methods

For cookies just out of the oven, store them in an airtight container at room temperature. This keeps them soft and chewy. Don’t store them in the fridge, as it can make them stale and hard.

Freezing Instructions

Freezing is a great way to enjoy your cookies for longer. To freeze dough, scoop it into portions, freeze on a baking sheet, then bag it. Bake frozen dough balls for a bit longer than usual. For frozen cookies, thaw at room temperature before eating.

Shelf Life Tips

  • Baked cookies: Store at room temperature in an airtight container for up to 5 days.
  • Unbaked cookie dough: Freeze for up to 3 months. Thaw in the refrigerator before baking.
  • Frozen baked cookies: Maintain quality for up to 3 months in the freezer.

Follow these tips to enjoy your Nestle Chocolate Chip Cookies for days or weeks. Every bite will be as tasty as the first.

Recipe Variations and Modifications

The classic Nestle Toll House Chocolate Chip Cookie recipe is loved by many. But, you can make it your own in many ways. Whether you need to follow a special diet or just want to try something new, there’s a lot you can do.

Gluten-Free and Vegan Options

For those who can’t eat gluten, just use gluten-free flour instead. Vegans can make these cookies by using flax or chia eggs and vegan butter or coconut oil.

Nut Additions

Adding chopped nuts like walnuts, pecans, or almonds makes the cookies better. They give a nice crunch and a nutty taste.

Flavor Variations

Try different mix-ins for new tastes. A little cinnamon or espresso powder adds warmth. Dried cranberries or chopped candied ginger give a sweet and tangy flavor.

VariationIngredients
Peanut Butter Chocolate Chip1 cup creamy peanut butter, 1/2 cup chocolate chips
Oatmeal Raisin Chocolate Chip1 1/2 cups old-fashioned oats, 1 cup raisins, 1/2 cup chocolate chips
White Chocolate Macadamia Nut1 cup white chocolate chips, 1 cup chopped macadamia nuts

With a bit of creativity, you can make the classic Nestle Toll House Chocolate Chip Cookie your own. Let your imagination run wild and find the perfect version for you.

Nutritional Information and Serving Size

Understanding the nutritional facts of Nestle Chocolate Chip Cookies is key. These treats are loved by many, but they should be enjoyed in moderation. This ensures they fit into a balanced diet.

Each cookie has about 110 calories. Most of these calories come from 6 grams of fat and 15 grams of carbohydrates. This includes 9 grams of sugar. They also offer a small amount of protein, about 1 gram per cookie.

NutrientAmount per Serving
Calories110
Total Fat6g
Carbohydrates15g
Sugar9g
Protein1g

The suggested serving size is 1-2 cookies. This helps you savor the taste while keeping an eye on calories. It’s also important to watch your sugar and fat intake when enjoying these cookies.

Conclusion

Mastering the Nestle chocolate chip cookie recipe is a rewarding journey. It brings the joy of baking success and creates cherished family traditions. This guide has equipped you with the knowledge and confidence to bake delicious homemade cookies.

With the right ingredients, tools, and practice, you can elevate your baking skills. Making Nestle chocolate chip cookies a staple in your home is possible. Sharing these treats with friends and family strengthens bonds and creates lasting memories.

Embrace the art of baking and let the Nestle recipe become a cherished part of your culinary repertoire. Whether you’re a seasoned baker or a novice, the satisfaction of baking is unparalleled. So, preheat your oven, gather your ingredients, and embark on a delicious journey with the iconic Nestle chocolate chip cookie recipe.

FAQ

The classic Nestle Chocolate Chip Cookie recipe needs a few key ingredients. You’ll need all-purpose flour, baking soda, and salt. Also, unsalted butter, granulated sugar, and brown sugar are important. Large eggs, vanilla extract, and Nestle Toll House semi-sweet chocolate morsels complete the list.

What type of butter should I use for the best results?

For the best cookies, use unsalted butter at room temperature. This makes the butter mix well with the sugars. It helps in getting a better cookie texture.

Should I chill the dough before baking?

Yes, chilling the dough is a must. Let it chill for at least 24 hours, or up to 72 hours. This enhances the flavors and makes the cookies thicker and chewier.

What’s the best way to measure the ingredients accurately?

For accurate measurements, use a kitchen scale for dry ingredients like flour and sugars. For wet ingredients like butter and eggs, use liquid measuring cups or spoons. This ensures you get the right amounts.

To get the perfect cookie texture, focus on the butter temperature and mixing techniques. Use room temperature butter and mix the dough just until combined. Chilling the dough is also key. It helps in achieving soft, chewy centers with crisp edges.

How should I store the baked cookies to keep them fresh?

Store baked Nestle Chocolate Chip Cookies in an airtight container at room temperature for up to 5 days. If you want to keep them longer, freeze the dough for up to 3 months. Then, bake as needed.

Yes, you can customize the recipe. Try making it gluten-free or vegan. You can also add nuts, chocolate chunks, or different flavored chips. This way, you can create your own unique version of the classic cookie.

Classic Ditalini Pasta Recipe – Easy Italian Comfort Food

Imagine a steaming bowl of pasta, perfectly al dente, coated in a rich, flavorful sauce. This is the essence of the classic ditalini pasta recipe. It comes from Italy and has won the hearts of many, becoming a favorite in American homes. But what makes ditalini pasta so versatile and comforting?

In this article, we’ll explore the rich history and cultural importance of ditalini. We’ll also look at its different forms and nutritional benefits. Most importantly, we’ll show you how to make a delicious ditalini pasta dish. It will take you straight to the cozy trattorias of Italy, from your own kitchen.

Key Takeaways

  • Ditalini pasta is a classic Italian pasta shape with a rich history and cultural significance.
  • This versatile pasta can be used in a variety of dishes, from hearty stews to creamy baked dishes.
  • Ditalini pasta is a healthy choice, offering a good source of complex carbohydrates and essential nutrients.
  • The classic ditalini pasta recipe is easy to prepare and can be customized to suit individual taste preferences.
  • Serving ditalini pasta with the right accompaniments can elevate the dish and create a truly satisfying Italian-inspired meal.

Understanding Ditalini: A Traditional Italian Pasta Shape

Ditalini is a beloved pasta shape in Italian cooking. It has a long history and deep cultural meaning. This small, tube-shaped pasta comes from Italy’s heart and is a key part of its food traditions.

Origins and Cultural Significance

Ditalini comes from Tuscany and Emilia-Romagna. It’s been a favorite in local meals for many years. The name “ditalini” means “little fingers” in Italian, reflecting its shape and size.

This shape not only looks good but also works well. It holds onto sauces perfectly, blending flavors in every bite.

Types and Variations of Ditalini

  • Traditional Ditalini: The classic, smooth-textured ditalini made from durum wheat semolina flour.
  • Whole Wheat Ditalini: A healthier choice, made with whole wheat flour for more fiber and nutrients.
  • Gluten-Free Ditalini: For those with dietary needs, gluten-free ditalini is made with grains like rice or corn.

Nutritional Profile of Ditalini Pasta

Ditalini pasta is nutritious, like other Italian pasta shapes. It’s a good carb source for energy and has some protein. It’s also low in fat, making it a healthy pasta choice for a balanced diet.

NutrientDitalini Pasta (100g)Whole Wheat Pasta (100g)Gluten-Free Pasta (100g)
Calories371353400
Carbohydrates74g71g81g
Protein13g14g8g
Fiber3g6g4g

Essential Ingredients for Perfect Ditalini Pasta Recipe

To make a perfect ditalini pasta dish, you need high-quality ingredients. This classic Italian comfort food is built on a few key components. They work together to create a dish full of flavor.

The pasta, ditalini, is at the heart of the recipe. It’s a small, tube-shaped pasta from Italy’s Campania region. Choose ditalini made from premium durum wheat for a firm texture and a strong bite.

Pair your ditalini with fragrant Italian herbs like fresh basil, oregano, and rosemary. These herbs add a unique Italian taste to the dish. Also, use quality olive oil for depth and richness in the flavor.

Adding a sprinkle of freshly grated Parmigiano-Reggiano cheese elevates the dish. This cheese’s nutty, umami flavor complements the pasta and herbs perfectly.

By using these key pasta ingredients, you’ll make a ditalini pasta dish that feels like Italy. Your taste buds will thank you.

Step-by-Step Cooking Instructions

Making the perfect ditalini pasta dish is all about following a few key steps. This guide will help you achieve al dente pasta and rich, authentic Italian flavors.

Preparing the Base

Start by boiling a large pot of salted water. This ensures your ditalini pasta cooks evenly and keeps its texture. While the water heats up, mix your base sauce with quality Italian ingredients like crushed tomatoes, garlic, onions, and olive oil.

Cooking Techniques

When the water boils, add the ditalini pasta gently and stir occasionally. It’s important to watch the cooking time closely and taste the pasta often. Ditalini usually takes 8-10 minutes to cook, but this can vary based on the pasta’s brand and size.

Tips for Al Dente Perfection

  • Use a large pot with plenty of water to let the ditalini move freely.
  • Put the pasta in boiling water and keep the simmer steady.
  • Check the pasta a minute or two before the recommended time for the perfect al dente.
  • Don’t overcook, as ditalini can become mushy if cooked too long.
  • Drain the pasta right when it’s done, saving some of the starchy cooking water.

By using these pasta cooking tips and techniques for al dente pasta, you can make your homemade ditalini truly special. It will taste like authentic Italian cooking.

Serving Suggestions and Pairings

Ditalini pasta is a versatile Italian staple. It’s great for many dishes, from comforting weeknight meals to fancy dishes for guests. These tips will make your ditalini dishes stand out.

Pairing ditalini with Italian wine is a classic choice. A crisp white wine like Pinot Grigio or Sauvignon Blanc complements its flavor. A bold red like Chianti or Montepulciano adds a rich contrast.

Ditalini goes well with many side dishes. Try it with a fresh salad and balsamic vinaigrette or roasted veggies like asparagus and zucchini. For a hearty meal, pair it with grilled chicken, Italian sausage, or sautéed shrimp.

To make your ditalini look great, add some garnishes. Freshly grated Parmesan cheese, chopped parsley, or a drizzle of olive oil can make a big difference. These simple touches can turn a basic dish into a feast for the eyes and taste buds.

Pasta PairingsItalian WineSide DishesGarnishes
DitaliniPinot Grigio, Sauvignon Blanc, Chianti, MontepulcianoSalad, Roasted Vegetables, Grilled Chicken, Italian Sausage, Sautéed ShrimpParmesan Cheese, Parsley, Olive Oil

Conclusion

The classic ditalini pasta recipe shows Italy’s rich culinary heritage. It’s a versatile pasta shape that brings comfort, whether in traditional Italian dishes or modern American cuisine.

The ditalini recipe is simple, with just a few key ingredients. It shows the beauty of Italian cooking. By making this dish, home cooks can enjoy the depth of Italian cuisine and the endless possibilities of pasta.

Try ditalini pasta with a classic tomato sauce, in a hearty soup, or with your own flavors. This recipe will become a favorite in your kitchen. Share your experiences with friends and family. Buon appetito!

FAQ

What is ditalini pasta?

Ditalini pasta is a traditional Italian shape that looks like small tubes. It’s great in soups, casseroles, and more.

What are the origins of ditalini pasta?

Ditalini pasta comes from Italy, especially Tuscany and Emilia-Romagna. It’s been loved in Italian kitchens for years.

What are the different types of ditalini pasta?

You can find ditalini in whole wheat, gluten-free, and special varieties. These options meet different tastes and needs.

What are the nutritional benefits of ditalini pasta?

Ditalini pasta is full of complex carbs, fiber, and vitamins and minerals. It’s a healthy choice for a balanced diet.

How do I cook ditalini pasta perfectly?

To get the perfect al dente, follow the cooking guide closely. Pay attention to time and water temperature. Don’t forget to drain and toss with sauce.

Ditalini pairs well with tomato, pesto, or creamy sauces. It’s also great in soups, casseroles, and baked dishes. Add fresh herbs, Parmigiano-Reggiano, and olive oil for extra flavor.

Can I substitute ditalini pasta in other pasta recipes?

Yes, you can use ditalini instead of elbow macaroni or tubetti in many recipes. Its texture and shape fit well in Italian dishes.

Easy and Authentic Ceviche Recipe for Beginners


When the warm summer sun shines, I crave something cool and tasty. My go-to ceviche recipe is just that – a burst of citrusy joy that reminds me of Latin America’s beaches. It’s a mix of fresh seafood and lime, lemon, and orange juices, creating a flavor explosion.

Ceviche is a favorite in Latin America, loved by food lovers everywhere. It highlights the seafood’s natural sweetness and texture, all while the citrus adds a perfect tang. Let’s make your own Zesty Lime Ceviche together. It’s sure to wow your guests with its bright colors and delicious taste.

What is Ceviche?

Ceviche is a vibrant dish from Central and South America’s coasts. It uses fresh fish or seafood “cooked” in lime juice. This mix is then seasoned with vegetables, herbs, and spices, blending flavors beautifully.

A Brief History of Ceviche

The Andean cultures of Peru started ceviche centuries ago. Spanish conquistadors brought it to Latin America, making it popular. Now, countries like Mexico, Ecuador, Colombia, and Chile have their own ceviche styles.

Cultural Significance in Latin America

Ceviche is more than food in Latin America. It shows the region’s rich sea heritage and diverse tastes. It’s a Latin American appetizer enjoyed at social events and family gatherings. Sharing ceviche brings people together, celebrating healthy Mexican cuisine and its traditions.

Ceviche is loved on Peru’s beaches, Mexico City’s streets, and Cartagena’s markets. It’s a symbol of Latin America’s culinary richness, delighting everyone who tries it.

Ingredients for My Zesty Lime Ceviche

Making the perfect zesty lime ceviche needs the right ingredients. You’ll need fresh seafood, crisp veggies, and a tangy marinade. These elements mix to create a dish full of flavor and texture.

Fresh Seafood Choices

I choose ocean fish like wild red snapper, sea bass, or halibut for the best ceviche. These fish are firm and white, perfect for soaking up lime flavors. I’ll use 1 lb of large cooked, peeled shrimp, cut into small pieces.

Essential Vegetables and Fruits

  • Red onion, finely diced
  • Ripe tomatoes, diced
  • Crisp cucumber, diced
  • Fresh cilantro, chopped
  • Jalapeño peppers, finely minced (optional for a spicy kick)
  • Avocado, diced (for a creamy contrast)
  • Radishes, thinly sliced (for a peppery crunch)

Seasoning and Marinades

The tangy lime marinade is the ceviche’s heart. I’ll use 1 ½ cups of fresh lime juice and a pinch of salt. For more flavor, I might add a few cloves of minced garlic. It’s important to use ripe, juicy limes for the right balance of tartness and sweetness.

Ingredient Quantity
Large cooked, peeled shrimp, chopped 1 lb
Fresh lime juice, divided 1 ½ cups
Salt to taste
Garlic, minced (optional) a few cloves

How to Prepare My Ceviche Step-by-Step

Making my zesty lime ceviche is simple and doesn’t need cooking. It’s a refreshing, flavorful appetizer. Let’s go through the easy steps to make this tasty dish.

Step 1: Sourcing Fresh Seafood

Begin by picking the freshest seafood. I choose firm white fish like tilapia or halibut, and shrimp. Cut the fish into small cubes and prepare the shrimp by peeling, deveining, and chopping.

Step 2: Marinating the Ceviche

In a big bowl, mix the seafood with lime juice. The lime’s acid will “cook” the seafood, making it firm. Refrigerate for 45-60 minutes, stirring now and then, until it’s opaque and firm.

Step 3: Mixing Ingredients Together

Once the seafood is marinated, add the rest of the ingredients. This includes diced red onions, cucumbers, tomatoes, and cilantro. Mix gently, without overdoing it. Season with salt and a bit of cayenne pepper to taste.

Your zesty lime ceviche is now ready! This easy recipe makes a delicious, no-cook appetizer. It’s great for summer parties or a light meal.

Tips for the Perfect Marinade

Making a tasty citrus-marinated fish dish begins with picking the right limes and knowing how long to marinate. The secret to a great mix of tangy lime flavors is in a few easy tips.

Choosing the Right Limes

Ripe, soft limes are essential for getting the most juice and flavor. Choose limes that are soft to the touch. These will give you the best juice for your marinade. Hard, dry limes won’t add much flavor to your dish.

Timing: How Long to Marinate

The marination time affects the fish’s texture and taste. For fish about 3/4 inch thick, marinate for 45-60 minutes. This lets the lime juice “cook” the fish, changing its texture and adding citrus flavor.

Marinating for up to 2 hours can make the fish firmer. But, be careful not to marinate too long, as it can make the fish chewy. When the fish looks opaque, it’s ready to mix with other ingredients.


Serving Suggestions for Ceviche

Ceviche is a refreshing seafood dish perfect for summer parties or gluten-free meals. It can be served in many creative ways.

Ideal Accompaniments

Crisp tortilla chips are great with ceviche, making it easy to scoop up. Mini tostadas with ceviche on top are also a hit. Serving it in coconut shells or appetizer cups adds a fun twist.

Presentation Ideas

  • Ceviche in lettuce cups for a low-carb, gluten-free option
  • Ceviche as a first course with creamy avocado sauce
  • Ceviche on a platter with colorful vegetables and herbs
  • Ceviche in small bowls or shot glasses for a festive party

When serving ceviche, highlight its fresh flavors. It’s perfect for any event, from casual gatherings to formal parties. The right accompaniments and presentation make it shine.

Storing Leftover Ceviche

Ceviche is a delightful dish that’s best enjoyed fresh. But what if you have leftovers? Don’t worry, with the right storage, you can keep the zesty flavors and fresh seafood for a few days. Let’s look at the best ways to refrigerate and enjoy your leftover ceviche.

Best Practices for Refrigeration

To keep your ceviche fresh, store it in an airtight container in the fridge. This keeps the flavors locked in and prevents the fish from drying out. Make sure the container is sealed tightly to keep air out, which can make the ceviche lose its vibrant color.

How Long Will It Last?

  • Properly stored in the fridge, your ceviche can last up to 2-3 days.
  • The citrus marinade will keep “cooking” the fish, changing its texture over time. So, it’s best to eat your leftover ceviche within a couple of days for the best flavor and texture.
  • Avoid freezing ceviche. Freezing can mess up the delicate balance of flavors and textures, making it mushy and unappetizing.

Remember, the key to storing leftover ceviche is to keep it cold and tightly sealed. With these simple tips, you can enjoy the fresh seafood and zesty flavors of your ceviche for a few extra days. Bon appétit!


Variations on My Zesty Lime Ceviche

My classic zesty lime ceviche is loved by many. But, the real magic happens when you try new things. Adding tropical fruits or a spicy kick can make it your own.

Tropical Fruit Additions

Diced mango or pineapple can add a sweet touch. Their natural sugars mix well with the lime, creating a perfect blend. Start with a little fruit and adjust to taste.

Spicy Twists with Jalapeños

For a spicy kick, use jalapeños or serrano peppers. Chop them finely, removing seeds and ribs to control the heat. Add them to the ceviche or use as a topping.

Try different seafood like shrimp, scallops, or a mix of fish. You can also add corn or sweet potato for texture and flavor.

Ingredient Amount
Shrimp, cooked or raw 2 pounds
Red onion, thinly sliced 1/2 cup
Jalapeño, ribs and seeds removed, minced 1
Cucumber, diced 3/4 cup
Roma tomatoes, seeded and diced 1 cup
Cilantro leaves, chopped 3/4 cup
Avocado, peeled, seeded, and chopped 1
Lime juice 1/2 cup (3/4 cup if using raw shrimp)
Lemon juice 1/4 cup
Orange juice 1/3 cup
Salt To taste
Tortilla chips For serving

Exploring these variations can lead to unique and tasty ceviche creations. It’s a great way to enjoy healthy Mexican cuisine and impress your guests.

Health Benefits of Ceviche

Ceviche is a vibrant dish from Latin American cuisine. It’s not just tasty but also healthy. As someone who cares about health, I’m excited to share its benefits.

Nutritional Value of Seafood

The base of ceviche is fresh seafood. This is a great source of lean protein. Seafood like white fish, shrimp, or scallops are full of omega-3s, vitamins, and minerals.

These nutrients are good for the heart, brain, and overall health.

Fresh Ingredients That Boost Immunity

Ceviche is more than just protein. It also has fresh ingredients that boost immunity. The citrus juices, like lime or lemon, are full of vitamin C.

Vitamin C is a strong antioxidant that strengthens the immune system. The veggies and herbs add more vitamins, minerals, and phytochemicals. These are key for a healthy diet.

Plus, ceviche is gluten-free. This makes it great for those with gluten sensitivities or on a gluten-free diet. Its healthy Mexican cuisine roots also make it a tasty and nutritious meal.

In short, ceviche is a dish that’s both delicious and healthy. It’s packed with lean protein and immune-boosting ingredients. It’s a great choice for anyone looking to eat well.

Pairing Drinks with Ceviche

Looking for the perfect drink to go with your zesty lime ceviche? You’ve got plenty of choices. Ceviche, being a light and citrusy dish, pairs well with cool, crisp drinks. These drinks help balance the tangy flavors.

Best Wines for Ceviche

Wine lovers, rejoice! Light and bright white wines are perfect with ceviche. Sauvignon Blanc and Pinot Grigio are top picks. They have zesty acidity and subtle fruit notes that match the fresh seafood and citrus.

Want to try something different? A Chilean Sauvignon Blanc from coastal regions like Limarí and Leyda is a great choice. These wines have a salty minerality and herbaceous notes that enhance ceviche’s flavors.

Refreshing Non-Alcoholic Options

  • Fruit-infused water, like lime and cucumber or strawberry and basil, is a light and refreshing choice for ceviche.
  • Coconut water is another great option. It has a subtle sweetness and tropical flavors that go well with the seafood and citrus.
  • For a bit of sweetness, try a light lemonade or hibiscus iced tea. They offer a nice contrast to the tangy ceviche.

When pairing drinks with ceviche, aim for something that balances its acidity and freshness. This lets the dish’s vibrant flavors stand out. Whether it’s a crisp white wine or a refreshing non-alcoholic drink, your ceviche will be a hit at any summer party.


Ceviche Around the World

Ceviche is a favorite dish in Latin America, showing the area’s rich food diversity. It’s made with fresh seafood and citrus juices. But, each country and region has its own twist on this dish.

Unique Regional Variations

In Peru, ceviche is a classic. It’s made with raw fish, citrus, onions, and cilantro. It’s often served with sweet potatoes or roasted corn.

Mexican ceviche is different. It includes tomatoes, cucumber, and fruits like mango. The seafood is marinated in a spicier mix.

In Ecuador, ceviche is full of local seafood like shrimp and octopus. It’s marinated with citrus and tropical fruits. Chile’s ceviche uses white fish, with roasted corn and onions.

Famous Ceviche Dishes to Try

  • Ceviche de Conchas Negras (Black Clam Ceviche) from Peru
  • Ceviche Vallartense from Puerto Vallarta, Mexico
  • Ceviche de Camarón (Shrimp Ceviche) from Ecuador
  • Ceviche de Corvina (Sea Bass Ceviche) from Chile

Peruvian ceviche is known for its bold flavors. But, Mexico and Ecuador offer tropical, vibrant versions. This dish is a must-try for anyone exploring Latin American cuisine.

Common Mistakes to Avoid

Making the perfect zesty lime ceviche is all about balance. You need fresh seafood, bright citrus, and herbs. But, even experienced cooks can make mistakes. By avoiding these, your easy ceviche preparation will always be a hit.

Over-Marinating Seafood

Marinating seafood in citrus is key. But, don’t let it sit for too long. Over-marinating makes the fish tough and rubbery. Aim for 30 minutes to 1 hour, depending on the seafood’s thickness.

Skimping on Fresh Herbs

Fresh herbs like cilantro are crucial for ceviche’s flavor. Don’t use dried herbs; they can’t match fresh ones. Add plenty of cilantro and maybe some parsley or oregano for extra taste.

Ingredient Quantity
Shrimp, peeled and deveined 1 lb
Lime juice 1 1/4 cup
Red onion, minced 1/2
Jalapeño pepper, minced 1/2
Roma tomatoes, hollowed and diced 2
Persian cucumbers, peeled, hollowed, and diced 2
Avocados, diced 2
Cilantro, minced 2 tbsp
Salt 1 tsp

By steering clear of these mistakes and following the recipe, you’ll make a flavor-packed, visually stunning ceviche. It’s sure to wow your guests.

My Favorite Ceviche-Focused Events

I love ceviche and can’t wait for summer to come. It’s the perfect time to go to ceviche-focused events. These gatherings celebrate Latin American food and let me enjoy ceviche’s fresh taste.

Hosting a Ceviche Tasting Party

Hosting a ceviche tasting party is a summer highlight for me. I invite friends and family to try different ceviche styles. We use shrimp, scallops, and snapper, showing how ceviche can be made in many ways.

Participating in Food Festivals

Attending food festivals is another summer joy. These festivals have ceviche vendors with fresh, seasonal ingredients. I love talking to chefs, learning about their ideas, and finding new ceviche recipes. These festivals are fun, delicious, and support our local food scene.

FAQ

What is the main ingredient in ceviche?

The main ingredient in ceviche is fresh seafood. This is usually fish like wild red snapper, sea bass, or halibut.

What are the key flavors in ceviche?

The key flavors in ceviche come from citrus juice, like lime. It also includes red onion, tomatoes, cucumber, cilantro, and jalapeños.

How long should ceviche be marinated?

Ceviche should marinate for 45-60 minutes. This depends on the fish piece size. Longer marinating makes the fish firmer but can make it chewy.

What are some serving suggestions for ceviche?

You can serve ceviche with tortilla chips or as mini tostadas. It’s also good in coconut shells, appetizer cups, or lettuce cups. For a special touch, serve it over a creamy avocado sauce.

How long will leftover ceviche last in the refrigerator?

Leftover ceviche can last 2-3 days in the fridge. It will continue to cure in the lime juice, changing its texture.

What are some common variations of ceviche?

Ceviche variations vary across Latin America. Peruvian ceviche is simple, while Mexican ceviche includes more vegetables. You can also try adding tropical fruits, changing spice levels, or using different seafood.

What are some common mistakes to avoid when making ceviche?

Avoid over-marinating the fish and using low-quality seafood. Don’t skip fresh herbs like cilantro. Also, make sure to balance the salt and lime juice to taste.

Easy Frozen Chicken Crock Pot Recipes for Dinner

Using your crock pot and frozen chicken makes dinner easy and tasty. Slow cooker recipes with frozen chicken are perfect for busy nights. They let you enjoy a homemade meal with little effort. You can make creamy chicken dishes or zesty Tex-Mex favorites with your crock pot and frozen chicken.

With the right ingredients and techniques, you can make delicious frozen chicken crock pot recipes. Your family will love gathering for these tasty dinners. These recipes and tips are great for both new and experienced cooks. They turn simple frozen chicken into amazing meals that everyone will love.

Key Takeaways

  • Discover the convenience of using frozen chicken in crock pot recipes for easy, hassle-free dinners.
  • Learn essential tips for safely cooking frozen chicken in a slow cooker, including proper temperature and timing guidelines.
  • Explore a variety of must-have ingredients and kitchen tools to elevate your frozen chicken crock pot creations.
  • Indulge in popular frozen chicken crock pot recipes like Creamy Italian Chicken, Honey Garlic Chicken, and Mexican-Style Shredded Chicken.
  • Unlock time-saving meal prep strategies to streamline your dinner routine.

Essential Tips for Cooking Frozen Chicken in a Slow Cooker

Cooking frozen chicken in a slow cooker is a great way to save time. But, it’s important to follow food safety and cooking tips. This way, your meals will be tasty and safe to eat. Here are some key tips for cooking frozen chicken in a slow cooker.

Food Safety Guidelines for Frozen Chicken

It’s crucial to follow food safety rules when cooking frozen chicken. Always thaw it in the fridge, not at room temperature. After thawing, cook the chicken until it reaches 165°F (74°C) to kill bacteria.

Best Temperature and Timing Settings

For the best results, cook frozen chicken on low for 7-8 hours or on high for 4-5 hours. This ensures it’s cooked safely. Check your slow cooker’s manual for exact settings.

Preparation Methods and Techniques

  • Place frozen chicken pieces in a single layer for even cooking.
  • Add a bit of liquid, like broth or water, to keep the chicken moist.
  • Try different seasonings and marinades to add flavor to your chicken.

By using these tips, you can cook frozen chicken safely and deliciously in your slow cooker. Enjoy making tasty meals for your family.

“Slow cooking frozen chicken in a crock pot is a game-changer for busy home cooks. The key is to follow food safety guidelines and cooking techniques to ensure your meals are not only delicious but also safe to enjoy.”

Must-Have Ingredients and Kitchen Tools

Creating tasty frozen chicken dishes in your crock pot needs a stocked pantry and the right tools. Essential seasonings and time-saving accessories are key. They help elevate your slow-cooked meals.

Let’s look at the crock pot essentials, slow cooker accessories, and pantry staples for chicken recipes. These will help you succeed in the kitchen.

Pantry Staples for Crock Pot Chicken Recipes

  • Boneless, skinless chicken breasts or thighs
  • Chicken broth or stock
  • Diced tomatoes
  • Onions, garlic, and herbs (such as thyme, rosemary, and parsley)
  • Spices (like paprika, cumin, chili powder, and oregano)
  • Soy sauce, Worcestershire sauce, and vinegar for marinades and sauces
  • Honey, brown sugar, and maple syrup for sweet and savory dishes

Essential Slow Cooker Accessories

  1. Programmable digital slow cooker with multiple settings
  2. Slow cooker liners for easy cleanup
  3. Meat thermometer to ensure safe internal temperatures
  4. Slow cooker shredder claws for effortless chicken shredding
  5. Slow cooker recipe book or online resources for inspiration
Crock Pot EssentialsFeaturesBenefits
6-Quart Programmable Slow CookerAdjustable temperature settings, digital timer, and automatic keep-warm functionPrecise temperature control, hands-off cooking, and food safety
Slow Cooker LinersBPA-free, heat-resistant, and disposableEasy cleanup, no scrubbing required
Meat Shredding ClawsSturdy, heat-resistant, and ergonomic designEffortless shredding of cooked chicken for versatile dishes

With these crock pot essentials, slow cooker accessories, and pantry staples for chicken recipes, you’re ready. You’ll make delicious and easy frozen chicken dishes in your slow cooker.

Frozen chicken makes crock pot chicken recipes easy and tasty. The slow cooker cooks frozen chicken into tender, flavorful dishes. Here are three favorite frozen chicken crock pot recipes for weeknights.

Creamy Italian Chicken

This easy chicken dinner uses frozen chicken breasts in a creamy Italian sauce. Just mix the chicken, cream of mushroom soup, Italian seasoning, and garlic in your slow cooker. Let it cook for a comforting meal. Serve over pasta or rice for a full slow cooker meal idea.

Honey Garlic Chicken

Try this Honey Garlic Chicken for a sweet and savory crock pot chicken recipe. Frozen chicken thighs or drumsticks are cooked in a sauce of honey, soy sauce, garlic, and ginger. It’s sticky and flavorful, great with steamed veggies and rice.

Mexican Style Shredded Chicken

Make your frozen chicken crock pot recipes into a Tex-Mex feast. Cook frozen chicken breasts or thighs with salsa, chili powder, cumin, and spices until tender. Shred the chicken and use it in tacos, burritos, or on nachos for a slow cooker meal idea full of flavor.

These crock pot chicken recipes show how versatile frozen chicken is in the slow cooker. With simple ingredients and no effort, you can have tasty easy chicken dinners any night.

Time-Saving Meal Prep Strategies

Getting a tasty and healthy dinner ready can be a big help with a crock pot and frozen chicken. By using meal planning, batch cooking, and freezer meals, you can save time. This makes weeknight cooking less stressful.

Planning your meals ahead is a smart move. Spend some time over the weekend planning your meals for the week. Make sure to include crock pot recipes with frozen chicken. This way, you can buy all your ingredients at once, avoiding last-minute grocery runs.

Batch cooking is also a big time-saver. When you make your crock pot meals, make extra. Freeze it for later and reheat when you need it. This saves time and ensures you have healthy meals ready for busy nights.

  1. Freeze individual portions of your favorite crock pot chicken dishes, like Creamy Italian Chicken or Honey Garlic Chicken. This makes quick meals easy to prepare.
  2. Precook and shred frozen chicken in big batches. Use it in tacos, salads, casseroles, and soups throughout the week.
  3. Keep frozen sides like rice, quinoa, and roasted veggies on hand. They’re great with your crock pot chicken dishes.

Using these time-saving meal prep strategies makes crock pot cooking with frozen chicken a breeze. With a bit of planning, you’ll have a delicious meal ready in no time.

Flavor Variations and Seasoning Combinations

Make your frozen chicken crock pot recipes more exciting with different seasonings. You can use classic herb and spice mixes or try flavors from around the world. This opens up a world of possibilities for your slow-cooked chicken dishes.

Classic Herb and Spice Blends

For a comforting taste, season your chicken with garlic, onion, paprika, thyme, and rosemary. These ingredients can turn your crock pot chicken into a delicious main dish.

International Flavor Profiles

Discover the bold tastes of global cuisine by using spices and seasonings from different places. Try chicken seasoning ideas like Moroccan cumin and coriander, Indian curry powder, or Mexican chili powder and cumin.

Sauce and Marinade Options

Enhance your crock pot chicken with various crock pot sauces and marinades. Choose from tangy barbecue sauce to creamy mushroom gravy. The right sauce can add global cuisine flavors and make your dish irresistible.

Seasoning BlendIngredientsCuisine Inspiration
Italian HerbGarlic, oregano, basil, rosemaryItalian
Cajun SpicePaprika, chili powder, garlic, onion, cayenneCreole/Cajun
Asian FusionGinger, garlic, soy sauce, rice vinegar, sesame oilAsian

“Experimenting with global cuisine flavors is a great way to keep your crock pot chicken recipes interesting and exciting.”

Troubleshooting Common Frozen Chicken Crock Pot Recipes

Cooking frozen chicken in a slow cooker can sometimes present a few challenges. But with the right troubleshooting tips, you can easily overcome any issues. This way, you can enjoy delicious, moist, and flavorful results every time. Let’s dive into some common problems and their solutions to help you perfect your slow cooker chicken recipes.

Dry, Stringy Chicken

If your frozen chicken is turning out dry and stringy, the culprit is likely overcooking. To avoid this, ensure you’re using the right temperature and cooking time settings for your slow cooker. Refer to the manufacturer’s recommendations and adjust as needed. Additionally, try adding more liquid, such as broth or sauce, to the pot. This will keep the chicken moist and tender.

Uneven Cooking

Frozen chicken pieces can sometimes cook unevenly in the slow cooker. Some parts may be fully cooked while others remain undercooked. To address this issue, try arranging the chicken pieces in a single layer. Make sure they’re not stacked or overlapping. This will allow for more even heat distribution and cooking.

Lack of Flavor

If your slow cooker chicken recipes lack flavor, it’s time to amp up the seasoning. Experiment with different spice blends, herbs, and marinades to infuse your dishes with bold, delicious flavors. Don’t be afraid to get creative with crock pot cooking tips and chicken recipe fixes. Find the perfect combination that suits your taste preferences.

Common Slow Cooker ProblemsSolutions
Dry, Stringy ChickenAdjust temperature and cooking time, add more liquid
Uneven CookingArrange chicken in a single layer, avoid overlapping
Lack of FlavorExperiment with spices, herbs, and marinades

By addressing these common slow cooker problems and applying the appropriate crock pot cooking tips and chicken recipe fixes, you’ll be well on your way. You’ll enjoy perfectly cooked, flavorful frozen chicken dishes every time you use your slow cooker.

Conclusion

Frozen chicken crock pot recipes are a great way to make easy dinners. They are perfect for busy nights or weekend meals. You can make tasty meals without much effort.

There are many ways to flavor your frozen chicken. You can use classic herbs, international spices, or creative sauces. With frozen chicken, you can try many different recipes.

Start by getting the right tools and learning how to prepare. This will help you become good at cooking with frozen chicken in your crock pot.

When making easy chicken dinners, always think about food safety. Try new flavors and use meal prep to save time. This article has given you great tips and recipes. Now, you can enjoy delicious frozen chicken crock pot meals.

FAQ

What are the benefits of using frozen chicken in crock pot recipes?

Frozen chicken in crock pot recipes is convenient and saves time. It’s easy to store and can go straight into the slow cooker without thawing. This is perfect for busy days or meal prep.

Plus, the slow cooker makes the chicken tender and juicy every time.

What food safety guidelines should I follow when cooking frozen chicken in a slow cooker?

Always cook frozen chicken in a slow cooker at 165°F (74°C) to kill bacteria. Don’t leave the chicken out for too long. Use a meat thermometer to check the chicken’s temperature before serving.

What are the optimal temperature and timing settings for cooking frozen chicken in a slow cooker?

Cook frozen chicken on low for 6-8 hours for the best results. This ensures it cooks evenly without drying out. If you’re in a hurry, use high for 3-4 hours. Always check the chicken’s temperature before serving.

What are some essential ingredients and kitchen tools for successful frozen chicken crock pot cooking?

You’ll need broth, onions, garlic, herbs, and sauces or seasonings. A programmable slow cooker, meat thermometer, and tongs or forks are also key. These tools help make delicious, easy chicken dishes.

Try Creamy Italian Chicken, Honey Garlic Chicken, or Mexican-Style Shredded Chicken. These recipes are easy to make and offer different flavors for everyone’s taste.

How can I streamline meal prep using frozen chicken and a crock pot?

Batch cook frozen chicken and portion it for later meals. Prepare crock pot chicken recipes in advance by assembling ingredients in a freezer-safe bag. These strategies save time and make delicious dinners ready for busy nights.

What flavor variations and seasoning combinations work well with frozen chicken crock pot recipes?

You can use classic herbs like rosemary and thyme, or try international flavors like Mexican or Mediterranean. Experiment with sauces like mushroom or barbecue for unique flavors.

How can I troubleshoot common issues with frozen chicken crock pot recipes?

For dry chicken, make sure it’s fully covered in liquid. Adjust cooking time or temperature if needed. Add more seasoning or sauce. Check the chicken’s temperature and shred it for the best results.

Get The Best Recipes In 2025

Exit mobile version