How to make the perfect Crab Brulee Recipe at Home

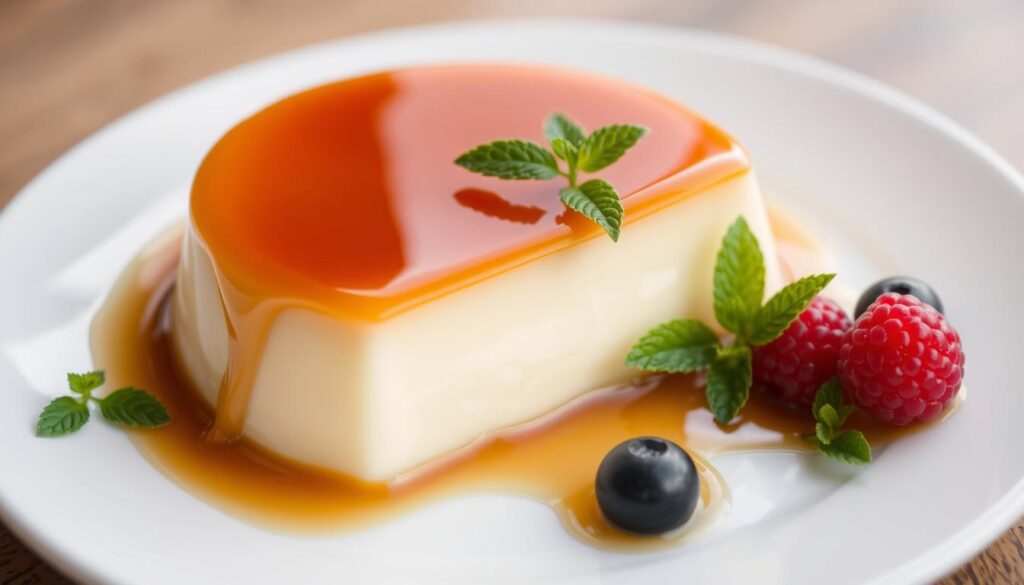
Crab Brulee is a mix of rich seafood and sweet dessert, making it a unique dish. It combines the creamy goodness of crème brûlée with the savory crab meat. This creates a delightful and unexpected treat. Ever wondered how to make this seafood sensation at home? Get ready to improve your cooking skills as we explore the secrets of the crab brulee recipe. Here, the homemade crab brulee outshines any store-bought version.

crab brulee

Key Takeaways

  • Discover the essential ingredients and equipment needed to create an exquisite homemade crab brulee
  • Learn the step-by-step process for preparing the crab mixture, custard base, and achieving the perfect brulee crust
  • Explore tips and techniques for ensuring your crab brulee is consistently delicious, from proper mixing to baking temperatures
  • Uncover common mistakes to avoid and storage/reheating guidelines to maintain the quality of your crab brulee
  • Elevate your culinary skills and impress your guests with this sophisticated yet surprisingly simple seafood dessert

Introduction to Crab Brulee

The story of crab brulee starts with French cooking and a love for seafood. It mixes the luxury of crème brûlée with crab meat’s savory taste. This mix creates a dish that excites your taste buds with its flavors and textures.

Crab brulee is a seafood custard with crab meat in a creamy base. It’s topped with a crunchy, caramelized sugar layer, like crème brûlée. This mix of smooth custard and crunchy sugar makes it a culinary treat.

Chefs in the United States created this dish by combining French cooking with local seafood. Now, it’s a favorite in fancy restaurants and homes.

Key Elements of Crab BruleeDescription
Crab MeatThe foundation of the dish, providing the savory, umami-rich flavor and texture.
Custard BaseA creamy, silky-smooth custard that serves as the base for the crab mixture.
Caramelized ToppingThe signature brulee layer, created by caramelizing a thin layer of sugar on top of the custard.

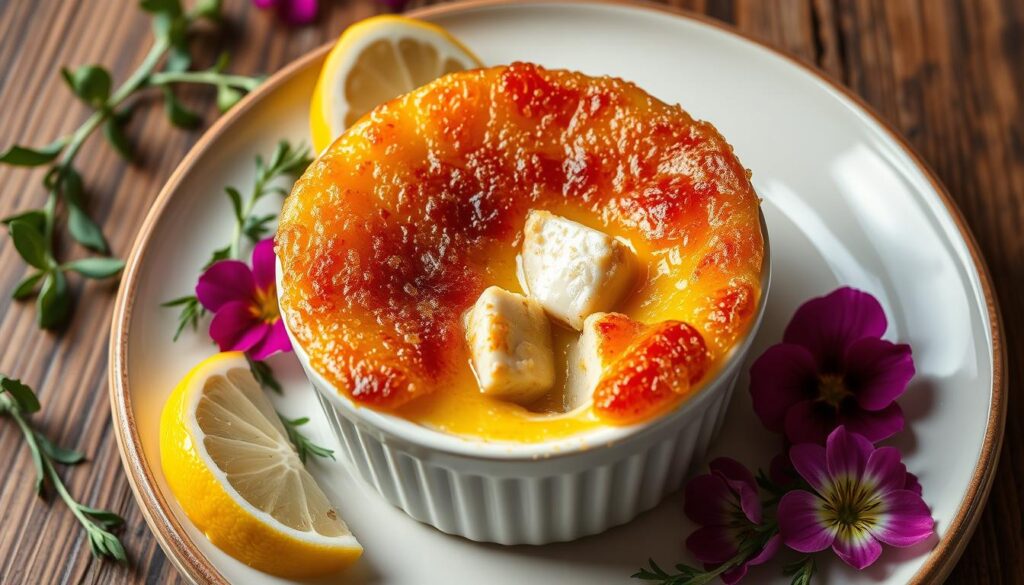
Crab brulee brings together the richness of crème brûlée and seafood’s savory taste. It’s a culinary innovation that delights the senses and celebrates French-inspired seafood cuisine.

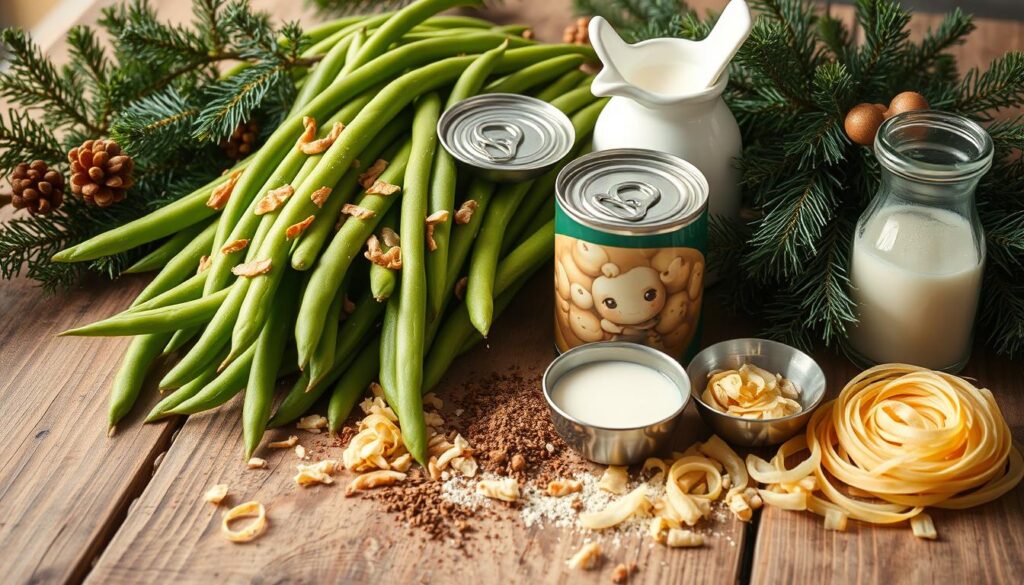
Essential Ingredients for Crab Brulee

Creating a delicious Crab Brulee starts with choosing the right ingredients. The type of crab meat and dairy components are key. Each part is important for the perfect taste and texture. Let’s look at what you need to make this tasty dish.

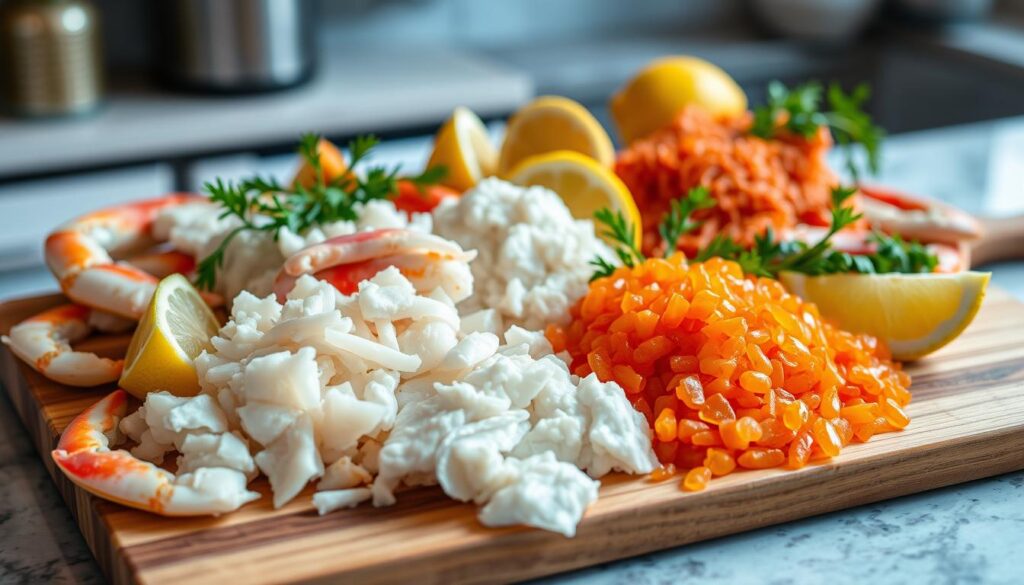
Types of Crab Meat to Use

The right crab meat selection is crucial. For a true Crab Brulee, use lump or jumbo lump crab meat. These types have a richer flavor and texture. Stay away from imitation crab or claw meat, as they don’t offer the same taste and sweetness.

Required Dairy Components

The custard base of Crab Brulee needs heavy cream and eggs. The heavy cream makes it creamy, while eggs help it bind and smooth out. Together, they create a base for the crab meat, blending flavors and textures beautifully.

Seasonings and Spices

Seasonings and spices are key to making Crab Brulee special. Old Bay seasoning is a great choice, enhancing the crab’s sweetness. A bit of salt and pepper also brings out the dish’s natural flavors.

IngredientQuantity
Lump or Jumbo Lump Crab Meat8 oz
Heavy Cream1 cup
Eggs3
Old Bay Seasoning1 tsp
Salt and Pepperto taste

Kitchen Equipment You’ll Need

Making the perfect Crab Brulee at home needs the right tools. You’ll need ramekins and a kitchen torch to get that crunchy topping. Let’s look at the key items for this dish.

You’ll first need ramekins for your Crab Brulee. Choose ovenproof ones that hold 4-6 ounces each. This size is perfect for even baking.

A kitchen torch is crucial for the caramelized crust. Get a high-quality one for the best results.

For the creamy base, you’ll need mixing bowls in different sizes. Stainless steel or tempered glass bowls are best for mixing.

Lastly, a shallow baking dish is needed for baking. It should fit the ramekins for even cooking.

With these tools, you’re ready to make Crab Brulee at home. Enjoy your cooking!

Preparing the Crab Mixture

To make the perfect Crab Brulee, you need to prepare the crab meat right. This guide will show you how to clean, shred, and season the crab. This ensures your dish is full of flavor.

Cleaning and Shredding the Crab

Begin by cleaning the crab meat well. Remove any shells, cartilage, or unwanted parts. Then, shred the crab into small pieces using a fork or your fingers. This makes the crab mix well with the custard base.

Creating the Base Mixture

In a bowl, mix the shredded crab preparation with a creamy base like cream cheese or mascarpone. Fold the ingredients together gently. Make sure there are no big clumps left.

Seasoning Proportions

  • Add a balanced seasoning blend to enhance the Crab Brulee’s flavor. Use salt, pepper, and a bit of paprika or cayenne to highlight the crab’s sweetness.
  • Adjust the shredding techniques and seasoning to your liking. This way, the crab’s flavor will stand out without being too strong.

By carefully preparing the crab mixture, you set the stage for a Crab Brulee that looks great and tastes amazing.

Making the Custard Base

Making the perfect custard recipe is key to a great Crab Brulee. The custard base is rich and creamy, perfect for the crab meat. You need to temper the egg mixture right to get that smooth texture.

Start by separating the egg yolks from the whites. Keep the whites for later. Heat the heavy cream, milk, and sweeteners or vanilla in a saucepan. Stir until it’s hot but not boiling.

Temper the eggs by whisking a bit of hot cream into the yolks. Then, add the tempered yolks back into the saucepan. Keep stirring until it thickens and is smooth.

Don’t let it boil, or the egg mixture will curdle. When it’s thick enough, take it off the heat. Let it cool a bit before mixing it with the crab.

Tempering the eggs and making a smooth custard base is essential. It’s the start of a Crab Brulee that will wow your taste buds. This step is crucial for the right mix of flavors and textures.

Combining Crab and Custard

Mixing the crab and custard is key to making perfect Crab Brulee. This step combines the ingredients in a way that brings out the dish’s unique texture and taste.

Proper Mixing Techniques

To mix crab and custard right, use gentle and careful methods. Don’t stir too hard, as it can mess up the creamy texture. Instead, fold them together with a spatula, moving in a smooth circle.

Texture Guidelines

The Crab Brulee should feel smooth and creamy. It should have no lumps or air pockets. This ensures a consistent texture that’s both enjoyable and satisfying.

Learning to mix crab and custard well is crucial. It’s what makes a Crab Brulee stand out. With practice, you’ll create a dish that wows your guests and satisfies your taste buds.

Baking Temperature and Timing

To make the perfect Crab Brulee, you need to get the baking temperature and timing just right. This ensures the custard is smooth and creamy.

Start by heating your oven to 325°F (165°C). This temperature is perfect for cooking the custard without drying out the crab mixture.

Then, put the ramekins filled with crab and custard in a big baking pan. Pour hot water into the pan to create a water bath. This method cooks the custard evenly and prevents it from cracking.

  1. Bake the Crab Brulee for 30-40 minutes. It should be slightly jiggly in the center but not too soft.
  2. Keep an eye on the baking time because ovens can differ. Check the Crab Brulee around 30 minutes to get it just right.
  3. After baking, take the ramekins out of the water bath. Let them cool down slowly before refrigerating. This helps the custard set perfectly.

By following these steps, you’ll get a Crab Brulee with a silky custard and a caramelized top.

Creating the Perfect Brulee Crust

Making the perfect caramelized crust on a Crab Brulee is key. It can make the whole dish shine. The right sugar and torching techniques are crucial for that caramelized sugar layer.

Sugar Selection

The type of sugar matters a lot for the crust texture. Granulated sugar works, but superfine or castor sugar is better. They caramelize faster and more evenly, giving a crisp, golden crust.

Some try brown sugar or turbinado sugar for a hint of molasses flavor. The goal is to pick a sugar that melts and caramelizes well with the brulee torch.

Torching Techniques

  • Hold the brulee torch 6-8 inches from the custard, moving it to spread heat evenly.
  • Use short, sweeping motions to caramelize the sugar slowly, avoiding burns.
  • Watch closely and stop when the crust is just right.
  • Use a professional brulee torch for better control and heat.

With the right sugar and torching skills, anyone can make a Crab Brulee with a standout crust texture.

Presentation and Serving Tips

Presenting and serving Crab Brulee can make a big difference. It’s all about the plating and garnishes. Every detail adds to the dish’s beauty and taste.

Start with plating ideas that highlight the creamy custard and caramelized top. Use individual ramekins or small dishes for a fancy look. Place them on a big platter or tray for a stunning display.

For garnish suggestions, try chopped chives or parsley for a fresh look. Add a dollop of crème fraîche or a balsamic reduction for extra elegance.

The serving temperature is key. Serve it warm, with the custard still a bit wobbly and the top golden and crisp. This perfect mix of temperature and texture will wow your guests.

The way you present and serve Crab Brulee is just as important as the recipe. By focusing on these details, you’ll create a memorable dining experience. Your guests will talk about it for a long time.

Storage and Reheating Guidelines

Enjoying homemade Crab Brulee doesn’t have to end after dinner. With the right refrigeration and reheating techniques, you can enjoy leftover crab brulee for days. This way, the dish stays flavorful and creamy.

Proper Storage Methods

To keep your Crab Brulee fresh, follow these guidelines:

  • Allow the dish to cool completely before storing.
  • Transfer the Crab Brulee to an airtight container or cover tightly with plastic wrap.
  • Refrigerate the leftovers promptly, within 2 hours of cooking.
  • Properly stored, the Crab Brulee will keep in the fridge for 3-4 days.

Reheating Instructions

When you’re ready to enjoy leftover crab brulee again, follow these reheating techniques:

  1. Preheat your oven to 325°F (165°C).
  2. Transfer the Crab Brulee to an oven-safe dish and cover loosely with foil.
  3. Reheat for 10-15 minutes, or until the center is heated through.
  4. Remove the foil during the last 2-3 minutes to allow the top to crisp up.
  5. Serve immediately and enjoy your perfectly reheated Crab Brulee!

By following these simple steps, your leftover crab brulee will taste as good as the first time. Savor every bite and enjoy your culinary masterpiece.

Common Mistakes to Avoid

Making a delicious Crab Brulee can be fun, but you need to watch out for common mistakes. Issues like overcooking the crab, curdling the custard, and sugar burning the top can ruin your dish. Knowing these problems helps you make a perfect Crab Brulee every time.

Cooking the crab meat right is key. Overcooking makes it dry and rubbery. So, heat the crab gently and avoid high temperatures for too long.

Curdling the custard is another mistake. It happens when the mixture gets too hot too fast or if eggs are added too quickly. To avoid this, slowly add the eggs to the hot liquid while stirring constantly. This keeps the custard smooth and creamy.

  • Avoid overcooking the crab
  • Prevent curdling of the custard base
  • Be cautious of sugar burning when creating the brulee crust

Finally, sugar burning can ruin the top of the Crab Brulee. Use the right sugar and watch closely when broiling or torching. This way, you get a golden, crisp crust without any burnt taste.

By avoiding these mistakes and following this guide, you’ll make a Crab Brulee that will wow your guests and satisfy your taste buds.

Conclusion

Crab Brulee is a standout seafood dessert that blends savory and sweet perfectly. With this guide, you can master the art of crab brulee mastery and improve your cooking at home.

Whether you’re an experienced chef or a home cooking enthusiast, Crab Brulee is a great way to wow your guests. It requires skill in making a rich custard base, mixing it with fresh crab, and getting that caramelized crust. This journey celebrates the seafood dessert success.

We invite you to try this recipe and see the endless possibilities it holds. Enjoy making this delicious dish and feel proud to serve a remarkable Crab Brulee. Bon appétit!

FAQ

What is Crab Brulee?

Crab Brulee is a seafood dessert that mixes crab with crème brûlée’s sweetness. It’s a mix of French desserts and seafood flavors.

What type of crab meat should I use for Crab Brulee?

Use lump or jumbo lump crab meat for the best flavor and texture.

What dairy components are required for the Crab Brulee custard?

Heavy cream and eggs are key for the custard. Cream adds richness, and eggs make it smooth.

What kitchen equipment is needed to make Crab Brulee at home?

You’ll need ramekins, a kitchen torch, bowls, and a baking dish. These tools help prepare and bake the dish.

How do I properly combine the crab mixture and custard base?

Fold the crab and custard gently to keep the texture right. Avoid overmixing.

What is the ideal oven temperature and baking time for Crab Brulee?

Bake at 325°F (165°C) for 30-40 minutes. This ensures the custard is just right.

How do I create the perfect caramelized crust on top of the Crab Brulee?

Use a kitchen torch to caramelize sugar on top. Rotate the torch for an even crust.

How should Crab Brulee be stored and reheated?

Store leftovers in the fridge for 3-4 days. Reheat in a warm oven (325°F/165°C) for 5-10 minutes.

What are some common mistakes to avoid when making Crab Brulee?

Avoid overcooking the custard and burning the sugar. Also, temper eggs well and don’t add too much air.

Mastering the Art of Macarons: A Sweet Journey to Perfection

Ah, macarons. Macarons are those delightful treats that are tactile, vibrant, and melt in your mouth. If you’ve ever walked through a bakery window and located yourself mesmerized by rows of flawlessly spherical cookies with their creamy fillings, you’re no longer on your own. Making macarons at home may also sound like an unfeasible feat reserved for professional pastry cooks; however, trust me, with a piece of staying power and the proper suggestions, you’ll be serving up Instagram-worthy macarons right away.

What You Need:

First matters first: gather your components. Macarons may have a reputation for being fussy, but the component list is actually quite simple:

  • Almond flour (finely ground and sifted)
  • Powdered sugar
  • Granulated sugar
  • Egg whites at room temperature yield remarkable results.
  • Cream of tartar (non-obligatory, but permits stabilization of the meringue)
  • Gel meals coloring (optionally to be had for those colorful colorings)
  • Flavor extracts (like vanilla, almond, or maybe rosewater)
  • Filling: Buttercream, ganache, or jam—your name!

The Step-thru: The Use of the Step Process

  1. Prep Like a Pro:
  • Line your baking sheet with parchment paper or a silicone baking mat.
  • Weigh your components. Accuracy subjects proper here.
  1. Make the Meringue:
  • Whisk the egg whites until frothy. Add cream of tartar if using it, then slowly add granulated sugar.
  • Whip until stiff peaks form. Add your meal’s coloring and taste extract here if you want.
  1. Mix the Batter (Macaronage):
  • Gently fold the almond flour and powdered sugar aggregate into the meringue. The batter should go along with the waft like lava: thick, however not runny.
  1. Pipe and Rest:
  • Transfer the batter to a piping bag with a round tip and pipe small circles onto the baking sheet.
  • Tap the tray at the counter a few times to cast off air bubbles. Allow the macarons to sit for 30-60 minutes to form pores and skin.
  1. Bake:
  • Preheat your oven to a few hundred°F (one hundred and fifty°C).
  • Bake for 15–20 minutes, checking for the signature “toes” (the ruffled edges). Let them cool completely before doing away with them from the tray.
  1. Fill and Assemble:
  • Pair shells of comparable sizes, then upload your chosen filling. Gently sandwich them together.

Tips for Success:

  • Sift Your Dry Ingredients: This ensures a clean batter.
  • Don’t overmix, or you’ll grow to be with flat, unfolded macarons.
  • Resting is Key: Skipping this step can negatively impact your chances of gaining momentum.
  • Use an Oven Thermometer: Macarons are temperamental, and unique baking temperature is crucial.

FAQ

A: Why are my macarons cracked? A: This commonly takes place when the batter hasn’t rested sufficiently or if there’s too much air trapped indoors. Make sure to tap the tray to release air bubbles and allow them to rest properly.

Q: Can I use liquid meal coloring? A: Gel meals coloring is better because it doesn’t add extra moisture to the batter, which can mess with the texture.

Q: How do I maintain macarons? A: Store them in a hermetic box within the fridge for as much as in step with the week. Bring them to room temperature earlier than serving for the incredible flavor.

A: Yes, you can make macarons without almond flour. You can substitute almond flour with other types of flour, such as coconut flour or oat flour, but the texture and flavor may be different. A: You can substitute almond flour with finely ground pistachios or sunflower seeds, but the texture and taste can be barely precise.

A: My macarons don’t have feet. What went wrong? A: This is probably because of under-blending, not resting long enough, or an oven that’s too cool. Double-check your method and oven temperature.

So there you have it! A truthful manual to analyzing macarons. Yes, they’re finicky, but with exercise, you’ll turn your kitchen right into a Parisian patisserie. Now, hold close your piping bag and get baking—your taste buds (and Instagram fans) will thank you!

Cherry Tomato Pasta Recipe: A Flavorful Homemade Delight

cherry tomato pasta recipe, Few foods compare to the appeal of well-prepared pasta for fast, delectable, and aesthetically beautiful dinners. Homemade cherry tomato spaghetti can become your new favorite meal if you’re looking for something new, vibrant, and simple to prepare. Filled with the richness of olive oil, the herbal sweetness of cherry tomatoes, the aromatic kick of garlic, and vibrant basil, this meal celebrates little ingredients that provide huge sensations.
What Makes Cherry Tomatoes Special?
Pasta recipes are a wonderful way to use cherry tomatoes. Their natural sweetness and juicy texture make them perfect for creating a tasty sauce. Cherry tomatoes are ideal for evening recipes since they require less knowledge than giant tomatoes and cook very quickly.

Materials You’ll Need: 12 oz (340 g) of pasta (either linguine, spaghetti, or another form of pasta of your choosing)

  • 3 garlic cloves, finely sliced; 2 cups of cherry tomatoes, cut in half
    ¼ cup extra virgin olive oil – ½ tsp red pepper flakes (optional, but adds a burst of chili flavor)
    ¼ cup of clean, torn basil leaves
    Season to taste with salt and freshly ground black pepper.
    Parmesan cheese (optional; served with food)

Comprehensive Step-by-Step Guide:

  1. Prepare the pasta:Bring a large saucepan of salted water to a boil. Cook the pasta according to the directions on the box until it’s al dente. Before draining the remaining pasta water, set aside about 1 cup.
  2. Get the sauce ready:
    In a large skillet, heat the olive oil over medium heat. Add the sliced garlic and red pepper flakes, and sauté for one to two minutes, or until the garlic is fragrant and just beginning to turn golden. Now, take care to avoid burning the garlic.
  3. Prepare the Tomatoes: After halving the cherry tomatoes, put them in the pan and add salt and pepper for seasoning. After five to seven minutes of stirring and cooking, the tomatoes should soften and release their juices, creating a light sauce.e.
    Fourth, mix the pasta and sauce by adding the cooked pasta to the pan and tossing. To make a smooth, cohesive sauce that covers the pasta, gradually add a few tablespoons at a time of the pasta water that was set aside. a.
  4. Incorporate Fresh Basil:
    After taking the skillet off the burner, add the shredded basil leaves and mix. If you want, you can adjust the seasoning by adding extra salt and pepper.
  5. Serve and Enjoy: If desired, sprinkle the heated spaghetti with freshly grated Parmesan cheese.

Success Tip: To improve the taste, use high-quality olive oil.

To get a clean sauce, be sure to save the pasta water.

– Fresh basil adds a freshness, but you may use parsley instead if you want.

cherry tomato pasta recipe Common Questions

A: Canned tomatoes may be used instead of fresh cherry tomatoes.
A: You may use canned cherry tomatoes if needed, but we like clean cherry tomatoes because of their sweetness and texture. To balance the tastes, adjust the seasoning.
Can I add any other toppings to this dish?
A: For texture and protein, you can add grilled chicken, shrimp, or even a handful of arugula. This spaghetti also goes very well with crumbled goat or feta cheese.
Q: Can vegans eat this dish?A: This dish is completely vegetarian. Use a dairy-free substitute or omit the Parmesan cheese to make it vegan.
Q: Is it possible to prepare this meal in advance?A: The sauce may be prepared a day ahead of time and reheated, but the pasta tastes best fresh. For delicate results, cook the pasta sparingly and incorporate it with the reheated sauce.
Take pleasure in creating this vibrant and tasty spaghetti with cherry tomatoes. It’s a simple but delightful meal that works well for any gathering!

Indulge in the Ultimate Lobster Pasta Recipe Experience

Lobster Pasta Recipe: A Culinary Recipe

Should you wish to impress your guests or indulge in a sumptuous dining experience, lobster linguine represents the quintessential dish to enhance your culinary repertoire. This recipe harmoniously combines the delicate delicacy of lobster with the comforting richness of pasta, complemented by either a buttery or piquant sauce, thereby achieving an exquisite balance of elegance and flavor. Whether it is an intimate dinner or a weekend indulgence, lobster linguine is certain to leave a lasting impression.

Components

To prepare an exquisite lobster pasta, the following ingredients are required:
Regarding the Lobster:

Please make sure to thaw two lobster tails, whether they are fresh or frozen.
Two tablespoons of butter.
One clove of garlic, finely minced.
Season with salt and pepper according to your preference.

Regarding the pasta and sauce:

Twelve ounces of spaghetti or linguine.
Two tablespoons of olive oil.
Two cloves of garlic, finely minced.
One shallot, coarsely minced.
One cup of heavy cream.
One-half cup of grated Parmesan cheese.
Serve one-quarter cup of dry white wine (optional).
1 teaspoon of red pepper flakes (optional, to add a degree of spiciness)
The zest and liquid were extracted from one lemon.
Season with salt and pepper according to your preference.
Chopped fresh parsley (for garnishing purposes)

Lobster Pasta Recipe Instructions

Step 1: Prepare the lobsters for cooking.

Prepare the lobster appendages by bisecting them longitudinally.
In a skillet, soften the butter over medium heat and incorporate the minced garlic.
Position the lobster tails with the flesh side facing downward and cook for a duration of 4 to 5 minutes, or until the flesh becomes opaque and exhibits a faint golden hue.
Invert the shell and sauté the exposed side for an additional two minutes. Upon completion, remove from heat, allow to cool slightly, and proceed to carve the lobster flesh into bite-sized pieces.

Step 2: Prepare the pasta for cooking.

Bring a substantial kettle of water, seasoned with salt, to a rolling boil.
Prepare the pasta in accordance with the instructions provided on the packaging, cooking it until it reaches an al dente texture. Prior to draining, please reserve one cup of the pasta cooking water.

Step 3: Prepare the Sauce

Heat olive oil in a spacious skillet over medium heat.
Sauté the garlic and shallots until they become aromatic and translucent.
Should you choose to utilize white wine, incorporate it into the mixture and allow it to percolate for a duration of two minutes.
Incorporate the heavy cream and Parmesan cheese, whisking continuously until the sauce attains a smooth and slightly thickened consistency.
Incorporate lemon zest, lemon juice, and red pepper flakes to impart a vibrant and piquant flavor.

Step 4: Integrate the components and present for consumption.

Add the drained pasta to the skillet containing the sauce. Utilize the reserved pasta water to modify the consistency, if necessary.
Incorporate the cooked lobster pieces and allow the mixture to heat for approximately one minute.
Serve the dish while steaming, adorned with fresh parsley and an additional dusting of Parmesan cheese.

Guidelines for Achieving Success

Utilize premium, freshly sourced lobster to achieve optimal flavor. You can also use frozen lobster tails, but make sure to thaw them thoroughly.
To achieve a lighter sauce, consider substituting heavy cream with half-and-half, or alternatively, utilize a tomato-based sauce for a different flavor profile.
Incorporate vegetables such as spinach or cherry tomatoes to enhance the dish’s visual appeal and vibrancy.

Commonly Asked Questions

Question 1: Is it permissible to utilize an alternative variety of pasta?Certainly! Linguine, fettuccine, and even pappardelle are all exceptionally well-suited for pairing with lobster pasta.

Q2: What would be an appropriate alternative to white wine in the sauce?One may utilize either chicken or vegetable bouillon, complemented by a dash of white vinegar or lemon juice, to achieve a comparable impact.

Q3: Is it permissible to prepare this dish in advance?While the sauce is most flavorful when prepared fresh, it is possible to prepare it and boil the lobster in advance. Reheat the mixture gradually and combine it with freshly prepared pasta prior to serving.
Question 4: What measures can I take to prevent the crustacean from becoming rubbery?Refrain from excessive preparation. Prepare the crustacean until it reaches a state of slight opacity; this process will require only a brief duration.
Q5: What is the most effective method for thawing frozen lobster tails?Refrigerate them overnight or immerse them in frigid water for a duration of 30 to 60 minutes. It is advisable to refrain from utilizing tepid water, as it may adversely impact the texture.

This sumptuous lobster pasta recipe serves as your gateway to a five-star dining experience within the comfort of your own home. It is both uncomplicated and opulent, rendering it an ideal dish to relish in the company of family or friends. Savor the exquisite flavors and the accolades!

Easy Homemade Empanada Recipe: Step by Step Guide

Easy Homemade Empanada Recipe: Step by Step Guide

Empanadas are loved worldwide for their flaky crusts and tasty fillings. Ever thought of making them at home? This guide will show you how to make homemade empanadas easily.

Imagine biting into a warm empanada. The buttery crust and the filling’s flavor are amazing. This recipe is for everyone, whether you’re experienced or new to cooking. You’ll impress your loved ones with your empanada-making skills!

Key Takeaways

  • Discover the secrets to creating authentic, homemade empanadas from scratch
  • Learn essential techniques for preparing the perfect empanada dough and fillings
  • Master the art of assembly, from filling to sealing, for picture-perfect empanadas
  • Explore baking and frying methods to achieve your desired texture and flavor
  • Pair your empanadas with delectable dipping sauces and accompaniments

Ready to start a tasty adventure and learn to make the best homemade empanadas? Let’s begin our journey to making this Latin American treat in your kitchen.

Introduction to Traditional Empanadas: A Latin American Delight

Empanadas are loved for their savory or sweet fillings in Latin American cuisine. They have a long history, loved for centuries across the region. These handheld pastries are filled with a variety of ingredients.

The tradition of making empanadas started in Spain. Many Latin American countries adopted and adapted this tradition. Each country has its own special way of making empanadas, like Argentina and Chile, or Mexico and Colombia.

The dough for empanadas is often made with wheat flour, lard, or butter. It’s a strong base for many fillings. Fillings can be seasoned meats and veggies or sweet treats like dulce de leche or fruit preserves.

Empanadas come in different shapes and sizes. Some are crescent-shaped, while others are circular or square. This variety adds to their charm.

CountryTraditional Empanada Fillings
ArgentinaBeef, onions, olives, hard-boiled eggs
ChileBeef, onions, raisins, hard-boiled eggs
MexicoChicken, potatoes, peas, carrots
ColombiaBeef, potatoes, peas, carrots

Empanadas are loved whether baked, fried, or steamed. They are a comfort food and show the rich heritage of Latin American cuisine. They bring joy to family gatherings and street food vendors alike.

Essential Ingredients for Perfect Empanadas

Making the perfect empanadas needs the right mix of ingredients. From the dough to the fillings, each part is key. Let’s explore the must-haves for your homemade empanadas to stand out.

Dough Ingredients

The empanada dough is the base of this tasty pastry. To get the right texture and taste, you’ll need:

  • All-purpose flour
  • Unsalted butter or lard
  • Salt
  • Warm water
  • Egg (optional, for an enriched dough)

Filling Options and Seasonings

There are countless empanada fillings to choose from. You can pick your favorite flavors. Here are some favorites:

  1. Beef – Ground beef, onions, garlic, and spices
  2. Chicken – Shredded chicken, sautéed veggies, and herbs
  3. Cheese – Melty cheeses like mozzarella, cheddar, or queso fresco
  4. Vegetable – Roasted or sautéed veggies, like potatoes, spinach, or corn

Seasoning the fillings with salt, pepper, cumin, paprika, and more can make them taste amazing.

Required Kitchen Tools

Having the right tools makes making empanadas easy. Here’s what you need:

ToolPurpose
Rolling pinFor shaping and rolling out the dough
Empanada mold or round cookie cutterFor cutting out the dough circles
Baking sheet or empanada trayFor baking the assembled empanadas
Fork or empanada sealerFor sealing and decorating the empanada edges

With these ingredients and tools, you’re ready to make delicious homemade empanadas.

How to Make Empanada Recipe: Complete Guide

Making empanadas from scratch is a fun cooking journey. It’s great for both experienced cooks and beginners. This guide will show you how to make tasty empanada recipes, from the dough to the fillings.

First, get all the ingredients for empanadas ready. Then, follow these simple steps to make your own empanadas:

  1. Prepare the Dough: Mix flour, butter, and salt to make a soft dough. Knead it gently and let it rest for 30 minutes before rolling.
  2. Make the Filling: Cook your filling, like ground beef, chicken, or veggies. Add spices and herbs for extra flavor.
  3. Assemble the Empanadas: Roll out the dough and cut into circles. Put filling in the center, then fold and crimp the edges to seal.
  4. Cook the Empanadas: Bake or fry them until they’re golden. Adjust cooking time and temperature as you like.

By following this step-by-step empanada guide, you can make delicious homemade empanadas. Enjoy them with your favorite sauces or toppings. You’ll love the taste of this Latin American favorite.

Preparing the Perfect Empanada Dough

Making the perfect empanada dough is key to delicious homemade empanadas. This guide will help you mix, rest, and roll the dough to get it just right. You’ll learn how to achieve the ideal dough consistency for your empanada recipe.

Mixing Techniques

The mixing process is crucial for a great empanada dough. Start by mixing dry ingredients like flour, salt, and spices in a big bowl. Then, add wet ingredients like water, oil, or egg slowly. Use your hands or a stand mixer with a dough hook.

Knead the dough until it’s smooth and pliable, about 5-10 minutes. Avoid over-kneading to prevent a tough dough.

Resting and Rolling Tips

  • Let the dough rest at room temperature for 30 minutes to an hour after mixing. This helps the gluten relax, making it easier to roll.
  • When you’re ready to roll, flour your work surface lightly. Use a rolling pin to flatten the dough into thin sheets, about 1/8-inch thick. Be gentle to prevent toughness.
  • If the dough sticks, dust the surface with more flour as needed.

Troubleshooting Common Dough Issues

Empanada dough can sometimes be tricky, but a few fixes can help. If it’s too dry and crumbly, add water a tablespoon at a time. Knead until it’s right. If it’s too sticky, add flour a little at a time until it’s easier to handle.

Dough IssueSolution
Dry and crumblyAdd water, 1 tablespoon at a time, and knead until desired texture
Sticky and wetIncorporate small amounts of flour until dough is more manageable

Mastering dough mixing, resting, and rolling will help you make perfect homemade empanadas. Remember, practice makes perfect. Don’t be afraid to try different methods until you find what works best for you.

Creating Delicious Empanada Fillings

The heart of a great empanada is its filling. You can choose from savory to sweet fillings. Whether you like traditional Latin American flavors or modern twists, making the perfect filling is an art.

Let’s look at some popular empanada fillings that will make your taste buds happy:

Savory Empanada Fillings

  • Ground Beef and Vegetables: A classic mix of ground beef, onions, garlic, and spices. It’s paired with diced potatoes, carrots, and peas.
  • Chicken and Cheese: This filling has shredded chicken, melted cheese, and herbs. It’s creamy and comforting.
  • Spinach and Feta: A vegetarian option with spinach and tangy feta cheese. It’s earthy and creamy.

Sweet Empanada Fillings

  1. Apple and Cinnamon: A sweet mix of diced apples, brown sugar, and cinnamon. It’s aromatic and delicious.
  2. Dulce de Leche: This filling is rich and caramelized. It’s a favorite in Latin America.
  3. Guava and Cream Cheese: A tropical mix of guava and creamy cheese. It’s tangy and sweet.

To make great empanada fillings, balance flavors and textures. Try different mixes and seasonings. Find the perfect filling that makes your empanadas even more delicious.

Mastering the Art of Empanada Assembly

Making the perfect empanada is more than just the dough and filling. The way you assemble it is key to great taste. This guide will show you how to master the art of empanada making, from start to finish.

Filling Techniques

Start by placing the filling in the dough circle’s center. Don’t overfill, as it can leak. Use a spoon to portion the filling, leaving space for sealing.

Try different empanada filling combinations to find your favorite.

Sealing Methods

  • Fold-Over Seal: Fold the dough over the filling and crimp the edges with a fork.
  • Empanada Crimper: Use a tool to make decorative, leak-proof sealing empanadas edges.
  • Wet Finger Seal: Wet your fingers and run them along the dough edges before folding and pressing.

Decorative Edges

Make your empanadas look great with empanada crimping techniques. Use a fork for patterns or pinch and twist for designs. For a pro look, use a crimping tool for scalloped edges.

With these empanada assembly tips, you’ll make perfectly sealed and beautiful empanadas. Try new fillings and edges to make each batch special and tasty.

Cooking Methods: Baked vs. Fried Empanadas

Choosing between baked empanadas and fried empanadas can change how your homemade treats taste and feel. Let’s look at the good and bad of each method. This will help you pick the best way to cook empanadas for you.

Baking Empanadas

Baking is a healthier choice for cooking empanadas. You make the empanadas and bake them until they’re golden and flaky. Baking has its perks:

  • It’s lower in fat than frying
  • It’s simpler, as you don’t need hot oil
  • Baked empanadas are often lighter and more like pastry

But, baking might make the empanadas a bit drier and less crunchy on the outside.

Frying Empanadas

If you want a crispy, golden outside, go for fried empanadas. You fry the empanadas in hot oil until they’re cooked through. The benefits of frying include:

  1. They get a crunchy, golden layer
  2. They cook faster than baking
  3. Frying adds a rich, indulgent taste

The downside of frying is the extra fat and the need to heat and keep the oil at the right temperature.

Whether you prefer baked empanadas or fried empanadas depends on what you like. Try both to see which one you enjoy more.

Best Sauces and Dips for Serving

Empanadas are a delightful Latin American delicacy. The perfect accompaniments can elevate the dining experience. Whether you prefer traditional or modern sauces, there’s a flavorful option to complement your homemade empanadas.

Traditional Accompaniments

One of the most iconic sauces to serve with empanadas is chimichurri. This vibrant green sauce, made with fresh parsley, garlic, olive oil, and a touch of acidity, offers a zesty and herbaceous contrast to the savory pastries. Another classic pairing is a creamy, cool avocado-based sauce, which can balance the richness of the empanada filling.

Modern Sauce Variations

For those seeking a more contemporary spin, try pairing your empanadas with a spicy, tomato-based salsa or a creamy, tangy yogurt-based dip. The versatility of empanadas allows you to experiment with diverse flavors. Try a sweet and smoky barbecue sauce or a bright, citrusy chimichurri with a touch of heat.

FAQ

What are the essential ingredients for making homemade empanadas?

To make homemade empanadas, you need flour, butter or shortening, and water. You also need salt and fillings like ground meat, veggies, cheese, and spices.

How do I prepare the perfect empanada dough?

First, mix flour and salt. Then, cut in the fat. Add water slowly until the dough forms. Let it rest before rolling and cutting.

Can I make empanadas ahead of time?

Yes, you can make empanadas ahead. The dough can chill overnight. Filled empanadas can freeze for up to 3 months before baking or frying.

What’s the difference between baking and frying empanadas?

Baked empanadas are lighter and flakier. Fried ones are crispy and golden. Baking is healthier, while frying is more indulgent.

Popular fillings include ground beef, chicken, pork, and cheese. You can also use veggies like spinach, potatoes, and onions. Sweet fillings like fruit or dulce de leche are also great.

How do I seal and crimp the edges of empanadas?

Use a fork to press and seal the dough. Or, fold and pinch the dough to create patterns.

What are some traditional sauces and dips to serve with empanadas?

Serve empanadas with chimichurri, a green sauce with parsley, garlic, and olive oil. Aji, a spicy green sauce, and various salsas are also great options.

Easy Homemade Curry Chicken Recipe: Step-by-Step Guide

Easy Homemade Curry Chicken Recipe: Step-by-Step Guide

Curry chicken is a favorite in Indian cuisine, loved for its bright flavors and fragrant spices. This guide will show you how to make delicious homemade curry chicken. It’s perfect for both experienced cooks and beginners. You’ll learn how to make authentic, tasty curry chicken right in your kitchen.

Key Takeaways

  • Discover the origins and flavors of traditional curry chicken dishes
  • Learn about the essential ingredients and spice blends for perfect curry chicken
  • Understand the necessary kitchen tools and equipment to streamline your cooking process
  • Explore the best methods for marinating and cooking the chicken to achieve optimal tenderness and flavor
  • Discover the perfect side dishes and serving suggestions to complement your homemade curry chicken

Understanding Curry Chicken: Origins and Flavors

Curry chicken is loved worldwide, coming from India’s rich food traditions. The word “curry” comes from “kari,” a Tamil term for a flavorful sauce. The taste of curry chicken comes from a mix of aromatic spices.

Traditional Curry Spice Blends

Curry chicken’s heart is a mix of spices, each adding its own flavor. Common spices in Indian curry blends include:

  • Turmeric, for its earthy and slightly bitter undertones
  • Cumin, lending a warm, nutty essence
  • Coriander, imparting a subtle citrus-like fragrance
  • Chili Powder, for a touch of heat and spice
  • Ginger, adding a refreshing zing to the blend

Regional Variations of Curry Chicken

Curry chicken’s basic flavors stay the same, but it changes with each region in India. In the south, coconut milk makes it creamy. In the north, spices like cardamom and cloves are used more. These changes show how curry chicken adapts to different places.

Health Benefits of Curry Spices

The spices in curry chicken are not just tasty; they’re also good for you. Turmeric fights inflammation, and ginger helps with digestion. This makes curry chicken a healthy and tasty choice.

Essential Ingredients for Perfect Curry Chicken

Making a tasty curry chicken dish begins with picking the right ingredients. Choosing the chicken and spices is key to a great meal. Let’s look at what you need for the best curry chicken:

Chicken Selection

The base of curry chicken is the chicken itself. Choose boneless, skinless chicken thighs for the best taste. The dark meat of thighs is juicier than chicken breasts, which can dry out in curry sauce.

Curry Ingredients

  • Fresh spices like cumin, coriander, turmeric, and ginger are crucial. They add depth and warmth to the dish.
  • Coconut milk makes the sauce creamy and sweet, adding indulgence.
  • Onions, garlic, and chilies are essential for the sauce’s aroma, balancing the richness.

Choosing top-notch curry ingredients ensures your curry chicken is full of flavor and true to its roots.

Success in curry chicken comes from using quality ingredients. With the right chicken, spices, and flavors, you’ll make a dish that wows everyone.

Kitchen Tools and Equipment You’ll Need

To make a delicious curry chicken dish, you need more than just good ingredients. You also need the right kitchen tools and equipment. This makes cooking easier and more efficient. Let’s look at the essential items you’ll need for your curry chicken journey.

Essential Cookware

The key to a great curry chicken recipe is the right cookware. You’ll need a big, heavy pot or Dutch oven. This helps spread heat evenly. A strong wooden spoon or ladle is great for stirring and serving.

A nonstick skillet is also important. It’s perfect for searing the chicken before adding it to the curry.

Measuring and Prep Tools

When making curry, precision is important. You need the right tools for measuring and prepping. A set of measuring cups and spoons helps you get the right amounts of spices and herbs.

A sharp chef’s knife and cutting board make chopping easy. They’re great for onions, garlic, and other ingredients. A spice grinder or mortar and pestle are also good for grinding spices for extra flavor.

Storage Containers

After you’ve made your curry chicken, you’ll want to store leftovers well. Use airtight containers like glass or BPA-free plastic. These keep the dish fresh and prevent freezer burn.

Having the right cooking utensils, kitchen equipment, and curry preparation tools helps you make a tasty curry chicken dish at home.

Essential CookwareMeasuring and Prep ToolsStorage Containers
Large, heavy-bottomed pot or Dutch oven Sturdy wooden spoon or ladle Nonstick skilletMeasuring cups and spoons Sharp chef’s knife and cutting board Spice grinder or mortar and pestleAirtight glass or BPA-free plastic containers

How to Cook Curry Chicken Recipe

Cooking curry chicken at home is simpler than you think. Follow these steps to make a delicious curry that will wow your loved ones. This curry chicken cooking steps guide is perfect for both newbies and seasoned cooks.

  1. Prepare the Chicken: Start by cutting the chicken into small pieces. Make sure they’re all the same size for even cooking.
  2. Marinate the Chicken: Mix the chicken with your favorite curry recipe instructions, like spices, yogurt, or lemon juice. Refrigerate for at least 30 minutes to soak up the flavors.
  3. Heat the Oil: Heat a tablespoon of oil in a big skillet or wok over medium-high heat.
  4. Brown the Chicken: Put the marinated chicken in the hot oil. Cook until it’s lightly browned on all sides, about 5-7 minutes.
  5. Add the Aromatics: Add diced onions, garlic, and ginger. Cook until they smell great, about 2-3 minutes.
  6. Stir in the Spices: Sprinkle curry spices like cumin, coriander, turmeric, and chili powder. Cook for 1-2 minutes to bring out their scent.
  7. Pour in the Liquid: Add coconut milk, stock, or tomato sauce. Let it simmer.
  8. Simmer and Thicken: Lower the heat and simmer for 15-20 minutes. Stir now and then until the sauce thickens.
  9. Finish with Herbs: Add fresh cilantro or green onions just before serving. It adds a fresh touch.
  10. Serve Hot: Serve your tasty homemade curry guide curry chicken over rice or with your favorite sides.

The secret to a great curry chicken is getting the flavors right and cooking it just right. Follow these easy steps to make a curry chicken dish that’s restaurant-quality, right in your kitchen.

Preparing and Marinating the Chicken

Making the perfect curry chicken starts with good chicken prep and marination. A few simple steps can bring out the best flavors. This way, you get a dish that tastes amazing.

Proper Chicken Cutting Techniques

Start by cutting the chicken into small pieces. This makes sure it cooks evenly and absorbs the curry spice mix well. Remember to cut against the grain for tender and juicy chicken.

Marination Tips and Timing

After cutting, it’s time to marinate the chicken. Let it soak in the spices and acids for at least 30 minutes. Or, for even more flavor, marinate it for up to 4 hours. This lets the curry spice mix tenderize the meat and add that special curry taste.

Best Spice Combinations

  • For a classic Indian taste, mix yogurt, ginger, garlic, cumin, coriander, and garam masala.
  • For a Thai twist, use fish sauce, lime juice, lemongrass, and red curry paste.
  • For a Jamaican flavor, try allspice, thyme, and scotch bonnet peppers.

Trying different spice mixes can lead to many tasty curry chicken flavors. You can find the perfect taste for your liking and cooking adventures.

Cooking Methods and Temperature Guide

Choosing the right cooking method can make a big difference in your curry chicken. Whether you’re simmering on the stovetop or slow-cooking, each method has its own benefits. Let’s look at the different ways to cook curry chicken and the temperatures you should use for the best results.

Stovetop Curry Chicken

The stovetop method is great for quick and tasty curry chicken. Start by searing the chicken in a skillet or Dutch oven. Then, add your spices, onions, and other ingredients. Let it simmer on the stovetop, keeping the heat low, until the chicken is tender and the flavors blend well. This usually takes 30-45 minutes.

Slow Cooker Curry Chicken

The slow cooker is perfect for making rich, flavorful curry chicken with little effort. Just put the chicken, spices, and other ingredients in the slow cooker. Let it cook for 4-6 hours on low or 2-3 hours on high. This way, the flavors meld and the chicken becomes tender.

Instant Pot Curry Chicken

The Instant Pot makes quick and delicious curry chicken. The pressure cooker infuses the chicken with flavors fast. Cook the curry chicken in the Instant Pot for 15-20 minutes on high pressure. Then, let the pressure release naturally for 10-15 minutes before serving.

Cooking MethodTemperatureCooking Time
Stovetop Curry ChickenMedium-low to medium heat30-45 minutes
Slow Cooker Curry ChickenLow or High setting4-6 hours (Low), 2-3 hours (High)
Instant Pot Curry ChickenHigh pressure setting15-20 minutes

No matter the cooking method, adjust the temperature and time to fit your recipe. With a bit of practice, you’ll get your curry chicken just right.

Side Dishes and Serving Suggestions

Enjoying curry chicken is even better with the right sides. Flavors like rice and vegetables can really make the meal pop. They add to the curry’s rich taste.

Rice Pairings

Choosing the right rice is key for curry chicken. Basmati rice is a top pick, as it’s light and fluffy. It absorbs the curry sauce well. Jasmine or brown rice can add more flavor.

Vegetable Accompaniments

  • Sautéed spinach or kale: These greens are fresh and nutritious. They’re great with garlic and lemon.
  • Roasted cauliflower or broccoli: These veggies are tasty when roasted with olive oil and spices.
  • Cucumber raita: This yogurt-based side is cool and refreshing. It’s perfect for balancing the curry’s heat.

Garnishing Tips

Finishing your curry chicken with garnishes can make it look and taste amazing. Here are some ideas:

  1. Chopped cilantro or parsley adds a fresh, herbaceous flavor.
  2. Toasted coconut flakes or crushed cashews add a nice crunch.
  3. A drizzle of yogurt or lime wedges brings a refreshing touch.

Choosing the right sides and garnishes can make your curry chicken meal special. It becomes a feast for the eyes and taste buds.

Storage Tips and Leftover Ideas

Enjoying curry chicken is better with good curry storage and creative use of leftovers. Here are some tips to keep your curry chicken fresh. Also, find out how to use leftovers in new and tasty ways.

Storing Curry Chicken Properly

To keep your curry chicken tasting great, follow these steps:

  • Keep cooked curry chicken in an airtight container in the fridge for 3-4 days.
  • For longer storage, freeze curry chicken in small containers for up to 3 months.
  • When reheating frozen curry chicken, thaw it in the fridge first. Then, warm it gently on the stovetop or in the microwave.

Repurposing Leftover Curry Chicken

Don’t waste leftover curry chicken! Try these fun recipe ideas:

  1. Curry Chicken Salad: Shred or chop leftover curry chicken. Mix it with mayonnaise, diced celery, and spices. It’s perfect for sandwiches or wraps.
  2. Curry Chicken Fried Rice: Cook leftover curry chicken with rice, veggies, and soy sauce. It’s a tasty one-dish meal.
  3. Curry Chicken Noodle Soup: Add leftover curry chicken to a soup with noodles, veggies, and spices. It’s comforting and filling.
Storage MethodShelf Life
Refrigerator3-4 days
FreezerUp to 3 months

By using these curry storage tips and getting creative with leftover curry recipes, you can enjoy curry chicken for a long time. Enjoy every bite and make the most of your cooking.

Conclusion

In this guide, we’ve covered curry chicken’s history, flavors, and health benefits. You now know how to make authentic curry chicken at home. This includes understanding its origins and mastering key ingredients and cooking methods.

Starting your homemade Indian cuisine journey is exciting. Don’t be afraid to try new spice blends and cooking techniques. Each successful dish will boost your kitchen confidence, making you a curry chicken master.

There’s more to explore beyond curry chicken. Try vegetarian curries or regional variations to grow your cooking skills. Learning about Indian cuisine’s diverse flavors will impress your loved ones and deepen your cultural appreciation.

FAQ

What are the main ingredients for making curry chicken?

To make curry chicken, you need chicken, onions, garlic, and ginger. You also need spices like cumin, coriander, turmeric, and chili powder. Don’t forget coconut milk or cream.

How long does it take to prepare and cook curry chicken?

Preparing and cooking curry chicken takes about 45 minutes to 1 hour. This includes marinating and cooking times.

Can I make curry chicken in a slow cooker or instant pot?

Yes, you can make curry chicken in a slow cooker or instant pot. Cooking in a slow cooker takes longer, but it’s just as tasty.

What are some good side dishes to serve with curry chicken?

Good sides for curry chicken include basmati rice and naan bread. Raita (cucumber yogurt salad) and roasted or sautéed veggies are also great choices.

How can I store leftover curry chicken and for how long?

Store leftover curry chicken in an airtight container in the fridge for 3-4 days. You can freeze it for up to 3 months for longer storage.

What are the health benefits of the spices used in curry chicken?

Spices like turmeric, cumin, and chili powder in curry chicken are good for you. They have anti-inflammatory and antioxidant properties, helping your health.

Can I make curry chicken less spicy?

Yes, you can make curry chicken less spicy. Use less chili powder or hot spices. Adding more yogurt or coconut milk can also help balance the heat.

Easy Homemade Flan Recipe: How to Make Flan Recipe

Flan, the classic Spanish custard dessert, has won the hearts of many around the world. It’s known for its silky texture and just the right amount of sweetness. This caramel custard is a favorite in Latin America and Europe. Making this creamy dessert at home is surprisingly easy, letting you enjoy the real taste of a Spanish dessert in your own kitchen.

Key Takeaways

  • Flan is a classic Spanish custard dessert with a silky-smooth texture and delicate sweetness.
  • This recipe provides a simple and straightforward approach to making homemade flan.
  • The key ingredients, including milk, cream, eggs, and caramel, come together to create the perfect custard base.
  • Proper baking techniques and temperature control are essential for achieving the desired texture and consistency.
  • Flan can be customized with various flavor variations and creative twists to suit individual preferences.

Introduction to Classic Spanish Flan

Flan, a traditional egg custard dessert, has a long history in Spanish cuisine. It’s also known as crème caramel or egg custard. For centuries, it has won hearts around the world, crossing cultural lines.

The roots of flan go back to ancient Roman and Arab cooking. These traditions shaped the creamy, caramel-topped dessert we know today in Spain. Over time, flan became a favorite in Spanish homes and restaurants, with many variations and family recipes.

Unlike crème brûlée from France, which has a hard caramel top, Spanish flan is smooth and creamy. It has a delicate caramel sauce that flows down the sides. This makes flan a special treat for the taste buds.

Flan is loved as a simple dessert or a star of a big celebration. Its timeless charm attracts dessert lovers everywhere. It’s also open to new ideas, keeping the classic Spanish dessert alive in our hearts.

Essential Ingredients for Perfect Flan

Making a perfect flan needs the right ingredients. From the creamy base to the caramel top, each part is crucial. Let’s explore what makes a flan truly special.

Types of Milk and Cream Options

The custard base of a flan is key. It’s made with condensed milk and evaporated milk. These milks make the flan creamy and rich. Some recipes add heavy cream or whole milk for extra richness.

Choosing the Right Eggs

Whole eggs are essential for a flan’s smooth texture. Recipes often use 4-6 whole eggs. Eggs make the flan creamy and help it hold its shape.

Caramel Ingredients

The caramel topping is the flan’s crowning glory. It’s made by caramelizing granulated sugar. This sweet sauce adds beauty and a rich flavor to the custard.

With these ingredients, you’re ready to make a perfect flan. It will impress everyone with its taste and look.

Kitchen Tools and Equipment Needed

Creating the perfect flan requires the right tools and equipment. You’ll need ramekins, a baking dish, and a water bath. These items are crucial for making a successful flan.

First, you’ll need ramekins for even cooking. They help keep the flan’s custard-like texture. If you don’t have ramekins, a baking dish works too, but cooking time might vary.

  • Ramekins or a baking dish
  • A large water bath or roasting pan for moist cooking
  • A whisk or hand mixer for mixing custard
  • A saucepan for caramel base
  • A sharp knife and cutting board for prep
Tool/EquipmentPurpose
RamekinsEnables even cooking and signature flan shape
Baking dishCan be used as an alternative to ramekins
Water bathProvides a moist, gentle cooking environment
Whisk/Hand mixerBlends the custard ingredients thoroughly
SaucepanPrepares the caramel base
Knife and cutting boardFor any necessary ingredient preparation

How to Make Flan Recipe: Step-by-Step Guide

Making flan at home is simpler than you might think. You’ll learn how to make the caramel base, mix the custard, and bake it right. This guide will help you make a delicious flan.

Preparing the Caramel Base

Start by caramelizing sugar in a saucepan over medium heat. Swirl the pan as the sugar melts and turns amber, about 5-7 minutes. Pour the hot caramel into ramekins or a baking dish, tilting to coat evenly.

Mixing the Custard

In a large bowl, whisk eggs, water bath baking cream, and sweetened condensed milk together. Pour the custard mixture over the caramel, being careful not to disturb it.

Proper Baking Techniques

Put the ramekins or dish in a roasting pan and add hot water halfway up the sides. This water bath baking method ensures even baking. Bake at 325°F for 40-50 minutes, until the custard is set but still jiggly.

After baking, let the flan cool for about 2 hours. Then, custard straining is needed for a smooth texture. Run a knife around the edges and invert onto a plate.

Tips for Achieving the Perfect Texture

Making a smooth, silky flan is a goal for every home chef. It needs a delicate touch and attention to detail. Here are some expert tips to help you make a heavenly flan.

Proper mixing is key. Whisk the ingredients gently to avoid air pockets. Slowly add the milk and eggs, blending until smooth.

Temperature control is crucial. Flan needs a gentle, even baking temperature. Bake in a water bath to keep it moist and silky.

Patience is important with flan. Let it cool completely before unmolding. This step helps it set and become dense and custard-like.

Follow these tips to make a flan that’s a delight for the senses. It will be smooth, silky, and rich, impressing your guests.

Common Mistakes to Avoid When Making Flan

Making flan is a delicate art. By avoiding common mistakes, you can make a better dessert. We’ll look at how to avoid issues like temperature problems and caramel mishaps for perfect flan every time.

Temperature Control Issues

Temperature is key when making flan. An overcooked flan is dry and rubbery. On the other hand, undercooked custard can curdle. Keep the oven temperature steady and don’t open the door too often. This helps the flan bake evenly.

Caramel Troubleshooting

The caramel base is crucial for a great flan. But, it’s easy to mess up. Burnt caramel tastes bitter, and undercooked caramel doesn’t set right. Watch the caramel closely, stirring often and adjusting the heat to get the right color.

Baking Time Errors

Getting the baking time right is important for a smooth flan. Baking too little makes it watery, while too much makes it rubbery. Use an oven thermometer and stick to the recipe. Adjust the time if your oven is different.

Pay attention to temperature, caramel, and baking time. This way, you’ll make flan that’s smooth, delicious, and sure to impress.

Flavor Variations and Creative Twists

Flan, a classic Spanish custard dessert, is perfect for trying new flavors. The traditional vanilla flan is loved by many. But, you can easily make it into something new and exciting.

Try making a chocolate flan for a rich treat. Add cocoa powder or melted chocolate to the mix. It turns into a creamy, chocolatey delight that chocolate lovers will adore.

For a taste of the tropics, make a coconut flan. Use coconut milk and add shredded coconut to the custard. It gives your flan a sweet, coconut flavor that’s perfect with its creamy texture.

Looking for a caffeine boost? A coffee flan is the answer. Mix in brewed coffee or espresso. It adds a bold coffee taste that balances well with the flan’s sweetness.

There are countless ways to make flan your own. You can add spices like cinnamon or cardamom. Or, try infusing it with citrus or layering it with fruits or nuts. It’s a great way to make a dessert that’s truly yours.

Creating a great flan is all about balance. With a bit of creativity and taste, you can turn a simple flan into a show-stopping dessert. It’s sure to impress your loved ones.

Storage and Serving Suggestions

Making the perfect flan is an art. But it doesn’t stop there. The right storage and serving can make your flan a true masterpiece. Let’s look at how to keep it smooth and flavorful, and how to present it in new ways.

Proper Refrigeration Methods

To keep your flan creamy, store it right. After it’s chilled flan and unmolded, put it in an airtight container. Refrigerate it for 3-4 days. This keeps the custard fresh and prevents it from drying out or getting a bad skin.

Plating and Presentation Ideas

Adding garnishes and unmolding flan can make it look amazing. Try drizzling caramel sauce, sprinkling toasted nuts, or adding fresh berries. For a fancy look, serve it with vibrant fruit coulis or compote.

Garnish IdeaFlavor Pairing
Caramel SauceClassic, Indulgent
Toasted AlmondsNutty, Crunchy
Fresh RaspberriesTart, Refreshing
Citrus ZestBright, Aromatic

Try different garnishing desserts to find the best match for your flan.

Make-Ahead Tips and Preparation Timeline

Flan is a delightful dessert that can be prepared in advance. It’s perfect for meal prep or busy schedules. With a few simple tips, your homemade flan will always have the perfect texture and flavor.

Preparation Timeline

For the best results, follow this timeline when making flan in advance:

  1. 1-3 days ahead: Prepare the caramel base and let it cool completely. This allows the caramel to thicken and develop its flavor.
  2. 1 day ahead: Make the custard and pour it into the prepared ramekins or baking dish. Cover and refrigerate overnight. This lets the flavors meld and the texture firm up.
  3. 2-3 hours before serving: Remove the flan from the fridge and let it come to room temperature. This ensures the custard is creamy and silky when served.

Make-Ahead Flan Tips

  • Prepare the caramel base and custard up to 3 days in advance for maximum meal prep desserts convenience.
  • Cover the flan tightly with plastic wrap or foil to prevent the custard from drying out during refrigeration.
  • For the best advance baking results, avoid baking the flan more than 1 day in advance. The texture and flan shelf life can be affected.

By following these simple make-ahead tips and preparation timeline, you can enjoy the delicious, creamy goodness of homemade flan without the stress of last-minute baking. Impress your guests or satisfy your sweet tooth with this classic Spanish dessert!

Dietary Modifications and Substitutions

Making the perfect flan can be fun, but what if you need special dietary options? Don’t worry, we’ve got you covered. We’ve found ways to make sure everyone can enjoy the creamy, custard-like goodness of flan.

Dairy-Free Options

If you’re lactose-free or vegan, lactose-free flan and vegan flan are great choices. Just replace the usual dairy with plant-based options. Here are some ideas:

  • Use coconut milk or almond milk instead of cow’s milk
  • Try cashew cream or coconut cream for heavy cream
  • Use egg replacer or silken tofu for eggs

These changes make a creamy and tasty lactose-free flan or vegan flan. You’ll love the flavor and texture.

Sugar Alternatives

If you’re on a low-carb or keto diet, regular flan might not fit. But, you can still enjoy a delicious keto flan. Just swap regular sugar for low-carb sweeteners. Here are some options:

  1. Erythritol or xylitol work as a one-to-one sugar substitute
  2. Stevia or monk fruit extract offer a milder sweetness
  3. Try mixing these alternatives to find your perfect taste

These sugar swaps let you enjoy a creamy keto flan. It meets your dietary needs while still being delicious.

Troubleshooting Your Flan Recipe

Making the perfect flan can be tricky, but we’re here to help. If your flan isn’t setting right, or if it’s grainy, we’ve got tips for you. Our expert advice will guide you to a successful flan every time.

Temperature control is key. If your flan isn’t setting, check the oven temperature and baking time. Try increasing the oven temperature and baking a bit longer. This will help the custard set properly.

On the other hand, if your flan feels rubbery or overcooked, the oven might have been too hot. Or you might have baked it for too long. Adjust these factors to get the right texture.

Caramel can be challenging, but don’t give up. If your caramel isn’t working, tweak the heat or cooking time. Making caramel takes patience. Rushing it can result in bitterness or uneven cooking. With practice, you’ll master caramel-topped flans.

FAQ

What is the origin and history of flan?

Flan comes from ancient Roman and Moorish cuisines. It’s also known as crème caramel in French. This custard dessert is loved in many Latin American countries, with each place adding its own twist.

What are the key ingredients needed to make the perfect flan?

To make flan, you need milk, cream, eggs, and sugar. The type of milk and the quality of eggs affect the texture and taste. Choosing the right ingredients is key for a creamy flan.

What kitchen tools and equipment are required to make flan?

You’ll need ramekins or a baking dish, a saucepan for caramel, and a water bath or roasting pan. A strainer helps make the custard smooth.

How do you properly bake flan to achieve the perfect texture?

Use a water bath to bake flan for even cooking. This method keeps the custard smooth. It’s important to control the temperature and baking time to avoid overcooking.

What are some common mistakes to avoid when making flan?

Watch out for temperature issues, caramel problems, and baking time mistakes. These can cause overcooked caramel, curdled custard, or a dry texture. Paying close attention to the recipe can help avoid these problems.

Can flan be made in advance and stored for later?

Yes, flan can be made ahead and stored in the fridge for days. Use plastic wrap or an airtight container to keep it fresh. When you’re ready, unmold and garnish it.

Are there any dietary modifications or substitutions available for making flan?

Flan can be made for different diets. Use plant-based milk and cream for dairy-free options. Try sugar substitutes like erythritol or stevia for low-sugar or keto versions.

Top 20 Easy & Delicious Beef Recipes for Dinner

Make your weeknight dinners better with our top 20 easy and tasty beef recipes. Whether you want a classic dish or something new, we’ve got you covered. These recipes are quick, easy, and perfect for busy families and home cooks.

Key Takeaways

  • Discover a range of beef recipes suitable for weeknight dinners
  • Explore a diverse selection of cooking methods, including stovetop, oven, slow cooker, and instant pot
  • Find both classic and innovative beef dishes to satisfy various culinary preferences
  • Enjoy easy-to-follow recipes that cater to busy home cooks
  • Elevate your dinner game with mouthwatering and family-friendly beef recipes

Quick and Simple Beef Recipes for Busy Weeknights

Weeknights can be busy, and time is precious. That’s why these easy beef recipes are perfect. They offer big flavor without the hassle. Enjoy one-pan wonders and 30-minute meals that are great for families on the go.

One-Pan Beef Dishes

These one-pan beef recipes make cleanup easy. Try Beef and Broccoli Stir-Fry or Cheesy Beef and Macaroni Skillet. They’re quick to make and fill your plate with a complete meal.

30-Minute Beef Meals

When time is tight, these 30-minute beef recipes save the day. Savor Teriyaki Beef Lettuce Wraps, Beef and Vegetable Fried Rice, or Beef Taco Skillet. They’re quick, tasty, and packed with nutrients.

Make-Ahead Options

Prep ahead to ease weeknight stress. Slow Cooker Beef Stroganoff and Beef and Broccoli Meal Prep Bowls are great for meal prep. They let you enjoy a delicious meal with little effort.

Essential Kitchen Tools for Perfect Beef Cooking

To cook delicious beef at home, you need the right tools. From precise cooking tools to versatile cookware, these items are key. They help you achieve top-notch results. Let’s look at the must-have tools for beef lovers.

Meat Thermometer: A Crucial Companion

An accurate meat thermometer is the first step to perfect beef. It removes the guesswork, ensuring your beef is always juicy and tender.

Cast-Iron Skillet: The Searing Superstar

A high-quality cast-iron skillet is a must for beef cooks. It can handle high heat, giving your beef a beautiful sear. This sear locks in flavor and adds a delightful crust.

Sharp Knives: The Key to Precision Cutting

Sharp, high-quality knives are crucial for beef prep. They make slicing steaks, dicing onions, and garlic easy. Sharp blades preserve the meat’s natural textures and juices.

Slow Cooker: The Hands-Off Tenderizer

A reliable slow cooker is essential for tender beef dishes. It makes pot roasts, stews, and braises easy to make with little effort.

ToolImportanceProper Usage
Meat ThermometerEnsures perfectly cooked beef every timeInsert the thermometer into the thickest part of the beef, avoiding bone, and check the internal temperature
Cast-Iron SkilletDelivers a delightful sear and crust on beefPreheat the skillet over high heat, add a small amount of oil, and sear the beef until a golden-brown crust forms
Sharp KnivesEnables precise cutting and preserves the natural texture and juices of beefUse sharp, high-quality knives to slice, dice, or mince beef as needed for your recipe
Slow CookerCreates mouthwatering, tender beef dishes with minimal effortAdd your beef and other ingredients to the slow cooker, set the desired cooking time and temperature, and let the magic happen

With these essential beef cooking equipment, kitchen gadgets for meat, and best tools for cooking beef, you’ll master beef cooking. You’ll be able to make delicious, restaurant-quality meals at home.

Classic Ground Beef Recipes for Family Dinners

Gather the family around the table for classic ground beef recipes. Enjoy hearty casseroles, satisfying pasta dishes, and quick skillet meals. These favorites will please both adults and kids. Discover a delicious collection of ground beef recipes that will become family staples.

Comforting Casseroles

Bake a classic shepherd’s pie with ground beef, veggies, and mashed potatoes for a cozy meal. Or try a savory beef and noodle casserole with tender noodles, ground beef, and creamy sauce. These casseroles are perfect for family-friendly meals that are easy and satisfying.

Hearty Pasta Dishes

Elevate your pasta night with spaghetti bolognese, a rich, meaty tomato sauce made with ground beef recipes. For a heartier option, enjoy a baked lasagna with ground beef, cheese, and flavorful sauce. These comfort food pasta dishes will be family favorites.

Quick Skillet Meals

For quick meals, try beef and rice burritos or classic hamburger helper. These ground beef recipes are perfect for busy weeknights. Serve with a fresh salad for a complete and satisfying family-friendly meal.

Slow Cooker and Instant Pot Beef Recipes

Busy people love slow cooker and instant pot beef recipes. They make tough beef tender and tasty with little effort. You can make comforting pot roasts or hearty beef stews easily. These recipes are great for crockpot beef recipes and instant pot beef meals ready when you are.

Slow cooker and instant pot recipes are amazing because they’re easy. Just put the ingredients in and let it cook. You’ll get a set-and-forget dinner that’s full of flavor and tender.

There are many recipes to try, like pot roasts, beef stews, and pulled beef sandwiches. These recipes are a game-changer for beef lovers. Try them out and find your new favorite crockpot beef recipe or instant pot beef meal.

Steakhouse-Quality Beef Recipes at Home

It’s easier than you think to make restaurant-style beef at home. A few key techniques can take your homemade steak to gourmet levels. Let’s uncover the secrets to making steakhouse-quality beef at home.

Perfect Marinade Techniques

The marinade is key to adding rich flavors to your beef. Try different marinades like red wine and herbs or bold Asian sauces. Marinating for 30 minutes to 24 hours can make your beef tender and flavorful.

Temperature Guide for Different Cuts

Getting the perfect doneness is essential. Use a meat thermometer to check the internal temperature. Here’s a guide for different cuts:

  • Filet Mignon: 120-125°F for medium-rare, 130-135°F for medium
  • Ribeye: 125-130°F for medium-rare, 135-140°F for medium
  • New York Strip: 130-135°F for medium-rare, 140-145°F for medium

Plating and Presentation Tips

The final touch is presentation. Slice your beef against the grain and serve on a warm plate. Add fresh herbs, roasted veggies, or a pan sauce drizzle. This will make your steak look and taste like it’s from a fancy restaurant.

Mastering these techniques lets you enjoy steakhouse-quality beef at home. Try different marinades, follow the temperature guide, and focus on presentation. This will make your dining experience unforgettable.

Budget-Friendly Beef Recipes

Creating tasty beef dishes doesn’t have to cost a lot. This section offers a range of affordable beef meals, cheap beef dinners, and economical meat recipes. These dishes are sure to please your taste buds without emptying your wallet.

Using less expensive cuts of meat, like chuck roast or flank steak, is key. These cuts can be turned into delicious meals with the right methods and ingredients. Adding budget-friendly veggies, grains, and legumes also helps make your beef go further. This way, you get full, tasty meals without spending a lot.

We’ve picked our top affordable beef recipes for you. These dishes are simple to make and full of flavor. From cozy beef stew to spicy fajitas, they show you can enjoy beef without spending too much.

RecipeIngredientsCost per Serving
Slow Cooker Beef StroganoffChuck roast, mushrooms, sour cream, egg noodles$3.50
Beef and Broccoli Stir-FryFlank steak, broccoli, rice, soy sauce$4.00
Baked Meatballs with Tomato SauceGround beef, breadcrumbs, eggs, canned tomatoes$2.75

With a bit of creativity and smart shopping, you can make cheap beef dinners that are easy on your wallet. Try out these economical meat recipes and discover a world of tasty, affordable beef meals for your family.

International Beef Recipes from Around the World

Start a global food journey with our tasty beef recipes from different places. You’ll find dishes from Asia, the Mediterranean, and Latin America. These recipes show how beef can be enjoyed in many ways, crossing borders.

Asian-Inspired Dishes

Discover the bold tastes of Asian beef recipes. Try Korean bulgogi, a marinated beef dish that’s loved in Korea. Enjoy the mix of sweet and savory in Chinese beef and broccoli, a stir-fry classic. And, experience the spicy flavors of Indian beef curry, a dish that feels like a trip to India.

Mediterranean Favorites

Explore the Mediterranean’s rich flavors. Try Greek moussaka, a layered dish with beef, eggplant, and creamy sauce. Enjoy the hearty taste of Italian beef ragu with pasta. And, savor the fresh herbs in Turkish beef kebabs, grilled to perfection.

Latin American Specialties

Discover the lively tastes of Latin American beef recipes. Taste the smoky flavor of Argentine asado, a barbecue feast. Enjoy the fresh, zesty Mexican beef tacos with their mix of toppings. And, try the comforting Brazilian beef stew, filled with unique spices.

These global beef recipes are your ticket to explore international cuisine. Whether you crave an Asian dish, a Mediterranean classic, or a Latin American specialty, we have it all. Our collection will take you on a flavorful journey around the world.

Healthy and Nutritious Beef Recipes

In the world of beef dishes, balance and nutrition are key. You can enjoy beef’s rich flavors while staying healthy. Our collection of lean beef recipes, low-calorie beef meals, and nutritious meat dishes bring together delicious taste and nourishing ingredients.

Lean cuts of beef, like sirloin, flank steak, and 93% lean ground beef, are packed with protein, iron, and vitamins. Pairing these with fresh veggies, whole grains, and healthy fats makes low-calorie beef meals that are both tasty and healthy.

  • Grilled Beef and Vegetable Skewers: Tender beef, bell peppers, zucchini, and onions, marinated in a tangy, low-sodium marinade for a nutrient-dense and flavorful dish.
  • Beef and Broccoli Stir-Fry: Lean beef strips and broccoli florets sautéed in a savory, low-sodium sauce, served over a bed of quinoa for a boost of fiber and protein.
  • Beef and Lentil Chili: Ground lean beef combined with fiber-rich lentils, diced tomatoes, and a blend of spices for a hearty, nutritious meat dish.

Exploring these healthy and nutritious beef recipes lets you enjoy beef’s taste while focusing on your health. Savor the flavors, nourish your body, and take a balanced approach to cooking.

Conclusion

This beef recipe roundup shows how versatile and tasty beef can be. It has everything from quick weeknight meals to fancy steakhouse dishes. These recipes are perfect for anyone who loves beef.

Looking for something affordable, healthy, or with international flavors? This collection has it all. With the right cooking skills and tools, you can make your beef dishes stand out. Impress your family and friends with your culinary skills.

Check out this beef recipe roundup and try new things. Find your new go-to dinner inspiration. Remember, the secret to great cooking is in the details. Follow our cooking tips for perfect beef every time. Share your favorite beef recipes and let’s celebrate this amazing protein together.

FAQ

Popular beef dinner recipes include beef stroganoff, shepherd’s pie, and beef stew. Also, try Korean beef bowls, Mediterranean stuffed peppers, and Latin-inspired beef fajitas for something new.

What are some quick and easy beef recipes for busy weeknights?

For quick weeknight meals, try one-pan beef dishes and 30-minute meals. Make-ahead recipes like beef and broccoli stir-fry, beef and rice burritos, and slow cooker beef and noodles are great too.

What are the essential kitchen tools for cooking beef?

Key tools for cooking beef are a meat thermometer, cast-iron skillet, slow cooker or instant pot, and a sharp knife. These ensure perfect results in doneness, searing, and tenderness.

What are some classic ground beef recipes for family dinners?

Classic ground beef recipes include shepherd’s pie, spaghetti bolognese, and beef and broccoli stir-fry. These are comforting and easy to make for family dinners.

What are some slow cooker and instant pot beef recipes?

Slow cooker and instant pot recipes offer tender pot roasts, flavorful stews, and pulled beef sandwiches. They’re perfect for those with busy schedules.

How can I recreate steakhouse-quality beef dishes at home?

To make steakhouse-quality beef at home, focus on marinades and achieving the right doneness. Pay attention to presentation to impress your guests.

What are some budget-friendly beef recipes?

Budget-friendly beef recipes use less expensive cuts like chuck roast or flank steak. They also use affordable ingredients to make tasty meals without breaking the bank.

What are some international beef recipes from around the world?

International beef recipes include Korean bulgogi, Greek moussaka, and Argentine asado. These dishes showcase a variety of global flavors.

What are some healthy and nutritious beef recipes?

Healthy beef recipes use lean cuts, are low in carbs, and include lots of veggies. They focus on both taste and nutrition.

Classic Green Bean Casserole Recipe – Holiday Favorite

The green bean casserole is a big name in American food, especially during holidays. It’s a favorite at Thanksgiving and Christmas, bringing families together. Its mix of green beans, mushroom sauce, and fried onions is loved by many.

Looking for a dish that everyone will enjoy? The green bean casserole is perfect. Its recipe has stayed the same since the 1950s. This keeps its taste and look loved by many at holiday meals.

Key Takeaways

  • The green bean casserole is a classic American holiday dish, popular at Thanksgiving and Christmas.
  • It features a simple combination of tender green beans, creamy mushroom sauce, and crunchy fried onions.
  • The recipe has remained largely unchanged since its creation in the 1950s, making it a beloved tradition.
  • The dish is a crowd-pleasing side that brings families together during the holiday season.
  • Preparing a delicious green bean casserole is a straightforward process that can be easily mastered by home cooks.

Introduction to the Beloved Holiday Side Dish

The Campbell’s green bean casserole is a favorite holiday dish in America. It was made in 1955 by Dorcas Reilly, a Campbell Soup Company home economist. Her recipe quickly became a Thanksgiving and Christmas favorite, making it a true comfort food classic.

History of Green Bean Casserole

Dorcas Reilly created the Campbell’s green bean casserole to show off Campbell’s cream of mushroom soup. It was a huge success, becoming a favorite for quick, tasty side dishes.

Why It’s a Holiday Essential

The Campbell’s green bean casserole brings back memories and comfort. It’s made with green beans, mushroom sauce, and crispy onions. This mix is both comforting and indulgent, making it a holiday table staple.

Essential Ingredients for Perfect Green Bean Casserole

The classic green bean casserole is a favorite holiday side dish. It combines fresh green beans, which add a crisp texture. The dish also includes cream of mushroom soup, making it rich and creamy.

A bit of milk and a splash of soy sauce balance the creaminess. A generous amount of black pepper adds flavor. The French’s fried onions add a crunchy, savory finish.

IngredientAmount
Fresh green beans4 cups, trimmed and cut into 1-inch pieces
Cream of mushroom soup1 (10.5 oz) can
Milk1/2 cup
Soy sauce1 tablespoon
Black pepper1/2 teaspoon
French’s fried onions2.8 oz (1 1/3 cups)

With these ingredients, you can make a classic green bean casserole. It’s sure to impress your guests and become a holiday tradition.

Kitchen Equipment and Tools Needed

To make the classic green bean casserole, you need some key kitchen tools. The right baking dish and utensils are crucial. They help get the perfect texture and flavor.

The right baking dish is essential for a classic green bean casserole. Look for a casserole dish that holds 2 to 3 quarts. This size fits the green beans, creamy sauce, and crispy topping well. Choose a dish made of sturdy, oven-safe material like glass, ceramic, or metal for even heating and easy cleanup.

Essential Utensils

  • A large mixing bowl for tossing the green beans, sauce, and other ingredients
  • A colander for draining the cooked green beans
  • A spatula or spoon for stirring and serving the casserole
  • A sharp knife for trimming the green beans, if needed
  • Measuring cups and spoons for accurately portioning the ingredients
ItemRecommended Size or Type
Casserole Dish2 to 3 quarts, oven-safe material (glass, ceramic, or metal)
Mixing BowlLarge, for tossing the casserole ingredients
ColanderFor draining cooked green beans
Spatula or SpoonFor stirring and serving the casserole
KnifeSharp, for trimming green beans if needed
Measuring Cups and SpoonsFor accurately portioning ingredients

With the right baking dish and essential utensils, you’re ready to make a delicious green bean casserole. It’s perfect for your holiday gathering.

Green Bean Casserole Recipe

Make your holiday feast special with our easy green bean casserole. It’s a favorite at Thanksgiving and Christmas. Follow our steps to make a casserole that everyone will love.

To start, get the key ingredients:

  • 2 cans (14.5 oz each) of green beans, drained
  • 1 can (10.5 oz) of cream of mushroom soup
  • 1/2 cup of milk
  • 1/4 teaspoon of black pepper
  • 1 1/3 cups of French fried onions

Preheat your oven to 350°F. Mix the green beans, cream of mushroom soup, milk, and black pepper in a big bowl. Stir until it’s smooth.

Put the green bean mix in a 1 1/2-quart baking dish. Spread the French fried onions on top. Bake for 25 minutes until the onions are golden and the casserole bubbles.

Watch the casserole closely during the last minutes. Take it out when the onions are crispy. Let it cool a bit before serving.

Enjoy this easy green bean casserole at your holiday meal. It’s a mix of tender green beans, creamy sauce, and crunchy onions that everyone will love.

Preparation and Cooking Tips

Making the perfect green bean casserole needs careful planning. This includes picking the right ingredients and storing leftovers well. Here are some tips to help your holiday dish be a hit every time.

Selecting Fresh vs Frozen Green Beans

Choosing between blanching green beans fresh or frozen is up to you. Fresh beans give a crunchy texture and bright color. But, they need more prep work. Frozen beans are easy to use and still taste great.

Whether you pick fresh or frozen, make sure to clean and trim them well before cooking.

Making Ahead Instructions

Make-ahead casserole recipes are a lifesaver. They let you prepare the dish early, saving time and stress. Just put everything together, cover it, and chill for up to 3 days.

When you’re ready to bake, let it sit at room temperature for 30 minutes first.

Storage Guidelines

Properly storing leftovers is crucial for enjoying your casserole later. Cool it down completely, then put it in a sealed container. Keep it in the fridge for up to 4 days or freeze for 3 months.

To reheat, thaw it in the fridge if it’s frozen. Then, bake at 350°F until it’s hot and ready to eat.

Preparation TipExplanation
Blanch Fresh Green BeansQuickly boiling the fresh green beans helps retain their crisp texture and vibrant color.
Make-Ahead CasseroleAssembling the casserole in advance saves time on the day of serving and allows the flavors to meld.
Proper Leftovers StorageStoring the casserole in an airtight container in the fridge or freezer ensures it stays fresh for days or weeks.

Customization Options and Variations

The classic green bean casserole is a holiday favorite. Its beauty comes from its versatility. You can add unique twists or meet dietary needs in many ways.

Adding bacon is a popular choice. For a bacon green bean casserole, sauté crispy bacon. Then, mix it into the casserole before baking. This adds a smoky flavor and crispy texture that pairs well with green beans.

For a vegan green bean casserole, swap the cream of mushroom soup. Use a creamy cashew-based sauce or vegan mushroom gravy. This keeps the rich and comforting flavor.

Gluten-free guests can enjoy it too. Just use gluten-free flour or cornstarch for thickening. Replace fried onions with crushed gluten-free crackers or breadcrumbs.

There are endless customization options. Try adding mushrooms, caramelized onions, or roasted garlic for more flavor. The green bean casserole can be made to please everyone’s taste.

Common Mistakes to Avoid

Making the perfect green bean casserole is all about balance. Avoiding common mistakes can make a big difference. One big issue is soggy green beans, often caused by overcooking or using low-quality ingredients. Another problem is a runny casserole filling, which can happen if the ingredients are not balanced right or if it’s baked for too long.

Troubleshooting Tips

If your green beans are soggy, try these tips:

  • Use fresh, crisp green beans instead of canned or frozen.
  • Blanch the beans briefly before assembling the casserole to ensure they stay firm and vibrant.
  • Avoid overcooking the casserole, as this can lead to mushy, waterlogged beans.

For arunny casserole, consider these tips:

  1. Reduce the amount of liquid in the recipe, such as the cream of mushroom soup or milk.
  2. Thicken the filling with a bit of cornstarch or flour before baking.
  3. Bake the casserole at a higher temperature to help evaporate excess moisture.

Achieving the Ideal Texture

The secret to a great green bean casserole is finding the right balance. You want crisp-tender beans and a creamy, luscious filling. Stick to the recipe, adjust cooking times as needed, and watch the casserole’s consistency while it bakes. With practice and these tips, you’ll make a dish that everyone will love.

Nutritional Information and Dietary Considerations

The classic green bean casserole is a holiday favorite. But, it’s key to look at its nutrition and dietary impact. We’ll examine the nutritional facts and healthier options for different diets.

A single serving of the traditional green bean casserole has about 150 calories. Most of these calories come from the creamy mushroom soup and fried onions. It also has a lot of sodium, which is a concern for those watching their salt.

For a low-sodium diet, use low-sodium cream of mushroom soup. Choose fresh or frozen green beans over canned ones. Making your own crispy onion topping can also lower sodium.

For healthier alternatives, try a plant-based sauce with Greek yogurt or low-fat milk. Use baked or air-fried onions to reduce fat and calories.

NutrientTraditional Green Bean CasseroleHealthier Alternative
Calories150 calories per servingApproximately 100 calories per serving
FatHigh in saturated and trans fatsLower in saturated and trans fats
SodiumHigh in sodium (up to 800 mg per serving)Reduced sodium (400-500 mg per serving)

By choosing wisely and trying healthier options, you can enjoy green bean casserole while considering your diet. A few tweaks can make this holiday dish more nutritious.

Serving Suggestions and Pairings

The classic green bean casserole is a versatile dish that pairs beautifully with many holiday favorites. It complements the flavors of roasted turkey, glazed ham, or baked chicken. This makes it a must-have on any Thanksgiving menu or Christmas dinner table.

Complementary Holiday Dishes

For a complete Thanksgiving feast, serve the green bean casserole with mashed potatoes, stuffing, cranberry sauce, and dinner rolls. This mix creates a harmonious blend of textures and flavors. It will delight your guests. The casserole also adds a welcome touch to a Christmas dinner spread, alongside roasted root vegetables, candied sweet potatoes, and a decadent holiday ham.

Garnishing Ideas

  • Top the casserole with a sprinkle of crispy fried onions or panko breadcrumbs for a delightful crunch.
  • Garnish with fresh parsley, thyme, or chives to add a pop of color and herbaceous aroma.
  • Drizzle a touch of balsamic glaze or a sprinkle of grated Parmesan cheese for an extra layer of flavor.
  • For a festive touch, arrange the casserole in a baking dish and top it with a few sprigs of fresh rosemary or a dusting of paprika.

By pairing the green bean casserole with complementary holiday dishes and adding creative garnishes, you can elevate this classic side dish. It becomes a standout feature on your Thanksgiving menu or Christmas dinner table.

Thanksgiving MenuChristmas Dinner SidesCasserole Toppings
Roasted TurkeyGlazed HamCrispy Fried Onions
Mashed PotatoesRoasted Root VegetablesPanko Breadcrumbs
StuffingCandied Sweet PotatoesFresh Parsley
Cranberry SauceDinner RollsBalsamic Glaze
Dinner RollsGreen Bean CasseroleGrated Parmesan

Reviews and Success Stories

The classic green bean casserole recipe is a favorite for many families in the United States. People love its tasty flavor and how easy it is to make. Sarah Wilson, a mom of three, says, “This recipe is a must-have at our Thanksgiving. It’s a hit with everyone, and it’s so easy to make.”

Many families have made this casserole a big part of their holiday traditions. Emily Garcia, a long-time fan, says, “Making this casserole is a tradition for us. It’s not Thanksgiving without it. Everyone looks forward to enjoying it together.”

Home cooks who have made this recipe have great things to say. Jessica Nguyen says, “This is my favorite holiday recipe now. It’s loved by all, and the flavors are amazing.” The green bean casserole is a beloved dish that brings families together during the holidays.

FAQ

What is the history of the classic green bean casserole?

Dorcas Reilly created the green bean casserole in 1955 at Campbell’s Soup Company. It quickly became a favorite for holidays. It’s loved for its simple ingredients and warm flavors.

Why is green bean casserole a holiday essential?

Green bean casserole is a holiday favorite. It’s a classic comfort food. The mix of green beans, mushroom sauce, and fried onions makes it a hit.

What are the essential ingredients for the perfect green bean casserole?

You need fresh or frozen green beans, cream of mushroom soup, milk, soy sauce, black pepper, and French’s fried onions for the classic recipe.

What kitchen equipment and tools are needed to make green bean casserole?

You’ll need a casserole dish, a mixing bowl, and a colander. Also, a spoon, whisk, and can opener are necessary.

How do you make green bean casserole from scratch?

Start by blanching the green beans. Then mix the soup, milk, soy sauce, and pepper. Combine everything and bake until hot and the topping is crispy.

What are some tips for preparing and cooking green bean casserole?

Use fresh or frozen green beans and blanch them for the best texture. You can also make it ahead of time. Don’t forget to store leftovers properly.

How can you customize or vary the classic green bean casserole recipe?

You can add bacon or mushrooms to make it your own. There are also vegan and gluten-free versions for different diets.

What are common mistakes to avoid when making green bean casserole?

Watch out for a soggy casserole. Tips for the right texture and consistency are important.

What are the nutritional facts and health considerations for green bean casserole?

Green bean casserole has calories, fat, and sodium. But, you can make it healthier with low-sodium ingredients or different cooking methods.

What holiday dishes pair well with green bean casserole?

It goes well with many dishes, like roasted turkey and mashed potatoes. You can also garnish it to make it look better.

Classic Pasta and Peas Recipe: A Quick Italian Meal

Pasta e piselli, or pasta and peas, is a beloved dish worldwide. It’s a simple yet flavorful meal that shows the power of quality ingredients and traditional cooking. What makes this dish so special? Let’s explore its captivating history and why it’s so irresistible.

Key Takeaways

  • Pasta e piselli is a classic Italian comfort food dish featuring pasta and fresh peas
  • The recipe is quick and easy to prepare, making it an ideal weeknight dinner option
  • This one-pot meal is packed with flavor and nutrition, making it a versatile and satisfying choice
  • Pasta e piselli has deep roots in traditional Italian home cooking and Mediterranean cuisine
  • Selecting the right ingredients and following a few simple techniques can ensure the perfect pasta and peas dish

What makes pasta and peas such an enduring and beloved dish in Italian cuisine? Discover the cultural significance and culinary secrets behind this timeless classic.

Introduction to Traditional Italian Pasta e Piselli

Pasta e piselli is a classic Italian dish with deep roots in the country’s culinary history. It’s a simple yet flavorful mix of pasta and peas. This dish shows the importance of traditional recipes in Italy’s Mediterranean diet.

Origins in Italian Home Cooking

Pasta e piselli started as peasant food. Italian families made it with what they had. Peas were a common ingredient, used in many dishes, including this one.

Cultural Significance in Mediterranean Cuisine

Now, pasta e piselli is a key part of Italian traditional recipes and the Mediterranean diet. It’s known for its simplicity and use of fresh ingredients. This dish is loved in Italian homes, showing the country’s culinary traditions.

Essential Ingredients for the Perfect Pasta and Peas

Making a great pasta and peas dish needs the right ingredients. You need the best pasta shape and the freshest peas. Each part is key to a tasty and balanced meal.

The pasta is the base of this Italian classic. Recipes often use small shapes like ditalini or tubetti. But, you can try other shapes like orecchiette or penne. Choose a semolina-based pasta for a firm bite.

Fresh peas are the main attraction. They’re sweeter and tender than frozen peas. Look for the plumpest, greenest peas at markets or stores when they’re in season.

The dish also needs olive oil and Parmesan cheese. Use extra-virgin olive oil for a rich flavor. Freshly grated Parmesan adds a savory taste. And, garlic is essential for its aroma.

With these ingredients, you’re ready to make a delicious pasta and peas dish. It will be a true taste of Italian home cooking.

Kitchen Tools and Equipment Needed

To make a tasty pasta and peas dish, you need some key tools. A pasta pot and a colander are must-haves. They help you cook like a pro and make your meal feel like it’s from Italy.

Essential Cookware

  • A large pasta pot or Dutch oven for boiling the pasta
  • A colander for draining the cooked pasta
  • A saucepan or skillet for sautéing the peas and other ingredients
  • A sharp chef’s knife for chopping fresh herbs and vegetables
  • A sturdy wooden spoon for stirring and mixing the pasta and sauce

Optional Kitchen Gadgets

Some cooking utensils can make your pasta and peas dish even better:

  1. A kitchen scale for accurately measuring ingredients
  2. A garlic press for finely mincing garlic cloves
  3. A vegetable peeler for shaving Parmesan cheese or other garnishes
  4. A food processor or blender for creating a smooth, creamy sauce

Measuring Tools

Getting the measurements right is key for a great pasta and peas dish. Make sure you have these tools:

  • Liquid measuring cups for accurate portioning of liquids
  • Dry measuring cups and spoons for measuring dry ingredients like pasta and herbs
  • A kitchen scale for weighing ingredients like fresh peas

With the right cooking utensils, pasta pot, colander, and kitchen scale, you’re ready to make a delicious pasta and peas dish.

Step-by-Step Pasta and Peas Recipe

Get ready for a tasty pasta adventure with our Pasta and Peas recipe. This classic Italian dish pairs perfectly cooked pasta with fresh peas. Follow our easy steps to make a meal that’s full of Mediterranean flavor.

  1. Start by boiling a large pot of salted water. Add the pasta and cook for 8-10 minutes, as the package cooking instructions suggest.
  2. While the pasta cooks, make the pea sauce. In a skillet, cook minced garlic in olive oil over medium heat for 1-2 minutes.
  3. Next, add the fresh or frozen peas to the skillet. Cook for 2-3 minutes, stirring often, until they’re tender.
  4. Then, pour in some broth or white wine. Let it simmer for 5-7 minutes to blend the flavors.
  5. Once the pasta is done, drain it and mix it with the pea sauce in the skillet. Toss until the pasta is well coated.
  6. Season the pasta and peas with salt, pepper, and fresh herbs like basil or parsley.
  7. Finally, serve the dish warm. Add more herbs or a sprinkle of Parmesan cheese if you like.

By following these easy cooking instructions and recipe method, you can make a delicious pasta and peas dish at home. It’s perfect for a quick weeknight meal or a special Italian-inspired dinner.

Tips for Selecting and Preparing Fresh Peas

Creating the perfect pasta e piselli (pasta and peas) dish starts with the peas. Whether you choose fresh or frozen peas, knowing the difference is key. It helps you get the best taste and texture.

Fresh vs. Frozen Peas

Frozen peas are easy and reliable. But fresh peas offer a unique taste and texture. They add a vibrant color and sweetness to your dish. But, the quality can change with the season and where you are.

Seasonal Availability Guide

  • Spring: Find tender, sweet English peas or snow peas in spring.
  • Summer: Shelling peas, or garden peas, are juiciest in summer.
  • Fall: Sugar snap peas and snow peas return in fall, adding crunch.

Always pick pea varieties that are bright, firm, and without spots. Fresh peas make your dish taste better and are healthier. They keep their nutritional quality and frozen vegetable quality high.

Sauce Variations and Flavor Enhancements

Make your pasta and peas dish even better by trying out different sauces and ingredients. You can choose from a creamy cream sauce or a light vegetable broth. There are many ways to make this Italian classic your own.

Think about what sauce you want. A cream sauce with heavy cream or half-and-half makes it rich and smooth. Or, a vegetable broth or white wine sauce can give it a lighter, more subtle taste.

  • Try adding different herb additions like basil, rosemary, or parsley. They can make the dish smell and taste amazing.
  • Adding a bit of pancetta option can add a savory, salty flavor that goes well with the peas.
  • Top it off with some Parmesan cheese or olive oil. They add richness and depth to the dish.
Sauce VariationFlavor ProfileRecommended Additions
Cream SauceRich, indulgent, and velvetyParmesan cheese, garlic, fresh herbs
Vegetable BrothLight, aromatic, and delicateLemon zest, white wine, fresh peas
Pancetta OptionSavory, salty, and umami-richGarlic, onions, fresh thyme

Try different sauces, herb additions, and pancetta to make your pasta and peas dish unique. Be creative and find the flavor you love. It’s all about making it your own.

Nutritional Benefits and Health Considerations

Pasta e piselli is a classic Italian dish loved for its taste. It’s also packed with nutrients, making it a healthy choice for many diets. The mix of pasta and peas gives you vegetarian protein, complex carbs, and fiber.

Protein and Fiber Content

One serving of this dish has about 10 grams of protein, mostly from the peas. Peas are a top choice for plant-based protein, perfect for vegetarians and those looking for low-fat options. Plus, the dish is rich in fiber, thanks to the peas, which helps with digestion and keeps you full.

Caloric Information

NutrientAmount per Serving
Calories300 calories
Total Fat5 grams
Carbohydrates50 grams
Protein10 grams

Dietary Adaptations

For those on a gluten-free diet, you can swap traditional pasta for gluten-free pasta. You can also use low-fat cheese or dairy-free options to meet dietary needs or preferences.

Pasta e piselli is a nutritious and flexible dish. It’s great for a balanced diet, offering health benefits and dietary options for everyone.

Wine Pairing and Serving Suggestions

When pairing Italian white wines with pasta and peas, think about the flavors. This classic Italian dish needs crisp, clean white wines. They should enhance the meal without overpowering it.

Pinot Grigio is a great choice. It’s a popular Italian white wine with bright acidity and citrus notes. Its clean taste goes well with the peas and pasta. You can also try Verdicchio or Greco di Tufo for a bit more complexity.

For the serving temperature, chill your Italian white wines to 45-50°F (7-10°C). This makes the wine crisp and refreshing. It pairs well with the pasta and peas.

For side dishes, add a simple green salad or crusty Italian bread. These dishes complement the meal. They make the dining experience balanced and enjoyable.

Wine VarietalFlavor ProfileServing Temperature
Pinot GrigioCrisp, clean, with citrus notes45-50°F (7-10°C)
VerdicchioMineral-driven, with subtle complexity45-50°F (7-10°C)
Greco di TufoAromatic, with a touch of acidity45-50°F (7-10°C)

Storage and Reheating Guidelines

Storing and reheating leftover pasta and peas is key for food safety and taste. By following a few easy steps, you can enjoy your meal prep leftovers safely and well.

To store leftover pasta and peas, put them in an airtight container. Then, refrigerate them within two hours of cooking. This stops harmful bacteria from growing and keeps the flavors bright. When reheating, keep these tips in mind:

  1. Warm the pasta and peas in a saucepan over medium heat, stirring now and then, until hot. Don’t microwave, as it can dry out the dish.
  2. If it’s too dry, add a bit of water or broth to moisten the pasta and peas.
  3. Reheat only what you’ll eat, as reheating too much can ruin the texture and taste.

By sticking to these storage and reheating tips, you can safely enjoy your leftover pasta and peas. This way, you keep the dish tasty and safe to eat.

Common Mistakes to Avoid When Making Pasta e Piselli

Making pasta e piselli, a classic Italian dish, can be a fun experience. But, there are common mistakes to watch out for. These mistakes can affect the pasta’s texture, the seasoning, and the sauce’s smoothness.

Cooking Time Pitfalls

One big mistake is overcooking the pasta. It should be al dente, with a bit of bite. This helps it pair well with the soft peas. If the pasta is too mushy, it’s not good. Also, peas that are not soft enough can ruin the dish.

Seasoning Balance Tips

Getting the seasoning right is key for a tasty pasta e piselli. Too much salt makes it bad, while too little makes it taste flat. Use salt, pepper, and herbs wisely to enhance the peas’ sweetness and the pasta’s flavor.

The sauce’s consistency is also important. A too-thin sauce leaves the pasta feeling unfinished. But, a too-thick sauce can make the dish heavy. The goal is a smooth sauce that coats everything well, blending the flavors together.

By avoiding these common mistakes and following the right cooking and seasoning tips, you can make a delicious pasta e piselli. It will be a dish that pleases the senses and satisfies your taste buds.

Conclusion

In this journey, we’ve explored the classic Italian dish of pasta and peas. We’ve seen its rich history and cultural importance. We’ve also learned how to make this beloved meal.

This pasta e piselli recipe is perfect for a quick dinner or to add to your pasta collection. It’s full of flavor, healthy, and easy to make. It’s a great choice for any home cook.

We invite you to enjoy this timeless dish and try new versions. Pasta and peas shows how simple ingredients can make a delicious meal. Buon appetito!

FAQ

What are the essential ingredients for making an authentic pasta and peas dish?

To make traditional pasta e piselli, you need pasta like ditalini or small shells. You also need fresh or frozen peas, Parmesan cheese, olive oil, and garlic. These ingredients make the classic Italian dish.

What are the best types of pasta to use for pasta and peas?

For pasta and peas, use small pasta shapes like ditalini, small shells, or tubetti. These shapes fit well with the peas, making the dish smooth.

Can I use frozen peas instead of fresh peas?

Yes, frozen peas are a good substitute for fresh peas. They are nutritious and available all year, even when fresh peas are not.

What are some tips for selecting and preparing fresh peas?

Choose fresh peas with bright, green pods that are plump and without blemishes. Shelled peas should be bright green and firm. For the best taste, use peas in season and eat them soon after picking.

What kitchen tools and equipment are essential for making pasta and peas?

You’ll need a large pot for cooking pasta, a colander for draining, and a skillet for sautéing. Also, a wooden spoon, a cutting board, and a knife are necessary for prep.

Can I make variations to the classic pasta and peas recipe?

Yes, you can make the dish your own. Try different sauces, like creamy or broth-based. Add pancetta, herbs, or spices to change the flavor.

What are the nutritional benefits of pasta and peas?

Pasta and peas are nutritious. Pasta gives you carbs and protein, while peas offer fiber, vitamins, and minerals. Together, they make a healthy meal.

How should I store and reheat leftover pasta and peas?

Store leftovers in an airtight container in the fridge for 3-4 days. Reheat by adding water or broth and warming it gently on the stovetop or in the microwave.

What are some common mistakes to avoid when making pasta and peas?

Avoid overcooking pasta to prevent it from becoming mushy. Also, don’t underseason the dish. Make sure the pasta and peas are cooked right and mix well.

Get The Best Recipes In 2025

Exit mobile version