Easy Peach Crumble Recipe for the Perfect Summer Treat

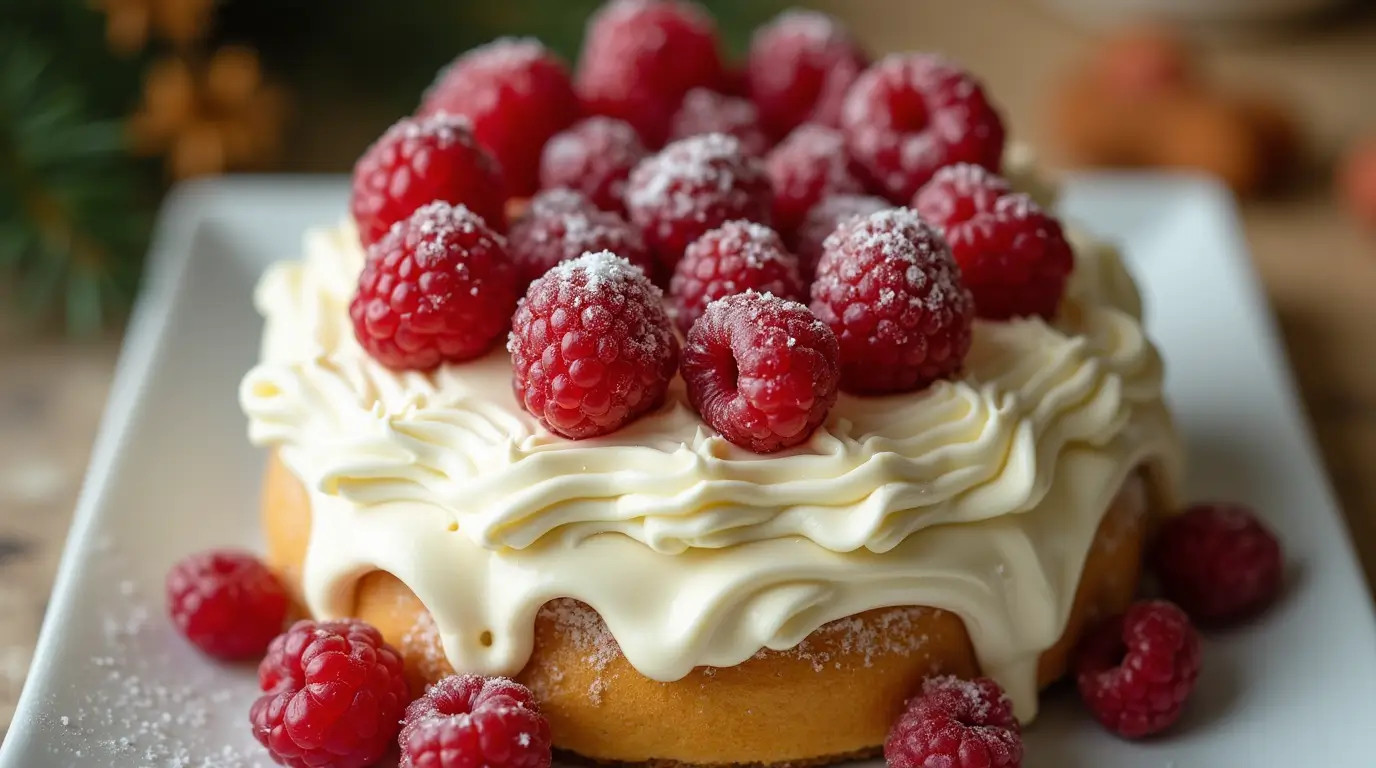
What makes a peach crumble recipe the ultimate summer dessert? It’s the mix of sweet, juicy fresh peaches and a crunchy topping. Or is there something more to this classic treat? As summer gets warmer, we all look for tasty, easy desserts to share with loved ones. A peach crumble is perfect, with its fresh peaches and delicious topping.

 Peach Crumble Recipe

Making a peach crumble at home is a great way to cool down and satisfy your sweet cravings. With a simple recipe, you can whip up a dessert that’s perfect for hot days. The sweet peaches and crunchy topping will make it a favorite among your guests. It’s a great pick for any summer gathering.

Key Takeaways

  • A peach crumble recipe is a perfect summer dessert featuring fresh peaches and a crunchy crumb topping
  • This dessert is easy to make and requires minimal ingredients
  • A homemade peach crumble is a great way to beat the heat and satisfy your sweet tooth
  • The combination of sweet peaches and crunchy crumb topping makes this dessert a hit with family and friends
  • This peach crumble recipe is an excellent choice for a summer dessert

Why Peach Crumble Is the Ultimate Summer Dessert

Peach crumble is a refreshing summer treat. It’s easy to make and perfect for gatherings. You can serve it warm or cold, making it versatile.

The mix of fresh peaches and a crumbly topping is amazing. It’s great for any summer event. Peach crumble offers several benefits:

  • Easy to make and prepare in advance
  • Can be served warm or cold
  • Perfect balance of textures and flavors

Peach crumble is a tasty and easy dessert for summer. Its refreshing taste and simple preparation make it a hit at parties.

Summer DessertPreparation TimeServing Options
Peach Crumble30 minutesWarm or Cold

Essential Ingredients for Your Peach Crumble Recipe

To make a delicious peach crumble, you need a few key ingredients. Fresh peaches are the base, and they should be ripe and sweet. Slice the peaches and mix them with sugar, flour, and spices for a tasty filling.

The crumb topping is also vital. It’s made from flour, sugar, and butter. You can add nuts or oats for extra texture and flavor. This topping makes the peach crumble special.

Choosing the Perfect Peaches

When picking peaches, look for ones that are slightly soft and smell sweet. You can use any peach variety, but some are better for baking. Slice and mix the peaches with sugar, flour, and spices for a delicious filling.

Crumble Topping Components

The crumb topping is a mix of flour, sugar, and butter. It should be crumbly. You can also add nuts or oats for more texture and flavor. This topping is what makes the peach crumble unique.

Optional Add-ins and Variations

You can customize your peach crumble in many ways. Try adding different spices or flavorings like cinnamon or vanilla. Use different sugars or add a splash of liqueur to the filling. The options are endless, so feel free to experiment and find your favorite peach crumble.

IngredientQuantity
Peaches3-4 cups
Sugar1/2 cup
Flour1 1/2 cups
Butter1/2 cup

Kitchen Tools and Equipment Needed

To make a tasty peach crumble, you need the right tools. A big mixing bowl is key for mixing the peach filling. You’ll also need a pastry blender or food processor for the crumb topping. Plus, a 9×9 inch baking dish is essential for baking the crumble.

You’ll also need a measuring cup, spoon, and spatula. These tools help you measure ingredients and prepare the dessert. Having the right tools makes making a peach crumble easier and faster.

  • Large mixing bowl
  • Pastry blender or food processor
  • 9×9 inch baking dish
  • Measuring cup
  • Spoon
  • Spatala

With these tools, you’re ready to make a delicious peach crumble dessert.

Step-by-Step Peach Crumble Recipe

To make a delicious peach crumble, follow a simple recipe. The secret is a sweet peach filling and a crunchy topping. We’ll show you how to prepare the filling, make the topping, and assemble the crumble.

Preparing the Peach Filling

Begin by slicing the peaches. Mix them with sugar, flour, and spices. This mix will be your peach filling. Use fresh, ripe peaches for the best taste.

Making the Crumb Topping

To create the topping, mix flour, sugar, and butter. Use a pastry blender or food processor until it’s coarse crumbs. This topping adds a crunchy texture to the soft peaches.

Here’s a simple list for the crumb topping:

  • Combine 1 cup of flour, 1/2 cup of sugar, and 1/2 cup of cold butter in a bowl
  • Use a pastry blender or food processor to work the butter into the dry ingredients
  • Continue blending until the mixture resembles coarse crumbs

Assembly and Baking Instructions

Place the peach filling in a 9×9 inch baking dish. Top it with the crumb topping. Bake at 375°F for 40-50 minutes. The topping should be golden, and the filling bubbly. This recipe is perfect for summer, impressing everyone with its peach filling and topping.

Tips for Achieving the Perfect Crumble Texture

Getting the perfect crumble texture is key to a tasty peach crumble. The right mix of flour and butter in the topping is crucial. Cold butter and mixing until it’s coarse crumbs are important steps. This makes the topping crunchy yet tender.

Remember, don’t overmix the topping. This can make it tough and dense, ruining the texture. By following these tips, you’ll make a peach crumble that wows everyone.

  • Use all-purpose flour for the topping. It gives the right texture and structure.
  • Bake the crumble just right. Overbaking can make the topping too brown and the filling dry.
  • The right sugar balance is key. Too much sugar makes the topping too sweet, too little makes it bland.
Baking TipsDescription
Use cold butterCold butter makes the topping crunchy and tender.
Don’t overmixOvermixing makes the topping tough and dense.
Use the right ratio of flour to butterThe right flour to butter ratio is essential for the perfect texture.

Follow these tips and use the right ingredients. You’ll make a peach crumble with a perfect texture. It will become a favorite dessert.

Serving Suggestions and Pairings

Peach crumble is a versatile dessert perfect for any occasion. Serving it with vanilla ice cream is a popular choice. This combo enhances the dessert’s warm and crunchy texture.

There are endless ways to serve peach crumble. You can enjoy it warm or cold, whichever you prefer. Adding a dollop of whipped cream or a sprinkle of cinnamon can make it even more special.

Best Ice Cream Combinations

Choosing the right ice cream can make a big difference. Here are some top picks for peach crumble:

  • Vanilla ice cream: a timeless favorite
  • Caramel ice cream: adds a sweet and salty twist
  • Peach ice cream: pairs perfectly with the peach crumble

Garnish Ideas

Adding a garnish can elevate your dessert. Here are some ideas:

  • Fresh peaches: arrange sliced peaches on top
  • Whipped cream: add a dollop with cinnamon
  • Caramel sauce: drizzle for a sweet and salty touch
TemperatureDescription
WarmServe the peach crumble warm, straight from the oven
ColdServe the peach crumble cold, chilled in the refrigerator for a few hours

Storage and Make-Ahead Options

Peach crumble is a versatile dessert that’s great for busy times or special events. It can be stored and made ahead in different ways. To keep it fresh, follow some key refrigeration tips.

Refrigerate the peach crumble in an airtight container. For longer storage, freeze it in a freezer-safe container or bag. This way, you can prepare it ahead and serve it whenever you want.

Here are some storage options to consider:

  • Refrigerate for up to 3 days
  • Freeze for up to 2 months
  • Store in an airtight container
  • Use a freezer-safe container or bag

By following these tips, your peach crumble will stay delicious, whether served fresh or made ahead.

Refrigeration Guidelines

Refrigeration is a good way to keep peach crumble fresh. Place it in an airtight container and store it in the fridge at 40°F (4°C) or below.

Freezing Instructions

Freezing is also a great option for peach crumble. Place it in a freezer-safe container or bag and store it at 0°F (-18°C) or below.

Storage MethodStorage TimeStorage Temperature
RefrigerateUp to 3 days40°F (4°C) or below
FreezeUp to 2 months0°F (-18°C) or below

Seasonal Variations and Fruit Substitutions

Peach crumble is a versatile dessert that can use different fruits. This makes it perfect for seasonal changes. By swapping fruits, you can enjoy new flavors with each season.

Nectarines, plums, and apricots are great substitutes for peaches. Each fruit adds its own taste and texture. For instance, nectarines are sweet and tangy, while plums are richer.

To try a new peach crumble, just swap the peaches with your favorite fruit. Adjust the spices and flavors to match. You can mix fruits for a unique dessert. Here are some ideas:

  • Summer: Peaches, nectarines, or plums, with a hint of cinnamon and nutmeg
  • Autumn: Apples or pears, with a blend of warm spices like cinnamon, nutmeg, and allspice
  • Winter: Quince or persimmons, with a touch of citrus and a crunchy oat topping

Exploring seasonal fruits and substitutions keeps your dessert fresh. It also highlights the unique tastes of each season. So, don’t hesitate to try new combinations. You might find a new favorite!

FruitSeasonal VariationSpices and Flavorings
PeachesSummerCinnamon, nutmeg
NectarinesSummerCinnamon, nutmeg, almond extract
PlumsAutumnCinnamon, nutmeg, allspice

Common Troubleshooting Tips

When making a peach crumble, you might face some common problems. These can be fixed with a few simple tips. To get your dessert just right, follow some basic baking advice. A soggy bottom is often due to too much liquid or not enough baking time.

To solve this, try baking it a bit longer or use a water bath. This helps keep the bottom from getting too wet. Another problem is a burnt topping. This usually happens if the oven is too hot or if it’s baked for too long.

To avoid this, lower the oven temperature or bake it for a shorter time. This way, you’ll get the perfect texture without burning.

Fixing a Soggy Bottom

  • Check the peach filling for excess liquid
  • Adjust the baking time to prevent a soggy bottom
  • Use a water bath to prevent the bottom from becoming too wet

Preventing Burnt Topping

  • Reduce the oven temperature to prevent burning
  • Adjust the baking time to achieve the perfect texture
  • Keep an eye on the peach crumble while it’s baking

By using these tips, your peach crumble will turn out perfectly. It will be a delicious dessert to enjoy. Always adjust the sweetness to your liking and try different ingredients for unique flavors.

Conclusion: Mastering Your Homemade Peach Crumble

Learning to make homemade peach crumble is easy. Just follow the steps and tips in this recipe. You’ll make a delicious dessert that everyone will love. Use fresh, quality ingredients and adjust the flavors to your liking.

With a bit of practice, you’ll be a pro at baking peach crumble. Serve it with vanilla ice cream for a summer treat. Or, try different fruits to keep things exciting.

So, why wait? Start making this tasty homemade dessert recipe. Enjoy the sweet peaches and the crunchy topping. It’s a great way to enjoy the season’s flavors.

FAQ

What are the key ingredients for a perfect peach crumble?

For a tasty peach crumble, you need fresh, ripe peaches. Also, add flour, sugar, butter, and spices like cinnamon or nutmeg.

How do I choose the best peaches for my crumble?

Choose peaches that are ripe and smell good. They should be slightly soft. Avoid hard or blemished peaches for the best taste and juiciness.

What tools and equipment do I need to make a peach crumble?

You’ll need a big mixing bowl and a pastry blender or food processor. Also, a 9×9 inch baking dish, a measuring cup, spoon, and spatula.

How do I prevent the crumb topping from burning?

To avoid a burnt topping, bake at 375°F. Keep an eye on it. If it browns too fast, lower the oven temperature or shorten the baking time.

Can I make peach crumble ahead of time?

Yes, you can make it ahead. Refrigerate for up to 3 days or freeze for 2 months. Thaw in the fridge or reheat in the oven when you’re ready.

What are some tasty variations or add-ins for peach crumble?

Try adding spices like cinnamon, nutmeg, or ginger. You can also add nuts, oats, or other fruits like nectarines, plums, or apricots for extra flavor and texture.

How do I achieve the perfect crumb texture for my peach crumble?

For the perfect crumb, use cold butter. Mix it into the dry ingredients until it’s coarse. Don’t overmix to avoid a tough topping.

What are some good serving suggestions for peach crumble?

Serve peach crumble with vanilla ice cream or whipped cream. You can also garnish with fresh peach slices or powdered sugar.

Mouthwatering Branzino Recipe: Baked to Perfection

What makes a perfect branzino recipe? It’s all about the mix of a tasty seafood recipe and the right cooking methods. Branzino, a prized Mediterranean fish, is loved for its delicate taste and firm texture. It’s a favorite among seafood fans. In this article, we’ll dive into the world of branzino and show you how to cook it to perfection.

Key Takeaways

  • Learn about the origins and characteristics of branzino, a Mediterranean fish
  • Discover the nutritional benefits of incorporating branzino into your seafood recipe
  • Get tips on how to cook the perfect branzino recipe with a delicious flavor
  • Explore different seasoning and marinade options for your branzino dish
  • Find out how to pair your baked branzino with complementary side dishes
  • Understand the importance of proper storing and reheating techniques for your branzino recipe

What is Branzino? Understanding This Prized Mediterranean Fish

Branzino is a type of sea bass known for its delicate flavor and firm texture. It comes from the Mediterranean Sea and is a key ingredient in many healthy fish recipe dishes. Its mild taste and versatility make it perfect for baking, grilling, or sautéing.

Chefs often choose simple yet flavorful seafood recipe methods to highlight Branzino’s natural taste. This lets the fish shine, with ingredients that boost its flavor. Whether you’re a pro chef or a home cook, Branzino is great for making a tasty and healthy fish recipe that will wow everyone.

Origins and Characteristics

Branzino has silver-gray scales and a unique flavor that’s sweet and savory. Its firm texture and flaky flesh are perfect for baking or grilling.

Nutritional Benefits

This Mediterranean fish is not just tasty but also healthy. It’s packed with protein, omega-3 fatty acids, and essential nutrients. Adding Branzino to your healthy fish recipe collection is a smart choice.

Why Chefs Love Branzino

Chefs love Branzino for its versatility and easy preparation. Its mild flavor and firm texture open up endless creative possibilities. It’s great for both traditional Mediterranean dishes and modern fusion cuisine.

Essential Ingredients for the Perfect Branzino Recipe

To make a tasty branzino recipe, you need a few key items. These include fresh branzino, olive oil, garlic, lemon, and herbs. The quality of these ingredients is key in Italian cuisine. They help make a dish that’s full of flavor and true to its roots.

For easy dinner ideas, having a good pantry is important. For branzino, you’ll need:

  • Fresh branzino fillets
  • Extra virgin olive oil
  • Garlic cloves
  • Fresh lemons
  • Chopped herbs, such as parsley or rosemary

A branzino recipe needs the right seasonings too. Add salt, pepper, and a bit of red pepper flakes for extra taste. With these, you’re ready to make a delicious Italian cuisine dish.

For a simple easy dinner idea, serve your branzino with roasted veggies or a fresh salad. This adds to the dish’s flavors and makes for a complete meal.

By using fresh ingredients and following these tips, you’ll make a branzino recipe that will wow everyone. It’s perfect for both experienced cooks and beginners.

IngredientQuantity
Fresh branzino fillets4-6
Extra virgin olive oil1/4 cup
Garlic cloves3-4
Fresh lemons2
Chopped herbs1/4 cup

Kitchen Tools and Equipment You’ll Need

To make a tasty seafood dish like branzino, you need the right tools and equipment. A well-stocked kitchen makes cooking easier and more fun. For baking the branzino, a baking sheet and oven are key.

For this seafood recipe, you’ll also need some special tools. A sharp knife for filleting, a cutting board for chopping, and a spatula for flipping the branzino are must-haves. Quality kitchen tools really make a difference.

  • A meat thermometer to check the branzino’s temperature
  • A pastry brush for marinades and sauces
  • Tongs for handling the fish carefully

With these tools and equipment, you’ll create a delicious seafood dish. It’s sure to impress everyone at your table.

Preparing Your Branzino for Cooking

To make a tasty branzino recipe, you need to prepare the fish right. Start by scaling, gutting, and rinsing the branzino. This removes any dirt and makes the fish clean for cooking.

Preparing the branzino is just the start. A great branzino recipe needs focus on every detail. Here are some important steps:

  • Scale the fish to remove any impurities
  • Gut the fish to remove the internal organs
  • Rinse the fish under cold water to remove any remaining impurities

By following these steps, you’ll get your branzino ready for cooking. Always handle the fish gently to keep its delicate flesh intact. With the right preparation and cooking tips, you’ll make a branzino recipe that will wow everyone.

Remember, the secret to a great dish is in the details. From the freshness of the ingredients to how you present the dish, every step matters. By paying attention to these details and preparing your branzino well, you’ll create a dish that’s not only delicious but also looks amazing.

Classic Mediterranean Branzino Recipe

To make a tasty Mediterranean dish, use fresh ingredients and keep it simple. Branzino is a key fish in the Mediterranean, loved for its flavor and health benefits. It’s enjoyed worldwide for these reasons.

Here are the main ingredients and steps for a true Mediterranean branzino recipe.

  • Fresh branzino fish, preferably wild-caught
  • Extra virgin olive oil for cooking and dressing
  • Lemon juice and zest for added flavor
  • Garlic and herbs like thyme and rosemary for seasoning

Start by preheating your oven to 400°F (200°C). Season the fish with salt, pepper, and herbs. Then, drizzle with olive oil and lemon juice. Bake for 12-15 minutes, or until it’s flaky and tender.

Cooking times and temperatures can change based on the fish’s size and thickness. Cooking at high heat for a short time makes the outside crispy and the inside tender. This method is key to Mediterranean seafood cooking, boosting the dish’s flavor.

IngredientMeasurement
Branzino fish4 fillets (6 oz each)
Olive oil1/4 cup
Lemon juice2 tablespoons
Garlic2 cloves, minced

Seasoning and Marinade Options

To add flavor to your branzino, you can use various seasoning and marinade options. A good seafood recipe can be enhanced with herbs and spices. These complement the delicate taste of the fish.

Some popular seasoning options for branzino include:

  • Lemon pepper
  • Garlic and herbs
  • Mediterranean spice blend

These seasoning options can be used alone or with a marinade for a more complex flavor.

A marinade adds moisture and flavor to the fish. A simple marinade is olive oil, lemon juice, and herbs. For a more elaborate seafood recipe, try a marinade with yogurt, garlic, and spices.

When using a marinade or seasoning, adjust salt and pepper to taste. You can also mix herbs and spices to create a unique flavor for your seafood recipe.

Seasoning OptionMarinade OptionFlavor Profile
Lemon pepperOlive oil and lemon juiceBright and citrusy
Garlic and herbsYogurt and garlicRich and savory
Mediterranean spice blendHerbs and spicesComplex and aromatic

Side Dishes That Complement Baked Branzino

Baked branzino is a versatile dish that pairs well with many side dishes. Mediterranean cuisine offers several traditional options that go great with branzino. These include roasted vegetables, quinoa salad, and grilled asparagus.

For seafood lovers, branzino pairs well with garlic shrimp, steamed mussels, and sautéed scallops. These dishes add variety and enhance the branzino’s flavor. For a modern twist, try pairing it with roasted sweet potatoes, braised kale, or lemon-herb rice.

Traditional Mediterranean Accompaniments

  • Roasted vegetables: Roasted vegetables like zucchini, bell peppers, and eggplant are a classic choice for branzino.
  • Quinoa salad: A quinoa salad with mixed veggies, feta, and lemon-tahini dressing is refreshing and pairs well with branzino.
  • Grilled asparagus: Grilled asparagus with lemon and parmesan is simple yet elegant, making it a great side dish for branzino.

Modern Pairing Suggestions

For a modern twist, consider pairing branzino with roasted sweet potatoes, braised kale, or lemon-herb rice. These options add a creative touch to the traditional Mediterranean pairings. They can also enhance your dining experience.

Side DishDescription
Roasted Sweet PotatoesRosemary and garlic infused roasted sweet potatoes
Braised KaleKale braised in white wine and garlic, finished with lemon butter
Lemon-Herb RiceFluffy rice infused with lemon zest, parsley, and dill

Common Mistakes to Avoid When Cooking Branzino

Seafood cooking, like with branzino, needs careful attention to avoid mistakes. Overcooking is a big error, making the fish dry and tough. Always stick to the recommended cooking times and temperatures for your branzino recipe.

Another mistake is underseasoning. Branzino’s mild flavor needs proper seasoning. Use quality ingredients and a balanced seasoning blend to enhance its taste.

Here are some common mistakes to avoid when cooking branzino:

  • Overcooking the fish
  • Underseasoning
  • Not using fresh and high-quality ingredients

To ensure a delicious branzino dish, be mindful of these mistakes. Always follow a trusted branzino recipe. Take your time to prepare your ingredients carefully for the best results.

Wine Pairing Suggestions for Your Branzino Dish

Choosing the right wine for baked branzino can make a big difference. A good wine pairing can enhance the dish’s flavors, making it unforgettable. For branzino, a Mediterranean wine is often the best choice. It complements the fish’s delicate taste and texture.

Popular white wine options for branzino include Pinot Grigio, Sauvignon Blanc, and Vermentino. These wines are crisp and refreshing. They balance the richness of the fish with their flavors. For a taste of the Mediterranean, try a Greek Assyrtiko or a Spanish Albariño. They match the bright, citrusy flavors of the region.

White Wine Options

  • Pinot Grigio: A crisp and refreshing wine with flavors of green apple and citrus
  • Sauvignon Blanc: A zesty and herbaceous wine with notes of grapefruit and grass
  • Vermentino: A dry and savory wine with flavors of lemon, lime, and herbs

Regional Mediterranean Pairings

For a truly authentic wine pairing, match your branzino with a wine from the same region. A Greek white wine, like Assyrtiko, pairs well with the Mediterranean’s bright flavors. A Spanish Albariño complements the fish’s rich, savory taste.

In conclusion, finding the right balance between the fish’s flavors and the wine is key. With these wine pairing suggestions, you’ll create a memorable culinary experience.

WineRegionFlavor Profile
Pinot GrigioItalyCrisp, refreshing, green apple, citrus
Sauvignon BlancFranceZesty, herbaceous, grapefruit, grass
VermentinoItalyDry, savory, lemon, lime, herbs

Storing and Reheating Tips

Storing and reheating your seafood recipe right is key. It keeps the dish safe and tasty. After cooking your branzino, let it cool down to room temperature. Then, store it in an airtight container in the fridge.

When reheating, use the oven or microwave safely. Here are some tips to remember:

  • Reheat the branzino to at least 165°F (74°C) for safety.
  • Check the internal temperature with a food thermometer, important for seafood.
  • Avoid overcrowding to prevent uneven heating and bacteria growth.

By following these tips, you can enjoy your seafood recipe safely and well. Proper food handling and storage are vital to avoid foodborne illness. So, handle and store your branzino carefully.

Conclusion: Mastering the Art of Baked Branzino

As we wrap up our journey into branzino, a key part of Mediterranean cuisine, it’s clear that mastering baked branzino is rewarding. With the right ingredients, tools, and techniques, you can make a dish that will wow your guests. It’s a true seafood cooking experience.

By following our guide, you can make a branzino dish that’s both delicious and authentic. Try different seasonings and marinades to find your favorite. Pair it with the right side dishes and wine pairings for a complete meal.

Now, you have the knowledge to make amazing baked branzino at home. Bring the Mediterranean to your kitchen and enjoy the joy of cooking. Impress your loved ones with this tasty and impressive dish.

FAQ

What is Branzino?

Branzino is a Mediterranean sea bass known for its delicate taste and firm texture. It’s a favorite among chefs and seafood lovers for its versatility and health benefits.

What are the origins and characteristics of Branzino?

Branzino comes from the Mediterranean Sea. It’s loved for its mild, sweet flavor and flaky texture. It’s great for many cooking methods, like baking, grilling, and pan-searing.

What are the nutritional benefits of Branzino?

Branzino is packed with protein, omega-3s, and vitamins. It’s low in mercury and high in lean protein, making it great for health.

Why do chefs love Branzino?

Chefs adore Branzino for its flexibility and ability to highlight different flavors. Its mild taste and firm texture make it perfect for creative dishes. It’s also a hit with diners, so it’s a menu staple.

What are the essential ingredients for a perfect Branzino recipe?

For a top Branzino dish, you need fresh Branzino, quality olive oil, garlic, lemon, and herbs like rosemary, thyme, and parsley.

What kitchen tools and equipment are needed to prepare Branzino?

You’ll need a baking sheet, oven, and basic cooking tools like a spatula and tongs. For more advanced prep, consider a fish spatula or deboning pliers.

How do you prepare Branzino for cooking?

First, scale, gut, and rinse the Branzino. This step cleans it for cooking.

What are some seasoning and marinade options for Branzino?

To flavor Branzino, try lemon, garlic, herbs, and Mediterranean spices like oregano, basil, and paprika.

What side dishes complement baked Branzino?

Baked Branzino goes well with roasted veggies, rice pilaf, and fresh salads. For something new, try quinoa, couscous, or grilled asparagus.

What common mistakes should be avoided when cooking Branzino?

Avoid overcooking, underseasoning, and using low-quality ingredients. Focus on proper prep and cooking times for a delicious Branzino.

What wine pairing suggestions are there for Branzino?

Pair Branzino with white wines like Sauvignon Blanc, Pinot Grigio, and Vermentino. Mediterranean wines like Greco di Tufo or Falanghina are also great choices.

How should Branzino be stored and reheated?

Store Branzino in the fridge and eat it within a few days. When reheating, use gentle heat to keep its texture and flavor intact.

Delicious Chocolate Gravy Recipe

What makes a chocolate gravy recipe unforgettable? Is it the rich, velvety texture or the deep flavor that goes well with breakfast treats? For many, the perfect chocolate gravy recipe is a key part of Southern cuisine. It makes biscuits, pancakes, and more even better. In this article, we’ll explore what makes homemade chocolate gravy special.

We’ll cover everything from essential ingredients to kitchen tools. Whether you’re a pro in the kitchen or just starting out, our guide is here to help. Our easy chocolate gravy recipe is all about simplicity and flavor. It’s sure to become a hit in your home. So, what makes a delicious chocolate gravy recipe stand out?

Key Takeaways

  • Understanding the basics of a chocolate gravy recipe is crucial for achieving the perfect flavor and texture
  • Homemade chocolate gravy can be made with just a few simple ingredients
  • An easy chocolate gravy recipe is perfect for breakfast or brunch
  • The right kitchen tools and equipment can make all the difference in creating a smooth and creamy gravy
  • Experimenting with different flavors and ingredients can help you create a unique chocolate gravy recipe
  • A delicious chocolate gravy recipe is a great way to add some excitement to your morning routine

What is Chocolate Gravy?

Chocolate gravy is a sweet, rich condiment loved in the United States, especially in the south. It’s made with chocolate, milk, and flour, giving it a smooth, creamy feel. It’s great over biscuits, pancakes, or waffles, making breakfast or brunch even better.

The idea of southern chocolate gravy started in the early 1900s. It was a way to use leftover chocolate, which was rare and expensive back then. Now, chocolate milk gravy is a key part of southern cooking, with families sharing their secret recipes for years.

In recent years, best chocolate gravy has become popular all over the United States. Restaurants and cafes now offer their own versions. Whether you want a classic chocolate milk gravy or something new, it’s a hit with foodies and chocolate fans.

Here are some ways to enjoy chocolate gravy:

  • Serving it over biscuits or pancakes
  • Using it as a topping for waffles or ice cream
  • Mixing it with other ingredients to create a unique dessert sauce

In summary, chocolate gravy is a tasty, versatile condiment that’s perfect for satisfying sweet cravings. Whether you’re a fan of southern chocolate gravy or just want to try something new, it’s definitely worth trying.

Essential Ingredients for the Perfect Chocolate Gravy

To make a tasty cocoa gravy recipe, you need a few key ingredients. High-quality cocoa powder is crucial for its rich, chocolatey taste. You’ll also need milk, flour, and sugar to get the right flavor and consistency.

For the best traditional chocolate gravy recipe, use top-notch chocolate. Dark or semi-sweet chocolate adds a deep, creamy flavor. A pinch of salt and a dash of vanilla extract can also boost the taste, adding depth to your cocoa gravy recipe.

Here are the essential ingredients you’ll need:

  • 1 cup high-quality cocoa powder
  • 2 cups milk
  • 2 tablespoons flour
  • 1 tablespoon sugar
  • 1/4 teaspoon salt
  • 1/2 teaspoon vanilla extract
  • 2 ounces high-quality chocolate (dark or semi-sweet)

By using these ingredients and following a simple classic chocolate gravy recipe, you can make a delicious, rich chocolate gravy. It’s perfect for biscuits, pancakes, or waffles. Choose the best ingredients for your traditional chocolate gravy recipe to get the best flavor and texture.

IngredientQuantity
Cocoa powder1 cup
Milk2 cups
Flour2 tablespoons
Sugar1 tablespoon
Salt1/4 teaspoon
Vanilla extract1/2 teaspoon
High-quality chocolate2 ounces

Kitchen Tools and Equipment Needed

To make delicious homemade chocolate gravy, you’ll need some basic kitchen tools. The right tools can greatly improve the quality of your easy chocolate gravy.

A medium saucepan is key for heating the mixture. A whisk is needed for smooth blending. And, a measuring cup is essential for accurate ingredient amounts.

Basic Requirements

  • Medium saucepan
  • Whisk
  • Measuring cup

Optional Tools for Better Results

Optional tools can help you get even better results. A thermometer is great for precise temperature control. And, a blender can make your gravy extra smooth.

Investing in these tools will help you make a rich and delicious easy chocolate gravy. It will take your breakfast or dessert dishes to the next level.

ToolPurpose
Medium saucepanHeating the mixture
WhiskSmooth blending
Measuring cupAccurate ingredient proportions

Classic Chocolate Gravy Recipe Step by Step

To make a tasty southern chocolate gravy, start by melting 1 cup of chocolate in a saucepan over low heat. Then, whisk in 2 tablespoons of flour to make a smooth paste. Next, add 1 cup of milk slowly, whisking all the time to avoid lumps.

Don’t forget to add 1 tablespoon of sugar. Keep whisking until the mix thickens up nicely.

Here’s a step-by-step guide to making the perfect chocolate gravy recipe:

  • Melt the chocolate in a saucepan over low heat
  • Whisk in the flour to create a smooth paste
  • Gradually add the milk, whisking continuously
  • Add the sugar and continue whisking until the mixture thickens

While cooking the chocolate gravy recipe, stir constantly to avoid burning. If you want it thicker, add a bit more flour or cook it longer. For a thinner gravy, add a bit more milk.

Once the southern chocolate gravy is just right, take it off the heat. Let it cool a bit. Serve it over biscuits, pancakes, or waffles for a sweet treat. This classic chocolate gravy recipe makes a rich, creamy sauce perfect for any time.

IngredientQuantity
Chocolate1 cup
Flour2 tablespoons
Milk1 cup
Sugar1 tablespoon

Tips for Achieving the Perfect Consistency

To make the best chocolate gravy, getting the right consistency is key. It might take some effort, but with the right tips, you can achieve a smooth, creamy gravy. This is great for biscuits or pancakes.

One common issue is the gravy being too thick or too thin. To fix this, whisk constantly while it cooks. This ensures the chocolate and milk mix well. Adjusting the heat helps prevent the gravy from boiling over or sticking to the pan.

Common Texture Problems

Texture issues like lumps, separation, or being too thick can happen. To solve these, whisk the gravy harder or add a bit more milk to thin it.

Troubleshooting Solutions

Don’t worry about texture problems in your chocolate gravy. For a thick gravy, add more milk or cream. If it’s too thin, cook it a bit longer to thicken it.

Expert Techniques

For an even better chocolate gravy, try tempering the chocolate or using top-notch cocoa powder. You can also add a pinch of salt or a teaspoon of vanilla extract for extra flavor.

By using these tips, you can make a delicious, creamy chocolate gravy. It’s perfect for biscuits, pancakes, or even ice cream. With practice, you’ll soon be a pro at making chocolate milk gravy.

Best Pairings and Serving Suggestions

There are many ways to serve classic chocolate gravy. It’s great over breakfast treats or desserts. Try it over biscuits, pancakes, or waffles for a traditional breakfast.

Here are some ideas for using classic chocolate gravy:

  • Serve over biscuits, pancakes, or waffles for a delicious breakfast treat
  • Use as a topping for ice cream or yogurt for a sweet dessert
  • Pair with fresh fruit, such as strawberries or bananas, for a lighter option
  • Try using traditional chocolate gravy recipe as a dip for nuts or pretzels

Classic chocolate gravy is always a winner. Its rich, chocolatey taste makes any meal better. So, get creative and find your favorite way to enjoy traditional chocolate gravy recipe!

Variations of Traditional Chocolate Gravy

Want to try something new? There are many ways to change up traditional chocolate gravy. These tweaks can make the classic recipe your own, fitting your taste and dietary needs. Making homemade chocolate gravy is simple, and a few tweaks can lead to exciting flavors.

For a deeper taste, try a dark chocolate version. Use dark cocoa powder or dark chocolate chips. It’s great for those who love a bold chocolate flavor in their easy chocolate gravy. If you’re looking for something dairy-free, use almond or soy milk. This makes the gravy perfect for those with dietary restrictions.

  • Dark Chocolate Version: uses dark cocoa powder or dark chocolate chips
  • Dairy-Free Alternatives: uses non-dairy milk such as almond or soy milk
  • Spiced Chocolate Gravy: adds a pinch of cinnamon or cayenne pepper to give the gravy a spicy kick

These changes can turn chocolate gravy into a variety of desserts. Enjoy it over pancakes or waffles, or as a topping for ice cream or fruit.

VariationIngredientsTaste
Dark Chocolate VersionDark cocoa powder or dark chocolate chipsDeeper, richer flavor
Dairy-Free AlternativesNon-dairy milk such as almond or soy milkSuitable for those with dietary restrictions
Spiced Chocolate GravyPinch of cinnamon or cayenne pepperSpicy kick

Storage and Reheating Guidelines

After making your tasty chocolate gravy, it’s key to store it right. This keeps it fresh and flavorful. Use airtight containers in the fridge or freezer to store your southern chocolate gravy.

Proper Storage Methods

For up to 3 days, keep your chocolate gravy in the fridge. Use a clean, airtight container to avoid contamination. For longer storage, freeze it for up to 2 months. Use a freezer-safe container to prevent ice and separation.

Reheating Instructions

To reheat, use the stovetop or microwave. On the stovetop, heat it over low, whisking constantly. In the microwave, heat in 10-second bursts, stirring between each. Always reheat to 165°F (74°C) for safety.

By following these tips, your homemade chocolate gravy will last longer. Enjoy it with breakfast, brunch, or as a dessert topping. It will stay fresh and delicious.

Storage MethodStorage TimeReheating Method
RefrigeratorUp to 3 daysStovetop or Microwave
FreezerUp to 2 monthsStovetop or Microwave

Common Mistakes to Avoid

When making the best chocolate gravy, it’s key to know common mistakes. Overcooking the gravy can make it thick and unappetizing. To avoid this, constant stirring is crucial, especially with chocolate milk gravy. Also, using low-quality ingredients can ruin the flavor and quality of the gravy.

To avoid these mistakes, pay close attention and practice. Here are some tips for perfect chocolate gravy:

  • Use high-quality cocoa powder or chocolate for the best flavor
  • Whisk the gravy constantly to prevent lumps and overcooking
  • Don’t overheat the gravy, as this can cause it to break or become too thick

By following these tips and being careful, you can make a delicious, creamy chocolate gravy. It’s great over biscuits or pancakes. Whether you stick to a traditional recipe or try a chocolate milk gravy, success comes from paying attention and practicing.

“The secret to making the best chocolate gravy is to use high-quality ingredients and to whisk constantly. With a little practice, you’ll be making delicious, creamy gravy like a pro!”

MistakeSolution
Overcooking the gravyConstant stirring and monitoring the heat
Using low-quality ingredientsChoosing high-quality cocoa powder or chocolate
Not whisking the gravy enoughWhisking constantly to prevent lumps and overcooking

Health Considerations and Dietary Adaptations

Enjoying classic chocolate gravy needs careful thought about nutrition and diet. Traditional recipes can be high in calories and fat. This is a problem for those with certain dietary needs. To make a healthier version, knowing the nutritional content and making changes is key.

The nutritional facts of chocolate gravy depend on the recipe. A typical serving has 100 to 200 calories, with lots of fat and sugar. For a healthier option, try using dark chocolate or dairy-free milk. These can lower calories and fat.

Nutritional Information

A typical serving of classic chocolate gravy contains:

  • Calories: 150-200 per serving
  • Fat: 10-15g per serving
  • Sugar: 20-25g per serving

Dietary Modifications

To make a healthier version of chocolate gravy, consider these changes:

  • Use dark chocolate with at least 70% cocoa content
  • Replace traditional milk with dairy-free alternatives, such as almond or soy milk
  • Reduce the amount of sugar used in the recipe

Understanding nutrition and making dietary changes can help enjoy healthier chocolate gravy. Whether sticking to a traditional recipe or making adjustments, knowing the nutritional facts is crucial. This way, you can make informed choices about your diet.

IngredientTraditional AmountHealthier Alternative
Chocolate1 cup milk chocolate1/2 cup dark chocolate
Milk1 cup whole milk1 cup dairy-free milk
Sugar2 tablespoons1 tablespoon

The History Behind Southern Chocolate Gravy

Southern chocolate gravy has a rich history that spans over a century. It started in the early 20th century and is now a staple in southern cuisine. To make homemade chocolate gravy, you need to know its cultural significance and how it evolved.

The history of southern chocolate gravy is tied to the traditional cuisine of the southern United States. It’s often served with breakfast foods like biscuits, pancakes, and waffles. Making easy chocolate gravy is simple, needing just a few ingredients: cocoa powder, sugar, and milk.

Here are some key facts about southern chocolate gravy:

  • It originated in the southern United States in the early 20th century.
  • It is often served with breakfast foods such as biscuits and pancakes.
  • The traditional recipe includes cocoa powder, sugar, and milk.

To truly appreciate southern chocolate gravy, you must understand its history and evolution. By making homemade chocolate gravy and serving it with traditional southern breakfast foods, you can enjoy its rich flavors and traditions. Whether for a special occasion or a weekday breakfast, this treat is sure to delight.

IngredientQuantity
Cocoa powder2 tablespoons
Sugar1 tablespoon
Milk1 cup

Conclusion: Mastering Your Chocolate Gravy Recipe

Making the perfect chocolate gravy recipe is an art. It needs quality ingredients, the right technique, and patience. This article has given you the knowledge to make a delicious southern chocolate gravy that will wow your guests.

Whether you’re experienced or new to cooking, you can make the best chocolate gravy. Dive into the world of this beloved southern treat. Try new things and let your creativity shine. With each try, you’ll get better and better at making chocolate gravy.

Keep enjoying the cooking journey, celebrate your wins, and learn from mistakes. The fun of cooking is in the making, not just the end result. Enjoy the process, and you’ll become a true chocolate gravy expert.

FAQ

What is chocolate gravy?

Chocolate gravy is a tasty gravy from the southern United States. It’s made with chocolate, milk, and flour. It’s great over biscuits, pancakes, or waffles.

What are the origins and history of chocolate gravy?

The exact start of chocolate gravy is a mystery. But, it’s thought to have started as a way to use leftover chocolate. Now, it’s a key part of southern meals, enjoyed at breakfast or brunch.

What are the essential ingredients for making chocolate gravy?

To make chocolate gravy, you need good cocoa powder, milk, flour, and sugar. A bit of salt and vanilla can also enhance the taste.

What kitchen tools and equipment are needed to make chocolate gravy?

You’ll need a medium saucepan, a whisk, and a measuring cup for chocolate gravy. Optional tools like a double boiler or blender can help too.

How do you make the classic chocolate gravy recipe step-by-step?

Start by melting the chocolate. Then, whisk in flour and add milk and sugar slowly. Cooking it right is key for the perfect texture.

How do you achieve the perfect consistency for chocolate gravy?

Getting the right consistency is important. You can fix common issues by whisking well and cooking it to the right temperature.

What are the best pairings and serving suggestions for chocolate gravy?

Chocolate gravy goes well with biscuits, pancakes, waffles, and even ice cream or yogurt. It also pairs nicely with fruit and nuts.

What are some variations of traditional chocolate gravy?

You can try dark chocolate, dairy-free, or spiced chocolate gravy. These options let you tailor the flavor to your liking.

How do you properly store and reheat chocolate gravy?

Keep chocolate gravy refrigerated or frozen to store it. Reheat it on the stovetop or in the microwave carefully to keep it smooth and flavorful.

What are some common mistakes to avoid when making chocolate gravy?

Avoid overcooking, using bad ingredients, and not whisking enough. These mistakes can ruin your gravy. Follow these tips for success.

What are the health considerations and dietary adaptations for chocolate gravy?

Chocolate gravy is tasty but not always healthy. Knowing the nutritional facts and making healthy swaps can help you enjoy it guilt-free.

What is the history behind southern chocolate gravy?

Southern chocolate gravy has a rich history from the early 20th century. It’s a beloved part of southern cuisine, passed down through generations.

The Ultimate Guide to Cooking with Canned Pink Salmon

In today’s fast-paced world, finding ingredients that combine convenience, nutrition, and versatility can feel like striking gold. Enter canned pink salmon—a pantry staple that deserves a prime spot in your kitchen. Whether you’re a busy professional, a parent juggling multiple responsibilities, or someone who simply appreciates efficient cooking, canned pink salmon offers an impressive array of possibilities for creating delicious, nutritious meals in minutes.

Why Choose Canned Pink Salmon?

Time is precious in the kitchen, and canned pink salmon delivers significant time savings compared to its fresh counterpart. While preparing fresh salmon typically requires 30-45 minutes from start to finish, meals using canned salmon can be ready in as little as 25 minutes. This 10-20 minute difference might seem small, but it can make all the difference on busy weeknights when every minute counts.

Beyond convenience, canned pink salmon packs a powerful nutritional punch. It’s rich in omega-3 fatty acids, which help reduce inflammation and promote heart health. A single serving provides approximately 15 grams of high-quality protein, making it an excellent choice for maintaining muscle health and feeling satisfied. The canning process even preserves the salmon’s calcium content, as the soft, edible bones remain intact.

A World of Culinary Possibilities

The versatility of canned pink salmon might surprise you. Far from being limited to basic salmon salad, this ingredient can transform into an impressive variety of dishes. Here are some creative ways to use canned pink salmon:

Classic Salmon Patties

A beloved family favorite, salmon patties combine simplicity with satisfying flavor. Here’s what you’ll need:

  • One 14.75-ounce can of pink salmon
  • 1/2 cup of crushed saltine crackers
  • 1 tablespoon Worcestershire sauce
  • 1 beaten egg
  • 2 tablespoons of melted unsalted butter
  • Salt and pepper to taste
  • Canola oil for frying

Mix ingredients together, form into patties, and fry until golden brown. Pro tip: Make extra patties and freeze them for future meals.

Refreshing Salmon Salads

When it comes to quick, light meals, salmon salads shine. Try these variations:

  1. Salmon Taco Salad: Combine flaked salmon with crisp lettuce, fresh vegetables, and a zesty Greek yogurt coleslaw for a Mexican-inspired feast.
  2. Classic Salmon Salad: Mix canned salmon with mayonnaise, Dijon mustard, capers, and scallions for a sophisticated take on the classic.

Innovative Sandwich Creations

Transform your lunch routine with these creative sandwich options:

  1. Crispy Salmon Sandwich: Elevate canned salmon by soaking it in milk and coating it in a seasoned flour-pecan mixture before frying. Total time: 28 minutes (10 prep, 18 cook).
  2. Salmon Patty Sandwich: Combine salmon with shallots, cilantro, and soy sauce to create a flavorful patty, then top with tangy slaw. Ready in 30 minutes (5 prep, 25 cook).

Quick and Easy Recipe Ideas

When time is of the essence, try these speedy solutions:

  1. 15-Minute Classic Salmon Salad
    Mix canned salmon with avocado oil mayonnaise, diced hard-boiled egg, Worcestershire sauce, Dijon mustard, and Old Bay seasoning for a protein-rich meal ready in minutes.
  2. Simple Salmon Tacos
    Flake canned salmon and combine with diced onion, fresh cilantro, and a squeeze of lime juice. Serve in warm tortillas for an easy Mexican-inspired dinner.
  3. Quick Salmon Burgers
    Mix canned salmon with an egg and your choice of breadcrumbs or crushed crackers, shape into patties, and bake for a healthier alternative to traditional burgers.

Tips for Success

  • When making patties or burgers, drain the salmon well but consider keeping the calcium-rich bones for added nutrition.
  • Customize your dishes with fresh herbs, spices, and seasonal vegetables.
  • Keep several cans in your pantry for last-minute meal solutions.
  • Don’t overlook the possibility of using canned salmon in dips, soups, and pasta dishes.

Conclusion

Canned pink salmon proves that convenience doesn’t have to mean compromising on nutrition or taste. With its impressive versatility, significant time-saving benefits, and stellar nutritional profile, it’s an ingredient that deserves a regular spot in your meal planning rotation. Whether you’re crafting quick weeknight dinners or preparing for impromptu gatherings, canned pink salmon stands ready to help you create delicious, nutritious meals with minimal effort.

Remember, the key to making the most of this versatile ingredient is to think beyond traditional recipes and let your culinary creativity shine. From classic comfort food to innovative modern dishes, canned pink salmon can help you put a delicious, healthy meal on the table in minutes.

Make Perfectly Crispy Potato Chips at Home

What makes the perfect crispy potato chips recipe? Can you really get that satisfying crunch at home? Making homemade potato chips is fun and rewarding. It lets you control the ingredients and seasonings.

With the right techniques and tools, you can make deliciously crispy potato chips. They can even rival your favorite store-bought brands.

Imagine enjoying freshly made, crispy potato chips at home. You won’t have to worry about preservatives or additives. The secret to great homemade potato chips is in the preparation and cooking.

By following a simple recipe and using the right equipment, you can get that perfect crunch and flavor.

Key Takeaways

  • Learn how to make homemade potato chips with a simple recipe.
  • Discover the essential ingredients and equipment needed for crispy potato chips.
  • Understand the importance of proper slicing and soaking techniques.
  • Find out how to achieve the perfect oil temperature for frying.
  • Get tips on how to season your homemade potato chips for added flavor.
  • Learn how to store and serve your crispy potato chips for maximum freshness.

Essential Ingredients and Equipment for Homemade Potato Chips

To make tasty homemade potato chips, you need the right ingredients and tools. Russet or Yukon Gold potatoes are best because they’re high in starch. This makes the chips crispy outside and fluffy inside.

For uniform slices, a mandoline slicer is key. You’ll also need a deep fryer or a heavy pot with a thermometer. Choose oils like peanut or avocado for frying, as they have high smoke points.

Choosing the right oil is crucial for perfect chips. Different oils have unique flavors and smoke points. Here are some good options:

  • Peanut oil: mild flavor and high smoke point
  • Avocado oil: mild flavor and high smoke point
  • Vegetable oil: neutral flavor and medium smoke point

With the right ingredients, tools, and oil, you can make delicious homemade potato chips. They’ll be crispy, flavorful, and irresistible.

How to Make Potato Chips: Preparation Steps

Getting the perfect potato chips starts with the first steps. You need to wash and peel the potatoes, if you want to. This removes dirt, debris, and pesticides from the skin.

After washing, drying the potatoes is key. This step stops excess moisture from ruining the frying process. Some like to keep the skin on for extra texture and nutrition. Others prefer peeling for a smoother chip. Just be gentle with the potatoes to avoid damage.

To stop the potatoes from turning dark, keep them in cold water after peeling. This helps remove starch, which can make the chips less crispy. Soaking them in cold water for at least 30 minutes is best.

  • Use high-quality potatoes that are high in starch, like Russet or Idaho potatoes.
  • Handle the potatoes gently to avoid bruising or damaging the flesh.
  • Keep the potatoes in cold water after peeling to prevent discoloration.

By following these steps and tips, you’re on your way to making tasty homemade potato chips. Remember, proper preparation is key to getting the best chips.

Perfect Slicing and Soaking Techniques

To get the perfect crispy potato chips, focus on slicing and soaking. Slicing needs attention to detail for even cooking. Use a mandoline or sharp knife for slices about 1/16 inch thick.

Soaking slices removes excess starch for crispier chips. Soak in cold water for at least 30 minutes. This makes the chips crunchier. After soaking, dry the slices with a towel or salad spinner.

Achieving Uniform Thickness

Uniform thickness is key for even cooking and texture. Use a mandoline or sharp knife for slices. Remove any eyes or blemishes before slicing.

Removing Excess Starch

Removing starch is crucial for crispier chips. Soaking in cold water removes surface starch. Soak for at least 30 minutes for a crunchier texture.

Drying Methods

Drying slices removes excess moisture. Use a towel or salad spinner for this. This prevents greasy or soggy chips. Follow these steps for perfect crispy chips at home.

Frying and Seasoning Your Homemade Chips

To get the perfect crunch and flavor, you need to master frying potato chips. Heat the oil to 325°F to 375°F. This ensures the chips cook evenly and don’t get greasy.

When frying, keeping the oil at the right temperature is key. It prevents the chips from soaking up too much oil. This makes them taste soggy.

After heating the oil, add the potato slices. Fry them in batches to avoid overcrowding. Each batch should cook for 3-5 minutes until golden brown. This step is crucial for the right texture and taste.

After frying, season the chips with your favorite flavors. You can choose classic salt and vinegar or try something new like barbecue or sour cream and onion.

Seasoning Suggestions

Season the chips right after frying when they’re still warm. This helps the flavors stick better and taste stronger. Here are some great seasoning options:

  • Salt and vinegar: a classic mix that brings out the potato’s natural taste
  • Barbecue: adds a smoky, savory flavor
  • Sour cream and onion: offers a rich, creamy taste with a hint of onion

By mastering frying and seasoning, you can make a variety of delicious chip flavors. Whether you like simple or bold, the secret to perfect homemade chips is in the frying and seasoning.

Conclusion: Storing and Serving Your Crispy Potato Chips

Now that you’ve made your homemade potato chips, it’s time to think about storage and serving. Store them in an airtight container at room temperature. Don’t put them in the fridge, as the moisture can make them soggy. Enjoy your homemade chips within 3-5 days for the best crispiness.

When serving your potato chips, get creative. They’re great on burgers or sandwiches for a crunchy topping. Serve them with dips like ranch or salsa for a tasty snack. You can also use them as a colorful garnish for soups or salads.

Making your own potato chips at home is rewarding. With these tips, you can enjoy your delicious, crispy snack. Impress your friends and family with your homemade culinary skills. So, grab a handful of your freshly made chips and enjoy the salty, crunchy goodness.

FAQ

What are the best potato varieties for making crispy homemade chips?

Russet and Yukon Gold potatoes are the top choices for crispy chips. They have lots of starch and not much moisture. This makes them perfect for getting extra crispy when fried.

What kitchen tools are required for making potato chips at home?

You’ll need a mandoline slicer or sharp knife for even slices. A deep fryer or heavy pot is needed for frying. Don’t forget a cooking thermometer to check the oil’s temperature.

What type of oil should I use for frying potato chips?

Use oils with a high smoke point like peanut, vegetable, or canola oil. These oils handle high temperatures well. They won’t burn or add bad flavors to your chips.

How do I ensure my potato slices are dried properly before frying?

Start by soaking the slices in cold water to remove starch. Then, dry them with paper towels or a clean towel. Letting them air dry for a few minutes helps too.

How do I control the oil temperature when frying potato chips?

Keeping the oil between 325°F and 350°F is key for crispy chips. Use a thermometer to check the temperature. Adjust the heat to stay in this range.

What are some creative seasoning ideas for homemade potato chips?

Try these seasonings for a twist on classic chips: barbecue, ranch, chili powder and lime, garlic and parmesan, Cajun spice, and sweet and spicy with brown sugar and cayenne.

Delicious Salmon Sushi Bake Recipe – Easy & Flavorful

What makes a sushi bake recipe with salmon so appealing? Can you really mix traditional sushi flavors with the ease of a baked dish? Salmon sushi bake has become popular for its unique taste and simple preparation. It’s perfect for those wanting a new sushi twist.

A well-made sushi bake recipe with salmon can change your meal game. It’s a delicious, easy salmon recipe that blends Japanese cuisine with a homemade casserole. With the right ingredients, you can make a sushi bake that will wow your family and friends. It’s considered an easy salmon recipe.

Key Takeaways

  • Salmon sushi bake is a Japanese fusion dish that combines traditional sushi flavors with the convenience of a baked casserole.
  • This easy salmon recipe is perfect for those looking for a new twist on traditional sushi.
  • A sushi bake recipe with salmon can be prepared with minimal ingredients and effort.
  • The dish offers a unique and delicious taste experience.
  • It is an ideal choice for a quick and easy meal.
  • A sushi bake recipe with salmon is a great way to enjoy Japanese cuisine at home.
  • This Japanese fusion dish is perfect for anyone looking to try something new and exciting.

What is a salmon sushi bake?

A salmon sushi bake is a tasty mix of traditional sushi and a warm casserole. It’s a deconstructed sushi that makes sushi easy to enjoy with family.

Origins of Sushi Bake

The sushi bake idea came up because people wanted to make sushi at home, especially during the COVID-19 pandemic. It’s inspired by layered casseroles, making sushi simpler and easier to make.

Why This Recipe Works

This sushi casserole is loved for its easy recipe and flexibility. It mixes fresh salmon, seasoned rice, and a creamy topping, all baked to perfection. You can change it up to fit your taste and what you have on hand.

Salmon is a top pick, but you can also try other ingredients. Add crab meat and avocado or try different sauces. Here are some favorite ways to mix it up:

VariationMain Ingredients
Crab DelightCrab meat, avocado, cream cheese
Spicy TunaTuna, sriracha, green onions
VegetarianTofu, cucumber, sesame seeds

Essential Ingredients for the Perfect Sushi Bake Recipe, Salmon Style

Making a tasty salmon sushi bake begins with picking the right ingredients. Each part is key to getting the real flavors and textures right.

  • Sushi rice: This is the base of the dish, giving it the right stickiness and sweetness. High-quality sushi rice is essential for the perfect texture.
  • Sushi-grade salmon: Choose fresh, sushi-grade salmon for its safety and rich taste. This top-notch fish adds a special flavor to the bake.
  • Nori sheets: These seaweed sheets add a traditional sushi touch. They bring a unique umami taste and a bit of crunch when baked.
  • Japanese mayo: This creamy and tangy mayo holds everything together. Its special flavor goes well with the salmon, making the dish even better.

If you prefer different options, you can use cauliflower rice or avocado. These changes let you customize the dish while keeping its true sushi taste.

Preparation and Assembly Steps

Making the perfect salmon sushi bake takes a few important steps. From making the sushi rice to putting it all together, each step is crucial. It makes the dish both tasty and beautiful.

Rice Preparation

First, learn how to make sushi rice. Rinse 2 cups of short-grain rice until the water is clear. Then, cook it as the package says, and mix it with rice vinegar, sugar, and salt. Spread this seasoned rice in your baking dish to start your sushi bake.

Salmon Mixture

Next, mix the salmon filling. Use cooked and flaked salmon, mayonnaise, soy sauce, and a bit of sriracha for spice. Mix well so the flavors blend, making a creamy and tasty topping for your rice.

Layering Technique

To assemble the sushi bake, layer the rice in the dish. Then, put the salmon mixture on top, spreading it evenly. This layering not only improves the texture but also makes the bake look great.

Baking Instructions

Heat your oven to 375°F (190°C). Put the sushi bake in the oven and bake for 15-20 minutes. It should be golden brown and bubbly on top. Let it cool a bit before serving for the best taste and texture.

Pro Tips for the Best Results

Choosing the freshest salmon is key for a tasty sushi bake. Go for sushi-grade salmon for both safety and taste. Use high-quality short-grain rice for a sticky texture that’s great for layering.

Seasoning the rice right is important for flavor. Mix rice vinegar, sugar, and salt for a balanced taste. Make the salmon mixture creamy so it blends well with the rice.

Add creative sushi bake toppings to make it better. Try crunchy furikake, smooth avocado, or spicy mayo. These toppings boost flavor and look good too.

For a stunning sushi bake presentation, use a shallow dish. Top it with sesame seeds and green onions. This makes your dish look great and inviting.

  • Prepare parts early to make assembly easier.
  • Keep leftovers in airtight containers in the fridge.
  • Reheat gently to keep the bake’s texture and taste.

When serving, think about sushi bake serving suggestions. Pair it with a light salad or miso soup. These add to the meal’s balance and satisfaction.

Conclusion: Mastering Your Homemade Sushi Bake

Making a salmon sushi bake at home is a fun way to enjoy tasty flavors. You don’t need to be a pro at rolling sushi. This dish is easy to make and lets you try out different flavors.

You can add your favorite seafood, fresh veggies, or unique sauces. This makes it a great dish to play with in the kitchen.

Choosing a sushi bake is also a healthy choice. It lets you control the portions and add nutritious ingredients. This way, you can make it fit your dietary needs and enjoy it with others.

We suggest trying new things in the kitchen and making the recipe your own. Share your sushi bake creations with friends and family. It’s a great way to share the joy of cooking and connect with others who love to cook too.

FAQ

What is a salmon sushi bake?

A salmon sushi bake is a mix of sushi flavors in a casserole. It has sushi rice, salmon, and other tasty ingredients. It’s easy to make and perfect for home cooks.

How do I make authentic sushi rice for the bake?

To make sushi rice, rinse short-grain rice until the water is clear. Cook it as the package says, then mix it with rice vinegar, sugar, and salt. Let it cool before using it in your sushi bake.

Can I customize the ingredients in my sushi bake?

Yes, you can! Sushi bakes are very flexible. You can add nori sheets, Japanese mayo, avocado, or even shrimp or tuna. This lets you make your own unique sushi bake.

What are some pro tips for enhancing the flavor of my sushi bake?

For the best taste, use fresh sushi-grade salmon. Make sure your sushi rice is seasoned right. Add Japanese mayo and toppings like green onions and sesame seeds. Follow the layering and baking instructions carefully for great flavor and look.

How should I store and reheat leftovers of the sushi bake?

Keep leftovers in an airtight container in the fridge for up to three days. Reheat in the oven at 350°F for 10 minutes. This keeps the texture and flavor good, making it delicious the next day too.

Irresistible Sourdough Pretzel Bites: The Perfect Bite-Sized Treat

What makes sourdough pretzel bites so irresistible? How can you make these tasty homemade pretzels in your kitchen? These bites have a unique texture and flavor, making them stand out from regular pretzels. They’re perfect for any time, with their mix of crunch and chew.

Sourdough pretzel bites are great for snacking or as party appetizers. Making them at home is incredibly rewarding. With the right ingredients and techniques, you can impress everyone with your sourdough pretzel bites. They’re perfect for a quick snack or a fun baking project.

Key Takeaways

  • Sourdough pretzel bites offer a unique texture and flavor that sets them apart from traditional pretzels
  • They are a great snack idea for any occasion, from casual snacking to party appetizers
  • Creating homemade pretzels can be a fun and rewarding baking project
  • Sourdough pretzel bites have a perfect balance of crunch and chew
  • They can be made with simple ingredients and techniques
  • Sourdough pretzel bites are a delicious and versatile treat that can be enjoyed by people of all ages

The Magic of Sourdough Pretzel Bites

Sourdough pretzel bites turn bread baking into a true art. The sourdough starter’s natural fermentation adds a tangy taste and chewiness. This makes these pretzels truly special.

Using a sourdough recipe in your baking adds depth to flavors. The longer fermentation time makes the pretzels more complex and easier to digest. This makes them a healthier option.

The magic of sourdough is in its crust and soft inside. The fermentation acids create a crispy outside and a soft, airy inside. This gives a perfect mix of textures.

Here’s how sourdough pretzel bites compare to commercial ones:

AspectSourdough Pretzel BitesCommercial Pretzels
FlavorRich and tangySweet and mild
TextureChewy with crisp crustUniformly chewy
HealthImproved digestibilityContains preservatives

A Brief History of Sourdough Pretzels

Pretzels have a long history, starting in European monasteries. Monks first made them, and they were loved for their shapes and tastes. They became a big part of religious and festive events.

Origins of Pretzel Making

The first pretzels were simple twists of dough, looking like arms crossed in prayer. This early form set the stage for the tasty bread baking methods that followed.

The Sourdough Revolution

Lately, there’s been a big comeback to old-school bread baking ways. Bakers are using sourdough starters again. This adds a rich flavor and texture to sourdough pretzel bites, just like the monks made them.

Modern Pretzel Evolution

Now, pretzels are a gourmet treat. The love for sourdough pretzel bites shows a trend towards making small, handmade snacks. This change shows how pretzels are still loved today, in new ways.

EraMilestone
Early Middle AgesCreation of the first pretzels in European monasteries
19th CenturyIntroduction of mass-produced pretzels in the United States
21st CenturyRise of artisanal and sourdough pretzel bites

Essential Ingredients for Perfect Pretzel Bites

To make the perfect pretzel bites, start with the right ingredients. A good sourdough recipe gives your dough a tangy flavor.

Flour is key for your pretzel dough. Use high-quality bread flour for a chewy texture. Brands like King Arthur or Bob’s Red Mill work well.

Water makes the flour come alive and activates the sourdough starter. Use filtered water for better taste and fermentation. Salt adds flavor and strengthens the dough, making pretzels more resilient.

The sourdough starter is vital for depth in your easy baking recipes. It makes your pretzels unique. Make sure your starter is active and bubbly for the best results.

  • Optional Ingredients:
    • Honey or malt syrup for sweetness and color.
    • Butter or oil for richer flavor and texture.
    • Seeds like sesame or poppy for a crunchy topping.

Choosing the right ingredients is key to mastering your pretzel dough. Focus on quality and understanding each ingredient’s role. This way, you can make delicious sourdough pretzel bites every time.

IngredientRoleTips
FlourProvides structure and chewinessUse high-protein bread flour for best results
WaterHydrates the dough and activates the starterPrefer filtered water to avoid impurities
SaltAdds flavor and strengthens doughSea salt is a great choice for even distribution
Sourdough StarterLeavening agent and flavor enhancerEnsure your starter is active and bubbly
HoneySweetens and browns the pretzelsUse sparingly to balance flavors
ButterEnriches the dough’s flavorMelt before adding for better incorporation

Required Equipment and Tools

Making homemade pretzels is a fun and rewarding task. You need the right tools to succeed. Whether you’re new to bread baking or want to get better, the right equipment is key.

Basic Kitchen Equipment

Most kitchens already have what you need for pretzels. You’ll find:

  • Mixing bowls
  • Baking sheets
  • Measuring cups and spoons
  • Whisk or wooden spoon

Specialist Tools for Better Results

To take your bread baking to the next level, consider these tools:

  • Dough scraper – great for sticky dough
  • Lame knife – perfect for scoring pretzels
  • Measuring scale – for exact ingredient amounts

Optional Gadgets

For extra precision and ease, these gadgets are helpful:

  • Digital scale – for exact ingredient weighing
  • Proofer – keeps dough at the best rising temperature
  • Stand mixer – makes kneading easier
CategoryExamplesPurpose
Basic Kitchen EquipmentMixing bowls, baking sheetsPreparing and baking dough
Specialist ToolsDough scraper, lame knifeHandling dough, scoring pretzels
Optional GadgetsDigital scale, prooferPrecision measurements, optimal dough rising

Making Your Sourdough Starter

Creating a strong sourdough starter is key for great bread and tasty sourdough pretzel bites. Follow these steps to make and keep your starter.

Starting from Scratch

Start by mixing equal parts of flour and water in a glass container. Use 100 grams of whole wheat flour and 100 grams of water. Stir well and cover loosely to let air in. Let it sit at room temperature for 24 hours.

Maintaining Your Starter

Feed your starter every day by throwing away half and adding fresh flour and water. This keeps it healthy and active. Keep it in a warm spot to help it grow.

Troubleshooting Common Issues

If your starter is not active or smells bad, try changing the flour or feeding schedule. The right temperature and water are key to avoiding problems.

DayActionAmount
1Mix flour and water100g each
2-7Feed dailyDiscard 50%, add 50g each of flour and water
8+MaintainContinue daily feeding or refrigerate

Step-by-Step Baking Process

Start by making the perfect pretzel dough. Mix flour, water, salt, and sourdough starter until it comes together. This step is key for a chewy pretzel texture.

  1. Kneading the Dough: Put the dough on a floured surface and knead for 8-10 minutes. This develops the gluten, making the pretzels strong.
  2. Shaping into Bites: Cut the dough into small pieces. Roll each into a rope and twist into pretzel shapes or bite-sized pieces.
  3. Proofing: Put the shaped pretzels on a baking sheet and let them rise in a warm place for 30 minutes. This makes them lighter.
  4. Baking Soda Bath: Mix baking soda with water for a special bath. Dip each pretzel bite in it for 30 seconds. This adds flavor and a shiny finish.
  5. Baking: Heat your oven to 450°F (230°C). Bake the pretzel bites for 12-15 minutes until they’re golden brown. Watch them closely to avoid overcooking.

For the best results, make sure your oven is hot and don’t overcrowd the baking sheet. These recipes are easy, even for beginners. Follow each step carefully to get pretzel dough that’s chewy and full of flavor. Your homemade pretzels will be a hit with everyone.

Creative Variations and Toppings

Sourdough pretzel bites are perfect for making your own unique snacks. They can be sweet or savory, depending on what you like. This makes them a great choice for any occasion.

Sweet Options

Make your sourdough pretzel bites into sweet treats with these toppings:

  • Cinnamon Sugar: A classic favorite that adds a warm, sweet crunch.
  • Chocolate-Coated: Dip bites in melted dark or milk chocolate for a rich treat.
  • Glazed with Honey: A natural sweetener that gives a glossy finish.

Savory Combinations

For those who love savory flavors, try these:

  • Cheese-Topped: Sprinkle shredded cheddar or parmesan for a melty delight.
  • Herb-Infused Dough: Incorporate rosemary or garlic into the dough for added aroma.
  • Spicy Mustard Dip: Pair with a tangy mustard sauce for an extra kick.

Dietary Modifications

It’s easy to make these bites fit different diets:

  • Gluten-Free: Use gluten-free flour blends to make pretzel bites suitable for gluten intolerance.
  • Vegan: Replace dairy ingredients with plant-based alternatives without sacrificing taste.
  • Low-Sodium: Reduce salt in the dough and toppings for a heart-friendly option.
Variation TypeExamples
Sweet OptionsCinnamon Sugar, Chocolate-Coated, Honey Glaze
Savory CombinationsCheese-Topped, Herb-Infused, Spicy Mustard Dip
Dietary ModificationsGluten-Free, Vegan, Low-Sodium

Storing and Reheating Tips

Keeping your sourdough pretzel bites fresh is all about proper storage. For a few days, store them in an airtight container at room temperature. This keeps their taste and texture perfect for up to three days.

Freezing is the best choice for longer storage. Put the pretzel bites in a freezer-safe bag, squeezing out air. They can stay fresh in the freezer for up to three months. Just reheat them to get their crispy outside and soft inside back.

Reheating your homemade pretzels is simple. Preheat your oven to 350°F (175°C). Place the pretzel bites on a baking sheet. Bake for 5-10 minutes until they’re crispy again. Or, use the microwave for a quicker option, though they might not be as crispy.

Leftover pretzel bites can be turned into new snack ideas. Crush them for a crunchy coating on chicken tenders or mix them into savory trail mix. These ideas help reduce waste and add variety to your snacks.

Storage MethodDurationTips
Airtight ContainerUp to 3 daysStore at room temperature away from direct sunlight.
FreezingUp to 3 monthsUse freezer-safe bags, remove excess air.
Reheating in OvenN/APreheat to 350°F and bake for 5-10 minutes.
MicrowaveN/AHeat for 20-30 seconds, may reduce crispiness.

Conclusion: Mastering Your Sourdough Pretzel Bite Journey

Making homemade pretzels with sourdough is easy and fun. Each batch lets you get better and try new tastes. It’s a rewarding and tasty experience.

You can make your pretzels just the way you like them. Whether you like sweet or savory, you can make them special. They’re perfect for impressing guests.

These pretzels are great for any time. They have a rich flavor and a chewy texture. Keep trying new recipes to grow your baking skills.

Learning to make sourdough pretzel bites is just the start. It opens up a world of tasty pretzel recipes. Keep exploring and making delicious treats at home.

FAQ

What makes sourdough pretzel bites different from regular pretzels?

A: Sourdough pretzel bites have a tangy flavor and chewy texture. This is thanks to the sourdough starter’s natural fermentation. It makes them taste better than regular pretzels.

Can I use a store-bought sourdough starter for homemade pretzels?

Yes, you can use a store-bought sourdough starter for homemade pretzels. Make sure the starter is active and well-fed. This will help your pretzel dough turn out great.

What are some easy baking recipes for beginners interested in bread baking?

Beginners should start with sourdough pretzel bites. They are easy to make and introduce you to bread baking. Plus, you get to enjoy making homemade pretzels.

How do I store homemade pretzel dough for later use?

Store homemade pretzel dough in an airtight container in the fridge for up to 3 days. For longer storage, freeze it for up to three months. Thaw it in the fridge before baking.

What are some creative snack ideas using sourdough pretzel bites?

A: Sourdough pretzel bites go well with cheese, mustard, or hummus. You can also add herbs, spices, or sweet toppings like cinnamon sugar. This makes for a tasty snack idea.

Are there any gluten-free variations for sourdough pretzel bites?

Yes, you can make gluten-free sourdough pretzel bites. Use a gluten-free sourdough starter and substitute regular flour with gluten-free alternatives. Make sure all ingredients are gluten-free.

How long does it take to make delicious pretzels from scratch?

Making delicious pretzels from scratch takes about 4 to 5 hours. This includes time for the dough to rise and the pretzels to bake. Using a sourdough starter may add extra time for fermentation.

What equipment do I need for making sourdough pretzel bites at home?

You’ll need basic kitchen tools like mixing bowls, a baking sheet, and a dough scraper. For better results, consider a digital scale, proofing basket, and a baking stone.

Can I make appetizer recipes using sourdough pretzel bites?

Absolutely! Sourdough pretzel bites are perfect for appetizers. Serve them with dips, make mini pretzel sliders, or top them with cheese and herbs. They’re a hit with any crowd.

What are the best toppings or dips for sourdough pretzel bites?

Great toppings and dips for sourdough pretzel bites include melted cheese, mustard, and beer cheese dip. Honey mustard, or even sweet toppings like chocolate sauce and caramel, are also great. They enhance the pretzels’ savory taste.

Christmas Dessert Recipes: Mouth-Watering Holiday Sweets

Christmas dessert recipes are key to holiday fun, making memories with loved ones. They offer a mix of old favorites and new twists. This variety makes your holiday celebrations even more special.

There’s a recipe for every skill level, from simple to complex. This means everyone can find something they’ll love to make and eat.

Whether you’re an expert or just starting, there’s a world of possibilities. You can make classic treats or try new, exciting flavors. The right dessert can turn your holiday into a memorable event.

Key Takeaways

  • Christmas dessert recipes are a vital part of holiday celebrations, offering a range of festive treats to enjoy.
  • From traditional favorites to modern twists, there’s a christmas dessert recipe to suit every taste and skill level.
  • Holiday sweets can create lasting memories for you and your loved ones, making them a crucial part of your festive experience.
  • Exploring different christmas dessert recipes can help you discover new favorite festive treats.
  • With the right holiday sweets, you can elevate your celebration and make it a truly special occasion.

Traditional Christmas Dessert Favorites

Holiday celebrations are not complete without traditional Christmas desserts. These sweet treats bring families together. They add a festive touch to every gathering.

Classic Christmas Pudding

Christmas pudding is a big part of British tradition. It’s made with dried fruits, spices, and suet. It’s often aged for weeks to get its rich flavor.

This dessert is a symbol of prosperity and good fortune for the coming year.

Gingerbread House

Building a gingerbread house is a favorite holiday activity. It’s made from gingerbread cookies, icing, and decorations. It lets everyone show their creativity.

For a sturdy house, use royal icing as glue. Let each section dry before adding more decorations.

Fruit Cake Variations

Fruit cake has many variations, offering a modern twist. Different places add unique ingredients like nuts or tropical fruits. Some even add chocolate.

To make it more appealing today, recipes use lighter flavors. They also focus on creative presentation.

DessertKey IngredientsCultural Significance
Christmas PuddingDried fruits, suet, spicesSymbolizes prosperity and tradition
Gingerbread HouseGingerbread, royal icing, candiesFosters creativity and family bonding
Fruit CakeDried fruits, nuts, spicesRepresents abundance and festive spirit

Quick and Easy Holiday Sweet Treats

Making easy Christmas desserts doesn’t need to take all day. Even if you’re short on time or new to baking, these quick holiday treats can add festive cheer to your table.

  • No-Bake Chocolate Oat Bars
  • Fruit Parfaits with Yogurt and Honey
  • Simple Sugar Cookies with Icing

Start by getting all your ingredients ready before you begin. Using pre-made parts can also save you time. This makes the holiday rush less stressful.

Give store-bought items a personal touch. For instance, add powdered sugar and sprinkles to brownies. Or, decorate cupcakes with fresh fruit and chocolate.

DessertIngredientsPrep Time
No-Bake Chocolate Oat BarsOats, chocolate, peanut butter, honey20 minutes
Fruit ParfaitsYogurt, mixed fruits, honey, granola10 minutes
Simple Sugar CookiesFlour, sugar, butter, eggs, icing30 minutes

Modern Twists on Christmas Desserts

Make your holiday celebrations special with modern christmas desserts. These treats mix old favorites with new ideas. They look great and taste amazing.

Fusion Holiday Flavors

Try fusion holiday flavors by adding international touches. Think about a fruit cake with matcha or gingerbread with chai spices. It’s a fun twist on classics.

Creative Dessert Presentations

Stand out with creative dessert presentations. Use fancy plating, bright colors, and cool shapes. Your desserts will look amazing and be perfect for social media.

Dietary-Friendly Adaptations

Offer dietary-friendly christmas sweets for everyone. Change old recipes to fit different diets. This way, no one misses out on the fun.

Dietary NeedAdaptation
Gluten-FreeUse almond or coconut flour instead of wheat flour.
VeganReplace eggs with flaxseed meal and use plant-based milk.
Low-SugarIncorporate natural sweeteners like stevia or erythritol.

Essential Baking Tips for Christmas Treats

Getting perfect holiday desserts starts with the right baking essentials. Having quality tools in your kitchen helps you follow your Christmas baking tips well.

  • Accurate Measuring Tools: Precision is key for consistent results.
  • Quality Mixing Bowls: Different sizes assist in various recipes.
  • Non-Stick Baking Sheets: Prevent unwanted spreading of cookies.

Choosing the right ingredients is key for your holiday dessert techniques. Always use room temperature butter and eggs for the best dough texture. It’s important to measure ingredients correctly, like spooning flour into cups and leveling them.

Watch out for common baking mistakes:

  1. Avoid overmixing to keep baked goods tender.
  2. Preheat your oven to ensure even baking.
  3. Use parchment paper for easier cleanup and better results.
Baking EssentialPurpose
Digital ScaleProvides precise measurements by weight.
Stand MixerEfficiently mixes doughs and batters.
Cooling RackEnsures even cooling of baked goods.

Make-Ahead Christmas Dessert Solutions

Preparing desserts ahead of time can make the holiday rush easier. Organize your baking schedule to make sure every dessert is ready when needed.

Freezer-Friendly Options

Many make-ahead christmas desserts can be frozen without losing flavor. Here are some freezer-friendly holiday sweets:

  • Cupcakes and muffins
  • Cookies and bars
  • Cheesecakes

Keep them in airtight containers and thaw in the fridge a day before serving.

Storage Guidelines

Proper dessert storage tips are key to keeping them fresh. Use airtight containers to avoid freezer burn. Store pastries in the fridge if not frozen. Label each container with the dessert name and date for easy organization.

Preparation Timeline

Creating a holiday baking timeline helps manage tasks well:

  1. Two weeks before: Bake and freeze desserts.
  2. One week before: Thaw and refrigerate as needed.
  3. Day before: Arrange and decorate your treats.

Follow this timeline for a stress-free holiday season with delicious desserts.

Decorating Your Holiday Sweets

Make your treats shine with christmas dessert decorations that wow your guests. You can use simple icing designs or get creative with sugar art. There are countless ways to make your holiday sweets stand out.

Boost your holiday cookie decorating with royal icing in holiday colors like red, green, and gold. Add sprinkles, edible glitter, or themed shapes to make each cookie special and fun.

For a challenge, try festive cake designs with fondant and piping. Make elegant patterns, holiday figures, or tiny scenes to top your cakes. They’ll be the stars of the show.

Use natural elements like fresh herbs or fruit for a touch of elegance. Pick colors that bring warmth and joy. This way, your desserts will be the highlight of any party.

  • Piping intricate designs with various tips
  • Working with fondant for smooth finishes
  • Creating edible decorations like sugar flowers

Set up your decorated sweets on a beautiful dessert table. By matching colors and styles, you’ll create a stunning centerpiece. It will add to the festive feel of your holiday parties.

Conclusion: Creating Sweet Holiday Memories

Embracing Christmas dessert traditions makes baking a fun family activity. Making family dessert recipes together creates lasting memories. Each recipe adds a new chapter to your family’s festive story.

Trying out different recipes and techniques helps you create unique holiday dessert traditions. Whether it’s a classic fruitcake or a modern gingerbread twist, each creation adds excitement to the season.

Sharing homemade sweets with loved ones strengthens bonds and spreads holiday cheer. These desserts are more than treats; they show care and create moments of happiness with friends and family.

These sweet gestures also benefit the community. Bringing desserts to gatherings or donating to local events can brighten the holidays for everyone. It’s a great way to connect and give back during this special time.

Remember, the most important ingredient in any Christmas dessert is the love and care you put into making it. These heartfelt efforts turn simple recipes into cherished memories, making your holiday celebrations truly special.

FAQ

What are some traditional Christmas desserts I can make?

Traditional Christmas desserts include classics like Christmas pudding, gingerbread houses, and fruit cake recipes. These treats have been loved for generations. They add a nostalgic touch to your holiday celebrations.

Can you recommend any easy Christmas dessert recipes for beginners?

Absolutely! Easy Christmas desserts include no-bake treats like chocolate peppermint bark and simple festive cookies. You can also make easy fruitcakes. These recipes need minimal ingredients and effort, perfect for beginners.

How can I make my Christmas desserts more modern and unique?

To modernize your Christmas desserts, try fusion flavors like matcha-infused fruit cakes or chai-spiced gingerbread. Use contemporary presentation ideas like geometric shapes or vibrant colors. This will make your desserts stand out.

What are some dietary-friendly Christmas sweets options?

There are many dietary-friendly Christmas sweets, like gluten-free cookies and vegan desserts. You can make delicious desserts by using alternatives like almond flour and natural sweeteners. This way, you can accommodate various dietary restrictions.

What essential baking tips should I follow for successful Christmas treats?

Key baking tips include accurately measuring ingredients and ensuring they’re at room temperature. Also, preheat your oven properly. Learn specific holiday dessert techniques, like perfecting Christmas pudding texture or building a sturdy gingerbread house.

How can I prepare Christmas desserts ahead of time?

Preparing desserts ahead of time can save you time during the holiday season. Choose freezer-friendly treats like brownies and decorated cookies. Use airtight containers and label each dessert with its date to keep them fresh.

What are some creative ways to decorate my holiday cookies and cakes?

For decorating cookies, use vibrant icing, edible glitter, and festive sprinkles. For cakes, try fondant decorations, intricate piping, or natural elements like herbs and fruits. These will make your desserts visually appealing and delicious.

How should I store different types of Christmas desserts to keep them fresh?

Proper storage is key to keeping your desserts fresh. Store gingerbread houses and fruit cakes in a cool, dry place or refrigerate if needed. Use airtight containers for cookies and freezer-friendly packaging for items you plan to freeze. This keeps your treats delicious throughout the holiday season.

What is a good preparation timeline for baking Christmas desserts?

Plan your make-ahead desserts first, like Christmas pudding and fruit cakes, which can be made weeks in advance. Decorate cookies and cakes closer to the holiday. Allocate specific days for each task to ensure a smooth baking experience leading up to Christmas.

Nourishing Breakfast Recipes to Power Your Athletic Performance

Nourishing Breakfast, What makes a great athlete? Is it the hard training or a smart nutrition plan? A good breakfast is key for athletes, giving them the energy to excel in training and competitions. Healthy breakfasts are vital for athletes to boost their performance. The right mix of sports nutrition helps athletes reach their goals.

Athletes need a diet full of nutrients to meet their physical needs. A great breakfast can significantly improve an athlete’s performance. By adding healthy breakfasts to their diet, athletes can enhance their nutrition and sports plans. But what makes a breakfast perfect for athletes, and how does it affect their training and competitions?

Key Takeaways

  • Healthy breakfast recipes for athletes are essential for optimal performance
  • Athletic nutrition plans should include a balance of nutrients
  • Sports nutrition plays a critical role in an athlete’s training and competition
  • A well-planned breakfast can provide the necessary energy for athletes
  • Incorporating healthy recipes into an athlete’s diet can improve overall performance
  • Athletes should focus on nutrient-dense foods to support their physical demands

Why Athletes Need a Power-Packed Breakfast

A nutritious breakfast is key for athletes to start their day right. Knowing sports nutrition science helps them make better food choices. These choices boost their performance and help them recover faster.

The Science Behind Athletic Nutrition

While we sleep, our bodies fix and heal. Eating a balanced breakfast fills up our energy tanks. It also gives us the fuel we need for our training.

Key Nutrients for Morning Energy

  • Complex Carbohydrates: Give us energy that lasts.
  • Lean Proteins: Help fix and grow our muscles.
  • Healthy Fats: Help make hormones and store energy.

Impact on Training Performance

BenefitDescription
Improved EnduranceSteady energy levels help us last longer in workouts.
Increased StrengthGood nutrition helps our muscles work better and stronger.
Enhanced Mental FocusHealthy meals improve our focus and decision-making.

Nourishing Breakfast Recipes for Athletes

A balanced breakfast is key for athletes to start their day right. It gives them the energy and nutrients they need. Here are some healthy options to boost your athletic performance.

Quick High-Protein Options

  • Egg White Frittatas: Full of protein and low in fat, great for muscle repair.
  • Greek Yogurt Parfaits: With fruits and nuts, they offer protein and healthy fats.
  • Protein Pancakes: Made with protein powder and oats, they give a filling start.

Complex Carbohydrate-Rich Meals

  • Overnight Oats: Easy to make and full of fiber for lasting energy.
  • Whole Grain Toast with Nut Butter and Banana: Offers complex carbs, healthy fats, and potassium.
  • Quinoa Breakfast Bowls: A versatile base with protein and essential minerals.

Smoothie Bowl Variations

  • Berry Blast Bowl: Mixed berries, spinach, and protein powder for a refreshing start.
  • Tropical Green Bowl: Mango, pineapple, kale, and Greek yogurt for a nutrient-dense option.
  • Chocolate Peanut Butter Bowl: Cocoa, banana, peanut butter, and almond milk for a tasty treat.

Adding these high-protein breakfast recipes, complex carb breakfast ideas, and athlete smoothie bowls to your morning can boost your energy. It also supports your training effectively.

Timing Your Pre-Workout Breakfast

Getting your pre-workout meal timing right is key for top performance. A balanced breakfast before exercise gives your body the energy it needs to do its best.

  • Eat a big meal 2-3 hours before you start training for lasting energy.
  • Go for smaller, easy-to-digest snacks 30 minutes to an hour before.
  • Choose foods high in complex carbs and moderate protein.

Knowing how digestion and athletic performance work helps plan your meals. The right pre-workout meal timing lets your body use nutrients well during exercise.

Meal SizeTiming Before ExerciseRecommended Foods
Large Meal2-3 HoursOatmeal with fruits, eggs with whole-grain toast
Small Snack30-60 MinutesBanana, yogurt, a handful of nuts

Post-Training Recovery Breakfast Ideas

After a tough workout, your body needs post-workout recovery meals to fix and grow muscle. Eating the right foods helps your body recover faster and get ready for the next workout.

Protein-Rich Recovery Meals

Protein is key in your recovery breakfast. Try salmon and avocado toast for a tasty and healthy choice. A tofu scramble with veggies is a great plant-based option. A high-protein smoothie is quick and filling.

Nutrient Replenishment Strategies

Replenishing nutrients after exercise means balancing electrolytes, restoring glycogen, and getting enough micronutrients. Eat foods high in potassium, magnesium, and calcium to help muscles and recovery.

Quick-Fix Options Under 15 Minutes

For those with tight schedules, quick athlete breakfasts are perfect. Grab-and-go overnight oats and protein bars are great. Quick smoothie recipes make a nutritious meal in minutes.

MealProtein (g)Carbohydrates (g)Preparation Time
Salmon and Avocado Toast253010 mins
Tofu Scramble201515 mins
High-Protein Smoothie30405 mins
Overnight Oats10505 mins (prep the night before)
Protein Bar1525Instant

Meal Prep Strategies for Athletic Success

Effective meal planning for athletes is key to staying energized and performing well. Set aside a day each week for planning your breakfast. This saves time and ensures you have healthy meals ready to start your day.

Try batch cooking breakfast by making big batches of important ingredients. Cook oatmeal, hard-boiled eggs, or sautéed veggies in advance. These can be mixed and matched to create different meals all week. It keeps your diet exciting and balanced.

  • Plan a diverse menu to avoid monotony.
  • Store meals in airtight containers to maintain freshness.
  • Incorporate different flavors and textures for variety.

Use time-saving meal prep to tackle busy mornings or travel days. Make quick meals like smoothie packs, overnight oats, or protein bars. These are perfect for when you’re in a rush but still want a healthy breakfast.

By using these meal prep tips, athletes can keep up a healthy breakfast habit. This boosts their performance and overall health.

Conclusion: Fueling Your Athletic Journey with Proper Nutrition

A well-planned breakfast is key for athletes. It boosts performance and health.

Starting with balanced nutrition gives your body the fuel it needs. High-protein foods, complex carbs, and vitamins keep energy up during workouts.

Meal prepping makes mornings easier. It helps you stay on track with healthy meals. This is vital for long-term success in sports.

Recovery is as important as training. A post-workout breakfast with protein and nutrients helps heal faster. Quick, healthy choices are best for refueling.

Focus on a nutritious breakfast to improve your sports performance and recovery. Try different recipes and strategies to find what suits you best.

See breakfast as a crucial part of your training. Good nutrition is a powerful ally for reaching your athletic goals and living a healthy, active life.

FAQ

Why is a healthy breakfast important for athletes?

A healthy breakfast gives athletes the nutrients and energy they need. It helps with muscle recovery and boosts endurance. It also improves focus during training and competitions.

What are some high-protein breakfast options for athletes?

High-protein breakfasts include egg white frittatas and Greek yogurt parfaits. Protein pancakes and tofu scrambles are also good. These meals help repair and grow muscles, giving athletes the energy they need for tough workouts.

How should athletes time their pre-workout breakfast?

Athletes should eat a big meal with carbs and proteins 2-3 hours before working out. For a quick meal, a small, easy-to-digest option can be eaten 30 minutes to an hour before.

What key nutrients should be included in an athlete’s breakfast?

Breakfasts for athletes should have complex carbs for energy, lean proteins for muscle repair, and healthy fats for health. Vitamins and minerals are also important for the body’s functions needed for performance.

What are some meal prep strategies for maintaining a nutritious breakfast routine?

Meal prep strategies include making breakfasts like overnight oats or quinoa bowls in advance. Preparing ingredients ahead of time and storing meals properly helps. Planning breakfasts for the week saves time and keeps the routine consistent.

Can you suggest quick post-training recovery breakfast ideas?

Quick recovery breakfasts include salmon and avocado toast, high-protein smoothies, and overnight oats. These meals provide the proteins and carbs needed to replenish muscle glycogen and aid in recovery.

How does meal timing affect athletic performance?

Proper meal timing gives athletes the energy they need for training and helps with recovery. Eating the right foods at the right time can boost endurance, strength, and mental focus during workouts and competitions.

Easy Creamy Shrimp Pasta Recipe Ready in 30 Minutes

Are you craving a delicious pasta dish that’s quick to make and full of flavor? This creamy shrimp pasta recipe is perfect. In just 30 minutes, you can enjoy a meal that will wow your family and friends.

This recipe is easy to follow. It combines tender shrimp, a rich cream sauce, and al dente pasta. It’s both comforting and sophisticated. Whether you love seafood or pasta, this dish will please your taste buds and become a favorite.

Key Takeaways

  • Ready in just 30 minutes for a quick and delicious dinner
  • Features a creamy, flavorful sauce that coats the tender shrimp and pasta
  • A versatile dish that appeals to both seafood lovers and pasta enthusiasts
  • Budget-friendly and easy to prepare, making it a great option for busy weeknights
  • Delivers restaurant-quality results in the comfort of your own home

Why This Creamy Shrimp Pasta Recipe Is Perfect for Quick Dinners

This creamy shrimp pasta recipe is a top pick for fast dinner ideas. It’s quick, delicious, and won’t break the bank. It’s perfect for busy weeknights.

Time-Saving Benefits

This recipe is made for those who are short on time. Prep takes just 10 minutes, and cooking is done in 20. You’ll have a tasty homemade pasta dish ready in under 30 minutes. It’s fast and easy, fitting right into your busy schedule.

Restaurant-Quality Results at Home

The secret to its great taste is the mix of flavors and creamy sauce. Using top-notch seafood and ingredients, you can make a dish as good as a restaurant’s. All from your kitchen.

Budget-Friendly Meal Option

Eating out can be pricey. But this affordable seafood meals recipe lets you enjoy a fancy dish without spending a lot. It’s great for families or anyone wanting to save money without losing flavor.

Whether you’re a busy parent, a young professional, or just love homemade pasta dishes, this recipe is a lifesaver. It’s fast, high-quality, and affordable. It’s the ideal choice for fast dinner ideas that everyone will love.

Essential Ingredients for Perfect Creamy Shrimp Pasta

Making a tasty creamy shrimp pasta needs the right ingredients. At the core are the shrimp pasta ingredients. These include top-notch seafood, a creamy sauce, and some key extras. Let’s look at what makes this dish a hit.

Choosing the Right Shrimp

The shrimp is the main attraction. They should be fresh, plump, and firm. Avoid any that look off or smell bad. Medium-sized shrimp work best for their texture and taste.

Pasta and Cream Sauce

For pasta, pick a shape that goes well with creamy sauce, like fettuccine or linguine. The sauce is made from heavy cream, Parmesan cheese, and a bit of white wine. This mix makes a rich, indulgent sauce.

Flavor-Enhancing Ingredients

  • Garlic: Minced or crushed garlic adds depth and aroma to the dish.
  • Fresh Herbs: Chopped parsley, basil, or thyme can brighten up the flavors.
  • Lemon Juice: A squeeze of lemon juice provides a subtle acidity to balance the richness.

With these key shrimp pasta ingredients, you’re ready to make a creamy shrimp pasta that will wow everyone.

IngredientQuantityPurpose
Shrimp1 lbThe star of the dish, providing the main protein and fresh seafood flavor.
Pasta (fettuccine or linguine)8 ozThe base of the dish, providing a sturdy platform for the creamy pasta sauce.
Heavy Cream1 cupThe foundation of the creamy pasta sauce, adding richness and creaminess.
Parmesan Cheese1/2 cup, gratedEnhances the creamy pasta sauce with its savory and umami flavors.
Garlic3 cloves, mincedAdds depth and aroma to the dish, complementing the shrimp pasta ingredients.
White Wine1/4 cupProvides a subtle acidity that balances the richness of the creamy pasta sauce.
Fresh Herbs (parsley, basil, or thyme)2 tbsp, choppedBrightens up the flavors and adds a fresh, herbaceous note to the dish.
Lemon Juice1 tbspAdds a touch of acidity to cut through the richness of the creamy pasta sauce.

With these essential shrimp pasta ingredients, you’re ready to make a delicious and creamy shrimp pasta that will impress your family and friends.

Kitchen Tools and Equipment Needed

To make a tasty creamy shrimp pasta, you need some key kitchen tools and equipment. The right pasta cookware and cooking utensils are crucial. They help you get restaurant-quality results at home.

Must-Have Utensils

  • Large pot for boiling pasta
  • Colander for draining cooked pasta
  • Skillet or saucepan for sautéing shrimp and making the sauce
  • Wooden spoon for stirring and scraping the bottom of the pan
  • Whisk for blending the sauce ingredients

Optional but Helpful Tools

  1. Garlic press for mincing garlic with ease
  2. Zester for adding a touch of lemon or Parmesan flavor
  3. Measuring cups and spoons for precise ingredient proportions
  4. Food processor or blender for making a smooth, creamy sauce

Pasta Cooking Essentials

For perfectly cooked pasta, you need the right tools. Pasta cookware like a large pot and a colander are essential. A pasta fork or tongs can also be helpful for handling and transferring the pasta.

“The right tools can make all the difference in the kitchen, transforming a simple dish into a culinary masterpiece.”

Step-by-Step Cooking Instructions

Making a tasty creamy shrimp pasta at home is simple. Just follow these easy steps to learn how to make shrimp pasta. You’ll enjoy a meal that tastes like it came from a restaurant, all in your own kitchen.

  1. Start by boiling a large pot of salted water. Add your favorite pasta and cook until it’s al dente, as the package says.
  2. While the pasta cooks, heat a big skillet over medium-high. Add olive oil and the shrimp. Cook the shrimp until they’re pink and done, about 2-3 minutes each side. Take the shrimp out and set them aside.
  3. In the same skillet, melt butter over medium. Add minced garlic and cook for 1-2 minutes, until it smells good.
  4. Now, pour in the heavy cream and mix in the Parmesan cheese. Let the sauce simmer and thicken for 2-3 minutes, stirring now and then.
  5. Drain the pasta and add it to the creamy sauce. Mix well to coat the pasta evenly.
  6. Finally, add the cooked shrimp to the pasta. Season with salt and pepper to taste.

Serve the how to make shrimp pasta hot. You can garnish with fresh parsley or basil if you like. Enjoy your homemade creamy shrimp pasta masterpiece!

Tips for Achieving the Perfect Sauce Consistency

Getting the right sauce consistency is crucial for a delicious creamy shrimp pasta dish. You might want a thick, velvety sauce or a smooth, pourable one. These expert tips will help you get it just right every time.

Sauce Troubleshooting Guide

If your sauce is too thick, add some pasta cooking water or milk to thin it. If it’s too thin, simmer it gently to reduce the liquid. Don’t forget to adjust the seasoning for the best flavor.

Making the Sauce Ahead

Make the creamy pasta sauce ahead of time to save effort on busy nights. Just follow the recipe, then store it in an airtight container in the fridge for up to 3 days. When you’re ready, reheat it gently and toss it with fresh pasta.

Storage and Reheating

Leftover creamy shrimp pasta can stay in the fridge for up to 3 days. To reheat, warm it in a saucepan over low heat, stirring now and then. Don’t microwave it, as it can make the sauce consistency grainy or separate.

“The secret to a perfect creamy pasta sauce is all in the technique. Follow these tips, and you’ll be serving up restaurant-quality creamy pasta dishes at home in no time.”

Recipe Variations and Substitutions

Explore the full potential of your creamy shrimp pasta dish with exciting variations and substitutions. You can switch up the seafood, add more veggies, or meet dietary needs. The options are endless.

Looking for seafood pasta alternatives? Try using scallops, mussels, or a mix of proteins instead of shrimp. Each choice brings a unique taste to your dish.

Want to try pasta recipe variations? Try different pasta shapes like spaghetti or zucchini noodles for a low-carb option. You can also tweak the sauce with creamier versions or herbs and spices.

Need to make dietary modifications? No worries. This recipe can be adapted for gluten-free, dairy-free, or vegetarian diets. Use gluten-free pasta, plant-based milk and cheese, or protein-rich veggies like mushrooms or tofu.

This creamy shrimp pasta dish is incredibly versatile. Feel free to get creative and make it your own. Enjoy the endless possibilities!

VariationIngredient SwapDietary Consideration
Seafood PastaScallops, Mussels, Crab Meat
Vegetarian PastaMushrooms, Tofu, ChickpeasVegetarian, Vegan
Gluten-Free PastaGluten-Free Pasta NoodlesGluten-Free
Dairy-Free PastaPlant-Based Milk, Vegan CheeseDairy-Free

Remember, the secret to enjoying this recipe is to have fun and try new things. Find your favorite pasta dish by exploring all the possibilities!

Conclusion

This creamy shrimp pasta recipe is a true delight. It’s quick, flavorful, and impressive. It’s perfect for those who want a satisfying meal without hassle.

The dish combines tender shrimp, a rich sauce, and perfectly cooked pasta in just 30 minutes. It’s great for a weeknight dinner or to impress guests. It’s both tasty and convenient.

We encourage you to try this recipe. Enjoy making a delicious, budget-friendly Italian dish at home. Share the experience with loved ones. Buon appetito!

FAQ

How long does it take to make this creamy shrimp pasta recipe?

This creamy shrimp pasta recipe is quick to make. It’s ready in just 30 minutes. It’s perfect for a fast and easy dinner any night of the week.

What type of pasta works best for this recipe?

Choose a long, thin pasta like linguine or fettuccine. It pairs well with the creamy sauce and shrimp.

Can I make the sauce ahead of time?

Yes, you can make the sauce ahead. Store it in the fridge for up to 3 days. Reheat it when you’re ready to serve with pasta and shrimp.

Is this recipe budget-friendly?

Yes, it’s a budget-friendly meal. The ingredients are easy to find and not expensive. It’s great for families or those watching their budget.

Can I substitute the shrimp with another type of seafood?

Absolutely! You can use scallops, salmon, or mix different proteins. It’s a versatile recipe.

How do I ensure the perfect sauce consistency?

For the perfect creamy sauce, add heavy cream and Parmesan slowly. Stir constantly to avoid lumps. Adjust the seasoning to taste.

Can I make this recipe gluten-free or dairy-free?

Yes, you can make it gluten-free or dairy-free. Use gluten-free pasta and replace heavy cream with coconut or cashew cream.

Get The Best Recipes In 2025

Exit mobile version