
Table of Contents
Classic Chicken Salad Recipe with Eggs | Easy Homemade Dish
Are you looking for a tasty, protein-rich salad? This classic chicken salad with eggs is perfect. It’s a favorite in American homes, mixing tender chicken, creamy eggs, and fresh ingredients. It’s great for a quick lunch, a picnic, or any special event.

So, why do people love chicken and eggs together in a salad? Find out in this article. It’s a must-try for anyone who loves cooking or eating great food.
Key Takeaways
- Discover the rich flavor and nutrition of classic chicken salad with eggs
- Learn how to easily prepare this versatile and crowd-pleasing dish at home
- Explore the health benefits of combining chicken and eggs in a salad
- Uncover essential ingredients and kitchen tools for the perfect chicken salad
- Gain expert tips and tricks to elevate your chicken salad game
Why This Classic Chicken Salad with Eggs is a Must-Try
Chicken and eggs together in a salad is a nutritional powerhouse. This dish is not just tasty but also full of vitamins and minerals. It’s great for your health.
Health Benefits of Combining Chicken and Eggs
Chicken is lean and high in protein, with little fat. Eggs are full of vitamin B12, riboflavin, and selenium. Together, they make a dish that boosts muscle, energy, and immune health.
- High in protein to support muscle and tissue repair
- Packed with essential vitamins and minerals for overall health
- Helps to keep you feeling full and satisfied
Perfect for Meal Prep and Special Occasions
This chicken salad with eggs is versatile. It’s great for meal prep, offering a healthy, protein-rich option for lunch or snacks. It’s also a hit at parties and special events.
| Meal Prepping | Special Occasions |
|---|---|
| Easy to make in advance | Delicious and satisfying |
| Portable and convenient | Suitable for a variety of events |
| Provides a nutritious high-protein meal | Impresses guests with its flavor and presentation |
Looking for a healthy meal or a dish to impress at parties? Try this classic chicken salad with eggs. It’s packed with nutritional benefits and is super versatile.
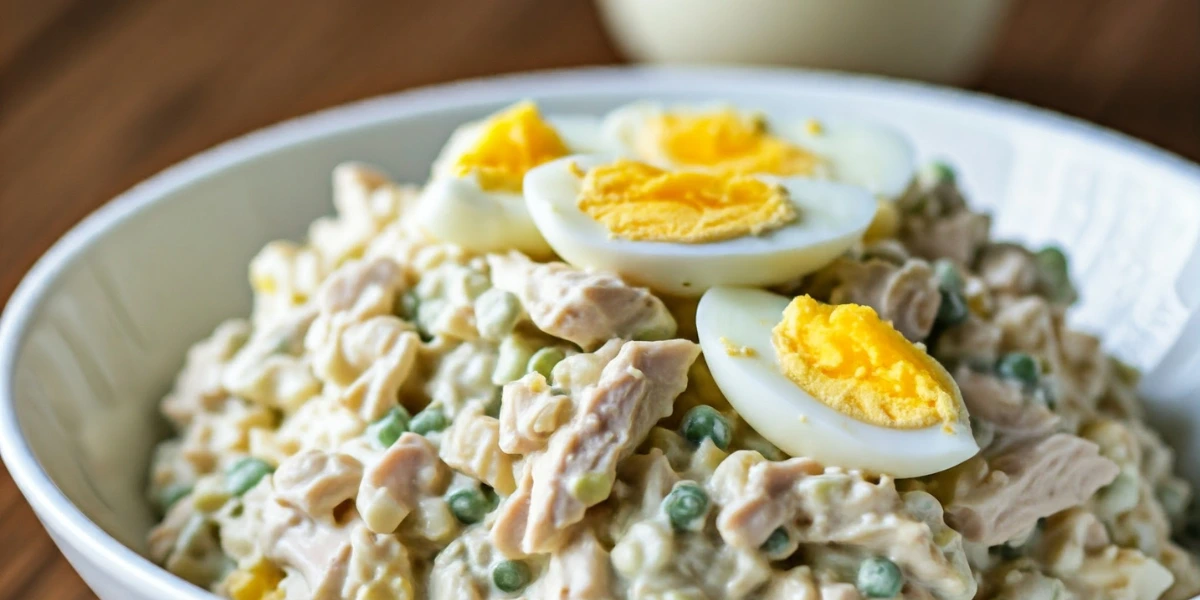
Essential Ingredients for the Perfect Chicken Salad Recipe with Eggs
Making the best chicken salad with eggs needs the right mix of fresh, quality ingredients. At its core, it has tender chicken breast and eggs that add protein. A creamy mayonnaise dressing is key, along with crunchy celery and sweet onion.
Here’s what you need for this tasty chicken salad:
- Cooked chicken breast, cubed or shredded (about 2 cups)
- Hard-boiled eggs, chopped (around 3-4 eggs)
- Mayonnaise (1/2 to 3/4 cup, for creaminess)
- Celery, diced (1/2 cup)
- Onion, finely chopped (1/4 cup)
- Salt and pepper to taste
- Optional: Chopped parsley, dill, or tarragon for more flavor
Choosing and mixing these key ingredients will help you make a delicious chicken salad. The freshest, best ingredients are crucial for success.
“The secret to a great chicken salad is in the balance of flavors and textures. The creamy mayonnaise, crunchy celery and onion, and tender chicken and eggs create a harmonious blend that’s simply irresistible.”
With these ingredients, you’re set to make the perfect chicken salad with eggs. Next, we’ll guide you through how to prepare it step by step.
Kitchen Tools and Equipment Needed
Making the perfect classic chicken salad with eggs needs a few key tools. You’ll need a food processor, mixing bowls, and a cutting board. The right tools make preparing the salad easy.
Time-Saving Utensils and Gadgets
Get a food processor to chop the chicken finely and mix the ingredients. You’ll also need sturdy mixing bowls in different sizes for mixing and serving. A cutting board is essential for chopping ingredients.
Storage Containers Recommendations
After making the salad, it’s important to store it right to keep it fresh. Use high-quality airtight containers for leftovers or meal prep. These containers keep flavors in and prevent drying out.
“Having the right kitchen tools on hand can streamline the preparation process and ensure your classic chicken salad with eggs turns out perfectly every time.”
With these essential tools and storage solutions, you’re ready to make a tasty classic chicken salad with eggs.
Step-by-Step Preparation Guide
Making the perfect chicken salad with eggs is easy. It involves a few key steps. Let’s go through them to make a tasty homemade dish.
Cooking the Chicken
Begin by cooking the chicken breasts. You can bake, poach, or grill them. Make sure they’re cooked well and tender before chopping them.
Boiling the Eggs
Boil water in a pot and add the eggs carefully. Cook for 6-8 minutes for hard-boiled eggs. Then, cool them in an ice bath, peel, and chop.
Chopping the Vegetables
Dice the celery, onion, and other veggies like green bell peppers or pickles. Make sure they’re all the same size for a smooth salad.
Mixing the Ingredients
In a big bowl, mix the chicken, eggs, and veggies. Start with a little mayonnaise and add more as needed. Season with salt, pepper, and herbs like dill or paprika.

Follow these steps to make a tasty chicken salad with eggs. It’s great for any time, from quick lunches to big gatherings.
Expert Tips for Making Creamy Chicken Salad
Making the perfect chicken salad is all about a creamy texture and great taste. As a seasoned chef, I’m here to share my best tips. These will help you make your chicken salad as good as the ones in restaurants.
Choosing the Right Mayonnaise
The right mayonnaise is crucial for a rich chicken salad. Go for a high-quality, full-fat mayonnaise for the best taste. Stay away from low-fat or “light” versions, as they can make the salad watery.
For flavor, choose a classic, neutral-tasting mayonnaise. This lets the other ingredients stand out.
Seasoning Secrets
Seasoning is essential for a great chicken salad. Begin with salt and pepper, then add herbs and spices for more flavor. Try dried dill, paprika, or garlic powder for a nice twist.
The goal is to enhance the chicken and eggs without overpowering them.
Texture Enhancement Techniques
To get the perfect creamy texture, use a few tricks. Chop or shred the chicken into small pieces so the mayonnaise coats it well. Also, mash some of the egg yolks gently to make the salad creamy and velvety.
Follow these expert tips to make a chicken salad that’s sure to impress. Try different flavors and textures to create your own unique dish. Enjoy the creamy, tasty results and wow your loved ones with your cooking skills.
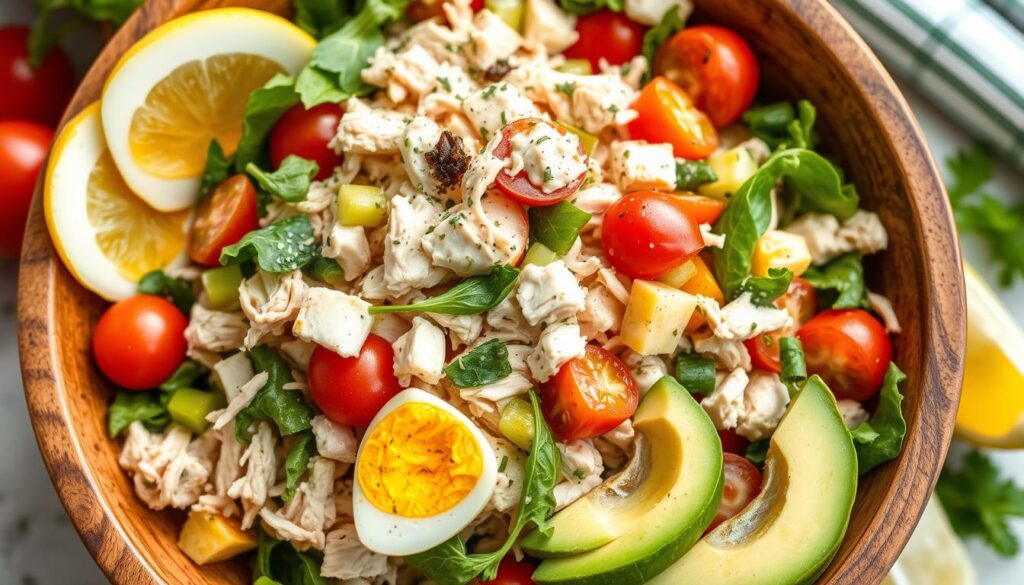
Serving Suggestions and Pairing Options
This classic chicken salad with eggs is perfect for many uses. It’s great as a sandwich filling, salad topping, or side dish. It can make any meal more enjoyable.
Try it in a sandwich with toasted bread or croissants. Add lettuce, tomatoes, or pickles for extra flavor. Or, put it in a wrap with greens and side dishes like carrots or avocado.
For a main course, place it on a bed of greens. Add fresh herbs, nuts, or balsamic vinaigrette for a light meal.
It’s also good with sides like roasted potatoes, asparagus, or a green salad. The creamy texture and savory flavors go well with many side dishes.
Finish the meal with a refreshing drink. Choose a white wine, lemonade, or iced tea. There are many ways to enjoy this versatile dish.

Storage Tips and Make-Ahead Instructions
Keeping your classic chicken salad with eggs fresh is key. Follow these easy steps to keep it delicious:
Proper Refrigeration Methods
After making your chicken salad, refrigerate it right away. Put it in an airtight container and store it in the coldest part of your fridge. This is usually the back shelves. Don’t let it sit at room temperature for over two hours. This can lead to harmful bacteria growth, affecting food safety.
How to Maintain Freshness
- Eat the salad within 3-4 days for the best freshness.
- If you’re keeping it longer, split it into smaller parts. Store them in separate containers. This helps keep air out and prevents spoilage.
- When reheating leftovers, make sure they’re hot enough. This stops foodborne pathogens from growing.
By sticking to these refrigeration and storage tips, your chicken salad stays fresh and tasty. It’s perfect for meal prep and special events.
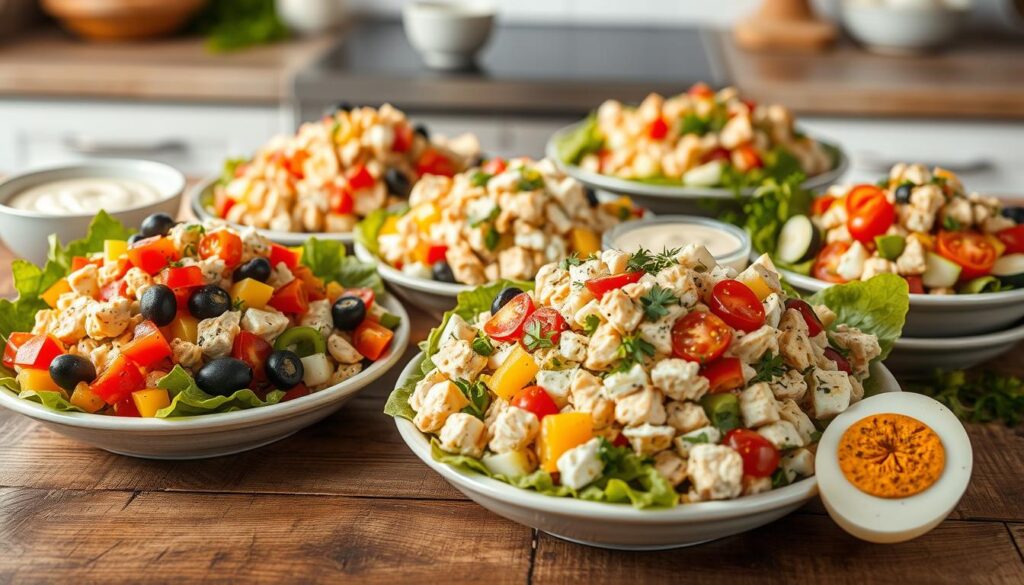
Common Variations and Substitutions
Chicken salad is a versatile dish that can be changed in many ways. You can make it fit different diets or just try new tastes. It’s easy to make this classic dish your own.
Dietary-Friendly Options
- For a gluten-free version, skip the bread or crackers. Serve it on greens or gluten-free bread.
- On a low-carb or keto diet? Try it in avocado halves or with cucumber slices for a healthy snack.
- Vegans and vegetarians can use chickpeas or tofu instead of chicken for a plant-based option.
Flavor Variations
Want to spice up the classic recipe? Add fresh herbs like dill, basil, or tarragon. For crunch, mix in chopped celery, apples, or grapes. Add a kick with cayenne pepper or smoked paprika.
Try using Greek yogurt or avocado instead of mayonnaise. This gives a creamy, tangy taste.
“The beauty of chicken salad is that it’s a blank canvas for your culinary creativity. Don’t be afraid to experiment with different ingredients and flavors to find your perfect combination.”
Looking to meet dietary needs or just want to try new flavors? The options for recipe variations, ingredient substitutions, and flavor additions are endless with this classic dish.
Conclusion
This classic chicken salad with eggs is loved by many. It’s easy to make and tastes amazing. The mix of roasted chicken, hard-boiled eggs, and mayonnaise makes it a great choice for quick meals or special events.
You can serve it on greens, in sandwiches, or with crackers. It’s a hit with everyone, making it a must-have in your kitchen. You can also try different seasonings and add-ins to make it your own.
Try making this chicken salad today. Its mix of flavors and textures will make it a favorite in your home. It’s a dish you’ll want to make over and over again.
FAQ
What are the main ingredients in this classic chicken salad recipe?
The key ingredients are cooked chicken breast, hard-boiled eggs, and mayonnaise. You’ll also need celery, onion, and seasonings.
What are the health benefits of combining chicken and eggs in this salad?
Chicken and eggs are great for protein, helping muscles grow and repair. They also have vitamins and minerals, making the salad nutritious and filling.
Is this chicken salad recipe suitable for meal prepping?
Yes, it’s perfect for meal prep. You can make it ahead and store it in airtight containers. It’s great for busy days or special events.
What types of mayonnaise work best for this recipe?
Use a high-quality, full-fat mayonnaise for the best taste and texture. Low-fat or reduced-calorie mayonnaise can change the salad’s flavor and feel.
How should the chicken and eggs be prepared for this recipe?
Cook the chicken until it’s fully done, then shred or dice it. Hard-boil the eggs, cool them, and chop or slice them before adding to the salad.
What are some tips for enhancing the texture of the chicken salad?
For a creamy texture, balance the mayonnaise with other ingredients. Chop the veggies and eggs small to mix well and keep the salad smooth.
How long can the chicken salad be stored, and what are the best storage methods?
Store it in an airtight container in the fridge for 3-4 days. Keep it chilled and avoid room temperature to keep it safe and fresh.
Are there any common variations or substitutions for this recipe?
Yes, you can add grapes, pecans, or dried cranberries for sweetness and crunch. For different tastes, try Greek yogurt instead of mayonnaise or use turkey or tuna.


")


