Category Archives: Desserts

Classic Nestle Chocolate Chip Cookie Recipe for Baking

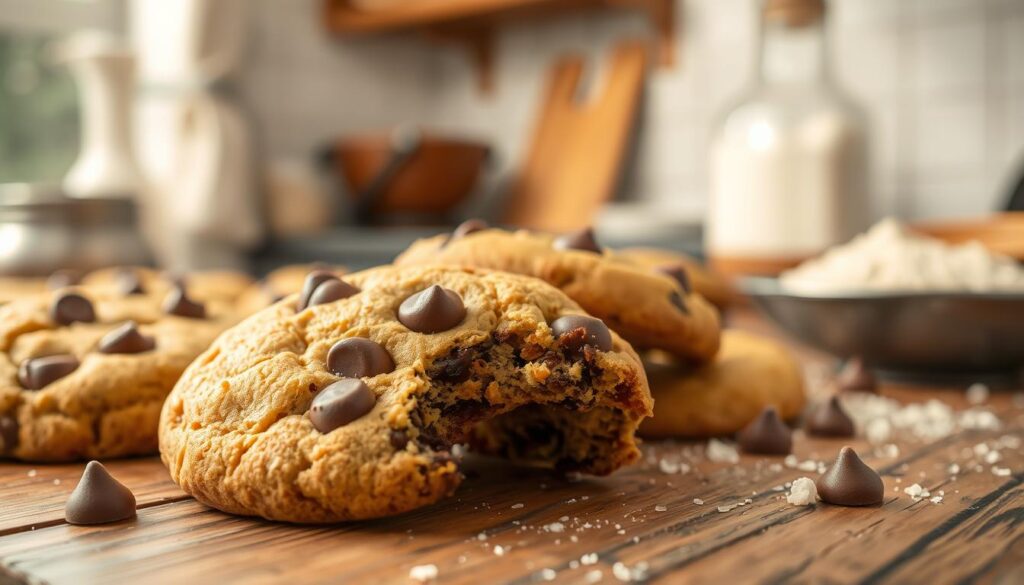
Imagine the smell of fresh chocolate chip cookies in your kitchen. This recipe from Nestle Toll House has been loved for years. What makes it so popular? We’ll look into its history, key ingredients, and how to make the perfect cookie.

Ever wondered why Nestle Toll House cookies are so loved? What’s the secret to making them at home? Let’s dive into the story of this beloved cookie.

Key Takeaways

  • Discover the captivating story behind the Nestle Toll House chocolate chip cookie recipe
  • Learn the essential ingredients and proper techniques to bake the perfect cookies
  • Explore a variety of recipe variations and modifications to suit your taste preferences
  • Uncover tips and tricks to achieve the perfect cookie texture, from soft and chewy to crisp and golden
  • Gain insights on proper storage and freshness guidelines to enjoy your homemade cookies for longer

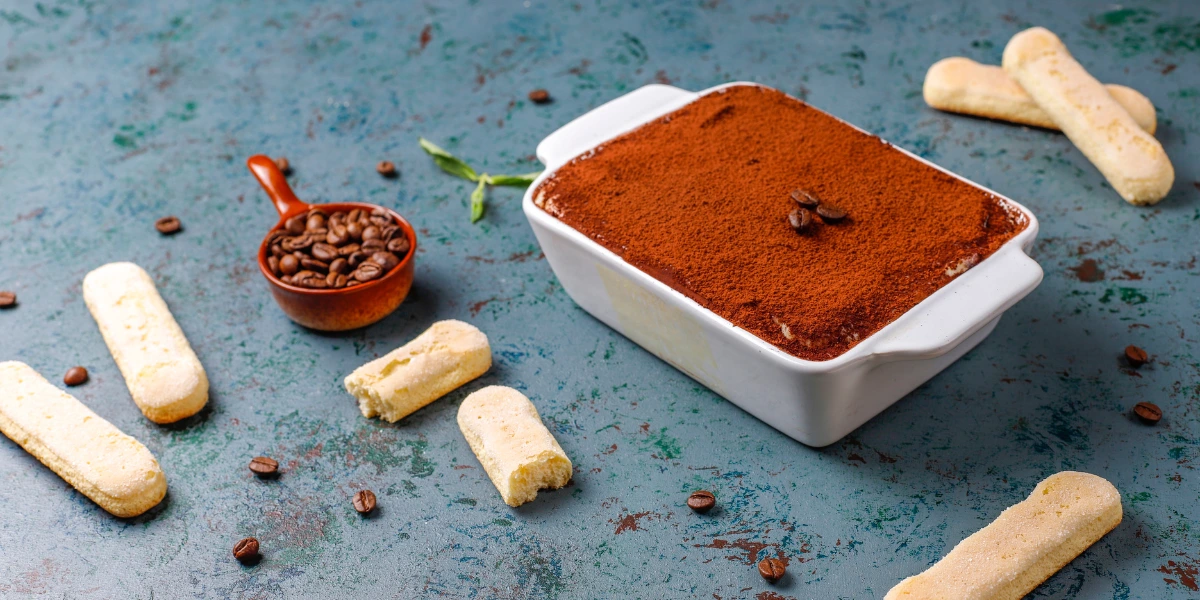
The Nestle Toll House Chocolate Chip Cookie recipe started at the Toll House Inn in Whitman, Massachusetts. In the 1930s, Ruth Wakefield, the inn’s owner, made delicious desserts. She created a cookie with chopped Nestle chocolate.

The Ruth Wakefield Story

Ruth Wakefield, a dietitian and food lecturer, made the Toll House cookie. In 1938, she added broken Nestle semi-sweet chocolate to her cookie dough. This created the famous chocolate chip cookie. Guests at the Toll House Inn loved it.

Evolution of the Original Recipe

  • Wakefield’s first recipe used chopped baker’s chocolate.
  • Later, Nestle’s semi-sweet chocolate chips were used for a better result.
  • The dough was adjusted for flour, sugar, and butter to get the right texture.

How Nestle Made It Famous

In 1939, Wakefield gave Nestle her recipe. Nestle saw its potential and started putting it on their chocolate chip packaging. This made the Toll House cookie a favorite across America. Nestle’s efforts made it a staple in kitchens for many years.

YearEvent
1930sRuth Wakefield creates the Toll House Cookie at the Toll House Inn
1939Wakefield shares the recipe with Nestle, who begins including it on their chocolate chip packaging
1940s-PresentNestle’s marketing and distribution of the recipe helps popularize the chocolate chip cookie nationwide

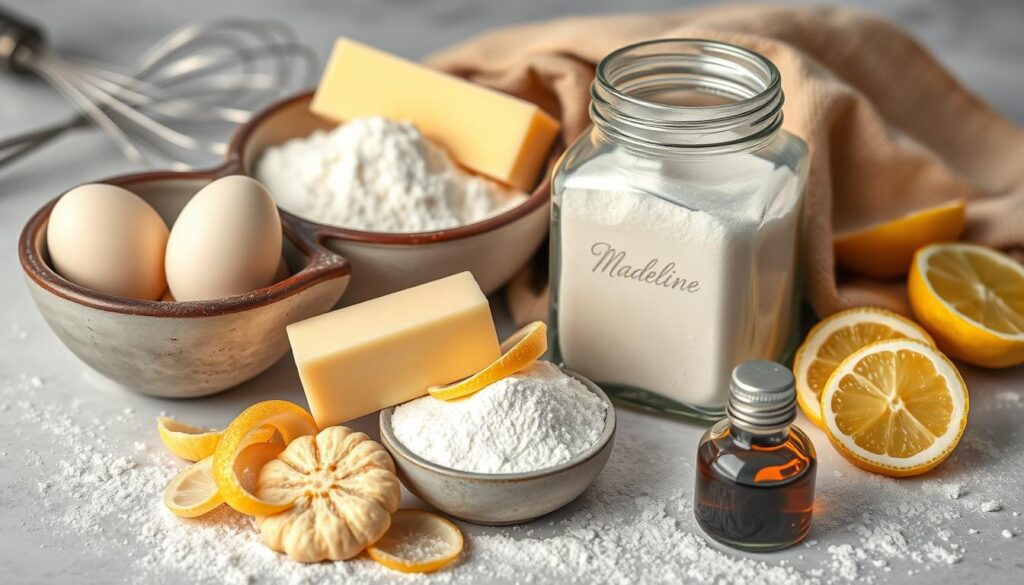
Essential Ingredients for Perfect Chocolate Chip Cookies

Making the classic Nestle chocolate chip cookie recipe needs the right mix of ingredients. Each part, from baking basics to Nestle Toll House morsels, is vital. They help get the perfect texture and taste.

The base of this recipe is butter, brown sugar, and vanilla extract. These ingredients work together. They make the cookies taste like Nestle and have a soft, chewy feel.

IngredientImportance
ButterProvides richness, texture, and helps create the signature chewiness.
Brown SugarAdds depth of flavor and contributes to the cookie’s soft, moist center.
Vanilla ExtractEnhances the overall flavor profile and complements the chocolate chips.
Nestle Toll House MorselsThe iconic chocolate chips that give these cookies their signature taste.

Nestle Toll House morsels are the best for chocolate chips. They have just the right sweetness and cocoa flavor. This makes them key to the classic recipe.

With these ingredients, you’re ready to make perfect Nestle chocolate chip cookies. They will surely please your family and friends.

Kitchen Tools and Equipment You’ll Need

To make the perfect Nestle chocolate chip cookies, you need the right tools. Essential baking tools and optional accessories are key. The right kitchen gear helps get the perfect texture and flavor.

Must-Have Baking Tools

  • Baking sheets: Choose high-quality baking sheets for even heat and to prevent warping.
  • Mixing bowls: Get a set of mixing bowls in different sizes for all your mixing needs.
  • Spatula: A flexible silicone or heat-resistant spatula is key for scraping and folding the dough.
  • Cookie scoop: A cookie scoop with a spring-loaded mechanism ensures even dough portions.

Optional Equipment for Better Results

While the basics are essential, some extra tools can improve your baking:

  • Electric mixer: An electric mixer makes creaming butter and sugar easier, for a lighter cookie.
  • Silicone baking mats: Silicone baking mats prevent cookies from sticking and make cleanup easy.

Measuring Tools Guide

Accurate measurements are key for perfect Nestle chocolate chip cookies. Use these tools for precise ingredient amounts:

ToolPurpose
Dry measuring cupsFor accurately measuring dry ingredients like flour, sugar, and chocolate chips.
Liquid measuring cupFor precisely measuring wet ingredients such as melted butter or vanilla extract.
Digital scaleFor the most accurate measurements, especially for smaller quantities of ingredients.

Learn how to make perfect Nestle chocolate chip cookies with this simple recipe. We’ll show you how to prepare the dough and bake them to perfection. Your homemade cookies will be delicious and hard to resist.

First, get all your ingredients ready. You’ll need flour, baking soda, salt, butter, sugars, eggs, and Nestle chocolate chips. Then, heat your oven to 375°F (190°C).

  1. In a medium bowl, whisk together the flour, baking soda, and salt. Set aside.
  2. In a large mixing bowl, cream the butter and sugars until light and fluffy, about 2-3 minutes.
  3. Beat in the eggs one at a time, then stir in the vanilla extract.
  4. Gradually add the dry ingredients to the wet ingredients, mixing just until combined. Fold in the Nestle chocolate chips.
  5. Scoop the cookie dough onto a baking sheet, spacing them about 2 inches apart.
  6. Bake for 9-11 minutes, or until the edges are golden brown and the centers are still slightly soft.
  7. Allow the cookies to cool on the baking sheet for 5 minutes before transferring them to a wire rack to cool completely.

The secret to perfect Nestle chocolate chip cookies is in the mixing and oven temperature. By following these steps, you’ll get cookies that are crispy on the edges and soft in the center.

Baking the perfect chocolate chip cookies is an art. Knowing how to get the right texture is key. You want soft centers and crispy edges for the best taste.

Understanding Butter Temperature

The butter’s temperature affects your cookies’ texture. Use butter that’s room temperature but not melted. This gives you a soft center and crispy edges.

If the butter is too cold, cookies spread too much and become flat. Too warm butter makes them greasy and cakey.

Mixing Techniques

  • Cream the butter and sugars well to add air. This makes your cookies light and airy.
  • Don’t over-mix the dough. This can make cookies tough and dense.
  • Gently fold in chocolate chips. This keeps them from breaking down too much.

Proper Dough Chilling

Chilling the dough for at least 24 hours is crucial. It lets flour hydrate, flavors develop, and dough firm up. This gives you cookies with crispy edges and a chewy center.

Texture PreferenceBaking Tips
Soft CookiesUse room-temperature butter, chill the dough for a shorter period, and bake at a slightly lower temperature.
Crispy Edges, Chewy CenterChill the dough for at least 24 hours, and bake at a higher temperature for a shorter time.

By mastering butter temperature, mixing, and chilling, you can perfect your cookies. You’ll make chocolate chip cookies that everyone loves.

Common Baking Mistakes to Avoid

Baking the perfect batch of chocolate chip cookies needs precision and care. Even experienced bakers can make mistakes that spoil the cookies. Let’s look at common errors and how to fix them for perfect cookies every time.

Overmixing the Dough

Overmixing the dough makes cookies tough and dense. Mix ingredients gently and stop when they’re just combined. Mixing too much develops gluten, making the cookies dry and crumbly.

Incorrect Oven Temperature

Baking at the wrong temperature can ruin cookies. Make sure your oven is set right and preheated well before baking. Adjust the temperature to get the perfect golden color and soft texture.

Improper Ingredient Measurements

Measuring ingredients correctly is key for consistent cookies. Too much or too little flour, sugar, or butter changes the cookies’ texture. Use the right tools and methods to get the dough just right.

Common Baking MistakePossible OutcomeHow to Avoid
Overmixing the doughTough, dense cookiesStop mixing as soon as the ingredients are just combined
Incorrect oven temperatureFlat cookies, overbakingEnsure accurate oven calibration and preheat thoroughly
Improper ingredient measurementsInconsistent cookie texture and appearanceUse proper measuring tools and techniques

Avoiding these common baking errors will help you make perfect Nestle Chocolate Chip Cookies every time. Cookie baking is an art. With practice and attention to detail, you’ll get it right soon.

Storage and Freshness Guidelines

Keeping your homemade Nestle Chocolate Chip Cookies fresh is crucial. Whether you’ve baked them or have dough ready, the right storage keeps them delicious. Proper storage helps keep the cookies soft and flavorful.

Short-term Storage Methods

For cookies just out of the oven, store them in an airtight container at room temperature. This keeps them soft and chewy. Don’t store them in the fridge, as it can make them stale and hard.

Freezing Instructions

Freezing is a great way to enjoy your cookies for longer. To freeze dough, scoop it into portions, freeze on a baking sheet, then bag it. Bake frozen dough balls for a bit longer than usual. For frozen cookies, thaw at room temperature before eating.

Shelf Life Tips

  • Baked cookies: Store at room temperature in an airtight container for up to 5 days.
  • Unbaked cookie dough: Freeze for up to 3 months. Thaw in the refrigerator before baking.
  • Frozen baked cookies: Maintain quality for up to 3 months in the freezer.

Follow these tips to enjoy your Nestle Chocolate Chip Cookies for days or weeks. Every bite will be as tasty as the first.

Recipe Variations and Modifications

The classic Nestle Toll House Chocolate Chip Cookie recipe is loved by many. But, you can make it your own in many ways. Whether you need to follow a special diet or just want to try something new, there’s a lot you can do.

Gluten-Free and Vegan Options

For those who can’t eat gluten, just use gluten-free flour instead. Vegans can make these cookies by using flax or chia eggs and vegan butter or coconut oil.

Nut Additions

Adding chopped nuts like walnuts, pecans, or almonds makes the cookies better. They give a nice crunch and a nutty taste.

Flavor Variations

Try different mix-ins for new tastes. A little cinnamon or espresso powder adds warmth. Dried cranberries or chopped candied ginger give a sweet and tangy flavor.

VariationIngredients
Peanut Butter Chocolate Chip1 cup creamy peanut butter, 1/2 cup chocolate chips
Oatmeal Raisin Chocolate Chip1 1/2 cups old-fashioned oats, 1 cup raisins, 1/2 cup chocolate chips
White Chocolate Macadamia Nut1 cup white chocolate chips, 1 cup chopped macadamia nuts

With a bit of creativity, you can make the classic Nestle Toll House Chocolate Chip Cookie your own. Let your imagination run wild and find the perfect version for you.

Nutritional Information and Serving Size

Understanding the nutritional facts of Nestle Chocolate Chip Cookies is key. These treats are loved by many, but they should be enjoyed in moderation. This ensures they fit into a balanced diet.

Each cookie has about 110 calories. Most of these calories come from 6 grams of fat and 15 grams of carbohydrates. This includes 9 grams of sugar. They also offer a small amount of protein, about 1 gram per cookie.

NutrientAmount per Serving
Calories110
Total Fat6g
Carbohydrates15g
Sugar9g
Protein1g

The suggested serving size is 1-2 cookies. This helps you savor the taste while keeping an eye on calories. It’s also important to watch your sugar and fat intake when enjoying these cookies.

Conclusion

Mastering the Nestle chocolate chip cookie recipe is a rewarding journey. It brings the joy of baking success and creates cherished family traditions. This guide has equipped you with the knowledge and confidence to bake delicious homemade cookies.

With the right ingredients, tools, and practice, you can elevate your baking skills. Making Nestle chocolate chip cookies a staple in your home is possible. Sharing these treats with friends and family strengthens bonds and creates lasting memories.

Embrace the art of baking and let the Nestle recipe become a cherished part of your culinary repertoire. Whether you’re a seasoned baker or a novice, the satisfaction of baking is unparalleled. So, preheat your oven, gather your ingredients, and embark on a delicious journey with the iconic Nestle chocolate chip cookie recipe.

FAQ

The classic Nestle Chocolate Chip Cookie recipe needs a few key ingredients. You’ll need all-purpose flour, baking soda, and salt. Also, unsalted butter, granulated sugar, and brown sugar are important. Large eggs, vanilla extract, and Nestle Toll House semi-sweet chocolate morsels complete the list.

What type of butter should I use for the best results?

For the best cookies, use unsalted butter at room temperature. This makes the butter mix well with the sugars. It helps in getting a better cookie texture.

Should I chill the dough before baking?

Yes, chilling the dough is a must. Let it chill for at least 24 hours, or up to 72 hours. This enhances the flavors and makes the cookies thicker and chewier.

What’s the best way to measure the ingredients accurately?

For accurate measurements, use a kitchen scale for dry ingredients like flour and sugars. For wet ingredients like butter and eggs, use liquid measuring cups or spoons. This ensures you get the right amounts.

To get the perfect cookie texture, focus on the butter temperature and mixing techniques. Use room temperature butter and mix the dough just until combined. Chilling the dough is also key. It helps in achieving soft, chewy centers with crisp edges.

How should I store the baked cookies to keep them fresh?

Store baked Nestle Chocolate Chip Cookies in an airtight container at room temperature for up to 5 days. If you want to keep them longer, freeze the dough for up to 3 months. Then, bake as needed.

Yes, you can customize the recipe. Try making it gluten-free or vegan. You can also add nuts, chocolate chunks, or different flavored chips. This way, you can create your own unique version of the classic cookie.

How to Make Madeline Cookies Recipe Using Cream

Are you a fan of the iconic French madeline cookies? Ever thought of making them at home? This guide will show you how to make perfect cream-based madelines in your kitchen. These treats are a classic, and adding cream brings a new flavor and texture. Impress your friends and family with your madeline baking skills!

Key Takeaways

  • Discover the history and origins of the classic French madeline cookie
  • Understand the difference between traditional and cream-based madeline variations
  • Learn about the essential ingredients needed to make perfect madeline cookies
  • Explore the must-have kitchen tools and equipment for baking madelines
  • Master the mixing and folding techniques for a light, airy madeline texture

The madeline cookie has a long history, starting in the 18th century in France’s Lorraine region. Made with simple ingredients like flour, eggs, and butter, they are a favorite in French pastry culture. They are especially loved in the town of Commercy.

History and Origins of Madeline Cookies

The madeline cookie’s story begins with the Duchess of Lorraine. She wanted a cookie that looked like her favorite scallop shell. A local pastry chef made the madeline, a soft, buttery treat that soon became popular all over France.

Traditional vs. Cream-Based Variations

The traditional French madeline is made with butter, flour, eggs, sugar, and melted butter. But, a cream-based version has also appeared. It uses heavy cream instead of some butter, making the madeline richer and more indulgent.

Why Cream Makes These Cookies Special

Cream in madeline cookies makes them extra special. It adds a creamy texture that goes well with the buttery taste. The cream also makes the cookies tender and soft, making them a treat to enjoy.

Essential Ingredients for Perfect Madeline Cookies

Making delicious madeline cookies needs a mix of top-notch baking ingredients. At the core of this French classic are a few key parts. They work together to give the cookies their light, airy, and soft texture.

The base of a great madeline is high-quality butter. Choose a premium, unsalted butter for the best flavor. Fresh eggs are also key, adding structure and a golden color to the cookies.

Heavy cream is used to make the cookies melt in your mouth. This ingredient adds a soft richness that makes madelines special.

Adding a bit of lemon zest can also boost the taste. It adds a light citrus flavor that goes well with the other ingredients.

IngredientRole in Madeline Cookies
High-quality butterProvides rich, creamy flavor and tender texture
Fresh eggsContributes structure and golden color
Heavy creamAdds a delicate richness and melt-in-your-mouth texture
Lemon zestEnhances the flavor profile with a subtle citrus note

By picking and using these baking ingredients wisely, you’ll make perfect madeline cookies every time.

Required Kitchen Tools and Equipment

Baking delicious madeline cookies needs the right tools and equipment. You’ll need a perfect madeline mold and essential temperature control devices. Let’s look at the must-have items for making great madelines.

Choosing the Right Madeline Pan

The key to great madeline cookies is the pan. Choose a high-quality, non-stick pan with classic shell shapes. Metal pans work better than silicone madeline molds for even heating.

Must-Have Baking Utensils

  • A strong stand mixer or hand mixer for creaming the batter
  • Measuring cups and spoons for accurate ingredient amounts
  • A rubber spatula for gently mixing the batter
  • A pastry brush for buttering the madeline pan

Temperature Control Essentials

Getting the temperature right is key for perfect madeline cookies. Get a reliable oven thermometer to check your oven’s accuracy. A digital thermometer is also good for checking the cookies’ internal temperature.

ToolPurpose
Madeline MoldBaking the classic shell-shaped cookies
Non-Stick PanEnsuring easy release and cleanup
Stand MixerWhipping and incorporating the batter
Oven ThermometerMaintaining precise baking temperatures

Madeline Cookies Recipe Using Cream

Explore the world of cream-based madeline cookies with our easy guide. This French pastry gets a rich twist with creamy additions. It’s a unique treat that will make your taste buds happy.

First, get the key ingredients for your cream-based madeline recipe:

  • Unsalted butter, softened
  • Granulated sugar
  • Eggs, at room temperature
  • All-purpose flour
  • Heavy cream
  • Vanilla extract
  • Lemon zest (optional)

Now, let’s start baking. Follow these steps for perfect cream-based madeline cookies:

  1. Preheat your oven to 375°F (190°C). Grease your madeline pan with butter or non-stick spray.
  2. In a medium bowl, mix the softened butter and sugar until fluffy.
  3. Add the eggs one at a time, beating well after each.
  4. Mix in the flour and heavy cream gently until just combined.
  5. Stir in vanilla extract and lemon zest for extra flavor, if desired.
  6. Spoon the batter into the madeline pan, filling each shell three-quarters full.
  7. Bake for 10-12 minutes, until edges are golden and centers set.
  8. Remove the madelines from the pan and cool on a wire rack.

With these cream-based madeline recipe tips and step-by-step instructions, you’re ready to make delicious madeline cookies. They’ll impress everyone with their buttery, creamy taste!

Preparing Your Ingredients and Workspace

Making perfect madeline cookies requires focus on detail. This begins with mise en place, a French term for preparing ingredients and workspace before baking. This method makes the baking process smooth and efficient, leading to the best results.

Room Temperature Guidelines

For the best texture and rise, all ingredients should be at room temperature. This ensures they mix well and incorporate air easily. Take eggs, butter, and other chilled items out of the fridge 30 minutes before baking.

Proper Measuring Techniques

  • Use accurate measurements for ingredients – don’t guess! Exact measurements are crucial for consistent, high-quality madelines.
  • For dry ingredients like flour and sugar, spoon and level them. This avoids packing and ensures the right amounts.
  • Use clear glass or plastic measuring cups for liquids. Place them on a flat surface for accurate readings.

Pan Preparation Tips

Properly greasing the madeline pan is key to prevent cookies from sticking. Brush or spray the wells with a thin layer of butter or non-stick spray. Make sure to cover all areas for easy cookie release.

With your ingredients prepared and your workspace ready, you’re all set for madeline-making success!

Mixing and Folding Techniques

To get the perfect madeline cookie texture, you need to mix and fold right. It’s all about adding air to the batter while keeping it smooth. Let’s dive into the key steps to nail this delicate process.

Achieving the Ideal Batter Consistency

The batter should be thick and creamy, holding its shape well. Mix the ingredients well but gently. Too much mixing makes the cookies dense, while too little makes them runny.

The goal is to mix just enough to get a batter that’s both combined and airy.

Mastering the Folding Method

Folding is key in making madelines. It adds air to the batter without breaking it down. Here’s how to fold it right:

  1. Scrape the batter from the bottom to the top with a rubber spatula.
  2. Fold the batter in half, pressing lightly to release air pockets.
  3. Do this 10-12 times, mixing just enough to stay smooth and airy.

The trick is to mix just enough to keep the batter smooth and airy without losing air.

Achieving the Perfect Rise and Texture

With these mixing and folding tips, you’ll get a batter perfect for baking light madelines. The air in the batter makes the cookies rise and gives them a smooth shell and soft crumb.

TechniquePurpose
Gentle MixingCombines ingredients without overmixing
Careful FoldingIncorporates air for a light, airy texture
Maintaining ConsistencyEnsures the batter holds its shape

Mastering these techniques will help you make light and delicate madeline cookies every time.

Achieving the Perfect Shell Shape

The iconic shell-like texture of madeline cookies is a key characteristic that sets them apart. To achieve this distinctive shape, paying close attention to the consistency of your batter and the proper filling of your madeline pan is crucial.

Batter Consistency Tips

The batter for madeline cookies should have a smooth, even distribution without being too thin or too thick. A well-aerated and slightly viscous consistency is ideal, as it will allow the batter to hold its shape when piped into the pan. Avoid over-mixing, which can result in a dense, heavy texture that won’t rise properly.

Pan Filling Methods

  • Use a piping bag to carefully fill each madeline mold, ensuring an even distribution of batter.
  • Avoid overfilling the molds, as the batter will expand during baking and can result in misshapen cookies.
  • Gently tap the pan on the counter to help the batter settle and eliminate any air pockets.
  • For an extra pronounced shell-like texture, use your finger to create a characteristic bump in the center of each mold before baking.

By mastering the consistency of your batter and the proper filling techniques, you can achieve those beautifully formed madeline cookies with their signature shell-like appearance every time.

Baking Temperature and Timing Guide

Baking the perfect madeline cookies needs careful temperature control and timing. Getting the right golden brown edges and fluffy texture is all about mastering the baking process.

First, make sure to preheat your oven to the right temperature. For madeline cookies, aim for a temperature between 375°F and 400°F. This ensures your cookies bake evenly and get the golden brown edges they’re known for.

After preheating, bake the cookies for 8 to 12 minutes. Keep an eye on them, especially around the 8-minute mark. They should be lightly golden and spring back when touched.

To check if your madelines are done, use an instant-read thermometer. The internal temperature should be between 195°F and 205°F for fully cooked cookies.

  1. Preheat oven to 375°F to 400°F
  2. Bake for 8 to 12 minutes, checking for doneness
  3. Cookies should be lightly golden and spring back when touched
  4. Check internal temperature – it should be between 195°F and 205°F

By watching the preheating oven temperature, baking time, and internal temperature closely, you can get your madeline cookies just right. They’ll come out with the perfect golden brown edges and a delightful texture every time.

Troubleshooting Common Madeline Problems

Baking perfect madeline cookies is a delicate art. With the right troubleshooting, you can overcome common issues. This leads to consistent, mouthwatering results. Let’s explore solutions for common madeline problems.

Texture Issues and Solutions

One common problem is a dry, tough texture in madelines. This often comes from overbaking the cookies. To avoid this, watch the baking time closely and adjust the oven temperature if needed.

Underbaking can make madelines dense and flat with a gummy center. Finding the right baking time is crucial.

For a light, airy texture, follow proper rise techniques. Chill the batter before baking and gently fold in ingredients. Avoid overworking the batter to prevent a dry texture.

Shape and Rise Concerns

Getting the classic shell shape of madelines can be tricky. Improper pan preparation or overfilling molds can cause cookies to spread. To get a beautiful shape, grease and flour the pan well and only fill molds two-thirds full.

If madelines are flat or lack rise, check the baking temperature and technique. Make sure your oven is preheated correctly and avoid opening the oven door too often. This can disrupt the rise.

Common IssuePossible CauseSolution
Dry, tough textureOverbakingAdjust oven temperature and baking time
Flat, gummy textureUnderbakingIncrease baking time and monitor closely
Spread-out shapeOverfilled molds, improper pan preparationFill molds only two-thirds full, grease and flour pan thoroughly
Lack of riseIncorrect baking temperature, frequent oven door openingEnsure proper oven temperature, minimize oven door openings

By tackling these common madeline problems and using the right solutions, you’ll bake perfect madelines every time. With practice and attention to detail, you can master this classic French pastry.

Storage and Serving Suggestions

Keeping your homemade madeline cookies fresh and delicious is important. To enjoy them at their best, proper storage is key. This ensures they stay soft and airy.

For the best freshness preservation, store your madelines in an airtight container at room temperature. This stops moisture loss and keeps them moist. Don’t refrigerate or freeze them, as cold can harm their delicate texture.

When you’re ready to serve, let the madelines come to serving temperature. Just leave them at room temperature for 10-15 minutes. This softens their texture and brings out the buttery flavor. For a special touch, pair them with a fragrant cup of tea or coffee.

Storage TipRecommendation
ContainerAirtight
TemperatureRoom temperature
ServingAllow to come to room temperature
PairingTea or coffee

By following these simple storage and serving suggestions, your homemade madeline cookies will stay fresh and flavorful. Enjoy these French treats at their best!

Conclusion

By mastering homemade madelines, you’ve started a journey of French pastry excellence. Using cream in the recipe adds a rich, creamy texture. This elevates these classic cookies to new heights of flavor and indulgence.

Whether you’re an experienced baker or new to baking, making delicious madeline cookies at home shows your culinary skills. This article has given you the essential techniques and tips. Now, you can make mouthwatering madelines that will impress everyone.

Keep exploring the world of homemade madelines and let your baking success shine. Enjoy the rewarding experience of making these delicate, golden-hued treats. Savor the moments of pure delight as you indulge in your homemade madeline cookies.

FAQ

What are the key ingredients needed for making madeline cookies using cream?

To make cream-based madeline cookies, you need high-quality butter, fresh eggs, heavy cream, and lemon zest. These ingredients combine to give the cookies their perfect texture and taste.

What types of kitchen tools and equipment are required for baking madeline cookies?

You’ll need a madeline pan, a stand mixer or hand mixer, a silicone baking mat or parchment paper, and an oven thermometer. These tools help ensure your cookies turn out right.

How do I achieve the signature shell shape of madeline cookies?

To get the shell shape, keep the batter right and fill the pan evenly. Piping the batter into the molds also helps make the shape uniform.

What baking temperature and timing should I follow for perfect madeline cookies?

Bake madeline cookies at 400°F (200°C) for 8-12 minutes. This temperature and time give them golden-brown edges and the right texture inside.

How can I troubleshoot common issues with madeline cookies, such as texture problems or lack of rise?

For texture issues, adjust the batter and check the oven temperature. Avoid overbaking. Good ingredient preparation and mixing techniques can also solve problems like flat or dry cookies.

How should I store and serve madeline cookies to maintain their freshness and quality?

Store madeline cookies in an airtight container at room temperature for 3-4 days. Let them come to room temperature before serving. Enjoy them with a hot drink or fresh fruit.

How to make the perfect Crab Brulee Recipe at Home

Crab Brulee is a mix of rich seafood and sweet dessert, making it a unique dish. It combines the creamy goodness of crème brûlée with the savory crab meat. This creates a delightful and unexpected treat. Ever wondered how to make this seafood sensation at home? Get ready to improve your cooking skills as we explore the secrets of the crab brulee recipe. Here, the homemade crab brulee outshines any store-bought version.

Key Takeaways

  • Discover the essential ingredients and equipment needed to create an exquisite homemade crab brulee
  • Learn the step-by-step process for preparing the crab mixture, custard base, and achieving the perfect brulee crust
  • Explore tips and techniques for ensuring your crab brulee is consistently delicious, from proper mixing to baking temperatures
  • Uncover common mistakes to avoid and storage/reheating guidelines to maintain the quality of your crab brulee
  • Elevate your culinary skills and impress your guests with this sophisticated yet surprisingly simple seafood dessert

Introduction to Crab Brulee

The story of crab brulee starts with French cooking and a love for seafood. It mixes the luxury of crème brûlée with crab meat’s savory taste. This mix creates a dish that excites your taste buds with its flavors and textures.

Crab brulee is a seafood custard with crab meat in a creamy base. It’s topped with a crunchy, caramelized sugar layer, like crème brûlée. This mix of smooth custard and crunchy sugar makes it a culinary treat.

Chefs in the United States created this dish by combining French cooking with local seafood. Now, it’s a favorite in fancy restaurants and homes.

Key Elements of Crab BruleeDescription
Crab MeatThe foundation of the dish, providing the savory, umami-rich flavor and texture.
Custard BaseA creamy, silky-smooth custard that serves as the base for the crab mixture.
Caramelized ToppingThe signature brulee layer, created by caramelizing a thin layer of sugar on top of the custard.

Crab brulee brings together the richness of crème brûlée and seafood’s savory taste. It’s a culinary innovation that delights the senses and celebrates French-inspired seafood cuisine.

Essential Ingredients for Crab Brulee

Creating a delicious Crab Brulee starts with choosing the right ingredients. The type of crab meat and dairy components are key. Each part is important for the perfect taste and texture. Let’s look at what you need to make this tasty dish.

Types of Crab Meat to Use

The right crab meat selection is crucial. For a true Crab Brulee, use lump or jumbo lump crab meat. These types have a richer flavor and texture. Stay away from imitation crab or claw meat, as they don’t offer the same taste and sweetness.

Required Dairy Components

The custard base of Crab Brulee needs heavy cream and eggs. The heavy cream makes it creamy, while eggs help it bind and smooth out. Together, they create a base for the crab meat, blending flavors and textures beautifully.

Seasonings and Spices

Seasonings and spices are key to making Crab Brulee special. Old Bay seasoning is a great choice, enhancing the crab’s sweetness. A bit of salt and pepper also brings out the dish’s natural flavors.

IngredientQuantity
Lump or Jumbo Lump Crab Meat8 oz
Heavy Cream1 cup
Eggs3
Old Bay Seasoning1 tsp
Salt and Pepperto taste

Kitchen Equipment You’ll Need

Making the perfect Crab Brulee at home needs the right tools. You’ll need ramekins and a kitchen torch to get that crunchy topping. Let’s look at the key items for this dish.

You’ll first need ramekins for your Crab Brulee. Choose ovenproof ones that hold 4-6 ounces each. This size is perfect for even baking.

A kitchen torch is crucial for the caramelized crust. Get a high-quality one for the best results.

For the creamy base, you’ll need mixing bowls in different sizes. Stainless steel or tempered glass bowls are best for mixing.

Lastly, a shallow baking dish is needed for baking. It should fit the ramekins for even cooking.

With these tools, you’re ready to make Crab Brulee at home. Enjoy your cooking!

Preparing the Crab Mixture

To make the perfect Crab Brulee, you need to prepare the crab meat right. This guide will show you how to clean, shred, and season the crab. This ensures your dish is full of flavor.

Cleaning and Shredding the Crab

Begin by cleaning the crab meat well. Remove any shells, cartilage, or unwanted parts. Then, shred the crab into small pieces using a fork or your fingers. This makes the crab mix well with the custard base.

Creating the Base Mixture

In a bowl, mix the shredded crab preparation with a creamy base like cream cheese or mascarpone. Fold the ingredients together gently. Make sure there are no big clumps left.

Seasoning Proportions

  • Add a balanced seasoning blend to enhance the Crab Brulee’s flavor. Use salt, pepper, and a bit of paprika or cayenne to highlight the crab’s sweetness.
  • Adjust the shredding techniques and seasoning to your liking. This way, the crab’s flavor will stand out without being too strong.

By carefully preparing the crab mixture, you set the stage for a Crab Brulee that looks great and tastes amazing.

Making the Custard Base

Making the perfect custard recipe is key to a great Crab Brulee. The custard base is rich and creamy, perfect for the crab meat. You need to temper the egg mixture right to get that smooth texture.

Start by separating the egg yolks from the whites. Keep the whites for later. Heat the heavy cream, milk, and sweeteners or vanilla in a saucepan. Stir until it’s hot but not boiling.

Temper the eggs by whisking a bit of hot cream into the yolks. Then, add the tempered yolks back into the saucepan. Keep stirring until it thickens and is smooth.

Don’t let it boil, or the egg mixture will curdle. When it’s thick enough, take it off the heat. Let it cool a bit before mixing it with the crab.

Tempering the eggs and making a smooth custard base is essential. It’s the start of a Crab Brulee that will wow your taste buds. This step is crucial for the right mix of flavors and textures.

Combining Crab and Custard

Mixing the crab and custard is key to making perfect Crab Brulee. This step combines the ingredients in a way that brings out the dish’s unique texture and taste.

Proper Mixing Techniques

To mix crab and custard right, use gentle and careful methods. Don’t stir too hard, as it can mess up the creamy texture. Instead, fold them together with a spatula, moving in a smooth circle.

Texture Guidelines

The Crab Brulee should feel smooth and creamy. It should have no lumps or air pockets. This ensures a consistent texture that’s both enjoyable and satisfying.

Learning to mix crab and custard well is crucial. It’s what makes a Crab Brulee stand out. With practice, you’ll create a dish that wows your guests and satisfies your taste buds.

Baking Temperature and Timing

To make the perfect Crab Brulee, you need to get the baking temperature and timing just right. This ensures the custard is smooth and creamy.

Start by heating your oven to 325°F (165°C). This temperature is perfect for cooking the custard without drying out the crab mixture.

Then, put the ramekins filled with crab and custard in a big baking pan. Pour hot water into the pan to create a water bath. This method cooks the custard evenly and prevents it from cracking.

  1. Bake the Crab Brulee for 30-40 minutes. It should be slightly jiggly in the center but not too soft.
  2. Keep an eye on the baking time because ovens can differ. Check the Crab Brulee around 30 minutes to get it just right.
  3. After baking, take the ramekins out of the water bath. Let them cool down slowly before refrigerating. This helps the custard set perfectly.

By following these steps, you’ll get a Crab Brulee with a silky custard and a caramelized top.

Creating the Perfect Brulee Crust

Making the perfect caramelized crust on a Crab Brulee is key. It can make the whole dish shine. The right sugar and torching techniques are crucial for that caramelized sugar layer.

Sugar Selection

The type of sugar matters a lot for the crust texture. Granulated sugar works, but superfine or castor sugar is better. They caramelize faster and more evenly, giving a crisp, golden crust.

Some try brown sugar or turbinado sugar for a hint of molasses flavor. The goal is to pick a sugar that melts and caramelizes well with the brulee torch.

Torching Techniques

  • Hold the brulee torch 6-8 inches from the custard, moving it to spread heat evenly.
  • Use short, sweeping motions to caramelize the sugar slowly, avoiding burns.
  • Watch closely and stop when the crust is just right.
  • Use a professional brulee torch for better control and heat.

With the right sugar and torching skills, anyone can make a Crab Brulee with a standout crust texture.

Presentation and Serving Tips

Presenting and serving Crab Brulee can make a big difference. It’s all about the plating and garnishes. Every detail adds to the dish’s beauty and taste.

Start with plating ideas that highlight the creamy custard and caramelized top. Use individual ramekins or small dishes for a fancy look. Place them on a big platter or tray for a stunning display.

For garnish suggestions, try chopped chives or parsley for a fresh look. Add a dollop of crème fraîche or a balsamic reduction for extra elegance.

The serving temperature is key. Serve it warm, with the custard still a bit wobbly and the top golden and crisp. This perfect mix of temperature and texture will wow your guests.

The way you present and serve Crab Brulee is just as important as the recipe. By focusing on these details, you’ll create a memorable dining experience. Your guests will talk about it for a long time.

Storage and Reheating Guidelines

Enjoying homemade Crab Brulee doesn’t have to end after dinner. With the right refrigeration and reheating techniques, you can enjoy leftover crab brulee for days. This way, the dish stays flavorful and creamy.

Proper Storage Methods

To keep your Crab Brulee fresh, follow these guidelines:

  • Allow the dish to cool completely before storing.
  • Transfer the Crab Brulee to an airtight container or cover tightly with plastic wrap.
  • Refrigerate the leftovers promptly, within 2 hours of cooking.
  • Properly stored, the Crab Brulee will keep in the fridge for 3-4 days.

Reheating Instructions

When you’re ready to enjoy leftover crab brulee again, follow these reheating techniques:

  1. Preheat your oven to 325°F (165°C).
  2. Transfer the Crab Brulee to an oven-safe dish and cover loosely with foil.
  3. Reheat for 10-15 minutes, or until the center is heated through.
  4. Remove the foil during the last 2-3 minutes to allow the top to crisp up.
  5. Serve immediately and enjoy your perfectly reheated Crab Brulee!

By following these simple steps, your leftover crab brulee will taste as good as the first time. Savor every bite and enjoy your culinary masterpiece.

Common Mistakes to Avoid

Making a delicious Crab Brulee can be fun, but you need to watch out for common mistakes. Issues like overcooking the crab, curdling the custard, and sugar burning the top can ruin your dish. Knowing these problems helps you make a perfect Crab Brulee every time.

Cooking the crab meat right is key. Overcooking makes it dry and rubbery. So, heat the crab gently and avoid high temperatures for too long.

Curdling the custard is another mistake. It happens when the mixture gets too hot too fast or if eggs are added too quickly. To avoid this, slowly add the eggs to the hot liquid while stirring constantly. This keeps the custard smooth and creamy.

  • Avoid overcooking the crab
  • Prevent curdling of the custard base
  • Be cautious of sugar burning when creating the brulee crust

Finally, sugar burning can ruin the top of the Crab Brulee. Use the right sugar and watch closely when broiling or torching. This way, you get a golden, crisp crust without any burnt taste.

By avoiding these mistakes and following this guide, you’ll make a Crab Brulee that will wow your guests and satisfy your taste buds.

Conclusion

Crab Brulee is a standout seafood dessert that blends savory and sweet perfectly. With this guide, you can master the art of crab brulee mastery and improve your cooking at home.

Whether you’re an experienced chef or a home cooking enthusiast, Crab Brulee is a great way to wow your guests. It requires skill in making a rich custard base, mixing it with fresh crab, and getting that caramelized crust. This journey celebrates the seafood dessert success.

We invite you to try this recipe and see the endless possibilities it holds. Enjoy making this delicious dish and feel proud to serve a remarkable Crab Brulee. Bon appétit!

FAQ

What is Crab Brulee?

Crab Brulee is a seafood dessert that mixes crab with crème brûlée’s sweetness. It’s a mix of French desserts and seafood flavors.

What type of crab meat should I use for Crab Brulee?

Use lump or jumbo lump crab meat for the best flavor and texture.

What dairy components are required for the Crab Brulee custard?

Heavy cream and eggs are key for the custard. Cream adds richness, and eggs make it smooth.

What kitchen equipment is needed to make Crab Brulee at home?

You’ll need ramekins, a kitchen torch, bowls, and a baking dish. These tools help prepare and bake the dish.

How do I properly combine the crab mixture and custard base?

Fold the crab and custard gently to keep the texture right. Avoid overmixing.

What is the ideal oven temperature and baking time for Crab Brulee?

Bake at 325°F (165°C) for 30-40 minutes. This ensures the custard is just right.

How do I create the perfect caramelized crust on top of the Crab Brulee?

Use a kitchen torch to caramelize sugar on top. Rotate the torch for an even crust.

How should Crab Brulee be stored and reheated?

Store leftovers in the fridge for 3-4 days. Reheat in a warm oven (325°F/165°C) for 5-10 minutes.

What are some common mistakes to avoid when making Crab Brulee?

Avoid overcooking the custard and burning the sugar. Also, temper eggs well and don’t add too much air.

Easy Homemade Flan Recipe: How to Make Flan Recipe

Flan, the classic Spanish custard dessert, has won the hearts of many around the world. It’s known for its silky texture and just the right amount of sweetness. This caramel custard is a favorite in Latin America and Europe. Making this creamy dessert at home is surprisingly easy, letting you enjoy the real taste of a Spanish dessert in your own kitchen.

Key Takeaways

  • Flan is a classic Spanish custard dessert with a silky-smooth texture and delicate sweetness.
  • This recipe provides a simple and straightforward approach to making homemade flan.
  • The key ingredients, including milk, cream, eggs, and caramel, come together to create the perfect custard base.
  • Proper baking techniques and temperature control are essential for achieving the desired texture and consistency.
  • Flan can be customized with various flavor variations and creative twists to suit individual preferences.

Introduction to Classic Spanish Flan

Flan, a traditional egg custard dessert, has a long history in Spanish cuisine. It’s also known as crème caramel or egg custard. For centuries, it has won hearts around the world, crossing cultural lines.

The roots of flan go back to ancient Roman and Arab cooking. These traditions shaped the creamy, caramel-topped dessert we know today in Spain. Over time, flan became a favorite in Spanish homes and restaurants, with many variations and family recipes.

Unlike crème brûlée from France, which has a hard caramel top, Spanish flan is smooth and creamy. It has a delicate caramel sauce that flows down the sides. This makes flan a special treat for the taste buds.

Flan is loved as a simple dessert or a star of a big celebration. Its timeless charm attracts dessert lovers everywhere. It’s also open to new ideas, keeping the classic Spanish dessert alive in our hearts.

Essential Ingredients for Perfect Flan

Making a perfect flan needs the right ingredients. From the creamy base to the caramel top, each part is crucial. Let’s explore what makes a flan truly special.

Types of Milk and Cream Options

The custard base of a flan is key. It’s made with condensed milk and evaporated milk. These milks make the flan creamy and rich. Some recipes add heavy cream or whole milk for extra richness.

Choosing the Right Eggs

Whole eggs are essential for a flan’s smooth texture. Recipes often use 4-6 whole eggs. Eggs make the flan creamy and help it hold its shape.

Caramel Ingredients

The caramel topping is the flan’s crowning glory. It’s made by caramelizing granulated sugar. This sweet sauce adds beauty and a rich flavor to the custard.

With these ingredients, you’re ready to make a perfect flan. It will impress everyone with its taste and look.

Kitchen Tools and Equipment Needed

Creating the perfect flan requires the right tools and equipment. You’ll need ramekins, a baking dish, and a water bath. These items are crucial for making a successful flan.

First, you’ll need ramekins for even cooking. They help keep the flan’s custard-like texture. If you don’t have ramekins, a baking dish works too, but cooking time might vary.

  • Ramekins or a baking dish
  • A large water bath or roasting pan for moist cooking
  • A whisk or hand mixer for mixing custard
  • A saucepan for caramel base
  • A sharp knife and cutting board for prep
Tool/EquipmentPurpose
RamekinsEnables even cooking and signature flan shape
Baking dishCan be used as an alternative to ramekins
Water bathProvides a moist, gentle cooking environment
Whisk/Hand mixerBlends the custard ingredients thoroughly
SaucepanPrepares the caramel base
Knife and cutting boardFor any necessary ingredient preparation

How to Make Flan Recipe: Step-by-Step Guide

Making flan at home is simpler than you might think. You’ll learn how to make the caramel base, mix the custard, and bake it right. This guide will help you make a delicious flan.

Preparing the Caramel Base

Start by caramelizing sugar in a saucepan over medium heat. Swirl the pan as the sugar melts and turns amber, about 5-7 minutes. Pour the hot caramel into ramekins or a baking dish, tilting to coat evenly.

Mixing the Custard

In a large bowl, whisk eggs, water bath baking cream, and sweetened condensed milk together. Pour the custard mixture over the caramel, being careful not to disturb it.

Proper Baking Techniques

Put the ramekins or dish in a roasting pan and add hot water halfway up the sides. This water bath baking method ensures even baking. Bake at 325°F for 40-50 minutes, until the custard is set but still jiggly.

After baking, let the flan cool for about 2 hours. Then, custard straining is needed for a smooth texture. Run a knife around the edges and invert onto a plate.

Tips for Achieving the Perfect Texture

Making a smooth, silky flan is a goal for every home chef. It needs a delicate touch and attention to detail. Here are some expert tips to help you make a heavenly flan.

Proper mixing is key. Whisk the ingredients gently to avoid air pockets. Slowly add the milk and eggs, blending until smooth.

Temperature control is crucial. Flan needs a gentle, even baking temperature. Bake in a water bath to keep it moist and silky.

Patience is important with flan. Let it cool completely before unmolding. This step helps it set and become dense and custard-like.

Follow these tips to make a flan that’s a delight for the senses. It will be smooth, silky, and rich, impressing your guests.

Common Mistakes to Avoid When Making Flan

Making flan is a delicate art. By avoiding common mistakes, you can make a better dessert. We’ll look at how to avoid issues like temperature problems and caramel mishaps for perfect flan every time.

Temperature Control Issues

Temperature is key when making flan. An overcooked flan is dry and rubbery. On the other hand, undercooked custard can curdle. Keep the oven temperature steady and don’t open the door too often. This helps the flan bake evenly.

Caramel Troubleshooting

The caramel base is crucial for a great flan. But, it’s easy to mess up. Burnt caramel tastes bitter, and undercooked caramel doesn’t set right. Watch the caramel closely, stirring often and adjusting the heat to get the right color.

Baking Time Errors

Getting the baking time right is important for a smooth flan. Baking too little makes it watery, while too much makes it rubbery. Use an oven thermometer and stick to the recipe. Adjust the time if your oven is different.

Pay attention to temperature, caramel, and baking time. This way, you’ll make flan that’s smooth, delicious, and sure to impress.

Flavor Variations and Creative Twists

Flan, a classic Spanish custard dessert, is perfect for trying new flavors. The traditional vanilla flan is loved by many. But, you can easily make it into something new and exciting.

Try making a chocolate flan for a rich treat. Add cocoa powder or melted chocolate to the mix. It turns into a creamy, chocolatey delight that chocolate lovers will adore.

For a taste of the tropics, make a coconut flan. Use coconut milk and add shredded coconut to the custard. It gives your flan a sweet, coconut flavor that’s perfect with its creamy texture.

Looking for a caffeine boost? A coffee flan is the answer. Mix in brewed coffee or espresso. It adds a bold coffee taste that balances well with the flan’s sweetness.

There are countless ways to make flan your own. You can add spices like cinnamon or cardamom. Or, try infusing it with citrus or layering it with fruits or nuts. It’s a great way to make a dessert that’s truly yours.

Creating a great flan is all about balance. With a bit of creativity and taste, you can turn a simple flan into a show-stopping dessert. It’s sure to impress your loved ones.

Storage and Serving Suggestions

Making the perfect flan is an art. But it doesn’t stop there. The right storage and serving can make your flan a true masterpiece. Let’s look at how to keep it smooth and flavorful, and how to present it in new ways.

Proper Refrigeration Methods

To keep your flan creamy, store it right. After it’s chilled flan and unmolded, put it in an airtight container. Refrigerate it for 3-4 days. This keeps the custard fresh and prevents it from drying out or getting a bad skin.

Plating and Presentation Ideas

Adding garnishes and unmolding flan can make it look amazing. Try drizzling caramel sauce, sprinkling toasted nuts, or adding fresh berries. For a fancy look, serve it with vibrant fruit coulis or compote.

Garnish IdeaFlavor Pairing
Caramel SauceClassic, Indulgent
Toasted AlmondsNutty, Crunchy
Fresh RaspberriesTart, Refreshing
Citrus ZestBright, Aromatic

Try different garnishing desserts to find the best match for your flan.

Make-Ahead Tips and Preparation Timeline

Flan is a delightful dessert that can be prepared in advance. It’s perfect for meal prep or busy schedules. With a few simple tips, your homemade flan will always have the perfect texture and flavor.

Preparation Timeline

For the best results, follow this timeline when making flan in advance:

  1. 1-3 days ahead: Prepare the caramel base and let it cool completely. This allows the caramel to thicken and develop its flavor.
  2. 1 day ahead: Make the custard and pour it into the prepared ramekins or baking dish. Cover and refrigerate overnight. This lets the flavors meld and the texture firm up.
  3. 2-3 hours before serving: Remove the flan from the fridge and let it come to room temperature. This ensures the custard is creamy and silky when served.

Make-Ahead Flan Tips

  • Prepare the caramel base and custard up to 3 days in advance for maximum meal prep desserts convenience.
  • Cover the flan tightly with plastic wrap or foil to prevent the custard from drying out during refrigeration.
  • For the best advance baking results, avoid baking the flan more than 1 day in advance. The texture and flan shelf life can be affected.

By following these simple make-ahead tips and preparation timeline, you can enjoy the delicious, creamy goodness of homemade flan without the stress of last-minute baking. Impress your guests or satisfy your sweet tooth with this classic Spanish dessert!

Dietary Modifications and Substitutions

Making the perfect flan can be fun, but what if you need special dietary options? Don’t worry, we’ve got you covered. We’ve found ways to make sure everyone can enjoy the creamy, custard-like goodness of flan.

Dairy-Free Options

If you’re lactose-free or vegan, lactose-free flan and vegan flan are great choices. Just replace the usual dairy with plant-based options. Here are some ideas:

  • Use coconut milk or almond milk instead of cow’s milk
  • Try cashew cream or coconut cream for heavy cream
  • Use egg replacer or silken tofu for eggs

These changes make a creamy and tasty lactose-free flan or vegan flan. You’ll love the flavor and texture.

Sugar Alternatives

If you’re on a low-carb or keto diet, regular flan might not fit. But, you can still enjoy a delicious keto flan. Just swap regular sugar for low-carb sweeteners. Here are some options:

  1. Erythritol or xylitol work as a one-to-one sugar substitute
  2. Stevia or monk fruit extract offer a milder sweetness
  3. Try mixing these alternatives to find your perfect taste

These sugar swaps let you enjoy a creamy keto flan. It meets your dietary needs while still being delicious.

Troubleshooting Your Flan Recipe

Making the perfect flan can be tricky, but we’re here to help. If your flan isn’t setting right, or if it’s grainy, we’ve got tips for you. Our expert advice will guide you to a successful flan every time.

Temperature control is key. If your flan isn’t setting, check the oven temperature and baking time. Try increasing the oven temperature and baking a bit longer. This will help the custard set properly.

On the other hand, if your flan feels rubbery or overcooked, the oven might have been too hot. Or you might have baked it for too long. Adjust these factors to get the right texture.

Caramel can be challenging, but don’t give up. If your caramel isn’t working, tweak the heat or cooking time. Making caramel takes patience. Rushing it can result in bitterness or uneven cooking. With practice, you’ll master caramel-topped flans.

FAQ

What is the origin and history of flan?

Flan comes from ancient Roman and Moorish cuisines. It’s also known as crème caramel in French. This custard dessert is loved in many Latin American countries, with each place adding its own twist.

What are the key ingredients needed to make the perfect flan?

To make flan, you need milk, cream, eggs, and sugar. The type of milk and the quality of eggs affect the texture and taste. Choosing the right ingredients is key for a creamy flan.

What kitchen tools and equipment are required to make flan?

You’ll need ramekins or a baking dish, a saucepan for caramel, and a water bath or roasting pan. A strainer helps make the custard smooth.

How do you properly bake flan to achieve the perfect texture?

Use a water bath to bake flan for even cooking. This method keeps the custard smooth. It’s important to control the temperature and baking time to avoid overcooking.

What are some common mistakes to avoid when making flan?

Watch out for temperature issues, caramel problems, and baking time mistakes. These can cause overcooked caramel, curdled custard, or a dry texture. Paying close attention to the recipe can help avoid these problems.

Can flan be made in advance and stored for later?

Yes, flan can be made ahead and stored in the fridge for days. Use plastic wrap or an airtight container to keep it fresh. When you’re ready, unmold and garnish it.

Are there any dietary modifications or substitutions available for making flan?

Flan can be made for different diets. Use plant-based milk and cream for dairy-free options. Try sugar substitutes like erythritol or stevia for low-sugar or keto versions.

How to Make Tiramisu: The No-Bake Dessert Everyone Loves

How to Make Tiramisu: Tiramisu is the closing Italian dessert. It’s creamy, espresso-flavored, and simply fancy enough to make everyone assume you’re a culinary genius. But here’s the game’s name: it’s immaculate to make! Observe this simple recipe if you’re geared up to wow your pals, family, or yourself. You don’t even want to turn on the oven.

How to Make Tiramisu: Ingredients You’ll Need

  • For the Creamy Layer:
    • 1 cup mascarpone cheese (room temperature)
    • 1 cup heavy whipping cream (cold)
    • 1/3 cup granulated sugar
    • 1 tsp vanilla extract
  • For the coffee soak:
    • 1 1/2 cups sturdy brewed espresso or coffee (cooled)
    • 2 tbsp. espresso liqueur (non-obligatory but exquisite)
  • The Base:
    • 1 % (approximately 24) ladyfinger cookies (savoiardi)
  • For Topping:
    • Unsweetened cocoa powder (for dusting)
    • Dark chocolate shavings (elective, but yum)

How to Make Tiramisu: Step-by-Step Instructions

  1. Whip Up the Creamy Goodness
    • In a blending bowl, beat the heavy cream till smooth peaks form. In another bowl, blend mascarpone, sugar, and vanilla till easy. Carefully incorporate the whipped cream into the mascarpone mixture by folding it gently. You’re aiming for a mild, fluffy texture here!
  2. Prepare the Coffee Dip
    • Brew your coffee and permit it to cool. Stir in the espresso liqueur if you’re using it (and you totally need to).
  3. Layer the Magic
    • Quickly dip every ladyfinger into the espresso (don’t allow them to soak, or they’ll turn into mush). Lay them in a single layer. Sure. Add half of the mascarpone mixture evenly over the dish. layer of ladyfingers. Repeat with every other layer of dipped ladyfingers and the ultimate mascara.
  4. Chill Out
    • Cover the dish and refrigerate it for at least four hours. (In a single day, it is even higher.) This helps the flavors meld together into that conventional tiramisu taste.
  5. Add the Finishing Touches
    • Before serving, dust the pinnacle with cocoa powder and sprinkle darkish chocolate shavings for additional pizzazz.

Nutritional Info (Per Serving)

Nutrient Amount Calories 320 Protein 5g Carbohydrates 25g fat, 22g sugar, 12g Pro Tips for Perfect Tiramisu

  1. Mascarpone is Key: Wait to replace it with cream cheese until it’s your closing hotel. The actual taste depends on the mascarpone!
  2. Don’t Over-Soak: A quick dip in coffee is all ladyfingers need.
  3. Use Quality Coffee: The more substantial and prosperous your coffee, the better the taste.

FAQ

Q: Can I make tiramisu without alcohol?

A: Yes! Skip the espresso liqueur. You can even add a vanilla extract to the coffee for extra flavor.

Q: How long does tiramisu ultimate?

A: It can be saved inside the refrigerator for up to a few days. However, it’s high-quality and eaten within the first 24-48 hours.

Q: Can I freeze tiramisu?

A: Absolutely! Freeze it in an airtight container for up to three months. Thaw in the refrigerator for a single day before serving.

Q: What can I use rather than ladyfingers?

A: Sponge cake slices or pound cake make excellent substitutes, but the texture could be more organized.

Final Thoughts

Tiramisu is one of these cakes that makes you seem like a pro chef without all the difficult work. It’s decadent, astonishing, and completely customizable. This recipe will succeed, whether making it for a dinner party or indulging in a non-public deal. Try it, and permit the compliments to roll in! 🎉

Christmas Dessert Recipes: Sweet Holiday Treats

As the holiday season gets closer, the air is filled with the smell of baked treats. Everyone looks forward to enjoying delicious desserts. This collection of Christmas dessert recipes has something for everyone. You’ll find both traditional favorites and new twists on classic sweets.

These recipes are perfect for making your holiday celebrations even more special. They’re sure to impress your family and guests during the most wonderful time of the year.

Key Takeaways

  • Explore a variety of Christmas dessert recipes, including traditional favorites and innovative twists.
  • Discover recipes for classic Christmas pudding, fruit cake variations, and the beloved Yule log.
  • Indulge in decadent chocolate treats, from peppermint truffles to hot chocolate bombs.
  • Enjoy easy no-bake holiday desserts and festive pies and tarts.
  • Find kid-friendly Christmas treats and delightful cheesecake variations.

Traditional Holiday Dessert Must-Haves

As the holiday season comes, certain desserts are key to the celebrations. The Christmas pudding and fruit cake are rich and flavorful, loved worldwide. The Yule log, or Bûche de Noël, adds elegance to any holiday.

Classic Christmas Pudding

The Christmas pudding is a dense, steamed dessert loved in Britain for centuries. It’s made with dried fruits, spices, and brandy. Served with brandy or hard sauce, it’s a true holiday treat.

Festive Fruit Cake Variations

The fruit cake is a Christmas classic. Traditional ones are dense with dried fruits and nuts. But, modern bakers offer boozy and lighter versions for all tastes.

Traditional Yule Log Recipe

No Christmas is complete without the Yule log, or Bûche de Noël. It’s a sponge cake rolled with creamy filling, decorated like a log. With meringue “mushrooms” and sugared cranberries, it’s a stunning centerpiece.

DessertKey IngredientsServing Suggestions
Christmas PuddingDried fruits, spices, brandyBrandy or hard sauce
Fruit CakeDried fruits, nuts, liquorDusted with powdered sugar
Yule Log (Bûche de Noël)Sponge cake, creamy filling, decorationsGarnished with meringue, cranberries, powdered sugar

The holiday season is the perfect time to indulge in festive treats. What better way to share the joy than with a cookie swap? Whether you’re a seasoned baker or just starting, these Christmas baking recipes will impress your friends and family.

Our collection of festive treats has something for everyone. Learn the secrets to perfectly decorated cookies. Discover tips for packaging and storing your creations. Get ready to wow the crowd at your next cookie swap.

Classic Sugar Cookies

No holiday cookie exchange is complete without sugar cookies. Our recipe yields soft, buttery cookies. They’re a blank canvas for your creative decorating skills.

Dust them with colorful sprinkles, pipe intricate designs with royal icing, or keep them simple with powdered sugar.

Gingerbread Cutouts

Add a touch of spice to your Christmas baking with gingerbread cutout cookies. These festive treats are infused with cinnamon, ginger, and molasses. They’re perfect for decorating with royal icing and edible embellishments.

Peppermint Chocolate Chip Cookies

Combine the classic flavors of chocolate and peppermint in these delightful holiday cookies. Bursting with fresh peppermint and studded with chocolate chips, these cookies are sure to be a hit at your cookie swap.

Cookie VarietyPrep TimeBaking TimeYield
Classic Sugar Cookies30 minutes8-10 minutes2-3 dozen
Gingerbread Cutouts45 minutes10-12 minutes2 dozen
Peppermint Chocolate Chip Cookies35 minutes12-15 minutes2-3 dozen

With these festive holiday cookie recipes, you’ll be the talk of the cookie swap. Impress your friends and family with your baking prowess. Don’t forget to have fun in the process. Happy Christmas baking!

https://youtube.com/watch?v=R2BdiBiPyB4

Decadent Christmas Chocolate Treats

Christmas is the perfect time for indulging in chocolate desserts. Enjoy classic peppermint truffles and trendy hot chocolate bombs. These treats are ideal for satisfying your sweet tooth during the holidays.

Dark Chocolate Peppermint Truffles

Experience the ultimate mix of chocolate and peppermint with dark chocolate peppermint truffles. These truffles have a cool peppermint flavor and a smooth dark chocolate coating. They are a delightful chocolate dessert that will impress your guests.

Hot Chocolate Bombs

Make your hot chocolate special with homemade hot chocolate bombs. These treats are filled with cocoa powder and mini marshmallows. They turn into a warm, creamy drink when you add hot milk. Add peppermint extract or crushed candy canes for a festive touch.

Chocolate-Dipped Holiday Cookies

Make your holiday cookie platter more elegant with chocolate-dipped cookies. Dip your favorite cookies in melted chocolate. Then, sprinkle with crushed candy canes or sprinkles. These treats are great for gifts or at your Christmas parties.

Easy No-Bake Holiday Desserts

As the holiday season gets closer, the idea of spending hours baking can feel overwhelming. Luckily, there are many quick desserts and no-bake treats that can satisfy your sweet tooth without the hassle. These stress-free recipes let you focus on other holiday plans while still impressing your guests with tasty desserts.

One simple no-bake option is a classic no-bake cookie. Just mix oats, peanut butter, and a few other ingredients. Chill it in the fridge until it’s firm. For a holiday touch, add crushed candy canes or drizzle with white chocolate.

  • No-Bake Peanut Butter Oatmeal Cookies
  • Peppermint Bark Bites
  • Chocolate-Dipped Pretzel Rods

Another favorite no-bake treat is a layered dessert, like a no-bake cheesecake or tiramisu. These can be made ahead and chilled until they’re ready. They’re perfect for stress-free holiday gatherings.

For a dessert that wows without much work, try making chocolate truffles or holiday fudge. These rich treats can be flavored with festive tastes like peppermint, eggnog, or cranberry.

With these easy no-bake desserts, you can enjoy the holiday season’s sweetness without the baking stress. Enjoy the ease of these quick desserts and no-bake treats for a stress-free and delicious holiday.

Festive Pies and Tarts for Christmas

Christmas is a time for indulging in delectable desserts. No holiday spread is complete without a selection of mouthwatering pies and tarts. From classic mince pies to a stunning cranberry apple lattice pie and a rich, buttery pecan tart, these festive treats are sure to delight your guests and satisfy your sweet tooth.

Classic Mince Pies

A quintessential Christmas delicacy, mince pies have been a beloved holiday tradition for centuries. These bite-sized pastries are filled with a fragrant mixture of dried fruits, spices, and brandy or rum. This creates a depth of flavor that perfectly captures the essence of the season. Serve these classic Christmas pies with a dusting of powdered sugar for a timeless and indulgent dessert.

Cranberry Apple Lattice Pie

For a show-stopping centerpiece on your holiday tarts table, consider this vibrant cranberry apple lattice pie. The combination of tart cranberries and sweet apples, nestled under a delicate lattice crust, makes for a truly stunning and delicious festive baking creation. Serve this pie warm, with a scoop of vanilla ice cream or a dollop of freshly whipped cream, for a truly decadent holiday treat.

Holiday Pecan Tart

No Christmas dessert spread is complete without a rich and buttery pecan tart. This indulgent holiday tart features a flaky pastry crust filled with a gooey, caramelized pecan filling. This creates a delightful contrast of textures and flavors. Drizzle with a touch of melted chocolate or serve with a scoop of vanilla ice cream for an extra layer of indulgence.

Kid-Friendly Christmas Treats

Christmas is a magical time of year. What better way to celebrate than with children’s desserts the whole family can enjoy? There are many fun holiday treats and family-friendly recipes for kids to help with.

Christmas Bark is a favorite among kids. It’s easy to make and doesn’t need baking. Just melt chocolate, add crushed candy canes or sprinkles, and spread it on a baking sheet. Let the kids decorate it with their favorite toppings.

  • Christmas Bark
  • Reindeer Pretzel Bites
  • Santa Hat Brownies
  • Snowman Cupcakes

Try making Reindeer Pretzel Bites for a fun touch. You’ll need pretzel rods, chocolate, and candies. Kids will love making their own reindeer designs.

RecipeDifficulty LevelPrep Time
Santa Hat BrowniesEasy30 minutes
Snowman CupcakesIntermediate45 minutes
Christmas BarkEasy15 minutes
Reindeer Pretzel BitesEasy20 minutes

Looking for a quick treat or something more complex? These kid-friendly Christmas desserts will make everyone happy. So, gather the family, play some holiday tunes, and start baking!

Holiday Cheesecake Variations

As Christmas gets closer, cheesecake fans can’t wait to try new flavors. From peppermint swirl to white chocolate cranberry, these holiday desserts add a fun twist to classic Christmas cheesecake recipes.

Peppermint Swirl Cheesecake

Make your Christmas party special with a peppermint swirl cheesecake. It’s a mix of minty and chocolatey, making it a festive flavor you’ll love. Add crushed candy canes on top for more holiday joy.

Gingerbread Cheesecake Bars

Warm up your holiday with gingerbread cheesecake bars. The spicy gingerbread goes great with the cheesecake’s creaminess. It’s a perfect mix that will make everyone want more.

White Chocolate Cranberry Cheesecake

Try the rich taste of white chocolate and tart cranberries in this holiday dessert. The creamy cheesecake meets the tangy cranberries, making it a festive flavor that will wow your guests.

Make-Ahead Christmas Desserts

Hosting a festive gathering can be joyful but also stressful. Luckily, there are many prep-ahead recipes to make things easier. These time-saving desserts ensure a stress-free holiday baking experience.

A classic Christmas pudding is a great make-ahead treat. It can be made weeks in advance and reheated on the big day. Another favorite is a festive fruit cake, which gets better with time. A homemade Yule log is also a great choice, ready to impress as a centerpiece.

For something lighter, try no-bake holiday desserts like peppermint truffles or hot chocolate bombs. These treats can be made ahead and kept in the fridge or freezer until serving time.

For an impressive spread, include make-ahead pies and tarts. Classics like mince pies, cranberry apple lattice pie, and pecan tarts can be made ahead. This frees you up to focus on other holiday tasks.

By using these prep-ahead recipes, you can create a delicious and stress-free dessert spread. Enjoy the season with these time-saving desserts!

DessertMake-Ahead TimeServing Suggestions
Christmas PuddingUp to 4 weeksServe warm with brandy butter or vanilla sauce
Festive Fruit CakeUp to 6 monthsEnjoy with a cup of tea or coffee
Peppermint TrufflesUp to 2 weeksPerfect for holiday cookie exchanges
Cranberry Apple Lattice PieUp to 3 daysServe with a scoop of vanilla ice cream

Conclusion

In this guide, we’ve shared many Christmas dessert recipes to make your holiday merry. You’ll find everything from classic Christmas pudding to fun chocolate treats. There’s something for everyone to enjoy.

When you start baking for Christmas, remember to have fun. Try new recipes and add your own twist to old favorites. The joy of baking is in the journey, not just the end result.

Whether you’re baking for a party or just for fun, these Christmas baking tips and holiday dessert ideas will help. You’ll make festive treats that everyone will love. Enjoy the sweet moments and create lasting memories.

FAQ

What are some traditional holiday dessert must-haves?

Classic Christmas pudding, festive fruit cakes, and Yule logs are must-haves. They are traditional holiday desserts.

Sugar cookies, unique flavors, and decorated treats are favorites. They’re perfect for Christmas cookie exchanges.

What are some decadent Christmas chocolate desserts?

Try dark chocolate peppermint truffles, hot chocolate bombs, and chocolate-dipped cookies. They’re indulgent and delicious.

What are some easy no-bake holiday desserts?

No-bake desserts are great for busy times. They’re quick, easy, and don’t need an oven.

What are some festive pies and tarts for Christmas?

Enjoy mince pies, cranberry apple lattice pie, and pecan tart. They’re festive and delicious.

What are some kid-friendly Christmas treats?

Kids love making and eating festive treats. They’re fun, easy, and decorated with holiday flair.

What are some holiday cheesecake variations?

Try peppermint swirl, gingerbread, and white chocolate cranberry cheesecakes. They’re creative and tasty.

What are some make-ahead Christmas desserts?

Make-ahead desserts save time during the holidays. They’re prepared in advance, so you can enjoy more time with loved ones.

Best Christmas Cookie Recipes For Your Holiday Treats

The holiday season is a time to enjoy delicious homemade treats. No Christmas celebration is complete without tasty cookies. Are you ready to unlock the secrets to becoming a holiday baking superstar?

In this guide, we’ll cover the best Christmas cookie recipes. We’ll also talk about essential baking tools and ingredients. Plus, we’ll share innovative decorating techniques to help you craft the perfect festive treats. Whether you’re a seasoned baker or new to the kitchen, you’ll find everything you need to impress your loved ones with your holiday baking skills.

Key Takeaways

  • Discover the must-have tools and ingredients for successful holiday baking
  • Master classic Christmas cookie recipes like sugar cookies and gingerbread
  • Learn creative decorating ideas to make your cookies truly festive
  • Explore allergen-free options for those with dietary restrictions
  • Discover tips for making, storing, and shipping your holiday cookies

Essential Holiday Baking Tools and Ingredients

For successful holiday baking, you need the right tools and ingredients. Essential items include stand mixers, cookie cutters, and top-notch ingredients like pure vanilla extract and unsalted butter. Knowing what you need can make your holiday treats truly special.

Must-Have Baking Equipment

Some baking tools are must-haves for the holidays. A strong stand mixer helps mix dough and whip batters fast. Cookie cutters let you make festive shapes from dough. You’ll also need mixing bowls of different sizes and baking sheets for your holiday baking.

Quality Ingredients for Perfect Results

Choosing the best ingredients is key for holiday baking success. Use pure vanilla extract for richer flavors in your treats. Go for unsalted butter for a creamy texture. And pick premium, unbleached all-purpose flour for a better crumb.

Storage and Organization Tips

  • Keep your baking supplies organized and easy to find in clear, labeled containers.
  • Store cookie cutters and other tools in a special drawer or bin for quick access.
  • Use airtight containers or ziplock bags to keep your baking ingredients fresh.

By getting the right baking equipment and ingredients, and keeping your workspace tidy, you’ll make delicious holiday treats. These will surely impress your guests.

Classic Sugar Cookies with Royal Icing

Indulge in the timeless joy of baking classic sugar cookies this holiday season. With a foolproof recipe and expert tips on decorating with royal icing, you’ll create festive treats that are sure to delight family and friends.

Start by mastering the perfect sugar cookie dough. Cream together softened butter, granulated sugar, and a touch of vanilla extract for a rich, buttery flavor. Gradually incorporate all-purpose flour, baking powder, and a pinch of salt to achieve the ideal cookie texture – crisp on the outside and delightfully soft on the inside.

Once your dough is ready, the fun begins! Roll out the chilled dough and use holiday-themed cookie cutters to create a variety of shapes, from jolly gingerbread men to whimsical snowflakes. Bake the cookies until lightly golden, then let them cool completely before decorating.

Decorating TipTechnique
Flood IcingUse a thin, smooth royal icing to cover the entire surface of the cookie, creating an even, glossy finish.
PipingPipe detailed designs and patterns using a thicker royal icing and a small piping bag with a thin tip.
Sprinkles and DecorationsAdd a festive touch by sprinkling on colorful sprinkles, edible glitter, or small candies.

With a little practice, you’ll be creating Instagram-worthy sugar cookie masterpieces in no time. Embrace the holiday spirit and let your creativity shine through these classic sugar cookie recipe creations adorned with vibrant royal icing and playful holiday shapes.

Enjoy the amazing smell and taste of classic gingerbread cookies this holiday. These treats, made with special spices, are a beloved tradition. They bring happiness to everyone around.

Perfect Spice Combinations

The secret to great gingerbread is the right mix of spices. Use ground ginger, cinnamon, cloves, and nutmeg for a rich flavor. Try different amounts to find your favorite, with ginger being the main spice.

Decorating Techniques

Get creative with your gingerbread cookies and houses. Use royal icing for detailed designs or add colorful decorations. You can also use sprinkles, candies, and glitter for a festive look.

Storage Methods

  • Keep gingerbread cookies in an airtight container at room temperature for up to 1 week.
  • Freeze baked and cooled cookies for up to 3 months. Let them thaw at room temperature before decorating and serving.
  • Gingerbread houses can be made and decorated a few days early. Store them in a cool, dry place until you’re ready to show them off.

Enjoy the spicy flavor of gingerbread cookies and welcome the holiday spirit home. With the right spices and creative decorating, you can make treats that everyone will love.

Chocolate Chip Christmas Cookies

The classic chocolate chip cookie is a favorite, but with a few twists, it becomes a Christmas treat. Add festive mix-ins and decorations to make it a holiday showstopper.

Begin with your favorite chocolate chip cookie recipe. Then, try these holiday variations to add Christmas cheer:

  • Peppermint Chocolate Chip Cookies – Crush candy canes or peppermint candies and fold them into the dough for a refreshing minty twist.
  • Eggnog Chocolate Chip Cookies – Replace some of the milk or cream in the recipe with creamy eggnog for a festive flavor.
  • White Chocolate Cranberry Cookies – Swap in white chocolate chips and dried cranberries for a pop of color and tartness.

Be creative with holiday mix-ins like crushed gingerbread, chopped candied pecans, or swirls of red and green food coloring. Top your cookies with powdered sugar, caramel, or coarse sugar for a dazzling look.

With a few tweaks, the classic chocolate chip cookie becomes a holiday delight. Try seasonal flavors and decorations to make these cookies a highlight of your Christmas baking.

Baking Christmas cookies can be fun, even if you’re new to it. You can make easy recipes or find quick tips. There are many options to help your holiday cookies stand out.

Easy No-Fail Recipes

Beginners should start with these simple recipes. They are tasty and easy to make:

  • No-Bake Peanut Butter Cookies: A classic that requires no oven time, just a few pantry staples, and a quick stir.
  • Slice-and-Bake Shortbread Cookies: Pre-slice the dough and bake for perfectly uniform and buttery cookies.
  • Crisp Meringue Cookies: Whip up a batch of these light and airy treats with just egg whites, sugar, and a touch of vanilla.

Time-Saving Tips

Here are some tips to make your holiday baking faster. This way, you can enjoy the holiday more:

  1. Prepare dough in advance and freeze for easy last-minute baking.
  2. Utilize pre-made cookie mixes or pre-portioned dough for a hassle-free start.
  3. Invest in a cookie scoop to ensure uniform sizes and even baking.

Common Mistakes to Avoid

Avoid these mistakes to make sure your cookies are perfect:

  • Overmixing the dough, which can lead to tough, dense cookies.
  • Overbaking, resulting in dry, crumbly cookies.
  • Failing to chill the dough, causing the cookies to spread excessively.

With these tips and recipes, even beginners can make delicious Christmas cookies. They will impress your family and friends.

Make your Christmas cookies special with creativity and festive touches. Learn to decorate them with designs that will impress everyone. Use cookie icing, sprinkles, and edible glitter to make your holiday treats look amazing.

Begin with the right cookie, like sugar or gingerbread. Then, get creative with icing techniques. Choose between smooth royal icing or fluffy buttercream for your design. Use piping tips to draw cool patterns and colors. Add vibrant food coloring to bring the holiday spirit to life.

Add festive sprinkles to your cookies for a fun touch. Use edible glitter to make them sparkle like snow. Try flooding the cookies with icing and then sprinkling toppings for a wow effect.

Decorating TechniqueDescriptionRecommended Supplies
Royal Icing PipingUse a piping bag and various tips to create intricate designs and patterns on the cookie surface.Royal icing, piping bags, assorted piping tips
Flooding with IcingFlood the cookie surface with a thin layer of icing, then add sprinkles, edible glitter, or other toppings.Royal icing, sprinkles, edible glitter
Buttercream DecoratingUse a piping bag and tips to create swirls, rosettes, and other decorative elements using buttercream frosting.Buttercream frosting, piping bags, assorted piping tips

With practice and holiday spirit, you’ll make amazing cookies. They’ll be so good, they’ll look great on Instagram. So, put on your apron, preheat the oven, and start decorating!

Make-Ahead and Freezer-Friendly Options

Baking Christmas cookies can take a lot of time. But, with some preparation, you can start early. Learning to make dough ahead and freeze cookies saves time. It makes baking easier and less stressful.

Freezing Instructions

To freeze cookie dough, first make the dough as usual. Then, scoop it onto a parchment-lined baking sheet. Put the sheet in the freezer until the dough is firm.

After, move the dough balls to an airtight container or freezer-safe bag. This way, you can bake fresh cookies whenever you want. You won’t have to mix the dough from scratch every time.

Thawing Guidelines

When you’re ready to bake, take the frozen dough balls out of the freezer. Place them on a baking sheet. Let them thaw at room temperature for about 30 minutes.

This slow thawing helps your cookies stay perfect in texture and taste.

Best Cookies for Mail Delivery

Cookie TypeShipping SuitabilityTips
Shortbread CookiesHighSturdy and less prone to crumbling
BiscottiHighTwice-baked for extra crispness
Gingerbread CookiesModerateCarefully pack to prevent breakage
Chocolate Chip CookiesLowSoft texture makes them more fragile

When shipping cookies, pick recipes that can handle the mail. Shortbread and biscotti are great because they’re sturdy and dry. Gingerbread cookies are also good, but pack them carefully to avoid breakage.

Soft, chewy cookies like chocolate chip aren’t the best for the mail. They’re too fragile.

Hosting a holiday cookie exchange needs careful planning and creativity. From setting up the event to showing off your cookies, these tips will make your swap a joyous tradition.

First, pick a date, time, and place for your cookie exchange. Send out invitations early, including details like how many cookies to bring and any dietary needs. Ask guests to RSVP so you know how many to expect.

Packaging and Presenting Cookies

Encourage guests to be creative with their cookie packaging. Give them recipe cards and packaging ideas to spark their imagination. Use festive tins or cellophane bags to add to the fun. Set up a display for guests to show off their beautifully wrapped cookie swap treats.

Making the Most of the Event

On the day of the cookie swap, have a plan to hand out cookies smoothly. Offer labels or tags for each guest to mark their cookies. Encourage everyone to try different kinds and share their favorite recipes. You could even hold a vote for the best-looking or tastiest cookies to add fun.

By using these hosting tips, you can make a holiday cookie swap that everyone will remember and look forward to every year.

Cookie Swap EssentialsRecommended Quantities
Number of Cookies per Guest2-3 dozen
Minimum Number of Guests6-8
Decorative Packaging OptionsTins, cellophane bags, boxes, or trays

For those with dietary restrictions, the holidays can be tough. But, you can still enjoy tasty allergen-free Christmas cookies. You can use gluten-free flours, dairy-free butters, and nut-free recipes. This guide will help you with allergy-friendly baking.

Gluten-Free Variations

Switching to gluten-free flours like rice, almond, or coconut can make holiday cookies safe for those with gluten issues. These flours might need different liquid amounts and baking times. But, they can taste just as good as regular cookies.

Dairy-Free Alternatives

Vegan butter from plants like coconut or olive oil can replace regular butter in cookies. Non-dairy milks like almond, soy, or oat milk make creamy cookies without lactose or animal products.

Nut-Free Recipes

For nut allergy sufferers, try cookies with seeds like sunflower or pumpkin. Egg substitutes like ground flax or chia seeds mixed with water also work. They keep the cookies tasty and safe.

FAQ

What are the essential holiday baking tools and ingredients?

Find out what you need for holiday baking. You’ll need tools like stand mixers and cookie cutters. Also, get high-quality ingredients like pure vanilla extract and unsalted butter. Don’t forget storage solutions for your baking supplies.

How do I make classic sugar cookies with royal icing?

Learn to make classic sugar cookies and decorate them with royal icing. Get tips for the perfect cookie texture. Also, learn to create intricate designs for festive holiday shapes.

Discover the rich flavors of traditional gingerbread cookies. Learn about the best spice combinations. Also, find out how to decorate gingerbread men and houses. Plus, learn how to store them to keep them fresh.

Find ways to make classic chocolate chip cookies festive. Try seasonal mix-ins and decorative techniques. Turn this beloved treat into a Christmas favorite.

Find easy Christmas cookie recipes for beginners. Get essential baking tips. Learn time-saving techniques and no-bake options. Avoid common pitfalls for successful holiday baking.

How can I decorate my Christmas cookies in a festive way?

Explore creative ways to decorate Christmas cookies. Learn icing techniques and use sprinkles and edible decorations. Create stunning designs to make your cookies visually appealing and delicious.

How can I prepare Christmas cookies in advance and store them properly?

Discover how to prepare Christmas cookies in advance. Learn freezing and thawing techniques. Find the best cookie recipes for freezing. Get tips for mailing cookies to loved ones.

Plan a successful holiday cookie exchange. Get tips for organizing the event and creative packaging ideas. Learn how to share recipes and make your cookie swap a memorable tradition.

Explore allergen-free Christmas cookie recipes. Learn about gluten-free flour alternatives and dairy-free butter substitutes. Find nut-free options to ensure everyone can enjoy holiday treats.

Healthy Dessert Recipes: Indulge Without the Guilt

Healthy Dessert Recipes: Delicious & Nutritious Treats

In today’s world, we all want to enjoy sweet treats without feeling guilty. Home cooks and chefs are making desserts that are both tasty and good for us. They’re finding ways to make desserts that are healthy and still satisfy our sweet cravings.

Ever thought about what makes a dessert truly “healthy”? Is it just about cutting sugar and using low-calorie options? Or is there more to it? This article will show you how to make desserts that are both delicious and good for you.

Key Takeaways

  • Discover the benefits of incorporating healthy ingredients into your desserts
  • Learn about natural sweeteners and their impact on blood sugar levels
  • Explore a variety of nutrient-dense dessert recipes for guilt-free indulgence
  • Understand the role of plant-based substitutions in creating wholesome sweet treats
  • Discover gluten-free and fruit-based dessert options for special dietary needs

Understanding the Benefits of Healthy Dessert Alternatives

More people want to eat less refined sugar. They look for desserts that are good for them. Choosing natural sweeteners over refined sugar alternatives helps keep diets balanced and blood sugar levels stable.

Natural Sweeteners vs. Refined Sugar

Natural sweeteners like honey, maple syrup, and date syrup are better than refined sugar. They don’t raise blood sugar as much and have health benefits. These sweeteners have antioxidants and minerals that are good for you.

Nutritional Value in Healthy Desserts

Healthy desserts use nutrient-dense ingredients. Adding nuts, seeds, and superfoods makes desserts nutritious. These ingredients turn sweet treats into healthy indulgences.

Impact on Blood Sugar Levels

Eating natural sweeteners in small amounts is better for blood sugar. They have a lower glycemic index. This means they are digested slowly, avoiding big blood sugar spikes.

IngredientNutritional BenefitsImpact on Blood Sugar
HoneyRich in antioxidants, enzymes, and mineralsLower glycemic index than refined sugar
Maple SyrupContains manganese, zinc, and antioxidantsModerate glycemic index, slower absorption
DatesHigh in fiber, vitamins, and mineralsLower glycemic index, slower sugar release

Essential Ingredients for Wholesome Sweet Treats

Making healthy and tasty desserts starts with the right ingredients. You need whole grain flours, healthy fats, and natural sweeteners. Each one is key to making old sweets healthier. Let’s look at what makes your desserts better.

Using whole grain flours like oat, almond, and coconut is a smart choice. They have more fiber, vitamins, and minerals than regular flour. This makes your desserts more nutritious.

Healthy fats, like coconut oil, avocado, and nut butters, add creaminess and health benefits. They help control blood sugar and keep you full longer.

Natural sweeteners, such as honey, maple syrup, and dates, are better than sugar. They give energy slowly, avoiding the crash and keeping blood sugar steady.

Adding superfoods like chia seeds, cacao, and berries to desserts boosts nutrition. These superfoods in desserts add antioxidants, fiber, and vitamins, making your treats healthy and powerful.

Choosing these healthy ingredients lets you make desserts that are good for you. They satisfy your sweet tooth and nourish your body. Explore the possibilities of delicious and healthy desserts with these essential ingredients.

IngredientHealth BenefitsCulinary Uses
Whole Grain FloursHigh in fiber, vitamins, and mineralsBaking cakes, cookies, and breads
Healthy FatsRegulate blood sugar, promote satietyAdding creaminess to desserts, baking
Natural SweetenersGradual energy release, stable blood sugarSweetening baked goods, sauces, and drinks
Superfoods in DessertsRich in antioxidants, fiber, and nutrientsIncorporating into smoothies, puddings, and baked treats

No-Bake Healthy Desserts Recipes for Beginners

Try out no-bake desserts that are both easy healthy treats and beginner-friendly. These quick recipes need little effort and tools. They’re great for those new to making healthy sweets.

Quick Energy Balls Recipes

Boost your energy with homemade energy balls. Mix together oats, nuts, seeds, and natural sweeteners. You can make them chocolatey or fruity. They’re a tasty and healthy snack or dessert.

Yogurt-Based Parfaits

Make stunning healthy desserts with yogurt parfaits. Start with Greek yogurt, then add berries, granola, and honey. It’s a sweet treat that’s good for you.

Frozen Fruit Treats

Enjoy cool frozen fruit treats that are easy healthy and beginner-friendly. Blend fruits with honey or maple syrup. Pour into molds and freeze for a light dessert. They’re perfect for summer.

Check out these quick recipes and beginner-friendly desserts. They’re part of your easy healthy treats collection. Enjoy their simple taste and health benefits.

Desserts Recipes Healthy: A Complete Guide

Making tasty yet healthy desserts is now an art. You might want healthy baking techniques, sugar-free desserts, or low-calorie treats. This guide will help you make nutrient-dense sweets that are good for you and taste great.

Learn healthier baking tricks from our collection. Find out how to use natural sweeteners like honey, maple syrup, or dates for sugar-free desserts. Also, learn to use whole grains, nuts, seeds, and fruits to make low-calorie treats that are full of flavor and nutrients.

  1. Try different flours: Use whole-wheat, almond, or coconut flour instead of all-purpose flour to make your baked goods healthier.
  2. Make smaller portions: Enjoy smaller, more thoughtful servings of nutrient-dense sweets to satisfy your sweet tooth.
  3. Add healthy fats: Use oils, nut butters, or avocado to add moisture and richness to your healthy baking techniques.
  4. Choose natural sweeteners: Use maple syrup, honey, or dates to sweeten your creations without sugar.
  5. Play with texture: Mix in chia seeds, oats, or yogurt to make low-calorie treats that feel good in your mouth.

With these tips, you can make delicious, guilt-free desserts that are good for you. Enjoy the art of healthy baking techniques and savor the joy of nutrient-dense sweets that make your meals special.

Plant-Based Substitutions for Traditional Dessert Ingredients

More people want healthier and sustainable desserts. Home bakers and chefs are finding plant-based substitutes for common ingredients. These include vegan egg alternatives, dairy-free options, and natural thickeners. They’re changing how we make sweet treats.

Vegan Egg Alternatives

For vegan desserts, flax eggs and aquafaba (chickpea liquid) work great. They add structure and moisture. Plus, they’re good for you.

Dairy-Free Options

Traditional desserts often use milk, cream, and butter. But now, dairy-free alternatives make it easy to make tasty treats without animal products. Nut milks, coconut cream, and plant-based spreads are great options.

Natural Thickeners

For the right texture, try agar-agar, arrowroot starch, and xanthan gum. They’re natural egg substitutes and dairy-free alternatives. They help thicken desserts like puddings and mousses.

Using these plant-based substitutes opens up new possibilities in the kitchen. It lets home cooks and bakers make delicious, healthy desserts for everyone.

Gluten-Free Dessert Options for Special Diets

For those with celiac disease or gluten sensitivities, finding tasty desserts can be hard. But, the world of gluten-free baking now offers many celiac-friendly desserts. These are both healthy and yummy. We’ll look at alternative flours and grain-free treats that are perfect for satisfying your sweet tooth without harming your health.

Alternative flours are key in gluten-free baking. Almond flour and coconut flour are favorites for good reasons. Almond flour is packed with protein, fiber, and healthy fats. Coconut flour is low in carbs and adds a sweet touch to desserts. These flours are great for making everything from cakes and cookies to custards and puddings.

Starting with gluten-free baking can seem daunting. But, with a few tips, you can make delicious celiac-friendly desserts. Try mixing different alternative flours and use natural sweeteners like honey or maple syrup. By exploring gluten-free baking, you can enjoy sweet treats that are also good for you.

Gluten-Free FlourNutritional BenefitsIdeal for
Almond FlourHigh in protein, fiber, and healthy fatsCakes, cookies, and custards
Coconut FlourLow in carbohydrates, high in fiberMuffins, breads, and pancakes
Tapioca FlourStarchy and helps with bindingPie crusts, breading, and thickening

Fruit-Based Desserts for Natural Sweetness

Looking for healthier sweet treats? Fruit-based desserts are a great choice. They use the natural sweetness of fruits. This makes them tasty and full of vitamins, minerals, and fiber. You can find everything from berry recipes to tropical fruit desserts to enjoy.

Berry-Based Recipes

Berries like blueberries, raspberries, and strawberries are full of flavor and nutrients. They add sweetness and color to your desserts. Try a Strawberry Chia Pudding or a Blueberry Almond Crumble for a tasty, healthy snack.

Tropical Fruit Combinations

Imagine a tropical getaway with pineapple, mango, and coconut desserts. Make a Pineapple Coconut Chia Parfait or a Mango Lime Sorbet. These desserts are refreshing and naturally sweet.

Baked Fruit Delights

Baking fruits brings out their natural sweetness. Try roasting apples with cinnamon for an Apple Crisp. Or bake pears with honey and walnuts for a Baked Pear dish. These fruit desserts highlight nature’s sweetness.

Adding fruit desserts to your menu means enjoying naturally sweet treats. They’re good for you and taste amazing. Dive into the world of berry recipes and tropical fruit desserts for a healthier sweet fix.

Conclusion

The world of healthy dessert lifestyle is full of tasty and nutritious options. It lets us enjoy sweet treats without feeling guilty. With the right recipes, we can indulge in desserts that are good for us.

Looking to cut down on sugar or eat more plants? This guide has you covered. It shows how to make delicious, healthy desserts. From energy balls to yogurt parfaits, there’s a world of possibilities.

Keep exploring the healthy dessert lifestyle and enjoy the journey. Try out the recipes and see how they can make your life better. It’s all about making tasty, healthy treats that make you feel great.

FAQ

What are the benefits of choosing healthy dessert alternatives over traditional sugary treats?

Healthy dessert alternatives help manage blood sugar levels better. They are also more nutritious and have less refined sugar. These treats use natural sweeteners, whole grain flours, and nutrient-rich ingredients. This makes them a healthier choice for sweet cravings.

What are some essential ingredients for creating nutritious desserts?

For wholesome desserts, use whole grain flours, healthy fats like coconut oil, and natural sweeteners like honey. Superfoods like chia seeds and cacao are also key. These ingredients boost flavor and add nutrients, fiber, and antioxidants.

What are some easy, no-bake healthy dessert recipes for beginners?

Beginners can start with no-bake recipes like energy balls, yogurt parfaits, and frozen fruit treats. These recipes are simple and require little equipment. They’re perfect for those new to making healthy sweets.

What are some plant-based substitutions for traditional dessert ingredients?

For plant-based desserts, use vegan egg alternatives like flax eggs and aquafaba. Choose dairy-free options like nut milks and coconut cream. Natural thickeners like agar-agar and arrowroot starch also work well. These substitutions make delicious, plant-based desserts.

What are some gluten-free dessert options for those with special dietary needs?

For those with gluten sensitivities, try recipes with almond and coconut flour. These grain-free options are safe for those with celiac disease or gluten sensitivities. They offer tasty and safe dessert choices.

How can fruit-based desserts provide natural sweetness?

Fruit-based desserts, like berry and tropical fruit recipes, are naturally sweet. They are also rich in nutrients. The natural sugars and fiber in fruits satisfy sweet cravings while offering health benefits.

Dubai Chocolate Bar Recipe: Luxurious Middle Eastern Treat

Dubai Chocolate Bar Recipe: Luxurious Middle Eastern Treat

Imagine enjoying a delicious chocolate bar that captures Dubai’s spirit. Beyond the city’s bright towers and lively streets, a rich culinary tradition exists. It mixes old flavors with new ones. But what makes a Dubai chocolate bar truly special? Get ready for a taste adventure that will excite your senses and take you to the Middle East.

Key Takeaways

  • Discover the rich history and cultural influences that shape Dubai’s chocolate culture.
  • Understand the use of traditional Middle Eastern spices and flavors in modern confectionery.
  • Learn how to select the best chocolate ingredients for an authentic Dubai-inspired treat.
  • Explore the techniques and tools needed to create a professional-quality Dubai chocolate bar.
  • Uncover the secret to achieving the perfect shine and texture in your homemade chocolate creation.

Understanding Dubai’s Chocolate Culture

Dubai, the shining city in the United Arab Emirates (UAE), has become a center for the UAE chocolate industry. Here, luxury chocolates and traditional Middle Eastern sweets meet. The city’s high-end chocolatiers have changed how people enjoy chocolate, mixing global tastes with Middle Eastern flavors.

The Rise of Luxury Chocolate in the UAE

In recent years, the UAE has seen a big increase in premium chocolate brands. Dubai is at the forefront of this trend. Famous chocolatiers have set up shop in the city, offering top-notch treats for the area’s rich and famous.

These luxury shops have not only raised the status of chocolate. They have also made people in the UAE and visitors appreciate chocolate-making more.

Traditional Middle Eastern Flavors in Modern Confectionery

The UAE’s chocolate scene also celebrates the Middle East’s rich food culture. Chocolatiers in Dubai have added traditional ingredients like dates, pistachios, and rose water to their sweets. This mix of flavors is both exciting and respectful of the region’s culinary traditions.

These modern sweets honor the Middle East’s food heritage. They also introduce a new audience to the tasty world of Middle Eastern desserts.

“Dubai has become a melting pot of global and local flavors, with its thriving chocolate industry leading the way in showcasing the region’s rich cultural heritage.”

Essential Ingredients for Dubai Chocolate Bar Recipe

Making the perfect Dubai chocolate bar is all about using the best ingredients. At its core, it features premium cocoa. This cocoa is known for its rich, velvety texture and deep flavor. It’s paired with the natural sweetness and chewy texture of Medjool dates from Emirati orchards.

The addition of Emirati pistachios gives it a Middle Eastern twist. These pistachios are chosen for their buttery crunch and bright green color. Lastly, the chocolate is enhanced by the subtle floral notes of rose water. This creates a balance of flavors that takes you to Dubai’s vibrant souks.

To make an exceptional Dubai chocolate bar, you need the best ingredients. Use premium cocoa, plump Medjool dates, crunchy Emirati pistachios, and the enchanting essence of rose water. This combination honors the UAE’s rich culinary traditions and creates a luxurious treat.

“The perfect Dubai chocolate bar is a marriage of the finest ingredients, each one carefully selected to showcase the unique flavors of the Middle East.”

Traditional Middle Eastern Spices That Enhance Chocolate

Chocolate can be made even better with Middle Eastern spices. These spices add depth and complexity to chocolate. Let’s see how cardamom, saffron, rose, and orange blossom can turn a simple chocolate bar into a luxurious treat.

Cardamom and Its Unique Flavor Profile

Cardamom is a favorite spice in the Middle East. It has a warm, sweet, and spicy taste. When mixed with cardamom chocolate, it creates a unique and enticing smell.

The aroma of cardamom blends perfectly with cocoa. This mix is both comforting and elegant.

Saffron: The Golden Touch

Saffron is known for its bright color and delicate taste. Adding a saffron infusion to chocolate makes it special. The floral and earthy flavors of saffron enhance the chocolate’s richness.

This makes the chocolate experience luxurious and memorable.

Rose and Orange Blossom Notes

Middle Eastern desserts often feature floral chocolate flavors. Rose and orange blossom are especially loved. These fragrances wrap the chocolate in a delicate, aromatic embrace.

The scent of these flowers adds elegance and sophistication. It takes the chocolate on a journey to the beautiful gardens of the Middle East.

“The synergy between chocolate and traditional Middle Eastern spices is a truly captivating and harmonious pairing.”

Premium Chocolate Selection Guide

Choosing the right premium chocolate is key to making a luxurious Dubai chocolate bar. The quality and taste of the chocolate can greatly affect the final product. Here are some essential tips for picking the best chocolate for this Middle Eastern treat.

Start by choosing couverture chocolate. This type of chocolate has more cocoa butter, giving it a smooth and glossy look. It also tastes better. Look for chocolate with a cocoa percentage between 60-75%. This range is perfect for a balance of richness and sweetness.

The origin of the cocoa beans is also crucial. Single-origin cocoa brings unique flavors that go well with Middle Eastern spices. Try chocolates from places like Ghana, Ivory Coast, or Ecuador. They can add special tastes from different places.

Cocoa PercentageFlavor ProfileBest Use
60-64%Balanced, sweet, and creamyIdeal for milk chocolate or as a base for flavored chocolate
65-74%Rich, intense, and complexExcellent for dark chocolate bars and couverture
75-100%Deeply intense, bold, and bittersweetPerfect for making intense, pure dark chocolate confections

By picking the right chocolate percentages and origin, you can make a Dubai chocolate bar that’s truly special. This focus on detail will make your confection even more luxurious and indulgent.

Tools and Equipment Needed

Making delicious Dubai-style chocolate bars needs the right tools and equipment. You’ll need everything from tempering machines to special molds. Each tool is key to getting the chocolate just right.

Professional Tempering Tools

Tempering is key to making chocolate smooth and shiny. You’ll need a chocolate thermometer to keep the chocolate at the right temperature. You can also use a marble slab or a tempering machine.

Specialty Molds and Forms

To get the Dubai chocolate bar shape, you need polycarbonate molds. These molds are strong and heat-resistant. They come in different sizes and styles for perfect chocolate bars. You might also use chocolate transfer sheets or silicone mats for cool designs.

ToolPurpose
Chocolate ThermometerPrecisely monitor and control the temperature of the chocolate during tempering.
Marble SlabUsed to temper chocolate, ensuring a smooth, glossy finish.
Polycarbonate MoldsSpecialty molds designed to create the iconic Dubai chocolate bar shape.

With these tools, you’re ready to make top-notch Dubai-style chocolate bars. They’ll be a true taste of Middle Eastern sweets.

Step-by-Step Dubai Chocolate Bar Recipe

Experience the rich tastes of the Middle East with this Dubai chocolate bar recipe. It combines the art of chocolate tempering with the luxury of ganache filling. Each layer of this layered chocolate bar brings out the region’s famous spices and fragrances.

First, temper the chocolate to get a shiny, crisp finish. After tempering, start adding the bar’s layers:

  1. Begin with a smooth, velvety chocolate base.
  2. Make a rich ganache filling with cardamom, saffron, and rose essence. Spread it over the chocolate base.
  3. Finish with another layer of tempered chocolate, making a luxurious layered chocolate bar.

To complete it, sprinkle ground cardamom, a pinch of saffron, and rose petal shards on top. This enhances both the look and the Middle Eastern flavors.

IngredientQuantity
High-quality dark chocolate200g
Heavy cream100ml
Ground cardamom1 tsp
Saffron threads1/2 tsp
Rose water1 tbsp

This Dubai chocolate bar is a feast for the senses. Its layers, exotic tastes, and stunning look make it a true indulgence. Enjoy each bite and let the Middle East’s flavors take you to a world of culinary beauty.

Tempering Techniques for Perfect Shine

To get the perfect shine and snap in a chocolate bar, you need to temper it. This means controlling the chocolate’s temperature to get the right chocolate crystallization. It’s all about the seeding method and watching the temper curve. Mastering these techniques is key to making a top-notch Dubai chocolate bar.

Double Boiler Method

The double boiler method is a trusted way to temper chocolate. You melt it in a bowl over simmering water. It’s important to keep the temperature steady to avoid mistakes.

By slowly heating the chocolate and keeping it in the right range, you get a glossy, perfect finish.

Temperature Control Tips

  • Start by melting the chocolate to a temperature of 115-120°F (46-49°C).
  • Once fully melted, cool the chocolate to 80-82°F (27-28°C) by removing the bowl from the heat and stirring constantly.
  • Slowly reheat the chocolate, bringing it back up to 88-90°F (31-32°C), the ideal tempering temperature.
  • Maintain this temperature range throughout the seeding method and the molding process to ensure a perfect temper.

By balancing temperatures carefully, you can get the best chocolate crystallization. This makes a Dubai chocolate bar with a stunning shine and a great snap.

Adding Signature Dubai Embellishments

Make the Dubai chocolate bar even more special by adding luxurious touches. Use edible gold leaf to add a shiny, elegant look. Then, sprinkle crushed pistachios on top for a green crunch.

For a Middle Eastern twist, decorate with date sugar patterns. These designs, inspired by Dubai’s architecture and textiles, add a refined touch. They make your chocolate bars visually stunning.

By adding these Dubai-inspired elements, you turn a simple chocolate bar into a work of art. It celebrates Dubai’s culture and luxury. Enjoy this treat and let it delight your senses.

FAQ

What are the key ingredients in the Dubai Chocolate Bar recipe?

The Dubai Chocolate Bar needs premium cocoa, Medjool dates, and Emirati pistachios. It also includes Middle Eastern flavors like rose water and cardamom.

How do traditional Middle Eastern spices enhance the chocolate flavor?

Spices like cardamom, saffron, rose, and orange blossom add unique flavors. They complement the chocolate, bringing aromatic and floral notes that are Middle Eastern.

What type of chocolate should be used for the Dubai Chocolate Bar?

Use high-quality couverture chocolate with a cocoa percentage between 64-72%. This ensures the chocolate is tempered right and has a smooth texture.

What special tools and equipment are needed to make the Dubai Chocolate Bar?

You’ll need a chocolate tempering machine, a marble slab, and a chocolate thermometer. Also, use specialty polycarbonate molds for the right shape and look.

How can the Dubai Chocolate Bar be decorated to reflect the opulence of Dubai?

Decorate the Dubai Chocolate Bar with edible gold leaf and crushed pistachios. Add artistic sugar work inspired by Middle Eastern patterns and designs.

Do You Like Our Recipe ?

0.0
0.0 out of 5 stars (based on 0 reviews)
Excellent0%
Very good0%
Average0%
Poor0%
Terrible0%

Ghirardelli Chocolate Chip Cookie recipe

Sure thing! Here’s an informal take on the Ghirardelli Chocolate Chip Cookie recipe, perfect for that warm, gooey, chocolatey goodness you’re craving. 🍪


Ghirardelli Chocolate Chip Cookie Recipe Ingredients

This’ll make about 2 dozen cookies (or fewer if you like them BIG):

  • 2 1/4 cups all-purpose flour
  • 1/2 tsp baking soda (tiny but mighty!)
  • 1 cup of softened (not melted, just squishy) butter
  • 3/4 cup granulated sugar
  • Add 3/4 cup of brown sugar (do not skimp!).
  • 1 tsp. vanilla extract (or a little more if you’re a fan—go wild)
  • Two eggs, either at room temperature or straight from the fridge, are ideal.
  • Two cups of Ghirardelli semi-sweet chocolate chips, also known as the stars of the show, are required.
  • Add one cup of chopped nuts (optional, but why not?).

Directions

  1. Preheat your oven to 375°F (190°C). You want it fresh and hot when your cookies go in.
  2. In a medium bowl, whisk together your flour and baking soda. This keeps things fluffy and balanced. Set it aside like a pro.
  3. Grab a bigger bowl and beat together your butter, granulated sugar, brown sugar, and vanilla until it’s creamy. It should look smooth and delicious at this point—try not to eat it yet.
  4. Toss in your eggs, one at a time. Beat well after each egg. It’ll get a little fluffier.
  5. Slowly mix in your flour/baking soda combo. Do it in parts so you don’t end up in a flour cloud. You’re looking for a smooth dough texture here.
  6. Stir in those Ghirardelli chocolate chips (don’t skimp) and nuts if you’re feeling fancy.
  7. Scoop your dough onto an ungreased cookie sheet—about a tablespoon per cookie. Leave a little space; they’ll spread out as they bake.
  8. Pop them in the oven for 9–11 minutes. You want them golden around the edges but still soft in the center. Don’t overbake unless you like crunchy cookies.
  9. Let them sit on the baking sheet for a couple of minutes before transferring them to a wire rack to cool. Or just eat one straight away—no judgment.

Pro Tips

  • Soft cookies? Bake on the lower end of the time range.
  • Add a sprinkle of flaky sea salt on top before baking if you’re feeling gourmet.
  • Store leftovers in an airtight container, but let’s be real—there probably won’t be any leftovers.

Enjoy your cookies with a glass of milk, coffee, or just straight up! 🍫✨