Category Archives: Desserts

delicious dessert you’ll love to try now

Delicious dessert , 75% of Americans enjoy a tasty dessert at least once a week. Many are on the hunt for the best desserts to try today. This shows how important it is to treat ourselves to sweet treats.

With the rise of foodie culture, people want to try new desserts. They look for everything from classic favorites to unique creations.

delicious dessert

Whether you crave something rich or something light, there’s a dessert for you. This article will guide you to your perfect dessert. We’ll explore a variety of delicious options and the best desserts to try today.

Key Takeaways

  • 75% of Americans indulge in a delicious dessert at least once a week
  • Treating oneself to mouth-watering sweet treats is a growing trend
  • There’s a wide range of desserts to try, from classic favorites to innovative creations
  • This article will provide a guide to finding your perfect dessert
  • Delicious dessert for try it now options will be covered, including the best desserts to try today
  • Mouth-watering sweet treats will be highlighted throughout the article

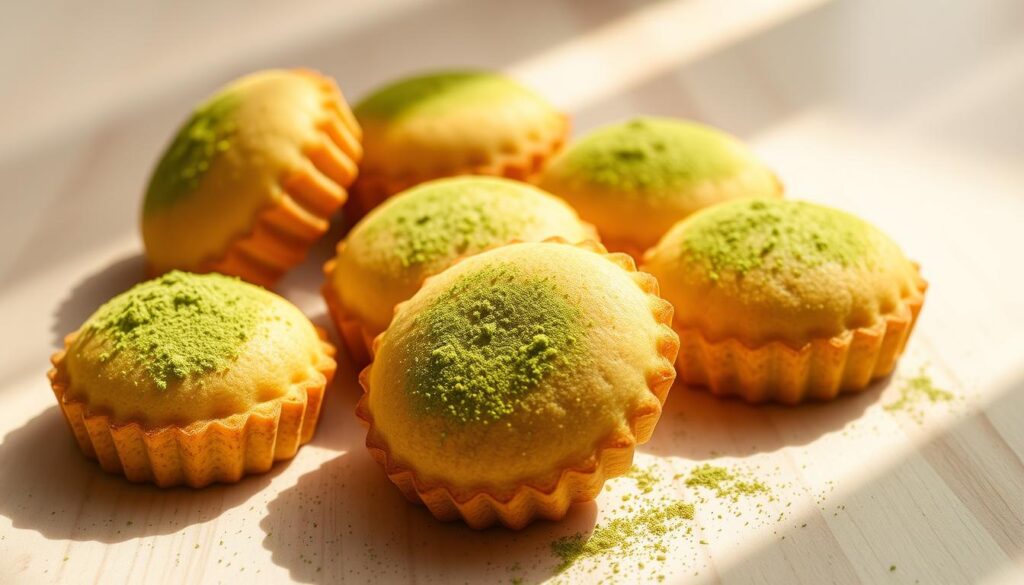
Discover Your Perfect Delicious Dessert for Try It Now

Enjoying a sweet treat can make your day brighter. There are many tempting desserts to choose from. You’ll find something that matches your taste, from classic to innovative.

Looking for something quick or something fancy? You’ll find amazing ideas. Try fruit desserts, creamy puddings, or rich chocolate cakes. You can also mix flavors and ingredients to make something unique.

Here are some popular dessert options to consider:

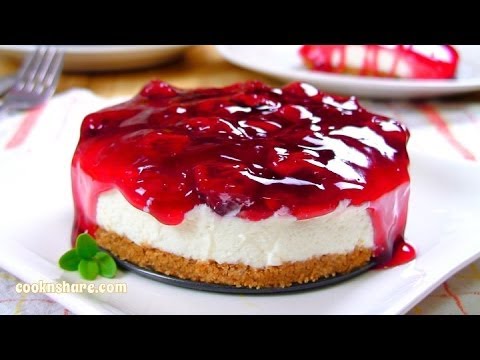
  • Classic cheesecake with a graham cracker crust
  • Rich chocolate cake with creamy frosting
  • Fruit-based desserts like strawberry shortcake or lemon bars
  • Creamy puddings like creme brulee or chocolate mousse

These ideas will help you find the perfect dessert. Whether you want something simple or elaborate, there’s a delicious option for you. So, why not try out some new dessert recipes today?

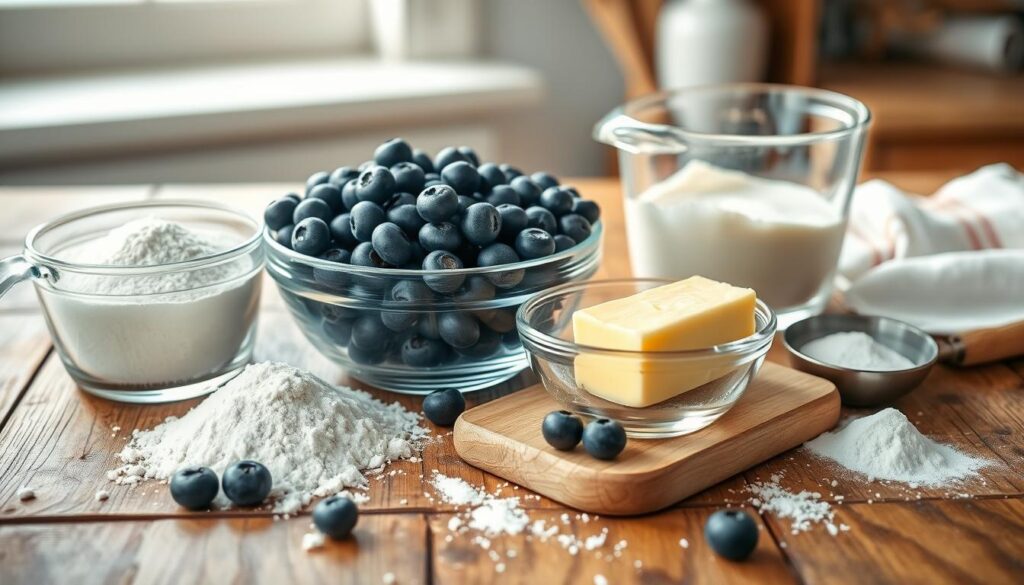
Essential Ingredients for Creating Memorable Sweet Treats

To make delicious treats, you need the right ingredients. Great desserts use fresh fruits, creamy dairy, and rich chocolate. Using seasonal ingredients boosts flavor and texture.

Keep sugar, honey, and cream in your pantry. These are key for many desserts. You can mix sugar and honey for syrup or cream with fruits for toppings.

Here are some must-have ingredients for creating memorable sweet treats:

  • Fresh fruits, such as strawberries and blueberries
  • Creamy dairy products, like cream and butter
  • High-quality chocolate, such as dark or milk chocolate
  • Sugar and honey, for adding sweetness and flavor

With these ingredients, you can make many tasty treats. Whether it’s a simple dessert or a complex cake, the right ingredients matter. So, stock up and start making delicious desserts.

Master These Basic Dessert-Making Techniques

To make tasty desserts, you need to learn the basics. These skills help you tackle any recipe. You can make everything from simple cookies to complex cakes.

Accuracy is crucial in dessert-making. Measuring ingredients right is key for the right taste and texture. Here are some tips:

  • Use digital scales for precise measurements
  • Measure ingredients at room temperature
  • Don’t overmix or undermix your batter

Temperature control is also important. The right temperature affects your dessert’s texture and consistency. Mastering these basics lets you make a variety of delicious desserts.

Follow these tips and practice to make amazing desserts. Whether you’re new or experienced, learning the basics is key. It helps you make treats perfect for any time, and satisfies your sweet tooth.

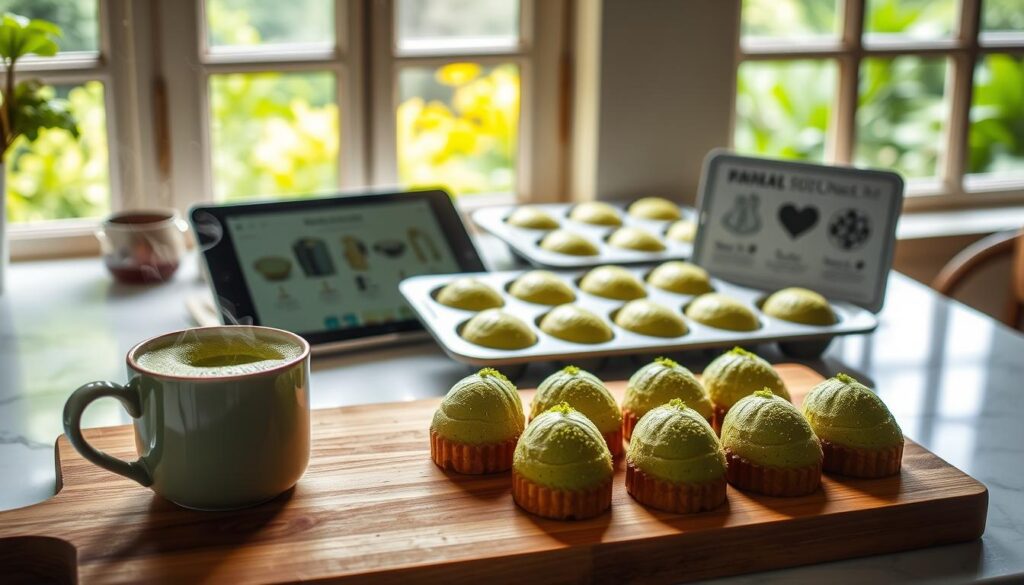
Time-Saving Shortcuts for Instant Dessert Gratification

Want to satisfy your sweet tooth fast? You don’t need to spend hours cooking. With a few quick tricks, you can whip up amazing desserts in minutes. From simple one-bowl recipes to no-bake treats, there’s a world of tasty options.

Quick desserts like fruit salad, chocolate-dipped strawberries, and cheesecake are perfect for a fast fix. For instance, a fruit salad with strawberries, grapes, and pineapple topped with whipped cream is easy and delicious.

Consider making treats ahead of time to keep them ready for when you need a dessert. Options include cookie dough balls, brownies, and creme brulee. These can be made in advance, saving you time.

  • Keep a stash of emergency dessert ingredients, such as chocolate, nuts, and fruit, on hand.
  • Use pre-made mixes or store-bought ingredients to save time.
  • Make ahead treats that can be stored in the fridge or freezer for later use.

By using these tips, you can quickly make delicious desserts. Enjoy the best treats today without spending hours cooking.

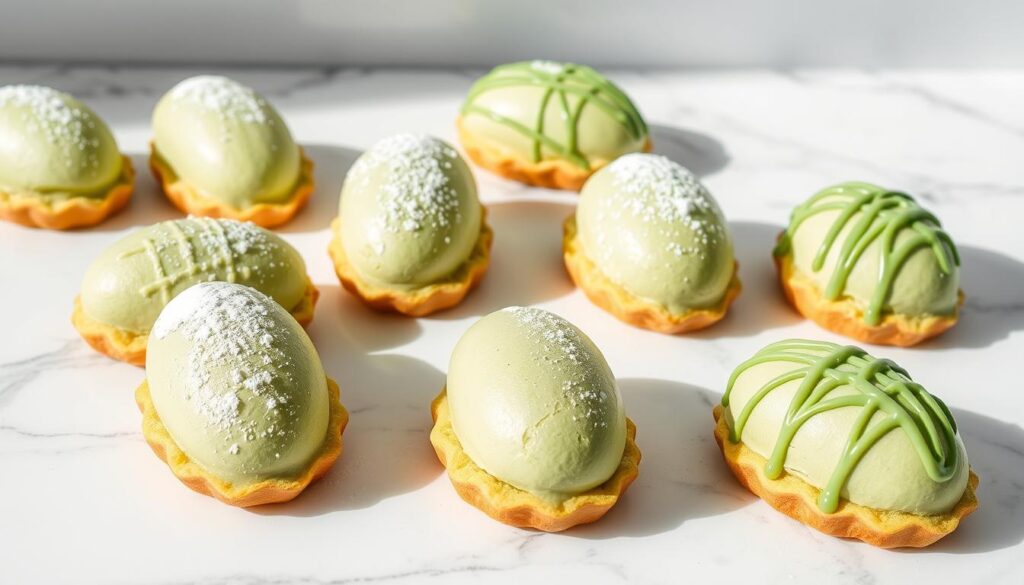
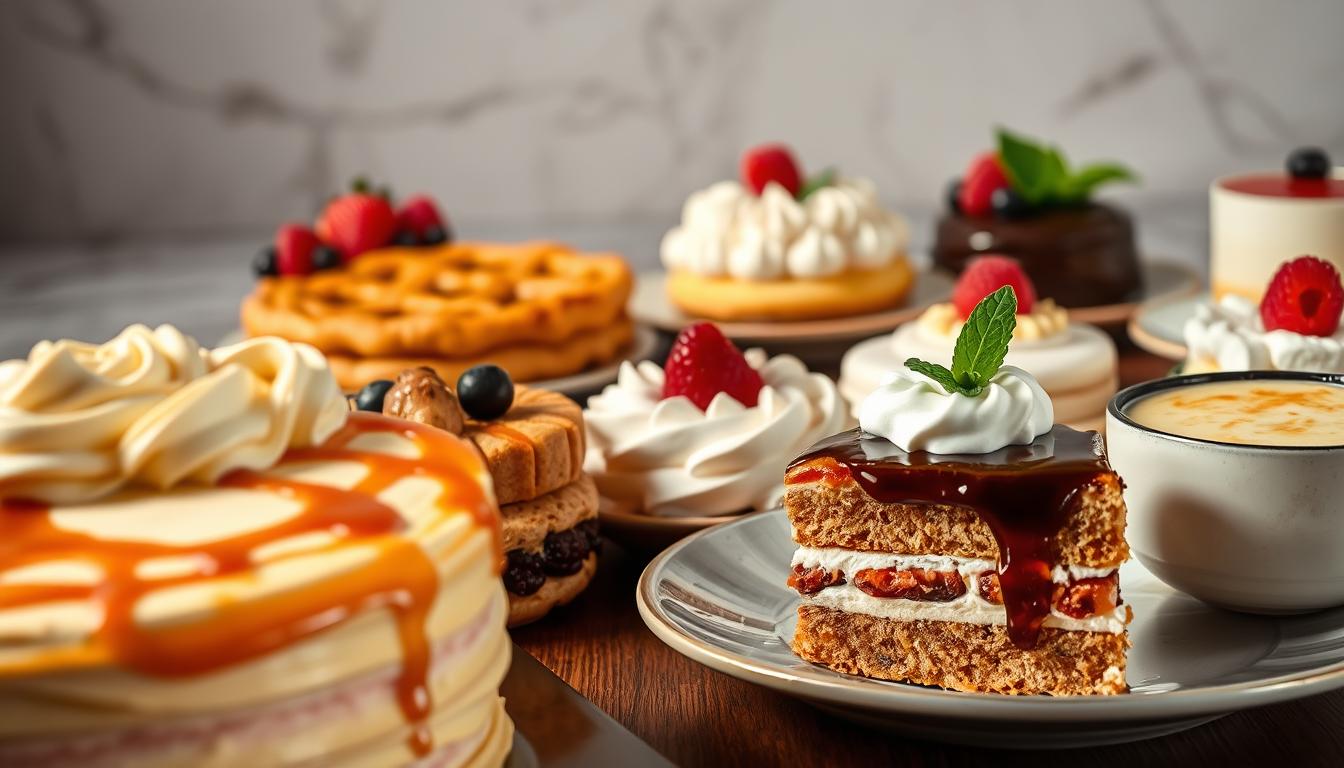
Creating Instagram-Worthy Dessert Presentations

When it comes to showing off your amazing desserts, how you present them matters a lot. A well-presented dessert can really make your treats stand out. To make your desserts Instagram-worthy, focus on a few key things.

First, think about the look you want to achieve. Consider colors, textures, and shapes that will look good together. Balance and harmony are key to a stunning dessert display.

  • Use different heights and textures to add depth and interest
  • Choose a color scheme that complements your dessert and looks good
  • Think about adding garnishes or decorations to make your dessert more appealing

By following these tips and trying out different presentation styles, you can impress everyone. Whether it’s for a big group or just for yourself, a beautifully presented dessert is unforgettable.

Common Dessert Mistakes and How to Avoid Them

Creating a delicious dessert can be exciting, but mistakes can happen. To make sure your desserts are perfect, know the common mistakes. Then, take steps to avoid them.

Common errors include overmixing, underbaking, and overdecorating. Overmixing makes desserts dense and tough. Underbaking can make them soggy or raw. Overdecorating can clutter the dessert. To avoid these, follow recipes carefully and complete each step right.

Here are some tips to help you avoid common dessert mistakes:

  • Measure ingredients accurately to ensure the right proportions
  • Don’t overmix batter or dough, as this can lead to a tough texture
  • Keep an eye on the dessert while it’s baking to avoid underbaking or overbaking
  • Decorate the dessert simply and elegantly to avoid overdecorating

By following these tips and being mindful of common dessert mistakes, you can create a delicious dessert for try it now that’s sure to impress. Whether you’re making top desserts for immediate enjoyment or special occasions, taking the time to get it right will make all the difference.

Customizing Desserts for Dietary Restrictions

Creating tasty treats for everyone is key. You can make delicious desserts for all kinds of diets. This way, everyone can enjoy the sweet treats at your party or at home.

Let’s look at some great alternatives. For those who can’t have gluten, try using gluten-free flours like almond or coconut. For less sugar, use stevia or honey. These options keep your desserts sweet without the extra sugar.

  • Gluten-free cheesecakes with fresh fruit toppings
  • Sugar-free chocolate truffles made with dark chocolate and coconut milk
  • Vegan fruit salads with coconut cream and toasted nuts

Adding these ideas to your dessert collection is easy. You’ll have many tasty options for all diets. With a bit of creativity, you can make desserts that everyone will love.

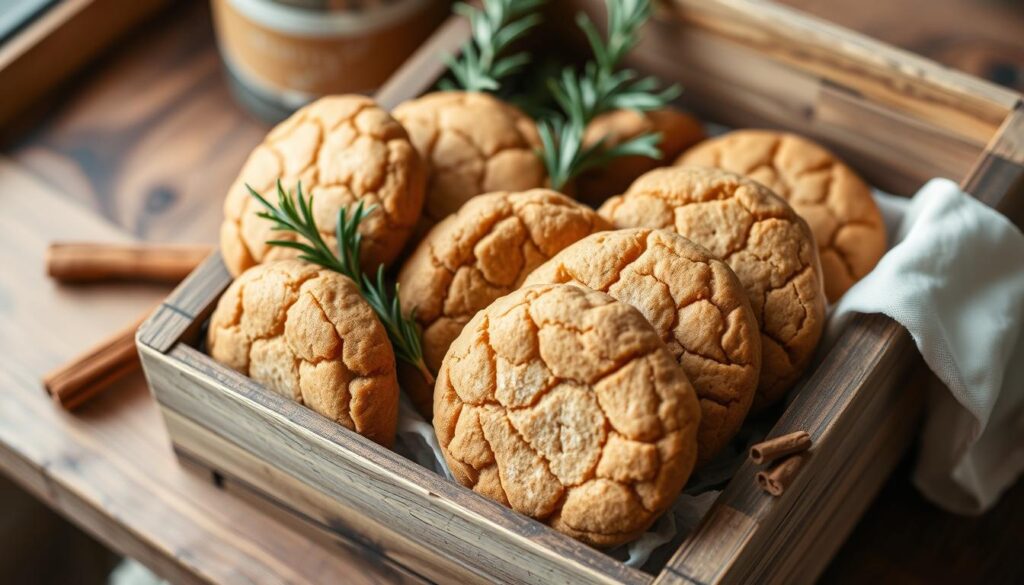
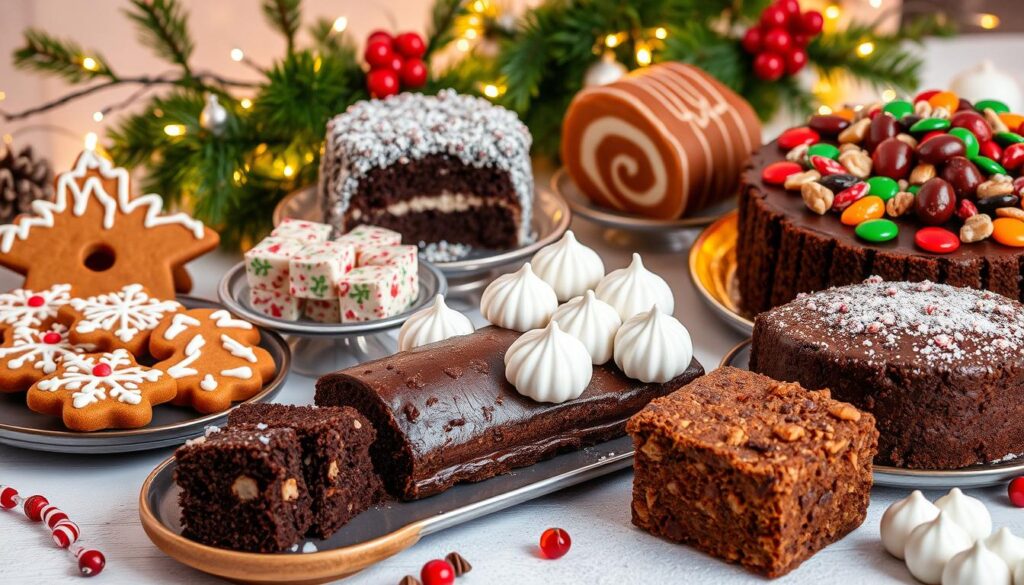
Seasonal Ingredients to Enhance Your Sweet Creations

Using seasonal ingredients can really elevate your tempting dessert recipes. They bring the freshest and most flavorful ingredients to your table. Plus, they spark amazing dessert ideas for your creations.

Winter brings spices like cinnamon and nutmeg. Summer offers fruits like strawberries and blueberries. Each season adds its own special flavors and ingredients. By using these, you can make desserts that match the season and wow everyone.

Some popular seasonal ingredients include:

  • Winter: cranberries, oranges, and ginger
  • Spring: lemons, raspberries, and rhubarb
  • Summer: peaches, watermelon, and mint
  • Autumn: apples, pears, and pumpkin

With these seasonal ingredients, you can whip up a variety of tempting dessert recipes and amazing dessert ideas. They’re sure to please your taste buds and impress your loved ones.

Conclusion: Embracing Your Sweet Journey

The world of desserts is full of joy and discovery. Whether you’re new to baking or love making desserts, there’s always something new to try. You can learn new techniques and use fresh ingredients to create amazing treats.

Start your dessert adventure with an open mind and a love for flavors. You’ll make desserts that wow everyone. So, get ready to bake, pick your favorite ingredients, and dive into the fun!

FAQ

What are some quick and easy dessert options to try?

Quick and easy desserts include no-bake treats like fruit salad and chocolate-dipped strawberries. You can also make a simple yogurt parfait. These are great for a sweet fix.

What are some decadent dessert choices for special occasions?

For special times, try cheesecake, chocolate lava cake, or crème brûlée. These desserts use rich ingredients like chocolate and creamy products. They’re perfect for indulging.

What are some no-bake dessert solutions?

No-bake desserts are perfect for quick treats. Options include no-bake cookies and energy bites. They’re great for hot days or when you’re in a rush.

What are the essential ingredients for creating memorable sweet treats?

Key ingredients are high-quality chocolate, fresh fruits, and creamy products. Sweeteners like sugar and honey are also important. Using fresh ingredients makes desserts taste better.

What are some basic dessert-making techniques to master?

Essential techniques include measuring, controlling temperature, and mixing. Mastering these basics helps you make a variety of delicious desserts.

What are some time-saving shortcuts for instant dessert gratification?

For quick desserts, try one-bowl wonders and no-bake treats. Make-ahead options are also great. They’re quick and easy to prepare.

How can I create Instagram-worthy dessert presentations?

To make desserts look great, focus on plating and garnishing. Use fresh fruit and edible flowers for color and decoration. This makes your desserts visually appealing.

What are some common dessert mistakes to avoid?

Avoid overmixing, underbaking, and overdecorating. Following recipes and using proper techniques ensures your desserts are perfect.

How can I customize desserts for dietary restrictions?

For dietary needs, use gluten-free, sugar-free, and vegan ingredients. With the right ingredients, you can make desserts that everyone can enjoy.

How can I use seasonal ingredients to enhance my sweet creations?

Use winter spices, summer fruits, and autumnal flavors to enhance your desserts. Seasonal ingredients add unique and delicious flavors to your treats.

Do You Like Our Recipe ?

0.0
0.0 out of 5 stars (based on 0 reviews)
Excellent0%
Very good0%
Average0%
Poor0%
Terrible0%

Indulge in Homemade Matcha Madeleines: A Delightful Recipe

What makes a perfect matcha madeleine recipe? How can you make these tasty cookies at home? Matcha madeleines are loved by many, thanks to matcha’s growing popularity. By following a simple recipe, you can enjoy the rich, green tea taste of homemade matcha madeleines.

Introduction to Matcha Madeleines

Matcha madeleines mix French and Japanese flavors for a unique taste. They use high-quality matcha powder for their green color and flavor. To make perfect matcha madeleines, it’s key to know the right ingredients and techniques.

Key Takeaways

  • Matcha madeleines are a delicious fusion of French and Japanese flavors
  • A good matcha madeleine recipe requires high-quality matcha powder
  • Understanding the right ingredients and techniques is crucial for creating perfect matcha madeleines
  • Matcha madeleine cookies are a great way to indulge in the rich, green tea-infused flavor of matcha
  • With a simple matcha madeleine recipe, readers can create delicious matcha madeleines at home
  • Using the right equipment and ingredients is essential for achieving the perfect matcha madeleine texture and flavor

The Magic of Matcha Madeleines: A French-Japanese Fusion

Matcha madeleines are a mix of French and Japanese flavors. They started in France as a small cake with a unique shape. Now, they include Japanese matcha powder, making them special.

When you make how to make matcha madeleine, using the best matcha madeleine ingredients is key.

Matcha madeleines have a special taste. The matcha’s bitterness meets the cake’s sweetness in a perfect mix. Knowing their history and cultural value makes them even more magical.

  • Origins of traditional madeleines in France
  • The influence of Japanese matcha on the recipe
  • The importance of using high-quality matcha madeleine ingredients

Understanding these points helps you see the charm of matcha madeleines. It also lets you make your own tasty ones at home.

Essential Equipment for Perfect Matcha Madeleines

To make perfect matcha madeleines, you need the right tools. Start with fresh, vibrant green matcha powder. The flour you choose is also key, as it affects the madeleines’ texture and shape. A madeleine pan is essential for the madeleines’ signature shell shape.

Here are some key equipment and matcha madeleine baking tips to remember:

  • A digital scale for accurate ingredient measurements
  • A stand mixer or handheld electric mixer for creaming butter and sugar
  • A silicone spatula for gentle ingredient folding
  • A madeleine pan for the madeleines’ unique shape

With the right tools and these matcha madeleine baking tips, you’ll make light, fluffy, and tasty matcha madeleines. Always use top-quality ingredients and follow the recipe closely for the best results.

Understanding Your Ingredients

To make the best matcha madeleine, knowing your ingredients is key. The quality of what you use can really make a difference. When you follow a step-by-step guide, pay close attention to each ingredient’s role.

Choosing the right ingredients can be tough, but it’s very important. Knowing what each ingredient does helps you make better choices. This ensures your matcha madeleines will taste great.

  • High-quality matcha powder for the best flavor and color
  • Finely milled flour for a tender texture
  • Granulated sugar to balance the bitterness of the matcha
  • Eggs for moisture and richness

By picking the right ingredients and following a guide, you can make delicious and beautiful matcha madeleines.

The Classic Matcha Madeleine Recipe

To make perfect matcha madeleines, follow a detailed recipe. This classic guide will help you get light, fluffy, and tasty results. First, preheat your oven to 375°F (190°C). Then, prepare your madeleine pan with butter and flour.

Whisk together 1 1/2 cups of all-purpose flour, 1/2 cup of granulated sugar, and 2 teaspoons of matcha powder in a medium bowl. In another bowl, mix 1/2 cup of whole milk, 2 large eggs, and 1/4 teaspoon of salt. Combine the wet and dry ingredients, folding gently until just combined.

Pour the batter into the madeleine pan, filling each shell about 3/4 of the way. Bake for 12-15 minutes, or until the edges are lightly golden. Let the matcha madeleines cool in the pan for 5 minutes before transferring them to a wire rack to cool completely.

By following this recipe and guide, your homemade matcha madeleines will be delicious and authentic. With practice, you’ll master the technique and create stunning, green tea-infused matcha madeleines that will impress everyone.

Some important tips for making matcha madeleines include using high-quality matcha powder. Also, avoid overmixing the batter and make sure the madeleine pan is well-prepared. By keeping these tips in mind and following the classic recipe, you’ll be on your way to making delicious matcha madeleines at home.

Preparation Techniques for Beautiful Results

To get beautiful matcha madeleines, you need to master some key techniques. This includes proper mixing methods, getting the batter just right, and preparing the pan. These steps help you make matcha madeleines with special matcha madeleine flavor variations.

Proper Mixing Methods

Mixing well is key to get air in and make the batter smooth. Here are some matcha madeleine baking tips for mixing:

  • Mix the dry ingredients separately from the wet ingredients.
  • Gently fold the wet ingredients into the dry ingredients.
  • Avoid overmixing, as this can result in dense madeleines.

Batter Consistency Tips

The batter’s consistency is important for the right texture. It should be smooth and without lumps. If it’s too thick, add a bit more liquid. If it’s too thin, add a bit more flour.

Pan Preparation Secrets

To make sure the madeleines come out easily, prepare the pan well. Here are some tips:

  • Butter the pan generously.
  • Dust the pan with flour.
  • Tap out any excess flour.

By using these preparation techniques and matcha madeleine baking tips, you can make beautiful and tasty matcha madeleines. They’ll have unique matcha madeleine flavor variations.

Mastering the Baking Process

To make perfect matcha madeleines, you need to follow a guide. It’s important to know about temperature, baking time, and other factors. By mastering these, you can make matcha madeleines that are just right and full of flavor.

Following a step-by-step guide can help you get the right texture and taste. This means preheating your oven, using the right amount of matcha, and not overmixing. With the right techniques, your matcha madeleines will be light, fluffy, and tasty.

Here are some key tips for baking matcha madeleines:

  • Use high-quality matcha powder for the best taste.
  • Don’t overbake, as it can dry out the madeleines.
  • Let the madeleines cool completely before serving.

By following these tips and a baking guide, you can make delicious matcha madeleines. They’re perfect for any occasion. Whether you’re experienced or new to baking, a step-by-step guide can help you get great results.

Troubleshooting Common Madeleine Problems

When baking matcha madeleines, you might face issues like texture, shape, or color problems. To get your matcha madeleines just right, it’s key to know how to solve these common issues. You’ll need the right ingredients and some helpful baking tips.

Fixing Texture Issues

Texture problems often come from overmixing or using the wrong flour. To fix this, mix all-purpose flour with cornstarch. Only mix until the ingredients just come together. This makes your madeleines tender and delicate, just like they should be.

Addressing Shape Concerns

Shape problems might stem from not greasing the pan well or filling it too much. To fix this, grease the pan well and fill it only 3/4 of the way. This ensures your madeleines bake evenly and keep their shape.

Color Correction Tips

If your matcha madeleines aren’t the right green, you can adjust the matcha powder amount. This tweak can change the color of your madeleines. With the right ingredients and tips, you’ll make matcha madeleines that look and taste great.

Creative Matcha Madeleine Variations

Want to elevate your matcha madeleine game? Try out different flavor variations. By adding unique ingredients and presentation ideas, you can make special treats that match your taste.

Here are some ideas for matcha madeleine flavor variations:

  • Adding a hint of lemon or orange zest to complement the brightness of the matcha
  • Incorporating chopped nuts or seeds for added texture and flavor
  • Using different types of milk, such as almond or coconut milk, to create a non-dairy matcha madeleine recipe
  • Adding a drizzle of honey or maple syrup for a touch of sweetness

When trying new flavors, keep your matcha madeleine recipe as a base. Make small changes to keep the essence of traditional matcha madeleines. This way, you can still express your creativity and preferences.

Exploring these creative matcha madeleine variations will deepen your understanding of the recipe. Whether you’re an experienced baker or just starting, trying new flavors keeps you inspired and engaged in matcha madeleines.

Storage and Freshness Tips

To keep your matcha madeleines fresh, follow proper storage methods. Let them cool completely on a wire rack after baking. This step is key to keeping their texture and flavor, as the guide shows.

Once cooled, store them in an airtight container at room temperature for up to 3 days. The quality of matcha madeleine ingredients affects their shelf life. High-quality matcha powder helps preserve flavor and aroma.

For longer storage, freezing is great. Place cooled madeleines in a single layer in a freezer-safe bag or container. Press out air before sealing. Frozen madeleines can last up to 2 months. Thaw at room temperature or reheat in the oven when ready.

Shelf Life Guidelines

  • Room temperature: up to 3 days
  • Refrigerator: up to 5 days
  • Freezer: up to 2 months

Follow these tips to enjoy your matcha madeleines longer. The baking guide will be worth it. Always check for staleness or mold before eating. Use the best ingredients for the best taste.

Serving Suggestions and Pairings

Enjoying matcha madeleine cookies is a fun experience. Pairing them with coffee or tea is a great start. The coffee’s bitterness and the tea’s floral notes mix well with the matcha’s bright taste.

For something different, try them with fruit preserves or whipped cream. The sweetness of these toppings balances the matcha’s bitterness. You can also pair them with ice cream or cake for a fancy dessert.

Present your matcha madeleines in a decorative tin or jar. Line it with parchment paper and sprinkle matcha powder on top. This makes them perfect for special occasions or gifts. By trying different pairings, you can make a unique and tasty experience for your loved ones.

Here are some great pairing ideas for matcha madeleine cookies:

  • Earl Grey tea: The bergamot flavor in the tea complements the matcha nicely, creating a refreshing and citrusy combination.
  • Fresh fruit: A simple but delicious option, pairing your matcha madeleines with fresh fruit such as strawberries or blueberries adds natural sweetness and flavor.
  • Chocolate: For a more indulgent treat, try pairing your matcha madeleines with a piece of dark chocolate or a chocolate truffle, creating a rich and decadent combination.

Conclusion: Mastering Your Matcha Madeleine Journey

Starting your matcha madeleine baking journey is exciting. The path to making these treats is as enjoyable as the taste. Follow the matcha madeleine baking guide in this article to make delicious, tasty treats. These will surely impress your friends and family.

With time and effort, you’ll get better at making matcha madeleine step-by-step. Try different matcha powders, adjust the batter, and improve your baking. The fun is in finding what you like best and making something special.

Keep trying new flavors, designs, and sharing your matcha madeleines. As you get better, you’ll find the journey is as rewarding as the treats. Enjoy every step, savor each bite, and let your love for baking show in every madeleine.

FAQ

What is a matcha madeleine?

A matcha madeleine is a twist on the classic French cookie. It includes matcha green tea powder. This gives the cookie a green color and a unique, earthy taste.

What are the key ingredients in a matcha madeleine recipe?

The main ingredients are flour, sugar, eggs, butter, and matcha powder. How you mix these ingredients is key to getting the right taste and texture.

How do I choose the right matcha powder for my madeleines?

Choose a high-quality, ceremonial-grade matcha. It should be vibrant green and have a smooth flavor. This will enhance the taste of your madeleines.

What equipment do I need to make matcha madeleines?

You’ll need a madeleine pan, a mixer, a sifter, and a whisk or spatula. These tools help mix and shape the batter.

How do I ensure my matcha madeleines have the classic shell-like shape?

Grease and flour the pan well. Fill molds only three-quarters full. Bake at the right temperature and time for the perfect shape.

Can I make variations on the classic matcha madeleine recipe?

Yes, you can try new flavors. Add lemon zest, white chocolate, or a matcha glaze on top. It’s a fun way to experiment.

How do I store matcha madeleines to keep them fresh?

Store them in an airtight container at room temperature for 3-5 days. For longer storage, freeze them for up to 2 months.

Do You Like Our Recipe ?

0.0
0.0 out of 5 stars (based on 0 reviews)
Excellent0%
Very good0%
Average0%
Poor0%
Terrible0%

Homemade Gingerbread Latte Cookies

What makes the perfect holiday treat? Is it the warm spices, rich coffee, or sharing homemade goodies? For us, it’s the mix of gingerbread and latte in a cookie. Gingerbread latte cookies are a fun twist on holiday baking. They offer a tasty project for anyone wanting to try something new.

Gingerbread latte cookies are a standout holiday treat. They blend gingerbread and latte flavors for a unique taste. Whether you’re an experienced baker or just starting, these cookies are a great way to feel festive.

Key Takeaways

  • Homemade gingerbread latte cookies make a great holiday treat
  • Gingerbread and latte flavors combine for a unique cookie
  • Perfect for holiday baking, these cookies offer a delicious twist on traditional treats
  • Gingerbread latte cookies are a great way to get into the holiday spirit
  • Holiday baking with gingerbread latte cookies is a fun and exciting project
  • Gingerbread latte cookies are a delicious addition to any holiday celebration

The Magic of Gingerbread Latte Cookies

We love baking easy gingerbread cookies during the holiday season. Adding a latte twist makes them even better. These treats are great for sharing with family and friends, impressing everyone with their unique taste.

The mix of coffee and spice in these cookies is irresistible. It adds a depth of flavor that’s hard to resist. This makes them a standout holiday treat.

For easy gingerbread cookies, the secret is using top-notch ingredients and a simple recipe. Quality spices and coffee make these treats special for the holidays. They’re perfect for both seasoned bakers and beginners.

  • The perfect balance of sweet and spicy flavors
  • The unique twist of adding coffee to traditional gingerbread
  • The ease of making them at home with simple ingredients

We hope you’ll try these easy gingerbread cookies. Experience the magic of gingerbread latte cookies for yourself. They’re delicious and easy to make, making them a holiday tradition.

Making delicious gingerbread latte cookies starts with the right ingredients. High-quality ingredients are key for the best taste and texture. You’ll need all-purpose flour, baking soda, and salt as the base.

Spices like cinnamon, ginger, and nutmeg are also important. Using fresh and aromatic spices makes a big difference. White and brown sugar add a rich, caramel-like flavor.

Adding coffee or espresso makes gingerbread latte cookies special. It gives them a mocha flavor and a boost of energy. You can use instant coffee or espresso powder, or even brew a shot of espresso.

  • All-purpose flour
  • Baking soda
  • Salt
  • Cinnamon
  • Ginger
  • Nutmeg
  • White and brown sugar
  • Coffee or espresso

With these ingredients and our guide, you’ll make delicious, unique cookies. They’re perfect for the holiday season.

Kitchen Tools and Equipment Needed

To make delicious gingerbread spice cookies, we need the right kitchen tools and equipment. Having the necessary tools makes the process easier and more efficient. We will outline the basic baking equipment, optional specialty tools, and measuring and mixing tools required to make these cookies.

When baking gingerbread spice cookies, accuracy is key. Measuring cups and spoons are essential for the right amount of ingredients. A digital scale can also help with precise measurements. Plus, a stand mixer or hand mixer can make mixing easier.

A well-stocked kitchen with the right equipment is key for making gingerbread spice cookies. Some other necessary tools include:

  • Baking sheets lined with parchment paper
  • A medium-sized bowl for whisking together dry ingredients
  • A large bowl for mixing the dough
  • A cookie scoop or spoon for portioning out the dough

Optional specialty tools, like a cookie press or a pastry bag, can be useful for decorative cookies. But they’re not necessary for making delicious gingerbread spice cookies. With the right kitchen tools and equipment, we can create a variety of gingerbread spice cookies that are perfect for the holiday season.

As we explore holiday baking, starting with the right dough is key. Making the dough for our gingerbread latte cookies needs focus and patience. We’ll show you how to mix and prepare the dough, making sure it’s just right.

First, we mix the dry ingredients like flour, baking soda, and spices. It’s important to sift them to blend well. Then, we add wet ingredients like butter, sugar, and eggs. We mix until the dough is smooth.

Now, let’s focus on adding the coffee flavor and spices. This is where our gingerbread latte cookies come to life. We mix in the coffee and spices until they’re evenly spread. This step gives our cookies a unique taste, perfect for holiday baking.

  • Use top-notch ingredients, like fresh spices and real coffee grounds.
  • Don’t overmix the dough to avoid tough cookies.
  • Chill the dough for at least 30 minutes to let the flavors mix.

By following these steps and preparing your dough carefully, you’ll get amazing gingerbread latte cookies. They’re ideal for the holiday season.

Mastering the Perfect Coffee-Infused Spice Blend

We’re excited to explore gingerbread dessert recipes. The right spice blend can make a big difference. For gingerbread spice cookies, finding the perfect mix is key.

Traditional spices include cinnamon, nutmeg, and ginger. They give a warm, comforting taste. To enhance our cookies, we can mix in coffee in various ways.

  • Adding instant coffee powder to the dry ingredients
  • Using brewed coffee as a substitute for some of the liquid ingredients
  • Infusing the dough with coffee beans or grounds

By perfecting the coffee-infused spice blend, we can make unforgettable gingerbread desserts. Whether you love classic cookies or want to try something new, finding the right flavor balance is crucial. With some experimentation and patience, you can craft a unique blend that will wow everyone.

As we dive deeper into gingerbread dessert recipes, remember the possibilities are endless. With creativity and practice, you can become a skilled baker. Your delicious creations will surely impress. So, start baking and don’t be afraid to try new things. Your taste buds will love it!

Baking Tips and Techniques

To make the perfect easy gingerbread cookies, follow some key baking tips. Mix traditional gingerbread spices with a hint of coffee for a unique taste. It’s important not to overbake the cookies. This can make them dry and hard.

Here are some tips to keep in mind:

  • Use a medium-sized baking sheet to ensure the cookies have enough space to spread out.
  • Keep an eye on the cookies while they’re baking, as the baking time may vary depending on the size and thickness of the cookies.
  • Remove the cookies from the oven when they’re lightly golden brown and still slightly soft to the touch.

By following these tips, you’ll make delicious homemade holiday treats. These are great for sharing with friends and family. With the right techniques, your easy gingerbread cookies will be soft, flavorful, and look great.

Decorating Your Holiday Cookies

Decorating gingerbread latte cookies is a fun part of holiday baking. We make these cookies delicious and pretty. The right decorations turn them into a holiday showstopper.

We have many decorating choices. We can use powdered sugar glaze or royal icing for a detailed look. Creative toppings and garnishes like sprinkles or nuts add a personal touch.

Some popular decorating ideas include:

  • Using festive cookie cutters to create shapes like trees, snowflakes, or bells
  • Creating a cookie bouquet with a variety of decorated cookies
  • Making a gingerbread latte cookie sandwich with a dollop of whipped cream or icing in the middle

With a bit of creativity, our gingerbread latte cookies become a beautiful holiday treat. Decorating them is a fun way to celebrate the season. It makes our holiday baking even more special.

Decorating IdeaMaterials NeededDifficulty Level
Simple Powdered Sugar GlazePowdered sugar, milk, food coloringEasy
Royal Icing DesignRoyal icing, piping bag, tipsMedium
Cookie BouquetCookie cutters, icing, sprinklesHard

Storage and Freshness Guidelines

Enjoying gingerbread dessert recipes, like gingerbread spice cookies, requires proper storage. This keeps their flavor and texture just right. We aim to keep our treats fresh and tasty all holiday season.

Choosing the right storage is key. For short-term, store cookies in an airtight container at room temperature. This keeps them moist and flavorful. Here are some tips for short-term storage:

  • Store cookies in a single layer to prevent them from becoming misshapen
  • Keep the container away from direct sunlight and heat sources
  • Use a paper towel or parchment paper to separate layers of cookies

For longer-term storage, freezing is a great choice. Freezing our gingerbread treats lets us enjoy them for months. Here are some freezing instructions:

Freezing cookies requires placing them in a single layer in a freezer-safe bag or container. We can also freeze the dough, thawing and baking as needed. By following these guidelines, we can savor our gingerbread spice cookies and other treats all holiday season.

Conclusion

As we wrap up our journey into gingerbread latte cookies, we feel a sense of pride. You’ve learned to make these treats that mix gingerbread’s warmth with latte’s rich taste. These gingerbread latte cookies are perfect for any holiday gathering or a cozy moment at home.

These cookies capture the holiday spirit in a delicious way. They offer a mix of spices and coffee-infused dough. Every step is designed to help you make a masterpiece that will wow your family and friends. Enjoying each bite brings joy and satisfaction from holiday baking and the memories it creates.

Whether you’re an experienced baker or new to cooking, we hope this guide has inspired you. It’s time to embrace the holiday spirit, gather your loved ones, and fill your home with the aroma of these cookies. Let it bring warmth and comfort to your holiday season.

FAQ

What makes gingerbread latte cookies unique?

Gingerbread latte cookies mix gingerbread flavors with latte coffee notes. This creates a tasty holiday treat that’s different from regular gingerbread cookies.

What ingredients are needed to make gingerbread latte cookies?

You’ll need flour, sugar, butter, and molasses for these cookies. Don’t forget spices like ginger, cinnamon, and cloves. Coffee or espresso powder adds the latte flavor.

What kitchen tools and equipment are required?

You’ll need basic baking tools like bowls, a mixer, baking sheets, and a rolling pin. Having a cookie cutter and cooling rack can also help.

First, cream the butter and sugar. Then, add molasses, spices, and coffee powder. Mix the dough, chill it, and roll out to cut into shapes.

What’s the secret to the perfect spice blend?

The secret is balancing gingerbread spices with coffee powder. Try different mixes to find your favorite flavor.

What are some tips for baking gingerbread latte cookies?

To get the right texture, don’t overbake. Watch them closely and chill the dough. Cool and store them properly to keep them fresh.

How can you decorate gingerbread latte cookies?

Decorating is fun and creative. Use icing, festive toppings, or professional finishes to make them special.

How should gingerbread latte cookies be stored?

Store them in an airtight container at room temperature for a short time. Freezing is best for longer storage to keep them fresh.

Do You Like Our Recipe ?

0.0
0.0 out of 5 stars (based on 0 reviews)
Excellent0%
Very good0%
Average0%
Poor0%
Terrible0%

Discover the Delicious Secrets of Gipfeli Recipe

Imagine waking up to the smell of freshly baked gipfeli. This traditional Swiss pastry is both flaky and buttery. With this guide, you’ll learn how to bake delicious gipfeli at home.

Whether you’re new to baking or have experience, this article has you covered. You’ll get the steps and tips to make authentic Swiss gipfeli. We’ll use a classic Swiss pastry recipe.

We’ll cover everything from the basics to advanced techniques. You’ll learn about Swiss gipfeli’s rich heritage and the essential ingredients. You’ll also find out what tools and equipment you need to make this Swiss pastry.

With this knowledge, you’ll be able to make gipfeli that will wow your friends and family.

Key Takeaways

  • Learn the secrets to baking delicious gipfeli at home using a traditional gipfeli recipe
  • Discover the rich heritage of Swiss gipfeli and its significance in Swiss culture
  • Get the essential ingredients and required tools and equipment to make a classic swiss pastry recipe
  • Master the techniques for creating flaky and buttery gipfeli
  • Learn how to store and reheat your gipfeli to keep it fresh
  • Explore creative variations and fillings to take your gipfeli to the next level

The Rich Heritage of Swiss Gipfeli

Swiss gipfeli has a long history in Swiss baking. It’s a beloved pastry in Swiss cuisine. The secret recipe is closely kept, but you can make your own delicious gipfeli at home.

Making gipfeli is a bit of work, but it’s worth it. It has flaky, buttery layers and a sweet crust. Whether you’re an experienced baker or new, making gipfeli lets you enjoy Swiss baking traditions.

Origins in Swiss Baking Tradition

Gipfeli started as a breakfast pastry in Swiss baking. Now, it’s enjoyed any time of day. To make authentic gipfeli, use quality ingredients and a traditional recipe. With patience and practice, you’ll make gipfeli that impresses.

How Gipfeli Differs from French Croissants

Gipfeli and French croissants may look alike, but they’re different. Gipfeli uses special yeast for its unique taste and texture. It also has more butter, making the crust richer and tenderer. By using a Swiss recipe, you can make gipfeli that’s uniquely Swiss.

Essential Ingredients for Perfect Gipfeli

To make a tasty easy gipfeli recipe, you need the right stuff. The flour, butter, and yeast you pick matter a lot. For real gipfeli recipe goodness, use top-notch ingredients that are fresh and stored right.

For flour, go for something high in protein. It makes your gipfeli flaky and strong. European-style butter with lots of fat is key for a rich taste. And don’t forget fresh, active yeast for a good rise.

  • High-protein flour
  • European-style butter
  • Fresh and active yeast
  • Salt and sugar to balance the flavor

With these key ingredients and a classic gipfeli recipe, you can make yummy gipfeli at home.

Required Tools and Equipment

To make delicious homemade gipfeli, you’ll need the right tools and equipment. A well-stocked kitchen is key for a perfect swiss pastry recipe. You’ll need mixing bowls, baking sheets, and a pastry blender.

Temperature control is crucial when baking gipfeli. A digital thermometer helps you get the perfect temperature for proofing and baking. Also, a stand mixer with a dough hook attachment makes mixing and kneading easier.

Basic Kitchen Equipment

  • Mixing bowls
  • Baking sheets
  • Pastry blender
  • Digital thermometer

Optional Professional Tools

For advanced gipfeli-making, consider these optional tools. Pastry brushes, dough scrapers, and a bench scraper can enhance your skills. They help achieve a professional finish and streamline the process.

Temperature Control Essentials

Temperature control is vital for gipfeli. Proofing should be between 75°F and 80°F, and baking between 375°F and 400°F. A digital thermometer and a temperature-controlled oven ensure perfect gipfeli every time.

Master Gipfeli Recipe: Step-by-Step Instructions

To make a tasty gipfeli, start by mixing the dough. It should have flour, yeast, and salt. Letting the dough rest and rise is key for a light texture. An easy recipe makes this process simple.

Here’s how to make gipfeli:

  • Mix the dough ingredients together until a shaggy dough forms
  • Knead the dough for about 10 minutes, until it becomes smooth and elastic
  • Let the dough rise in a warm place for about an hour, or until it has doubled in size
  • Roll out the dough to a thickness of about 1/4 inch
  • Cut the dough into triangles and roll each one into a crescent shape

Follow these steps to make a delicious gipfeli. Keep your ingredients simple and your steps easy. You’ll soon have a tasty gipfeli recipe.

Remember, practice makes perfect. If your first batch doesn’t turn out right, don’t worry. With patience and practice, you’ll make great gipfeli. Use your favorite easy gipfeli recipe to do it.

The Art of Lamination in Gipfeli Making

To make a tasty Swiss pastry, you must master lamination. Lamination is when you fold and roll the dough to layer butter and dough. This makes gipfeli flaky and delicious. When making homemade gipfeli, knowing how to laminate is key.

First, you need to make perfect butter layers. Roll out the dough to 1/4 inch thick and spread butter on it. The butter should be soft, not melted, for even spreading. After spreading, fold the dough in half and roll it out again for another layer.

Key Lamination Techniques

  • Folding: Fold the dough in half to create a layer of butter and dough.
  • Rolling: Roll out the dough to create another layer of butter and dough.
  • Rotating: Rotate the dough 90 degrees to ensure even lamination.

By using these techniques and being patient, you can make a flaky, buttery homemade gipfeli. Remember, the secret to a great Swiss pastry is in the lamination. So, take your time and keep trying until you get it right.

Proofing and Rising Techniques

To make perfect gipfeli, you need to get good at proofing and rising. This step makes the dough soft and tasty. A good gipfeli recipe will tell you how to help yeast grow well.

Watch the dough closely while it’s rising. Look for bubbles or if it’s getting bigger. The best place for rising is at room temperature, away from cold air, and with little disturbance.

When handling the dough, gently fold it to spread yeast evenly. This helps it rise evenly and prevents it from becoming too dense. By doing this, your gipfeli will be light and delicious.

Important things to remember for proofing and rising are:

  • Keep the temperature steady for yeast to work well.
  • Handle the dough gently to avoid over-working it.
  • Check the dough often to prevent it from rising too much.

Mastering these techniques will make your gipfeli recipe better. Your baked goods will be light, fluffy, and full of flavor.

Shaping Your Gipfeli Like a Pro

To get the perfect shape for your homemade gipfeli, you need to know the basics. With practice and patience, you can become a pro at shaping your gipfeli.

The crescent shape is a favorite for gipfeli and is easy to make. First, roll out the dough thinly. Then, cut out crescent shapes with a pastry cutter or knife. You can also try different shapes like spirals or braids to make your gipfeli unique.

  • Use a light touch when handling the dough to avoid stretching or tearing it.
  • Make sure the dough is at room temperature before shaping to ensure it’s pliable and easy to work with.
  • Don’t overwork the dough, as this can lead to a dense and tough texture.

By following these tips and practicing, you’ll make beautiful and tasty homemade gipfeli. These will impress your friends and family. Shaping gipfeli like a pro is achievable with patience and practice, using a traditional Swiss pastry recipe.

Baking Temperature and Timing Guide

To make perfect gipfeli, following a good recipe is key. Paying attention to baking temperature and timing is crucial. You can find easy gipfeli recipes online, but knowing how to bake is important.

When baking gipfeli, watch the temperature and timing closely. Here are some important points to remember:

  • Preheat the oven to the correct temperature, usually around 375°F (190°C).
  • Place the gipfeli on a baking sheet lined with parchment paper, leaving enough space between each pastry.
  • Bake for 15-20 minutes, or until the gipfeli are golden brown.

Proper Oven Settings

Make sure your oven is at the right temperature before baking. An easy gipfeli recipe can go wrong if the oven temperature is off.

Visual Doneness Indicators

Look for visual signs of doneness, like a golden brown color and a firm texture. A well-baked gipfeli should have a delicate crust and a soft inside.

By following these tips and using a reliable gipfeli recipe, you’ll make delicious, flaky pastries. Always keep an eye on the baking temperature and timing for the best results.

Gipfeli RecipeBaking TemperatureBaking Time
Classic Gipfeli375°F (190°C)15-20 minutes
Chocolate Gipfeli350°F (180°C)12-15 minutes

Troubleshooting Common Gipfeli Problems

When making swiss pastry recipe, including homemade gipfeli, you might face some issues. Overproofing or underbaking can be a real challenge. But, there are ways to fix these problems. It’s key to know what causes them and how to avoid them.

Some common problems you might run into include:

  • Overproofing, which can cause the gipfeli to collapse
  • Underbaking, resulting in a dense or raw interior
  • Incorrect lamination, leading to a lack of flaky layers

To avoid these issues, it’s important to follow the swiss pastry recipe closely. Make sure your ingredients and tools are top-notch. Also, watch the proofing and baking times carefully. This will help you get the right texture and taste in your homemade gipfeli.

By knowing the common problems and how to prevent them, you can make perfect homemade gipfeli every time. With a bit of practice and patience, you’ll get the hang of making delicious swiss pastry recipe gipfeli.

Common ProblemCauseSolution
OverproofingToo much yeast or overproofing timeReduce yeast amount or proofing time
UnderbakingInsufficient baking time or temperatureIncrease baking time or temperature
Incorrect laminationIncorrect folding or rolling techniquePractice lamination technique to achieve flaky layers

Storage and Reheating Tips

Mastering the easy gipfeli recipe is just the start. Storing and reheating your gipfeli right is key to keeping it fresh and tasty. The right storage helps keep your gipfeli’s texture and flavor just right.

To store your gipfeli, use an airtight container at room temperature for up to 2 days. For longer storage, freeze it for up to 2 months. Wrap it tightly in plastic wrap or foil to avoid freezer burn.

Proper Storage Methods

  • Store gipfeli in an airtight container at room temperature
  • Freeze gipfeli for up to 2 months
  • Wrap gipfeli tightly in plastic wrap or aluminum foil before freezing

Reheating Instructions

To reheat, bake at 350°F (180°C) for 5-10 minutes. Or, use the microwave for 20-30 seconds. This will warm it up nicely.

Freezing Guidelines

Freezing your gipfeli? Label the container with date and contents. Store it at 0°F (-18°C) or below. To eat, thaw overnight in the fridge and then reheat.

Follow these tips to enjoy your gipfeli recipe longer. It keeps the flavor and texture delicious.

Storage MethodStorage TimeReheating Instructions
Airtight container at room temperatureUp to 2 daysBake in oven at 350°F (180°C) for 5-10 minutes
FreezerUp to 2 monthsReheat in oven at 350°F (180°C) for 5-10 minutes or in microwave for 20-30 seconds

Creative Variations and Fillings

When making homemade gipfeli, you can try many things. Add chocolate or nuts for a new twist on the swiss pastry recipe. Just put your filling between the dough layers before baking.

Here are some filling ideas:

  • Chocolate chips or shavings
  • Chopped nuts, such as almonds or hazelnuts
  • Dried fruit, like cranberries or cherries
  • Caramel or nutella

For a savory gipfeli, use cheese, herbs, or spices. Try different doughs like whole wheat or rye for more flavor. With creativity, your homemade gipfeli can become a special swiss pastry recipe.

Remember, making great gipfeli is all about having fun and being creative. Try new fillings and flavors. You might discover a delicious new treat!

Conclusion: Mastering the Art of Swiss Gipfeli

Our journey through gipfeli has shown us that mastering this Swiss pastry is a challenge. It requires patience, practice, and a love for Swiss baking traditions. Now, you have the knowledge to make your own gipfeli at home.

Creating perfect gipfeli is all about following each step carefully. This includes the lamination, shaping, and baking. Your first tries might not be perfect, but that’s okay. Enjoy the process of getting better with each batch.

Sharing your gipfeli with others or enjoying them yourself is the best part. It’s about the joy of making something special. So, let your creativity flow and keep exploring this Swiss tradition. Happy gipfeli-making!

FAQ

What is a gipfeli?

A gipfeli is a Swiss pastry that tastes like a croissant but is flakier and butterier.

How does a gipfeli differ from a French croissant?

Gipfeli and French croissants are both flaky pastries. But gipfeli are shaped like a crescent and taste richer and butterier.

What are the essential ingredients for making gipfeli?

To make gipfeli, you need good flour, butter, yeast, and a bit of salt. The right mix and method are key for the perfect taste and texture.

What kind of equipment is needed to bake gipfeli at home?

You’ll need basic kitchen tools like bowls, a rolling pin, and baking sheets. A pastry brush and dough scraper can also help with the dough.

How do you properly proof and rise the dough for gipfeli?

To proof and rise the dough right, create a good environment for yeast. Watch the dough closely and handle it gently during these steps.

What are some common issues that can arise when making gipfeli, and how can they be troubleshooted?

Issues like overproofing, underbaking, and lamination problems can happen. Knowing these problems and how to fix them can help you avoid and solve them.

How should gipfeli be stored and reheated to maintain their freshness?

Store gipfeli in an airtight container or the freezer. To reheat, use the oven or toaster. This keeps the pastry flaky and tasty.

Can you make creative variations or fillings with gipfeli?

Yes! You can fill gipfeli with chocolate or nuts. Try savory or fruit fillings for a twist on the traditional.

Delicious Cherry Cheesecake Recipe

What makes a classic cheesecake unforgettable? Can a simple cherry cheesecake recipe take this beloved dessert to new heights? The mix of creamy cheesecake and sweet cherry topping is perfect for any occasion. It’s a treat that’s sure to impress with its rich flavor and smooth texture.

A classic cheesecake is a staple in American desserts. Adding a cherry topping gives it a unique twist. Whether you’re an experienced baker or just starting, a cherry cheesecake recipe is a great choice. We’ll show you how to make a delicious homemade cheesecake that will become a favorite.

Key Takeaways

  • Learn the secrets to making a creamy and delicious cherry cheesecake recipe
  • Discover the essential ingredients and tools needed to create a classic cheesecake
  • Find out how to add a sweet and tangy cherry topping to your homemade cheesecake
  • Get tips on baking and cooling techniques to ensure a smooth and creamy texture
  • Explore the world of cheesecakes and learn how to make a cherry cheesecake recipe that’s sure to impress

The History of Cherry Cheesecake

Cheesecakes have a long history, starting in ancient Greece. The first cheesecakes were made with cheese, honey, and flour. They were enjoyed as desserts or snacks.

Over time, cheesecakes changed with different cultures. They added new cheesecake ingredients and toppings.

In the United States, cherries became a favorite topping for cheesecakes. To make a great cherry topping, use fresh cherries. Cook them with sugar and cornstarch for a thick, tasty sauce.

Origins of Cheesecake

Cheesecakes have been around for centuries. Each culture added their own twist, like the Greek and American cheesecakes. These variations have unique flavors and textures.

Evolution of Cherry Toppings

The cherry topping has changed a lot. People use different baking techniques to make the perfect topping. You can cook cherries with sugar and cornstarch or use fresh cherries and jam.

Some common cheesecake ingredients include graham cracker crust, cream cheese, and sour cream. Mixing these with the right baking techniques makes a delicious cherry cheesecake.

Essential Ingredients for Your Cherry Cheesecake Recipe

To make a delicious cherry cheesecake, you’ll need certain cheesecake ingredients. These include graham cracker crumbs, sugar, cream cheese, eggs, sour cream, and cherries. The quality of these ingredients is key. It affects the cheesecake’s texture and taste.

In dessert recipes, the ingredients matter a lot. For a cherry cheesecake, use fresh or frozen cherries. They’re a favorite for fruit desserts. You can also try other fruits like blueberries or raspberries for a different taste.

Here are the must-have ingredients for your cherry cheesecake recipe:

  • Graham cracker crumbs
  • Sugar
  • Cream cheese
  • Eggs
  • Sour cream
  • Cherries

Using top-notch ingredients and a reliable recipe will help you make a fantastic cherry cheesecake. It’s perfect for impressing your loved ones. This recipe is great for both experienced bakers and beginners. It’s a tasty and memorable dessert choice.

Kitchen Tools and Equipment Needed

To bake a cherry cheesecake, you need the right tools and equipment. Proper baking techniques require basic and specialized tools. A springform pan is key for easy cake removal. A mixer, whisk, and thermometer are also essential for the right consistency and temperature.

Having the right tools is crucial for cheesecake baking tips. A well-stocked kitchen with tools like a pastry brush and silicone spatula helps achieve professional results. Optional equipment like a food processor or stand mixer can also be beneficial.

Essential Baking Tools

  • Springform pan
  • Mixer
  • Whisk
  • Thermometer
  • Pastry brush
  • Silicone spatula
  • Measuring cups

Optional Equipment for Professional Results

Optional equipment like a food processor or stand mixer can help achieve professional results. These tools make mixing and blending easier, making the baking process more efficient.

Measuring and Temperature Tools

Accurate measurements and temperature control are key in baking. A digital thermometer and measuring cups ensure ingredients are at the right temperature and proportion. By using these kitchen tools with expert baking techniques and cheesecake baking tips, you’ll make a delicious and memorable dessert.

ToolDescription
Springform panEssential for removing the cheesecake from the pan
MixerUsed for mixing and blending ingredients
ThermometerCrucial for ensuring the right temperature

Preparing the Perfect Cheesecake Crust

To make a tasty cheesecake, you need a great crust. A graham cracker crust is a favorite. With the right baking, you get a crunchy, flavorful base. The secret is to mix the ingredients right and bake for the right time.

When making the crust, mixing the ingredients is key. Mix graham cracker crumbs, sugar, and melted butter for a smooth texture. Press it into the pan to cover the whole surface. Bake until it’s lightly browned and firm.

  • Use high-quality ingredients, such as fresh graham cracker crumbs and real butter.
  • Don’t overmix the crust mixture, as this can lead to a tough and dense texture.
  • Bake the crust at the right temperature, usually around 350°F, to achieve a golden brown color and a crispy texture.

By following these tips and using the right baking techniques, you can create a delicious and well-made cheesecake crust. It will make your dessert even better.

Creating the Creamy Cheesecake Filling

To make a creamy cheesecake filling, focus on the right mixing techniques. The filling is the dessert’s heart, making it special. It should be smooth and even, without lumps or air pockets.

When making the filling, temperature control is key. Make sure all ingredients are at room temperature. This prevents texture changes. The mixing techniques used can also affect the filling’s texture. Overmixing makes it dense, while undermixing makes it too soft.

Mixing Techniques for a Smooth Filling

  • Use a stand mixer or hand mixer to cream the cheese and sugar until smooth.
  • Gradually add the eggs, one at a time, mixing well after each addition.
  • Scrape down the sides of the bowl to ensure all ingredients are well incorporated.

By following these tips and using the right mixing techniques, you can create a creamy cheesecake filling. Keep an eye on the temperature and texture. Don’t overmix. With practice and patience, you’ll make a delicious and creamy filling perfect for any occasion.

Cherry Topping Preparation Methods

Creating a delicious cherry cheesecake starts with the cherry topping. You need to pick the right cherries, cook them well, and mix them with sugar and other ingredients. Here are some tips to help you make a perfect cherry topping for your fruit desserts.

Some popular methods for preparing cherry toppings include:

  • Cooking fresh or frozen cherries with sugar and water to create a sweet and tangy sauce
  • Using cherry jam or preserves as a topping, which can be a convenient and delicious option
  • Mixing cherries with other fruits, such as blueberries or raspberries, to create a unique and flavorful topping

These methods can be used to create a variety of dessert recipes, from classic cherry cheesecakes to innovative fruit desserts. By following these tips and experimenting with different ingredients and techniques, you can create a cherry topping that elevates your desserts to the next level.

You can also try using different types of cherries, such as sweet or sour cherries, to create a unique flavor profile. With a little practice and patience, you can create a delicious cherry topping that complements your favorite dessert recipes and adds a touch of elegance to your fruit desserts.

Baking and Cooling Guidelines

To get a perfectly baked cheesecake, you need to follow some key steps. Keeping the temperature right is very important. It makes the cheesecake smooth and tasty. Using a water bath helps keep the temperature steady, which prevents cracks and uneven cooking.

It’s important to watch the temperature closely when baking. The best temperature for a cheesecake is between 325°F and 350°F. This range helps the cheesecake cook gently, avoiding cracks and a dense texture. By sticking to these guidelines, you’ll get a cheesecake that’s creamy and smooth.

Water Bath Techniques

A water bath is a great way to keep the temperature steady while baking. To do this, put the cheesecake pan in a bigger pan filled with hot water. This method lowers the chance of cracks and makes the texture even. Using a water bath helps you get a cheesecake that’s perfectly baked and shiny.

Cooling Process

After baking, it’s crucial to cool the cheesecake slowly. This step helps avoid cracks and keeps the texture even. To cool it, turn off the oven and let it sit in the oven for 1 hour. Then, take it out and let it cool down to room temperature. Following these cooling steps ensures your cheesecake is perfectly cooled and ready to eat.

Baking TemperatureCooling Time
325°F1 hour
350°F30 minutes

Troubleshooting Common Issues

When making a cheesecake, several issues can arise. These problems can affect the final product’s quality and appearance. To address these cheesecake problems, it’s essential to understand the causes and apply effective troubleshooting techniques.

One common issue is the formation of cracks on the surface. This can be prevented by ensuring the cheesecake cools slowly and evenly.

Another issue that can arise is texture problems, such as a dense or soggy consistency. This can be resolved by adjusting the baking time and temperature. Also, using the right storage solutions is crucial in preventing texture problems and maintaining the overall quality of the cheesecake.

Preventing Cracks

To prevent cracks, it’s essential to avoid sudden temperature changes. Ensure the cheesecake is properly cooled. This can be achieved by turning off the oven and letting the cheesecake cool inside with the door slightly ajar.

By following these tips and using the right storage solutions, you can minimize the risk of cheesecake problems. This way, you can achieve a perfectly baked cheesecake.

Texture Problems

Texture problems can be caused by overmixing or underbaking the cheesecake. To resolve this issue, it’s essential to follow the recipe carefully. Adjust the baking time as needed.

By applying these troubleshooting techniques and using the right storage solutions, you can achieve a smooth and creamy texture. This texture is free from cheesecake problems.

Conclusion: Mastering Your Cherry Cheesecake

Creating the perfect homemade cheesecake with a cherry topping is an art. We’ve explored the history, ingredients, and techniques needed. This guide will help you impress your loved ones with a delicious dessert.

Follow our step-by-step guide and try new flavors. Improve your baking skills to become a cheesecake expert. Remember, baking is all about the journey of discovery.

So, get ready to bake! Preheat your oven and gather your ingredients. Enjoy every bite of your homemade cherry cheesecake. Happy baking!

FAQ

What is the history of cherry cheesecake?

Cheesecakes have a long history, starting in ancient Greece. They were made with cheese, honey, and flour. Over time, they evolved with new ingredients and toppings.

In the United States, cherries became a favorite topping. They are sweet and tart, making them perfect for cheesecakes.

What are the essential ingredients needed to make a cherry cheesecake?

To make a great cherry cheesecake, you need several ingredients. These include graham cracker crumbs, sugar, cream cheese, eggs, sour cream, and cherries. The quality of these ingredients is key to a delicious cheesecake.

What kitchen tools and equipment are needed to prepare a cherry cheesecake?

You’ll need various tools to make a cherry cheesecake. These include a springform pan, a mixer, a whisk, and a thermometer. Optional tools like a food processor or stand mixer can also help.

How do I prepare the perfect cheesecake crust?

The crust is essential for a cheesecake. It provides a base for the filling and adds texture and flavor. To make a perfect crust, mix the ingredients, press it into the pan, and bake it well.

What techniques are used to create a creamy cheesecake filling?

The filling is what makes a cheesecake creamy. To achieve this, focus on mixing techniques and temperature guidelines. Also, avoid mistakes that can ruin the texture.

How do I prepare the cherry topping for my cheesecake?

Preparing the cherry topping is important. You need to choose the right cherries, cook them, and mix them with sugar and other ingredients. This will make your topping delicious.

What guidelines should I follow when baking and cooling a cheesecake?

Baking and cooling a cheesecake needs care. Wrong temperatures or cooling methods can harm the texture. Follow guidelines on temperature, water baths, and cooling to ensure a perfect cheesecake.

How can I troubleshoot common issues that may arise when making a cheesecake?

Even with the best recipe, problems can occur. To fix issues like cracks, texture problems, and storage, follow tips and advice. This will help you solve these common problems.

Easy Peach Crumble Recipe for the Perfect Summer Treat

What makes a peach crumble recipe the ultimate summer dessert? It’s the mix of sweet, juicy fresh peaches and a crunchy topping. Or is there something more to this classic treat? As summer gets warmer, we all look for tasty, easy desserts to share with loved ones. A peach crumble is perfect, with its fresh peaches and delicious topping.

Making a peach crumble at home is a great way to cool down and satisfy your sweet cravings. With a simple recipe, you can whip up a dessert that’s perfect for hot days. The sweet peaches and crunchy topping will make it a favorite among your guests. It’s a great pick for any summer gathering.

Key Takeaways

  • A peach crumble recipe is a perfect summer dessert featuring fresh peaches and a crunchy crumb topping
  • This dessert is easy to make and requires minimal ingredients
  • A homemade peach crumble is a great way to beat the heat and satisfy your sweet tooth
  • The combination of sweet peaches and crunchy crumb topping makes this dessert a hit with family and friends
  • This peach crumble recipe is an excellent choice for a summer dessert

Why Peach Crumble Is the Ultimate Summer Dessert

Peach crumble is a refreshing summer treat. It’s easy to make and perfect for gatherings. You can serve it warm or cold, making it versatile.

The mix of fresh peaches and a crumbly topping is amazing. It’s great for any summer event. Peach crumble offers several benefits:

  • Easy to make and prepare in advance
  • Can be served warm or cold
  • Perfect balance of textures and flavors

Peach crumble is a tasty and easy dessert for summer. Its refreshing taste and simple preparation make it a hit at parties.

Summer DessertPreparation TimeServing Options
Peach Crumble30 minutesWarm or Cold

Essential Ingredients for Your Peach Crumble Recipe

To make a delicious peach crumble, you need a few key ingredients. Fresh peaches are the base, and they should be ripe and sweet. Slice the peaches and mix them with sugar, flour, and spices for a tasty filling.

The crumb topping is also vital. It’s made from flour, sugar, and butter. You can add nuts or oats for extra texture and flavor. This topping makes the peach crumble special.

Choosing the Perfect Peaches

When picking peaches, look for ones that are slightly soft and smell sweet. You can use any peach variety, but some are better for baking. Slice and mix the peaches with sugar, flour, and spices for a delicious filling.

Crumble Topping Components

The crumb topping is a mix of flour, sugar, and butter. It should be crumbly. You can also add nuts or oats for more texture and flavor. This topping is what makes the peach crumble unique.

Optional Add-ins and Variations

You can customize your peach crumble in many ways. Try adding different spices or flavorings like cinnamon or vanilla. Use different sugars or add a splash of liqueur to the filling. The options are endless, so feel free to experiment and find your favorite peach crumble.

IngredientQuantity
Peaches3-4 cups
Sugar1/2 cup
Flour1 1/2 cups
Butter1/2 cup

Kitchen Tools and Equipment Needed

To make a tasty peach crumble, you need the right tools. A big mixing bowl is key for mixing the peach filling. You’ll also need a pastry blender or food processor for the crumb topping. Plus, a 9×9 inch baking dish is essential for baking the crumble.

You’ll also need a measuring cup, spoon, and spatula. These tools help you measure ingredients and prepare the dessert. Having the right tools makes making a peach crumble easier and faster.

  • Large mixing bowl
  • Pastry blender or food processor
  • 9×9 inch baking dish
  • Measuring cup
  • Spoon
  • Spatala

With these tools, you’re ready to make a delicious peach crumble dessert.

Step-by-Step Peach Crumble Recipe

To make a delicious peach crumble, follow a simple recipe. The secret is a sweet peach filling and a crunchy topping. We’ll show you how to prepare the filling, make the topping, and assemble the crumble.

Preparing the Peach Filling

Begin by slicing the peaches. Mix them with sugar, flour, and spices. This mix will be your peach filling. Use fresh, ripe peaches for the best taste.

Making the Crumb Topping

To create the topping, mix flour, sugar, and butter. Use a pastry blender or food processor until it’s coarse crumbs. This topping adds a crunchy texture to the soft peaches.

Here’s a simple list for the crumb topping:

  • Combine 1 cup of flour, 1/2 cup of sugar, and 1/2 cup of cold butter in a bowl
  • Use a pastry blender or food processor to work the butter into the dry ingredients
  • Continue blending until the mixture resembles coarse crumbs

Assembly and Baking Instructions

Place the peach filling in a 9×9 inch baking dish. Top it with the crumb topping. Bake at 375°F for 40-50 minutes. The topping should be golden, and the filling bubbly. This recipe is perfect for summer, impressing everyone with its peach filling and topping.

Tips for Achieving the Perfect Crumble Texture

Getting the perfect crumble texture is key to a tasty peach crumble. The right mix of flour and butter in the topping is crucial. Cold butter and mixing until it’s coarse crumbs are important steps. This makes the topping crunchy yet tender.

Remember, don’t overmix the topping. This can make it tough and dense, ruining the texture. By following these tips, you’ll make a peach crumble that wows everyone.

  • Use all-purpose flour for the topping. It gives the right texture and structure.
  • Bake the crumble just right. Overbaking can make the topping too brown and the filling dry.
  • The right sugar balance is key. Too much sugar makes the topping too sweet, too little makes it bland.
Baking TipsDescription
Use cold butterCold butter makes the topping crunchy and tender.
Don’t overmixOvermixing makes the topping tough and dense.
Use the right ratio of flour to butterThe right flour to butter ratio is essential for the perfect texture.

Follow these tips and use the right ingredients. You’ll make a peach crumble with a perfect texture. It will become a favorite dessert.

Serving Suggestions and Pairings

Peach crumble is a versatile dessert perfect for any occasion. Serving it with vanilla ice cream is a popular choice. This combo enhances the dessert’s warm and crunchy texture.

There are endless ways to serve peach crumble. You can enjoy it warm or cold, whichever you prefer. Adding a dollop of whipped cream or a sprinkle of cinnamon can make it even more special.

Best Ice Cream Combinations

Choosing the right ice cream can make a big difference. Here are some top picks for peach crumble:

  • Vanilla ice cream: a timeless favorite
  • Caramel ice cream: adds a sweet and salty twist
  • Peach ice cream: pairs perfectly with the peach crumble

Garnish Ideas

Adding a garnish can elevate your dessert. Here are some ideas:

  • Fresh peaches: arrange sliced peaches on top
  • Whipped cream: add a dollop with cinnamon
  • Caramel sauce: drizzle for a sweet and salty touch
TemperatureDescription
WarmServe the peach crumble warm, straight from the oven
ColdServe the peach crumble cold, chilled in the refrigerator for a few hours

Storage and Make-Ahead Options

Peach crumble is a versatile dessert that’s great for busy times or special events. It can be stored and made ahead in different ways. To keep it fresh, follow some key refrigeration tips.

Refrigerate the peach crumble in an airtight container. For longer storage, freeze it in a freezer-safe container or bag. This way, you can prepare it ahead and serve it whenever you want.

Here are some storage options to consider:

  • Refrigerate for up to 3 days
  • Freeze for up to 2 months
  • Store in an airtight container
  • Use a freezer-safe container or bag

By following these tips, your peach crumble will stay delicious, whether served fresh or made ahead.

Refrigeration Guidelines

Refrigeration is a good way to keep peach crumble fresh. Place it in an airtight container and store it in the fridge at 40°F (4°C) or below.

Freezing Instructions

Freezing is also a great option for peach crumble. Place it in a freezer-safe container or bag and store it at 0°F (-18°C) or below.

Storage MethodStorage TimeStorage Temperature
RefrigerateUp to 3 days40°F (4°C) or below
FreezeUp to 2 months0°F (-18°C) or below

Seasonal Variations and Fruit Substitutions

Peach crumble is a versatile dessert that can use different fruits. This makes it perfect for seasonal changes. By swapping fruits, you can enjoy new flavors with each season.

Nectarines, plums, and apricots are great substitutes for peaches. Each fruit adds its own taste and texture. For instance, nectarines are sweet and tangy, while plums are richer.

To try a new peach crumble, just swap the peaches with your favorite fruit. Adjust the spices and flavors to match. You can mix fruits for a unique dessert. Here are some ideas:

  • Summer: Peaches, nectarines, or plums, with a hint of cinnamon and nutmeg
  • Autumn: Apples or pears, with a blend of warm spices like cinnamon, nutmeg, and allspice
  • Winter: Quince or persimmons, with a touch of citrus and a crunchy oat topping

Exploring seasonal fruits and substitutions keeps your dessert fresh. It also highlights the unique tastes of each season. So, don’t hesitate to try new combinations. You might find a new favorite!

FruitSeasonal VariationSpices and Flavorings
PeachesSummerCinnamon, nutmeg
NectarinesSummerCinnamon, nutmeg, almond extract
PlumsAutumnCinnamon, nutmeg, allspice

Common Troubleshooting Tips

When making a peach crumble, you might face some common problems. These can be fixed with a few simple tips. To get your dessert just right, follow some basic baking advice. A soggy bottom is often due to too much liquid or not enough baking time.

To solve this, try baking it a bit longer or use a water bath. This helps keep the bottom from getting too wet. Another problem is a burnt topping. This usually happens if the oven is too hot or if it’s baked for too long.

To avoid this, lower the oven temperature or bake it for a shorter time. This way, you’ll get the perfect texture without burning.

Fixing a Soggy Bottom

  • Check the peach filling for excess liquid
  • Adjust the baking time to prevent a soggy bottom
  • Use a water bath to prevent the bottom from becoming too wet

Preventing Burnt Topping

  • Reduce the oven temperature to prevent burning
  • Adjust the baking time to achieve the perfect texture
  • Keep an eye on the peach crumble while it’s baking

By using these tips, your peach crumble will turn out perfectly. It will be a delicious dessert to enjoy. Always adjust the sweetness to your liking and try different ingredients for unique flavors.

Conclusion: Mastering Your Homemade Peach Crumble

Learning to make homemade peach crumble is easy. Just follow the steps and tips in this recipe. You’ll make a delicious dessert that everyone will love. Use fresh, quality ingredients and adjust the flavors to your liking.

With a bit of practice, you’ll be a pro at baking peach crumble. Serve it with vanilla ice cream for a summer treat. Or, try different fruits to keep things exciting.

So, why wait? Start making this tasty homemade dessert recipe. Enjoy the sweet peaches and the crunchy topping. It’s a great way to enjoy the season’s flavors.

FAQ

What are the key ingredients for a perfect peach crumble?

For a tasty peach crumble, you need fresh, ripe peaches. Also, add flour, sugar, butter, and spices like cinnamon or nutmeg.

How do I choose the best peaches for my crumble?

Choose peaches that are ripe and smell good. They should be slightly soft. Avoid hard or blemished peaches for the best taste and juiciness.

What tools and equipment do I need to make a peach crumble?

You’ll need a big mixing bowl and a pastry blender or food processor. Also, a 9×9 inch baking dish, a measuring cup, spoon, and spatula.

How do I prevent the crumb topping from burning?

To avoid a burnt topping, bake at 375°F. Keep an eye on it. If it browns too fast, lower the oven temperature or shorten the baking time.

Can I make peach crumble ahead of time?

Yes, you can make it ahead. Refrigerate for up to 3 days or freeze for 2 months. Thaw in the fridge or reheat in the oven when you’re ready.

What are some tasty variations or add-ins for peach crumble?

Try adding spices like cinnamon, nutmeg, or ginger. You can also add nuts, oats, or other fruits like nectarines, plums, or apricots for extra flavor and texture.

How do I achieve the perfect crumb texture for my peach crumble?

For the perfect crumb, use cold butter. Mix it into the dry ingredients until it’s coarse. Don’t overmix to avoid a tough topping.

What are some good serving suggestions for peach crumble?

Serve peach crumble with vanilla ice cream or whipped cream. You can also garnish with fresh peach slices or powdered sugar.

Christmas Dessert Recipes: Mouth-Watering Holiday Sweets

Christmas dessert recipes are key to holiday fun, making memories with loved ones. They offer a mix of old favorites and new twists. This variety makes your holiday celebrations even more special.

There’s a recipe for every skill level, from simple to complex. This means everyone can find something they’ll love to make and eat.

Whether you’re an expert or just starting, there’s a world of possibilities. You can make classic treats or try new, exciting flavors. The right dessert can turn your holiday into a memorable event.

Key Takeaways

  • Christmas dessert recipes are a vital part of holiday celebrations, offering a range of festive treats to enjoy.
  • From traditional favorites to modern twists, there’s a christmas dessert recipe to suit every taste and skill level.
  • Holiday sweets can create lasting memories for you and your loved ones, making them a crucial part of your festive experience.
  • Exploring different christmas dessert recipes can help you discover new favorite festive treats.
  • With the right holiday sweets, you can elevate your celebration and make it a truly special occasion.

Traditional Christmas Dessert Favorites

Holiday celebrations are not complete without traditional Christmas desserts. These sweet treats bring families together. They add a festive touch to every gathering.

Classic Christmas Pudding

Christmas pudding is a big part of British tradition. It’s made with dried fruits, spices, and suet. It’s often aged for weeks to get its rich flavor.

This dessert is a symbol of prosperity and good fortune for the coming year.

Gingerbread House

Building a gingerbread house is a favorite holiday activity. It’s made from gingerbread cookies, icing, and decorations. It lets everyone show their creativity.

For a sturdy house, use royal icing as glue. Let each section dry before adding more decorations.

Fruit Cake Variations

Fruit cake has many variations, offering a modern twist. Different places add unique ingredients like nuts or tropical fruits. Some even add chocolate.

To make it more appealing today, recipes use lighter flavors. They also focus on creative presentation.

DessertKey IngredientsCultural Significance
Christmas PuddingDried fruits, suet, spicesSymbolizes prosperity and tradition
Gingerbread HouseGingerbread, royal icing, candiesFosters creativity and family bonding
Fruit CakeDried fruits, nuts, spicesRepresents abundance and festive spirit

Quick and Easy Holiday Sweet Treats

Making easy Christmas desserts doesn’t need to take all day. Even if you’re short on time or new to baking, these quick holiday treats can add festive cheer to your table.

  • No-Bake Chocolate Oat Bars
  • Fruit Parfaits with Yogurt and Honey
  • Simple Sugar Cookies with Icing

Start by getting all your ingredients ready before you begin. Using pre-made parts can also save you time. This makes the holiday rush less stressful.

Give store-bought items a personal touch. For instance, add powdered sugar and sprinkles to brownies. Or, decorate cupcakes with fresh fruit and chocolate.

DessertIngredientsPrep Time
No-Bake Chocolate Oat BarsOats, chocolate, peanut butter, honey20 minutes
Fruit ParfaitsYogurt, mixed fruits, honey, granola10 minutes
Simple Sugar CookiesFlour, sugar, butter, eggs, icing30 minutes

Modern Twists on Christmas Desserts

Make your holiday celebrations special with modern christmas desserts. These treats mix old favorites with new ideas. They look great and taste amazing.

Fusion Holiday Flavors

Try fusion holiday flavors by adding international touches. Think about a fruit cake with matcha or gingerbread with chai spices. It’s a fun twist on classics.

Creative Dessert Presentations

Stand out with creative dessert presentations. Use fancy plating, bright colors, and cool shapes. Your desserts will look amazing and be perfect for social media.

Dietary-Friendly Adaptations

Offer dietary-friendly christmas sweets for everyone. Change old recipes to fit different diets. This way, no one misses out on the fun.

Dietary NeedAdaptation
Gluten-FreeUse almond or coconut flour instead of wheat flour.
VeganReplace eggs with flaxseed meal and use plant-based milk.
Low-SugarIncorporate natural sweeteners like stevia or erythritol.

Essential Baking Tips for Christmas Treats

Getting perfect holiday desserts starts with the right baking essentials. Having quality tools in your kitchen helps you follow your Christmas baking tips well.

  • Accurate Measuring Tools: Precision is key for consistent results.
  • Quality Mixing Bowls: Different sizes assist in various recipes.
  • Non-Stick Baking Sheets: Prevent unwanted spreading of cookies.

Choosing the right ingredients is key for your holiday dessert techniques. Always use room temperature butter and eggs for the best dough texture. It’s important to measure ingredients correctly, like spooning flour into cups and leveling them.

Watch out for common baking mistakes:

  1. Avoid overmixing to keep baked goods tender.
  2. Preheat your oven to ensure even baking.
  3. Use parchment paper for easier cleanup and better results.
Baking EssentialPurpose
Digital ScaleProvides precise measurements by weight.
Stand MixerEfficiently mixes doughs and batters.
Cooling RackEnsures even cooling of baked goods.

Make-Ahead Christmas Dessert Solutions

Preparing desserts ahead of time can make the holiday rush easier. Organize your baking schedule to make sure every dessert is ready when needed.

Freezer-Friendly Options

Many make-ahead christmas desserts can be frozen without losing flavor. Here are some freezer-friendly holiday sweets:

  • Cupcakes and muffins
  • Cookies and bars
  • Cheesecakes

Keep them in airtight containers and thaw in the fridge a day before serving.

Storage Guidelines

Proper dessert storage tips are key to keeping them fresh. Use airtight containers to avoid freezer burn. Store pastries in the fridge if not frozen. Label each container with the dessert name and date for easy organization.

Preparation Timeline

Creating a holiday baking timeline helps manage tasks well:

  1. Two weeks before: Bake and freeze desserts.
  2. One week before: Thaw and refrigerate as needed.
  3. Day before: Arrange and decorate your treats.

Follow this timeline for a stress-free holiday season with delicious desserts.

Decorating Your Holiday Sweets

Make your treats shine with christmas dessert decorations that wow your guests. You can use simple icing designs or get creative with sugar art. There are countless ways to make your holiday sweets stand out.

Boost your holiday cookie decorating with royal icing in holiday colors like red, green, and gold. Add sprinkles, edible glitter, or themed shapes to make each cookie special and fun.

For a challenge, try festive cake designs with fondant and piping. Make elegant patterns, holiday figures, or tiny scenes to top your cakes. They’ll be the stars of the show.

Use natural elements like fresh herbs or fruit for a touch of elegance. Pick colors that bring warmth and joy. This way, your desserts will be the highlight of any party.

  • Piping intricate designs with various tips
  • Working with fondant for smooth finishes
  • Creating edible decorations like sugar flowers

Set up your decorated sweets on a beautiful dessert table. By matching colors and styles, you’ll create a stunning centerpiece. It will add to the festive feel of your holiday parties.

Conclusion: Creating Sweet Holiday Memories

Embracing Christmas dessert traditions makes baking a fun family activity. Making family dessert recipes together creates lasting memories. Each recipe adds a new chapter to your family’s festive story.

Trying out different recipes and techniques helps you create unique holiday dessert traditions. Whether it’s a classic fruitcake or a modern gingerbread twist, each creation adds excitement to the season.

Sharing homemade sweets with loved ones strengthens bonds and spreads holiday cheer. These desserts are more than treats; they show care and create moments of happiness with friends and family.

These sweet gestures also benefit the community. Bringing desserts to gatherings or donating to local events can brighten the holidays for everyone. It’s a great way to connect and give back during this special time.

Remember, the most important ingredient in any Christmas dessert is the love and care you put into making it. These heartfelt efforts turn simple recipes into cherished memories, making your holiday celebrations truly special.

FAQ

What are some traditional Christmas desserts I can make?

Traditional Christmas desserts include classics like Christmas pudding, gingerbread houses, and fruit cake recipes. These treats have been loved for generations. They add a nostalgic touch to your holiday celebrations.

Can you recommend any easy Christmas dessert recipes for beginners?

Absolutely! Easy Christmas desserts include no-bake treats like chocolate peppermint bark and simple festive cookies. You can also make easy fruitcakes. These recipes need minimal ingredients and effort, perfect for beginners.

How can I make my Christmas desserts more modern and unique?

To modernize your Christmas desserts, try fusion flavors like matcha-infused fruit cakes or chai-spiced gingerbread. Use contemporary presentation ideas like geometric shapes or vibrant colors. This will make your desserts stand out.

What are some dietary-friendly Christmas sweets options?

There are many dietary-friendly Christmas sweets, like gluten-free cookies and vegan desserts. You can make delicious desserts by using alternatives like almond flour and natural sweeteners. This way, you can accommodate various dietary restrictions.

What essential baking tips should I follow for successful Christmas treats?

Key baking tips include accurately measuring ingredients and ensuring they’re at room temperature. Also, preheat your oven properly. Learn specific holiday dessert techniques, like perfecting Christmas pudding texture or building a sturdy gingerbread house.

How can I prepare Christmas desserts ahead of time?

Preparing desserts ahead of time can save you time during the holiday season. Choose freezer-friendly treats like brownies and decorated cookies. Use airtight containers and label each dessert with its date to keep them fresh.

What are some creative ways to decorate my holiday cookies and cakes?

For decorating cookies, use vibrant icing, edible glitter, and festive sprinkles. For cakes, try fondant decorations, intricate piping, or natural elements like herbs and fruits. These will make your desserts visually appealing and delicious.

How should I store different types of Christmas desserts to keep them fresh?

Proper storage is key to keeping your desserts fresh. Store gingerbread houses and fruit cakes in a cool, dry place or refrigerate if needed. Use airtight containers for cookies and freezer-friendly packaging for items you plan to freeze. This keeps your treats delicious throughout the holiday season.

What is a good preparation timeline for baking Christmas desserts?

Plan your make-ahead desserts first, like Christmas pudding and fruit cakes, which can be made weeks in advance. Decorate cookies and cakes closer to the holiday. Allocate specific days for each task to ensure a smooth baking experience leading up to Christmas.

How to Make Fondant Recipe – Easy DIY Instructions

Unlock your creativity in the kitchen with homemade fondant! This icing gives your cakes a smooth finish and endless decorating options. But, what makes fondant special? And can you make it like a pro at home?

This guide will show you how to make fondant from scratch. It’s perfect for both experienced bakers and beginners. You’ll learn how to make fondant that’s as good as store-bought. We’ll cover everything from the types of fondant to kneading and coloring. Get ready to make cakes that wow your loved ones!

Key Takeaways

  • Discover the benefits of using homemade fondant for your cakes and confections.
  • Learn the various types of fondant and their unique properties.
  • Uncover the essential ingredients and tools needed to make fondant from scratch.
  • Explore step-by-step instructions for creating a perfect fondant recipe.
  • Gain valuable tips for achieving the perfect fondant consistency and troubleshooting common issues.

Understanding Fondant: Types and Basic Ingredients

Fondant comes in several types, each with its own special qualities. You can choose from rolled fondant, poured fondant, and marshmallow fondant. Knowing the differences helps you get better at decorating cakes with fondant.

Different Types of Fondant Explained

  • Rolled Fondant: This fondant is soft and easy to shape. It’s great for making cakes look smooth and for adding details.
  • Poured Fondant: Thinner and more liquid, poured fondant is perfect for glazing and filling. It has a shiny finish.
  • Marshmallow Fondant: Easy to make and use, marshmallow fondant is soft. It’s perfect for sculpting and modeling.

Essential Ingredients for Homemade Fondant

To make fondant at home, you need powdered sugar, gelatin, and glycerin. These ingredients make fondant smooth and pliable. They also help it last longer.

Tools and Equipment Needed

For homemade fondant, you’ll need a few tools. You’ll need a rolling pin, a fondant smoother, and corn starch to prevent sticking. With these tools, you can make cakes and decorations that look amazing and taste great.

How to Make Fondant Recipe: Step-by-Step Guide

Learning to make fondant at home is a fun and rewarding skill. It can take your baking to the next level. This guide will help you make a smooth, pliable homemade sugar paste for your cakes and treats.

Let’s start with the basics of marshmallow fondant tutorial. We’ll cover the essential steps to make your own tasty fondant from scratch:

  1. Gather and Measure the Ingredients: Get all the needed items like powdered sugar, light corn syrup, and water. Measure them carefully as the recipe calls for.
  2. Combine the Ingredients: Put the powdered sugar, corn syrup, and water in a big bowl. Mix until a dough starts to form.
  3. Knead the Fondant: Turn the dough onto a clean, lightly dusted area. Knead it for a few minutes until it’s smooth and soft.
  4. Wrap and Chill: Shape the fondant into a ball, wrap it in plastic wrap, and chill for at least 2 hours. This step makes the fondant perfect.
  5. Re-knead and Color (Optional): Take the fondant out of the fridge and knead it a bit. If you want, divide it and add food coloring for different colors.

Follow these easy steps to make your own fondant recipe. Remember, making fondant takes patience and care. Enjoy the process and don’t rush it.

“The key to perfect fondant is in the kneading – the more you work it, the smoother and more pliable it becomes.”

Preparing Your Workspace and Ingredients

Making fondant is more than just a recipe. You need a clean, organized space and accurate measurements. A clean workspace and precise measurements are key for success.

Proper Surface Preparation

Start by cleaning your work area well. Use a damp cloth to wipe down the counter or table. This removes crumbs, spills, and residue.

After drying, dust the surface with powdered sugar or cornstarch. This prevents the fondant from sticking.

Measuring and Organizing Components

Getting the measurements right is crucial for fondant. Use measuring cups and spoons to accurately measure each ingredient. Keep your ingredients organized and within reach for a smooth process.

Temperature and Humidity Considerations

The temperature and humidity in your workspace matter a lot. Aim for a cool, dry place. High temperatures and humidity can make the fondant sticky or hard to work with.

Use a dehumidifier or air conditioning to keep the ideal conditions for fondant preparation.

“Attention to detail is the key to successful fondant making. Take the time to set up a clean, organized workspace and measure your ingredients precisely.”

Workspace Preparation ChecklistIdeal Conditions
Surface CleaningThoroughly wiped down and dusted
Ingredient MeasurementPrecise, using appropriate tools
Temperature and HumidityCool, dry environment

Kneading and Coloring Techniques

Learning to knead fondant is key for a smooth, pliable texture. Dust your work area with powdered sugar or cornstarch to stop it from sticking. Use the heel of your hand to knead, folding the fondant to add air and make it silky. Don’t overwork it, or it will become stiff and brittle.

Gel colors are best for coloring fondant. They mix well without making the fondant too thin or changing its texture. Start with a little color and knead it in, adding more until you get the shade you want. For a marbled look, color different parts of the fondant, then fold them together gently.

Coloring TechniqueAdvantagesConsiderations
Fondant kneadingAchieves a smooth, pliable textureAvoid overworking to prevent a stiff, brittle fondant
Gel food coloringConcentrated pigments that blend well without thinning fondantStart with small amounts and gradually increase color intensity
MarblingCreates unique, eye-catching patternsRequires careful handling to achieve the desired effect

With practice in fondant kneading, food coloring, and marbling, you can make your cakes look amazing. Your creativity can turn cakes into stunning art pieces.

Tips for Achieving the Perfect Fondant Consistency

Getting the right fondant texture is a bit tricky. But, with the right methods, you can make it smooth and easy to work with. Here are some tips to fix common texture issues and keep your fondant in top shape, no matter the weather.

Common Texture Problems and Solutions

If your fondant feels dry and crumbly, it might not have enough moisture or you might have kneaded it too much. To fix this, add a little water or corn syrup and knead it gently until it’s smooth again. If your fondant is too sticky, it might have too much moisture. Add some powdered sugar or cornstarch to soak up the extra moisture and get the right texture.

Storage and Shelf Life Guidelines

Keeping your fondant in good shape starts with proper storage. Use an airtight container or wrap it tightly in plastic wrap to keep it from drying out. Fondant can last for weeks at room temperature when stored this way. For longer storage, refrigerate or freeze it to keep it fresh for months.

Working with Different Weather Conditions

Fondant can be tricky in different weather. In humid places, it gets sticky, and in dry areas, it dries out. To handle these issues, you might need to adjust your recipe or how you work with it. For example, add more powdered sugar or cornstarch in humid weather, and a bit of water or corn syrup in dry conditions to keep it just right.

“The key to troubleshooting fondant is understanding how temperature, humidity, and your ingredients work together to create the perfect consistency.”

Troubleshooting Common Fondant Issues

Working with fondant can be both exciting and challenging. You might face problems like cracks, tears, elephant skin, and air bubbles. But don’t worry, with the right techniques and patience, you can fix these issues and get perfect results.

Fixing Fondant Cracks and Tears

Fondant cracks and tears can be frustrating. But they’re often easy to fix. For small cracks, knead in some vegetable shortening or corn syrup to rehydrate and smooth the surface. For bigger tears, press the edges together and use a fondant smoother to blend the seam.

Working in a humid environment can help prevent fondant cracks. Or, mist your fondant lightly as needed.

Preventing Elephant Skin Texture

The “elephant skin” texture is a common problem. It happens when your workspace is too hot or dry. Fondant does best in cool, low-humidity places. If it’s too dry, knead in some vegetable shortening or corn syrup to rehydrate it.

Make sure your fondant is well-kneaded and free of air pockets. This helps avoid an uneven texture.

Dealing with Fondant Bubbles

Air bubbles in fondant can cause bumps and ruin the finish. To avoid them, knead your fondant well to remove air pockets. If bubbles do appear, use a toothpick or fondant smoother to gently pop them and smooth the surface.

Fixing fondant problems takes practice and patience. With time and effort, you’ll get better at solving any fondant challenge.

Common Fondant IssuePossible CausesSolutions
Fondant Cracks– Dry environment
– Overworked fondant
– Add vegetable shortening or corn syrup
– Increase humidity in workspace
Elephant Skin Texture– Dry environment
– Inadequate kneading
– Add vegetable shortening or corn syrup
– Knead fondant thoroughly
Fondant Bubbles– Air pockets in fondant– Pop bubbles with a toothpick or smoother
– Knead fondant thoroughly

Creative Ways to Use Your Homemade Fondant

Homemade fondant opens up a world of creativity. It can turn simple baked goods into stunning works of art. From basic cake covering to intricate designs, fondant is incredibly versatile.

Basic Cake Covering Techniques

Covering cakes with fondant makes them look professional. Learning to drape and smooth fondant is key. It also lets you add more decorations, making your cakes truly special.

Decorative Elements and Shapes

Fondant is great for making fondant flowers, 3D fondant figures, and more. You can create everything from simple flowers to detailed figures. These decorations add a touch of magic to any dessert.

Advanced Design Applications

For those who love a challenge, fondant can create amazing 3D designs. By experimenting with layering and texture, you can make cakes look like masterpieces. It’s a way to turn simple treats into edible art.

“Fondant is the ultimate medium for unleashing your creativity in the kitchen. With a little practice, the possibilities are truly limitless.”

Whether you’re new to fondant or have experience, it’s a great way to express yourself in the kitchen. It can lead to endless creativity and joy in your baking.

Conclusion

Congratulations on mastering homemade fondant! We’ve covered types, ingredients, tools, and how to make it. Now, you can improve your cake decorating skills.

Making your own fondant has many benefits. You control the ingredients and texture. Plus, you get to enjoy making a versatile cake topping from scratch.

Keep practicing and having fun with fondant. Try new flavors, colors, and designs. With effort and a love for learning, your desserts will amaze everyone. Bon appétit!

FAQ

What is fondant?

Fondant is a smooth, pliable icing used for cakes. It can be shaped and textured, giving cakes a professional look.

What are the different types of fondant?

There are three main types: rolled, poured, and marshmallow fondant. Each has its own uses and qualities.

What are the essential ingredients for making homemade fondant?

Homemade fondant needs confectioners’ sugar, gelatin, and glycerin. These ingredients help achieve the right texture and consistency.

What tools and equipment are needed for making fondant?

You’ll need a rolling pin, fondant smoother, cornstarch, and a clean surface. These tools help knead and roll the dough.

How do I properly knead and color fondant?

Kneading fondant makes it smooth and pliable. You can also add color gels or pastes for custom shades and marbled effects.

How do I troubleshoot common fondant issues?

Fixing problems like cracking and air bubbles involves adjusting moisture and technique. Patience and practice are crucial.

What are some creative ways to use homemade fondant?

Fondant is great for basic cake covering and making decorations like flowers and figures. Its versatility opens up endless creative options.

Quick & Easy Homemade Blueberry Cobbler Recipe Easy

Craving a homemade dessert that’s easy to make and full of fresh blueberry taste? This quick and easy blueberry cobbler recipe is perfect. It mixes a buttery crust with the juicy sweetness of ripe blueberries. This homemade cobbler is a true delight for the senses.

It requires minimal effort and uses pantry staple ingredients. It’s the perfect treat to whip up for any occasion.

Key Takeaways

  • Quick and easy blueberry cobbler recipe with minimal preparation time
  • Combines a buttery crust with juicy, sweet blueberries for classic comfort food appeal
  • Made with simple pantry ingredients, no specialized equipment required
  • Versatile dessert that can be enjoyed year-round with fresh or frozen blueberries
  • Perfect for sharing with family and friends as a delicious homemade treat

What Makes This Blueberry Cobbler Special

This blueberry cobbler recipe is a true standout. It combines classic comfort food, quick preparation, and simple pantry ingredients. It’s perfect for both seasoned bakers and kitchen novices, becoming a family favorite.

Classic Comfort Food Appeal

Blueberry cobbler brings back memories of cozy family gatherings and grandma’s baking. It captures the comforting, old-fashioned flavor. It’s the perfect sweet treat for any time of year.

Time-Saving Preparation Methods

This blueberry cobbler is quick and easy to make. It requires simple mixing and short baking. You can have a delicious cobbler ready in no time, great for sudden cravings or guests.

Simple Pantry Ingredients

The recipe uses common pantry staples, making it easy for all bakers. It includes juicy blueberries and a flaky topping. You can make this comfort food delight whenever you want.

Essential Ingredients for Perfect Blueberry Cobbler

Making a delicious blueberry cobbler begins with the right ingredients. Whether you’re an experienced baker or new to cooking, this classic dessert is key. It needs fresh blueberries, flour, sugar, and butter to get the perfect taste and texture.

Here are the main ingredients for a blueberry cobbler that will impress everyone:

  • Blueberries: The heart of this dessert, blueberries add sweetness and color.
  • Flour: This is what makes the cobbler topping tender and biscuit-like.
  • Sugar: It sweetens the filling and helps the topping caramelize.
  • Butter: Unsalted butter gives the crust a rich, flaky texture and flavor.
  • Baking Powder: It makes the topping light and fluffy.
  • Salt: A little salt balances the sweetness and enhances the flavor.
  • Milk or Cream: Adds moisture and makes the topping tender.

With these ingredients, you’re ready to make a blueberry cobbler that’s full of flavor. Get ready to enjoy a homemade treat that’s both comforting and delicious.

Kitchen Tools and Equipment Needed

To bake a tasty blueberry cobbler, you need some key kitchen tools and equipment. From basic baking items to optional tools and precise measuring devices, the right gear is crucial. It can make a big difference in your homemade blueberry cobbler’s success.

Basic Baking Essentials

  • Baking dish or pie plate
  • Mixing bowls
  • Whisk or spoon for stirring
  • Spatula for spreading and serving
  • Knife for slicing and cutting

Optional Helpful Tools

  1. Food processor for quick dough preparation
  2. Stand mixer or hand mixer for effortless mixing
  3. Pastry cutter for achieving a flaky cobbler topping
  4. Parchment paper or silicone baking mat for easy cleanup

Measuring Equipment

Getting the measurements right is key for a perfect blueberry cobbler. Make sure you have these measuring tools:

  • Measuring cups for dry and liquid ingredients
  • Measuring spoons for accurate portioning
  • Digital scale for weighing ingredients like flour and sugar

With these baking tools, kitchen equipment, and measuring utensils, you’re ready to make this delicious blueberry cobbler. You’ll do it with confidence and ease.

Blueberry Cobbler Recipe Easy – Step-by-Step Guide

Making a delicious blueberry cobbler is simpler than you think. Follow this easy guide to make a homemade cobbler that will wow everyone. These cobbler recipe instructions are perfect for both beginners and experts. They’ll guide you through the baking steps for a tasty easy dessert guide.

  1. Preheat your oven to 375°F (190°C).
  2. In a large bowl, gently toss the fresh or frozen blueberries with granulated sugar, cornstarch, and a pinch of salt until well combined.
  3. Pour the blueberry mixture into a greased 9×13-inch baking dish.
  4. In a separate bowl, whisk together the all-purpose flour, baking powder, granulated sugar, and a pinch of salt.
  5. Cut in the cold, cubed butter until the mixture resembles coarse crumbs.
  6. Stir in the milk or buttermilk until just combined, being careful not to overmix.
  7. Drop spoonfuls of the cobbler topping over the blueberry filling, creating an even layer.
  8. Bake for 30-35 minutes, or until the topping is golden brown and the filling is bubbly.
  9. Allow the cobbler to cool for at least 15 minutes before serving.

Enjoy your fresh and easy blueberry cobbler with a scoop of vanilla ice cream or a dollop of whipped cream. This cobbler recipe instructions will quickly become a family favorite!

Tips for Selecting and Preparing Fresh Blueberries

Choosing the right fresh blueberries is key to a great blueberry cobbler. To make your dessert sweet and flavorful, follow these tips. They’ll help you pick, wash, and store your blueberries.

Seasonal Selection Guide

The best time for fresh blueberries is from June to August. The juiciest ones are usually in mid-summer. Choose plump, firm berries with a deep color. Stay away from shriveled, moldy, or off-color berries.

Washing and Storage Methods

Rinse your blueberries gently under cool water to get rid of dirt. Dry them with a clean towel. Store them in an airtight container in the fridge for up to a week.

Fresh vs. Frozen Options

Fresh blueberries are best for this recipe, but frozen ones work too. Frozen berries keep their nutrients and taste. Just thaw them before adding to your cobbler.

By picking and preparing your blueberries carefully, you’ll make a delicious homemade blueberry cobbler. It will be full of flavor and texture.

Customizing Your Cobbler Topping

Blueberry cobbler is a classic dessert. But, you can easily change the topping to make it unique. Try these simple ways to enhance your cobbler.

Add a Crunchy Topping

For a nice contrast, sprinkle chopped nuts like pecans or almonds on top. You can also add old-fashioned oats for a granola-like topping.

Spice it Up

Add a dash of ground cinnamon, nutmeg, or ginger to the topping. These spices complement the sweet blueberries perfectly.

Make it Indulgent

For a richer cobbler, add a crumbled cookie or shortbread topping. Dotting the top with cold butter makes it flaky and biscuit-like.

Dietary Adaptations

Want a gluten-free or vegan option? Use oats, almond flour, and coconut oil instead of flour. This makes a delicious, dairy-free cobbler for all diets.

These easy tips let you turn a simple blueberry cobbler into a unique dessert. Try different flavors to find your new favorite cobbler.

Common Mistakes to Avoid When Making Cobbler

Making the perfect blueberry cobbler needs focus and avoiding common mistakes. Issues like temperature problems, texture issues, and wrong ingredient amounts can ruin your cobbler. Knowing these mistakes helps you fix them and get great results every time.

Temperature Control Issues

Getting the oven temperature right is key for a good cobbler. If it’s too hot, the topping will burn before the filling is done. If it’s too cold, the cobbler will be soggy. Use an oven thermometer to check the temperature and adjust as needed.

Texture Problems and Solutions

  • Runny Filling: If your filling is too thin, add more thickener like cornstarch or flour to soak up the extra moisture.
  • Tough Topping: A tough topping comes from overworking the dough. Mix it gently to keep it light and tender.
  • Soggy Bottom: Baking on a preheated baking sheet helps the bottom crust stay crisp and prevents it from getting soggy.

Ingredient Measurements

Getting the right amounts of ingredients is crucial. Wrong amounts of sugar, flour, or butter can mess up the flavors and textures. Use digital scales and measuring cups and spoons to get it right.

Common Cobbler MistakesSolutions
Improper oven temperatureUse an oven thermometer to maintain the correct temperature
Runny fillingAdd more thickener, such as cornstarch or flour
Tough, dense toppingHandle the dough gently and avoid over-mixing
Soggy bottom crustBake the cobbler on a preheated baking sheet
Inaccurate ingredient measurementsUse proper measuring tools, such as a digital scale and graduated cups and spoons

By fixing these commonbaking tips,troubleshooting desserts, andcobbler mistakes, you can make your homemade blueberry cobbler even better.

Serving Suggestions and Storage Tips

Make your blueberry cobbler even better with these serving ideas and storage tips. Whether you’re having a party or a quiet night in, these tips will help you serve your dessert beautifully. They also keep it fresh for days.

Delightful Dessert Presentation

Enjoy your warm blueberry cobbler with vanilla ice cream or whipped cream. The mix of hot berries and cool cream is amazing. Add a sprig of mint or powdered sugar for a fancy touch.

Storing Leftover Cobbler

  • Let the cobbler cool before putting it in an airtight container.
  • Keep it in the fridge for up to 4 days to stay fresh.
  • Reheat it in the microwave or oven when you’re ready.

Extending the Cobbler’s Lifespan

Freeze leftover cobbler for longer storage. Wrap it in plastic or foil, then put it in a freezer-safe container. Frozen cobbler stays good for up to 3 months.

With these tips, you can enjoy your blueberry cobbler in many ways. It stays delicious for days. Enjoy the classic taste and flavors of this beloved dessert.

Conclusion

This easy homemade blueberry cobbler recipe is a true delight. It captures the essence of classic comfort food. Its simple preparation and impressive results make it a family favorite across the United States.

Looking for a quick and easy treat? Or a crowd-pleasing option for your next gathering? This blueberry cobbler is sure to exceed your expectations. It satisfies sweet cravings and is quick to make, becoming a new household staple.

Why not try making this delightful homemade blueberry treat? Its inviting aroma and irresistible flavor make it perfect for your recipe repertoire. Indulge in the comforting, homemade goodness of this easy dessert recipe today!

FAQ

What makes this blueberry cobbler recipe special?

This blueberry cobbler recipe is a classic comfort food. It’s easy to make and uses simple ingredients. This makes it a delicious homemade dessert option for everyone.

What are the essential ingredients for the perfect blueberry cobbler?

The key ingredients include fresh blueberries, flour, sugar, and butter. These ingredients are crucial for the right texture and flavor.

What kitchen tools and equipment are needed to make this blueberry cobbler?

You’ll need basic baking tools like a baking dish and mixing bowls. Optional tools and measuring equipment can also help.

How do I select and prepare the fresh blueberries for this recipe?

Choose the best blueberries by following a seasonal guide. Wash them well. You can use fresh or frozen berries. Proper storage keeps them fresh.

Can I customize the cobbler topping for this recipe?

Yes, you can add nuts, oats, or spices to the topping. This lets you tailor the flavor and texture to your liking.

What common mistakes should I avoid when making this blueberry cobbler?

Avoid temperature and texture issues, and make sure to measure ingredients correctly. These tips help ensure your cobbler turns out right.

How should I serve and store the blueberry cobbler?

Serve it with ice cream or whipped cream, or enjoy it plain. For storage, use proper techniques to keep it fresh longer.

Easy Kefir Sheet Cake Recipe – Moist & Delicious Dessert

Take your baking to the next level with this simple yet amazing homemade kefir cake. It’s moist, tangy, and incredibly tasty. Perfect for any occasion or when you just want something comforting, this kefir sheet cake is a hit with its unique flavor and easy-to-make recipe.

So, what’s so special about this kefir cake? Let’s find out how kefir works its magic in baking. You’ll learn about its health perks and how it makes your sheet cake even better.

Ready to add a tangy twist to your desserts? Follow this easy kefir sheet cake recipe. It’s a moist, delicious treat that will make your taste buds happy.

Key Takeaways

  • Discover the secret behind kefir’s transformative powers in baking
  • Learn about the health benefits of using kefir in your cake recipes
  • Explore an easy-to-follow kefir sheet cake recipe for a moist and delicious dessert
  • Understand how kefir affects the texture and moisture of your sheet cake
  • Get tips on achieving the perfect moisture level and preventing common baking issues

Why Kefir Makes the Perfect Sheet Cake Ingredient

Kefir is a superstar in baking. It adds a tangy flavor and makes cakes moist and tender. Its unique nutritional profile and how it mixes with other ingredients are the secrets.

Health Benefits of Baking with Kefir

Kefir is full of probiotics, great for health-conscious bakers. These live cultures support gut health and overall well-being. Plus, it’s a rich source of probiotics in baking, boosting your treats’ nutrition.

How Kefir Affects Cake Texture

The kefir nutritional value is key to a perfect cake texture. Its natural acidity tenderizes flour, making the cake moist and delicate. This, along with kefir’s richness, creates a moist cake texture that everyone loves.

IngredientBenefit in Baking
KefirProvides probiotics for gut health Contributes to a moist and tender texture Adds a delightful tangy flavor

“Kefir is the secret ingredient that takes my sheet cakes to the next level. The texture is always perfectly moist and the flavor is simply divine.”

– Sarah, Avid Baker

Essential Ingredients for Your Kefir Sheet Cake

To make a delicious kefir sheet cake, you need the right ingredients. The flour is the base, and the tangy kefir adds a special touch. Each part is crucial for a moist, tasty dessert. Let’s look at what you need to make a kefir cake everyone will love.

The kefir is key, bringing a unique tang and moistness. It’s a baking staple that boosts nutrition and flavor in your recipes.

You’ll also need all-purpose flour and cake flour for the right texture. Don’t forget eggs, granulated sugar, and butter or oil for a cake that’s soft and delicious.

Adding vanilla extract and a bit of salt can enhance the taste. Try spices like cinnamon or nutmeg for different flavors.

With the right mix of kefir cake ingredients, you’re set to make a sheet cake that will wow. Using the best baking staples is key to a great result.

IngredientQuantity
Kefir1 cup
All-Purpose Flour1 1/2 cups
Cake Flour1 cup
Granulated Sugar1 1/4 cups
Eggs3 large
Unsalted Butter (or Oil)1/2 cup
Vanilla Extract1 teaspoon
Salt1/4 teaspoon

https://youtube.com/watch?v=MtCMSj_9T9E

With these quality ingredients, you’re all set to bake a tasty kefir sheet cake. It will satisfy your sweet cravings and impress your family and friends.

Kitchen Tools and Equipment Needed

Baking a kefir sheet cake needs the right tools and equipment. This ensures the cake turns out moist and flavorful. You’ll need a good baking pan and mixing tools to get it just right.

Baking Pan Recommendations

For a classic kefir sheet cake, use a 9×13 inch baking pan. This size lets the cake rise and bake evenly. Choose pans made of durable materials like aluminized steel or ceramic for even heat and easy release.

Mixing Equipment Essentials

You’ll need an electric mixer, either a stand or hand mixer, to mix the batter well. These tools blend the kefir, eggs, and dry ingredients quickly. A large mixing bowl is also crucial for this recipe.

Measuring Tools Required

  • Measuring cups for dry and liquid ingredients
  • Measuring spoons for precise portioning of spices and leavening agents
  • A digital scale for accurately weighing ingredients like flour and sugar

Accurate measurements are vital in baking. Make sure you have all the measuring tools you need. This ensures your kefir sheet cake turns out perfectly every time.

Baking EquipmentRecommended Items
Baking Pan9×13 inch aluminized steel or ceramic-coated metal pan
Mixing EquipmentStand mixer or hand mixer, large mixing bowl
Measuring ToolsMeasuring cups, measuring spoons, digital scale

With the right baking equipment, sheet cake pan, and kitchen essentials, you’re ready to make a delicious kefir sheet cake. It’s sure to impress your friends and family.

Step-by-Step Kefir Sheet Cake Recipe

Making a homemade kefir sheet cake is simple. Follow these steps to bake a moist, tasty dessert for any event.

  1. Preheat your oven to 350°F (175°C). Grease a 9×13-inch baking pan with butter or non-stick spray.
  2. In a large bowl, whisk together 2 cups of flour, 1 teaspoon of baking soda, and 1/2 teaspoon of salt.
  3. In a separate bowl, beat 1 cup of softened butter and 1 1/2 cups of sugar until fluffy.
  4. Add 3 large eggs, one at a time, beating well after each egg.
  5. Stir in 1 cup of kefir and 1 teaspoon of vanilla extract until mixed well.
  6. Gradually fold the dry ingredients into the wet ingredients, mixing until no flour pockets remain.
  7. Pour the kefir cake batter into the prepared pan and smooth the top with a spatula.
  8. Bake for 30-35 minutes, or until a toothpick inserted in the center comes out clean.
  9. Allow the kefir sheet cake to cool in the pan for 10 minutes. Then, transfer it to a wire rack to cool completely.

With these easy steps, you’ll have a moist, flavorful homemade sheet cake. Enjoy your delicious kefir-infused treat!

IngredientQuantity
All-purpose flour2 cups
Baking soda1 teaspoon
Salt1/2 teaspoon
Unsalted butter (softened)1 cup
Granulated sugar1 1/2 cups
Large eggs3
Kefir1 cup
Vanilla extract1 teaspoon

Tips for Achieving the Perfect Moisture Level

Getting the right moisture is key for a moist, tasty kefir sheet cake. To avoid a dry or crumbly cake, try these helpful tips.

Common Moisture Control Mistakes

One big mistake in baking is over-mixing the batter. This can make the cake dense and dry. Mix the ingredients gently until they’re just combined. Also, watch out for overbaking, as it can make the cake dry and tough.

Storage Solutions for Freshness

Proper storage keeps your kefir sheet cake moist and fresh. After it cools, wrap it tightly in plastic wrap or use an airtight container. This keeps moisture in and prevents drying. For longer storage, freeze the cake. It stays moist for weeks.

By avoiding common mistakes and using the right storage, your kefir sheet cake will stay moist and delicious. Enjoy its fresh, authentic taste for days.

Frosting and Topping Options

There are countless ways to make your homemade kefir sheet cake stand out. You can choose from classic buttercream to tangy cream cheese frosting. Each option brings a unique taste to this moist and flavorful dessert.

A simple vanilla buttercream is a timeless favorite. It’s creamy and sweet, which complements the kefir’s tanginess perfectly. For a richer taste, try a chocolate buttercream or a peanut butter buttercream.

Cream cheese frosting is also a great choice for kefir sheet cakes. It adds a tangy flavor that matches the kefir’s subtle tartness. You can go for a plain cream cheese frosting or add a twist with lemon zest or chopped nuts.

For a lighter topping, use fresh fruit. Sliced strawberries, blueberries, or diced pineapple can add sweetness and color to your kefir cake decoration.

Choosing the right cake frosting ideas or sheet cake toppings is key. Let the kefir’s delicate flavors be the star. With creativity and the right ingredients, your kefir sheet cake can become a stunning dessert.

Troubleshooting Common Baking Issues

Baking is a fun and rewarding hobby, but even experts face problems. Issues like uneven baking, over or under-baking, and texture problems can happen. Knowing how to fix these issues can help you make the perfect kefir sheet cake every time.

Temperature and Timing Solutions

Keeping the oven at the right temperature is key. If your cake browns too fast but is still raw inside, your oven might be too hot. Try lowering the temperature by 25°F and watch the baking time closely. On the other hand, if your cake takes too long or dries out, try raising the oven temperature by 25°F.

Getting the baking time right is also important. Baking for too long can make your cake dry and crumbly. Baking it too short can make it dense and uncooked. Start with the recommended time, but adjust it based on your oven and pan size.

Texture Problem Fixes

  • A tough, rubbery cake often comes from overmixing the batter. Mix ingredients gently and avoid overdoing it.
  • A crumbly, dry cake might be due to too much flour or not enough liquid. Double-check your measurements and adjust the flour-to-liquid ratio.
  • A dense, heavy cake could mean your baking soda or powder is old. Make sure to use fresh, active leavening agents.

Every oven is different, and your kitchen’s unique setup can affect baking. Try different temperatures and times to find what works best for your kefir sheet cake.

Baking IssuePossible CauseSolution
Uneven BakingOven temperature too highReduce oven temperature by 25°F
Dry, Crumbly TextureOverestimated baking timeReduce baking time and monitor closely
Dense, Heavy CakeExpired baking soda or powderReplace leavening agent

“Baking is a science, and understanding the fundamentals of troubleshooting can make all the difference in achieving the perfect cake texture.”

Recipe Variations and Flavor Combinations

Why not try new flavors with kefir sheet cake? Its tangy and creamy taste is perfect for many flavors. Unleash your inner pastry chef and explore kefir cake flavors and sheet cake variations.

Chocolate lovers will enjoy a kefir chocolate cake. It’s made with cocoa powder and dark chocolate chips. For a fresh twist, add lemon or orange zest. Spice fans can try cinnamon, ginger, or nutmeg for a warm and aromatic kefir cake.

Fruit-based kefir sheet cakes are also a great idea. Imagine a cake with juicy berries or apple-cinnamon. The options are endless with kefir.

Looking for vanilla or something special? Kefir can take your baking to new levels. Let your creativity shine and discover the many sheet cake variations kefir offers.

Make-Ahead and Storage Guidelines

Baking a delicious kefir sheet cake doesn’t have to be rushed. Planning ahead keeps your dessert fresh and tasty. With these tips, you can enjoy your homemade treat whenever you want.

Freezing Instructions

Freezing your kefir sheet cake is a smart move for make-ahead desserts. Let the cake cool completely first. Then, wrap it tightly in plastic wrap or foil.

Put the wrapped cake in a freezer bag or airtight container. This way, your kefir sheet cake can stay good for up to 3 months.

Reheating Methods

When it’s time to enjoy your frozen reheat cake, thaw it in the fridge overnight. After thawing, warm it up in a 350°F oven for 10-15 minutes. This will make it moist and delicious again.

Learning how to prepare and store your kefir sheet cake ahead of time makes it a hit. You can serve it whenever you like, and it will still impress everyone.

Serving Suggestions and Presentation Ideas

Turning a simple kefir sheet cake into a stunning dessert is all about how you present it. You can use creative garnishes and plating techniques to make it the highlight of any event.

First, think about the cake’s shape and size. A sheet cake is perfect for simple, elegant slices. You can also cut it into fun shapes or stack it for a tiered look. Adding a dusting of powdered sugar or caramel sauce can make it look even more special.

For garnishes, the choices are endless. Try using fresh berries, edible flowers, candied citrus peels, or toasted nuts. Arrange them in a way that looks good and tastes great, playing with colors and textures.

For a wow factor, serve the cake with vanilla ice cream or whipped cream. The contrast between the moist cake and the cool topping is a classic favorite.

Remember, the goal is to let the cake’s beauty shine. With a few simple touches, you can make this dessert a true showstopper that everyone will love.

Garnish IdeaFlavor PairingVisual Impact
Fresh BerriesLemon or VanillaVibrant and Colorful
Edible FlowersLavender or RosemaryElegant and Whimsical
Candied Citrus PeelsOrange or LimeBright and Zesty
Toasted NutsAlmond or HazelnutNutty and Crunchy

The secret to a stunning cake presentation is to highlight the sheet cake‘s natural beauty. With some creative dessert plating, you can turn this moist and tasty kefir cake into a memorable showstopper.

Conclusion

This kefir sheet cake recipe is a delightful homemade treat. It uses kefir, a probiotic-rich dairy product, for extra moisture and health benefits. It’s perfect for any occasion, whether you’re hosting a party or just want a cozy dessert.

The recipe is easy to follow, and you can find all the ingredients in most stores. It’s great for both beginners and experienced bakers. Plus, you can add your favorite flavors and toppings to make it unique.

We invite you to make this kefir sheet cake and enjoy the process. It’s a chance to create something delicious and healthy. Let your imagination run wild as you try different flavors and toppings.

FAQ

What is kefir, and how does it benefit baking?

Kefir is a fermented milk product. It’s full of probiotics and has special properties. These enhance baking, adding moisture, tenderness, and a tangy flavor to cakes.

What are the essential ingredients needed for a kefir sheet cake?

For a kefir sheet cake, you need flour, sugar, eggs, kefir, baking powder, baking soda, and salt. Using fresh, high-quality ingredients is crucial for great results.

What baking equipment is required to make a kefir sheet cake?

You’ll need a rimmed baking sheet or jelly roll pan, an electric mixer, and mixing bowls. Also, measuring cups and spoons, and a cooling rack. Accurate measurements are important.

How do I ensure the perfect moisture level in my kefir sheet cake?

To keep the cake moist, avoid overbaking. Be careful not to use too much flour or over-mix the batter. Store the cake covered to keep it fresh.

What are some tasty frosting and topping options for a kefir sheet cake?

Try classic buttercream, cream cheese frosting, or fresh fruit like berries or citrus. These toppings complement the tangy kefir sheet cake well. Feel free to get creative.

How can I troubleshoot common baking issues with a kefir sheet cake?

If the cake bakes unevenly or has texture problems, adjust the oven temperature and baking time. Follow the recipe’s guidelines and make adjustments for your oven.

What are some creative flavor variations for a kefir sheet cake?

You can add flavors like chocolate, fruit-infused, or spiced to kefir sheet cakes. The tangy kefir goes well with many ingredients.

How can I make and store a kefir sheet cake in advance?

Kefir sheet cakes can be made ahead and frozen. To serve, thaw in the fridge and gently reheat if needed. This preserves the texture and flavor.