Best Christmas Cookie Recipes For Your Holiday Treats

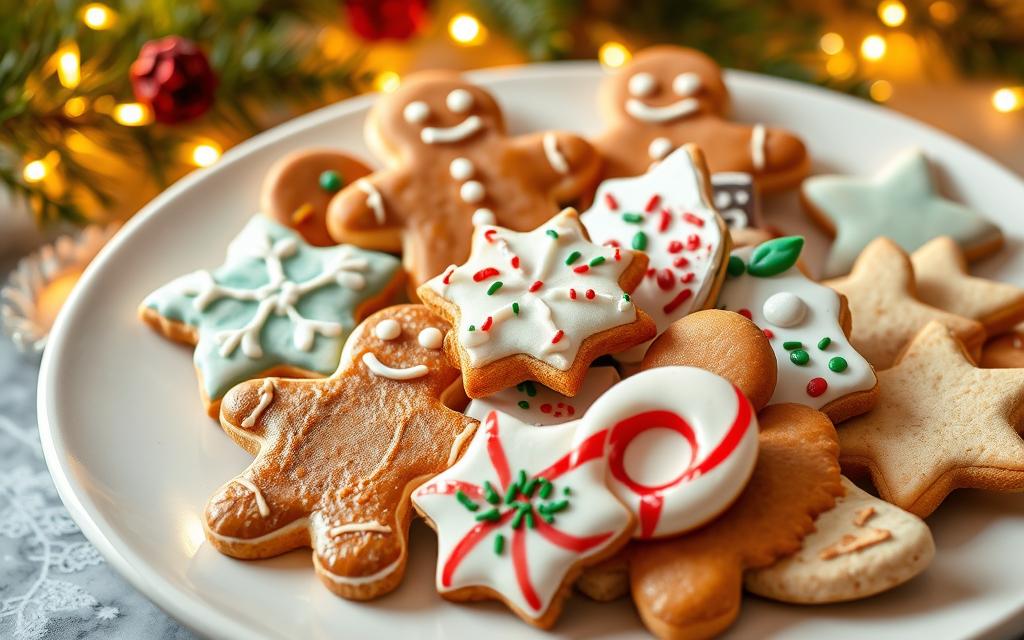
The holiday season is a time to enjoy delicious homemade treats. No Christmas celebration is complete without tasty cookies. Are you ready to unlock the secrets to becoming a holiday baking superstar?

In this guide, we’ll cover the best Christmas cookie recipes. We’ll also talk about essential baking tools and ingredients. Plus, we’ll share innovative decorating techniques to help you craft the perfect festive treats. Whether you’re a seasoned baker or new to the kitchen, you’ll find everything you need to impress your loved ones with your holiday baking skills.

Key Takeaways

  • Discover the must-have tools and ingredients for successful holiday baking
  • Master classic Christmas cookie recipes like sugar cookies and gingerbread
  • Learn creative decorating ideas to make your cookies truly festive
  • Explore allergen-free options for those with dietary restrictions
  • Discover tips for making, storing, and shipping your holiday cookies

Essential Holiday Baking Tools and Ingredients

For successful holiday baking, you need the right tools and ingredients. Essential items include stand mixers, cookie cutters, and top-notch ingredients like pure vanilla extract and unsalted butter. Knowing what you need can make your holiday treats truly special.

Must-Have Baking Equipment

Some baking tools are must-haves for the holidays. A strong stand mixer helps mix dough and whip batters fast. Cookie cutters let you make festive shapes from dough. You’ll also need mixing bowls of different sizes and baking sheets for your holiday baking.

Quality Ingredients for Perfect Results

Choosing the best ingredients is key for holiday baking success. Use pure vanilla extract for richer flavors in your treats. Go for unsalted butter for a creamy texture. And pick premium, unbleached all-purpose flour for a better crumb.

Storage and Organization Tips

  • Keep your baking supplies organized and easy to find in clear, labeled containers.
  • Store cookie cutters and other tools in a special drawer or bin for quick access.
  • Use airtight containers or ziplock bags to keep your baking ingredients fresh.

By getting the right baking equipment and ingredients, and keeping your workspace tidy, you’ll make delicious holiday treats. These will surely impress your guests.

Classic Sugar Cookies with Royal Icing

Indulge in the timeless joy of baking classic sugar cookies this holiday season. With a foolproof recipe and expert tips on decorating with royal icing, you’ll create festive treats that are sure to delight family and friends.

Start by mastering the perfect sugar cookie dough. Cream together softened butter, granulated sugar, and a touch of vanilla extract for a rich, buttery flavor. Gradually incorporate all-purpose flour, baking powder, and a pinch of salt to achieve the ideal cookie texture – crisp on the outside and delightfully soft on the inside.

Once your dough is ready, the fun begins! Roll out the chilled dough and use holiday-themed cookie cutters to create a variety of shapes, from jolly gingerbread men to whimsical snowflakes. Bake the cookies until lightly golden, then let them cool completely before decorating.

Decorating TipTechnique
Flood IcingUse a thin, smooth royal icing to cover the entire surface of the cookie, creating an even, glossy finish.
PipingPipe detailed designs and patterns using a thicker royal icing and a small piping bag with a thin tip.
Sprinkles and DecorationsAdd a festive touch by sprinkling on colorful sprinkles, edible glitter, or small candies.

With a little practice, you’ll be creating Instagram-worthy sugar cookie masterpieces in no time. Embrace the holiday spirit and let your creativity shine through these classic sugar cookie recipe creations adorned with vibrant royal icing and playful holiday shapes.

Enjoy the amazing smell and taste of classic gingerbread cookies this holiday. These treats, made with special spices, are a beloved tradition. They bring happiness to everyone around.

Perfect Spice Combinations

The secret to great gingerbread is the right mix of spices. Use ground ginger, cinnamon, cloves, and nutmeg for a rich flavor. Try different amounts to find your favorite, with ginger being the main spice.

Decorating Techniques

Get creative with your gingerbread cookies and houses. Use royal icing for detailed designs or add colorful decorations. You can also use sprinkles, candies, and glitter for a festive look.

Storage Methods

  • Keep gingerbread cookies in an airtight container at room temperature for up to 1 week.
  • Freeze baked and cooled cookies for up to 3 months. Let them thaw at room temperature before decorating and serving.
  • Gingerbread houses can be made and decorated a few days early. Store them in a cool, dry place until you’re ready to show them off.

Enjoy the spicy flavor of gingerbread cookies and welcome the holiday spirit home. With the right spices and creative decorating, you can make treats that everyone will love.

Chocolate Chip Christmas Cookies

The classic chocolate chip cookie is a favorite, but with a few twists, it becomes a Christmas treat. Add festive mix-ins and decorations to make it a holiday showstopper.

Begin with your favorite chocolate chip cookie recipe. Then, try these holiday variations to add Christmas cheer:

  • Peppermint Chocolate Chip Cookies – Crush candy canes or peppermint candies and fold them into the dough for a refreshing minty twist.
  • Eggnog Chocolate Chip Cookies – Replace some of the milk or cream in the recipe with creamy eggnog for a festive flavor.
  • White Chocolate Cranberry Cookies – Swap in white chocolate chips and dried cranberries for a pop of color and tartness.

Be creative with holiday mix-ins like crushed gingerbread, chopped candied pecans, or swirls of red and green food coloring. Top your cookies with powdered sugar, caramel, or coarse sugar for a dazzling look.

With a few tweaks, the classic chocolate chip cookie becomes a holiday delight. Try seasonal flavors and decorations to make these cookies a highlight of your Christmas baking.

Baking Christmas cookies can be fun, even if you’re new to it. You can make easy recipes or find quick tips. There are many options to help your holiday cookies stand out.

Easy No-Fail Recipes

Beginners should start with these simple recipes. They are tasty and easy to make:

  • No-Bake Peanut Butter Cookies: A classic that requires no oven time, just a few pantry staples, and a quick stir.
  • Slice-and-Bake Shortbread Cookies: Pre-slice the dough and bake for perfectly uniform and buttery cookies.
  • Crisp Meringue Cookies: Whip up a batch of these light and airy treats with just egg whites, sugar, and a touch of vanilla.

Time-Saving Tips

Here are some tips to make your holiday baking faster. This way, you can enjoy the holiday more:

  1. Prepare dough in advance and freeze for easy last-minute baking.
  2. Utilize pre-made cookie mixes or pre-portioned dough for a hassle-free start.
  3. Invest in a cookie scoop to ensure uniform sizes and even baking.

Common Mistakes to Avoid

Avoid these mistakes to make sure your cookies are perfect:

  • Overmixing the dough, which can lead to tough, dense cookies.
  • Overbaking, resulting in dry, crumbly cookies.
  • Failing to chill the dough, causing the cookies to spread excessively.

With these tips and recipes, even beginners can make delicious Christmas cookies. They will impress your family and friends.

Make your Christmas cookies special with creativity and festive touches. Learn to decorate them with designs that will impress everyone. Use cookie icing, sprinkles, and edible glitter to make your holiday treats look amazing.

Begin with the right cookie, like sugar or gingerbread. Then, get creative with icing techniques. Choose between smooth royal icing or fluffy buttercream for your design. Use piping tips to draw cool patterns and colors. Add vibrant food coloring to bring the holiday spirit to life.

Add festive sprinkles to your cookies for a fun touch. Use edible glitter to make them sparkle like snow. Try flooding the cookies with icing and then sprinkling toppings for a wow effect.

Decorating TechniqueDescriptionRecommended Supplies
Royal Icing PipingUse a piping bag and various tips to create intricate designs and patterns on the cookie surface.Royal icing, piping bags, assorted piping tips
Flooding with IcingFlood the cookie surface with a thin layer of icing, then add sprinkles, edible glitter, or other toppings.Royal icing, sprinkles, edible glitter
Buttercream DecoratingUse a piping bag and tips to create swirls, rosettes, and other decorative elements using buttercream frosting.Buttercream frosting, piping bags, assorted piping tips

With practice and holiday spirit, you’ll make amazing cookies. They’ll be so good, they’ll look great on Instagram. So, put on your apron, preheat the oven, and start decorating!

Make-Ahead and Freezer-Friendly Options

Baking Christmas cookies can take a lot of time. But, with some preparation, you can start early. Learning to make dough ahead and freeze cookies saves time. It makes baking easier and less stressful.

Freezing Instructions

To freeze cookie dough, first make the dough as usual. Then, scoop it onto a parchment-lined baking sheet. Put the sheet in the freezer until the dough is firm.

After, move the dough balls to an airtight container or freezer-safe bag. This way, you can bake fresh cookies whenever you want. You won’t have to mix the dough from scratch every time.

Thawing Guidelines

When you’re ready to bake, take the frozen dough balls out of the freezer. Place them on a baking sheet. Let them thaw at room temperature for about 30 minutes.

This slow thawing helps your cookies stay perfect in texture and taste.

Best Cookies for Mail Delivery

Cookie TypeShipping SuitabilityTips
Shortbread CookiesHighSturdy and less prone to crumbling
BiscottiHighTwice-baked for extra crispness
Gingerbread CookiesModerateCarefully pack to prevent breakage
Chocolate Chip CookiesLowSoft texture makes them more fragile

When shipping cookies, pick recipes that can handle the mail. Shortbread and biscotti are great because they’re sturdy and dry. Gingerbread cookies are also good, but pack them carefully to avoid breakage.

Soft, chewy cookies like chocolate chip aren’t the best for the mail. They’re too fragile.

Hosting a holiday cookie exchange needs careful planning and creativity. From setting up the event to showing off your cookies, these tips will make your swap a joyous tradition.

First, pick a date, time, and place for your cookie exchange. Send out invitations early, including details like how many cookies to bring and any dietary needs. Ask guests to RSVP so you know how many to expect.

Packaging and Presenting Cookies

Encourage guests to be creative with their cookie packaging. Give them recipe cards and packaging ideas to spark their imagination. Use festive tins or cellophane bags to add to the fun. Set up a display for guests to show off their beautifully wrapped cookie swap treats.

Making the Most of the Event

On the day of the cookie swap, have a plan to hand out cookies smoothly. Offer labels or tags for each guest to mark their cookies. Encourage everyone to try different kinds and share their favorite recipes. You could even hold a vote for the best-looking or tastiest cookies to add fun.

By using these hosting tips, you can make a holiday cookie swap that everyone will remember and look forward to every year.

Cookie Swap EssentialsRecommended Quantities
Number of Cookies per Guest2-3 dozen
Minimum Number of Guests6-8
Decorative Packaging OptionsTins, cellophane bags, boxes, or trays

For those with dietary restrictions, the holidays can be tough. But, you can still enjoy tasty allergen-free Christmas cookies. You can use gluten-free flours, dairy-free butters, and nut-free recipes. This guide will help you with allergy-friendly baking.

Gluten-Free Variations

Switching to gluten-free flours like rice, almond, or coconut can make holiday cookies safe for those with gluten issues. These flours might need different liquid amounts and baking times. But, they can taste just as good as regular cookies.

Dairy-Free Alternatives

Vegan butter from plants like coconut or olive oil can replace regular butter in cookies. Non-dairy milks like almond, soy, or oat milk make creamy cookies without lactose or animal products.

Nut-Free Recipes

For nut allergy sufferers, try cookies with seeds like sunflower or pumpkin. Egg substitutes like ground flax or chia seeds mixed with water also work. They keep the cookies tasty and safe.

FAQ

What are the essential holiday baking tools and ingredients?

Find out what you need for holiday baking. You’ll need tools like stand mixers and cookie cutters. Also, get high-quality ingredients like pure vanilla extract and unsalted butter. Don’t forget storage solutions for your baking supplies.

How do I make classic sugar cookies with royal icing?

Learn to make classic sugar cookies and decorate them with royal icing. Get tips for the perfect cookie texture. Also, learn to create intricate designs for festive holiday shapes.

Discover the rich flavors of traditional gingerbread cookies. Learn about the best spice combinations. Also, find out how to decorate gingerbread men and houses. Plus, learn how to store them to keep them fresh.

Find ways to make classic chocolate chip cookies festive. Try seasonal mix-ins and decorative techniques. Turn this beloved treat into a Christmas favorite.

Find easy Christmas cookie recipes for beginners. Get essential baking tips. Learn time-saving techniques and no-bake options. Avoid common pitfalls for successful holiday baking.

How can I decorate my Christmas cookies in a festive way?

Explore creative ways to decorate Christmas cookies. Learn icing techniques and use sprinkles and edible decorations. Create stunning designs to make your cookies visually appealing and delicious.

How can I prepare Christmas cookies in advance and store them properly?

Discover how to prepare Christmas cookies in advance. Learn freezing and thawing techniques. Find the best cookie recipes for freezing. Get tips for mailing cookies to loved ones.

Plan a successful holiday cookie exchange. Get tips for organizing the event and creative packaging ideas. Learn how to share recipes and make your cookie swap a memorable tradition.

Explore allergen-free Christmas cookie recipes. Learn about gluten-free flour alternatives and dairy-free butter substitutes. Find nut-free options to ensure everyone can enjoy holiday treats.

Creative Ways to Transform Your Turkey Leftovers 🍗

So, Thanksgiving is over, and now your refrigerator seems like a turkey parade floor. Don’t let those leftovers hang out with you! Turkey is incredibly versatile, and with a little creativity, you could flip the day’s banquet into today’s fabulous meals. Let’s dive into some smooth, tasty, and fun approaches to reinventing your turkey leftovers.

1. Turkey Tacos

Why no longer add some fiesta vibes to your post-vacation meals? Shred that turkey, season it with taco spices (like cumin, paprika, and chili powder), and heat it up in a pan. Load it onto gentle tortillas and top with guacamole, salsa, and cheese. Boom—your turkey simply has become a party.

2. Turkey Soup

This one’s a conventional one; however, it’s a conventional one for a motive. Toss your turkey scraps right into a pot with vegetables, broth, and a few herbs (thyme and bay leaves are MVPs here). Got leftover stuffing or gravy? Throw those in too for a further flavor kick. It’s cozy, it’s hot, and it makes your kitchen smell super.

3. Turkey Pot Pie

If you’re feeling fancy, whip up a turkey pot pie. Sauté onions, carrots, and celery in butter, mix for your chopped turkey, and coat everything in creamy gravy. Pour it all right into a pie crust, slap some other crust on top, and bake. It’s consolation meals at their greatest!

4. Turkey Fried Rice

Got some leftover rice putting around too? Perfect! Stir-fry it with turkey, soy sauce, scrambled eggs, and some veggies you want (peas, carrots, and green onions are classics). It’s a quick and gratifying dinner that takes much less time than reheating your antique mashed potatoes.

5. Turkey Sandwiches 2.0

Forget dull cold turkey sandwiches. Instead, toast a few slices of sourdough bread, layer it with turkey, cranberry sauce, stuffing, and maybe even a slice of cheese. Grill it up panini-style, and you’ve got a sandwich that merits a status ovation.

6. Turkey Breakfast Hash

Start your day without work right with a hearty turkey breakfast hash. Sauté diced potatoes till crispy, mix in turkey, onions, and bell peppers, and crack a fried egg on top. Breakfast just was given an extreme improvement.

FAQs About Turkey Leftovers

A: You can hold turkey leftovers in the refrigerator for 3 to 4 days. A: Turkey leftovers are desirable for approximately 3–4 days inside the refrigerator. If you’re not going to apply them in time, toss them in the freezer for up to 3 months. A: Yes, you can freeze cooked turkey. A: Absolutely! Just make sure it’s cooled down absolutely, then save it in an airtight container or freezer bag. Label it so you don’t forget what it’s for. A: How do I avoid dry turkey in leftover dishes? A: Add moisture! Use broths, sauces, or creamy substances to maintain your turkey’s smoothness. A: Are turkey bones beneficial? A: Yes! Use them to make a wealthy, flavorful inventory. Just simmer them with water, veggies, and herbs for some hours. Now go raid your fridge, take hold of that leftover turkey, and allow your culinary creativity to shine!

Juicy Shoulder Steak Recipe: Your Guide to Steak Perfection

Juicy Shoulder Steak Recipe

1–2 shoulder steaks (approximately 1 inch thick)
2 tbsp olive oil (or any oil you make a decision upon)
three garlic cloves (minced)
Fresh rosemary or thyme (a few sprigs)
1 tsp paprika
1 tsp black pepper
1 teaspoon salt
½ tsp chili flakes (non-obligatory, for some warmth)
1 teaspoon butter
Juice of 1/2 a lemon

Let’s Cook

Juicy Shoulder Steak Recipe Prep the Steak

Take the steak out of the fridge at least half an hour before cooking. This allows it to prepare dinner lightly.
Pat it dry with a paper towel and rub with olive oil.
Mix the salt, pepper, paprika, and chili flakes in a bowl, then rub this spice combo everywhere on the steak.

Sear It to Perfection

Heat a skillet or solid iron pan over medium-high heat until it’s smoking hot.
Add a dash of olive oil and lay the steak in the pan. Don’t circulate it for about 3–4 minutes—allow it to increase that golden crust.

Flip & Add Flavor

Flip the steak and decrease the heat barely.
Toss in the minced garlic, butter, and rosemary or thyme. As the butter melts, spoon it over the steak for a further layer of taste.

Finish It Off

Cook the steak for any other 3–4 minutes, relying on your chosen doneness. Use a meat thermometer if you have one (100°F for unusual, 130°F for medium-rare, and so forth).
Squeeze some sparkling lemon juice over the steak over the last minute of cooking.

Rest & Serve

Remove the steak from the pan and permit it to rest for five to ten minutes. This step is prime to keeping it juicy.
Slice it towards the grain and serve it collectively together with your preferred facets—mashed potatoes, a crisp salad, or maybe a hearty loaf of bread.

Tips for Tender Shoulder Steak

Marinate, Marinate, Marinate: If you’ve got time, marinate your steak in a marinade in something acidic like vinegar or lemon juice with olive oil and spices. This lets in breaking down the fibers and tenderizing the beef.
Go Low & Slow: If you don’t need to sear, shoulder steak is remarkable for sluggish cooking or braising.
Don’t Overcook: This cut can get difficult if overdone. Medium-uncommon to medium is the sweet spot.

FAQs
A: The best way to tenderize a shoulder steak is to marinate it in an acidic liquid, such as vinegar or citrus juice, for a few hours before cooking. You can also use a meat mallet to pound the steak, which will break down the muscle fibers and make it more tender.

Healthy Breakfast Recipes for Pregnant Women

Healthy Breakfast Recipes for Pregnant Women

As a pregnant woman, it’s key to eat right for your health and your baby’s growth. But finding time and ideas for a healthy breakfast can be tough. This guide offers tasty, healthy breakfasts just for pregnant women. Learn how to start your day well and support your prenatal health.

How can you ensure your breakfast is packed with the right nutrients to fuel your pregnancy journey?

Key Takeaways

  • Prioritize nutrient-dense, pregnancy-safe ingredients for your morning meals
  • Understand the key vitamins, minerals, and macronutrients needed during each trimester
  • Discover quick, easy, and make-ahead breakfast options to simplify your mornings
  • Explore nourishing smoothie recipes to combat morning sickness
  • Meal prep strategies to ensure a balanced breakfast throughout your pregnancy

The Importance of a Healthy Breakfast During Pregnancy

Eating a nutrient-dense breakfast is key for pregnant women. Your body needs a steady flow of vitamins and minerals. These are vital for your health and your baby’s growth. A balanced morning meal is crucial.

Key Nutrients Needed in Pregnancy

Pregnancy has special needs for your body. You need certain nutrients more than usual. These include:

  • Folic acid to prevent neural tube defects
  • Iron to prevent anemia and support blood production
  • Calcium for strong bones and teeth
  • Protein for tissue growth and repair

Benefits of Starting Your Day Right

Starting your day with a healthy breakfast has many benefits. It boosts your energy and focus. It also gives you the nutrients you and your baby need.

Moreover, a good breakfast can help with morning sickness and gestational diabetes.

Pregnancy TrimesterRecommended Caloric Intake
First Trimester1,800-2,200 calories per day
Second Trimester2,200-2,400 calories per day
Third Trimester2,400-2,600 calories per day

By adding nutrient-dense foods to your breakfast, you and your baby get a great start to the day.

Essential Ingredients for Pregnancy-Safe Breakfast Meals

Eating well during pregnancy is key, and a good breakfast is a great start. When making breakfast for pregnancy, choose ingredients that give you and your baby the vitamins and nutrients you need.

Whole grains like oats, quinoa, and whole-wheat toast are full of carbs, fiber, and B vitamins. Lean proteins such as eggs, Greek yogurt, or tofu help with growth. Fruits and vegetables are rich in antioxidants and folate. Dairy alternatives like almond or soy milk add calcium and vitamin D.

Mixing these ingredients into a balanced breakfast helps meet your pregnancy needs. Pay attention to how you feel and adjust your meals to support a healthy pregnancy.

“Eating a nutrient-rich breakfast sets the tone for the day and provides the energy and nourishment you and your baby need.”

Quick and Easy Breakfast Recipes for Pregnant Women

As a busy expectant mother, finding time for a nutritious breakfast can be tough. Luckily, there are many quick and easy options to start your day right during pregnancy.

5-Minute Protein-Rich Options

For a protein-packed breakfast fast, try a Greek yogurt parfait with fresh berries and chia seed pudding. Another quick favorite is avocado toast with a soft-boiled egg.

Make-Ahead Breakfast Ideas

On weekends, prepare a batch of overnight oats for busy mornings. You can also make a frittata or breakfast casserole ahead and reheat slices all week.

No-Cook Morning Meals

For something refreshing, make a smoothie with Greek yogurt, frozen fruit, and leafy greens. A parfait with yogurt, granola, and fresh fruit is also a quick no-cook option.

Keep your kitchen stocked with eggs, yogurt, whole grains, and produce. This way, you can quickly make many healthy and satisfying breakfasts, even on the busiest mornings.

Nutrient-Dense Smoothie Recipes for Morning Sickness

Pregnant women often face morning sickness, a common but tough experience. Nourishing smoothies can offer much-needed relief and essential nutrients. Making the perfect smoothie can be a big help for expectant mothers.

The ginger smoothie is a great choice. Ginger helps soothe an upset stomach, making it perfect for morning sickness. Mix fresh ginger, banana, and your favorite milk or yogurt for a creamy treat that eases queasiness.

Try a banana spinach smoothie for a nutrient boost. This green smoothie is packed with vitamins and minerals from fresh spinach. Blend it with banana, almond milk, and a bit of honey for a sweet and satisfying start.

If you want something more indulgent, a berry protein shake is ideal. Mix your favorite berries, protein powder, and a splash of milk or Greek yogurt. It’s a filling and energizing breakfast that helps with morning sickness and supports your nutrition needs.

Smoothie RecipeKey IngredientsNutritional Benefits
Ginger SmoothieGinger, banana, milk/yogurtSoothes nausea, provides vitamin C and B6
Banana Spinach SmoothieBanana, spinach, almond milk, honeyRich in folate, iron, and vitamins A and K
Berry Protein ShakeBerries, protein powder, milk/yogurtHigh in antioxidants, supports muscle growth

Adding these smoothie recipes to your morning can help with morning sickness. They nourish your body and support your pregnancy journey.

“Nourishing smoothies can be a game-changer for pregnant women struggling with morning sickness.”

High-Protein Breakfast Options for Gestational Health

For pregnant women, eating a balanced diet rich in protein is key. It helps both the baby and the mom stay healthy. There are many tasty and healthy breakfasts that can meet these protein needs.

Egg-Based Recipes

Eggs are packed with protein, vitamins, and minerals important for the baby’s growth. Pregnant women can make many egg dishes like scrambled eggs, omelets, or frittatas. Adding spinach, tomatoes, or avocado makes them even better.

Plant-Based Protein Solutions

Vegetarian or vegan moms-to-be have many plant-based protein options for breakfast. Vegetarian protein sources like tofu, tempeh, and legumes are great. Calcium-rich foods like fortified non-dairy milk can also be used in breakfasts.

Dairy-Rich Morning Meals

Dairy is full of calcium, which is vital for the baby’s bones. Pregnant women can enjoy Greek yogurt, cottage cheese, or oatmeal with eggs and pregnancy-friendly milk. These meals are both protein-rich and full of calcium.

By trying different high-protein breakfasts, expectant moms can meet their nutritional needs. This supports their baby’s growth and health.

Safe and Unsafe Breakfast Foods During Pregnancy

Pregnancy is a special time, and expecting mothers need to watch what they eat. This is to keep themselves and their baby healthy. Some breakfast foods can be risky because of listeria, salmonella, or mercury.

Raw or undercooked eggs are a big no-no because of salmonella. This means avoiding soft-boiled eggs, sunny-side-up eggs, and certain sauces. Instead, choose cooked eggs like scrambled or hard-boiled.

Unpasteurized dairy products are also off-limits because of listeria. This includes raw milk, soft cheeses, and unpasteurized juices. Opt for pasteurized dairy like yogurt, cottage cheese, and milk instead.

  • Avoid raw or undercooked eggs, which can harbor salmonella
  • Steer clear of unpasteurized dairy products, which may contain listeria
  • Limit fish high in mercury, such as swordfish and shark, during breakfast

Fish with high mercury levels, like swordfish and shark, should be avoided. Mercury is bad for the growing fetus. Choose safer fish like salmon, trout, or canned light tuna instead.

Safe Breakfast FoodsUnsafe Breakfast Foods
Cooked eggsRaw or undercooked eggs
Pasteurized dairy productsUnpasteurized dairy products
Low-mercury fish (e.g., salmon, trout)High-mercury fish (e.g., swordfish, shark)

By following these guidelines, expectant mothers can start their day safely and healthily.

Trimester-Specific Breakfast Meal Planning

Pregnancy brings many changes, including dietary needs. With some planning, you can meet these needs with each trimester. From easing morning sickness in the first to boosting energy in the third, these tips will help you stay healthy.

First Trimester Solutions

Morning sickness can make eating hard in the first trimester. Opt for light, easy-to-digest foods. Try whole-grain toast with avocado or oatmeal with berries. Ginger and peppermint can also help with nausea.

Second Trimester Nutrition

Your calorie needs increase as your baby grows. Make sure your breakfast is full of nutrients. Include iron-rich foods like spinach and lentils. Add protein sources like eggs or Greek yogurt for a balanced meal.

Third Trimester Energy Boosters

Fatigue is common in the third trimester. Start your day with energizing breakfasts. Choose meals with complex carbs and plenty of nutrients. Whole-grain waffles with almond butter and bananas or a veggie-packed frittata are great options.

By planning your breakfasts for each trimester, you and your baby will stay nourished and healthy.

Tips for Meal Prepping Pregnancy Breakfasts

Keeping a healthy diet during pregnancy can be tough, especially with busy schedules. But, with some planning, you can make sure you and your baby get the nutrients you need. Here are some easy tips for meal prepping pregnancy breakfasts.

Batch Cooking for Convenience

Batch cooking is a great way to save time and have healthy breakfasts ready. Spend a few hours on the weekend making big batches of overnight oats, frittatas, or breakfast burritos. These freezer-friendly meals can be divided and reheated easily all week.

Healthy Snacks for Pregnancy Cravings

Pregnancy can make you crave certain foods. It’s smart to have healthy snacks ready. Make batches of trail mix, energy bars, or cut fruits and veggies to curb hunger.

Batch Cooking TipsHealthy Pregnancy Snacks
Prepare large portions of breakfast staples Focus on freezer-friendly meals like overnight oats, frittatas, or breakfast burritos Portion out meals for easy reheatingTrail mix Energy bars Fresh fruits and vegetables

By using batch cooking and having healthy snacks ready, you can nourish yourself and your baby. Even on the busiest mornings, you’ll be well-fed.

“Meal prepping during pregnancy can be a game-changer, allowing you to focus on nourishing your body and your baby without the stress of daily meal planning.”

Conclusion

A healthy breakfast is key for pregnant women to get the right nutrients for their baby. This article has shared important tips and recipes. These help expectant mothers start their day right with a nutritious meal.

There are many breakfast ideas, from protein-rich foods to smoothies, tailored for each pregnancy stage. Eating a balanced breakfast helps pregnant women and their babies get the nutrients they need. It gives them the energy for a healthy day.

Starting your day with a healthy meal is the first step to a nutritious pregnancy. Use the breakfast ideas and tips from this article. They will help you and your baby stay healthy and strong.

FAQ

What are the key nutrients needed during pregnancy?

Expectant mothers need folic acid, iron, calcium, protein, and healthy fats. These nutrients are crucial for both mom and baby’s health.

How does a healthy breakfast benefit pregnancy?

A healthy breakfast gives expectant mothers the nutrients and energy they need. It helps keep them healthy and supports their baby’s growth.

Pregnant women should eat about 300 extra calories a day in the second and third trimesters. This helps meet their increased energy needs.

What are some pregnancy-safe breakfast ingredients?

Safe breakfast ingredients include whole grains, lean proteins, fruits, vegetables, and dairy or non-dairy alternatives. These are good for expectant mothers.

What are some quick and easy breakfast options for busy pregnant women?

Busy pregnant women can try 5-minute protein-rich options, make-ahead meals like overnight oats, and no-cook meals like Greek yogurt parfaits and avocado toast.

How can smoothies help with morning sickness during pregnancy?

Smoothies with ginger and fruit and vegetable blends can help with morning sickness. They also provide essential nutrients.

What are some high-protein breakfast options for gestational health?

High-protein breakfasts include egg-based recipes, plant-based options, and dairy-rich meals. These support both mom and baby’s health.

What foods should pregnant women avoid for breakfast?

Pregnant women should avoid foods that can cause listeria, salmonella, or high mercury. This includes undercooked eggs, unpasteurized dairy, and certain fish.

How should breakfast meals be adjusted throughout the trimesters?

Breakfasts should change to help with morning sickness in the first trimester, meet nutritional needs in the second, and boost energy in the third.

What are some tips for meal prepping pregnancy breakfasts?

Meal prepping tips include batch cooking, making freezer-friendly meals, and keeping healthy snacks on hand. This ensures consistent nutrition during pregnancy.

Healthy Dessert Recipes: Indulge Without the Guilt

Healthy Dessert Recipes: Delicious & Nutritious Treats

In today’s world, we all want to enjoy sweet treats without feeling guilty. Home cooks and chefs are making desserts that are both tasty and good for us. They’re finding ways to make desserts that are healthy and still satisfy our sweet cravings.

Ever thought about what makes a dessert truly “healthy”? Is it just about cutting sugar and using low-calorie options? Or is there more to it? This article will show you how to make desserts that are both delicious and good for you.

Key Takeaways

  • Discover the benefits of incorporating healthy ingredients into your desserts
  • Learn about natural sweeteners and their impact on blood sugar levels
  • Explore a variety of nutrient-dense dessert recipes for guilt-free indulgence
  • Understand the role of plant-based substitutions in creating wholesome sweet treats
  • Discover gluten-free and fruit-based dessert options for special dietary needs

Understanding the Benefits of Healthy Dessert Alternatives

More people want to eat less refined sugar. They look for desserts that are good for them. Choosing natural sweeteners over refined sugar alternatives helps keep diets balanced and blood sugar levels stable.

Natural Sweeteners vs. Refined Sugar

Natural sweeteners like honey, maple syrup, and date syrup are better than refined sugar. They don’t raise blood sugar as much and have health benefits. These sweeteners have antioxidants and minerals that are good for you.

Nutritional Value in Healthy Desserts

Healthy desserts use nutrient-dense ingredients. Adding nuts, seeds, and superfoods makes desserts nutritious. These ingredients turn sweet treats into healthy indulgences.

Impact on Blood Sugar Levels

Eating natural sweeteners in small amounts is better for blood sugar. They have a lower glycemic index. This means they are digested slowly, avoiding big blood sugar spikes.

IngredientNutritional BenefitsImpact on Blood Sugar
HoneyRich in antioxidants, enzymes, and mineralsLower glycemic index than refined sugar
Maple SyrupContains manganese, zinc, and antioxidantsModerate glycemic index, slower absorption
DatesHigh in fiber, vitamins, and mineralsLower glycemic index, slower sugar release

Essential Ingredients for Wholesome Sweet Treats

Making healthy and tasty desserts starts with the right ingredients. You need whole grain flours, healthy fats, and natural sweeteners. Each one is key to making old sweets healthier. Let’s look at what makes your desserts better.

Using whole grain flours like oat, almond, and coconut is a smart choice. They have more fiber, vitamins, and minerals than regular flour. This makes your desserts more nutritious.

Healthy fats, like coconut oil, avocado, and nut butters, add creaminess and health benefits. They help control blood sugar and keep you full longer.

Natural sweeteners, such as honey, maple syrup, and dates, are better than sugar. They give energy slowly, avoiding the crash and keeping blood sugar steady.

Adding superfoods like chia seeds, cacao, and berries to desserts boosts nutrition. These superfoods in desserts add antioxidants, fiber, and vitamins, making your treats healthy and powerful.

Choosing these healthy ingredients lets you make desserts that are good for you. They satisfy your sweet tooth and nourish your body. Explore the possibilities of delicious and healthy desserts with these essential ingredients.

IngredientHealth BenefitsCulinary Uses
Whole Grain FloursHigh in fiber, vitamins, and mineralsBaking cakes, cookies, and breads
Healthy FatsRegulate blood sugar, promote satietyAdding creaminess to desserts, baking
Natural SweetenersGradual energy release, stable blood sugarSweetening baked goods, sauces, and drinks
Superfoods in DessertsRich in antioxidants, fiber, and nutrientsIncorporating into smoothies, puddings, and baked treats

No-Bake Healthy Desserts Recipes for Beginners

Try out no-bake desserts that are both easy healthy treats and beginner-friendly. These quick recipes need little effort and tools. They’re great for those new to making healthy sweets.

Quick Energy Balls Recipes

Boost your energy with homemade energy balls. Mix together oats, nuts, seeds, and natural sweeteners. You can make them chocolatey or fruity. They’re a tasty and healthy snack or dessert.

Yogurt-Based Parfaits

Make stunning healthy desserts with yogurt parfaits. Start with Greek yogurt, then add berries, granola, and honey. It’s a sweet treat that’s good for you.

Frozen Fruit Treats

Enjoy cool frozen fruit treats that are easy healthy and beginner-friendly. Blend fruits with honey or maple syrup. Pour into molds and freeze for a light dessert. They’re perfect for summer.

Check out these quick recipes and beginner-friendly desserts. They’re part of your easy healthy treats collection. Enjoy their simple taste and health benefits.

Desserts Recipes Healthy: A Complete Guide

Making tasty yet healthy desserts is now an art. You might want healthy baking techniques, sugar-free desserts, or low-calorie treats. This guide will help you make nutrient-dense sweets that are good for you and taste great.

Learn healthier baking tricks from our collection. Find out how to use natural sweeteners like honey, maple syrup, or dates for sugar-free desserts. Also, learn to use whole grains, nuts, seeds, and fruits to make low-calorie treats that are full of flavor and nutrients.

  1. Try different flours: Use whole-wheat, almond, or coconut flour instead of all-purpose flour to make your baked goods healthier.
  2. Make smaller portions: Enjoy smaller, more thoughtful servings of nutrient-dense sweets to satisfy your sweet tooth.
  3. Add healthy fats: Use oils, nut butters, or avocado to add moisture and richness to your healthy baking techniques.
  4. Choose natural sweeteners: Use maple syrup, honey, or dates to sweeten your creations without sugar.
  5. Play with texture: Mix in chia seeds, oats, or yogurt to make low-calorie treats that feel good in your mouth.

With these tips, you can make delicious, guilt-free desserts that are good for you. Enjoy the art of healthy baking techniques and savor the joy of nutrient-dense sweets that make your meals special.

Plant-Based Substitutions for Traditional Dessert Ingredients

More people want healthier and sustainable desserts. Home bakers and chefs are finding plant-based substitutes for common ingredients. These include vegan egg alternatives, dairy-free options, and natural thickeners. They’re changing how we make sweet treats.

Vegan Egg Alternatives

For vegan desserts, flax eggs and aquafaba (chickpea liquid) work great. They add structure and moisture. Plus, they’re good for you.

Dairy-Free Options

Traditional desserts often use milk, cream, and butter. But now, dairy-free alternatives make it easy to make tasty treats without animal products. Nut milks, coconut cream, and plant-based spreads are great options.

Natural Thickeners

For the right texture, try agar-agar, arrowroot starch, and xanthan gum. They’re natural egg substitutes and dairy-free alternatives. They help thicken desserts like puddings and mousses.

Using these plant-based substitutes opens up new possibilities in the kitchen. It lets home cooks and bakers make delicious, healthy desserts for everyone.

Gluten-Free Dessert Options for Special Diets

For those with celiac disease or gluten sensitivities, finding tasty desserts can be hard. But, the world of gluten-free baking now offers many celiac-friendly desserts. These are both healthy and yummy. We’ll look at alternative flours and grain-free treats that are perfect for satisfying your sweet tooth without harming your health.

Alternative flours are key in gluten-free baking. Almond flour and coconut flour are favorites for good reasons. Almond flour is packed with protein, fiber, and healthy fats. Coconut flour is low in carbs and adds a sweet touch to desserts. These flours are great for making everything from cakes and cookies to custards and puddings.

Starting with gluten-free baking can seem daunting. But, with a few tips, you can make delicious celiac-friendly desserts. Try mixing different alternative flours and use natural sweeteners like honey or maple syrup. By exploring gluten-free baking, you can enjoy sweet treats that are also good for you.

Gluten-Free FlourNutritional BenefitsIdeal for
Almond FlourHigh in protein, fiber, and healthy fatsCakes, cookies, and custards
Coconut FlourLow in carbohydrates, high in fiberMuffins, breads, and pancakes
Tapioca FlourStarchy and helps with bindingPie crusts, breading, and thickening

Fruit-Based Desserts for Natural Sweetness

Looking for healthier sweet treats? Fruit-based desserts are a great choice. They use the natural sweetness of fruits. This makes them tasty and full of vitamins, minerals, and fiber. You can find everything from berry recipes to tropical fruit desserts to enjoy.

Berry-Based Recipes

Berries like blueberries, raspberries, and strawberries are full of flavor and nutrients. They add sweetness and color to your desserts. Try a Strawberry Chia Pudding or a Blueberry Almond Crumble for a tasty, healthy snack.

Tropical Fruit Combinations

Imagine a tropical getaway with pineapple, mango, and coconut desserts. Make a Pineapple Coconut Chia Parfait or a Mango Lime Sorbet. These desserts are refreshing and naturally sweet.

Baked Fruit Delights

Baking fruits brings out their natural sweetness. Try roasting apples with cinnamon for an Apple Crisp. Or bake pears with honey and walnuts for a Baked Pear dish. These fruit desserts highlight nature’s sweetness.

Adding fruit desserts to your menu means enjoying naturally sweet treats. They’re good for you and taste amazing. Dive into the world of berry recipes and tropical fruit desserts for a healthier sweet fix.

Conclusion

The world of healthy dessert lifestyle is full of tasty and nutritious options. It lets us enjoy sweet treats without feeling guilty. With the right recipes, we can indulge in desserts that are good for us.

Looking to cut down on sugar or eat more plants? This guide has you covered. It shows how to make delicious, healthy desserts. From energy balls to yogurt parfaits, there’s a world of possibilities.

Keep exploring the healthy dessert lifestyle and enjoy the journey. Try out the recipes and see how they can make your life better. It’s all about making tasty, healthy treats that make you feel great.

FAQ

What are the benefits of choosing healthy dessert alternatives over traditional sugary treats?

Healthy dessert alternatives help manage blood sugar levels better. They are also more nutritious and have less refined sugar. These treats use natural sweeteners, whole grain flours, and nutrient-rich ingredients. This makes them a healthier choice for sweet cravings.

What are some essential ingredients for creating nutritious desserts?

For wholesome desserts, use whole grain flours, healthy fats like coconut oil, and natural sweeteners like honey. Superfoods like chia seeds and cacao are also key. These ingredients boost flavor and add nutrients, fiber, and antioxidants.

What are some easy, no-bake healthy dessert recipes for beginners?

Beginners can start with no-bake recipes like energy balls, yogurt parfaits, and frozen fruit treats. These recipes are simple and require little equipment. They’re perfect for those new to making healthy sweets.

What are some plant-based substitutions for traditional dessert ingredients?

For plant-based desserts, use vegan egg alternatives like flax eggs and aquafaba. Choose dairy-free options like nut milks and coconut cream. Natural thickeners like agar-agar and arrowroot starch also work well. These substitutions make delicious, plant-based desserts.

What are some gluten-free dessert options for those with special dietary needs?

For those with gluten sensitivities, try recipes with almond and coconut flour. These grain-free options are safe for those with celiac disease or gluten sensitivities. They offer tasty and safe dessert choices.

How can fruit-based desserts provide natural sweetness?

Fruit-based desserts, like berry and tropical fruit recipes, are naturally sweet. They are also rich in nutrients. The natural sugars and fiber in fruits satisfy sweet cravings while offering health benefits.

Classic Chicken Salad Recipe with Eggs: A Gourmet Delight

Classic Chicken Salad Recipe with Eggs | Easy Homemade Dish

Are you looking for a tasty, protein-rich salad? This classic chicken salad with eggs is perfect. It’s a favorite in American homes, mixing tender chicken, creamy eggs, and fresh ingredients. It’s great for a quick lunch, a picnic, or any special event.

So, why do people love chicken and eggs together in a salad? Find out in this article. It’s a must-try for anyone who loves cooking or eating great food.

Key Takeaways

  • Discover the rich flavor and nutrition of classic chicken salad with eggs
  • Learn how to easily prepare this versatile and crowd-pleasing dish at home
  • Explore the health benefits of combining chicken and eggs in a salad
  • Uncover essential ingredients and kitchen tools for the perfect chicken salad
  • Gain expert tips and tricks to elevate your chicken salad game

Why This Classic Chicken Salad with Eggs is a Must-Try

Chicken and eggs together in a salad is a nutritional powerhouse. This dish is not just tasty but also full of vitamins and minerals. It’s great for your health.

Health Benefits of Combining Chicken and Eggs

Chicken is lean and high in protein, with little fat. Eggs are full of vitamin B12, riboflavin, and selenium. Together, they make a dish that boosts muscle, energy, and immune health.

  • High in protein to support muscle and tissue repair
  • Packed with essential vitamins and minerals for overall health
  • Helps to keep you feeling full and satisfied

Perfect for Meal Prep and Special Occasions

This chicken salad with eggs is versatile. It’s great for meal prep, offering a healthy, protein-rich option for lunch or snacks. It’s also a hit at parties and special events.

Meal PreppingSpecial Occasions
Easy to make in advanceDelicious and satisfying
Portable and convenientSuitable for a variety of events
Provides a nutritious high-protein mealImpresses guests with its flavor and presentation

Looking for a healthy meal or a dish to impress at parties? Try this classic chicken salad with eggs. It’s packed with nutritional benefits and is super versatile.

Essential Ingredients for the Perfect Chicken Salad Recipe with Eggs

Making the best chicken salad with eggs needs the right mix of fresh, quality ingredients. At its core, it has tender chicken breast and eggs that add protein. A creamy mayonnaise dressing is key, along with crunchy celery and sweet onion.

Here’s what you need for this tasty chicken salad:

  • Cooked chicken breast, cubed or shredded (about 2 cups)
  • Hard-boiled eggs, chopped (around 3-4 eggs)
  • Mayonnaise (1/2 to 3/4 cup, for creaminess)
  • Celery, diced (1/2 cup)
  • Onion, finely chopped (1/4 cup)
  • Salt and pepper to taste
  • Optional: Chopped parsley, dill, or tarragon for more flavor

Choosing and mixing these key ingredients will help you make a delicious chicken salad. The freshest, best ingredients are crucial for success.

“The secret to a great chicken salad is in the balance of flavors and textures. The creamy mayonnaise, crunchy celery and onion, and tender chicken and eggs create a harmonious blend that’s simply irresistible.”

With these ingredients, you’re set to make the perfect chicken salad with eggs. Next, we’ll guide you through how to prepare it step by step.

Kitchen Tools and Equipment Needed

Making the perfect classic chicken salad with eggs needs a few key tools. You’ll need a food processor, mixing bowls, and a cutting board. The right tools make preparing the salad easy.

Time-Saving Utensils and Gadgets

Get a food processor to chop the chicken finely and mix the ingredients. You’ll also need sturdy mixing bowls in different sizes for mixing and serving. A cutting board is essential for chopping ingredients.

Storage Containers Recommendations

After making the salad, it’s important to store it right to keep it fresh. Use high-quality airtight containers for leftovers or meal prep. These containers keep flavors in and prevent drying out.

“Having the right kitchen tools on hand can streamline the preparation process and ensure your classic chicken salad with eggs turns out perfectly every time.”

With these essential tools and storage solutions, you’re ready to make a tasty classic chicken salad with eggs.

Step-by-Step Preparation Guide

Making the perfect chicken salad with eggs is easy. It involves a few key steps. Let’s go through them to make a tasty homemade dish.

Cooking the Chicken

Begin by cooking the chicken breasts. You can bake, poach, or grill them. Make sure they’re cooked well and tender before chopping them.

Boiling the Eggs

Boil water in a pot and add the eggs carefully. Cook for 6-8 minutes for hard-boiled eggs. Then, cool them in an ice bath, peel, and chop.

Chopping the Vegetables

Dice the celery, onion, and other veggies like green bell peppers or pickles. Make sure they’re all the same size for a smooth salad.

Mixing the Ingredients

In a big bowl, mix the chicken, eggs, and veggies. Start with a little mayonnaise and add more as needed. Season with salt, pepper, and herbs like dill or paprika.

Follow these steps to make a tasty chicken salad with eggs. It’s great for any time, from quick lunches to big gatherings.

Expert Tips for Making Creamy Chicken Salad

Making the perfect chicken salad is all about a creamy texture and great taste. As a seasoned chef, I’m here to share my best tips. These will help you make your chicken salad as good as the ones in restaurants.

Choosing the Right Mayonnaise

The right mayonnaise is crucial for a rich chicken salad. Go for a high-quality, full-fat mayonnaise for the best taste. Stay away from low-fat or “light” versions, as they can make the salad watery.

For flavor, choose a classic, neutral-tasting mayonnaise. This lets the other ingredients stand out.

Seasoning Secrets

Seasoning is essential for a great chicken salad. Begin with salt and pepper, then add herbs and spices for more flavor. Try dried dill, paprika, or garlic powder for a nice twist.

The goal is to enhance the chicken and eggs without overpowering them.

Texture Enhancement Techniques

To get the perfect creamy texture, use a few tricks. Chop or shred the chicken into small pieces so the mayonnaise coats it well. Also, mash some of the egg yolks gently to make the salad creamy and velvety.

Follow these expert tips to make a chicken salad that’s sure to impress. Try different flavors and textures to create your own unique dish. Enjoy the creamy, tasty results and wow your loved ones with your cooking skills.

Serving Suggestions and Pairing Options

This classic chicken salad with eggs is perfect for many uses. It’s great as a sandwich filling, salad topping, or side dish. It can make any meal more enjoyable.

Try it in a sandwich with toasted bread or croissants. Add lettuce, tomatoes, or pickles for extra flavor. Or, put it in a wrap with greens and side dishes like carrots or avocado.

For a main course, place it on a bed of greens. Add fresh herbs, nuts, or balsamic vinaigrette for a light meal.

It’s also good with sides like roasted potatoes, asparagus, or a green salad. The creamy texture and savory flavors go well with many side dishes.

Finish the meal with a refreshing drink. Choose a white wine, lemonade, or iced tea. There are many ways to enjoy this versatile dish.

Storage Tips and Make-Ahead Instructions

Keeping your classic chicken salad with eggs fresh is key. Follow these easy steps to keep it delicious:

Proper Refrigeration Methods

After making your chicken salad, refrigerate it right away. Put it in an airtight container and store it in the coldest part of your fridge. This is usually the back shelves. Don’t let it sit at room temperature for over two hours. This can lead to harmful bacteria growth, affecting food safety.

How to Maintain Freshness

  • Eat the salad within 3-4 days for the best freshness.
  • If you’re keeping it longer, split it into smaller parts. Store them in separate containers. This helps keep air out and prevents spoilage.
  • When reheating leftovers, make sure they’re hot enough. This stops foodborne pathogens from growing.

By sticking to these refrigeration and storage tips, your chicken salad stays fresh and tasty. It’s perfect for meal prep and special events.

Common Variations and Substitutions

Chicken salad is a versatile dish that can be changed in many ways. You can make it fit different diets or just try new tastes. It’s easy to make this classic dish your own.

Dietary-Friendly Options

  • For a gluten-free version, skip the bread or crackers. Serve it on greens or gluten-free bread.
  • On a low-carb or keto diet? Try it in avocado halves or with cucumber slices for a healthy snack.
  • Vegans and vegetarians can use chickpeas or tofu instead of chicken for a plant-based option.

Flavor Variations

Want to spice up the classic recipe? Add fresh herbs like dill, basil, or tarragon. For crunch, mix in chopped celery, apples, or grapes. Add a kick with cayenne pepper or smoked paprika.

Try using Greek yogurt or avocado instead of mayonnaise. This gives a creamy, tangy taste.

“The beauty of chicken salad is that it’s a blank canvas for your culinary creativity. Don’t be afraid to experiment with different ingredients and flavors to find your perfect combination.”

Looking to meet dietary needs or just want to try new flavors? The options for recipe variations, ingredient substitutions, and flavor additions are endless with this classic dish.

Conclusion

This classic chicken salad with eggs is loved by many. It’s easy to make and tastes amazing. The mix of roasted chicken, hard-boiled eggs, and mayonnaise makes it a great choice for quick meals or special events.

You can serve it on greens, in sandwiches, or with crackers. It’s a hit with everyone, making it a must-have in your kitchen. You can also try different seasonings and add-ins to make it your own.

Try making this chicken salad today. Its mix of flavors and textures will make it a favorite in your home. It’s a dish you’ll want to make over and over again.

FAQ

What are the main ingredients in this classic chicken salad recipe?

The key ingredients are cooked chicken breast, hard-boiled eggs, and mayonnaise. You’ll also need celery, onion, and seasonings.

What are the health benefits of combining chicken and eggs in this salad?

Chicken and eggs are great for protein, helping muscles grow and repair. They also have vitamins and minerals, making the salad nutritious and filling.

Is this chicken salad recipe suitable for meal prepping?

Yes, it’s perfect for meal prep. You can make it ahead and store it in airtight containers. It’s great for busy days or special events.

What types of mayonnaise work best for this recipe?

Use a high-quality, full-fat mayonnaise for the best taste and texture. Low-fat or reduced-calorie mayonnaise can change the salad’s flavor and feel.

How should the chicken and eggs be prepared for this recipe?

Cook the chicken until it’s fully done, then shred or dice it. Hard-boil the eggs, cool them, and chop or slice them before adding to the salad.

What are some tips for enhancing the texture of the chicken salad?

For a creamy texture, balance the mayonnaise with other ingredients. Chop the veggies and eggs small to mix well and keep the salad smooth.

How long can the chicken salad be stored, and what are the best storage methods?

Store it in an airtight container in the fridge for 3-4 days. Keep it chilled and avoid room temperature to keep it safe and fresh.

Are there any common variations or substitutions for this recipe?

Yes, you can add grapes, pecans, or dried cranberries for sweetness and crunch. For different tastes, try Greek yogurt instead of mayonnaise or use turkey or tuna.

Delicious Sweet Breakfast Recipes to Start Your Day

Imagine waking up to the mouthwatering aroma of freshly baked pastries or the fluffy goodness of homemade pancakes. Starting your day with a sweet breakfast can be the ultimate indulgence. But what if you could create these delectable morning treats right at home? Prepare to embark on a culinary journey as we explore a variety of sweet breakfast recipes that will satisfy your morning cravings and elevate your breakfast experience.

Are you ready to discover the secrets to crafting the perfect French toast, fluffy pancakes, or decadent cinnamon rolls? Join us as we unveil the essential ingredients, time-saving tips, and innovative variations that will transform your breakfast routine into a delightful celebration of flavors.

Whether you’re in the mood for a classic breakfast favorite or an unexpected twist on a morning classic, this guide has you covered. Prepare to be inspired and empowered to create your own sweet breakfast masterpieces that will have your taste buds dancing with joy.

Key Takeaways

  • Explore a wide range of sweet breakfast recipes to start your day on a delightful note.
  • Discover the essential ingredients and time-saving tips to elevate your breakfast game.
  • Uncover classic favorites and innovative variations to satisfy your morning cravings.
  • Learn how to create sweet breakfast treats that are perfect for any occasion.
  • Discover healthy and make-ahead options to simplify your morning routine.

Essential Ingredients for Sweet Breakfast Creations

Making tasty sweet breakfast dishes starts with the right ingredients. Whether it’s fluffy pancakes, French toast, or waffles, you need a good pantry and fresh items. Let’s look at the key ingredients and shortcuts to make your mornings easier.

Pantry Staples for Sweet Breakfasts

Your pantry is the base for sweet breakfasts. Keep these items on hand to be ready for anything:

  • All-purpose flour
  • Granulated sugar
  • Brown sugar
  • Baking powder and baking soda
  • Vanilla extract
  • Cinnamon
  • Maple syrup
  • Honey
  • Butter or oil for cooking

Fresh Ingredients Shopping Guide

Adding to your pantry, these fresh items will make your breakfasts even better:

  1. Eggs
  2. Milk or non-dairy milk alternatives
  3. Seasonal fruits (berries, bananas, apples, etc.)
  4. Whipped cream
  5. Nuts and seeds

Time-Saving Ingredient Substitutions

When you’re short on time, these swaps can save the day:

IngredientSubstitution
ButtermilkMilk + lemon juice or vinegar
Brown sugarGranulated sugar + molasses
Vanilla extractVanilla bean paste or powder
Maple syrupHoney or agave nectar

With these ingredients and smart swaps, you’re set for a world of sweet breakfasts. Get creative and enjoy your mornings!

Classic French Toast Variations

Make your breakfast special with a variety of French toast recipes. From the traditional to creative twists, these dishes are a great way to start your day.

The brioche French toast is a favorite. It uses rich, buttery brioche instead of regular bread. Add maple syrup and powdered sugar for a sweet treat.

For a filling breakfast, try stuffed French toast. Fill it with cream cheese, fresh fruit, or chocolate. It’s a mix of flavors and textures.

Be bold with French toast casseroles. They’re easy to make ahead and perfect for weekends or busy mornings.

Whether you pick a French toast recipe, these classics will make your breakfast amazing. They’re sure to make your day start off right.

Fluffy Pancakes and Waffle Combinations

Make your breakfast special with the perfect pancakes and waffles. Learn how to make fluffy pancakes and crispy waffles. Your taste buds will thank you.

Perfect Pancake Making Tips

Getting the right pancake texture is simple. Just follow these easy steps for perfect pancakes every time:

  1. Use room-temperature ingredients for a light and airy batter.
  2. Gently whisk the batter to avoid overmixing, which can lead to tough pancakes.
  3. Let the batter rest for 10-15 minutes before cooking to allow the gluten to relax.
  4. Use a griddle or nonstick pan preheated to medium-low heat for even cooking.
  5. Resist the urge to flip the pancakes too soon – wait until the edges are set and bubbles appear on the surface.

Creative Waffle Toppings

Waffles are more than just for syrup! Try these amazing toppings:

  • Fresh Berries: Strawberries, blueberries, or a mixed berry compote add a burst of sweetness.
  • Nutty Goodness: Chopped pecans, walnuts, or a drizzle of hazelnut spread bring warmth and crunch.
  • Decadent Chocolate: Melted chocolate chips, chocolate sauce, or a dusting of cocoa powder for a rich indulgence.
  • Savory Twist: Crumbled bacon, shredded cheese, or a fried egg for a unique sweet-and-savory experience.

Make-Ahead Batter Secrets

Get ready for busy mornings with make-ahead batter. Mix dry and wet ingredients separately. Then, combine just before cooking. Store in the fridge for up to 3 days or freeze for up to 3 months. Thaw and cook for a quick breakfast.

With these tips, you’ll be a breakfast pro. Serve fluffy pancakes and crispy waffles that everyone will love. Enjoy making pancakes and waffles and start your day with a sweet treat.

Sweet Breakfast Recipes for Special Occasions

Make your breakfasts special with these sweet recipes. They’re perfect for brunches, holiday mornings, and other big days. These dishes will wow your guests and make your family happy.

Indulgent Brunch Casserole

Begin your day with this creamy brunch casserole. It has layers of croissants, custard, and chocolate chips. Bake it early and warm it up for a stunning holiday breakfast.

Festive French Toast Bake

Turn French toast into a festive dish with this recipe. It’s filled with cranberries, pecans, and maple syrup. It’s great for Christmas or New Year’s brunch and will wow your guests.

RecipePrep TimeCook TimeTotal Time
Indulgent Brunch Casserole20 minutes45 minutes1 hour 5 minutes
Festive French Toast Bake15 minutes45 minutes1 hour

These sweet breakfasts add elegance to your special days. Impress your guests with these treats and start your day with joy.

Quick and Easy Morning Pastries

It’s easy to skip homemade pastries in the morning rush. But, with a few tricks, you can make delicious breakfast treats fast. Learn how to make quick Danish recipes, simple cinnamon rolls, and easy breakfast muffins. Your family will love starting the day with these treats.

15-Minute Danish Recipes

Don’t think Danish pastries are only for fancy bakeries. With simple ingredients and a quick method, you can make your own in 15 minutes. Try apple, cherry, or cheese-filled Danish for a tasty morning treat.

Simple Cinnamon Roll Shortcuts

Homemade cinnamon rolls are a favorite, but they can take a lot of time. Use these shortcuts to make warm, gooey cinnamon rolls quickly. Use refrigerated dough, a quick glaze, and smart assembly tricks to save time.

Easy Breakfast Muffins

Muffins are perfect for a quick breakfast. With a few hacks, you can have freshly baked muffins in no time. Try different flavors like blueberry or chocolate chip for a tasty morning treat.

RecipePrep TimeKey Ingredients
15-Minute Danish15 minutesPuff pastry, fruit preserves, cream cheese
Simple Cinnamon Rolls30 minutesRefrigerated dough, cinnamon, brown sugar, cream cheese
Easy Breakfast Muffins25 minutesFlour, sugar, eggs, milk, fruit or chocolate chips

“Baking is like washing dishes, you just have to get in there and do it. It’s messy and wonderful.” – Julia Child

Healthy Sweet Breakfast Options

Starting your day with sweet breakfasts is a joy. These low-sugar morning recipes and wholesome breakfast treats meet your sweet tooth needs. They also give you the nutrients your body needs to start the day right.

Greek yogurt parfaits are a great choice. Mix plain Greek yogurt with fresh berries, a bit of honey, and some granola. This combo is full of protein and fiber. The sweetness of the fruit and the tangy yogurt make for a perfect balance.

Baked oatmeal is perfect for a filling nutritious sweet breakfast. Mix rolled oats, mashed banana, cinnamon, and a bit of maple syrup. Bake until it’s golden and smells amazing. Add sliced almonds, dried cranberries, or peanut butter for extra flavor and nutrition.

Healthy Sweet Breakfast OptionsNutritional Benefits
Greek Yogurt ParfaitsHigh in protein, calcium, and probiotics
Baked OatmealRich in fiber, complex carbohydrates, and heart-healthy fats
Chia PuddingPacked with omega-3 fatty acids, fiber, and antioxidants
Avocado Toast with HoneyProvides healthy fats, vitamins, and a natural sweetener

Chia pudding is a quick and easy low-sugar morning recipe. Mix chia seeds with almond milk, a bit of honey, and your favorite berries or fruit. Refrigerate it overnight for a creamy and satisfying wholesome breakfast treat.

Avocado toast with honey is another tasty and healthy option. The creamy avocado gives you healthy fats, and the honey adds natural sweetness to this nutritious sweet breakfast.

“Start your day with a nourishing and delightful sweet breakfast that fuels your body and satisfies your taste buds.”

Adding these healthy sweet breakfast options to your morning routine is a great way to enjoy tasty foods. They support your health and well-being.

Make-Ahead Sweet Breakfast Ideas

Busy mornings can make us forget about a good breakfast. But, with some planning, you can have tasty, sweet breakfasts without stress. Try these make-ahead ideas to make your mornings easier and start your day well.

Overnight Oats Variations

Overnight oats are perfect for busy days. Just mix oats, milk or yogurt, and your favorite toppings in a jar the night before. In the morning, you’ll have a healthy, tasty breakfast ready. Try peanut butter and banana, chocolate and berry, or apple pie flavors for a delicious start.

Freezer-Friendly Options

Make batches of breakfast sandwiches, breakfast burritos, or mini quiches on the weekend. Then, freeze them. When you’re ready, just reheat them for a filling, protein-rich freezer breakfast meal.

Meal Prep Guidelines

  • Set aside time on the weekend to prep your overnight breakfast recipes or freezer breakfast meals.
  • Get quality airtight containers or reusable bags for storing your breakfasts.
  • Label containers with what’s inside and when you made it to keep things fresh.
  • Learn about food storage to keep your breakfast meal prep items fresh longer.

Using these make-ahead tips, you can enjoy yummy sweet breakfasts without the morning rush. Prepare your favorites ahead of time and start your day with a healthy, tasty meal.

Seasonal Sweet Breakfast Dishes

Make your mornings special with seasonal sweet breakfast recipes. They highlight the best of nature’s offerings. Enjoy everything from fresh summer berries to warm winter spices all year.

Start the warmer months with a Mixed Berry Yogurt Parfait. It’s made with Greek yogurt, strawberries, blueberries, and granola. When fall arrives, try a Pumpkin Spice Latte Waffle for a cozy treat. For the holidays, Gingerbread Pancakes with whipped cream and maple syrup are perfect.

These sweet breakfasts let you enjoy nature’s best all year. They make mornings delightful and full of flavor. So, let’s celebrate the seasons with these tasty dishes.

FAQ

What are the essential ingredients for creating sweet breakfast recipes?

For sweet breakfasts, you need basics like flour, sugar, eggs, butter, and baking powder. Don’t forget fresh ingredients like fruit, nuts, and dairy. They add flavor and texture to your morning treats.

How can I make classic French toast more exciting?

To spice up French toast, try using brioche bread. Add a filling like cream cheese or fruit. Top it with caramel, whipped cream, or candied nuts for a special touch.

What are some tips for making perfect pancakes and waffles?

For great pancakes, use room temperature ingredients and don’t over-mix. Let the batter rest before cooking. For waffles, a hot, greased iron is key. Try creative toppings to elevate your breakfast.

How can I make sweet breakfast recipes healthier?

To healthify sweet breakfasts, use whole grain flours and less sugar. Add more fruits and nuts, and choose low-fat dairy. Try alternative sweeteners and baking methods for nutritious morning treats.

What are some make-ahead sweet breakfast ideas?

Try overnight oats, freezer-friendly breakfast sandwiches or burritos, and batch-prepared muffins or pastries. These ideas save time and let you enjoy a tasty start to your day with ease.

How can I incorporate seasonal flavors into my sweet breakfast dishes?

Use fresh, in-season fruits like berries in summer, apples and pumpkin in fall, and citrus in winter. Experiment with spices and ingredients that match each season’s flavors.

10 Easy Eggplant Pasta Recipes for Dinner Tonight

10 Easy Eggplant Pasta Recipes for Dinner Tonight

Eggplant and pasta are a great team for tasty meals. They can make everything from classic Mediterranean dishes to creamy casseroles. These recipes are perfect for a quick dinner or a special weekend meal. They’re sure to become favorites in your household.

Key Takeaways

  • Eggplant pasta dishes offer a tasty and nutritious way to enjoy Italian cuisine at home.
  • These recipes feature a variety of cooking methods, from sautéing and roasting to baking, to create unique flavor profiles.
  • Eggplant provides a meaty texture and versatile flavor that complements different pasta types and sauce combinations.
  • Many of these recipes can be prepared quickly, making them ideal for busy weeknight dinners.
  • Eggplant pasta dishes are often vegetarian-friendly, providing a satisfying meatless option for plant-based diets.

Why Eggplant and Pasta Make the Perfect Dinner Combination

The mix of eggplant and pasta is a culinary dream. These ingredients work well together, making a meal that’s both tasty and healthy. You’ll want to have more of it.

Nutritional Benefits of Eggplant in Pasta Dishes

Eggplant is full of nutrition. It has vitamins, minerals, and antioxidants. It’s also high in fiber and low in calories, making it great for a healthy dinner.

Adding eggplant to pasta makes the dish creamy and nutritious. It’s a win-win for your meal.

Best Pasta Types for Eggplant Dishes

Choosing the right pasta varieties is key for eggplant dishes. Penne, rigatoni, and spaghetti are top picks. Their shapes and textures match eggplant’s softness.

Eggplant’s strong flavors go well with these pasta types. It makes for a meal that’s both tasty and satisfying.

“Eggplant and pasta are the perfect dinner duo – the vegetable’s creaminess and robust flavor beautifully complements the pasta’s versatility and comforting qualities.”

Looking for a Mediterranean dish or a creamy pasta bake? Eggplant and pasta will impress your taste buds. It’s a nutritious and fulfilling meal.

Essential Kitchen Tools for Making Eggplant Pasta

Creating delicious eggplant pasta dishes is easier with the right tools. Sharp knives, versatile pots, and pans are key. They help you prepare, cook, and serve tasty eggplant pasta.

Indispensable Tools for Eggplant Pasta Prep

  • Sharp Chef’s Knife – A top-notch chef’s knife is crucial for slicing, dicing, and chopping eggplant. It makes your pasta dishes perfect.
  • Vegetable Peeler – A sharp vegetable peeler is handy for peeling eggplant when needed.
  • Colander – A colander is essential for draining and rinsing pasta after boiling. It prepares your noodles for the eggplant sauce.

Cooking Essentials for Eggplant Pasta

  1. Large Stockpot – A big stockpot is great for boiling pasta and simmering eggplant sauces.
  2. Nonstick Skillet – A quality nonstick skillet is perfect for sautéing eggplant and vegetables. It prevents sticking and burning.
  3. Pasta Maker – For homemade eggplant pasta, a pasta maker is a must. It lets you make your own fresh noodles.
Kitchen ToolPurposeWhy It’s Essential
Chef’s KnifeCutting and chopping eggplantEnsures precise, uniform eggplant pieces for even cooking
ColanderDraining and rinsing cooked pastaPrevents the pasta from becoming waterlogged and soggy
Nonstick SkilletSautéing eggplant and other vegetablesAllows for efficient, mess-free cooking of eggplant and other ingredients

With these tools, you’ll be ready to make amazing eggplant pasta dishes. They’re sure to impress anyone.

Classic Mediterranean Eggplant Pasta with Fresh Herbs

Dive into the vibrant world of the Mediterranean with our eggplant pasta dish. It’s a mix of eggplant’s richness and fresh herbs’ aroma. This creates a perfect balance of taste and texture.

Preparing the Perfect Eggplant

Getting the eggplant right is key. Choose firm, glossy eggplants. Slice them into 1-inch rounds and salt them for 30 minutes. This removes bitterness, making them creamy when cooked.

Sauce Components and Herbs

The sauce for this pasta alla Norma celebrates Mediterranean flavors. Start by sautéing garlic and onions in olive oil. Add diced tomatoes, fresh basil, and oregano. Let it simmer to blend the flavors.

Cooking Process

  1. Preheat your oven to 375°F (190°C).
  2. Put the eggplant slices on a baking sheet, drizzle with olive oil, and roast for 20-25 minutes. They should be tender and golden.
  3. Cook your pasta, like penne or rigatoni, as the package says.
  4. Combine the roasted eggplant with the tomato-herb sauce, making sure each slice is coated.
  5. Mix the cooked pasta with the eggplant-tomato sauce, letting the flavors combine.
  6. Top with fresh basil and Parmesan cheese, if you like.

Enjoy the taste of the Mediterranean cuisine in every bite of this fresh herbs-filled pasta alla Norma. It’s a mix of tender eggplant, flavorful tomato sauce, and fragrant herbs. It’s like a trip to the Mediterranean’s sunny shores.

Creamy Roasted Eggplant Fettuccine

Make your pasta night special with this creamy roasted eggplant fettuccine recipe. Roasting the eggplant makes a smooth sauce that goes great with fettuccine noodles. It’s a feast of roasted vegetables and their rich flavors in a creamy pasta sauce.

Roasting the Eggplant

The secret to this dish is roasting the eggplant. Cut it into small pieces and mix with olive oil, salt, and pepper. Place the eggplant on a baking sheet and roast until tender and caramelized, about 25-30 minutes.

Creating the Creamy Sauce

After roasting, blend the eggplant into a creamy sauce. Use a blender or food processor to puree it. Add heavy cream, parmesan, and fresh herbs like basil or parsley. Blend until smooth and well mixed.

Bringing it all Together

Cook the fettuccine as directed, then mix it with the creamy eggplant sauce. Add extra parmesan, black pepper, and herbs for a beautiful dish.

Enjoy the creamy texture and bold flavors of this creamy roasted eggplant fettuccine recipe. It’s a comforting meal that will impress everyone.

Spicy Eggplant Pasta with Tomato Sauce

Make your pasta night exciting with a spicy eggplant dish. It combines a rich tomato sauce with bold spices. This mix creates a perfect balance that will make you want more.

Spice Blend Selection

The secret to great spicy eggplant pasta is the spice blend. Use chili flakes, smoked paprika, and ground cumin for a warm taste. Add cayenne pepper or harissa paste for extra heat.

Heat Level Adjustments

  • For a milder taste, use less chili flakes and a softer spice mix.
  • Love spicy food? Increase chili flakes or add sliced jalapeños to the sauce.
  • Adjust the heat to match your taste and your guests’.

Finding the right mix between the tomato-based sauce and spices is key. This ensures the flavors work well together.

With a few tweaks, you can wow your family and friends with spicy eggplant pasta. Pair it with a salad or garlic bread for a full meal.

One-Pot Eggplant Pasta Recipes

Craving a delicious and hassle-free dinner? Look no further than one-pot eggplant pasta recipes! These simple dishes not only make cleanup easy but also pack a lot of flavor. Forget about juggling multiple pots and pans – with a single-pot approach, you can enjoy tender eggplant and perfectly cooked pasta.

One of the key benefits of one-pot eggplant pasta is the ease of preparation. Cooking the eggplant and pasta together saves time. Plus, the starch from the pasta makes a velvety sauce that coats every bite. This makes for a satisfying and comforting meal, perfect for busy weeknights.

To get the perfect texture, dice the eggplant into bite-sized pieces. Let it soften as the pasta cooks. This way, the eggplant is tender and blends well with the dish. With a few simple seasonings and the right pasta, you’ll have a one-pot meal that’s sure to delight your taste buds.

RecipePrep TimeCook TimeTotal Time
One-Pot Eggplant Penne15 minutes30 minutes45 minutes
Creamy One-Pot Eggplant Linguine20 minutes35 minutes55 minutes
Skillet Eggplant Spaghetti10 minutes25 minutes35 minutes

Embrace the convenience and flavor of one-pot eggplant pasta recipes for a delightful and fuss-free dining experience. Savor the perfect blend of tender eggplant and perfectly cooked pasta, all in a single pot.

Vegetarian Eggplant Pasta Bake

Looking for a tasty vegetarian casserole? Try a baked eggplant pasta dish. It’s a mix of creamy eggplant and warm pasta. This combo makes a meal that everyone will love.

Cheese Selection Tips

Choosing the right cheese is crucial for your eggplant pasta bake. Use a mix of cheeses like mozzarella, ricotta, and Parmesan. They give a creamy, gooey, and nutty taste. Feel free to add goat cheese or feta for a tangy flavor.

Layering Techniques

Layering is important for a great-looking and tasty vegetarian casserole. Begin with marinara or tomato sauce at the bottom. Then, add eggplant slices and cheese. Keep layering until you finish with a cheese top. This way, every bite is full of flavor and texture.

Mastering eggplant and pasta bakes means a delicious, vegetarian casserole for dinner. It’s comforting and nutritious, perfect for satisfying your taste buds.

Quick and Easy Grilled Eggplant Pasta

Summer is here, and nothing beats a light, flavorful grilled eggplant pasta dish. It’s perfect for enjoying outside. This recipe combines the smoky eggplant with pasta for a great meal.

To make this dish, start by slicing the eggplant into 1/2-inch thick slices. Brush both sides with avocado or grapeseed oil and season with salt and pepper. Grill the eggplant over medium-high heat until it’s charred and tender, about 8-10 minutes.

While the eggplant grills, cook your favorite pasta. Toss the pasta with the grilled eggplant, crushed tomatoes, garlic, and fresh basil. The eggplant’s smoky flavor pairs well with the tangy tomato sauce. It’s a light, satisfying dish for summer and outdoor dining.

IngredientQuantity
Eggplant, sliced lengthwise into 1/2-inch thick slices1 medium
Avocado or grapeseed oil2 tablespoons
Salt and freshly ground black pepperTo taste
Pasta of your choice8 ounces
Crushed tomatoes1 (14.5 ounce) can
Garlic, minced3 cloves
Fresh basil, chopped1/2 cup

Enjoy this grilled vegetables pasta as a quick dinner or for a relaxing al fresco dining experience this summer. The mix of charred eggplant, tangy tomato sauce, and pasta is delightful and satisfying for the whole family.

Common Mistakes to Avoid When Cooking Eggplant Pasta

Eggplant pasta is a tasty and flexible dish. But, it needs careful prep to taste great. Stay away from these common mistakes to make sure your eggplant pasta is full of flavor and texture.

Proper Eggplant Preparation

Getting the eggplant right is key to making eggplant pasta. Skipping this step can make it bitter, too wet, or soft. Always do the following:

  • Salt the eggplant and let it sit for at least 30 minutes to draw out any bitterness.
  • Thoroughly pat the eggplant dry before cooking to prevent sogginess.
  • Roast or grill the eggplant to concentrate its flavor and create a firmer texture.

Seasoning Guidelines

Seasoning is crucial to boost the taste of your eggplant pasta. Don’t forget to season well and don’t just rely on the pasta sauce. Here are some seasoning tips:

  1. Season the eggplant generously with salt and pepper before cooking.
  2. Try aromatic spices like cumin, paprika, or oregano to add depth.
  3. Finish with a sprinkle of fresh herbs, such as basil or parsley, for a bright, herbaceous note.

By avoiding these common mistakes and following the best practices for eggplant preparation and seasoning techniques, you’ll make delicious eggplant pasta every time.

Storage and Reheating Tips for Eggplant Pasta Dishes

Enjoying eggplant pasta doesn’t have to stop after dinner. With the right storage and reheating, you can enjoy leftovers for days. Store eggplant pasta in an airtight container in the fridge. This keeps the pasta moist and prevents it from drying out.

Eggplant pasta can be frozen for up to 3 months. Cool the pasta completely, then put it in a freezer-safe bag or container. To reheat, thaw it in the fridge overnight. Then, heat it on the stovetop or in the microwave. This method keeps the pasta’s texture and prevents it from getting soggy.

To make reheated eggplant pasta taste fresh again, add a bit of water, broth, or olive oil. This adds moisture and brings back the pasta’s original flavor. Follow these tips to enjoy eggplant pasta for longer.

FAQ

What are the key benefits of using eggplant in pasta dishes?

Eggplant is a versatile vegetable that pairs beautifully with pasta. It adds a creamy texture and rich flavor. It’s also packed with fiber and antioxidants.

The combination of eggplant and pasta makes for a satisfying meal. It’s perfect for weeknight dinners.

What are the best types of pasta to use with eggplant?

Some of the best pasta varieties for eggplant include penne, rigatoni, spaghetti, and fettuccine. These shapes and textures complement the eggplant well. They also absorb the flavors of the sauces.

What essential kitchen tools are needed for making eggplant pasta?

For eggplant pasta, you’ll need sharp knives for slicing, a large pot for boiling pasta, and a colander for draining. You’ll also need non-stick pans for sautéing and roasting the eggplant.

Having the right tools ensures a smooth cooking process. It also helps you achieve the best results.

How do I properly prepare eggplant for use in pasta dishes?

Proper preparation is key for the best texture and flavor. Start by choosing fresh, firm eggplants. Slice or cube them, then lightly salt to draw out moisture.

Let it sit for 30 minutes, then rinse and pat dry. This step is crucial before sautéing, roasting, or adding to pasta.

What are some common mistakes to avoid when cooking eggplant pasta?

Common mistakes include overcooking the eggplant and under-seasoning the dish. Not properly salting the eggplant before cooking is another mistake.

It’s important to balance flavors and textures. This ensures delicious eggplant pasta every time.

How can I store and reheat leftover eggplant pasta dishes?

To store leftovers, cool the dish completely. Then, transfer it to an airtight container. Refrigerate for up to 3-4 days.

When reheating, add a splash of water or broth. Warm it gently on the stove or in the microwave. Stir occasionally until heated through.

Dubai Chocolate Bar Recipe: Luxurious Middle Eastern Treat

Dubai Chocolate Bar Recipe: Luxurious Middle Eastern Treat

Imagine enjoying a delicious chocolate bar that captures Dubai’s spirit. Beyond the city’s bright towers and lively streets, a rich culinary tradition exists. It mixes old flavors with new ones. But what makes a Dubai chocolate bar truly special? Get ready for a taste adventure that will excite your senses and take you to the Middle East.

Key Takeaways

  • Discover the rich history and cultural influences that shape Dubai’s chocolate culture.
  • Understand the use of traditional Middle Eastern spices and flavors in modern confectionery.
  • Learn how to select the best chocolate ingredients for an authentic Dubai-inspired treat.
  • Explore the techniques and tools needed to create a professional-quality Dubai chocolate bar.
  • Uncover the secret to achieving the perfect shine and texture in your homemade chocolate creation.

Understanding Dubai’s Chocolate Culture

Dubai, the shining city in the United Arab Emirates (UAE), has become a center for the UAE chocolate industry. Here, luxury chocolates and traditional Middle Eastern sweets meet. The city’s high-end chocolatiers have changed how people enjoy chocolate, mixing global tastes with Middle Eastern flavors.

The Rise of Luxury Chocolate in the UAE

In recent years, the UAE has seen a big increase in premium chocolate brands. Dubai is at the forefront of this trend. Famous chocolatiers have set up shop in the city, offering top-notch treats for the area’s rich and famous.

These luxury shops have not only raised the status of chocolate. They have also made people in the UAE and visitors appreciate chocolate-making more.

Traditional Middle Eastern Flavors in Modern Confectionery

The UAE’s chocolate scene also celebrates the Middle East’s rich food culture. Chocolatiers in Dubai have added traditional ingredients like dates, pistachios, and rose water to their sweets. This mix of flavors is both exciting and respectful of the region’s culinary traditions.

These modern sweets honor the Middle East’s food heritage. They also introduce a new audience to the tasty world of Middle Eastern desserts.

“Dubai has become a melting pot of global and local flavors, with its thriving chocolate industry leading the way in showcasing the region’s rich cultural heritage.”

Essential Ingredients for Dubai Chocolate Bar Recipe

Making the perfect Dubai chocolate bar is all about using the best ingredients. At its core, it features premium cocoa. This cocoa is known for its rich, velvety texture and deep flavor. It’s paired with the natural sweetness and chewy texture of Medjool dates from Emirati orchards.

The addition of Emirati pistachios gives it a Middle Eastern twist. These pistachios are chosen for their buttery crunch and bright green color. Lastly, the chocolate is enhanced by the subtle floral notes of rose water. This creates a balance of flavors that takes you to Dubai’s vibrant souks.

To make an exceptional Dubai chocolate bar, you need the best ingredients. Use premium cocoa, plump Medjool dates, crunchy Emirati pistachios, and the enchanting essence of rose water. This combination honors the UAE’s rich culinary traditions and creates a luxurious treat.

“The perfect Dubai chocolate bar is a marriage of the finest ingredients, each one carefully selected to showcase the unique flavors of the Middle East.”

Traditional Middle Eastern Spices That Enhance Chocolate

Chocolate can be made even better with Middle Eastern spices. These spices add depth and complexity to chocolate. Let’s see how cardamom, saffron, rose, and orange blossom can turn a simple chocolate bar into a luxurious treat.

Cardamom and Its Unique Flavor Profile

Cardamom is a favorite spice in the Middle East. It has a warm, sweet, and spicy taste. When mixed with cardamom chocolate, it creates a unique and enticing smell.

The aroma of cardamom blends perfectly with cocoa. This mix is both comforting and elegant.

Saffron: The Golden Touch

Saffron is known for its bright color and delicate taste. Adding a saffron infusion to chocolate makes it special. The floral and earthy flavors of saffron enhance the chocolate’s richness.

This makes the chocolate experience luxurious and memorable.

Rose and Orange Blossom Notes

Middle Eastern desserts often feature floral chocolate flavors. Rose and orange blossom are especially loved. These fragrances wrap the chocolate in a delicate, aromatic embrace.

The scent of these flowers adds elegance and sophistication. It takes the chocolate on a journey to the beautiful gardens of the Middle East.

“The synergy between chocolate and traditional Middle Eastern spices is a truly captivating and harmonious pairing.”

Premium Chocolate Selection Guide

Choosing the right premium chocolate is key to making a luxurious Dubai chocolate bar. The quality and taste of the chocolate can greatly affect the final product. Here are some essential tips for picking the best chocolate for this Middle Eastern treat.

Start by choosing couverture chocolate. This type of chocolate has more cocoa butter, giving it a smooth and glossy look. It also tastes better. Look for chocolate with a cocoa percentage between 60-75%. This range is perfect for a balance of richness and sweetness.

The origin of the cocoa beans is also crucial. Single-origin cocoa brings unique flavors that go well with Middle Eastern spices. Try chocolates from places like Ghana, Ivory Coast, or Ecuador. They can add special tastes from different places.

Cocoa PercentageFlavor ProfileBest Use
60-64%Balanced, sweet, and creamyIdeal for milk chocolate or as a base for flavored chocolate
65-74%Rich, intense, and complexExcellent for dark chocolate bars and couverture
75-100%Deeply intense, bold, and bittersweetPerfect for making intense, pure dark chocolate confections

By picking the right chocolate percentages and origin, you can make a Dubai chocolate bar that’s truly special. This focus on detail will make your confection even more luxurious and indulgent.

Tools and Equipment Needed

Making delicious Dubai-style chocolate bars needs the right tools and equipment. You’ll need everything from tempering machines to special molds. Each tool is key to getting the chocolate just right.

Professional Tempering Tools

Tempering is key to making chocolate smooth and shiny. You’ll need a chocolate thermometer to keep the chocolate at the right temperature. You can also use a marble slab or a tempering machine.

Specialty Molds and Forms

To get the Dubai chocolate bar shape, you need polycarbonate molds. These molds are strong and heat-resistant. They come in different sizes and styles for perfect chocolate bars. You might also use chocolate transfer sheets or silicone mats for cool designs.

ToolPurpose
Chocolate ThermometerPrecisely monitor and control the temperature of the chocolate during tempering.
Marble SlabUsed to temper chocolate, ensuring a smooth, glossy finish.
Polycarbonate MoldsSpecialty molds designed to create the iconic Dubai chocolate bar shape.

With these tools, you’re ready to make top-notch Dubai-style chocolate bars. They’ll be a true taste of Middle Eastern sweets.

Step-by-Step Dubai Chocolate Bar Recipe

Experience the rich tastes of the Middle East with this Dubai chocolate bar recipe. It combines the art of chocolate tempering with the luxury of ganache filling. Each layer of this layered chocolate bar brings out the region’s famous spices and fragrances.

First, temper the chocolate to get a shiny, crisp finish. After tempering, start adding the bar’s layers:

  1. Begin with a smooth, velvety chocolate base.
  2. Make a rich ganache filling with cardamom, saffron, and rose essence. Spread it over the chocolate base.
  3. Finish with another layer of tempered chocolate, making a luxurious layered chocolate bar.

To complete it, sprinkle ground cardamom, a pinch of saffron, and rose petal shards on top. This enhances both the look and the Middle Eastern flavors.

IngredientQuantity
High-quality dark chocolate200g
Heavy cream100ml
Ground cardamom1 tsp
Saffron threads1/2 tsp
Rose water1 tbsp

This Dubai chocolate bar is a feast for the senses. Its layers, exotic tastes, and stunning look make it a true indulgence. Enjoy each bite and let the Middle East’s flavors take you to a world of culinary beauty.

Tempering Techniques for Perfect Shine

To get the perfect shine and snap in a chocolate bar, you need to temper it. This means controlling the chocolate’s temperature to get the right chocolate crystallization. It’s all about the seeding method and watching the temper curve. Mastering these techniques is key to making a top-notch Dubai chocolate bar.

Double Boiler Method

The double boiler method is a trusted way to temper chocolate. You melt it in a bowl over simmering water. It’s important to keep the temperature steady to avoid mistakes.

By slowly heating the chocolate and keeping it in the right range, you get a glossy, perfect finish.

Temperature Control Tips

  • Start by melting the chocolate to a temperature of 115-120°F (46-49°C).
  • Once fully melted, cool the chocolate to 80-82°F (27-28°C) by removing the bowl from the heat and stirring constantly.
  • Slowly reheat the chocolate, bringing it back up to 88-90°F (31-32°C), the ideal tempering temperature.
  • Maintain this temperature range throughout the seeding method and the molding process to ensure a perfect temper.

By balancing temperatures carefully, you can get the best chocolate crystallization. This makes a Dubai chocolate bar with a stunning shine and a great snap.

Adding Signature Dubai Embellishments

Make the Dubai chocolate bar even more special by adding luxurious touches. Use edible gold leaf to add a shiny, elegant look. Then, sprinkle crushed pistachios on top for a green crunch.

For a Middle Eastern twist, decorate with date sugar patterns. These designs, inspired by Dubai’s architecture and textiles, add a refined touch. They make your chocolate bars visually stunning.

By adding these Dubai-inspired elements, you turn a simple chocolate bar into a work of art. It celebrates Dubai’s culture and luxury. Enjoy this treat and let it delight your senses.

FAQ

What are the key ingredients in the Dubai Chocolate Bar recipe?

The Dubai Chocolate Bar needs premium cocoa, Medjool dates, and Emirati pistachios. It also includes Middle Eastern flavors like rose water and cardamom.

How do traditional Middle Eastern spices enhance the chocolate flavor?

Spices like cardamom, saffron, rose, and orange blossom add unique flavors. They complement the chocolate, bringing aromatic and floral notes that are Middle Eastern.

What type of chocolate should be used for the Dubai Chocolate Bar?

Use high-quality couverture chocolate with a cocoa percentage between 64-72%. This ensures the chocolate is tempered right and has a smooth texture.

What special tools and equipment are needed to make the Dubai Chocolate Bar?

You’ll need a chocolate tempering machine, a marble slab, and a chocolate thermometer. Also, use specialty polycarbonate molds for the right shape and look.

How can the Dubai Chocolate Bar be decorated to reflect the opulence of Dubai?

Decorate the Dubai Chocolate Bar with edible gold leaf and crushed pistachios. Add artistic sugar work inspired by Middle Eastern patterns and designs.

Do You Like Our Recipe ?

0.0
0.0 out of 5 stars (based on 0 reviews)
Excellent0%
Very good0%
Average0%
Poor0%
Terrible0%

Easy Tortilla Quiche Bake: Perfect Breakfast Recipe

Easy Tortilla Quiche Bake, Are you tired of the same old breakfast routine? Introducing the ultimate breakfast casserole that combines the best of Mexican and French cuisines – the Tortilla Quiche Bake! This make-ahead dish is a game-changer, offering a delicious and convenient way to start your day. Imagine a fluffy egg-based quiche nestled between layers of crisp tortillas, brimming with a medley of flavorful ingredients.

Whether you’re feeding a crowd or prepping for the week ahead, this tortilla quiche bake is sure to become your new go-to breakfast recipe.

Key Takeaways

  • A delicious fusion of Mexican and French cuisines in a breakfast casserole
  • Convenient make-ahead option for busy mornings or weekend brunch
  • A versatile recipe that can be customized to suit various dietary needs
  • Packed with nutritional benefits from the egg, vegetable, and tortilla layers
  • Time-saving preparation and easy-to-follow step-by-step instructions

Why This Mexican-Inspired Breakfast Casserole Will Become Your Go-To Recipe

The Mexican-inspired breakfast casserole, also known as a Mexican quiche, is a great way to start your day. It’s not just tasty but also good for you. It’s perfect for a vegetarian breakfast or brunch.

Health Benefits and Nutritional Value

This breakfast casserole is full of healthy ingredients. It has eggs, veggies, and whole-grain tortillas. This mix gives you protein, fiber, and important vitamins and minerals.

Adding ingredients like bell peppers, onions, and spinach makes it even better. It’s a nutritious way to begin your day.

Time-Saving Advantages

This Mexican quiche recipe is easy and quick. It requires little prep and bakes with minimal effort. Just layer the ingredients, bake, and enjoy a tasty breakfast without much work.

Versatility for Different Dietary Needs

This breakfast casserole can be adjusted for any diet. It’s great for vegetarian diets, gluten sensitivities, or anyone who likes meatless meals. You can change ingredients or add your favorite veggies to make it your own.

This Mexican-inspired breakfast casserole is a winner. It’s healthy, easy to make, and can be customized. It’s sure to be a favorite in your kitchen for many mornings.

Essential Ingredients for Your Tortilla Quiche Bake Recipe

Making a tasty tortilla quiche bake needs the right ingredients. These ingredients work together to make a delicious breakfast or brunch. The key parts of this recipe add flavor and texture inspired by Mexico.

The base of the dish is warm, soft tortillas. They hold the egg custard well. You can choose corn tortillas or go gluten-free with rice or almond flour tortillas.

Eggs are the main ingredient. Mixing whole eggs with egg whites makes the quiche creamy. Adding sautéed veggies like bell peppers or spinach boosts nutrition and taste.

Cheese is essential for creaminess and a melty texture. Shredded cheddar or Monterey Jack are good choices. You can also try crumbled feta or Oaxaca cheese.

Fresh herbs like cilantro or chives add a bright flavor. A bit of cumin, chili powder, or smoked paprika enhances the Mexican taste.

Choosing and mixing these ingredients well makes a tortilla quiche bake that looks great and tastes amazing. It’s perfect for a gluten-free, egg-based breakfast or brunch.

Ingredient Purpose

Tortillas (corn or gluten-free) Provides the base and structure for the quiche.

Eggs (whole eggs and egg whites) Creates the rich, creamy quiche filling

Cheese (cheddar, Monterey Jack, feta, Oaxaca) Adds creaminess and melty texture

Sautéed vegetables (bell peppers, onions, spinach) Enhance flavor and nutritional value

Fresh herbs (cilantro, chives) Provides a vibrant, aromatic touch

Spices (cumin, chili powder, smoked paprika) Elevates the Mexican-inspired profile of the dish

By carefully selecting and combining these essential ingredients, you can create a tortilla quiche bake that is not only visually appealing but also bursting with flavor and texture, making it a go-to recipe for your gluten-free, egg-based breakfast or brunch repertoire.

Kitchen Tools and Equipment You’ll Need

Before you start making your easy quiche recipe or breakfast casserole, you need the right tools. You’ll need essential baking dishes and some optional gadgets. These items will help you make a successful tortilla quiche bake.

Must-Have Baking Dishes

  • 9-inch pie dish or tart pan: This is the foundation for your easy quiche recipe, providing the perfect vessel for the egg and tortilla layers.
  • Baking sheet or jelly roll pan: Use this to bake the tortilla pieces before assembling the casserole.
  • Mixing bowl: You’ll need a large mixing bowl to combine the egg mixture and other ingredients.

Optional Kitchen Gadgets

While not absolutely necessary, these optional kitchen tools can make the process of preparing your breakfast casserole even easier:

  1. Tortilla cutter or pizza cutter: Quickly slice the tortillas into bite-sized pieces for the perfect quiche layering.
  2. Food processor: Use this to shred the cheese or finely chop any vegetables you want to incorporate.
  3. Hand mixer or stand mixer: These appliances can help you achieve a smooth, well-blended egg mixture for your easy quiche recipe.

Measuring Tools

Accurate measurements are key to ensuring your easy quiche recipe or breakfast casserole turns out perfectly. Be sure to have the following tools on hand:

  • Measuring cups: These are used to measure dry ingredients like flour, cheese, and vegetables precisely.
  • Measuring spoons: To accurately portion out spices, herbs, and other small ingredients.
  • Digital scale: This can be helpful for measuring ingredients by weight, which is often more precise than volume measurements.

With the right kitchen tools and equipment in place, you’ll be well on your way to creating a delicious and easy quiche recipe or Mexican-inspired breakfast casserole. It will delight your family and guests.

Step-by-Step Preparation Guide

Making the perfect tortilla quiche bake recipe is simpler than you think. Just follow these easy steps to make a tasty Mexican-inspired breakfast casserole.

  1. Preheat your oven to 375°F (190°C).
  2. In a large mixing bowl, whisk together the eggs, milk, salt, and pepper until well combined.
  3. Arrange a layer of corn tortillas in the bottom of a greased 9×13-inch baking dish, overlapping the edges slightly to form a crust.
  4. Pour half of the egg mixture over the tortilla layer, followed by a layer of shredded cheese.
  5. Repeat the process with another layer of tortillas, the remaining egg mixture, and more shredded cheese.
  6. Optional: Top the quiche with diced tomatoes, sliced jalapeños, or any other desired toppings.
  7. Bake the easy quiche recipe for 35-40 minutes, or until the center is set and the edges are golden brown.
  8. Remove the quiche from the oven and let it cool for 5-10 minutes before slicing and serving.

With just a few simple steps, you can create a delicious and satisfying tortilla quiche bake recipe. It will impress your family and friends. Enjoy this Mexican-inspired breakfast casserole any day of the week!

Tips for the Perfect Egg and Tortilla Layer Assembly

Making a great tortilla quiche bake is all about balance. You need to mix the egg custard with the crisp tortilla layers just right. Follow these tips to make a dish that everyone will love.

Layering Techniques

Start by placing corn or flour tortillas in your baking dish. Overlap them a bit to make a strong base. This keeps the tortillas from getting soggy. Then, spread the egg mixture evenly over the tortillas, making sure to cover the edges. Finish with the last tortilla slices, pressing them down to hold everything together.

Preventing Soggy Tortillas

  • Choose fresh, soft tortillas that can handle the heat without getting hard.
  • Lightly spray or brush the tortillas with oil before building the dish.
  • Refrain from filling the dish too much, as too much moisture can make the tortillas soggy.

Cheese Selection and Placement

The right cheese can make your egg bake shine for a classic Mexican quiche; mix cheddar and Monterey Jack. Spread the cheese over the tortillas, making sure to cover the edges to avoid dry spots.

Cheese Type Melting Properties Flavor Profile

Cheddar Excellent melting ability Sharp, tangy

Monterey Jack Smooth, creamy melt Mild, slightly nutty

“The key to a perfect tortilla quiche bake is in the layering. Achieving the right balance between the crisp tortillas and the fluffy egg custard is an art form.”

Customization Options and Flavor Variations

The beauty of a vegetarian breakfast or Mexican quiche casserole is its versatility. You can make it your own by adding your favorite ingredients. Let’s look at some tasty ways to customize your breakfast casserole:

Veggie Combinations

  • Try using zucchini, spinach, or diced tomatoes instead of bell peppers for a new taste.
  • For a rich flavor, add sautéed mushrooms, caramelized onions, or roasted sweet potatoes.
  • Bring in the Mexican vibe with diced jalapeños or fire-roasted chiles.

Protein Boosters

  1. Make it more filling by adding cooked chorizo or ground turkey.
  2. Top it with crispy bacon or sausage for a savory touch.
  3. For a satisfying meal, sprinkle in diced ham or shredded chicken.

Spice and Flavor Enhancements

Enhance your Mexican quiche with chili powder, cumin, or smoked paprika. For a burst of flavor, add fresh herbs like cilantro, oregano, or crushed red pepper flakes.

Ingredient Suggested Variation

Bell Peppers, Zucchini, Spinach, Diced Tomatoes

Protein Chorizo, Ground Turkey, Bacon, Sausage, Ham, Chicken

Spices Chili Powder, Cumin, Smoked Paprika, Crushed Red Pepper Flakes

Herbs Cilantro, Oregano

Customizing your vegetarian breakfast or Mexican quiche casserole is endless. Have fun mixing and matching ingredients and spices to make your ideal breakfast casserole.

Make-Ahead and Storage Instructions

This make-ahead breakfast casserole is a game-changer for busy mornings. It’s perfect for brunches or just having a tasty breakfast ready for the week. The tortilla quiche bake is your go-to solution.

Freezing Guidelines

You can freeze this casserole for up to 3 months. Just assemble it without baking. Wrap it in plastic wrap or foil, then freeze. When you’re ready, thaw it in the fridge overnight and bake as instructed.

Reheating Methods

Reheating leftovers or a frozen make-ahead breakfast casserole is easy. For a single serving, microwave for 1-2 minutes. For the whole casserole, bake at 350°F for 20-25 minutes, covered in foil.

Preparing this breakfast casserole ahead of time makes mornings easier. It’s great for busy days or special brunches. This tortilla quiche bake has you covered.

Serving Suggestions and Complementary Sides

The Mexican-inspired tortilla quiche bake is a versatile brunch dish perfect for a crowd-pleasing brunch. To make it even better, try these serving ideas and side dishes:

  • Serve the warm, freshly baked tortilla quiche on a large platter. Add fresh herbs like cilantro or parsley for a bright look.
  • Pair the quiche with a fresh mixed green salad or roasted vegetable medley. This adds a light, crisp touch to the rich quiche.
  • For a fuller side, offer seasoned home fries or cheesy hash browns. They match the quiche’s protein-packed goodness.
  • Give guests warm tortillas or crusty bread to use as a base. It’s fun to scoop up the tasty fillings.
  • Set out spicy salsas, avocado slices, and sour cream on the side. Let guests add their favorite flavors.

Presenting the tortilla quiche as part of a colorful brunch dish spread will impress your guests. It’s a crowd-pleasing brunch that brings together Mexico’s comforting flavors with the ease of a casserole.

Common Recipe Mistakes to Avoid

Making the perfect easy quiche recipe or tortilla quiche bake recipe is a fun journey. But, it’s key to avoid common mistakes. Knowing these can help you make a flawless breakfast casserole every time.

Overlooking Tortilla Prep

Preparing tortillas right is crucial for a great tortilla quiche bake. Not dipping or brushing them with oil or butter can make them dry and crumbly. This ruins the dish’s texture.

Overstuffing the Casserole

It’s easy to want to add lots of fillings to the tortilla quiche bake recipe. But don’t overdo it. Too much filling can cause uneven cooking and a soggy, dense dish. Keep the filling balanced for the best taste.

Underbaking the Quiche

Quiches need the right baking time to get that perfect custard texture. Taking the easy quiche recipe out too early can make it runny and unset. This can mess up the whole dish.

Avoiding these mistakes and following a step-by-step guide will help you make a delicious tortilla quiche bake. It will be a hit with your family and friends.

Conclusion

The tortilla quiche bake recipe is a versatile and crowd-pleasing breakfast option. It’s perfect for brunch gatherings or a simple weekday meal. Its health benefits and time-saving features make it great for any household.

This article gives you all the details on how to make a delicious tortilla quiche bake. You’ll learn how to prevent soggy tortillas and choose the right cheese. Plus, you can customize it to your taste.

Try this tortilla quiche bake recipe and enjoy its convenience and flavor. It’s great for a crowd-pleasing brunch or a breakfast casserole any day. Happy baking!

FAQ

What is a tortilla quiche bake?

A tortilla quiche bake is a mix of Mexican and French cuisines. It has corn tortillas, a fluffy egg custard, and various fillings. It’s a tasty breakfast or brunch choice.

What are the health benefits of this Mexican-inspired breakfast casserole?

This dish is good for you. It has protein from eggs and fiber from whole-grain tortillas. It also has vitamins, minerals, and antioxidants from the fillings.

What are the time-saving advantages of the tortilla quiche bake?

This recipe is great for saving time. You can make it ahead and bake it when you’re ready. It’s a hot, homemade meal without the rush.

How is the tortilla quiche bake versatile for different dietary needs?

This dish can fit many diets. Use gluten-free tortillas for gluten-free meals. Choose vegetarian fillings for plant-based eaters.

What are the essential ingredients for a tortilla quiche bake?

The main ingredients are corn tortillas, eggs, and cheese. Add sautéed veggies, cooked meats, or both for fillings. The eggs make the custard, and tortillas are the base.

What kitchen tools and equipment are needed for this recipe?

You’ll need a baking dish, a bowl, a whisk, and measuring tools. A food processor or mandoline can help with prep.

How do you assemble the perfect layers for the tortilla quiche bake?

Start with a lightly oiled dish. Layer tortillas, then the egg custard. Add fillings and cheese, spreading them evenly.

Can I customize the flavors of the tortilla quiche bake?

Yes! You can try different veggies or meats. Peppers, onions, spinach, or mushrooms are good choices. Add chorizo, bacon, or ham for extra flavor.

Can I make the tortilla quiche bake in advance?

Yes, it’s perfect for making ahead. Assemble and refrigerate for up to 3 days. Or bake, cool, and freeze for up to 3 months. Reheat in the oven or microwave.

What are some serving suggestions and complementary side dishes for the tortilla quiche bake?

It’s great with fresh fruit salad, roasted potatoes, or a green salad. Offer hot sauces, salsas, or avocado slices for extra flavor.

What are some common mistakes to avoid when making the tortilla quiche bake?

Avoid overcrowding the dish for even cooking. Don’t pack tortillas too tight to prevent sogginess. And don’t overbake to avoid rubbery eggs.

Get The Best Recipes In 2025

Exit mobile version