Oatmeal meatloafis a delicious and hearty dish that combines the flavors of ground beef and oats. It is a great way to enjoy a classic comfort food while also adding some healthy ingredients. This recipe is easy to make and perfect for family dinners or meal prep for the week.
Table of Contents
Why Make This Recipe
Making oatmeal meatloaf is a smart choice for many reasons. First, it is simple to prepare and requires few ingredients. Second, the combination of oats and ground beef makes it a filling and satisfying meal. Lastly, it is a versatile dish that you can customize with your favorite seasonings and vegetables.
How to Make Oatmeal Meatloaf
Ingredients:
2 pounds lean ground beef (90% lean, 10% fat)
3 eggs
3/4 cup old-fashioned rolled oats
Minced garlic
Diced onion
Chopped mushrooms
Ketchup
Italian seasoning
Salt
Pepper
Fresh parsley
1/3 cup ketchup (for glaze)
2 tablespoons brown sugar
1 tablespoon yellow mustard
Directions:
Mix ground beef, oats, eggs, and seasonings gently.
Shape into a loaf in a 9×5-inch baking pan or a rimmed baking sheet.
Preheat oven to 350°F.
Bake for 1 hour or until internal temperature reaches 160°F.
Add glaze halfway through baking and again in the last 10 minutes.
Let it rest for 15 minutes before slicing.
How to Serve Oatmeal Meatloaf
Serve oatmeal meatloaf with a side of mashed potatoes or steamed vegetables. You can also add a fresh salad for a complete meal. Slicing the meatloaf and serving it with extra ketchup on the side can make it even more enjoyable!
How to Store Oatmeal Meatloaf
To store leftover oatmeal meatloaf, wrap it tightly in plastic wrap or foil and place it in the refrigerator. It will last for 2 to 3 days. For longer storage, you can freeze it. Make sure to slice it before freezing for easier reheating.
Tips to Make Oatmeal Meatloaf
Always use lean ground beef to keep the dish healthier.
Feel free to mix in your favorite vegetables, such as bell peppers or shredded carrots.
If you want more flavor, let the meatloaf sit for a few hours before baking.
Variation
You can change the spices or add different herbs to the meatloaf mix. For example, trying out barbecue sauce instead of ketchup gives it a different taste. You can also substitute ground turkey for a lighter option.
FAQs
Can I use quick oats instead of old-fashioned rolled oats?
Yes, you can use quick oats, but the texture may be slightly different.
How do I know when the meatloaf is done?
Use a meat thermometer to check for an internal temperature of 160°F.
Can I add cheese to the meatloaf?
Absolutely! Add shredded cheese to the mixture for a cheesy twist.
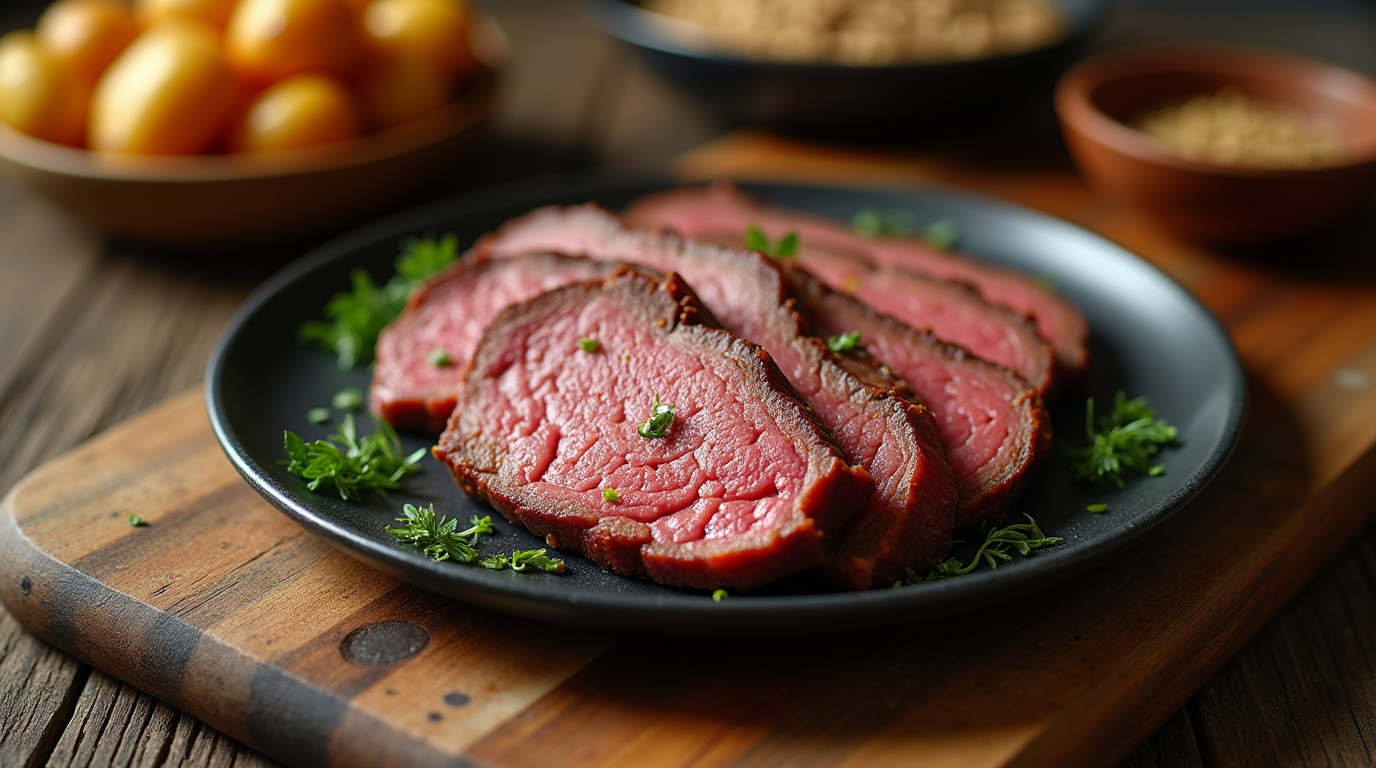
Corned beef is a classic dish enjoyed by many, especially during special occasions like St. Patrick’s Day. Its rich flavor and tender texture make it a favorite for both seasoned cooks and beginners. Learning how to make corned beef at home can bring a warm, hearty meal to your table that everyone will love.
Table of Contents
Why Make This Recipe
Making corned beef at home lets you enjoy a fresh and flavorful dish. The brining process infuses the meat with spices, and slow cooking makes it tender. It’s a wonderful way to bring family and friends together for a delicious meal.
How to Make Corned Beef
Ingredients:
4-5 pound beef brisket
1 gallon cold water
1 1/2 cups kosher salt
1/2 cup brown sugar
3 tablespoons pink curing salt
5 cloves garlic
2 tablespoons whole black peppercorns
2 tablespoons mustard seeds
2 tablespoons coriander seeds
1 tablespoon allspice berries
1 tablespoon juniper berries
2 bay leaves
1 cinnamon stick
10 whole cloves
1 teaspoon ground ginger
1 large onion
2 carrots
2 celery stalks
1 tablespoon pickling spices
Optional vegetables: cabbage, potatoes, carrots
Directions:
Prepare the Brine: Toast peppercorns, mustard seeds, coriander seeds, allspice berries, and cloves in a dry skillet until fragrant. In a large pot, combine water, kosher salt, pink curing salt, brown sugar, and all spices. Bring to a simmer; stir until salts and sugar dissolve. Cool to room temperature, then refrigerate.
Prepare and Brine the Brisket: Trim excess fat from the brisket. Place the brisket in a large container. Pour chilled brine over the meat, ensuring it’s submerged. Refrigerate for 5-7 days, turning the meat daily.
Rinse the Cured Brisket: Remove the brisket from brine and rinse thoroughly under cold water.
Simmer the Corned Beef: Place rinsed brisket in a large pot with onion, carrots, celery, and pickling spices. Add water to cover meat by 1 inch. Bring to a boil; reduce to a low simmer. Cover and cook for 3-4 hours.
Rest and Slice: Remove corned beef and let rest for 15 minutes. Slice against the grain.
Serve with Traditional Sides (Optional): Add cabbage, potatoes, and carrots to cooking liquid. Simmer until tender. Serve with sliced corned beef.
How to Serve Corned Beef
Corned beef can be served on a plate with your choice of sides. Common sides include cabbage, potatoes, and carrots. You can also use it in sandwiches or as a topping for salads. It’s delicious any way you enjoy it!
How to Store Corned Beef
To store leftovers, let corned beef cool completely. Place it in an airtight container and keep it in the refrigerator. It can last for about 3-4 days. If you want to keep it longer, you can freeze it. Be sure to wrap it tightly to prevent freezer burn.
Tips to Make Corned Beef
Make sure to fully submerge the brisket in the brine for even flavor.
Don’t rush the brining process; the longer it sits, the better the flavor.
Use fresh spices for the best taste.
Variation
You can experiment with spices in the brine to create your own unique flavor. Some recipes include additional herbs or peppers for a spicy kick.
FAQs
1. Can I make corned beef without pink curing salt? Yes, you can make corned beef without pink curing salt, but it helps to preserve the color and flavor.
2. How long does it take to cook corned beef? It usually takes about 3-4 hours of simmering time. The meat should be fork-tender when done.
3. Can I use a different cut of meat? While brisket is traditional, you can use other cuts like chuck roast, but the texture and flavor will vary.
Beef tagine is a delicious Moroccan dish that is full of rich flavors and aromas. It is a slow-cooked stew that brings together tender beef, warm spices, and sweet fruits. This dish is perfect for sharing with family and friends, bringing a taste of Morocco right to your table.
Table of Contents
Why Make This Recipe
This recipe is not only tasty but also easy to prepare. Using a few simple ingredients, you can create a comforting meal that impresses everyone. The slow cooking method allows the beef to become tender and juicy while the spices blend beautifully together. Plus, it is a great way to explore Moroccan cuisine and introduce new flavors into your cooking.
How to Make Beef Tagine
Ingredients:
2 pounds beef chuck or shoulder, cut into 1.5 inch cubes
3 tablespoons olive oil
2 large onions, thinly sliced
4 garlic cloves, minced
2 inch piece of fresh ginger, grated
1 cinnamon stick
2 teaspoons ground cumin
2 teaspoons ground coriander
1 teaspoon ground turmeric
1 teaspoon paprika
1/2 teaspoon cayenne pepper
1/2 teaspoon ground black pepper
1 teaspoon salt
2 tablespoons honey
2 tablespoons fresh lemon juice
1 can (14 oz) diced tomatoes
2 cups beef broth
1 cup dried apricots, halved
1/2 cup green olives, pitted
1/4 cup fresh cilantro, chopped
1/4 cup fresh parsley, chopped
1/4 cup toasted almonds for garnish
Directions:
Season the beef cubes with salt and pepper.
Heat the olive oil in a pot over medium heat. Sear the meat in batches until golden brown.
In the same pot, sauté the onions until they are soft.
Add the minced garlic and grated ginger, cooking until fragrant.
Mix in the spices and stir until they release their aroma.
Return the beef to the pot, then add the diced tomatoes and beef broth.
Bring everything to a boil, reduce the heat, and let it simmer for about 1.5 hours.
Stir in the honey, lemon juice, halves of apricots, and olives. Cook for an additional 30 minutes.
Taste the dish and adjust the seasoning if necessary.
Garnish with the chopped cilantro, parsley, and toasted almonds before serving.
How to Serve Beef Tagine
Serve the beef tagine hot, accompanied by some warm bread, couscous, or rice to soak up the delicious sauce. This dish is great for gatherings and will surely be a hit!
How to Store Beef Tagine
Let the beef tagine cool to room temperature before transferring it to an airtight container. You can store it in the refrigerator for up to three days. It also freezes well for up to three months. Just reheat gently before serving.
Tips to Make Beef Tagine
Feel free to adjust the spices according to your taste.
For extra flavor, marinate the beef in spices and lemon juice overnight.
Serve with a side of fresh salad for a refreshing contrast.
Variation
You can add vegetables like carrots, bell peppers, or zucchini for more nutrition. For a sweeter twist, consider adding more dried fruits like raisins or dates.
FAQs
1. Can I use chicken instead of beef in this recipe?
Yes, chicken can be used as a substitute. Just adjust the cooking time since chicken cooks faster than beef.
2. Is beef tagine spicy?
The spice level can be adjusted based on your preference. You can reduce or omit the chili pepper for a milder dish.
3. Can I make beef tagine in a slow cooker?
Absolutely! You can follow the steps up to searing the meat, then transfer everything to a slow cooker and let it cook on low for 6-8 hours.
Are you ready for a bowl of cozy flavor? Marry Me Chicken Soup is just what you need! This soup is not only delicious but also quick to make. Perfect for any family dinner, it’s sure to impress your loved ones and make them come back for more!
Table of Contents
Why Make This Recipe
There are many reasons to try this recipe! It’s creamy, hearty, and packed with flavors. It’s perfect for busy weekdays or a lazy weekend when you want something comforting. Plus, it uses simple ingredients you might already have at home. This soup is a crowd-pleaser and can easily become a family favorite!
How to Make Marry Me Chicken Soup
Ingredients:
12 cup drained julienne cut sun dried tomatoes packed in oil with herbs
1 tablespoon oil from sun dried tomato jar, divided
1 1/2 cups chopped yellow onion
4 medium garlic cloves, minced
3 tablespoons tomato paste
2 (32 ounce) packages chicken broth
1 cup heavy whipping cream
4 teaspoons chopped fresh basil (plus more for garnish, optional)
2 teaspoons kosher salt
1 1/2 teaspoons dried Italian seasoning
1 teaspoon garlic powder
1/4 teaspoon crushed red pepper (plus more for garnish)
8 ounces uncooked medium shell pasta
3 cups packed roughly chopped fresh baby spinach
2 cups shredded rotisserie chicken
8 ounces cream cheese, cubed at room temperature
1 1/2 ounces Parmesan cheese, finely shredded (plus more for garnish)
Directions:
Gather all your ingredients.
Heat the oil from the sun dried tomatoes in a large Dutch oven over medium heat until it shimmers.
Add the chopped onion and minced garlic. Cook while stirring often until they soften, about 3 to 4 minutes.
Now, add the tomato paste and sun-dried tomatoes. Cook while stirring constantly until the tomato paste turns a slightly deeper red, about 2 minutes.
Stir in the chicken broth, heavy cream, fresh basil, salt, Italian seasoning, garlic powder, and crushed red pepper. Bring this to a boil over medium heat, stirring occasionally for about 12 minutes.
Add the uncooked pasta and reduce the heat to medium-low. Cook, stirring occasionally, until the pasta is al dente, about 12 minutes.
Lower the heat to low and add the spinach, rotisserie chicken, cream cheese, and Parmesan. Stir often until the cream cheese and Parmesan melt and the chicken is heated through, about 5 minutes.
Garnish with extra Parmesan, fresh basil, and a sprinkle of red pepper. Serve immediately and enjoy!
How to Serve Marry Me Chicken Soup
Serve this warm, hearty soup in bowls with some crusty bread on the side. You can also sprinkle a little extra Parmesan cheese and fresh basil on top for added flavor. It’s perfect for cozy family dinners or a gathering with friends!
How to Store Marry Me Chicken Soup
If you have leftovers, let the soup cool down and store it in an airtight container in the fridge. It will last for about 3 to 4 days. You can also freeze it for up to 3 months. Just make sure to thaw it before reheating!
Tips to Make Marry Me Chicken Soup
Always taste the soup before serving. You can adjust the salt and spices to your liking.
If you want a thicker soup, let it simmer longer without the lid.
You can add more veggies, like carrots or bell peppers, for extra nutrition.
Variation
Feel free to switch out the shell pasta for another type of pasta if you prefer! You can also use different herbs or add spices like paprika for a kick. The soup is versatile, so get creative!
FAQs
Can I use fresh chicken instead of rotisserie chicken? Yes! You can cook fresh chicken in the soup, but it will take a bit longer to prepare.
Is this soup gluten-free? You can make it gluten-free by using gluten-free pasta.
Can I make this soup in advance? Yes, you can prepare the soup ahead of time. Just store it in the fridge or freezer and reheat it when you’re ready to serve.
This casserole is perfect for busy nights or lazy weekends. It’s simple to prepare, takes not much time in the oven, and is sure to please everyone, even the pickiest eaters. Plus, it’s a great way to use up ingredients you may already have at home!
How to Make Cheesy Beef Tater Tot Casserole
Making this Cheesy Beef Tater Tot Casserole is easy and quick. Here’s how to do it:
Ingredients:
1 lb. ground beef
2 cups potatoes, diced
1 onion, chopped
1 can cream of mushroom soup
1/2 cup milk
1 cup shredded cheddar cheese
2 cups tater tots
Directions:
Start by browning the ground beef and chopped onion in a large skillet over medium heat. Make sure to drain any excess grease once it’s cooked.
In a mixing bowl, combine the cooked beef, onion, cream of mushroom soup, and milk. Stir well until everything is mixed together.
Pour the mixture into a greased casserole dish, spreading it out evenly.
Top the casserole with shredded cheddar cheese and layer the tater tots on top.
Bake in the oven at 375 degrees F for about 30-40 minutes, or until it’s golden brown and bubbly.
How to Serve Cheesy Beef Tater Tot Casserole
This casserole is best served hot out of the oven. You can enjoy it on its own or pair it with a simple side salad for a complete meal. Don’t forget to scoop out generous portions for everyone!
How to Store Cheesy Beef Tater Tot Casserole
If you have leftovers, let the casserole cool completely before storing it. Place it in an airtight container in the refrigerator. It will stay fresh for about 3-4 days. You can also freeze it for up to 2 months. Just make sure to let it thaw in the fridge before reheating.
Tips to Make Cheesy Beef Tater Tot Casserole
Use lean ground beef to make it a bit healthier.
Feel free to add more veggies like corn or peas to boost the nutrition.
Try different cheese varieties for a unique flavor twist!
Variation
You can easily swap the ground beef for ground turkey or chicken. For a vegetarian version, you can replace the meat with extra veggies or plant-based meat.
FAQs
1. Can I make this casserole ahead of time? Yes! You can prepare it up to the baking step, cover it, and refrigerate it. Just bake it when you’re ready to eat.
2. Can I use fresh potatoes instead of frozen? Absolutely! Just make sure to cook them until tender before adding them to the casserole.
3. How do I know when the casserole is done? It should be bubbly and golden brown on top. You can check it with a fork to see if it’s hot throughout. Enjoy!
Meatloaf with Lipton Onion Soup is both comforting and delicious. It has rich flavors and a tender texture. We’ll look into its history, how to make it, and its variations. This guide will help you make the perfect meatloaf.
Introduction to Meatloaf
The meatloaf with Lipton Onion Soup is a classic American dish. It’s easy to make and always a hit. We’ll explore the classic recipe and its many variations.
Key Takeaways
We’ll explore the history of the meatloaf recipe with Lipton Onion Soup
Learn how to make a classic meatloaf recipe using Lipton Onion Soup mix
Discover variations of the meatloaf recipe to suit your tastes
Get tips for making the perfect meatloaf with a meatloaf recipe lipton onion soup
Learn how to serve and store your meatloaf for maximum flavor
Explore the many benefits of using a classic meatloaf recipe with Lipton Onion Soup mix
The History Behind Classic Meatloaf with Lipton Onion Soup Mix
Exploring meatloaf’s history is key to understanding its appeal. The traditional recipe has changed a lot, thanks to Lipton Onion Soup mix. This mix made the dish easier to make and more tasty. Let’s see how this combo became a favorite in American kitchens and how the recipe evolved.
The best meatloaf recipe often starts with a solid foundation, and in this case, it’s the Lipton Onion Soup mix. This mix has been a cornerstone of American cuisine for decades, and its inclusion in meatloaf recipes has become a standard practice. As we examine the history of meatloaf, it’s clear that the traditional meatloaf recipe has been influenced by various factors, including cultural and social trends.
Some key factors that contributed to the evolution of meatloaf include:
Availability of ingredients
Cultural exchange and influence
Advances in food technology
These factors have shaped the traditional meatloaf recipe into what we know and love today. By understanding the history behind this dish, we can appreciate its significance and versatility in American cuisine.
Essential Ingredients for Your Perfect Meatloaf
To make a tasty and moist meatloaf, you need the right ingredients. For an easy meatloaf recipe, we choose fresh, high-quality stuff. A homemade meatloaf recipe usually has ground meat, Lipton Onion Soup mix, eggs, and breadcrumbs.
Here are the key ingredients you’ll need:
Ground meat (beef, pork, or a mix)
Lipton Onion Soup mix
Eggs
Breadcrumbs
Optional ingredients (cheese, veggies, etc.)
With these ingredients, you can make a delicious meatloaf for any event. Whether you’re new to cooking or experienced, knowing each ingredient’s role is crucial. A simple easy meatloaf recipe lets you enjoy a homemade meatloaf recipe that everyone will love.
Step-by-Step Meatloaf Recipe Using Lipton Onion Soup
To make a moist meatloaf, follow these steps. They ensure your meatloaf is tasty and looks great. We’ll show you how to prepare your ingredients and bake the meatloaf for the best results.
Start with the right ingredients for a delicious meatloaf. Lipton Onion Soup mix adds rich, savory flavors. Preheat your oven to 350°F (180°C). Then, start getting your ingredients ready.
Preparing Your Ingredients
1 pound ground beef
1/2 cup breadcrumbs
1/2 cup chopped onion
2 cloves garlic, minced
1 packet Lipton Onion Soup mix
1 egg
Salt and pepper to taste
Mixing Techniques for Tender Results
Mix the ingredients gently but well to get a tender meatloaf. Overmixing makes it dense and dry. Mix the ground beef, breadcrumbs, onion, garlic, Lipton Onion Soup mix, egg, salt, and pepper in a big bowl. Use your hands or a spoon until just mixed.
Shaping and Seasoning Tips
Shape the mix into a loaf and put it on a baking sheet with parchment paper. Brush the top with oil and add extra seasoning if you like. This makes the crust tasty and flavorful.
Baking Instructions and Temperature Guide
Bake the meatloaf at 350°F (180°C) for 45-50 minutes. It should reach 160°F (71°C) inside. Check the temperature often to avoid overcooking. This recipe makes a juicy, flavorful meatloaf with a great crust.
Secret Tips for the Most Flavorful Results
To make the most flavorful meatloaf, mix ground meats like beef, pork, and veal. This mix adds depth and complexity. Also, using fresh herbs like parsley, thyme, and rosemary can boost the flavor.
Adding a glaze while baking is another secret. A glaze made from ketchup, brown sugar, and Worcestershire sauce adds a sweet and tangy taste. Try using different cheese types, like cheddar or parmesan, for more flavor.
Here are some more tips:
Use a mix of onion soup mix and beef broth for moisture and flavor.
Add smoked paprika for a smoky taste.
Use freshly ground black pepper for a bold, peppery flavor.
By using these tips, you can make a meatloaf that’s full of flavor. It’s sure to please even the pickiest eaters. Don’t be afraid to try different ingredients and techniques to find your favorite.
Common Mistakes to Avoid When Making Meatloaf
Making a tasty meatloaf can be tricky. We’ve all seen it – a meatloaf that’s dry, overcooked, or lacks flavor. Here are some tips to help you make a moist, flavorful, and perfectly cooked meatloaf.
One big mistake is texture problems. These happen when you mix the meat too much. This makes it dense and tough. To fix this, mix your ingredients just until they stick together. Don’t overwork the meat.
Another common problem is temperature and timing issues. Not cooking the meatloaf to the right temperature or not letting it rest long enough can cause this. Here are some tips to follow:
Cook the meatloaf to an internal temperature of at least 160°F (71°C)
Let the meatloaf rest for 10-15 minutes before slicing
Lastly, seasoning balance is key to a great meatloaf. Taste and adjust the seasoning as you go. Don’t be shy about adding more salt, pepper, or herbs to get the flavor right.
Delicious Variations of the Classic Recipe
We can make the classic meatloaf recipe in many ways. By adding different ingredients, we can please many tastes and diets. Some favorites include adding cheese, vegetables, or using other meats.
For instance, we can make a cheese-stuffed version by mixing in shredded cheese. This adds a creamy and flavorful layer. Or, we can add vegetables like bell peppers, onions, or mushrooms. This boosts the dish’s nutrition and taste.
Here are some ideas for tasty meatloaf variations:
Cheese-stuffed meatloaf with cheddar or mozzarella cheese
Vegetable-enhanced meatloaf with sautéed spinach and mushrooms
Meatloaf with alternative meats such as turkey, chicken, or pork
These changes let us make a dish that fits our likes. By trying out different ingredients and mixes, we can craft a special meatloaf recipe. Our family and friends will surely enjoy it.
Serving Suggestions and Perfect Side Dishes
There are many ways to serve meatloaf, from classic to modern. Serving suggestions can include traditional favorites or new ideas. For a classic choice, try it with mashed potatoes and gravy. It’s a comforting and satisfying option.
Other great side dishes are roasted vegetables like brussels sprouts or carrots. They add a nice contrast in texture and flavor. You can also serve meatloaf with a fresh green salad or garlic bread for a more filling meal.
These choices offer a variety of flavors and textures. They make the meal well-rounded and delicious.
Storage and Reheating Guidelines
After cooking the meatloaf, it’s key to store and reheat it right. Let the meatloaf rest for 10-15 minutes before slicing. This makes it tender and flavorful.
For short-term storage, wrap the meatloaf in plastic wrap or foil and refrigerate for up to 3 days. For longer storage, freeze it for up to 3 months.
Refrigeration and Freezing Methods
Refrigerate the meatloaf at 40°F (4°C) or below.
Freeze it at 0°F (-18°C) or below.
Use airtight containers or freezer bags to keep it fresh.
To reheat without drying it out, use the oven or microwave. For the oven, wrap it in foil and heat at 350°F (180°C) for 20-25 minutes. It should reach 165°F (74°C).
For the microwave, wrap it in a damp paper towel. Heat on high for 30-45 seconds until warm.
By following these tips, you can enjoy your meatloaf longer while keeping it safe and tasty.
Conclusion: Mastering the Ultimate Comfort Food
Our journey through the classic meatloaf recipe with Lipton Onion Soup mix has ended. We now appreciate this beloved American comfort food more than ever. We’ve learned about its rich history, key ingredients, and techniques that make it special.
Whether you’re a pro in the kitchen or just starting out, making meatloaf is a fun and tasty challenge. Adding Lipton Onion Soup mix gives your meatloaf a bold flavor. With a bit of practice, your meatloaf will become a family favorite, enjoyed for years to come.
Don’t be afraid to try new things with meatloaf. Mix different meats, add unique veggies, or make a cheesy version. The fun of making a meatloaf that’s all your own is unmatched.
So, let’s celebrate the lasting appeal of meatloaf and Lipton Onion Soup. May your kitchen always smell of this comfort food. And may everyone enjoy the delicious meatloaves you make. Bon appétit!
FAQ
What is the classic meatloaf recipe with Lipton Onion Soup mix?
The classic meatloaf recipe uses ground meat, Lipton Onion Soup mix, eggs, breadcrumbs, and seasonings. This mix makes a moist and tasty meatloaf. It’s a favorite in many American homes.
What is the history behind using Lipton Onion Soup mix in meatloaf?
Lipton Onion Soup mix was introduced in the mid-20th century. It added flavor and moisture to meatloaf, making it popular in American cooking. Even today, it’s a key ingredient in many meatloaf recipes.
What are the essential ingredients needed to make the perfect meatloaf?
To make the perfect meatloaf, you need ground meat, Lipton Onion Soup mix, eggs, and breadcrumbs. Using fresh, high-quality ingredients is important for great flavor and texture.
How do I make a step-by-step meatloaf recipe using Lipton Onion Soup?
First, prepare your ingredients. Then, mix them using the right techniques. Shape and season the meatloaf. Bake it at the right temperature and time.
What are some secret tips for achieving the most flavorful meatloaf?
For the most flavorful meatloaf, mix different meats and add spices and herbs. Also, try using a glaze or topping while baking.
What are the common mistakes to avoid when making meatloaf?
Avoid texture problems, temperature and timing issues, and seasoning imbalances. Fixing these can make your meatloaf moist, flavorful, and perfectly cooked.
What are some delicious variations of the classic meatloaf recipe?
Try cheese-stuffed meatloaf, vegetable-enhanced options, or different meat combinations like ground beef and pork. These variations add new flavors to the classic recipe.
What are some serving suggestions and perfect side dishes to pair with meatloaf?
Serve meatloaf sliced with mashed potatoes and gravy. Other great sides include roasted vegetables, salads, and various starches.
How should I store and reheat leftover meatloaf?
Store leftover meatloaf in the fridge or freezer. Use proper reheating methods to keep it moist and safe to eat.
What makes traditional Ramadan recipes so special during this Islamic holiday? How can you prepare delicious Middle Eastern recipes for Ramadan to impress your family and friends? Ramadan is a time for spiritual reflection, and food is a big part of this celebration. With manyRamadan recipes to choose from, you can make a memorable and tasty experience for your loved ones.
Table of Contents
Introduction to Ramadan Cuisine
Ramadan is a time for spiritual growth, and traditional Ramadan recipes are key to this journey. From savory dishes to sweet treats, Middle Eastern recipes for Ramadan offer a wide range of flavors and ingredients. In this article, we’ll explore the world of Ramadan recipes. We’ll give you the inspiration and guidance you need to create a memorable and delicious Ramadan experience.
Key Takeaways
Discover the significance of food during Ramadan and its role in spiritual reflection
Explore a variety of traditional Ramadan recipes and Middle Eastern recipes for Ramadan
Learn how to prepare delicious and flavorful dishes for your family and friends
Get inspired by the diverse range of Ramadan recipes and their cultural significance
Find out how to make your Ramadan celebration even more special with these flavorful recipes
Understand the importance of traditional Ramadan recipes in bringing people together
Understanding the Significance of Ramadan Meals
Ramadan is a time for spiritual growth, and food is key. Muslims fast from dawn to sunset. The meals before and after fasting are important for their health and spirit. Ramadan recipes aim to nourish the body and honor the spiritual aspect of eating.
The main meals are suhoor and iftar. Suhoor is eaten before dawn and should include fiber, protein, and carbs. Iftar, eaten after sunset, helps replenish nutrients. Iftar recipes often feature dates and fruits for quick energy.
For suhoor recipes, choose foods that are easy to digest and keep you hydrated. Watermelon and cucumbers are great choices. Nuts and seeds add healthy fats to keep you full.
By following these tips and ramadan recipes, you can have a healthy and meaningful Ramadan. Whether you’re looking for iftar recipes or suhoor recipes, there are many tasty and nutritious options. This makes it easy to stay nourished and focused during the holy month.
Essential Ingredients for Your Ramadan Kitchen
To make tasty middle eastern recipes for ramadan, you need the right stuff. Traditional recipes use aromatic spices, fresh herbs, and key ingredients. These add flavor and depth to your dishes.
Make sure you have olive oil, cumin, coriander, cinnamon, and cardamom. These spices and herbs are key in traditional ramadan recipes. They make stews, soups, and rice pilafs warm and aromatic.
Here are some must-haves for your Ramadan kitchen:
Basmati rice
Canned chickpeas and beans
Fresh parsley and cilantro
Lemons and lime juice
Sumac and paprika
With these ingredients, you can whip up a bunch of tasty middle eastern recipes for ramadan. They’ll impress your loved ones. Whether it’s dolmas or kebabs, these ingredients will bring Middle Eastern flavors to your home.
Traditional Ramadan Recipes for Iftar
As the sun sets during Ramadan, families and friends come together. They share delicious iftar recipes. Traditional Ramadan dishes are key, blending flavors and ingredients that unite people.
Popular iftar dishes include dates, samosas, and kebabs. They’re often paired with dips and sauces. Also, lentil soup, chickpea salad, and grilled meats are iftar favorites. These dishes not only taste great but also give energy after fasting.
Here are some traditional Ramadan recipes for iftar:
Lentil soup with a side of pita bread
Grilled chicken or beef skewers with a variety of vegetables
Chickpea salad with a dollop of yogurt and a sprinkle of cumin
Dates and samosas with a side of cardamom tea
These Middle Eastern recipes for Ramadan are simple to make and can be tailored to your liking. Whether you’re after something classic or something new, there’s an iftar recipe for you. So, why not try something new this Ramadan and dive into the rich culinary heritage of the Middle East?
Energizing Suhoor Meal Ideas
During Ramadan, a nutritious suhoor meal is key to give you energy for the day. Healthy ramadan recipes help you get the nutrients needed to stay focused and energized. Make sure your suhoor includes complex carbs, protein, and healthy fats to keep you full.
A good suhoor meal can greatly help you fast and stay energized. Try overnight oats with fruit and nuts, whole grain toast with avocado and eggs, or a smoothie bowl with spinach, banana, and almond milk. These recipes are not only tasty but also full of nutrients to power your day.
Remember to drink plenty of water when preparing your suhoor meal. You can also add healthy drinks like coconut water or low-sugar juice to replace lost electrolytes. By using these healthy ramadan recipes and tips, you’ll be ready for a successful fasting day.
Here are some more suhoor recipes to try:
Whole grain cereal with milk and fruit
Scrambled eggs with whole grain toast and vegetables
Greek yogurt with honey and nuts
These suhoor recipes are simple to make and can be tailored to fit your dietary needs. Starting your day with a nutritious suhoor meal will help you tackle fasting challenges and stay energized all day.
Quick and Easy Ramadan Recipes for Busy Days
During Ramadan, it can be hard to balance work, family, and spiritual duties. Cooking can be a big challenge. That’s why easy Ramadan recipes are a big help. They are quick, tasty, and save you time, so you can focus on what’s important.
Planning your meals ahead is a smart move. Look for recipes that take less than 30 minutes, like one-pot dishes or simple salads. You can also prep ingredients early, like chopping veggies or marinating meat. This makes cooking quicker and easier.
For iftar, make dishes that are quick to prepare and serve. Some ideas include:
Grilled meats or vegetables
Simple soups or stews
Salads with pre-cooked ingredients
These easy Ramadan recipes will help you make tasty meals, even when you’re very busy.
Healthy Alternatives for Modern Ramadan Meals
During Ramadan, it’s key to eat healthily to keep your energy up. Adding healthy ramadan recipes to your meals can really help. These recipes include lots of fruits, veggies, and whole grains. They give you the nutrients you need for a balanced diet.
Starting with vegetarian ramadan recipes is a smart move. They’re not only good for you but also taste great. You can make dishes like vegetable stir-fries, lentil soups, and grilled vegetable skewers. These are simple to make and you can change them to fit your taste.
Choose whole grains over refined grains
Incorporate a variety of fruits and vegetables into your meals
Use herbs and spices to add flavor instead of salt and sugar
By following these tips and trying vegetarian ramadan recipes, you can make a healthy Ramadan meal plan. It will feed your body well and please your taste buds.
Sweet Treats and Desserts for Special Ramadan Moments
Ramadan is a time for joy and thought. What’s better than enjoying tasty sweets and desserts? Ramadan recipes often include traditional Middle Eastern desserts. These treats are key to the Ramadan spirit, enjoyed at iftar and other celebrations.
There’s a wide range of desserts to try, from classic traditional ramadan recipes like baklava and ma’amoul. You can also find modern sweets that mix old flavors with new twists. For something different, try kunafeh or umm ali.
Whether you’re hosting a big iftar or just want to share sweets with loved ones, these desserts will impress. This Ramadan, why not try something new? Dive into the world of ramadan recipes and Middle Eastern desserts.
Vegetarian and Vegan Ramadan Dishes
Many people seek vegetarian ramadan recipes and vegan ramadan recipes during Ramadan. These dishes are both healthy and tasty. They are ideal for those who eat vegetarian or vegan and want to enjoy the holy month with great food.
For vegetarian ramadan recipes, you can use lentils, chickpeas, and veggies. For vegan ramadan recipes, try vegan yogurt and vegan cheese. Some favorites include vegetable stir-fries, lentil soups, and grilled portobello mushroom burgers.
Here are some tips for making vegan ramadan recipes:
Use a variety of spices and herbs to add flavor to your dishes
Incorporate plant-based protein sources like beans, lentils, and tofu
Choose whole grains like brown rice, quinoa, and whole wheat bread
By following these tips and exploring different vegetarian ramadan recipes and vegan ramadan recipes, you can make delicious meals for Ramadan. Whether you’re vegetarian or vegan, there are many tasty options for your Ramadan meals.
Meal Planning and Preparation Guidelines
During Ramadan, planning and preparing meals is key for a smooth experience. With the right ramadan recipes and meal planning strategies, you can save time and reduce stress. It’s important to create a weekly menu plan with a variety of iftar recipes and suhoor meals.
A well-planned menu keeps you organized and ensures you have all the ingredients. Here are some tips for a successful meal plan:
Plan your meals in advance and make a grocery list to avoid last-minute trips to the store
Consider your dietary needs and preferences when selecting ramadan recipes
Choose recipes that can be prepared ahead of time to save time during busy periods
Proper storage and reheating of food are also key during Ramadan. Here are some tips for safe storage and reheating:
Food Type
Storage Tips
Reheating Tips
Cooked Meals
Store in airtight containers in the refrigerator
Reheat to an internal temperature of 165°F (74°C)
Raw Ingredients
Store in separate containers to prevent cross-contamination
Handle and prepare safely to prevent foodborne illness
By following these guidelines, you can enjoy a stress-free and delicious Ramadan with your loved ones. Remember to stay hydrated, eat nutritious meals, and take breaks when needed. This ensures a healthy and happy fasting period.
Hosting Memorable Ramadan Gatherings
Hosting Ramadan gatherings is key during this spiritual time. Delicious ramadan recipes and thoughtful decorations make your home welcoming. Serving traditional iftar recipes like dates, samosas, and kebabs helps everyone come together.
Adding middle eastern recipes for ramadan to your menu makes your gathering special. These dishes are tasty and carry deep cultural meaning. Try shawarma, falafel, and ma’amoul to share Ramadan’s spirit.
Here are some tips for hosting a memorable Ramadan gathering:
Plan ahead and create a menu that includes a variety of dishes to suit different tastes and dietary needs.
Use decorative elements such as lanterns, flowers, and traditional clothing to create a festive atmosphere.
Encourage guests to share their own favorite ramadan recipes and cooking traditions.
Follow these tips and include tasty iftar recipes and middle eastern recipes for ramadan to make your gathering memorable. Focus on hospitality and generosity. Make sure to have plenty of food and drinks to break the fast.
Special Recipes for Eid al-Fitr Celebration
Eid al-Fitr is a big Islamic holiday that ends Ramadan. Food is a key part of this celebration. Different countries have their own eid al-fitr recipes for Eid al-Fitr.
At Eid al-Fitr, people enjoy traditional and tasty dishes. These include sweet pastries, fragrant rice, and tender meat stews. These recipes have been passed down for generations and are a big part of Eid al-Fitr.
Here are some ideas for Eid al-Fitr recipes:
Traditional Middle Eastern desserts like baklava and ma’amoul
Savory dishes like kebabs and falafel
Flavorful rice dishes like biryani and pilaf
To make your Eid al-Fitr celebration special, try new eid al-fitr recipes. You can find many online or try new ingredients. Make sure it’s delicious for you and your family.
Conclusion: Embracing the Spirit of Ramadan Through Food
Food is at the heart of Ramadan, more than just fuel for our bodies. It brings families and communities together. This is a time to share blessings and create lasting memories.
The meals of Ramadan are special. They go beyond just eating. They are about reflection, gratitude, and strengthening bonds. By following these culinary traditions, we honor our faith and connect with our heritage.
As you celebrate Ramadan, let these recipes guide you. May your kitchen fill with the scents of traditional dishes. And may your gatherings show the power of food to nourish both body and soul.
FAQ
What are some traditional Ramadan recipes?
Traditional Ramadan recipes include savory dishes like lamb or chicken stews. They also feature vegetable-based main courses and refreshing drinks like mint lemonade or hibiscus tea. Popular dishes are maqloobeh, fattoush, and baklava.
How can I plan and prepare for Ramadan meals?
Start by making a weekly menu and a detailed shopping list. Stock your pantry with spices, herbs, and Middle Eastern staples. Meal prepping suhoor and iftar dishes can save time during Ramadan.
What are some healthy and nutritious Ramadan recipes?
Healthy Ramadan recipes include grilled or baked fish, lentil soups, and roasted vegetable platters. Focus on balanced meals that provide energy and nourishment during fasting.
How can I incorporate vegetarian or vegan options into my Ramadan meals?
Explore vegetarian and vegan recipes like stuffed grape leaves, roasted cauliflower, and lentil stews. These dishes can be as flavorful as traditional meat-based recipes.
What are some quick and easy Ramadan recipes for busy days?
For busy days, try 30-minute iftar solutions like one-pot meals or easy salads. Make-ahead suhoor options like overnight oats or breakfast burritos can also save time.
How can I incorporate special treats and desserts into my Ramadan celebrations?
Ramadan is a great time for traditional Middle Eastern desserts like baklava, kunafa, or umm ali. You can also try modern fusion sweets or sugar-free options to satisfy your sweet tooth.
What are some tips for hosting memorable Ramadan gatherings?
Create a warm and welcoming atmosphere with decorations, music, and activities. Offer a variety of delicious Ramadan-inspired dishes, both savory and sweet, to make the event memorable for your guests.
We all love a great steak, and making it even better with a tasty steak butter recipe is a game-changer. A homemade steak butter can transform your steak’s flavor and texture. With a simple recipe, you can add a rich, savory taste that pairs perfectly with your steak.
Picture this: biting into a juicy steak, with creamy, flavorful steak butter on top that melts in your mouth. It’s a total game-changer for steak lovers. In this article, we’ll dive into the world of steak butter recipes. We’ll also give you a step-by-step guide to making your own homemade steak butter.
Table of Contents
Introduction to Steak Butter
For any steak lover, a great steak butter recipe is key. It’s a simple way to take your steak to the next level and add a new flavor dimension. Whether you prefer ribeye, filet mignon, or strip steak, a steak butter recipe can bring out the best in your steak.
Key Takeaways
We will provide a simple and easy-to-follow steak butter recipe
Homemade steak butter can elevate your steak experience
A steak butter recipe is a great way to add flavor to your steak
We will discuss the benefits of using steak butter
A step-by-step guide will be provided to make your own steak butter
Steak butter is a great way to enhance the natural flavors of your steak
The Magic of Compound Butter for Steaks
Compound butter is a mix of butter, seasonings, herbs, and spices. It’s a game-changer for steak lovers. It adds a rich flavor to the steak, making it a must-try for anyone wanting to improve their steak experience. With an easy steak butter recipe, you can create your own unique flavors and elevate your steak.
We’ll explore the history of compound butters, their benefits, and what makes steak butter special. We’ll cover the best steak butter recipe and tips for making your own. Whether you’re a seasoned chef or a beginner, making compound butter is simple and rewarding.
Added flavor: Compound butter adds a rich and complex flavor profile to the steak, making it more enjoyable to eat.
Easy to make: With a few simple ingredients, you can make your own compound butter at home.
Customizable: You can create your own unique flavor combinations to suit your taste preferences.
By understanding compound butter, you can create your own easy steak butter recipe. This will take your steak experience to new heights. With the best steak butter recipe, you’ll impress your friends and family with your culinary skills.
Essential Ingredients for the Perfect Steak Butter Recipe
To make a tasty steak butter recipe, we must use top-notch ingredients. The key is the butter, which should be rich and creamy. Choose European-style butter with a high fat content for the best taste.
Other must-haves are garlic, parsley, and lemon zest. They bring a rich flavor and a zesty citrus taste to the steak butter recipe. For garlic, pick fresh, firm cloves without blemishes. Choose fresh, green parsley leaves. Lemon zest comes from grating the outer lemon peel layer.
Here are the main ingredients for your homemade steak butter recipe:
1/2 cup high-quality butter, softened
2 cloves garlic, minced
1/4 cup fresh parsley, chopped
1 tablespoon lemon zest
By mixing these ingredients, you’ll make a rich, flavorful steak butter recipe. It will take your steak to the next level. This homemade steak butter will impress your friends and add a new flavor to your meals.
Kitchen Tools and Equipment Needed
To make the perfect easy steak butter, you need the right tools. Having these essentials makes the process smoother and more efficient. We’ll talk about the must-have utensils and optional equipment for advanced preparation.
Making steak butter is all about the right tools. With the right equipment, you can create a smooth, creamy butter perfect for steak. You’ll need a mixing bowl, whisk, and spatula.
Must-Have Utensils
Mixing bowl: This is where you’ll combine all the ingredients for your steak butter.
Whisk: This is used to mix and blend the ingredients until they’re smooth and creamy.
Spatula: This is used to scrape the bowl’s sides and fold in any leftover ingredients.
Optional Equipment for Advanced Preparation
For advanced steak butter, you can use optional equipment. A stand mixer and a pastry blender can help. These tools allow for a more complex, flavorful butter that will impress.
Step-by-Step Steak Butter Preparation
We’ll show you how to make a tasty steak butter. This guide will help you make a perfect steak butter recipe. It will make your steak taste even better.
Start with the best ingredients for your steak butter. Use fresh herbs and spices for a unique flavor. Try different mixes to find your favorite.
Softening the butter: Leave the butter at room temperature for a few hours to soften it.
Adding seasonings and herbs: Mix in your desired herbs and spices to create a unique flavor profile.
Shaping and storage: Shape the steak butter into a log or roll, and store it in the refrigerator or freezer for later use.
Follow these steps to make a delicious homemade steak butter. It will perfectly complement your steak. Our guide will help you make a flavorful steak butter that makes your meal special.
Flavor Variations and Combinations
Creating the best steak butter recipe is all about exploring new flavors. We can mix and match ingredients to make a unique and tasty easy steak butter. Some favorite combinations include:
Garlic and parsley: a classic mix that brings a savory taste to the steak
Lemon and herbs: a fresh and zesty blend that complements the steak’s richness
Spicy and smoky: a bold mix that adds a kick to the steak
To make these flavors, we can use ingredients like garlic powder, dried parsley, lemon zest, and smoked paprika. The goal is to find the perfect balance of tastes for a delicious easy steak butter. By trying out different mixes, we can find the best steak butter recipe for our taste.
These flavor combinations can take our steak to the next level. Whether we like a classic taste or something bold and spicy, we can make the perfect easy steak butter. Using the best steak butter recipe, we can make our steak experience even better and enjoy a tasty meal.
Best Practices for Applying Steak Butter
Enjoying a delicious steak with homemade steak butter is all about the application. It’s important to apply the butter at the right time. This enhances your dining experience. Think about the steak’s temperature and the room’s environment when you apply it.
Temperature control is key when applying steak butter. Make sure your steak is at the right internal temperature before adding butter. This lets the butter melt and add rich flavors to your steak. For the best results, add the butter when the steak is still warm. This way, the butter melts and spreads evenly.
Here are some tips to keep in mind:
Use 1-2 tablespoons of steak butter per serving.
Adjust the butter amount based on the steak type.
Try different flavors like garlic and herbs for a unique taste.
By following these tips, you can make your steak even better. Enjoy a memorable meal with your homemade steak butter.
Pairing Your Steak Butter with Different Cuts
Pairing steak butter with various cuts of meat opens up a world of flavors. An easy steak butter recipe can make even simple cuts taste amazing. Try it with a ribeye or strip steak for a rich, savory taste. The goal is to match the meat’s tenderness with the butter’s richness.
A great steak butter can enhance the meat’s natural flavors. Using a top-notch recipe, you can make a meal that highlights the butter’s taste. Whether it’s a special event or a casual dinner, choosing the right meat is key.
Ribeye and strip steak: These cuts are perfect for a rich and savory steak butter.
Filet mignon: A more delicate cut that pairs well with a lighter and more subtle steak butter.
Other meats: Don’t be afraid to experiment with pairing your steak butter with other meats, such as chicken or pork.
Exploring different pairings can help you find the ideal match for your taste. This way, you can enjoy the full flavor of your easy steak butter.
Storage and Preservation Tips
To keep your steak butter fresh, store it right. Put it in an airtight container in the fridge. This keeps it tasting great.
Freezing is good for longer storage. Shape it into a log, wrap it in plastic or foil, and bag it. Thaw it in the fridge or at room temperature when you need it. This keeps the flavors strong.
Here are some extra tips:
Always use clean and sanitized equipment when handling your steak butter to prevent contamination.
Keep your steak butter away from strong-smelling foods, as it can absorb odors easily.
Label and date your stored steak butter so you can keep track of how long it’s been stored.
Follow these tips to enjoy your steak butter longer. It’s perfect for grilled steak or adding flavor to dishes. Your homemade steak butter will stay fresh and tasty.
Common Mistakes to Avoid
When making easy steak butter, it’s key to know common mistakes. These can ruin the quality and taste of your butter. We’ll cover these errors and offer tips to make sure your butter is always great.
One common mistake is not controlling the temperature right. This can make the butter melt or get too soft. To fix this, let the butter sit at room temperature for a bit before mixing. Another error is getting the seasoning wrong, leading to too much or too little flavor. To avoid this, taste the butter as you mix it and adjust the seasoning as needed.
Here are some more tips to keep in mind:
Use high-quality ingredients for the best taste.
Avoid overmixing the butter to keep it firm.
Keep the butter in an airtight container to stay fresh.
By following these tips and avoiding common mistakes, you can make delicious easy steak butter. Always use the best recipe and taste the butter as you mix it. Adjust the seasoning to your liking.
Conclusion
As we wrap up our exploration of steak butter recipes, it’s clear that this condiment is a game-changer. It’s a must-have for steak lovers. Now, you can make a delicious homemade steak butter to elevate your steak experience.
With the tips from this article, you can make a custom easy steak butter. It will perfectly match your favorite steak cuts.
Whether you’re grilling a juicy ribeye or searing a tender filet mignon, our best steak butter recipe will elevate your meal. The rich, creamy texture and bold flavors will make your steak a culinary masterpiece.
So, go ahead and try making your own steak butter. It will make your next steak night unforgettable.
FAQ
What makes steak butter special?
Steak butter, also known as compound butter, is a mix of butter and seasonings. It adds a rich flavor to steak, making meals more enjoyable.
What is the historical background of compound butters?
Compound butters come from French cooking traditions. They were used to flavor and moisten meats, like steak.
What are the benefits of using flavored butter on steak?
Flavored butter, like steak butter, adds richness and moisture to steak. It also creates a flavorful crust on the outside.
What are the essential ingredients for the perfect steak butter recipe?
For a tasty steak butter, you need high-quality butter, garlic, parsley, and lemon zest. These ingredients make a flavorful compound butter.
What kitchen tools and equipment are needed to make steak butter?
To make steak butter, you’ll need a mixing bowl, whisk, and spatula. You might also use a food processor or stand mixer for extra help.
What is the step-by-step process for preparing steak butter?
To prepare steak butter, soften the butter, add seasonings and herbs, and shape it. Then, store it for later use.
What are some flavor variations and combinations for steak butter?
You can experiment with different flavors in your steak butter. Try garlic and parsley, lemon and herbs, or spicy and smoky. This way, you can make a unique butter that goes well with your steak.
What are the best practices for applying steak butter to your steak?
For the best steak butter experience, consider timing, temperature, and portion control. Proper application ensures the butter melts well and enhances the steak’s flavor.
How can I pair steak butter with different cuts of meat?
Steak butter goes well with many meats, like ribeye, strip steak, and filet mignon. You can also use it with chicken, pork, or lamb. Just pick flavors that match the meat’s taste.
How should I store and preserve my steak butter?
To keep your steak butter fresh, store it in the fridge or freezer. Use proper wrapping or portioning to extend its shelf life.
What are some common mistakes to avoid when making steak butter?
Avoid temperature control errors, seasoning mistakes, and storage issues. Being careful about these can help you make great steak butter every time.
Looking for a meal that everyone will enjoy? Thischopped steak recipe is a classic American dish. It’s easy to make and full of flavor. It’s perfect for busy parents and cooks of all levels.
This homemade chopped steakis ready in under an hour. It’s ideal for those crazy weeknights.
Table of Contents
Key Takeaways
Discover a chopped steak recipe that’s quick, easy, and delicious for the whole family.
Learn how to prepare a homemade chopped steak with minimal ingredients and maximum flavor.
Master the art of creating a chopped steak recipe that’s ready in under an hour.
Find out why this dish is a timeless favorite in American cuisine.
Get tips for serving and pairing your chopped steak recipe with complementary sides.
Understanding Chopped Steak: A Classic American Dish
Chopped steak is a favorite in many American homes for years. It’s made from ground beef, often mistaken for hamburg steak. But they are different. Let’s dive into its history and what makes it special.
A classic chopped steak combines ground beef with spices, shaped into patties. This mix creates a tasty and soft patty. Chopped steak has been a part of American food since the early 1900s. It was a cheap option compared to steak.
Key Characteristics of Chopped Steak
Made with ground beef and seasonings
Formed into a patty shape
Can be cooked to various levels of doneness
Chopped steak is a tasty and flexible dish. It can be enjoyed in many ways. If you’re searching for a delicious chopped steak recipe or just curious about it, knowing its history and how it’s made is key.
Essential Ingredients for the Perfect Chopped Steak Recipe
To make a tasty and simple chopped steak, you need the right stuff. The key ingredients are ground beef, breadcrumbs, egg, onion, salt, and pepper. These mix together to form a patty, making it easy to cook and serve.
Breadcrumbs help hold the mix together. The egg adds moisture and richness. The onion brings a sweet and savory taste that goes well with the beef. Salt and pepper add depth and complexity, making it a classic American dish.
When making your chopped steak, remember these important ingredients:
Ground beef: the main part of the dish
Breadcrumbs: help bind the mix
Egg: adds moisture and richness
Onion: adds a sweet and savory flavor
Salt and pepper: add depth and complexity
A good chopped steak recipe is a staple in many homes. With these key ingredients, you’re on your way to making a delicious and easy dish. Whether you’re an experienced cook or just starting, this recipe will be a hit with your family.
Kitchen Tools and Equipment Needed
To make a tasty homemade chopped steak, you need the right tools and equipment. A quick recipe for chopped steak requires basic utensils and cookware. These help get the perfect texture and flavor.
A large bowl, meat thermometer, spatula, and a cooking surface like a skillet or grill are essential. These tools ensure your chopped steak turns out juicy and flavorful. For a quick recipe, having these tools is crucial.
Must-Have Utensils
Fork
Knife
Spoon
Optional but Helpful Tools
Food processor
Stand mixer
With these tools, you’re ready to make a delicious homemade chopped steak. It will impress even the most finicky eaters. Whether you want a quick recipe or a more detailed dish, the right tools are key.
Preparing Your Meat for Success
To make the perfect ground beef chopped steak, start with top-notch ingredients. Choose lean and fresh ground beef. Handle the meat gently to prevent it from becoming dense and tough.
Cooking the meat to the right temperature is key. The ideal internal temperature for ground beef chopped steak is 160°F. Use a meat thermometer to check this. It ensures the meat is safe and tender.
Some important tips for meat preparation include:
Picking the right fat content for your ground beef chopped steak
Not overmixing the meat to avoid compacting
Cooking the classic chopped steak to the recommended internal temperature
By following these steps and preparing your meat well, you’ll make a tasty classic chopped steak. It will impress everyone at your table.
Step-by-Step Chopped Steak Preparation Method
To make a tasty chopped steak, follow a simple step-by-step guide. It’s important to handle the meat gently. This prevents it from becoming dense and tough.
Begin by mixing ground beef with breadcrumbs, egg, onion, salt, and pepper. Just mix until they’re combined. Don’t overdo it to keep the texture right.
Mixing and Seasoning
Combine ground beef with breadcrumbs, egg, onion, salt, and pepper
Mix ingredients until just combined
Avoid overmixing to prevent a dense texture
Shaping Techniques
After mixing, shape the steak into a patty. Try to make it about 3/4 inch thick. This ensures it cooks evenly and tastes great.
Pre-cooking Tips
Before cooking, handle the steak gently. This keeps it tender and juicy. By following these steps, you’ll get a delicious chopped steak for any meal.
Mastering the Cooking Process
To make a tasty chopped steak recipe, you need to get the cooking right. Cook the chopped steak to 160°F. You can use pan-frying, grilling, or broiling to cook it.
When making a homemade chopped steak, cook it slowly. This helps prevent the outside from burning before the inside is done.
Here are some tips for cooking your chopped steak recipe:
Cook the chopped steak in a skillet over medium-high heat.
Use a thermometer to check if the internal temperature is 160°F.
Don’t press down on the chopped steak while it’s cooking. This can make it dry.
By following these tips, you’ll make a delicious homemade chopped steak. It will be a hit with everyone. Always cook your chopped steak recipe safely to avoid foodborne illness.
Sauce and Gravy Options
When you make a quick chopped steak recipe, the right sauce or gravy can make it even better. For a ground beef chopped steak, the right sauce adds flavor, moisture, and texture. There are many options to choose from, each with its own special taste.
A classic brown gravy is a traditional choice that goes well with chopped steak. It’s made with beef broth and flour, seasoned with salt, pepper, and spices. This gravy brings a rich, savory flavor to the dish.
Variations and Alternatives
Mushroom sauce variation: This creamy and savory option is made with sautéed mushrooms and heavy cream.
Horseradish sauce: This spicy and tangy option adds a unique flavor and texture to the dish.
BBQ sauce: This sweet and smoky option is perfect for those who like a little bit of sweetness with their chopped steak.
These sauce and gravy options can enhance the flavor of a quick chopped steak recipe, made with ground beef chopped steak. By picking the right sauce, you can add a new dimension to the dish and make it even more enjoyable.
Serving Suggestions and Side Dishes
There are many ways to serve a tasty chopped steak. You can pair it with sides like mashed potatoes, steamed veggies, or a fresh salad. The goal is to find sides that make the steak even better without taking over.
Try serving the steak with roasted Brussels sprouts, sautéed spinach, or creamy coleslaw. These options add a nice contrast in texture and taste. For a cozy meal, pair the steak with garlic mashed potatoes or roasted sweet potatoes. Sweet potatoes’ earthy sweetness complements the steak’s savory flavor.
Here are some popular side dishes that go well with a classic chopped steak:
Roasted vegetables: Brussels sprouts, broccoli, or carrots
Sautéed greens: spinach, kale, or collard greens
Creamy sides: coleslaw, mashed potatoes, or sweet potatoes
Fresh salads: garden salad, Caesar salad, or caprese salad
The choice of side dishes depends on what you like and the event. A delicious chopped steak is perfect for any meal. It’s sure to impress anyone. Whether it’s a classic or a modern twist, the right sides can make it even more special.
Conclusion: Making This Chopped Steak Recipe Your Own
This chopped steak recipe is a true American classic. You can easily make it your own. Just try different ingredients and seasonings to find the perfect flavor.
Whether you like a classic homemade chopped steak or something new, it’s easy to make. This dish can be customized to your liking.
This recipe is very versatile. You can serve the tender, flavorful chopped steak with your favorite sides. Try it with mashed potatoes or roasted vegetables, and add a rich sauce or gravy.
The possibilities are endless. You can create a memorable meal that everyone will love. It’s a great way to satisfy your taste buds and your family’s preferences.
So, don’t be afraid to try new things. With a few simple changes, you can make this chopped steak recipe a new family favorite. Enjoy finding the perfect ingredients and techniques to make it shine in your kitchen.
FAQ
What is chopped steak?
Chopped steak is a classic American dish. It’s made with ground beef seasoned and shaped into a patty. It’s different from hamburg steak, even though many think they’re the same.
How is chopped steak different from hamburg steak?
Chopped steak uses ground beef mixed with seasonings. Hamburg steak, on the other hand, has a coarser beef grind and less seasoning.
What are the essential ingredients for a chopped steak recipe?
To make chopped steak, you need ground beef, breadcrumbs, egg, onion, salt, and pepper. These ingredients make a flavorful and tender patty.
What kitchen tools and equipment do I need to make chopped steak?
You’ll need a large bowl, a meat thermometer, a spatula, and a cooking surface like a skillet or grill. A food processor and stand mixer can also be helpful.
How do I prepare the ground beef for the chopped steak recipe?
Choose a lean and fresh ground beef. Handle it gently to avoid compacting. Cook it to 160°F to ensure it’s safe to eat.
What are the steps for preparing the chopped steak?
First, mix and season the ground beef. Then, shape it into a patty. Cook it slowly to the right temperature. This way, the outside won’t burn before the inside is cooked.
What are some sauce and gravy options for chopped steak?
You can try a classic brown gravy or a mushroom sauce. Horseradish sauce or BBQ sauce are also great options.
What are some good side dishes to serve with chopped steak?
Serve it with mashed potatoes, steamed vegetables, or a salad. Choose sides that enhance the flavor and texture of the steak without overpowering it.
Imagine a delicious and easy-to-make appetizer perfect for any occasion. Salmon bites are a favorite among food lovers. They’re versatile and full of flavor, making them a staple in many homes. This recipe is a great way to impress your guests with a healthy and tasty dish.
Table of Contents
The salmon bites recipe is perfect for those looking to try something new without spending hours in the kitchen. It’s great for both seasoned chefs and beginners. You can play with different flavors and ingredients to make it your own.
It’s perfect for any occasion, whether it’s a party or a family gathering
The recipe is versatile and can be customized with different flavors and ingredients
Salmon bites are a healthy and mouth-watering choice
The salmon bites recipe is easy to make and requires minimal time in the kitchen
It’s a great option for those who want to try something new and exciting
The recipe is suitable for both beginners and experienced chefs
Understanding the Perfect Salmon Bites Recipe
Making the perfect salmon bites is all about keeping it simple. A good recipe should be straightforward and need only a few ingredients. This makes it ideal for a quick, tasty meal. The right mix of fresh salmon, tasty marinades, and cooking methods is key.
Using fresh, high-quality ingredients is crucial. Fresh salmon gives a light flavor and firm texture, essential for great bites. The right marinades also add a rich flavor, taking the dish to new heights.
What Makes a Great Salmon Bite
A top-notch salmon bite balances flavors and textures. The salmon should be cooked just right, with a crispy outside and soft inside. The marinade should enhance the salmon’s taste without overwhelming it.
Essential Components
Key parts of a great salmon bite recipe include:
Fresh salmon fillets
A flavorful marinade, like soy sauce, lemon juice, and herbs
A cooking method, such as baking or pan-frying, for a crispy texture
Time and Difficulty Level
Easy salmon bites are quick to make and cook. With a simple recipe and few ingredients, anyone can whip up delicious bites. The recipe is easy and fast, perfect for a weeknight dinner or a quick lunch.
Essential Ingredients for Salmon Bites
To make a tasty quick salmon snack, you need fresh, high-quality ingredients. The base of a great salmon bite recipe includes salmon fillets, olive oil, lemon juice, and herbs. These add flavor and ensure the snack’s texture is perfect.
Having the right ingredients is key for a quick salmon snack. Common ones in salmon bite recipes are:
Salmon fillets
Olive oil
Lemon juice
Herbs like parsley, dill, or basil
Using fresh, top-notch ingredients will make your quick salmon snack even better. When you mix them with the right seasonings and cooking methods, you get a meal that’s both enjoyable and satisfying.
By choosing quality ingredients, you’ll make a quick salmon snack that’s not just tasty but also looks great. This focus on detail will make your dish memorable and impress your guests.
Kitchen Tools and Equipment Needed
To make tasty homemade salmon bites, you need the right tools and equipment. These help make the process easier and ensure your bites are cooked just right. Having the right tools is key to a great dish.
You’ll need a sharp knife to cut the salmon, a cutting board for prep, and a baking sheet with parchment paper for cooking. Also, a mixing bowl and spoon are needed for the marinade and seasoning.
Must-Have Tools
Sharp knife
Cutting board
Baking sheet
Mixing bowl
Spoon
Optional Equipment
Tools like a food processor and pastry brush can be helpful. They make prep work easier and help you get consistent results.
With the right tools, making homemade salmon bites is easy and fun. Whether you’re experienced or new to cooking, good tools make a big difference in your dishes.
Tool
Description
Sharp knife
For cutting the salmon into bite-sized pieces
Cutting board
For preparing the ingredients
Baking sheet
For cooking the salmon bites
Preparing Your Salmon
To make the best salmon bites, start with fresh, high-quality salmon. Look for fillets that are vibrant pink and smell pleasant. Avoid salmon with a strong fishy smell or visible spoilage.
Choose wild-caught Alaskan or Pacific salmon for the best flavor and texture. They have a richer taste and firmer flesh.
After picking your salmon, prepare it for cooking. If it’s frozen, thaw it in the fridge or under cold water. Handle the fish gently to prevent damage. Pat the salmon dry with paper towels to remove excess moisture.
This helps the salmon cook evenly and prevents it from steaming instead of searing.
Here are some tips for preparing your salmon:
Remove any bloodlines or dark meat, as they can give the salmon a stronger flavor.
Cut the salmon into small, uniform pieces, about 1-2 inches in size, to ensure they cook evenly.
Remove any skin or bones, as they can be tough and chewy.
By following these simple steps, you’ll be well on your way to making the best salmon bites. With fresh, high-quality salmon and proper preparation, you’ll create a delicious dish. It’s sure to impress your friends and family.
Step-by-Step Salmon Bites Recipe
To make tasty salmon bites, follow this simple recipe. Begin by making the marinade. This step is key to adding flavor to the salmon. Mix your favorite ingredients like soy sauce, lemon juice, and olive oil in a bowl.
Preparing the Marinade
In a small bowl, whisk together 1/2 cup of soy sauce, 1/4 cup of lemon juice, and 1/4 cup of olive oil. Add 2 cloves of minced garlic and 1 teaspoon of dried thyme. This marinade is a crucial part of the recipe.
Cutting and Portioning
Cut the salmon into bite-sized pieces, about 1 inch in size. Place the salmon pieces in a shallow dish and pour the marinade over them. Let it marinate for at least 30 minutes, or up to 2 hours in the refrigerator.
Cooking Instructions
Preheat your oven to 400°F (200°C). Remove the salmon from the marinade and place it on a baking sheet lined with parchment paper. Bake for 12-15 minutes, or until the salmon is cooked through and flakes easily with a fork. This easy salmon bites recipe is perfect for a quick and delicious meal.
Step
Instructions
1
Preheat the oven to 400°F (200°C)
2
Remove the salmon from the marinade
3
Place the salmon on a baking sheet lined with parchment paper
4
Bake for 12-15 minutes, or until the salmon is cooked through
By following this salmon bites recipe, you can create a delicious and easy meal that is perfect for any occasion.
Sauce and Seasoning Options
Adding the right sauce and seasoning can really boost the taste of your salmon bites. For a quick snack, try squeezing some fresh lemon juice or sprinkling dill on top. These simple touches can make your homemade salmon bites taste amazing without taking much time.
Here are some other great sauce and seasoning choices for salmon bites:
Garlic butter: a rich and savory option that pairs well with the natural flavor of salmon
Asian-inspired soy sauce and ginger: a sweet and sour combination that adds a unique twist to traditional salmon bites
Mediterranean-style olive oil and oregano: a light and refreshing option that complements the delicate flavor of salmon
These are just a few examples of the many sauce and seasoning options available for salmon bites. Whether you’re making a quick snack or a more elaborate dish, the right sauce and seasoning can elevate your dish.
By trying out different sauce and seasoning combinations, you can find the perfect match for your taste. This way, you can create a delicious quick salmon snack or homemade salmon bites dish.
Sauce/Seasoning
Description
Lemon Juice
A bright and citrusy option that pairs well with salmon
Dill
A light and refreshing herb that complements the natural flavor of salmon
Garlic Butter
A rich and savory option that adds depth to salmon bites
Creative Variations and Flavor Combinations
Looking for the best salmon bites? Try mixing up flavors to take this dish to new heights. The basic recipe can be tweaked to suit many tastes. This way, you can make a dish that stands out.
Being creative with flavors is key. Experiment with seasonings, marinades, and sauces. Here are some ideas:
Asian-inspired: soy sauce, ginger, and sesame oil
Mediterranean: lemon juice, garlic, and oregano
Spicy: chili flakes, cumin, and smoked paprika
Remember, the goal is to highlight the salmon’s natural taste. Finding the right mix of flavors makes your dish unique. Whether you want something spicy or tangy, the options are endless.
Don’t be shy to try new flavors. This will elevate your salmon bites. With practice, you’ll impress everyone with your creations.
Serving and Presentation Tips
When serving easy salmon bites, how you present them matters a lot. You want to impress your guests. A well-presented dish can make the whole experience better. Start by thinking about how to plate your homemade salmon bites.
Consider serving them on a bed of mixed greens. Or with a tangy sauce. You could also add them to a larger appetizer platter.
A good garnish can really enhance your easy salmon bites. Try using fresh herbs like parsley or dill. Or, use thinly sliced lemon or orange. Even a sprinkle of capers can add a nice touch.
Be creative with your garnishes. Edible flowers or microgreens can make your dish stand out.
Plating Suggestions
Use a variety of colors on the plate to add visual interest
Consider the texture of the dish and add contrasting elements, such as crunchy vegetables or crispy bread
Don’t be afraid to get creative with your plating, and have fun with it
Garnish Ideas
Here are some more garnish ideas for your homemade salmon bites:
Fresh fruit, such as sliced strawberries or grapes
Nuts or seeds, like chopped almonds or sesame seeds
A dollop of creme fraiche or sour cream
By following these tips, you can impress your guests with your easy salmon bites. Whether it’s for a dinner party or a quick snack, the right presentation can make a big difference.
Storage and Make-Ahead Guidelines
For a quick salmon snack, it’s key to store cooked salmon bites right. Cool them down to room temperature first. Then, put them in an airtight container. Keep them in the fridge for up to 24 hours.
When you’re making a salmon bites recipe ahead of time, cook them until they’re 80% done. Let them cool down, then refrigerate or freeze them. To reheat, bake them in the oven at 350°F (180°C) for a few minutes. They should be crispy on the outside and fully cooked.
Here are some tips for making ahead and reheating salmon bites:
Make the salmon bites mixture ahead of time and keep it in the fridge for up to a day.
Cook a lot of salmon bites at once and freeze them for later.
Reheat cooked salmon bites in the oven or microwave, but don’t overcook them.
By following these tips, you can enjoy a quick salmon snack anytime. Just reheat your pre-cooked salmon bites and serve them with your favorite dipping sauce. It’s a delicious and easy snack.
Storage Method
Shelf Life
Refrigerator
Up to 24 hours
Freezer
Up to 3 months
Troubleshooting Common Issues
When making homemade salmon bites, several issues can arise. These can affect the texture, flavor, and quality of the dish. To get the best salmon bites, it’s key to tackle these common problems.
Texture issues are a big concern. They can come from overcooking or undercooking the salmon. Temperature control is also crucial. It affects the doneness and safety of the salmon.
Ensuring the salmon is cooked to the right internal temperature is vital. This prevents foodborne illness. Seasoning balance is also key. It can make or break the flavor of the dish.
Common Issues and Solutions
Texture issues: Adjust cooking time and temperature to achieve the desired texture.
Temperature control: Use a food thermometer to ensure the salmon is cooked to a safe internal temperature.
Seasoning balance: Taste and adjust the seasoning as needed to achieve a balanced flavor.
By tackling these common issues, you can make delicious homemade salmon bites. With practice and patience, you’ll master the recipe. Then, you can enjoy the best salmon bites possible.
Issue
Solution
Overcooking
Reduce cooking time and temperature
Undercooking
Increase cooking time and temperature
Seasoning imbalance
Adjust seasoning to taste
With these tips and solutions, you’ll be well on your way to creating the best salmon bites. You’ll enjoy a delicious and satisfying homemade dish.
Conclusion
Our journey ends, and it’s clear the simple salmon bites recipe is a hit. Using fresh ingredients and following the steps, you can make a tasty appetizer. It’s all about the details, trying new flavors, and enjoying the making.
Whether you stick to the classic or try something new, this recipe is versatile. It lets you please different tastes. So, don’t hesitate to try new flavors. The world of salmon bites is full of possibilities.
Now, what are you waiting for? Get your ingredients ready and start cooking. Prepare to enjoy the delicious flavors of these salmon bites. Bon appétit!
FAQ
What are the key ingredients for making salmon bites?
To make salmon bites, you need fresh salmon fillets, olive oil, lemon juice, and herbs and seasonings for flavor.
How difficult is it to prepare salmon bites?
Making salmon bites is quite easy. Just use top-quality ingredients and follow the recipe well.
What type of tools and equipment are needed for making salmon bites?
You’ll need a sharp knife, cutting board, baking sheet, and mixing bowls. A food processor can also help with prep work.
How should the salmon be prepared before cooking the bites?
It’s important to prepare the salmon right. Choose fresh, quality fillets, thaw them if needed, and cut them into small pieces.
Can I make variations on the classic salmon bites recipe?
Yes, you can! The salmon bites recipe is flexible. Try different flavors like Asian, Mediterranean, or spicy.
How can I store and reheat leftover salmon bites?
Store cooked salmon bites in the fridge for 3-4 days. Reheat in the oven or microwave, but avoid overcooking.
What are some common issues that may arise when making salmon bites?
Issues like texture problems, temperature control, and seasoning balance can happen. The article offers tips to solve these problems.