Table of Contents
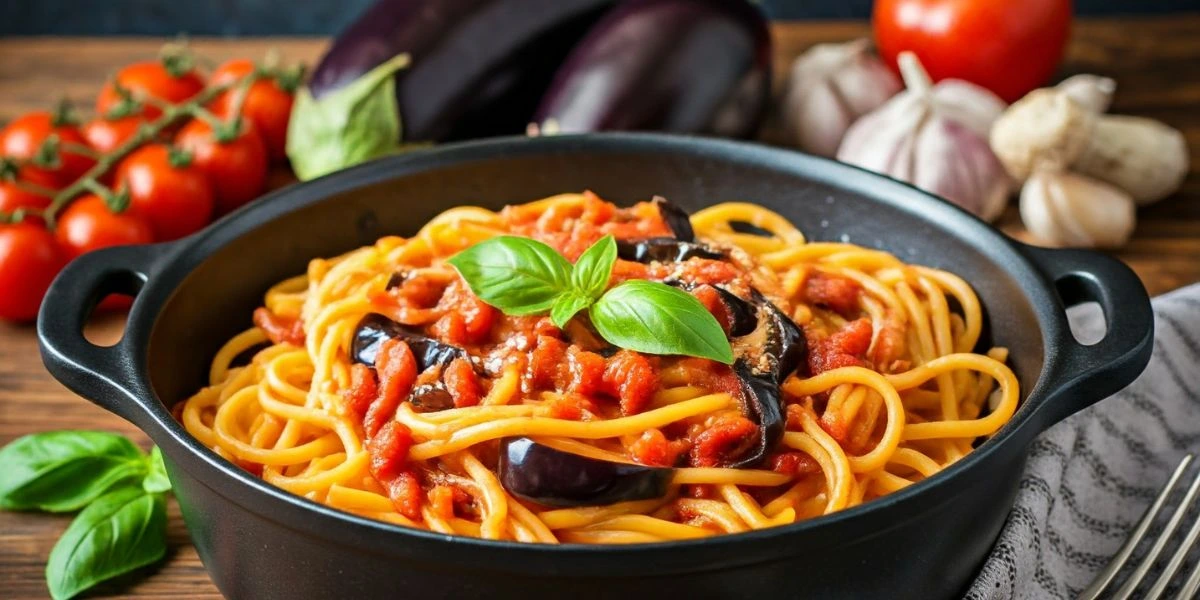
10 Easy Eggplant Pasta Recipes for Dinner Tonight
Eggplant and pasta are a great team for tasty meals. They can make everything from classic Mediterranean dishes to creamy casseroles. These recipes are perfect for a quick dinner or a special weekend meal. They’re sure to become favorites in your household.


Key Takeaways
- Eggplant pasta dishes offer a tasty and nutritious way to enjoy Italian cuisine at home.
- These recipes feature a variety of cooking methods, from sautéing and roasting to baking, to create unique flavor profiles.
- Eggplant provides a meaty texture and versatile flavor that complements different pasta types and sauce combinations.
- Many of these recipes can be prepared quickly, making them ideal for busy weeknight dinners.
- Eggplant pasta dishes are often vegetarian-friendly, providing a satisfying meatless option for plant-based diets.
Why Eggplant and Pasta Make the Perfect Dinner Combination
The mix of eggplant and pasta is a culinary dream. These ingredients work well together, making a meal that’s both tasty and healthy. You’ll want to have more of it.
Nutritional Benefits of Eggplant in Pasta Dishes
Eggplant is full of nutrition. It has vitamins, minerals, and antioxidants. It’s also high in fiber and low in calories, making it great for a healthy dinner.
Adding eggplant to pasta makes the dish creamy and nutritious. It’s a win-win for your meal.
Best Pasta Types for Eggplant Dishes
Choosing the right pasta varieties is key for eggplant dishes. Penne, rigatoni, and spaghetti are top picks. Their shapes and textures match eggplant’s softness.
Eggplant’s strong flavors go well with these pasta types. It makes for a meal that’s both tasty and satisfying.
“Eggplant and pasta are the perfect dinner duo – the vegetable’s creaminess and robust flavor beautifully complements the pasta’s versatility and comforting qualities.”
Looking for a Mediterranean dish or a creamy pasta bake? Eggplant and pasta will impress your taste buds. It’s a nutritious and fulfilling meal.
Essential Kitchen Tools for Making Eggplant Pasta
Creating delicious eggplant pasta dishes is easier with the right tools. Sharp knives, versatile pots, and pans are key. They help you prepare, cook, and serve tasty eggplant pasta.
Indispensable Tools for Eggplant Pasta Prep
- Sharp Chef’s Knife – A top-notch chef’s knife is crucial for slicing, dicing, and chopping eggplant. It makes your pasta dishes perfect.
- Vegetable Peeler – A sharp vegetable peeler is handy for peeling eggplant when needed.
- Colander – A colander is essential for draining and rinsing pasta after boiling. It prepares your noodles for the eggplant sauce.
Cooking Essentials for Eggplant Pasta
- Large Stockpot – A big stockpot is great for boiling pasta and simmering eggplant sauces.
- Nonstick Skillet – A quality nonstick skillet is perfect for sautéing eggplant and vegetables. It prevents sticking and burning.
- Pasta Maker – For homemade eggplant pasta, a pasta maker is a must. It lets you make your own fresh noodles.
| Kitchen Tool | Purpose | Why It’s Essential |
|---|---|---|
| Chef’s Knife | Cutting and chopping eggplant | Ensures precise, uniform eggplant pieces for even cooking |
| Colander | Draining and rinsing cooked pasta | Prevents the pasta from becoming waterlogged and soggy |
| Nonstick Skillet | Sautéing eggplant and other vegetables | Allows for efficient, mess-free cooking of eggplant and other ingredients |
With these tools, you’ll be ready to make amazing eggplant pasta dishes. They’re sure to impress anyone.
Classic Mediterranean Eggplant Pasta with Fresh Herbs
Dive into the vibrant world of the Mediterranean with our eggplant pasta dish. It’s a mix of eggplant’s richness and fresh herbs’ aroma. This creates a perfect balance of taste and texture.
Preparing the Perfect Eggplant
Getting the eggplant right is key. Choose firm, glossy eggplants. Slice them into 1-inch rounds and salt them for 30 minutes. This removes bitterness, making them creamy when cooked.
Sauce Components and Herbs
The sauce for this pasta alla Norma celebrates Mediterranean flavors. Start by sautéing garlic and onions in olive oil. Add diced tomatoes, fresh basil, and oregano. Let it simmer to blend the flavors.
Cooking Process
- Preheat your oven to 375°F (190°C).
- Put the eggplant slices on a baking sheet, drizzle with olive oil, and roast for 20-25 minutes. They should be tender and golden.
- Cook your pasta, like penne or rigatoni, as the package says.
- Combine the roasted eggplant with the tomato-herb sauce, making sure each slice is coated.
- Mix the cooked pasta with the eggplant-tomato sauce, letting the flavors combine.
- Top with fresh basil and Parmesan cheese, if you like.
Enjoy the taste of the Mediterranean cuisine in every bite of this fresh herbs-filled pasta alla Norma. It’s a mix of tender eggplant, flavorful tomato sauce, and fragrant herbs. It’s like a trip to the Mediterranean’s sunny shores.
Creamy Roasted Eggplant Fettuccine
Make your pasta night special with this creamy roasted eggplant fettuccine recipe. Roasting the eggplant makes a smooth sauce that goes great with fettuccine noodles. It’s a feast of roasted vegetables and their rich flavors in a creamy pasta sauce.
Roasting the Eggplant
The secret to this dish is roasting the eggplant. Cut it into small pieces and mix with olive oil, salt, and pepper. Place the eggplant on a baking sheet and roast until tender and caramelized, about 25-30 minutes.
Creating the Creamy Sauce
After roasting, blend the eggplant into a creamy sauce. Use a blender or food processor to puree it. Add heavy cream, parmesan, and fresh herbs like basil or parsley. Blend until smooth and well mixed.
Bringing it all Together
Cook the fettuccine as directed, then mix it with the creamy eggplant sauce. Add extra parmesan, black pepper, and herbs for a beautiful dish.
Enjoy the creamy texture and bold flavors of this creamy roasted eggplant fettuccine recipe. It’s a comforting meal that will impress everyone.

Spicy Eggplant Pasta with Tomato Sauce
Make your pasta night exciting with a spicy eggplant dish. It combines a rich tomato sauce with bold spices. This mix creates a perfect balance that will make you want more.
Spice Blend Selection
The secret to great spicy eggplant pasta is the spice blend. Use chili flakes, smoked paprika, and ground cumin for a warm taste. Add cayenne pepper or harissa paste for extra heat.
Heat Level Adjustments
- For a milder taste, use less chili flakes and a softer spice mix.
- Love spicy food? Increase chili flakes or add sliced jalapeños to the sauce.
- Adjust the heat to match your taste and your guests’.
Finding the right mix between the tomato-based sauce and spices is key. This ensures the flavors work well together.
With a few tweaks, you can wow your family and friends with spicy eggplant pasta. Pair it with a salad or garlic bread for a full meal.
One-Pot Eggplant Pasta Recipes
Craving a delicious and hassle-free dinner? Look no further than one-pot eggplant pasta recipes! These simple dishes not only make cleanup easy but also pack a lot of flavor. Forget about juggling multiple pots and pans – with a single-pot approach, you can enjoy tender eggplant and perfectly cooked pasta.
One of the key benefits of one-pot eggplant pasta is the ease of preparation. Cooking the eggplant and pasta together saves time. Plus, the starch from the pasta makes a velvety sauce that coats every bite. This makes for a satisfying and comforting meal, perfect for busy weeknights.
To get the perfect texture, dice the eggplant into bite-sized pieces. Let it soften as the pasta cooks. This way, the eggplant is tender and blends well with the dish. With a few simple seasonings and the right pasta, you’ll have a one-pot meal that’s sure to delight your taste buds.
| Recipe | Prep Time | Cook Time | Total Time |
|---|---|---|---|
| One-Pot Eggplant Penne | 15 minutes | 30 minutes | 45 minutes |
| Creamy One-Pot Eggplant Linguine | 20 minutes | 35 minutes | 55 minutes |
| Skillet Eggplant Spaghetti | 10 minutes | 25 minutes | 35 minutes |
Embrace the convenience and flavor of one-pot eggplant pasta recipes for a delightful and fuss-free dining experience. Savor the perfect blend of tender eggplant and perfectly cooked pasta, all in a single pot.

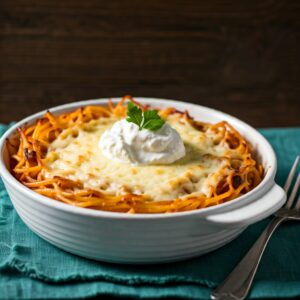
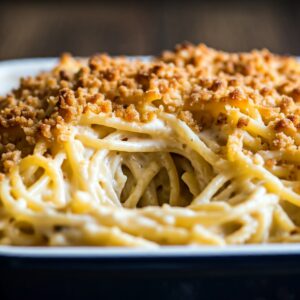
Vegetarian Eggplant Pasta Bake
Looking for a tasty vegetarian casserole? Try a baked eggplant pasta dish. It’s a mix of creamy eggplant and warm pasta. This combo makes a meal that everyone will love.
Cheese Selection Tips
Choosing the right cheese is crucial for your eggplant pasta bake. Use a mix of cheeses like mozzarella, ricotta, and Parmesan. They give a creamy, gooey, and nutty taste. Feel free to add goat cheese or feta for a tangy flavor.
Layering Techniques
Layering is important for a great-looking and tasty vegetarian casserole. Begin with marinara or tomato sauce at the bottom. Then, add eggplant slices and cheese. Keep layering until you finish with a cheese top. This way, every bite is full of flavor and texture.
Mastering eggplant and pasta bakes means a delicious, vegetarian casserole for dinner. It’s comforting and nutritious, perfect for satisfying your taste buds.
Quick and Easy Grilled Eggplant Pasta
Summer is here, and nothing beats a light, flavorful grilled eggplant pasta dish. It’s perfect for enjoying outside. This recipe combines the smoky eggplant with pasta for a great meal.
To make this dish, start by slicing the eggplant into 1/2-inch thick slices. Brush both sides with avocado or grapeseed oil and season with salt and pepper. Grill the eggplant over medium-high heat until it’s charred and tender, about 8-10 minutes.
While the eggplant grills, cook your favorite pasta. Toss the pasta with the grilled eggplant, crushed tomatoes, garlic, and fresh basil. The eggplant’s smoky flavor pairs well with the tangy tomato sauce. It’s a light, satisfying dish for summer and outdoor dining.
| Ingredient | Quantity |
|---|---|
| Eggplant, sliced lengthwise into 1/2-inch thick slices | 1 medium |
| Avocado or grapeseed oil | 2 tablespoons |
| Salt and freshly ground black pepper | To taste |
| Pasta of your choice | 8 ounces |
| Crushed tomatoes | 1 (14.5 ounce) can |
| Garlic, minced | 3 cloves |
| Fresh basil, chopped | 1/2 cup |

Enjoy this grilled vegetables pasta as a quick dinner or for a relaxing al fresco dining experience this summer. The mix of charred eggplant, tangy tomato sauce, and pasta is delightful and satisfying for the whole family.
Common Mistakes to Avoid When Cooking Eggplant Pasta
Eggplant pasta is a tasty and flexible dish. But, it needs careful prep to taste great. Stay away from these common mistakes to make sure your eggplant pasta is full of flavor and texture.
Proper Eggplant Preparation
Getting the eggplant right is key to making eggplant pasta. Skipping this step can make it bitter, too wet, or soft. Always do the following:
- Salt the eggplant and let it sit for at least 30 minutes to draw out any bitterness.
- Thoroughly pat the eggplant dry before cooking to prevent sogginess.
- Roast or grill the eggplant to concentrate its flavor and create a firmer texture.
Seasoning Guidelines
Seasoning is crucial to boost the taste of your eggplant pasta. Don’t forget to season well and don’t just rely on the pasta sauce. Here are some seasoning tips:
- Season the eggplant generously with salt and pepper before cooking.
- Try aromatic spices like cumin, paprika, or oregano to add depth.
- Finish with a sprinkle of fresh herbs, such as basil or parsley, for a bright, herbaceous note.
By avoiding these common mistakes and following the best practices for eggplant preparation and seasoning techniques, you’ll make delicious eggplant pasta every time.
Storage and Reheating Tips for Eggplant Pasta Dishes
Enjoying eggplant pasta doesn’t have to stop after dinner. With the right storage and reheating, you can enjoy leftovers for days. Store eggplant pasta in an airtight container in the fridge. This keeps the pasta moist and prevents it from drying out.
Eggplant pasta can be frozen for up to 3 months. Cool the pasta completely, then put it in a freezer-safe bag or container. To reheat, thaw it in the fridge overnight. Then, heat it on the stovetop or in the microwave. This method keeps the pasta’s texture and prevents it from getting soggy.
To make reheated eggplant pasta taste fresh again, add a bit of water, broth, or olive oil. This adds moisture and brings back the pasta’s original flavor. Follow these tips to enjoy eggplant pasta for longer.
FAQ
What are the key benefits of using eggplant in pasta dishes?
Eggplant is a versatile vegetable that pairs beautifully with pasta. It adds a creamy texture and rich flavor. It’s also packed with fiber and antioxidants.
The combination of eggplant and pasta makes for a satisfying meal. It’s perfect for weeknight dinners.
What are the best types of pasta to use with eggplant?
Some of the best pasta varieties for eggplant include penne, rigatoni, spaghetti, and fettuccine. These shapes and textures complement the eggplant well. They also absorb the flavors of the sauces.
What essential kitchen tools are needed for making eggplant pasta?
For eggplant pasta, you’ll need sharp knives for slicing, a large pot for boiling pasta, and a colander for draining. You’ll also need non-stick pans for sautéing and roasting the eggplant.
Having the right tools ensures a smooth cooking process. It also helps you achieve the best results.
How do I properly prepare eggplant for use in pasta dishes?
Proper preparation is key for the best texture and flavor. Start by choosing fresh, firm eggplants. Slice or cube them, then lightly salt to draw out moisture.
Let it sit for 30 minutes, then rinse and pat dry. This step is crucial before sautéing, roasting, or adding to pasta.
What are some common mistakes to avoid when cooking eggplant pasta?
Common mistakes include overcooking the eggplant and under-seasoning the dish. Not properly salting the eggplant before cooking is another mistake.
It’s important to balance flavors and textures. This ensures delicious eggplant pasta every time.
How can I store and reheat leftover eggplant pasta dishes?
To store leftovers, cool the dish completely. Then, transfer it to an airtight container. Refrigerate for up to 3-4 days.
When reheating, add a splash of water or broth. Warm it gently on the stove or in the microwave. Stir occasionally until heated through.


")