Top 20 Easy & Delicious Beef Recipes for Dinner

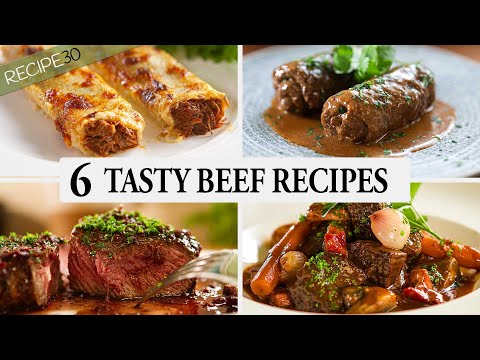
Make your weeknight dinners better with our top 20 easy and tasty beef recipes. Whether you want a classic dish or something new, we’ve got you covered. These recipes are quick, easy, and perfect for busy families and home cooks.

Key Takeaways

  • Discover a range of beef recipes suitable for weeknight dinners
  • Explore a diverse selection of cooking methods, including stovetop, oven, slow cooker, and instant pot
  • Find both classic and innovative beef dishes to satisfy various culinary preferences
  • Enjoy easy-to-follow recipes that cater to busy home cooks
  • Elevate your dinner game with mouthwatering and family-friendly beef recipes

Quick and Simple Beef Recipes for Busy Weeknights

Weeknights can be busy, and time is precious. That’s why these easy beef recipes are perfect. They offer big flavor without the hassle. Enjoy one-pan wonders and 30-minute meals that are great for families on the go.

One-Pan Beef Dishes

These one-pan beef recipes make cleanup easy. Try Beef and Broccoli Stir-Fry or Cheesy Beef and Macaroni Skillet. They’re quick to make and fill your plate with a complete meal.

30-Minute Beef Meals

When time is tight, these 30-minute beef recipes save the day. Savor Teriyaki Beef Lettuce Wraps, Beef and Vegetable Fried Rice, or Beef Taco Skillet. They’re quick, tasty, and packed with nutrients.

Make-Ahead Options

Prep ahead to ease weeknight stress. Slow Cooker Beef Stroganoff and Beef and Broccoli Meal Prep Bowls are great for meal prep. They let you enjoy a delicious meal with little effort.

Essential Kitchen Tools for Perfect Beef Cooking

To cook delicious beef at home, you need the right tools. From precise cooking tools to versatile cookware, these items are key. They help you achieve top-notch results. Let’s look at the must-have tools for beef lovers.

Meat Thermometer: A Crucial Companion

An accurate meat thermometer is the first step to perfect beef. It removes the guesswork, ensuring your beef is always juicy and tender.

Cast-Iron Skillet: The Searing Superstar

A high-quality cast-iron skillet is a must for beef cooks. It can handle high heat, giving your beef a beautiful sear. This sear locks in flavor and adds a delightful crust.

Sharp Knives: The Key to Precision Cutting

Sharp, high-quality knives are crucial for beef prep. They make slicing steaks, dicing onions, and garlic easy. Sharp blades preserve the meat’s natural textures and juices.

Slow Cooker: The Hands-Off Tenderizer

A reliable slow cooker is essential for tender beef dishes. It makes pot roasts, stews, and braises easy to make with little effort.

ToolImportanceProper Usage
Meat ThermometerEnsures perfectly cooked beef every timeInsert the thermometer into the thickest part of the beef, avoiding bone, and check the internal temperature
Cast-Iron SkilletDelivers a delightful sear and crust on beefPreheat the skillet over high heat, add a small amount of oil, and sear the beef until a golden-brown crust forms
Sharp KnivesEnables precise cutting and preserves the natural texture and juices of beefUse sharp, high-quality knives to slice, dice, or mince beef as needed for your recipe
Slow CookerCreates mouthwatering, tender beef dishes with minimal effortAdd your beef and other ingredients to the slow cooker, set the desired cooking time and temperature, and let the magic happen

With these essential beef cooking equipment, kitchen gadgets for meat, and best tools for cooking beef, you’ll master beef cooking. You’ll be able to make delicious, restaurant-quality meals at home.

Classic Ground Beef Recipes for Family Dinners

Gather the family around the table for classic ground beef recipes. Enjoy hearty casseroles, satisfying pasta dishes, and quick skillet meals. These favorites will please both adults and kids. Discover a delicious collection of ground beef recipes that will become family staples.

Comforting Casseroles

Bake a classic shepherd’s pie with ground beef, veggies, and mashed potatoes for a cozy meal. Or try a savory beef and noodle casserole with tender noodles, ground beef, and creamy sauce. These casseroles are perfect for family-friendly meals that are easy and satisfying.

Hearty Pasta Dishes

Elevate your pasta night with spaghetti bolognese, a rich, meaty tomato sauce made with ground beef recipes. For a heartier option, enjoy a baked lasagna with ground beef, cheese, and flavorful sauce. These comfort food pasta dishes will be family favorites.

Quick Skillet Meals

For quick meals, try beef and rice burritos or classic hamburger helper. These ground beef recipes are perfect for busy weeknights. Serve with a fresh salad for a complete and satisfying family-friendly meal.

Slow Cooker and Instant Pot Beef Recipes

Busy people love slow cooker and instant pot beef recipes. They make tough beef tender and tasty with little effort. You can make comforting pot roasts or hearty beef stews easily. These recipes are great for crockpot beef recipes and instant pot beef meals ready when you are.

Slow cooker and instant pot recipes are amazing because they’re easy. Just put the ingredients in and let it cook. You’ll get a set-and-forget dinner that’s full of flavor and tender.

There are many recipes to try, like pot roasts, beef stews, and pulled beef sandwiches. These recipes are a game-changer for beef lovers. Try them out and find your new favorite crockpot beef recipe or instant pot beef meal.

Steakhouse-Quality Beef Recipes at Home

It’s easier than you think to make restaurant-style beef at home. A few key techniques can take your homemade steak to gourmet levels. Let’s uncover the secrets to making steakhouse-quality beef at home.

Perfect Marinade Techniques

The marinade is key to adding rich flavors to your beef. Try different marinades like red wine and herbs or bold Asian sauces. Marinating for 30 minutes to 24 hours can make your beef tender and flavorful.

Temperature Guide for Different Cuts

Getting the perfect doneness is essential. Use a meat thermometer to check the internal temperature. Here’s a guide for different cuts:

  • Filet Mignon: 120-125°F for medium-rare, 130-135°F for medium
  • Ribeye: 125-130°F for medium-rare, 135-140°F for medium
  • New York Strip: 130-135°F for medium-rare, 140-145°F for medium

Plating and Presentation Tips

The final touch is presentation. Slice your beef against the grain and serve on a warm plate. Add fresh herbs, roasted veggies, or a pan sauce drizzle. This will make your steak look and taste like it’s from a fancy restaurant.

Mastering these techniques lets you enjoy steakhouse-quality beef at home. Try different marinades, follow the temperature guide, and focus on presentation. This will make your dining experience unforgettable.

Budget-Friendly Beef Recipes

Creating tasty beef dishes doesn’t have to cost a lot. This section offers a range of affordable beef meals, cheap beef dinners, and economical meat recipes. These dishes are sure to please your taste buds without emptying your wallet.

Using less expensive cuts of meat, like chuck roast or flank steak, is key. These cuts can be turned into delicious meals with the right methods and ingredients. Adding budget-friendly veggies, grains, and legumes also helps make your beef go further. This way, you get full, tasty meals without spending a lot.

We’ve picked our top affordable beef recipes for you. These dishes are simple to make and full of flavor. From cozy beef stew to spicy fajitas, they show you can enjoy beef without spending too much.

RecipeIngredientsCost per Serving
Slow Cooker Beef StroganoffChuck roast, mushrooms, sour cream, egg noodles$3.50
Beef and Broccoli Stir-FryFlank steak, broccoli, rice, soy sauce$4.00
Baked Meatballs with Tomato SauceGround beef, breadcrumbs, eggs, canned tomatoes$2.75

With a bit of creativity and smart shopping, you can make cheap beef dinners that are easy on your wallet. Try out these economical meat recipes and discover a world of tasty, affordable beef meals for your family.

International Beef Recipes from Around the World

Start a global food journey with our tasty beef recipes from different places. You’ll find dishes from Asia, the Mediterranean, and Latin America. These recipes show how beef can be enjoyed in many ways, crossing borders.

Asian-Inspired Dishes

Discover the bold tastes of Asian beef recipes. Try Korean bulgogi, a marinated beef dish that’s loved in Korea. Enjoy the mix of sweet and savory in Chinese beef and broccoli, a stir-fry classic. And, experience the spicy flavors of Indian beef curry, a dish that feels like a trip to India.

Mediterranean Favorites

Explore the Mediterranean’s rich flavors. Try Greek moussaka, a layered dish with beef, eggplant, and creamy sauce. Enjoy the hearty taste of Italian beef ragu with pasta. And, savor the fresh herbs in Turkish beef kebabs, grilled to perfection.

Latin American Specialties

Discover the lively tastes of Latin American beef recipes. Taste the smoky flavor of Argentine asado, a barbecue feast. Enjoy the fresh, zesty Mexican beef tacos with their mix of toppings. And, try the comforting Brazilian beef stew, filled with unique spices.

These global beef recipes are your ticket to explore international cuisine. Whether you crave an Asian dish, a Mediterranean classic, or a Latin American specialty, we have it all. Our collection will take you on a flavorful journey around the world.

Healthy and Nutritious Beef Recipes

In the world of beef dishes, balance and nutrition are key. You can enjoy beef’s rich flavors while staying healthy. Our collection of lean beef recipes, low-calorie beef meals, and nutritious meat dishes bring together delicious taste and nourishing ingredients.

Lean cuts of beef, like sirloin, flank steak, and 93% lean ground beef, are packed with protein, iron, and vitamins. Pairing these with fresh veggies, whole grains, and healthy fats makes low-calorie beef meals that are both tasty and healthy.

  • Grilled Beef and Vegetable Skewers: Tender beef, bell peppers, zucchini, and onions, marinated in a tangy, low-sodium marinade for a nutrient-dense and flavorful dish.
  • Beef and Broccoli Stir-Fry: Lean beef strips and broccoli florets sautéed in a savory, low-sodium sauce, served over a bed of quinoa for a boost of fiber and protein.
  • Beef and Lentil Chili: Ground lean beef combined with fiber-rich lentils, diced tomatoes, and a blend of spices for a hearty, nutritious meat dish.

Exploring these healthy and nutritious beef recipes lets you enjoy beef’s taste while focusing on your health. Savor the flavors, nourish your body, and take a balanced approach to cooking.

Conclusion

This beef recipe roundup shows how versatile and tasty beef can be. It has everything from quick weeknight meals to fancy steakhouse dishes. These recipes are perfect for anyone who loves beef.

Looking for something affordable, healthy, or with international flavors? This collection has it all. With the right cooking skills and tools, you can make your beef dishes stand out. Impress your family and friends with your culinary skills.

Check out this beef recipe roundup and try new things. Find your new go-to dinner inspiration. Remember, the secret to great cooking is in the details. Follow our cooking tips for perfect beef every time. Share your favorite beef recipes and let’s celebrate this amazing protein together.

FAQ

Popular beef dinner recipes include beef stroganoff, shepherd’s pie, and beef stew. Also, try Korean beef bowls, Mediterranean stuffed peppers, and Latin-inspired beef fajitas for something new.

What are some quick and easy beef recipes for busy weeknights?

For quick weeknight meals, try one-pan beef dishes and 30-minute meals. Make-ahead recipes like beef and broccoli stir-fry, beef and rice burritos, and slow cooker beef and noodles are great too.

What are the essential kitchen tools for cooking beef?

Key tools for cooking beef are a meat thermometer, cast-iron skillet, slow cooker or instant pot, and a sharp knife. These ensure perfect results in doneness, searing, and tenderness.

What are some classic ground beef recipes for family dinners?

Classic ground beef recipes include shepherd’s pie, spaghetti bolognese, and beef and broccoli stir-fry. These are comforting and easy to make for family dinners.

What are some slow cooker and instant pot beef recipes?

Slow cooker and instant pot recipes offer tender pot roasts, flavorful stews, and pulled beef sandwiches. They’re perfect for those with busy schedules.

How can I recreate steakhouse-quality beef dishes at home?

To make steakhouse-quality beef at home, focus on marinades and achieving the right doneness. Pay attention to presentation to impress your guests.

What are some budget-friendly beef recipes?

Budget-friendly beef recipes use less expensive cuts like chuck roast or flank steak. They also use affordable ingredients to make tasty meals without breaking the bank.

What are some international beef recipes from around the world?

International beef recipes include Korean bulgogi, Greek moussaka, and Argentine asado. These dishes showcase a variety of global flavors.

What are some healthy and nutritious beef recipes?

Healthy beef recipes use lean cuts, are low in carbs, and include lots of veggies. They focus on both taste and nutrition.

Classic Green Bean Casserole Recipe – Holiday Favorite

The green bean casserole is a big name in American food, especially during holidays. It’s a favorite at Thanksgiving and Christmas, bringing families together. Its mix of green beans, mushroom sauce, and fried onions is loved by many.

Looking for a dish that everyone will enjoy? The green bean casserole is perfect. Its recipe has stayed the same since the 1950s. This keeps its taste and look loved by many at holiday meals.

Key Takeaways

  • The green bean casserole is a classic American holiday dish, popular at Thanksgiving and Christmas.
  • It features a simple combination of tender green beans, creamy mushroom sauce, and crunchy fried onions.
  • The recipe has remained largely unchanged since its creation in the 1950s, making it a beloved tradition.
  • The dish is a crowd-pleasing side that brings families together during the holiday season.
  • Preparing a delicious green bean casserole is a straightforward process that can be easily mastered by home cooks.

Introduction to the Beloved Holiday Side Dish

The Campbell’s green bean casserole is a favorite holiday dish in America. It was made in 1955 by Dorcas Reilly, a Campbell Soup Company home economist. Her recipe quickly became a Thanksgiving and Christmas favorite, making it a true comfort food classic.

History of Green Bean Casserole

Dorcas Reilly created the Campbell’s green bean casserole to show off Campbell’s cream of mushroom soup. It was a huge success, becoming a favorite for quick, tasty side dishes.

Why It’s a Holiday Essential

The Campbell’s green bean casserole brings back memories and comfort. It’s made with green beans, mushroom sauce, and crispy onions. This mix is both comforting and indulgent, making it a holiday table staple.

Essential Ingredients for Perfect Green Bean Casserole

The classic green bean casserole is a favorite holiday side dish. It combines fresh green beans, which add a crisp texture. The dish also includes cream of mushroom soup, making it rich and creamy.

A bit of milk and a splash of soy sauce balance the creaminess. A generous amount of black pepper adds flavor. The French’s fried onions add a crunchy, savory finish.

IngredientAmount
Fresh green beans4 cups, trimmed and cut into 1-inch pieces
Cream of mushroom soup1 (10.5 oz) can
Milk1/2 cup
Soy sauce1 tablespoon
Black pepper1/2 teaspoon
French’s fried onions2.8 oz (1 1/3 cups)

With these ingredients, you can make a classic green bean casserole. It’s sure to impress your guests and become a holiday tradition.

Kitchen Equipment and Tools Needed

To make the classic green bean casserole, you need some key kitchen tools. The right baking dish and utensils are crucial. They help get the perfect texture and flavor.

The right baking dish is essential for a classic green bean casserole. Look for a casserole dish that holds 2 to 3 quarts. This size fits the green beans, creamy sauce, and crispy topping well. Choose a dish made of sturdy, oven-safe material like glass, ceramic, or metal for even heating and easy cleanup.

Essential Utensils

  • A large mixing bowl for tossing the green beans, sauce, and other ingredients
  • A colander for draining the cooked green beans
  • A spatula or spoon for stirring and serving the casserole
  • A sharp knife for trimming the green beans, if needed
  • Measuring cups and spoons for accurately portioning the ingredients
ItemRecommended Size or Type
Casserole Dish2 to 3 quarts, oven-safe material (glass, ceramic, or metal)
Mixing BowlLarge, for tossing the casserole ingredients
ColanderFor draining cooked green beans
Spatula or SpoonFor stirring and serving the casserole
KnifeSharp, for trimming green beans if needed
Measuring Cups and SpoonsFor accurately portioning ingredients

With the right baking dish and essential utensils, you’re ready to make a delicious green bean casserole. It’s perfect for your holiday gathering.

Green Bean Casserole Recipe

Make your holiday feast special with our easy green bean casserole. It’s a favorite at Thanksgiving and Christmas. Follow our steps to make a casserole that everyone will love.

To start, get the key ingredients:

  • 2 cans (14.5 oz each) of green beans, drained
  • 1 can (10.5 oz) of cream of mushroom soup
  • 1/2 cup of milk
  • 1/4 teaspoon of black pepper
  • 1 1/3 cups of French fried onions

Preheat your oven to 350°F. Mix the green beans, cream of mushroom soup, milk, and black pepper in a big bowl. Stir until it’s smooth.

Put the green bean mix in a 1 1/2-quart baking dish. Spread the French fried onions on top. Bake for 25 minutes until the onions are golden and the casserole bubbles.

Watch the casserole closely during the last minutes. Take it out when the onions are crispy. Let it cool a bit before serving.

Enjoy this easy green bean casserole at your holiday meal. It’s a mix of tender green beans, creamy sauce, and crunchy onions that everyone will love.

Preparation and Cooking Tips

Making the perfect green bean casserole needs careful planning. This includes picking the right ingredients and storing leftovers well. Here are some tips to help your holiday dish be a hit every time.

Selecting Fresh vs Frozen Green Beans

Choosing between blanching green beans fresh or frozen is up to you. Fresh beans give a crunchy texture and bright color. But, they need more prep work. Frozen beans are easy to use and still taste great.

Whether you pick fresh or frozen, make sure to clean and trim them well before cooking.

Making Ahead Instructions

Make-ahead casserole recipes are a lifesaver. They let you prepare the dish early, saving time and stress. Just put everything together, cover it, and chill for up to 3 days.

When you’re ready to bake, let it sit at room temperature for 30 minutes first.

Storage Guidelines

Properly storing leftovers is crucial for enjoying your casserole later. Cool it down completely, then put it in a sealed container. Keep it in the fridge for up to 4 days or freeze for 3 months.

To reheat, thaw it in the fridge if it’s frozen. Then, bake at 350°F until it’s hot and ready to eat.

Preparation TipExplanation
Blanch Fresh Green BeansQuickly boiling the fresh green beans helps retain their crisp texture and vibrant color.
Make-Ahead CasseroleAssembling the casserole in advance saves time on the day of serving and allows the flavors to meld.
Proper Leftovers StorageStoring the casserole in an airtight container in the fridge or freezer ensures it stays fresh for days or weeks.

Customization Options and Variations

The classic green bean casserole is a holiday favorite. Its beauty comes from its versatility. You can add unique twists or meet dietary needs in many ways.

Adding bacon is a popular choice. For a bacon green bean casserole, sauté crispy bacon. Then, mix it into the casserole before baking. This adds a smoky flavor and crispy texture that pairs well with green beans.

For a vegan green bean casserole, swap the cream of mushroom soup. Use a creamy cashew-based sauce or vegan mushroom gravy. This keeps the rich and comforting flavor.

Gluten-free guests can enjoy it too. Just use gluten-free flour or cornstarch for thickening. Replace fried onions with crushed gluten-free crackers or breadcrumbs.

There are endless customization options. Try adding mushrooms, caramelized onions, or roasted garlic for more flavor. The green bean casserole can be made to please everyone’s taste.

Common Mistakes to Avoid

Making the perfect green bean casserole is all about balance. Avoiding common mistakes can make a big difference. One big issue is soggy green beans, often caused by overcooking or using low-quality ingredients. Another problem is a runny casserole filling, which can happen if the ingredients are not balanced right or if it’s baked for too long.

Troubleshooting Tips

If your green beans are soggy, try these tips:

  • Use fresh, crisp green beans instead of canned or frozen.
  • Blanch the beans briefly before assembling the casserole to ensure they stay firm and vibrant.
  • Avoid overcooking the casserole, as this can lead to mushy, waterlogged beans.

For arunny casserole, consider these tips:

  1. Reduce the amount of liquid in the recipe, such as the cream of mushroom soup or milk.
  2. Thicken the filling with a bit of cornstarch or flour before baking.
  3. Bake the casserole at a higher temperature to help evaporate excess moisture.

Achieving the Ideal Texture

The secret to a great green bean casserole is finding the right balance. You want crisp-tender beans and a creamy, luscious filling. Stick to the recipe, adjust cooking times as needed, and watch the casserole’s consistency while it bakes. With practice and these tips, you’ll make a dish that everyone will love.

Nutritional Information and Dietary Considerations

The classic green bean casserole is a holiday favorite. But, it’s key to look at its nutrition and dietary impact. We’ll examine the nutritional facts and healthier options for different diets.

A single serving of the traditional green bean casserole has about 150 calories. Most of these calories come from the creamy mushroom soup and fried onions. It also has a lot of sodium, which is a concern for those watching their salt.

For a low-sodium diet, use low-sodium cream of mushroom soup. Choose fresh or frozen green beans over canned ones. Making your own crispy onion topping can also lower sodium.

For healthier alternatives, try a plant-based sauce with Greek yogurt or low-fat milk. Use baked or air-fried onions to reduce fat and calories.

NutrientTraditional Green Bean CasseroleHealthier Alternative
Calories150 calories per servingApproximately 100 calories per serving
FatHigh in saturated and trans fatsLower in saturated and trans fats
SodiumHigh in sodium (up to 800 mg per serving)Reduced sodium (400-500 mg per serving)

By choosing wisely and trying healthier options, you can enjoy green bean casserole while considering your diet. A few tweaks can make this holiday dish more nutritious.

Serving Suggestions and Pairings

The classic green bean casserole is a versatile dish that pairs beautifully with many holiday favorites. It complements the flavors of roasted turkey, glazed ham, or baked chicken. This makes it a must-have on any Thanksgiving menu or Christmas dinner table.

Complementary Holiday Dishes

For a complete Thanksgiving feast, serve the green bean casserole with mashed potatoes, stuffing, cranberry sauce, and dinner rolls. This mix creates a harmonious blend of textures and flavors. It will delight your guests. The casserole also adds a welcome touch to a Christmas dinner spread, alongside roasted root vegetables, candied sweet potatoes, and a decadent holiday ham.

Garnishing Ideas

  • Top the casserole with a sprinkle of crispy fried onions or panko breadcrumbs for a delightful crunch.
  • Garnish with fresh parsley, thyme, or chives to add a pop of color and herbaceous aroma.
  • Drizzle a touch of balsamic glaze or a sprinkle of grated Parmesan cheese for an extra layer of flavor.
  • For a festive touch, arrange the casserole in a baking dish and top it with a few sprigs of fresh rosemary or a dusting of paprika.

By pairing the green bean casserole with complementary holiday dishes and adding creative garnishes, you can elevate this classic side dish. It becomes a standout feature on your Thanksgiving menu or Christmas dinner table.

Thanksgiving MenuChristmas Dinner SidesCasserole Toppings
Roasted TurkeyGlazed HamCrispy Fried Onions
Mashed PotatoesRoasted Root VegetablesPanko Breadcrumbs
StuffingCandied Sweet PotatoesFresh Parsley
Cranberry SauceDinner RollsBalsamic Glaze
Dinner RollsGreen Bean CasseroleGrated Parmesan

Reviews and Success Stories

The classic green bean casserole recipe is a favorite for many families in the United States. People love its tasty flavor and how easy it is to make. Sarah Wilson, a mom of three, says, “This recipe is a must-have at our Thanksgiving. It’s a hit with everyone, and it’s so easy to make.”

Many families have made this casserole a big part of their holiday traditions. Emily Garcia, a long-time fan, says, “Making this casserole is a tradition for us. It’s not Thanksgiving without it. Everyone looks forward to enjoying it together.”

Home cooks who have made this recipe have great things to say. Jessica Nguyen says, “This is my favorite holiday recipe now. It’s loved by all, and the flavors are amazing.” The green bean casserole is a beloved dish that brings families together during the holidays.

FAQ

What is the history of the classic green bean casserole?

Dorcas Reilly created the green bean casserole in 1955 at Campbell’s Soup Company. It quickly became a favorite for holidays. It’s loved for its simple ingredients and warm flavors.

Why is green bean casserole a holiday essential?

Green bean casserole is a holiday favorite. It’s a classic comfort food. The mix of green beans, mushroom sauce, and fried onions makes it a hit.

What are the essential ingredients for the perfect green bean casserole?

You need fresh or frozen green beans, cream of mushroom soup, milk, soy sauce, black pepper, and French’s fried onions for the classic recipe.

What kitchen equipment and tools are needed to make green bean casserole?

You’ll need a casserole dish, a mixing bowl, and a colander. Also, a spoon, whisk, and can opener are necessary.

How do you make green bean casserole from scratch?

Start by blanching the green beans. Then mix the soup, milk, soy sauce, and pepper. Combine everything and bake until hot and the topping is crispy.

What are some tips for preparing and cooking green bean casserole?

Use fresh or frozen green beans and blanch them for the best texture. You can also make it ahead of time. Don’t forget to store leftovers properly.

How can you customize or vary the classic green bean casserole recipe?

You can add bacon or mushrooms to make it your own. There are also vegan and gluten-free versions for different diets.

What are common mistakes to avoid when making green bean casserole?

Watch out for a soggy casserole. Tips for the right texture and consistency are important.

What are the nutritional facts and health considerations for green bean casserole?

Green bean casserole has calories, fat, and sodium. But, you can make it healthier with low-sodium ingredients or different cooking methods.

What holiday dishes pair well with green bean casserole?

It goes well with many dishes, like roasted turkey and mashed potatoes. You can also garnish it to make it look better.

Classic Pasta and Peas Recipe: A Quick Italian Meal

Pasta e piselli, or pasta and peas, is a beloved dish worldwide. It’s a simple yet flavorful meal that shows the power of quality ingredients and traditional cooking. What makes this dish so special? Let’s explore its captivating history and why it’s so irresistible.

Key Takeaways

  • Pasta e piselli is a classic Italian comfort food dish featuring pasta and fresh peas
  • The recipe is quick and easy to prepare, making it an ideal weeknight dinner option
  • This one-pot meal is packed with flavor and nutrition, making it a versatile and satisfying choice
  • Pasta e piselli has deep roots in traditional Italian home cooking and Mediterranean cuisine
  • Selecting the right ingredients and following a few simple techniques can ensure the perfect pasta and peas dish

What makes pasta and peas such an enduring and beloved dish in Italian cuisine? Discover the cultural significance and culinary secrets behind this timeless classic.

Introduction to Traditional Italian Pasta e Piselli

Pasta e piselli is a classic Italian dish with deep roots in the country’s culinary history. It’s a simple yet flavorful mix of pasta and peas. This dish shows the importance of traditional recipes in Italy’s Mediterranean diet.

Origins in Italian Home Cooking

Pasta e piselli started as peasant food. Italian families made it with what they had. Peas were a common ingredient, used in many dishes, including this one.

Cultural Significance in Mediterranean Cuisine

Now, pasta e piselli is a key part of Italian traditional recipes and the Mediterranean diet. It’s known for its simplicity and use of fresh ingredients. This dish is loved in Italian homes, showing the country’s culinary traditions.

Essential Ingredients for the Perfect Pasta and Peas

Making a great pasta and peas dish needs the right ingredients. You need the best pasta shape and the freshest peas. Each part is key to a tasty and balanced meal.

The pasta is the base of this Italian classic. Recipes often use small shapes like ditalini or tubetti. But, you can try other shapes like orecchiette or penne. Choose a semolina-based pasta for a firm bite.

Fresh peas are the main attraction. They’re sweeter and tender than frozen peas. Look for the plumpest, greenest peas at markets or stores when they’re in season.

The dish also needs olive oil and Parmesan cheese. Use extra-virgin olive oil for a rich flavor. Freshly grated Parmesan adds a savory taste. And, garlic is essential for its aroma.

With these ingredients, you’re ready to make a delicious pasta and peas dish. It will be a true taste of Italian home cooking.

Kitchen Tools and Equipment Needed

To make a tasty pasta and peas dish, you need some key tools. A pasta pot and a colander are must-haves. They help you cook like a pro and make your meal feel like it’s from Italy.

Essential Cookware

  • A large pasta pot or Dutch oven for boiling the pasta
  • A colander for draining the cooked pasta
  • A saucepan or skillet for sautéing the peas and other ingredients
  • A sharp chef’s knife for chopping fresh herbs and vegetables
  • A sturdy wooden spoon for stirring and mixing the pasta and sauce

Optional Kitchen Gadgets

Some cooking utensils can make your pasta and peas dish even better:

  1. A kitchen scale for accurately measuring ingredients
  2. A garlic press for finely mincing garlic cloves
  3. A vegetable peeler for shaving Parmesan cheese or other garnishes
  4. A food processor or blender for creating a smooth, creamy sauce

Measuring Tools

Getting the measurements right is key for a great pasta and peas dish. Make sure you have these tools:

  • Liquid measuring cups for accurate portioning of liquids
  • Dry measuring cups and spoons for measuring dry ingredients like pasta and herbs
  • A kitchen scale for weighing ingredients like fresh peas

With the right cooking utensils, pasta pot, colander, and kitchen scale, you’re ready to make a delicious pasta and peas dish.

Step-by-Step Pasta and Peas Recipe

Get ready for a tasty pasta adventure with our Pasta and Peas recipe. This classic Italian dish pairs perfectly cooked pasta with fresh peas. Follow our easy steps to make a meal that’s full of Mediterranean flavor.

  1. Start by boiling a large pot of salted water. Add the pasta and cook for 8-10 minutes, as the package cooking instructions suggest.
  2. While the pasta cooks, make the pea sauce. In a skillet, cook minced garlic in olive oil over medium heat for 1-2 minutes.
  3. Next, add the fresh or frozen peas to the skillet. Cook for 2-3 minutes, stirring often, until they’re tender.
  4. Then, pour in some broth or white wine. Let it simmer for 5-7 minutes to blend the flavors.
  5. Once the pasta is done, drain it and mix it with the pea sauce in the skillet. Toss until the pasta is well coated.
  6. Season the pasta and peas with salt, pepper, and fresh herbs like basil or parsley.
  7. Finally, serve the dish warm. Add more herbs or a sprinkle of Parmesan cheese if you like.

By following these easy cooking instructions and recipe method, you can make a delicious pasta and peas dish at home. It’s perfect for a quick weeknight meal or a special Italian-inspired dinner.

Tips for Selecting and Preparing Fresh Peas

Creating the perfect pasta e piselli (pasta and peas) dish starts with the peas. Whether you choose fresh or frozen peas, knowing the difference is key. It helps you get the best taste and texture.

Fresh vs. Frozen Peas

Frozen peas are easy and reliable. But fresh peas offer a unique taste and texture. They add a vibrant color and sweetness to your dish. But, the quality can change with the season and where you are.

Seasonal Availability Guide

  • Spring: Find tender, sweet English peas or snow peas in spring.
  • Summer: Shelling peas, or garden peas, are juiciest in summer.
  • Fall: Sugar snap peas and snow peas return in fall, adding crunch.

Always pick pea varieties that are bright, firm, and without spots. Fresh peas make your dish taste better and are healthier. They keep their nutritional quality and frozen vegetable quality high.

Sauce Variations and Flavor Enhancements

Make your pasta and peas dish even better by trying out different sauces and ingredients. You can choose from a creamy cream sauce or a light vegetable broth. There are many ways to make this Italian classic your own.

Think about what sauce you want. A cream sauce with heavy cream or half-and-half makes it rich and smooth. Or, a vegetable broth or white wine sauce can give it a lighter, more subtle taste.

  • Try adding different herb additions like basil, rosemary, or parsley. They can make the dish smell and taste amazing.
  • Adding a bit of pancetta option can add a savory, salty flavor that goes well with the peas.
  • Top it off with some Parmesan cheese or olive oil. They add richness and depth to the dish.
Sauce VariationFlavor ProfileRecommended Additions
Cream SauceRich, indulgent, and velvetyParmesan cheese, garlic, fresh herbs
Vegetable BrothLight, aromatic, and delicateLemon zest, white wine, fresh peas
Pancetta OptionSavory, salty, and umami-richGarlic, onions, fresh thyme

Try different sauces, herb additions, and pancetta to make your pasta and peas dish unique. Be creative and find the flavor you love. It’s all about making it your own.

Nutritional Benefits and Health Considerations

Pasta e piselli is a classic Italian dish loved for its taste. It’s also packed with nutrients, making it a healthy choice for many diets. The mix of pasta and peas gives you vegetarian protein, complex carbs, and fiber.

Protein and Fiber Content

One serving of this dish has about 10 grams of protein, mostly from the peas. Peas are a top choice for plant-based protein, perfect for vegetarians and those looking for low-fat options. Plus, the dish is rich in fiber, thanks to the peas, which helps with digestion and keeps you full.

Caloric Information

NutrientAmount per Serving
Calories300 calories
Total Fat5 grams
Carbohydrates50 grams
Protein10 grams

Dietary Adaptations

For those on a gluten-free diet, you can swap traditional pasta for gluten-free pasta. You can also use low-fat cheese or dairy-free options to meet dietary needs or preferences.

Pasta e piselli is a nutritious and flexible dish. It’s great for a balanced diet, offering health benefits and dietary options for everyone.

Wine Pairing and Serving Suggestions

When pairing Italian white wines with pasta and peas, think about the flavors. This classic Italian dish needs crisp, clean white wines. They should enhance the meal without overpowering it.

Pinot Grigio is a great choice. It’s a popular Italian white wine with bright acidity and citrus notes. Its clean taste goes well with the peas and pasta. You can also try Verdicchio or Greco di Tufo for a bit more complexity.

For the serving temperature, chill your Italian white wines to 45-50°F (7-10°C). This makes the wine crisp and refreshing. It pairs well with the pasta and peas.

For side dishes, add a simple green salad or crusty Italian bread. These dishes complement the meal. They make the dining experience balanced and enjoyable.

Wine VarietalFlavor ProfileServing Temperature
Pinot GrigioCrisp, clean, with citrus notes45-50°F (7-10°C)
VerdicchioMineral-driven, with subtle complexity45-50°F (7-10°C)
Greco di TufoAromatic, with a touch of acidity45-50°F (7-10°C)

Storage and Reheating Guidelines

Storing and reheating leftover pasta and peas is key for food safety and taste. By following a few easy steps, you can enjoy your meal prep leftovers safely and well.

To store leftover pasta and peas, put them in an airtight container. Then, refrigerate them within two hours of cooking. This stops harmful bacteria from growing and keeps the flavors bright. When reheating, keep these tips in mind:

  1. Warm the pasta and peas in a saucepan over medium heat, stirring now and then, until hot. Don’t microwave, as it can dry out the dish.
  2. If it’s too dry, add a bit of water or broth to moisten the pasta and peas.
  3. Reheat only what you’ll eat, as reheating too much can ruin the texture and taste.

By sticking to these storage and reheating tips, you can safely enjoy your leftover pasta and peas. This way, you keep the dish tasty and safe to eat.

Common Mistakes to Avoid When Making Pasta e Piselli

Making pasta e piselli, a classic Italian dish, can be a fun experience. But, there are common mistakes to watch out for. These mistakes can affect the pasta’s texture, the seasoning, and the sauce’s smoothness.

Cooking Time Pitfalls

One big mistake is overcooking the pasta. It should be al dente, with a bit of bite. This helps it pair well with the soft peas. If the pasta is too mushy, it’s not good. Also, peas that are not soft enough can ruin the dish.

Seasoning Balance Tips

Getting the seasoning right is key for a tasty pasta e piselli. Too much salt makes it bad, while too little makes it taste flat. Use salt, pepper, and herbs wisely to enhance the peas’ sweetness and the pasta’s flavor.

The sauce’s consistency is also important. A too-thin sauce leaves the pasta feeling unfinished. But, a too-thick sauce can make the dish heavy. The goal is a smooth sauce that coats everything well, blending the flavors together.

By avoiding these common mistakes and following the right cooking and seasoning tips, you can make a delicious pasta e piselli. It will be a dish that pleases the senses and satisfies your taste buds.

Conclusion

In this journey, we’ve explored the classic Italian dish of pasta and peas. We’ve seen its rich history and cultural importance. We’ve also learned how to make this beloved meal.

This pasta e piselli recipe is perfect for a quick dinner or to add to your pasta collection. It’s full of flavor, healthy, and easy to make. It’s a great choice for any home cook.

We invite you to enjoy this timeless dish and try new versions. Pasta and peas shows how simple ingredients can make a delicious meal. Buon appetito!

FAQ

What are the essential ingredients for making an authentic pasta and peas dish?

To make traditional pasta e piselli, you need pasta like ditalini or small shells. You also need fresh or frozen peas, Parmesan cheese, olive oil, and garlic. These ingredients make the classic Italian dish.

What are the best types of pasta to use for pasta and peas?

For pasta and peas, use small pasta shapes like ditalini, small shells, or tubetti. These shapes fit well with the peas, making the dish smooth.

Can I use frozen peas instead of fresh peas?

Yes, frozen peas are a good substitute for fresh peas. They are nutritious and available all year, even when fresh peas are not.

What are some tips for selecting and preparing fresh peas?

Choose fresh peas with bright, green pods that are plump and without blemishes. Shelled peas should be bright green and firm. For the best taste, use peas in season and eat them soon after picking.

What kitchen tools and equipment are essential for making pasta and peas?

You’ll need a large pot for cooking pasta, a colander for draining, and a skillet for sautéing. Also, a wooden spoon, a cutting board, and a knife are necessary for prep.

Can I make variations to the classic pasta and peas recipe?

Yes, you can make the dish your own. Try different sauces, like creamy or broth-based. Add pancetta, herbs, or spices to change the flavor.

What are the nutritional benefits of pasta and peas?

Pasta and peas are nutritious. Pasta gives you carbs and protein, while peas offer fiber, vitamins, and minerals. Together, they make a healthy meal.

How should I store and reheat leftover pasta and peas?

Store leftovers in an airtight container in the fridge for 3-4 days. Reheat by adding water or broth and warming it gently on the stovetop or in the microwave.

What are some common mistakes to avoid when making pasta and peas?

Avoid overcooking pasta to prevent it from becoming mushy. Also, don’t underseason the dish. Make sure the pasta and peas are cooked right and mix well.

30 Easy Paleo Recipes for Healthy Living

Are you ready to start a healthier, more vibrant lifestyle? Look no further than paleo-friendly recipes! This guide offers 30 easy and delicious paleo dishes. They will change how you plan meals and nourish your body. You’ll find quick breakfasts, satisfying main courses, and tempting desserts for everyone.

The paleo diet focuses on whole, unprocessed foods. It’s become very popular lately. By eating nutrient-dense foods and avoiding processed items, it helps with weight management and overall health. Curious about the benefits of paleo eating? Let’s explore these simple, yet flavorful recipes together.

Key Takeaways

  • Discover 30 easy and delicious paleo recipes for healthy living
  • Understand the fundamental principles of the paleo diet and its health benefits
  • Explore a wide range of paleo-friendly meals, from breakfast to desserts
  • Learn essential kitchen tools and meal prep tips to streamline your paleo journey
  • Gain insights into paleo-approved snacks and treats to satisfy your cravings

Understanding the Paleo Diet Fundamentals

The paleo diet, also known as the ancestral eating or caveman diet, focuses on whole, unprocessed foods. It’s inspired by our hunter-gatherer ancestors. This diet emphasizes whole foods and an anti-inflammatory diet.

Key Principles of Paleo Eating

  • Emphasis on whole, unprocessed foods
  • Avoidance of grains, legumes, dairy, and refined sugars
  • Focus on high-quality, nutrient-dense ingredients
  • Encouragement of an active, natural lifestyle

Foods to Embrace and Avoid

The paleo diet promotes eating whole foods like:

  • Meat, poultry, and seafood
  • Vegetables and fruits
  • Nuts and seeds
  • Healthy fats (e.g., olive oil, avocado, coconut oil)

It also avoids processed, refined, and artificial ingredients. This includes:

  • Grains (e.g., wheat, rice, corn)
  • Legumes (e.g., beans, lentils, peanuts)
  • Dairy products
  • Refined sugars and sweeteners

Health Benefits of Going Paleo

Following a paleo diet can bring many health benefits. These include:

  1. Improved blood sugar regulation and reduced risk of type 2 diabetes
  2. Reduced inflammation and better management of inflammatory conditions
  3. Enhanced gut health and digestion
  4. Increased energy levels and better overall well-being

By following the paleo diet, you can enjoy a nutritious, whole foods-based diet. It aligns with our ancestral past and supports health and wellness.

Essential Kitchen Tools for Paleo Cooking

Starting a paleo lifestyle means learning new cooking ways. You’ll need the right tools to make cooking easier. Having top-notch paleo cooking equipment, kitchen gadgets, and food prep tools is key. They help make your paleo cooking smooth.

A good set of chef’s knives is a must for any paleo kitchen. Sharp knives make chopping and slicing easy. Use them with a strong cutting board for a solid prep base.

  • High-quality chef’s knives
  • Versatile cutting boards
  • Spiralizer for creating veggie noodles
  • Food processor for nut butters, pesto, and more
  • Blender for smoothies, sauces, and dressings
  • Immersion blender for soups and marinades
  • Slow cooker for effortless meal prep
  • Instant Pot for quick-cooking paleo dishes

With these paleo cooking equipment and kitchen gadgets, you’re set for tasty paleo meals. Choose the right food prep tools to keep your paleo life easy and fun.

Breakfast Easy Paleo Recipes

Start your day with a tasty and healthy paleo breakfast. Choose from quick egg dishes, grain-free bowls, or protein-packed smoothies. These ideas will energize you and keep you full until lunch.

Quick Egg-Based Dishes

Eggs are key in the paleo diet, offering quick protein. Try paleo quiche, frittatas, or scrambled eggs with sautéed veggies. These can be made ahead for a stress-free morning.

Grain-Free Breakfast Bowls

For a filling paleo breakfast, try grain-free bowls. Use riced cauliflower, roasted sweet potatoes, and fresh berries. Add avocado or nut butter for extra health benefits.

Paleo Smoothie Options

Make a quick, nutritious paleo smoothie for breakfast. Mix fruits, veggies, healthy fats, and protein sources like almond milk, chia seeds, and collagen powder. Smoothies are perfect for getting important vitamins and minerals early.

With these simple paleo breakfast recipes, you can kickstart your day with healthy, protein-rich meals. They follow the paleo diet’s principles perfectly.

Protein-Rich Main Course Dishes

Make your paleo dinners more exciting with these protein-rich main courses. You can choose from grilled meats, seafood, or plant-based dishes. These recipes will keep you full and energized, all while following the paleo diet.

Try a paleo-friendly steak that’s seasoned just right. Or enjoy a baked salmon fillet with a tangy lemon-dill glaze. For a meatless choice, go for a roasted vegetable and quinoa bowl that’s packed with protein and nutrients.

These protein-rich main courses will quickly become your family’s favorites. They show how versatile paleo cooking can be. So, get your ingredients ready and start making these tasty lean protein meals.

Paleo Dinner RecipeProtein SourcePrep Time
Grilled Lemon-Herb ChickenChicken Breast30 minutes
Seared Ahi Tuna SteaksAhi Tuna20 minutes
Paleo Meatballs with Zucchini NoodlesGround Beef45 minutes

Versatile Paleo Protein Options

Discover a variety of meat-based entrees that fit the paleo diet and are simple to make. You can enjoy tender grilled meats or flavorful seafood dishes. These recipes offer many protein sources to satisfy your taste buds.

  • Grilled Steak with Chimichurri Sauce
  • Baked Lemon-Garlic Cod
  • Paleo Beef and Broccoli Stir-Fry

Simple Paleo Lunch Ideas

Following a paleo diet doesn’t mean you have to give up on tasty and easy lunches. There are many simple, healthy paleo recipes perfect for busy days.

Make-Ahead Meal Prep Solutions

Planning ahead is key for paleo lunches. Spend a few hours on the weekend making meals like grilled chicken and roasted veggies. Or, make a big batch of paleo chili for easy portions all week.

Quick Office-Friendly Options

For busy workdays, quick and easy paleo meals are a lifesaver. Try a simple salad with grilled salmon or a wrap with turkey, avocado, and veggies. These lunches keep you energized all afternoon.

Portable Paleo Snacks

Having paleo snacks ready is crucial for staying energized. Choose items like nuts, fruit, hard-boiled eggs, or paleo energy bars. These snacks fit easily in your bag or lunchbox, making sure you’re always ready for hunger.

Paleo Lunch RecipesPrep TimeCook Time
Grilled Chicken and Roasted Vegetable Salad10 minutes30 minutes
Paleo Breakfast Burrito5 minutes15 minutes
Paleo Tuna Salad Stuffed Avocado15 minutes0 minutes
Paleo Cauliflower Rice Bowl with Grilled Shrimp20 minutes20 minutes

Vegetable Side Dishes and Salads

Make your paleo meals better with paleo veggie recipes and healthy side dishes. Enjoy leafy green salads and roasted vegetable mixes. These recipes highlight the natural tastes and health perks of plants.

Discover the magic of seasonal veggies in the paleo kitchen. Try these tasty and simple paleo veggie recipes. They’ll make your meals both healthy and delicious.

Roasted Cauliflower with Garlic and Herbs

This paleo veggie recipe is easy yet fancy. It’s tender cauliflower, garlic, herbs, and olive oil. It’s a great nutrient-dense side for any paleo dish.

Zucchini Noodle Salad with Pesto

Zucchini noodles are a great choice for a leafy green salad. They’re mixed with basil pesto, cherry tomatoes, and pine nuts. It’s a tasty and nutrient-dense side.

Roasted Sweet Potato Wedges

These paleo veggie recipes are perfect for a crunchy snack. Sweet potato wedges, seasoned with spices, add color and texture to your meals.

Balsamic Roasted Brussels Sprouts

Brussels sprouts become sweet with this paleo veggie recipe. They’re tossed in balsamic glaze and roasted. These nutrient-dense sides are great with any paleo dish.

Kale and Avocado Salad

This leafy green salad is packed with nutrients. Kale, avocado, almonds, and lemon vinaigrette make it a filling and nutrient-dense side.

Paleo-Approved Snacks and Appetizers

Embracing the paleo lifestyle doesn’t mean missing out on tasty snacks and appetizers. The paleo diet offers a variety of paleo snack ideas and healthy appetizers. These options satisfy your cravings and support your clean eating journey. From quick party bites to post-workout fuel and kid-friendly snacks, these clean eating treats will keep you feeling great and on track.

Quick Party Bites

Hosting a gathering or bringing a dish to a potluck? These paleo-friendly party bites will impress. Try making bacon-wrapped dates, spicy kale chips, or savory stuffed mushrooms. These snacks are easy to make and won’t ruin your healthy lifestyle.

Post-Workout Snacks

Need to refuel after a workout? Paleo snacks are perfect. Choose protein-rich options like hard-boiled eggs, almond butter with apple slices, or homemade paleo energy bars. These snacks will help you recover and keep your energy up.

Kid-Friendly Options

Getting kids to try paleo can be fun. Make paleo snack ideas that kids will love. Offer veggie sticks with guacamole, paleo-friendly fruit leathers, or bite-sized paleo muffins. These snacks are healthy and tasty for kids.

Adding these paleo-approved snacks and appetizers to your routine is a great idea. You can enjoy the flavors you love while staying healthy. Explore these options and indulge in delicious, nutritious treats that support your paleo journey.

Easy Paleo Recipes for Beginners

Starting the paleo diet can seem hard, especially if you’re new. But don’t worry, there are many simple recipes to help you begin. These recipes are great for both experienced cooks and beginners. They make it easy to create tasty, healthy meals.

These recipes include quick dishes like eggs and grain-free bowls. They show that healthy eating can be easy. Plus, there are snacks and meals for kids, so the whole family can enjoy paleo living. Let’s explore some easy paleo recipes to start your healthy journey.

Beginner-Friendly Paleo Recipes

  • Paleo Scrambled Eggs with Avocado and Spinach
  • Zucchini Noodle Stir-Fry with Chicken and Veggies
  • Baked Sweet Potato Fries with Homemade Aioli
  • Grilled Salmon with Roasted Brussels Sprouts
  • Cauliflower Rice Stir-Fry with Shrimp and Broccoli

These meals are not only simple to make but also full of good ingredients. They use fresh produce, lean proteins, and healthy fats. This will help you start your paleo journey with confidence.

Remember, the secret to great paleo cooking is simplicity and planning. With these recipes, you’ll soon be making delicious, healthy meals. Enjoy your cooking!

Paleo Desserts and Treats

Following a paleo lifestyle doesn’t mean you can’t enjoy delicious desserts. Discover a world of paleo sweets and grain-free desserts that are both tasty and healthy. Learn about natural sugar alternatives and how to bake without grains for guilt-free treats.

Natural Sweetener Alternatives

Traditional refined sugars are off-limits for paleo followers. But, there are many natural sweeteners that fit paleo diets. Try honey, maple syrup, dates, and coconut sugar to enjoy sweet treats without processed sugar.

Baked Goods Without Grains

Paleo baking is all about using different ingredients. Instead of wheat flour, use almond flour, coconut flour, and more. These alternatives help make tasty paleo sweets and grain-free desserts. You can make everything from fluffy cakes to chewy cookies.

No-Bake Dessert Options

No-bake desserts are perfect for those who don’t want to spend time in the kitchen. Make creamy chia puddings, rich raw truffles, or cool frozen treats. These desserts are easy to make and let you enjoy healthy indulgence without baking.

Natural SweetenerGlycemic IndexNutritional Benefits
Honey58Rich in antioxidants, enzymes, and minerals
Maple Syrup54Contains antioxidants and trace minerals
Dates42High in fiber, vitamins, and minerals
Coconut Sugar54Retains some nutrients from the coconut palm

Meal Planning and Prep Tips

Staying on track with the paleo lifestyle means planning meals and prepping food well. Start by planning your meals for the week. Use whole, nutrient-rich foods that fit the paleo diet. Get good storage containers and cook big batches of proteins, veggies, and fats for the week.

Save time by chopping veggies early, marinating meats overnight, and prepping snacks and sides on weekends. These small actions can greatly help your paleo meal routine. Also, try making paleo recipes ahead of time and freezing them for quick meals on busy days.

Good meal planning and prep are crucial for sticking to the paleo diet in our busy lives. With some organization and a well-stocked pantry, you can enjoy the paleo lifestyle without stress. Use these tips to make your paleo journey easier and focus on your health.

FAQ

What is the paleo diet, and how does it work?

The paleo diet focuses on eating whole, unprocessed foods. It’s based on what people ate during the Paleolithic era. This includes fruits, vegetables, lean meats, seafood, eggs, nuts, and seeds.

The diet avoids grains, legumes, dairy, and processed foods. It’s about eating foods that are as close to nature as possible.

What are the potential health benefits of following a paleo diet?

The paleo diet can lead to weight loss and better blood sugar control. It may also reduce inflammation and improve heart health. Eating nutrient-dense foods supports overall wellness and a healthy lifestyle.

What are some essential kitchen tools for paleo cooking?

Key tools for paleo cooking include high-quality knives and a food processor. A blender, spiralizer, and slow cooker or Instant Pot are also essential. These tools help prepare a variety of paleo meals and snacks efficiently.

What are some quick and easy paleo breakfast ideas?

Quick paleo breakfasts include egg dishes like frittatas or omelets. Grain-free breakfast bowls with avocado, berries, and nuts are also great. Smoothies made with almond milk, spinach, and chia seeds are nutritious and easy to make.

How can I meal prep for the paleo diet?

Meal prep for the paleo diet involves making large batches of protein-rich dishes. This includes grilled chicken or roasted salmon. Preparing vegetable sides and salads in advance is also helpful.

Creating portable snacks like hard-boiled eggs, veggie sticks, and trail mixes is key. These strategies save time and ensure healthy meals and snacks all week.

What are some paleo-approved dessert and treat options?

Paleo desserts use natural sweeteners like honey, maple syrup, or dates. They avoid grains and refined sugars. Examples include grain-free baked goods and no-bake energy bites.

Fruit-based sweets like baked apples or berry compotes are also paleo-friendly. These options allow for sweet treats while following paleo principles.

How can I meal plan and prep for the paleo diet effectively?

Effective paleo meal planning involves batch cooking and prepping snacks and sides. Creating a weekly menu ensures a variety of paleo options. Planning ahead reduces stress, saves time, and supports your paleo lifestyle.

Quick & Easy Salmon Breakfast Recipes to Start Your Day

Make your mornings better with salmon! It’s full of omega-3s and protein, great for your heart. Whether you want a classic dish or something fast for busy days, we’ve got you covered.

Key Takeaways

  • Salmon is a nutrient-dense choice for a healthy breakfast, providing essential omega-3s and protein.
  • Quick and easy salmon breakfast recipes can help you start your day with a nutritious meal.
  • Incorporating salmon into your morning routine can boost brain function and energy levels.
  • Salmon breakfast options range from traditional dishes to convenient grab-and-go options.
  • Selecting high-quality salmon and storing it properly are important for enjoying the best flavors and health benefits.

Benefits of Starting Your Day with Salmon

Adding salmon to your breakfast can bring many health benefits. It’s packed with omega-3 fatty acids, which are great for your brain and heart. These fats help fight inflammation and lower disease risk, making salmon a smart choice for breakfast.

Omega-3 Rich Morning Nutrition

Salmon is a top source of omega-3 fatty acids, like EPA and DHA. These nutrients are key for brain health, supporting your thinking and memory. Eating salmon for breakfast gives you a brain-boosting start to the day.

Protein-Packed Breakfast Benefits

Salmon is also a great source of high-quality protein. It gives you energy that lasts all morning. Protein-rich breakfasts help you feel full and keep your blood sugar steady. Choosing salmon for breakfast fuels your body and mind for a day full of energy.

Brain-Boosting Morning Energy

Salmon is not just about omega-3s; it’s also full of vitamins and minerals for your brain. Its mix of protein, healthy fats, and nutrients gives you a morning brain boost. This helps you stay focused and sharp all day long.

Essential Kitchen Tools and Ingredients

Preparing tasty salmon breakfasts needs the right tools and ingredients. You’ll need efficient cooking gear and tasty seasonings. These salmon breakfast essentials make cooking smooth and successful.

Here are the kitchen equipment for salmon recipes you should have:

  • A high-quality nonstick skillet or frying pan for searing and cooking salmon fillets
  • A sharp chef’s knife for effortlessly slicing and portioning the salmon
  • A sturdy cutting board to provide a stable surface for meal preparation
  • Measuring cups and spoons to precisely portion out ingredients
  • A digital food thermometer to ensure your salmon is cooked to the perfect temperature
  • A set of mixing bowls for combining ingredients and whipping up sauces

Also, having the right salmon breakfast ingredients makes a big difference. Some must-haves include:

  1. Fresh salmon fillets for the main protein component
  2. Eggs for classic breakfast dishes like salmon and eggs
  3. Hollandaise sauce or other creamy accompaniments
  4. Leafy greens like spinach or arugula for nutrient-dense salads
  5. Whole grains such as quinoa or brown rice for hearty breakfast bowls
  6. Flavorful herbs and spices to season your salmon dishes

With these salmon breakfast essentials and kitchen equipment for salmon recipes, you’re ready to make delicious salmon breakfasts. These will give you the energy to start your day right.

Classic Smoked Salmon and Eggs Benedict

Try the ultimate breakfast treat – Smoked Salmon Eggs Benedict. It’s a mix of hollandaise sauce, soft poached eggs, and smoky salmon. It’s a rich and tasty start to your day.

Hollandaise Sauce Preparation Tips

Making smooth hollandaise sauce is key. Start by mixing egg yolks, lemon juice, and salt in a double boiler. Slowly add melted butter, whisking all the time, until it thickens.

Be patient and keep the heat low. This prevents the eggs from scrambling.

Perfect Poaching Techniques

  • Fill a large saucepan with water and bring it to a gentle simmer, not a rolling boil.
  • Crack fresh, cold eggs into a small ramekin or cup, then gently slide them into the simmering water.
  • Cook the eggs for 3-4 minutes, until the whites are set and the yolks are still runny.
  • Use a slotted spoon to carefully remove the poached eggs from the water.

Assembly and Presentation

To make Smoked Salmon Eggs Benedict, start with toasted English muffin or toast. Add a layer of smooth smoked salmon, then the poached eggs. Drizzle hollandaise sauce over it.

Finish with fresh chives or dill. This makes it look like a dish from a fancy restaurant.

Salmon Breakfast Recipes for Busy Mornings

Weekday mornings can be hectic, but you don’t have to skip breakfast. These quick salmon breakfast recipes are great for busy days. They offer tasty and easy morning recipes ready in 15 minutes or less. Ditch the usual toast or sugary cereal for time-saving breakfast ideas that pack protein from salmon.

Salmon Toast

Begin your day with whole-grain toast, topped with smoked salmon, creamy avocado, and fresh dill. Add a soft-boiled egg for more protein.

Salmon Breakfast Wrap

Try a salmon breakfast wrap for a convenient meal. Spread cream cheese on a whole-wheat tortilla, add smoked salmon, and your favorite veggies. Fold it up and take it with you.

Salmon Breakfast Scramble

Make a quick salmon breakfast by whisking eggs with salmon, chives, and lemon zest. Serve with whole-grain toast for a filling start.

These easy morning recipes show you can have tasty, healthy breakfasts even when you’re in a rush. Enjoy the benefits of salmon with these quick and tasty options.

Savory Salmon Breakfast Bowls

Start your day with a delicious salmon breakfast bowl. These bowls are packed with healthy ingredients. They offer a tasty and nutritious way to begin your morning.

Grain Base Options

Choose a nutritious grain to start your bowl. Options include:

  • Quinoa
  • Brown rice
  • Farro
  • Oats

These grains are rich in fiber. They make a great base for your bowl and pair well with salmon and other toppings.

Vegetable Combinations

Add fresh veggies to your bowl for flavor and color. Try:

  1. Sautéed spinach or kale
  2. Roasted sweet potatoes or beets
  3. Sliced avocado
  4. Diced tomatoes
  5. Crisp cucumber slices

There are many choices. You can pick your favorites to make a meal that’s both tasty and healthy.

Sauce and Seasoning Suggestions

Make your bowl even better with sauces and seasonings. Try a creamy Greek yogurt dressing or a zesty lemon-dill vinaigrette. Add herbs like dill, chives, or parsley for a fresh taste. A bit of salt and pepper can also boost the flavor.

Customize your salmon breakfast bowl with different grains, veggies, sauces, and seasonings. This way, you can make a meal that’s both unique and energizing. Enjoy a healthy start to your day with these savory bowls.

Make-Ahead Salmon Breakfast Ideas

Mornings can be busy, but you don’t have to skip breakfast. With some meal prep, you can enjoy salmon-based breakfasts even when you’re in a rush. Here are some ideas for make-ahead salmon breakfasts to make your mornings easier.

Overnight Salmon Oats

Make a tasty breakfast the night before with overnight oats. Mix rolled oats, milk, and flaked salmon in a jar. Add berries, nuts, or honey on top. Refrigerate it overnight for a quick, healthy meal prep salmon breakfast in the morning.

Salmon Breakfast Burritos

Make a batch of breakfast burritos with eggs, salmon, and veggies. Wrap them up and freeze. Reheat them in the microwave or oven for a tasty batch cooking breakfast option.

Salmon Frittata

Bake a salmon-filled frittata on the weekend. Slice it into portions for easy reheating. Add your favorite veggies, cheese, and herbs for a protein-packed meal prep salmon breakfast.

Preparing these make-ahead salmon breakfasts saves you time. Enjoy the ease of overnight salmon recipes and batch cooking breakfast while getting the health benefits of salmon.

Low-Carb Salmon Breakfast Options

Starting your day with a low-carb salmon breakfast is a tasty and fulfilling choice. Salmon is packed with protein, healthy fats, and vitamins and minerals. It’s perfect for a keto-friendly morning meal.

Keto-Friendly Ingredients

When making low-carb salmon breakfasts, use keto-friendly ingredients like:

  • Salmon (fresh or smoked)
  • Eggs
  • Avocado
  • Leafy greens (spinach, kale, arugula)
  • Low-carb vegetables (broccoli, cauliflower, zucchini)
  • Healthy fats (olive oil, coconut oil, butter)
  • Herbs and spices (dill, chives, lemon pepper)

Portion Control Guidelines

It’s important to keep portions balanced, even on a low-carb or keto diet. A good low-carb salmon breakfast portion includes:

  • 3-4 ounces of cooked salmon
  • 2-3 eggs
  • 1/2 avocado
  • 1 cup of leafy greens or low-carb vegetables

Controlling portions helps you meet your diet goals and get the nutrients you need for a great start.

Tips for Selecting and Storing Salmon

Choosing the right salmon is crucial for your breakfast recipes. Whether it’s smoked salmon or a fresh fillet, knowing how to pick and store it is important. This ensures you get the best flavor and health benefits.

For fresh salmon, look for vibrant color, firm texture, and a clean smell. Stay away from dull, slimy, or smelly salmon. These signs indicate it’s not fresh. For the best types of salmon for breakfast, consider:

  • Atlantic salmon: Known for its rich, buttery taste and soft texture.
  • Coho salmon: Offers a milder taste and firmer flesh.
  • Sockeye salmon: Famous for its deep-red color and strong, sweet flavor.

After picking the perfect salmon, it’s important to store it right. Keep fresh salmon fillets in the coldest part of your fridge, at 40°F or below. Eat it within 1-2 days. For longer storage, wrap it tightly in plastic or foil and freeze at 0°F or below. It can last up to 3 months.

Salmon Storage TipsFresh SalmonFrozen Salmon
Storage Temperature40°F or below0°F or below
Storage Duration1-2 daysUp to 3 months
PackagingPlastic wrap or aluminum foilPlastic wrap or vacuum-sealed

By following these tips for selecting and storing salmon, you’ll make tasty and healthy breakfasts. These dishes will give you the energy to start your day right.

Conclusion

We’ve looked at how salmon can boost your breakfast. It’s full of omega-3s and protein. These make it a great way to start your day.

There are many ways to enjoy salmon in the morning. You can try a smoked salmon and eggs Benedict, a salmon breakfast bowl, or a salmon-based meal you can make ahead. Each option brings its own set of flavors and health benefits.

By choosing high-quality salmon for your breakfast, you’re giving your body and brain a great start. Try out different salmon recipes and find what you like best. A healthy breakfast with salmon can make your day more productive and full of energy.

FAQ

What are the key benefits of starting your day with salmon?

Salmon is packed with omega-3 fatty acids, which are great for your brain. It’s also a protein-rich food that keeps you full and energized. The natural oils in salmon give you a boost of energy to start your day.

What essential kitchen tools and ingredients are needed for salmon breakfast recipes?

You’ll need a skillet, a sharp knife, measuring cups, and a mixing bowl to make salmon breakfast dishes. Key ingredients include fresh or smoked salmon, eggs, hollandaise sauce, whole grains, and fresh vegetables and herbs.

How can I make Smoked Salmon Eggs Benedict at home?

To make Smoked Salmon Eggs Benedict, start by making hollandaise sauce. Whisk together egg yolks, lemon juice, and melted butter. Then, poach the eggs in simmering water. Layer toasted English muffins with smoked salmon, eggs, and hollandaise sauce for a tasty breakfast.

What are some quick and easy salmon breakfast recipes for busy mornings?

For quick salmon breakfasts, try a Salmon Breakfast Wrap with scrambled eggs, avocado, and salsa. Or, make Salmon Breakfast Toast with flaked salmon, cream cheese, and tomatoes. Salmon Breakfast Scrambles are also easy, letting you mix salmon with eggs, veggies, and herbs.

How can I incorporate salmon into a low-carb or keto-friendly breakfast?

For low-carb or keto salmon breakfasts, use eggs, avocado, leafy greens, and healthy fats. Try Salmon Breakfast Frittatas, Salmon and Veggie Breakfast Bowls, or Salmon Breakfast Lettuce Wraps. Choose low-carb toppings and sides to stay on track.

What tips should I keep in mind when selecting and storing salmon for breakfast recipes?

Choose fresh, high-quality salmon fillets or slices. Wild-caught salmon is better than farmed. Check for bright color and firm texture. Store salmon in the fridge at 40°F or below and use within 1-2 days. Frozen salmon can be thawed in the fridge and used in 3-4 days.

Best Recipes for Christmas of 2024: Holiday Feast Guide

Best Recipes for Christmas of 2024 ,Christmas is a time for family, traditions, and delicious food. As 2024’s holiday season nears, this guide has the top Christmas recipes for a memorable feast. You’ll find classic dishes and new twists on desserts to impress your guests.

Key Takeaways

  • Discover a variety of traditional and innovative Christmas recipes for 2024
  • Plan a complete holiday feast, from main dishes and appetizers to side dishes and desserts
  • Explore modern twists on classic Christmas favorites and festive cocktails
  • Find recipes catering to special diets and dietary preferences
  • Prepare make-ahead breakfast ideas to start your Christmas day off right

Traditional Christmas Main Dishes for 2024

As the holiday season nears, families look forward to classic Christmas dishes. In 2024, these favorites get a modern twist, blending tradition with innovation.

Perfect Honey-Glazed Holiday Ham

The holiday ham is a must-have at Christmas. This year, we’ve made a honey-glazed version that’s both sweet and savory. A special marinade creates a caramelized sheen, making it a standout dish.

Herb-Crusted Prime Rib Roast

The Christmas roast that stands out is the herb-crusted prime rib. It’s rubbed with rosemary, thyme, and garlic, making it tender and flavorful. The crust adds a nice crunch to each bite.

Stuffed Turkey with Cranberry Glaze

The stuffed turkey is a beloved tradition, now with a cranberry glaze. The glaze caramelizes, giving the turkey a beautiful finish. The stuffing adds savory flavors that everyone will love.

“These updated Christmas main dishes bring a fresh perspective to our holiday table, while still honoring the timeless flavors we cherish.”

Festive Christmas Appetizers and Starters

Make your Christmas party special with tasty holiday appetizers and starters. These recipes offer a mix of savory and sweet, perfect for a memorable feast.

Try the Bacon-Wrapped Dates for a mix of salty and sweet. Or, go for the Cranberry Brie Bites for a burst of tartness and creamy brie in a flaky pastry.

Holiday AppetizersServing SizePrep Time
Bacon-Wrapped Dates24 pieces20 minutes
Cranberry Brie Bites32 pieces30 minutes
Mini Caprese Skewers20 skewers15 minutes
Baked Brie en Croute8 servings45 minutes

For something light, serve Mini Caprese Skewers. They’re a colorful mix of cherry tomatoes, mozzarella, and basil. The Baked Brie en Croute is also a hit, with its golden crust and melted brie inside.

These holiday appetizers, Christmas hors d’oeuvres, and festive starters are great for starting your Christmas celebration. They’re easy to make and sure to please your guests!

Best Recipes for Christmas of 2024: Side Dishes That Steal the Show

At Christmas, side dishes are just as important as the main course. This year, three recipes are expected to be the stars of the holiday table.

Creamy Garlic Mashed Potatoes

No Christmas meal is complete without creamy mashed potatoes. This year, we add fragrant garlic to make it even better. It’s a side that matches the holiday main course perfectly.

Roasted Winter Vegetables Medley

Add color to your Christmas table with roasted winter vegetables. This dish includes everything from root vegetables to Brussels sprouts. It’s a festive side that’s sure to impress.

Green Bean Casserole with Crispy Onions

This green bean casserole is a modern twist on a classic. It has tender green beans, creamy mushroom sauce, and crispy onions on top. It’s a dish that everyone will love.

DishKey IngredientsCooking Time
Creamy Garlic Mashed PotatoesPotatoes, butter, milk, garlic, salt, pepper40 minutes
Roasted Winter Vegetables MedleyCarrots, parsnips, Brussels sprouts, olive oil, herbs1 hour
Green Bean Casserole with Crispy OnionsGreen beans, mushrooms, cream of mushroom soup, fried onions1 hour 15 minutes

These Christmas side dishes are sure to impress your guests. They offer a mix of classic comfort and vibrant seasonal flavors. They’re the perfect addition to your holiday feast.

Modern Twists on Classic Christmas Desserts

The holiday season of 2024 brings a fresh wave to Christmas desserts. Say goodbye to old favorites like fruitcake and peppermint bark. This year, desserts are all about new flavors, textures, and looks that will wow your guests.

The Eggnog Crème Brûlée is a standout. It’s a creamy custard dessert with eggnog’s rich taste. The caramelized sugar on top adds a nice crunch, blending flavors and textures perfectly.

Try the Cranberry White Chocolate Trifle for a holiday twist. It’s a mix of tangy cranberry, fluffy vanilla cake, and creamy white chocolate mousse. It’s a feast for the eyes and taste buds.

  • Eggnog Crème Brûlée
  • Cranberry White Chocolate Trifle
  • Spiced Chai-Infused Cheesecake
  • Chocolate-Dipped Gingerbread Macarons

The Spiced Chai-Infused Cheesecake is another gem. It combines the warmth of chai spices with the cheesecake’s creaminess. A layer of chai-infused whipped cream on top makes it a sensory treat.

The Chocolate-Dipped Gingerbread Macarons are a modern spin on gingerbread cookies. These chewy macarons, filled with gingerbread spices, are covered in dark chocolate. It’s a mix of flavors and textures that’s hard to resist.

These desserts will impress your guests with their creativity and taste. They’re the essence of the 2024 holiday season. Enjoy these treats and experience the best of both tradition and innovation.

Holiday Cocktails and Festive Beverages

As Christmas nears, it’s time to gather with loved ones. We have a range of holiday cocktails and festive drinks to make your celebrations special. From classic Christmas cocktails to warm winter drinks, we’ve got you covered.

Signature Christmas Cocktails

Looking for a festive drink? Our signature Christmas cocktails will make your holiday merry. Try a creamy Classic Eggnog or a Mulled Wine with warm spices. Enjoy them with Christmas canapés for a joyful time.

Non-Alcoholic Holiday Punch Options

For those who prefer not to drink alcohol or want a break, our holiday mocktails and punches are perfect. Make a Cranberry-Orange Punch or a Spiced Apple Cider. They’ll keep everyone in the holiday mood.

Warm Winter Drinks

As it gets colder, warm drinks are just what you need. Our hot chocolate and mulled cider are perfect for cozying up by the fire. Try our Peppermint Mocha or Irish Coffee for a special treat.

CocktailDescriptionIngredients
Classic EggnogA rich, creamy holiday classicEggs, cream, sugar, nutmeg
Mulled WineA warm, spiced red wine treatRed wine, brandy, citrus, spices
Cranberry-Orange PunchA festive non-alcoholic punchCranberry juice, orange juice, ginger ale
Peppermint MochaA decadent winter coffee drinkEspresso, chocolate, peppermint syrup, milk

Whether you’re hosting a party or having a quiet night in, our drinks will add cheer to your holiday. Enjoy the flavors of the season and raise a glass!

Make-Ahead Christmas Breakfast Ideas

Christmas morning is magical, but cooking shouldn’t be a chore. These make-ahead breakfast ideas save the day. They include savory casseroles and sweet pastries, making your brunch festive and easy.

Overnight French Toast Bake

Make this rich French toast casserole the night before. Bake it on Christmas morning. It’s a mix of custardy bread, warm spices, and sweet maple syrup, perfect for your guests.

Sausage and Egg Breakfast Burrito Bake

Try this savory breakfast burrito bake for a hearty option. Layer fluffy eggs, spicy sausage, and melted cheese the day before. Bake it on Christmas morning for a tasty, easy breakfast.

Cinnamon Roll Christmas Tree

Turn store-bought cinnamon rolls into a festive tree. Arrange them in a tree shape, let them rise, then bake and drizzle with icing. It’s a stunning holiday breakfast centerpiece.

RecipePreparation TimeCooking Time
Overnight French Toast Bake20 minutes45 minutes
Sausage and Egg Breakfast Burrito Bake30 minutes1 hour
Cinnamon Roll Christmas Tree25 minutes30 minutes

These make-ahead breakfast ideas let you enjoy the holiday more. Choose from savory or sweet options. They’ll become your new family traditions.

“The key to a stress-free Christmas morning is planning ahead. These make-ahead breakfast recipes will have your holiday brunch table looking and tasting amazing, without the hassle.”

As the holiday season comes near, it’s time to dive into Christmas cookies. Whether you’re an experienced baker or new to the kitchen, these recipes are perfect. They’ll help you make festive treats that everyone will love.

Classic Sugar Cookies with Royal Icing

Classic sugar cookies with royal icing are a true Christmas symbol. They’re simple yet elegant, making them ideal for holiday parties. Their soft texture and bright colors are perfect for decorating.

Gingerbread Men Variations

Gingerbread men are a holiday favorite, but why not try something new? Mix up the flavors and designs to create unique treats. From traditional gingerbread to new twists, these cookies will impress your guests.

Chocolate Peppermint Cookies

Indulge in these rich chocolate peppermint cookies for a special treat. The mix of chocolate and peppermint is a flavor dream. These cookies are perfect for sharing or enjoying all by yourself.

Looking to bake classic cookies or try something new? These recipes will fill your kitchen with holiday joy. Get creative with Christmas cookies, holiday baking, and festive treats.

Special Dietary Christmas Recipes

This holiday season, we’ve got you covered with a delightful range of Christmas recipes catering to diverse dietary needs. Whether you’re craving gluten-free indulgences, savoring vegan delights, or seeking keto-friendly festive treats, our collection promises to make your holiday feast an inclusive and delectable experience.

For those seeking gluten-free options, our Roasted Garlic and Herb Crusted Pork Tenderloin and Flourless Chocolate Yule Log will have your taste buds dancing with joy. Vegans can indulge in our Stuffed Butternut Squash with Quinoa and Cranberries, as well as our decadent Vegan Peppermint Mocha Cupcakes.

And for those following a keto lifestyle, our Rosemary and Garlic Roasted Chicken with Cauliflower Mash and Keto Gingerbread Cookies will ensure that no one is left out of the holiday feast. Savor the flavors of the season, no matter your dietary preferences.

FAQ

What is the best way to plan a Christmas feast for 2024?

This guide offers top Christmas recipes for 2024. It covers main dishes, appetizers, desserts, and drinks. It helps plan a memorable feast with both traditional and new dishes.

Three classic Christmas main dishes are updated for 2024. These include a Honey-Glazed Holiday Ham, an Herb-Crusted Prime Rib Roast, and a Stuffed Turkey with Cranberry Glaze.

What are some festive Christmas appetizer and starter ideas?

The guide has easy and appealing Christmas appetizers and starters. They are hot and cold, for all diets, and use seasonal ingredients.

What are the best side dish recipes for a Christmas feast in 2024?

Three standout Christmas side dishes are featured. These include Creamy Garlic Mashed Potatoes, a Roasted Winter Vegetables Medley, and a Classic Green Bean Casserole with a Crispy Onion Topping.

What are some modern twists on classic Christmas desserts?

The guide offers creative takes on traditional Christmas desserts. It features new flavors, textures, and presentation styles to wow your guests.

What kind of holiday cocktails and festive beverages can I serve at my Christmas gathering?

The guide has a wide range of holiday drinks. This includes Signature Christmas Cocktails, Non-Alcoholic Punch Options, and Warm Winter Drinks for all preferences.

What are some make-ahead Christmas breakfast ideas?

This section has make-ahead breakfast and brunch recipes. They range from savory casseroles to sweet pastries, perfect for Christmas morning.

The guide includes simple yet delicious Christmas cookie recipes. These include Classic Sugar Cookies with Royal Icing, Gingerbread Men Variations, and Chocolate Peppermint Cookies, all quick and tasty.

Does the guide include any special dietary Christmas recipes?

Yes, the final section has Christmas recipes for special diets. It includes gluten-free, vegan, keto, and allergen-friendly options for main dishes, sides, and desserts.

Easy Homemade Tacos Recipe – Authentic Mexican Flavor

Tacos recipe Imagine the smell of grilled meat and the crunch of a homemade corn tortilla. Welcome to the world of authentic Mexican tacos. These have won hearts around the world. Now, you can make this delicious experience at home. Get ready to learn how to make perfect homemade tacos with authentic Mexican flavor.

This guide will take you through Mexican taco traditions and regional flavors. You’ll learn about the key ingredients and how to make them. Whether you’re a pro in the kitchen or just starting, this article will help you improve your taco-making skills.

So, what’s the secret to making authentic Mexican flavors at home? Let’s find out!

Key Takeaways

  • Discover the traditions and regional variations of authentic Mexican tacos
  • Learn the essential ingredients and preparation techniques for the perfect homemade tacos
  • Master the art of selecting the right meat and creating flavorful fillings
  • Explore a variety of fresh toppings and garnishes to enhance your taco experience
  • Uncover the secrets to making delicious homemade salsas and sauces
  • Understand the differences between corn and flour tortillas and how to prepare them
  • Avoid common mistakes and achieve taco-making perfection

Understanding Authentic Mexican Taco Traditions

Tacos are a beloved Mexican culinary icon, deeply rooted in the country’s rich cultural heritage. To truly appreciate the depths of authentic Mexican taco traditions, it’s essential to explore the regional variations and the evolution from traditional to modern interpretations.

Regional Mexican Taco Variations

Across Mexico’s diverse regions, the taco takes on unique local flavors and preparations. From the al pastor tacos of central Mexico, characterized by spit-roasted pork, to the seafood-centric tacos of coastal areas, each region boasts its own signature style. Tacos de lengua (beef tongue tacos) in the north, tacos de canasta (basket tacos) in the south – the regional taco landscape is a tapestry of delicious diversity.

Traditional vs. Modern Interpretations

While the foundations of authentic Mexican taco traditions remain strong, the modern taco landscape has evolved to incorporate innovative twists and reimagined flavors. Traditional recipes and preparation methods coexist with contemporary interpretations, blending the time-honored with the cutting-edge. This dynamic interplay between the old and the new has resulted in a taco renaissance, captivating the taste buds of taco enthusiasts worldwide.

Ultimately, the enduring allure of Mexican taco traditions lies in their ability to simultaneously honor the past and embrace the future. From the vibrant regional variations to the exciting modern interpretations, the humble taco continues to showcase the depth and diversity of Mexican culinary culture.

Essential Ingredients for Perfect Homemade Tacos

Making the perfect homemade taco is all about the right taco ingredients. You need the protein-rich meat, fresh taco components, and the right Mexican spices. Each part is key to a delicious taco.

The meat is the taco’s heart. You can use ground beef, shredded chicken, or even soy crumbles. Season it with Mexican spices like cumin, chili powder, garlic, and onion. This gives it a bold, Mexican flavor.

Essential Taco IngredientsRole in the Perfect Taco
Meat (ground beef, shredded chicken, etc.)Provides the protein-rich filling
Mexican spices (cumin, chili powder, garlic, onion)Adds authentic flavor to the meat filling
Corn or flour tortillasThe essential vessel for the taco
Diced tomatoes, onions, cilantroFresh taco components that add crunch and brightness
Shredded cheese, sour cream, guacamoleCreamy and cooling toppings that balance the flavors

The tortilla is crucial for the taco. Choose between corn or flour tortillas. The right one makes a big difference.

The fresh taco components like diced tomatoes, onions, and cilantro add crunch and freshness. Creamy toppings like cheese, sour cream, and guacamole balance the flavors. Together, they make a great taco.

Mastering the taco ingredients and their roles helps you make perfect homemade tacos. You’ll get the true flavors of Mexico.

Step-by-Step Tacos Recipe

Making homemade tacos is a fun cooking adventure. It lets you enjoy the real flavors of Mexico. Follow these steps to make perfect tacos at home, from the tasty meat to the fresh tortillas.

Preparing the Meat Filling

The key to a great taco is the meat. Start by cooking ground beef or turkey in a skillet. Cook it until it’s fully done, then drain any extra fat. Add spices like chili powder, cumin, and garlic powder to the meat. Simmer it in broth to add more flavor.

Making Fresh Tortillas

  1. Mix masa harina, warm water, and a bit of salt in a big bowl.
  2. Knead the dough until it’s smooth. Then, make small balls, like golf balls.
  3. Roll each ball into a thin tortilla with a rolling pin.
  4. Cook the tortillas in a dry skillet or griddle for 30 seconds to 1 minute on each side. They should puff up and get a bit charred.

Assembly Techniques

Now you have the meat and tortillas. It’s time to put your tacos together. Place a big spoonful of meat in the center of each tortilla. Add your favorite toppings like onions, cilantro, lettuce, cheese, and salsa or hot sauce.

IngredientQuantity
Ground beef or turkey1 lb
Masa harina2 cups
Warm water1 1/2 cups
Salt1 tsp
Chili powder2 tsp
Cumin1 tsp
Garlic powder1 tsp
Onion powder1 tsp
Beef or chicken broth1/4 cup

Choosing the Right Meat for Your Tacos

Choosing the right meat is key to making perfect homemade tacos. You can pick from traditional Mexican meats or try vegetarian options. Let’s look at the best taco meat choices to make your tacos stand out.

Exploring Traditional Taco Meats

Authentic Mexican tacos often use rich, flavorful meats. Here are some top picks:

  • Carne Asada – Grilled, thinly sliced steak with a savory, charred taste.
  • Al Pastor – Marinated, spit-roasted pork with spices and pineapple for a sweet flavor.
  • Carnitas – Slow-cooked or fried pork with a crispy outside and soft inside.

Exploring Vegetarian and Alternative Taco Fillings

For those who prefer meat-free tacos, there are many tasty options:

  1. Roasted Vegetable Tacos – A mix of roasted bell peppers, onions, and zucchini.
  2. Lentil or Bean-based Tacos – Protein-rich fillings from lentils, black beans, or pinto beans.
  3. Mushroom Tacos – Sautéed, seasoned mushrooms for a savory taste.

Whether you like traditional meats or vegetarian options, the secret is to try different marinades and cooking methods. This way, you can make tacos that everyone will love. By exploring different taco fillings, you can please many tastes and dietary needs.

Taco Meat OptionFlavor ProfileCooking Method
Carne AsadaSavory, charredGrilled
Al PastorSweet, tangySpit-roasted
CarnitasCrispy exterior, tender interiorSlow-braised or fried
Roasted VegetablesFlavorful, colorfulRoasted
Lentils or BeansHearty, protein-richSimmered or mashed
MushroomsSavory, umami-richSautéed

Fresh Toppings and Garnishes

Tacos are a favorite Mexican dish. The secret to their authentic taste is in the fresh toppings and garnishes. You can choose from classic Mexican favorites to modern creations.

Classic Mexican Toppings

Traditional Mexican taco toppings come from the country’s rich food history. Some top picks include:

  • Diced onions
  • Chopped cilantro
  • Sliced radishes
  • Pickled red onions
  • Crumbled queso fresco
  • Lime wedges

These toppings add color, texture, and flavor to tacos. They bring out the tangy lime and the earthy cilantro.

Creative Modern Additions

Modern chefs and home cooks have added new twists to tacos. Some exciting modern toppings are:

  1. Avocado crema – a creamy, zesty avocado sauce
  2. Chipotle-lime slaw – a crunchy, spicy-tangy cabbage topping
  3. Roasted corn salsa – a sweet, smoky salsa with grilled corn
  4. Crispy fried onions – a crunchy, savory topping
  5. Crumbled cotija cheese – a salty, crumbly Mexican cheese

These toppings bring new flavors and textures to tacos. They make tacos a true culinary joy.

Mastering Homemade Salsas and Sauces

Start your taco journey with homemade salsas and sauces. These condiments add zesty goodness and show off Mexican cuisine’s variety.

Try salsa roja and salsa verde for different tastes. Each has its own flavor that pairs well with tacos. Find the perfect homemade salsa for you.

Crafting Flavorful Salsas

Salsas are key in Mexican food, with endless options. Mix fresh tomatoes, onions, garlic, chili peppers, and herbs for your salsa. Choose peppers for heat and add lime or vinegar for balance.

  • Classic Salsa Roja: Roasted tomatoes, onions, garlic, and a blend of chili peppers
  • Salsa Verde: Tomatillos, green chili peppers, cilantro, and a hint of lime
  • Mango Salsa: Sweet and tangy with ripe mangoes, red onion, and jalapeño

Complementary Taco Sauces

Mexican cuisine also has many sauces for tacos. Try crema for creaminess and adobo for smokiness. These sauces add depth to your tacos.

SauceKey IngredientsFlavor Profile
CremaSour cream, lime juice, garlicCreamy, tangy, and cooling
AdoboChipotle chili peppers, tomatoes, garlicSmoky, spicy, and rich
Salsa MachaToasted chili peppers, garlic, peanutsNutty, complex, and packed with heat

Try these homemade salsa and sauce recipes. They’ll make your tacos taste like Mexico. Enjoy them with your favorite fillings for a great meal.

Tips for Perfect Tortilla Preparation

Making the perfect homemade tacos is more than just the filling and toppings. The key is the tortilla. We’ll look at corn vs flour tortillas and how to warm and store them.

Corn vs. Flour Tortillas

Choosing between homemade tortillas made of corn or flour depends on taste and tradition. Corn tortillas have a real, earthy taste and a firmer feel. They’re great for filling tacos. Flour tortillas are softer and can hold more ingredients.

Corn tortillas are full of fiber and gluten-free. Flour tortillas have more calories and carbs. Think about your diet and taste to pick the right tortilla for your tacos.

Warming and Storage Methods

  • Warming corn vs flour tortillas right is key. Heat them lightly on a skillet or griddle, or microwave them wrapped in a damp towel for 30-60 seconds. This makes them soft and ready.
  • To keep them fresh, store homemade tortillas in a sealed container in the fridge for up to 5 days. Freeze them for months if you need to. Just thaw them well before using.

Learning how to warm and store tortillas right makes your tacos better. It adds to the taste and feel of your Mexican dishes.

Common Mistakes to Avoid

Making homemade tacos can be fun, but it comes with its own set of challenges. To get great results, knowing the common mistakes is key. From picking the right ingredients to mastering cooking techniques, a bit of knowledge helps a lot.

One big mistake is not seasoning the meat enough. Meat that’s not seasoned well can make your tacos taste bad. Make sure to add plenty of spices like cumin, chili powder, garlic, and salt. This will bring out the true Mexican flavors.

Another mistake is cooking too much meat at once. This can make the meat steam instead of sear, leading to a less tasty filling. Always cook in batches. This way, the meat can brown well and get that nice caramelized crust.

FAQ

What are the key ingredients for making authentic homemade tacos?

To make perfect homemade tacos, you need fresh tortillas and tasty meat fillings. Choose from carne asada, al pastor, or vegetarian options. Don’t forget toppings like onions, cilantro, lime wedges, and salsa. Add condiments like crema, queso fresco, and hot sauce for extra flavor.

How can I achieve the perfect taco meat filling?

For the best taco meat, marinate it in Mexican spices, citrus, and aromatics. Use slow-cooking methods to get deep flavors. Season and texture the meat right for that authentic taste and feel.

What are some traditional Mexican taco styles and regional variations?

Mexico has many taco styles, like al pastor in Mexico City and fish tacos in Baja California. Birria tacos from Jalisco are another favorite. Learning about these can help you make authentic Mexican tacos at home.

How can I make fresh, homemade tortillas for my tacos?

Making your own tortillas, whether corn or flour, boosts your tacos’ flavor and texture. Use the right masa and cook the tortillas well to get them just right.

What are some common mistakes to avoid when making homemade tacos?

Avoid using low-quality ingredients and overcooking the meat. Also, don’t forget to warm the tortillas and balance your fillings and toppings. Following these tips ensures delicious homemade tacos every time.

How can I customize my tacos with unique toppings and sauces?

Add modern toppings like pickled red onions and mango salsa. Try chipotle crema or avocado crema for a twist. Experimenting with sauces and garnishes lets you make your tacos your own and discover new tastes.

Pasta con Broccoli Recipe: Delicious and Nutritious

Craving a dish that harmoniously blends the comfort of pasta with the wholesome goodness of broccoli? Look no further than the enticing world of Pasta con Broccoli. This culinary delight not only satisfies your taste buds but also offers a nourishing meal that is simple yet oh-so-satisfying. As you embark on this flavorful journey, expect to uncover the secrets to creating a delectable pasta dish that will become a staple in your recipe repertoire.

Get ready to immerse yourself in the aromatic allure of garlic-infused broccoli mingling with perfectly al dente pasta strands. In this article, we promise to guide you through each step with precision and care, ensuring that your Pasta con Broccoli turns out impeccably delicious every time. So, prepare your kitchen for a culinary adventure filled with flavors, textures, and tantalizing aromas as we delve into the art of crafting this classic Italian dish.

The Delicious Origins of Pasta con Broccoli

In the world of culinary delights, pasta con broccoli shines as a humble yet flavorful dish that has found its way into the hearts and kitchens of many. Originating from the beautiful region of Southern Italy, this recipe pays homage to the simplicity and richness of Italian cuisine.

Legend has it that pasta con broccoli was born out of necessity, where resourceful Italian cooks creatively combined leftover pasta with freshly harvested broccoli to create a satisfying and nutritious meal. This fusion of hearty pasta and vibrant broccoli highlights the ingenuity and resourcefulness deeply ingrained in Italian cooking traditions.

Through generations, the recipe for pasta con broccoli has evolved, with each family adding its own unique twist to create a dish that is not only delicious but also a representation of love and tradition. The melding of flavors in this dish speaks to the harmony found in combining simple ingredients with skillful techniques, showcasing the magic that happens when food brings people together.

A Love Letter to Broccoli: Why This Veggie is a Pasta’s Best Friend

Broccoli, with its vibrant green florets and tender stalks, is more than just a vegetable – it’s a culinary superstar that elevates any pasta dish to new heights. Its earthy flavor profile complements the richness of pasta, creating a harmonious balance of textures and tastes.

Rich in essential nutrients like vitamin C, fiber, and antioxidants, broccoli brings not only flavor but also health benefits to your plate. It adds a delightful crunch and freshness to pasta dishes, making each bite a satisfying and nutritious experience. Embrace broccoli as your pasta companion for a wholesome meal that nourishes both body and soul.

The Versatility of Broccoli

Broccoli’s versatility knows no bounds – whether roasted to caramelized perfection, steamed until tender-crisp, or sautéed with garlic for added depth of flavor, this veggie can adapt to various cooking methods without losing its charm. Its ability to absorb the flavors of herbs and seasonings makes it an ideal partner for pasta dishes with diverse ingredients.

Incorporating broccoli into pasta not only enhances the visual appeal of the dish with its vibrant green hue but also introduces a subtle sweetness that plays well with savory components like cheese or tomatoes. This cruciferous gem shines in both creamy sauces and light olive oil-based dressings, proving that broccoli truly deserves its place as an essential element in the realm of pasta recipes.

A Nutrient Powerhouse for Your Palate

Brimming with vitamins K and A, calcium, folate, and potassium, broccoli offers a nutritional boost that complements the carb-rich nature of pasta perfectly. Its high fiber content aids in digestion while promoting satiety, making it an excellent choice for those seeking a balanced meal that fuels the body without weighing it down.

By celebrating broccoli as more than just a side dish but as an integral part of your pasta creations, you embrace not only its exceptional taste but also its role in supporting overall well-being. Let this cruciferous delight take center stage on your plate alongside al dente noodles for a culinary symphony that celebrates the beauty of simplicity and healthfulness.

The Perfect Pasta: Choosing the Right Noodles for Your Dish

When it comes to pasta con broccoli, selecting the perfect noodles is crucial in creating a harmonious dish. Opt for shapes that can capture the creamy sauce and tender broccoli florets. Fusilli or penne are excellent choices, as their nooks and crannies hold onto the flavors, giving each bite a delightful texture.

Consider the cooking time of the pasta as well. For pasta con broccoli, aim for an al dente texture to ensure that your noodles maintain a slight chewiness that contrasts beautifully with the softness of the broccoli. This balance of textures elevates the overall dining experience and keeps each mouthful interesting.

Whole wheat or gluten-free options can also be great alternatives for a healthier twist on this classic dish. These variations can add nuttiness or different flavors to complement the richness of the sauce while providing additional nutrients. Experimenting with different types of pasta can open up a world of possibilities in your culinary journey.

Mastering the Art of Cooking Broccoli: Tips and Tricks for Perfectly Cooked Vegetables

Choosing Fresh Broccoli: When selecting broccoli, look for vibrant green florets with firm stalks. Avoid any signs of yellowing or wilting. To retain maximum freshness, store broccoli in a perforated plastic bag in the crisper drawer of your refrigerator until ready to use.

Cutting Techniques: For uniform cooking, cut broccoli into bite-sized florets and peel and slice the stalks into evenly sized pieces. Don’t discard the stalks – they are just as delicious as the florets! If using frozen broccoli, allow it to thaw before cooking to prevent excess moisture.

Cooking Methods: To preserve broccoli’s nutrients and vibrant color, opt for steaming or blanching over boiling. Steaming broccoli for 3-4 minutes until tender-crisp maintains its texture and flavor. Alternatively, blanching in boiling water for 2 minutes then immediately plunging into ice water stops the cooking process and sets that vivid green hue.

Pasta Con Broccoli Recipe: Step-by-Step Instructions for a Mouthwatering Meal

Cooking the Pasta: Begin by bringing a large pot of salted water to a boil. Add your choice of pasta – penne, rigatoni, or bowtie work well. Cook until al dente, following the package instructions. Remember, pasta continues to cook slightly after draining, so al dente is key for perfect texture.

Preparing the Broccoli: While the pasta cooks, trim and chop fresh broccoli into florets. In a separate pan, heat olive oil over medium heat and add minced garlic for fragrance. Then, toss in the broccoli florets and sauté until they are tender yet still vibrant green. Season with salt and pepper.

Bringing it All Together: Once both the pasta and broccoli are cooked to perfection, combine them in a large skillet over low heat. Toss gently to mix well while adding a splash of pasta water to create a light sauce that coats everything beautifully. Finish with grated Parmesan cheese and a drizzle of extra-virgin olive oil before serving hot.

Elevate Your Dish: Optional Add-Ins and Substitutions for a Personalized Touch

When it comes to pasta con broccoli, the beauty lies in its versatility. By incorporating additional ingredients or making substitutions, you can truly customize this dish to suit your taste preferences and dietary needs. Here are some creative ways to elevate your pasta con broccoli and make it uniquely yours:

1. Add-In: Sun-Dried Tomatoes

For a burst of tangy sweetness and an extra layer of flavor, consider tossing in some chopped sun-dried tomatoes to your pasta con broccoli. These concentrated gems will add a delightful contrast to the earthy broccoli and savory pasta, creating a harmonious medley of tastes in every bite.

2. Substitution: Whole Wheat Pasta

If you’re looking to boost the nutritional value of your meal, swapping traditional pasta with whole wheat noodles is a great option. Not only does whole wheat pasta offer more fiber and nutrients, but it also adds a nutty depth of flavor that pairs beautifully with the broccoli and other ingredients in this dish.

3. Add-In: Toasted Pine Nuts

To introduce a crunchy texture and rich nuttiness to your pasta con broccoli, consider sprinkling toasted pine nuts over the top before serving. The slight char from toasting enhances the natural sweetness of the nuts, providing a delightful contrast to the tender pasta and vegetables for a gourmet touch.

Serving Suggestions: How to Plate and Present Your Pasta con Broccoli Like a Pro

When it comes to serving pasta con broccoli, presentation is key in elevating your dish from ordinary to extraordinary. Here are some tips on how to plate and present your culinary creation like a true professional:

Plate Selection

Choose a large, shallow bowl or plate for serving your pasta con broccoli. This will allow the delicious flavors and vibrant colors of the dish to be showcased beautifully. Opt for white or neutral-colored dishes to create a clean and sophisticated presentation.

For an added touch of elegance, consider garnishing the rim of the plate with fresh basil leaves or a sprinkle of grated Parmesan cheese. This simple addition not only adds visual appeal but also enhances the overall dining experience.

Garnish with Flair

To add visual interest and flavor complexity to your pasta con broccoli, top it off with a drizzle of high-quality extra virgin olive oil just before serving. The glossy sheen of the oil will make your dish glisten invitingly, enticing diners to dive in.

Freshly cracked black pepper or red pepper flakes sprinkled over the top not only provide a pop of color but also add a hint of heat that complements the earthy flavors of the broccoli and pasta. Remember, it’s all about creating a feast for both the eyes and the taste buds.

The Art of Plating

When plating your pasta con broccoli, consider arranging individual portions in neat mounds at the center of each plate. This method allows for easier distribution at the table and ensures that each diner receives an equal share of this delectable dish.

You can further enhance the presentation by garnishing each serving with freshly chopped parsley or basil leaves for a burst of freshness and herbaceous aroma. Remember, attention to detail in plating goes a long way in making your meal look truly appetizing.

Wine Pairings Made Simple: The Perfect Bottle to Complement Your Meal

Exploring the Art of Wine Pairing

Pairing wine with food is akin to a delicate dance of flavors. When it comes to pasta con broccoli, you’ll want a wine that can match the dish’s earthy tones while also providing a refreshing contrast. Opt for a crisp Sauvignon Blanc or a light Pinot Grigio to enhance the subtle flavors of the broccoli and pasta.

The Harmony of White Wines

White wines tend to be the go-to choice for pasta dishes with vegetable-based sauces like pasta con broccoli. Their bright acidity and citrus notes can cut through the richness of the dish, cleansing your palate with each sip. Consider a Chardonnay or an unoaked Viognier to bring out the creamy textures of the pasta while highlighting the freshness of the broccoli.

Elevating Your Dining Experience

Pairing wine with your pasta con broccoli isn’t just about finding a suitable drink; it’s about creating an unforgettable dining experience. Take this opportunity to savor each bite, sip, and conversation shared around the table. Let the wine enhance not only your meal but also your enjoyment of good food and great company.

Leftovers Reinvented: Creative Ways to Enjoy Pasta con Broccoli the Next Day

When it comes to leftover pasta con broccoli, there are endless possibilities for transforming your meal into something new and exciting. Instead of simply reheating the dish as is, consider these creative ideas to elevate your leftovers into a delicious feast.

Veggie-Packed Frittata

Turn your leftover pasta con broccoli into a flavorful frittata by mixing it with beaten eggs and any additional veggies you have on hand. The creamy pasta will add richness to the frittata while broccoli provides a nutritious crunch. Bake until golden brown for an easy and satisfying meal.

Pasta Salad Remix

Create a refreshing pasta salad by tossing your leftover pasta con broccoli with fresh greens, cherry tomatoes, and a bright vinaigrette dressing. The combination of cold pasta with crisp vegetables offers a delightful contrast in textures and flavors, perfect for a light and satisfying lunch option.

Cheesy Baked Pasta Casserole

Transform your leftovers into a comforting baked pasta casserole by layering the pasta with marinara sauce, mozzarella cheese, and breadcrumbs. Bake until bubbly and golden brown for a cheesy delight that will have you savoring every bite. This reinvented dish is sure to bring warmth and comfort to your next meal.

Health Benefits of Pasta con Broccoli: Nutritious and Delicious, All in One Bite

The humble yet mighty broccoli, a key ingredient in pasta con broccoli, is a powerhouse of nutrients. Rich in vitamins C, K, and A, broccoli boosts immunity and supports healthy vision. Its high fiber content aids digestion and promotes a feeling of fullness.

When paired with pasta, broccoli provides a balanced source of carbohydrates for sustained energy. This combination makes pasta con broccoli an ideal meal for active individuals or those looking for a wholesome dish that satisfies hunger without weighing them down.

Moreover, the antioxidants found in broccoli help combat inflammation and oxidative stress in the body. By incorporating pasta con broccoli into your diet regularly, you’re not just savoring a delicious meal but also nourishing your body with essential nutrients that support overall health and well-being.

Conclusion

As we reach the end of this culinary journey exploring the wonders of pasta con broccoli, it is evident that this dish is not just a meal but a celebration of flavors, textures, and traditions. Through the fusion of tender pasta and vibrant broccoli, we have discovered a symphony of taste that transcends borders and captivates palates.

Embrace the artistry of cooking as you prepare this delectable dish for yourself or loved ones. Let each bite be a reminder that simple ingredients can create extraordinary experiences. In a world filled with chaos, let the act of preparing and savoring pasta con broccoli be your moment of tranquility and joy.

Though our culinary exploration may soon come to an end, remember that the magic of pasta con broccoli lies within your kitchen, waiting to be recreated time and time again. So, pick up your apron, gather your ingredients, and embark on your own gastronomic adventure. Buon appetito!</

Coffee Loophole Recipe: Guilt-Free Flavor in Every Sip

Coffee Loophole Recipe: Guilt-Free Flavor in Every Sip Let’s speak about the internet’s latest obsession: the espresso loophole. If you have yet to hear about it, you’re in for a treat. This sneaky little recipe hack is making waves among espresso fans, dieters, and dessert fans. So, clutch your favorite mug and settle in as we smash it down.

What is the Coffee Loophole? 🤔

The coffee loophole isn’t some secret discount code at your favorite café (even though we wish it were). It’s an amusing, creative way to turn your daily cup of coffee into a fulfilling, low-calorie treat that looks like dessert without derailing your food regimen or pockets. The loophole includes spicing up your espresso with components that make it flavor-indulgent—think cinnamon, cocoa, or vanilla—without including a ton of sugar, cream, or calories.

The Basic Recipe ☕✨

The splendor of the espresso loophole is its simplicity. Here’s a basic version to get you started:

You’ll Need:

  • 1 cup of black coffee (warm or iced)
  • A splash of unsweetened almond milk (or any low-calorie milk alternative)
  • 1 teaspoon of cocoa powder
  • A pinch of cinnamon
  • A sprint of vanilla extract
  • Sweetener of your choice (stevia, monk fruit, or maybe a touch of honey)

Directions:

  1. Brew your espresso and pour it into your preferred mug.
  2. Mix in the cocoa powder, cinnamon, and vanilla extract even as the espresso is hot to allow the flavors to meld.
  3. Add the almond milk and sweetener, stirring well.
  4. Taste—look at it and regulate it according to your preference. Want it, frother? Use a milk frother for café vibes.

That’s it! You’ve turned your everyday coffee into a flowery (and healthier) deal in minutes.

People love the coffee loophole for a few reasons:

  • Low-calorie indulgence: You get the flavor of something decadent without feeling like you’ve “cheated.”
  • Customizable: The opportunities are infinite—peppermint for winter vibes, a pinch of nutmeg for a fall sense, or protein powder for a publish-exercising boost.
  • Budget-pleasant: Skip the overpriced unique beverages and make your masterpiece at home.

Tips to Perfect Your Coffee Loophole Game ☕

  • Experiment with spices: Cardamom, nutmeg, or even a tiny dash of cayenne can add unexpected depth.
  • Go sugar-loose: Opt for natural sweeteners to keep things mild.
  • Make it a dependency: Brew your loophole coffee each morning to begin the day healthier.

FAQ

Q: Can I use instant coffee for this recipe?

A: Absolutely! Ensure it’s a brand you like because the coffee taste is the recipe’s base.

Q: Is the coffee loophole appropriate for weight loss?

While it’s no longer a magic answer, the recipe can help reduce cravings for excessive-calorie desserts and preserve your everyday calorie consumption.

Q: Can I make it dairy-unfastened?

A: one hundred%! Use almond, oat, soy, or any plant-based milk alternative.

Q: What’s the high-quality sweetener to apply?

A: It relies upon your taste. Stevia and monk fruit are popular for low-calorie maintenance, but honey or agave can be painted if you opt for an herbal contact.

So there you have it—the espresso loophole in all its glory. Try it out, percentage your twists at the recipe, and let us know how you make it your own! Cheers to guilt-loose sipping! ☕💫

How to Make Tiramisu: The No-Bake Dessert Everyone Loves

How to Make Tiramisu: Tiramisu is the closing Italian dessert. It’s creamy, espresso-flavored, and simply fancy enough to make everyone assume you’re a culinary genius. But here’s the game’s name: it’s immaculate to make! Observe this simple recipe if you’re geared up to wow your pals, family, or yourself. You don’t even want to turn on the oven.

How to Make Tiramisu: Ingredients You’ll Need

  • For the Creamy Layer:
    • 1 cup mascarpone cheese (room temperature)
    • 1 cup heavy whipping cream (cold)
    • 1/3 cup granulated sugar
    • 1 tsp vanilla extract
  • For the coffee soak:
    • 1 1/2 cups sturdy brewed espresso or coffee (cooled)
    • 2 tbsp. espresso liqueur (non-obligatory but exquisite)
  • The Base:
    • 1 % (approximately 24) ladyfinger cookies (savoiardi)
  • For Topping:
    • Unsweetened cocoa powder (for dusting)
    • Dark chocolate shavings (elective, but yum)

How to Make Tiramisu: Step-by-Step Instructions

  1. Whip Up the Creamy Goodness
    • In a blending bowl, beat the heavy cream till smooth peaks form. In another bowl, blend mascarpone, sugar, and vanilla till easy. Carefully incorporate the whipped cream into the mascarpone mixture by folding it gently. You’re aiming for a mild, fluffy texture here!
  2. Prepare the Coffee Dip
    • Brew your coffee and permit it to cool. Stir in the espresso liqueur if you’re using it (and you totally need to).
  3. Layer the Magic
    • Quickly dip every ladyfinger into the espresso (don’t allow them to soak, or they’ll turn into mush). Lay them in a single layer. Sure. Add half of the mascarpone mixture evenly over the dish. layer of ladyfingers. Repeat with every other layer of dipped ladyfingers and the ultimate mascara.
  4. Chill Out
    • Cover the dish and refrigerate it for at least four hours. (In a single day, it is even higher.) This helps the flavors meld together into that conventional tiramisu taste.
  5. Add the Finishing Touches
    • Before serving, dust the pinnacle with cocoa powder and sprinkle darkish chocolate shavings for additional pizzazz.

Nutritional Info (Per Serving)

Nutrient Amount Calories 320 Protein 5g Carbohydrates 25g fat, 22g sugar, 12g Pro Tips for Perfect Tiramisu

  1. Mascarpone is Key: Wait to replace it with cream cheese until it’s your closing hotel. The actual taste depends on the mascarpone!
  2. Don’t Over-Soak: A quick dip in coffee is all ladyfingers need.
  3. Use Quality Coffee: The more substantial and prosperous your coffee, the better the taste.

FAQ

Q: Can I make tiramisu without alcohol?

A: Yes! Skip the espresso liqueur. You can even add a vanilla extract to the coffee for extra flavor.

Q: How long does tiramisu ultimate?

A: It can be saved inside the refrigerator for up to a few days. However, it’s high-quality and eaten within the first 24-48 hours.

Q: Can I freeze tiramisu?

A: Absolutely! Freeze it in an airtight container for up to three months. Thaw in the refrigerator for a single day before serving.

Q: What can I use rather than ladyfingers?

A: Sponge cake slices or pound cake make excellent substitutes, but the texture could be more organized.

Final Thoughts

Tiramisu is one of these cakes that makes you seem like a pro chef without all the difficult work. It’s decadent, astonishing, and completely customizable. This recipe will succeed, whether making it for a dinner party or indulging in a non-public deal. Try it, and permit the compliments to roll in! 🎉

Get The Best Recipes In 2025

Exit mobile version